- Related Products
- AD360
- Log360
- ADAudit Plus
- ADSelfService Plus
- EventLog Analyzer
- Exchange Reporter Plus

Help Document
Steps to modify REST API permissions
Though we suggest providing all the recommended permissions, organizational requirements might not allow this. In this section, you will learn how to modify the REST API permissions for an already configured tenant. If you are looking for a way to configure a tenant with only the permissions you require, please configure it manually.
Prerequisite: The tenant should have been successfully configured in ADManager Plus with REST API enabled for it. To learn how to configure a tenant in ADManager Plus and enable REST API, click here.
- Log in to the Microsoft Entra ID admin center using the credentials of a Global Administrator or any other user account with the permission to create Entra ID applications.
- Navigate to Identity > Applications > App registration.
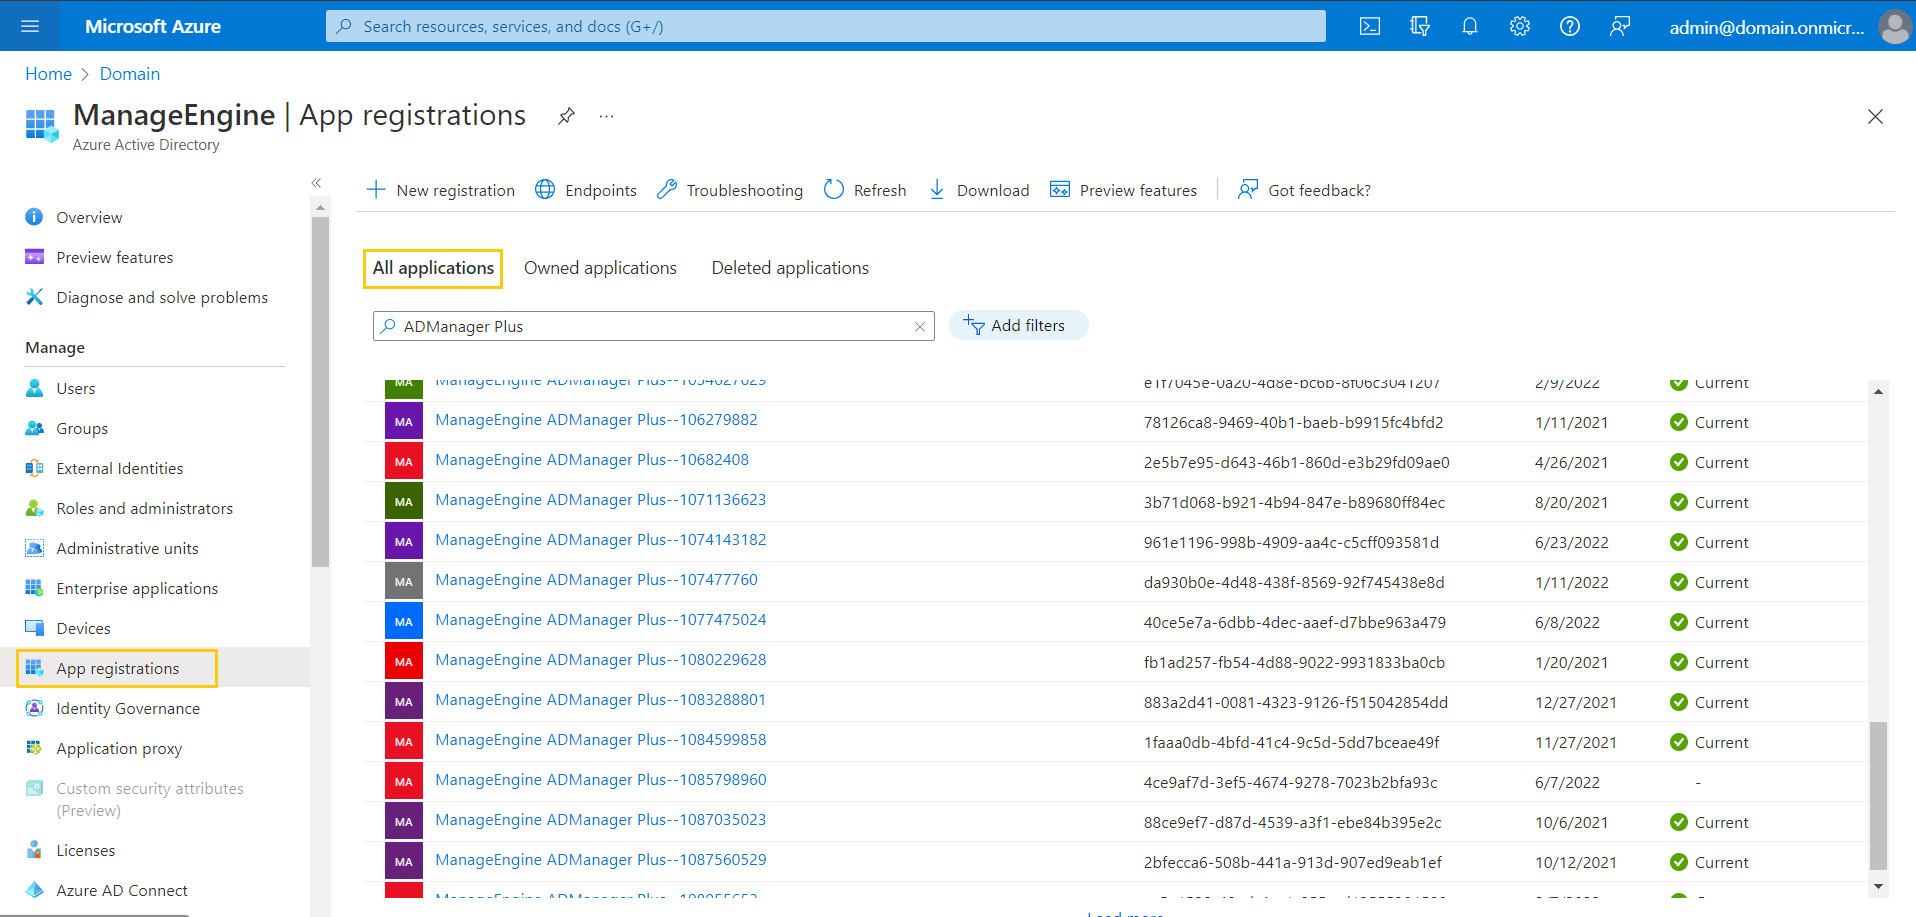
- Select All applications.
- Search for the application name that you configured and click it.
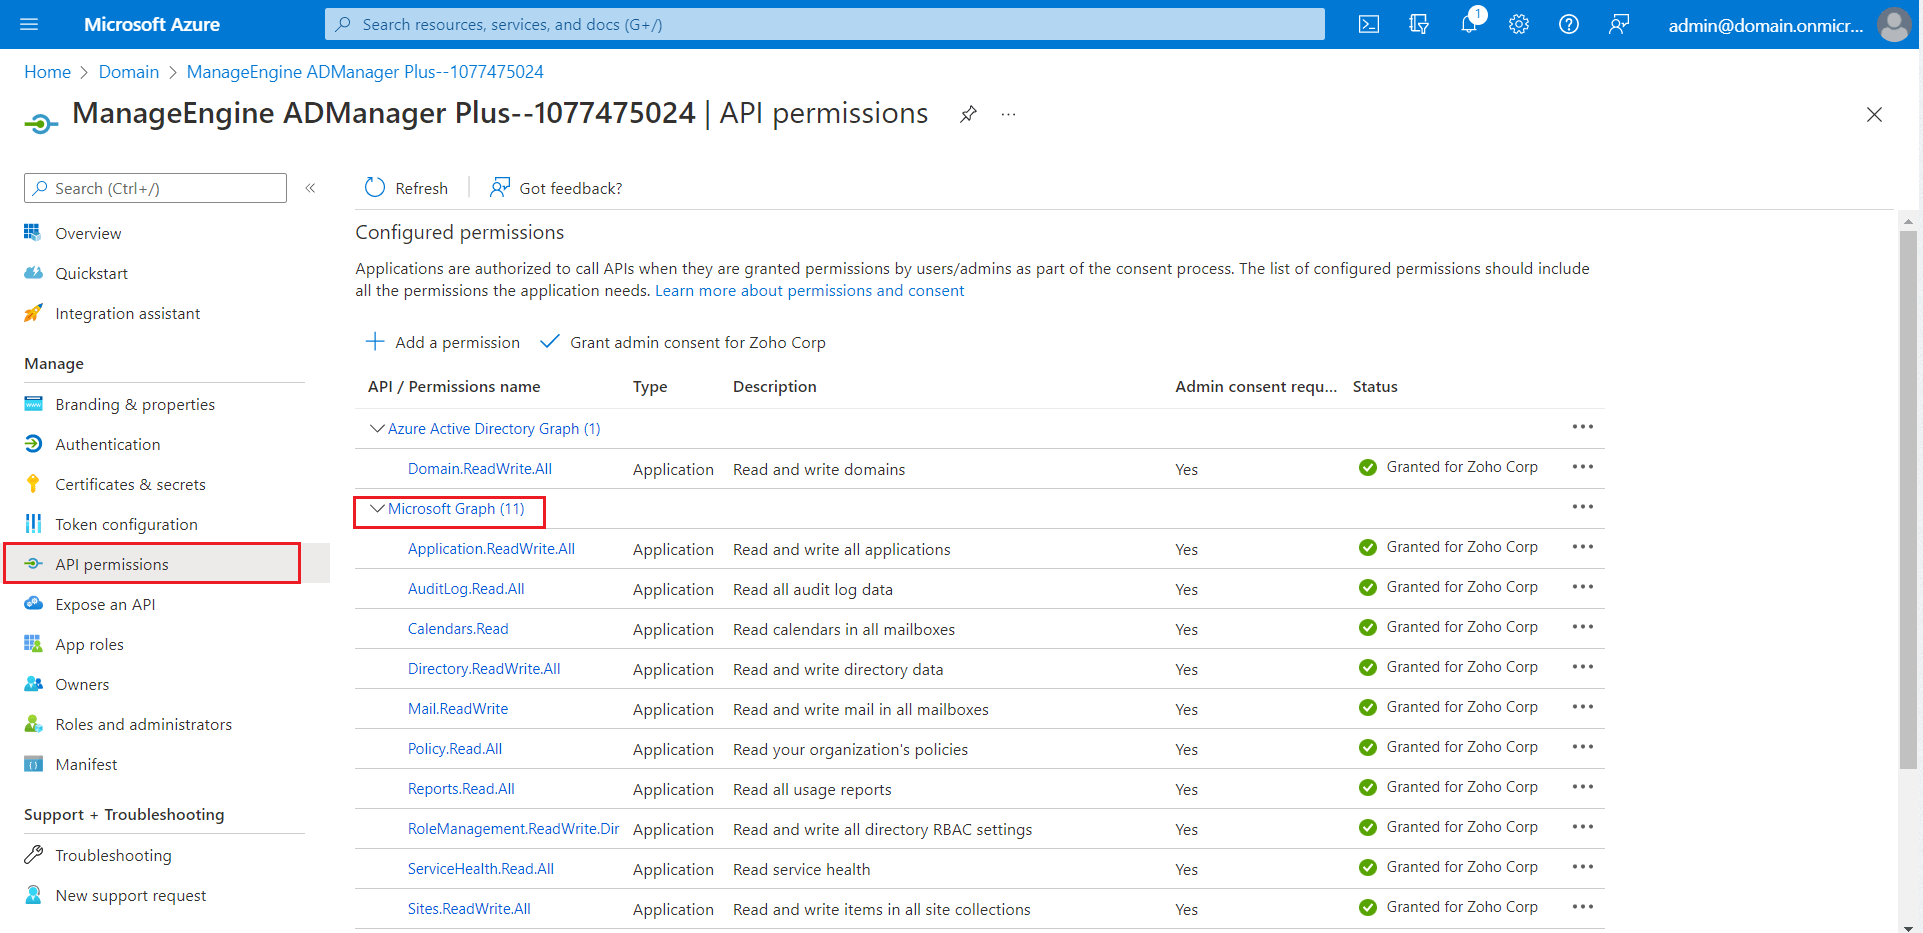
- Select API Permissions under Manage.
- Choose Microsoft Graph.
- Click expand all to view all the permissions already granted to this application.
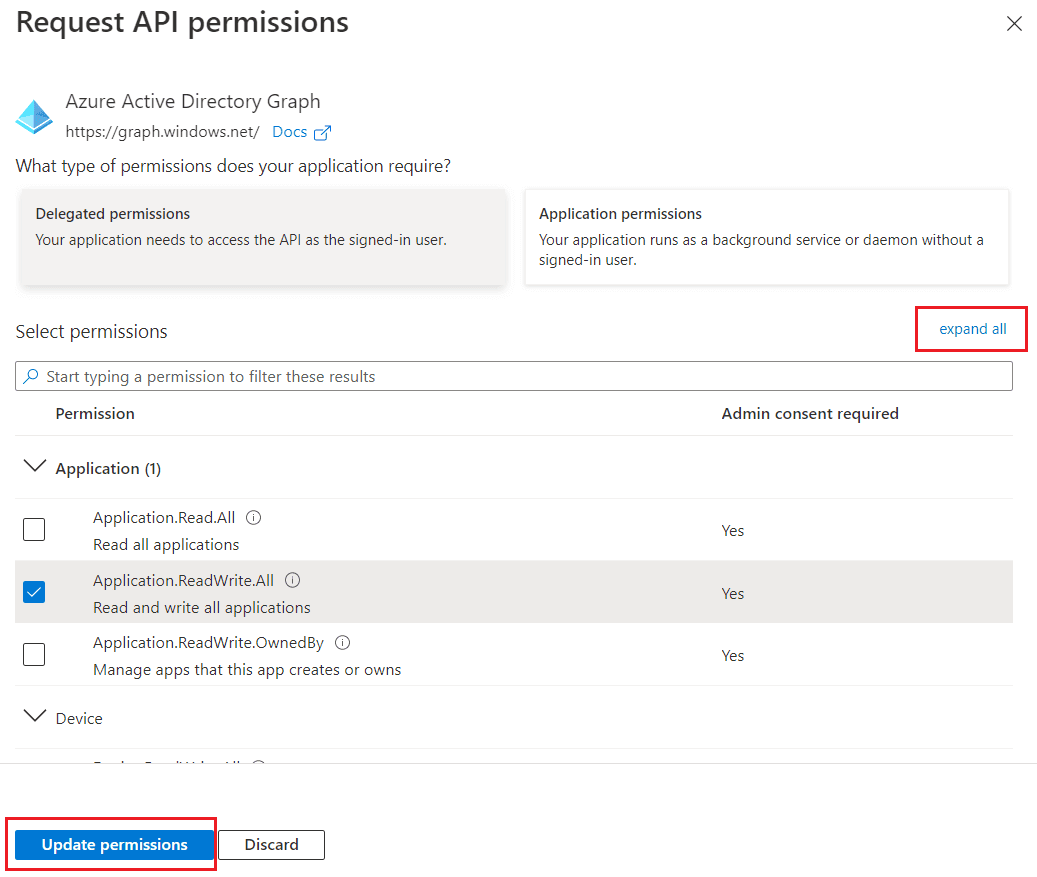
- Add, remove, or modify permissions as per your requirements.
- Click Update permissions.
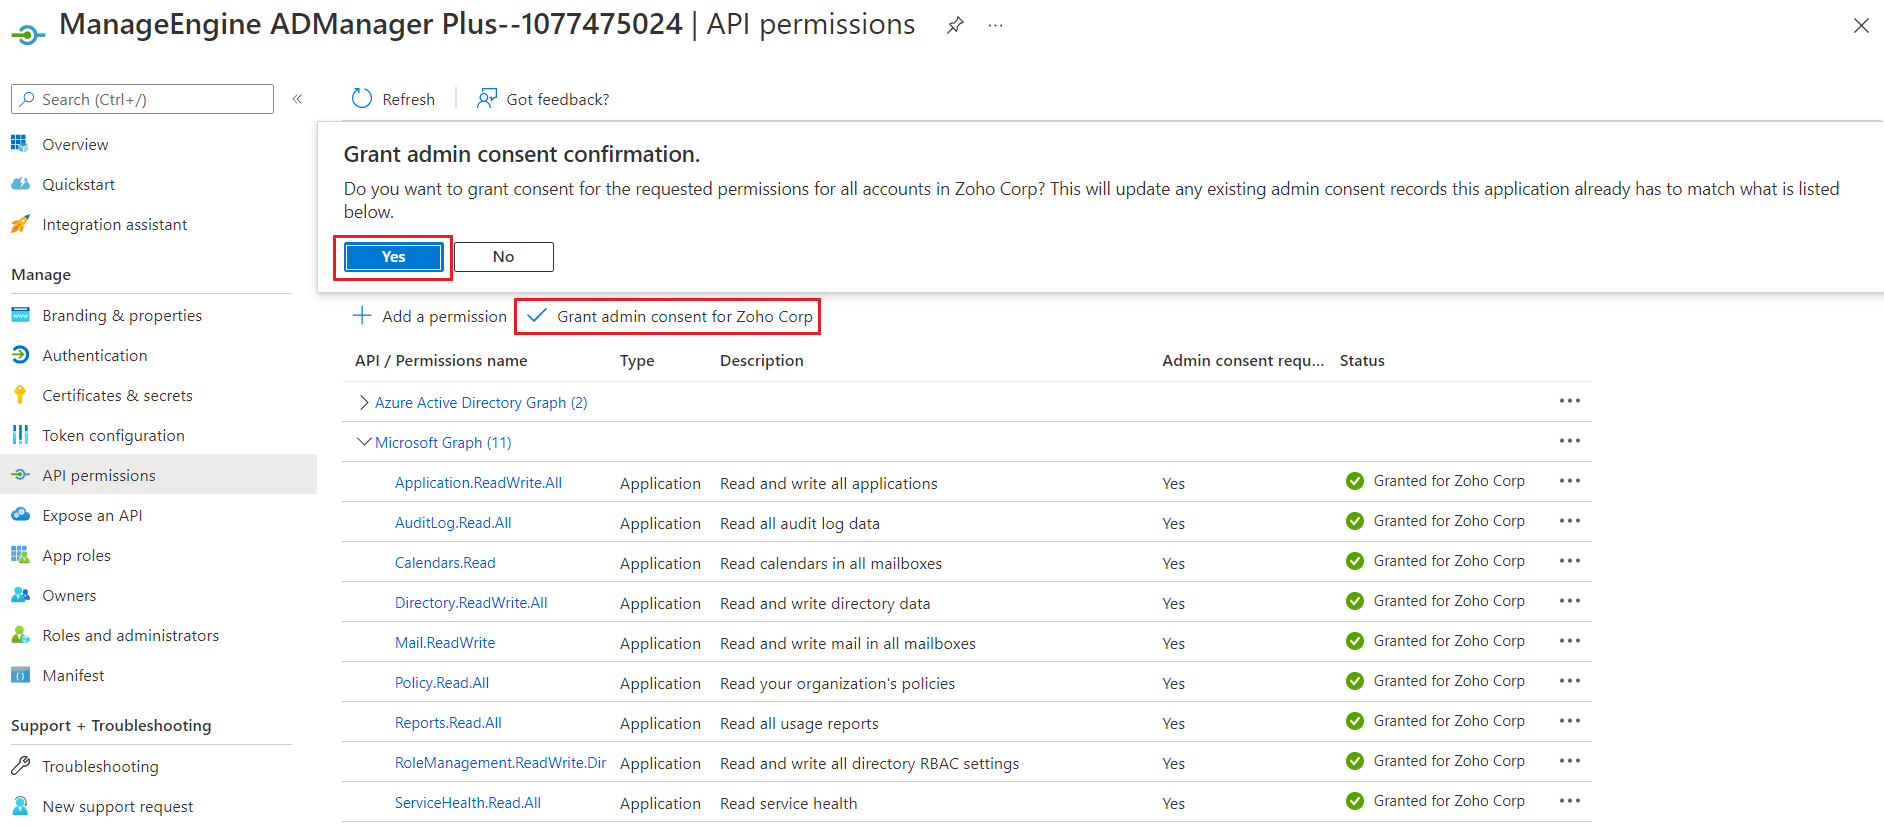
- Select the Grant admin consent for domain_name option found at the top of the permissions table.
- Choose Yes in the box that appears.
- Click Save and Continue > Grant admin consent > Yes.
- You have now successfully modified the permissions required by the REST API application.