


|
|
Follow the steps given below to install and set up the ManageEngine SupportCenter Plus application with One-Click Install.
Download the ManageEngine_SupportCenter_Plus.exe file.
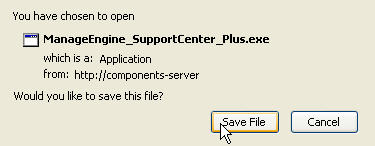
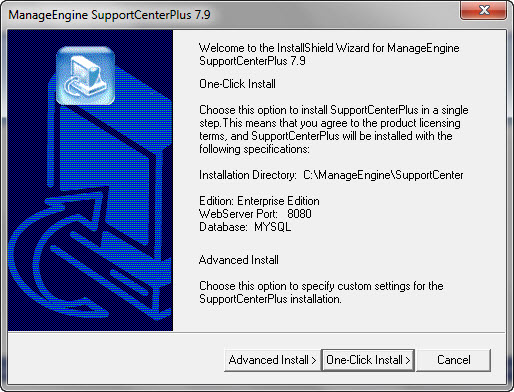
Click the exe file to start the installation. The SupportCenter Plus installation wizard appears. Choose between One-Click Install and Advanced Install (custom settings).
In One-Click Install, SupportCenter is installed in a single step with default specifications,
Installation Directory: C:\ManageEngine\SupportCenter
Edition: Enterprise Edition
WebServer Port: 8080
Database: MYSQL
Click One-Click Install.
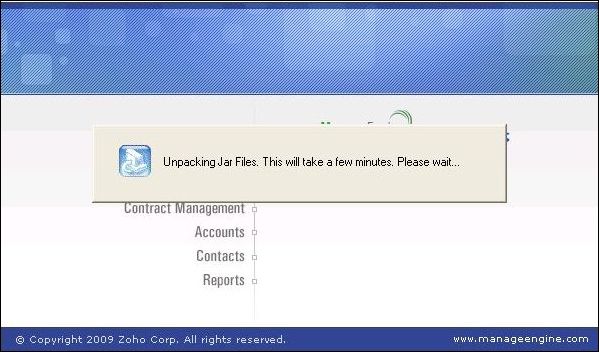
The application begins to get installed as shown below,
On successful installation, the InstallShield Wizard Complete window pops up,
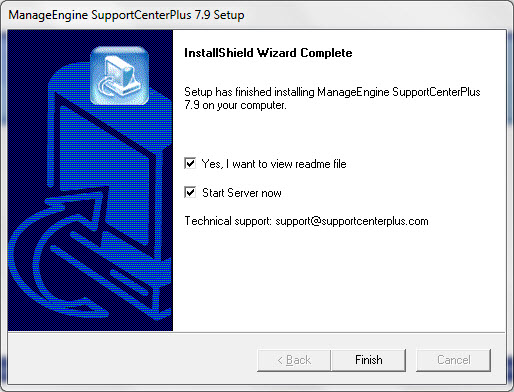
When you choose to start the SupportCenter Service, the SupportCenter Server is started automatically and the client window opens with the login page. If you do not wish to view the readme file or start SupportCenter as a windows service, de-select the options provided.
Click Finish to complete the installation.
Follow the steps given below to install and set up the ManageEngine SupportCenter Plus application with Advance Install.
Download the ManageEngine_SupportCenter_Plus.exe file.
Click the exe file to start the installation. The SupportCenter Plus installation wizard appears. Choose between One-Click Install and Advanced Install (custom settings). Click Advanced Install.
Review the License Agreement and click Yes to proceed with the installation.
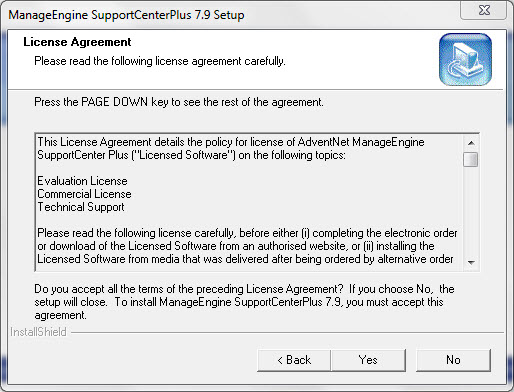
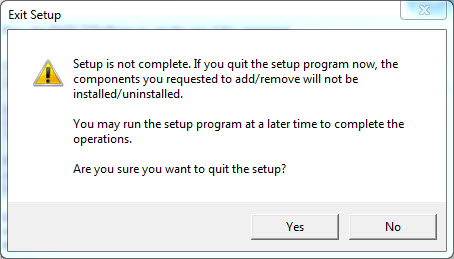
If you choose to exit the setup then click No. The Exit Setup pop up window appears,
On accepting the license agreement, choose the Edition to install from the Edition Selection Panel.
Enterprise Edition: The Trial Enterprise Edition is valid for 30 days and allows login access to two technicians, creation of ten business units and creation/tracking of unlimited accounts/contacts. However, multiple technicians can be added without login access.
The features in enterprise edition are, Request Management, Email Response Management, Account/Contact Management, Knowledge Base, SLA Management, Customer Portal, Contract Management, Product Catalog, AD Integration, API, Customer Survey, CSV based customer information synchronization and Dashboard Analytic.
Professional Edition: The Trial Professional Edition is valid for 30 days and allows access to two technicians, creation of three business units and creation/tracking of unlimited accounts/contacts. However, multiple technicians can be added without login access.
The features in professional edition are, Request Management, Email Response Management, Account/Contact Management, Knowledge Base, SLA Management, Customer Portal, Contract Management, Product Catalog, AD Integration, Customer Survey, CSV based customer information synchronization and Dashboard Analytic.
Standard Edition: The Trial Standard Edition is valid for 30 days and allows access to two technicians, creation of three business units and creation/tracking of unlimited accounts/contacts. However, multiple technicians can be added without login access. The features in standard edition are, Request Management, Email Response Management, Account/Contact Management, Knowledge Base and SLA Management.
Free Edition: Free Edition is restricted to a single Support Representative login and creation/tracking of 25 accounts/contacts. However, multiple support representative can be added without login access. The free edition never expires.
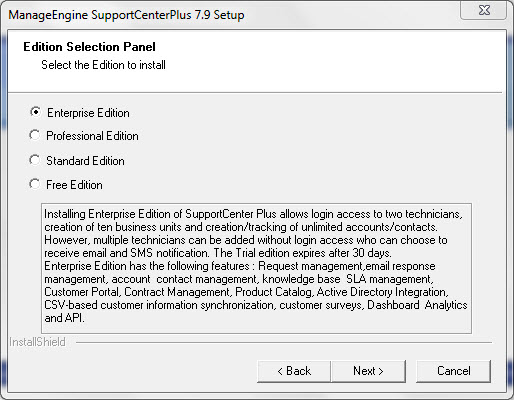
Choose the appropriate edition for your need and click Next.
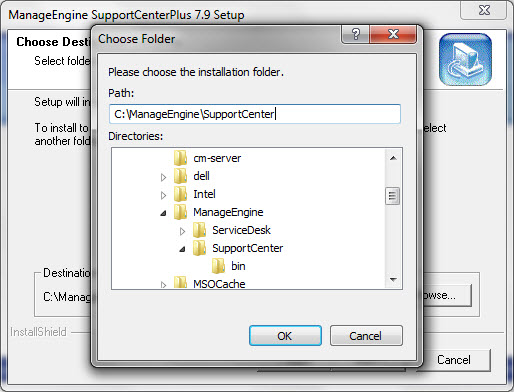
The next step is choosing the installation directory. By default, the application is installed in C:\ManageEngine\SupportCenter directory.

Click Browse to change the installation directory. Choose the directory of your choice and click Ok. Click Next to proceed.
|
Warning: The installation directory or its parent directories must not have any space character in its name. |
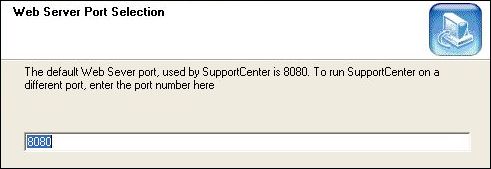
Enter the port number to run the web server. If any application is running in the default port (8080) then, enter the number of the port that is free to run the SupportCenter Plus application server. Click Next.
Choose the Database between MY SQL and MS SQL. By default, SupportCenter Plus supports MY SQL database. To switch over to SQL database, configure SQL server to establish connection and start the server. Enter the following details,
Host Name: The IP Address/host name in which the database is available. The default host name is 'localhost'.
Port: The default value is 1433.
Database: The database name is supportcenter in non-editable format, by default.
User Name: The user name to login to the server.
Password: The password for the username. Click Next to continue.
|
Note : Need to enable SQL authentication as Windows authentication will not work. |
Provide a name to appear in the Programs folder. By default, it is ManageEngine SupportCenter.

Click Next. The application begins to get installed.
On successful installation, the Registration for Technical Support form is displayed. It is an optional form and enables you to register for technical assistance. By registering, the technical support team are better informed about your organization and its specific needs thus providing a more focused support.
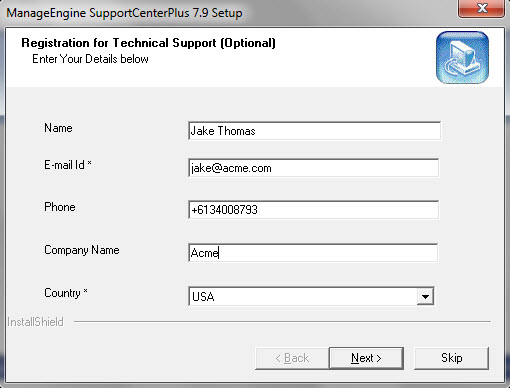
Enter the details such as Name, contact E-mail ID, Phone Number (helps in making calls for immediate support), Company Name, and Country. Click Next. The following screen is displayed.
When you choose to start the SupportCenter Service, the SupportCenter Server is started automatically and the client window opens. If you do not wish to view the readme file or start SupportCenter as a windows service, de-select the options provided.
Click Finish to complete the installation.
Installing SupportCenter Plus in Linux console mode
To install the product in Linux console mode, follow the steps give below:
Download the ManageEngine_SupportCenter_Plus_7_Linux.bin file.
Change the mode to linux excecutable in your command prompt using the below command:
chmod 755 ManageEngine_SupportCenter_Plus_Linux.bin
Execute the .bin as given below, in your command
prompt to install the product in the console mode:
./ManageEngine_SupportCenter_Plus_7_Linux.bin -console
Follow the displayed steps to procede with the installation.
Follow the steps given below to install and setup the ManageEngine SupportCenter Plus application:
Download the ManageEngine_SupportCenter_Plus_7_Linux.bin file.
Execute the .bin as given below, in your command
prompt:
./ManageEngine_SupportCenter_Plus_7_Linux.bin
|
Note: You need to have execute permissions for executing the .bin type files. |
The installation wizard appears. Choose between One-Click Install and Advanced Install (custom settings).
In One-Click Install, SupportCenter Plus is installed
in a single step with the default specifications,
Installation Directory: ./ManageEngine\SupportCenter
Edition: Enterprise Edition
WebServer Port: 8080
Database: MYSQL
If you do not wish to view the Readme file, de-select the check box.
Click Finish to complete the installation.
Follow the steps given below to install and setup the ManageEngine SupportCenter Plus application:
Download the ManageEngine_SupportCenter_Plus_7_Linux.bin
file.
ManageEngine_SupportCenter_Plus_7_Linux_console.bin file.
Execute the .bin as given below, in your command
prompt:
./ManageEngine_SupportCenter_Plus_7_Linux.bin
|
Note: You need to have execute permissions for executing the .bin type files. |
The installation wizard appears. Choose between One-Click Install and Advanced Install (custom settings). Click Advanced Install.
Review the License Agreement and click Yes to proceed with the installation.
On accepting the license
agreement, choose the Edition to install from the
Edition Selection Panel.
Enterprise Edition: The Trial Enterprise Edition is valid for
30 days and allows login access to two technicians, creation of ten business
units and creation/tracking of unlimited accounts/contacts. However, multiple
technicians can be added without login access.
The features in enterprise edition are, Request Management, Email Response Management, Account/Contact Management, Knowledge Base, SLA Management, Customer Portal, Contract Management, Product Catalog, AD Integration, API, Customer Survey, CSV based customer information synchronization and Dashboard Analytic.
Professional Edition: The Trial Professional Edition is valid for 30 days and allows access to two technicians, creation of three business units and creation/tracking of unlimited accounts/contacts. However, multiple technicians can be added without login access.
The features in professional edition are, Request Management, Email Response Management, Account/Contact Management, Knowledge Base, SLA Management, Customer Portal, Contract Management, Product Catalog, AD Integration, Customer Survey, CSV based customer information synchronization and Dashboard Analytic.
Standard
Edition: The Trial Standard Edition is valid for 30 days and allows
access to two technicians, creation of three business units and creation/tracking
of unlimited accounts/contacts. However, multiple technicians can be added
without login access. The features in standard edition are, Request Management,
Email Response Management, Account/Contact Management, Knowledge Base
and SLA Management.
Free Edition: Free Edition is restricted to a single Support Representative
with creation/tracking of 25 accounts/contracts. However, multiple support
representatives can be added without login access. The free edition never
expires.
Choose the appropriate edition for your need and click Next.
Click Browse to choose the installation directory. Click Next to continue.
Enter the port number to run the web server. If any application is running in the default port (8080) then, enter the number of the port that is free to run the SupportCenter Plus application server and click Next.
|
|
Warning: If you wish to provide a port number lesser than 1024 as the web server port, then you need to be the super-user of the system to successfully install and run SupportCenter Plus application. |
The details provided
till now is displayed for your confirmation:
Details of Installation
Installation Directory: home/<user>/ManageEngine/SupportCenter
Product Size: 72.6
MB.
If the information displayed is correct, click Next, else click
Back to make the necessary changes and proceed with the installation.
The application is installed. If you do not wish to view the Readme file, de-select the check box.
Click Finish to complete the installation.
|
|