- Overview
- Configuration
Freshbooks
Automate FreshBooks user provisioning and ensure up-to-date employee data.
FreshBooks is a popular cloud-based accounting software designed for small businesses and freelancers, offering invoicing, expense tracking, time tracking, and reporting features. By integrating FreshBooks with ADManager Plus, organizations can simplify and automate user management processes related to their FreshBooks accounts. This integration ensures that user data is kept consistent and up to date, while reducing manual effort and minimizing errors.
Automate user creation:
Automatically create FreshBooks accounts for new employees during the onboarding process. This ensures that new hires can immediately access FreshBooks to manage their tasks, such as expense reporting and time tracking.
Update user data:
Keep FreshBooks user information synchronized with the details stored in Active Directory. When an employee’s details (e.g., department, role, or contact information) are updated in AD, the integration ensures these changes are reflected in their FreshBooks account.
Configuration document: Integrating Freshbooks with ADManager Plus
Pre-requisites:
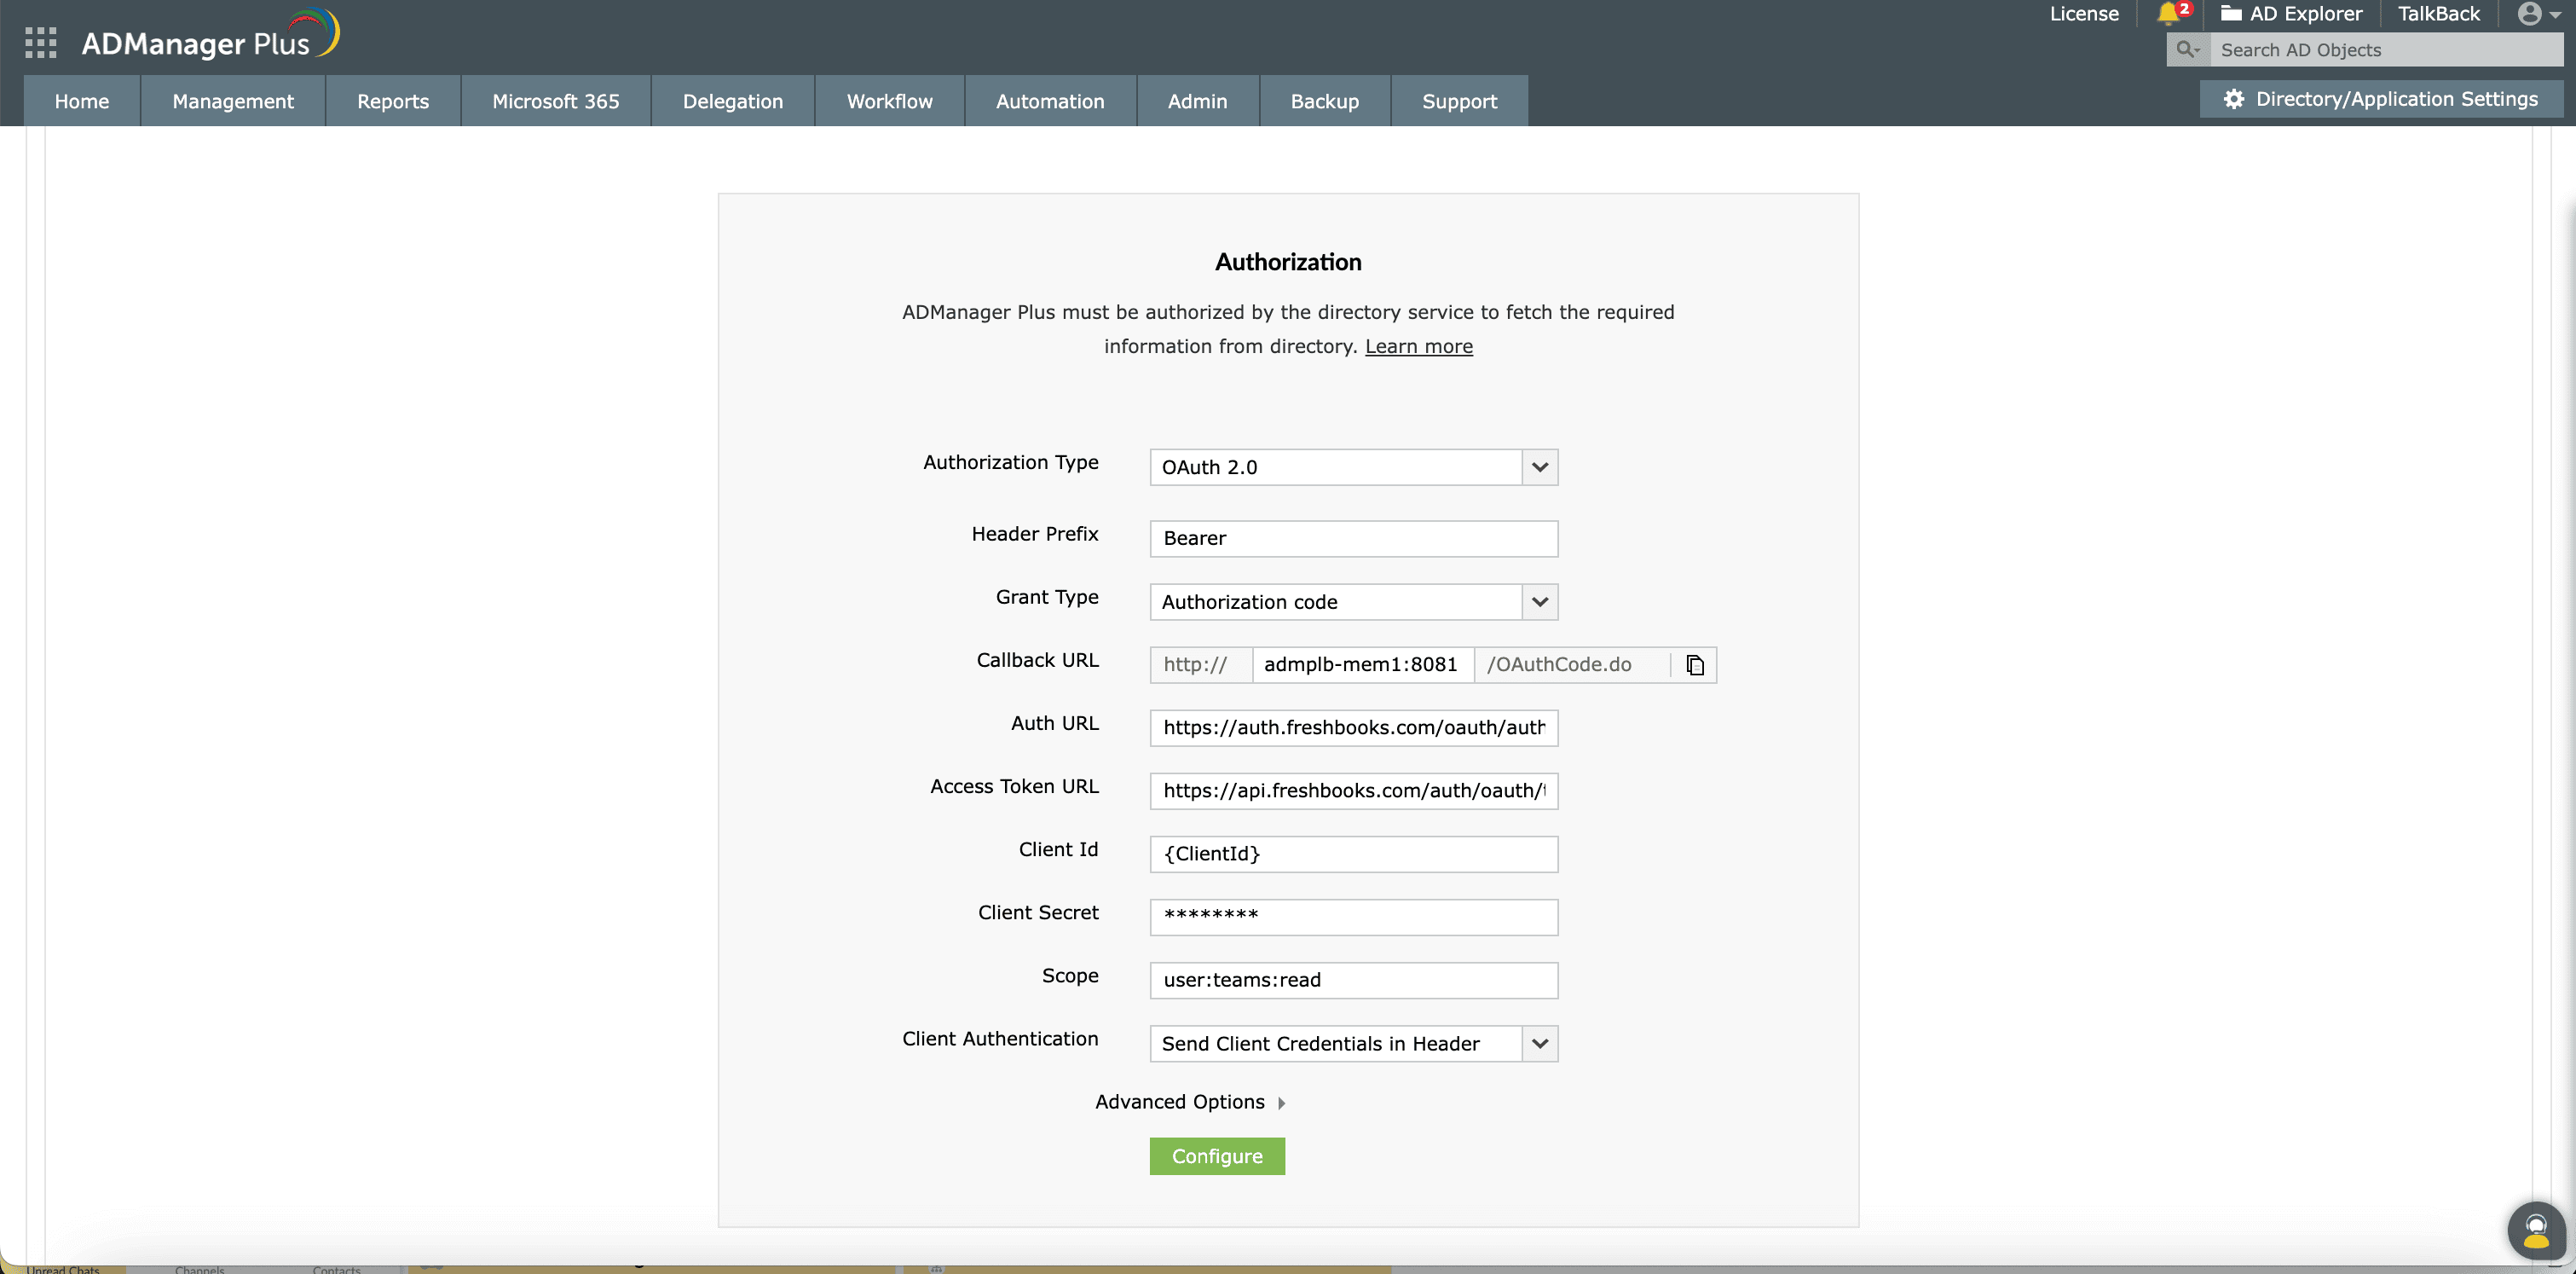
Freshbooks uses OAuth 2.0 to authorize API requests.
It requires a client_id and client_secret for authorization.
Privileges:
To import users (inbound action): Ensure the account used for authorization has permission to read all user accounts.
To perform any action or query in Freshbooks (outbound action): Ensure the account used for authorization has permission to perform the desired action.
Note: ADManager Plus comes with preconfigured set of APIs that help perform basic actions with the integration. If the action you require is not available, please gather the necessary API details from Freshbooks's API documentation to configure inbound or outbound webhooks to perform the required actions.Authorization configuration
- Log in to ADManager Plus and navigate to the Directory/Application Settings.
- Select Application Integrations.
- Under Enterprise Applications, search and click Freshbooks.
- Toggle the Enable Freshbooks Integration button on.
- On the Freshbooks Configuration page, click Authorization.
- Perform the steps to generate a client_id and client_secret from Freshbooks, and paste them in the respective value fields.
- Click Configure.
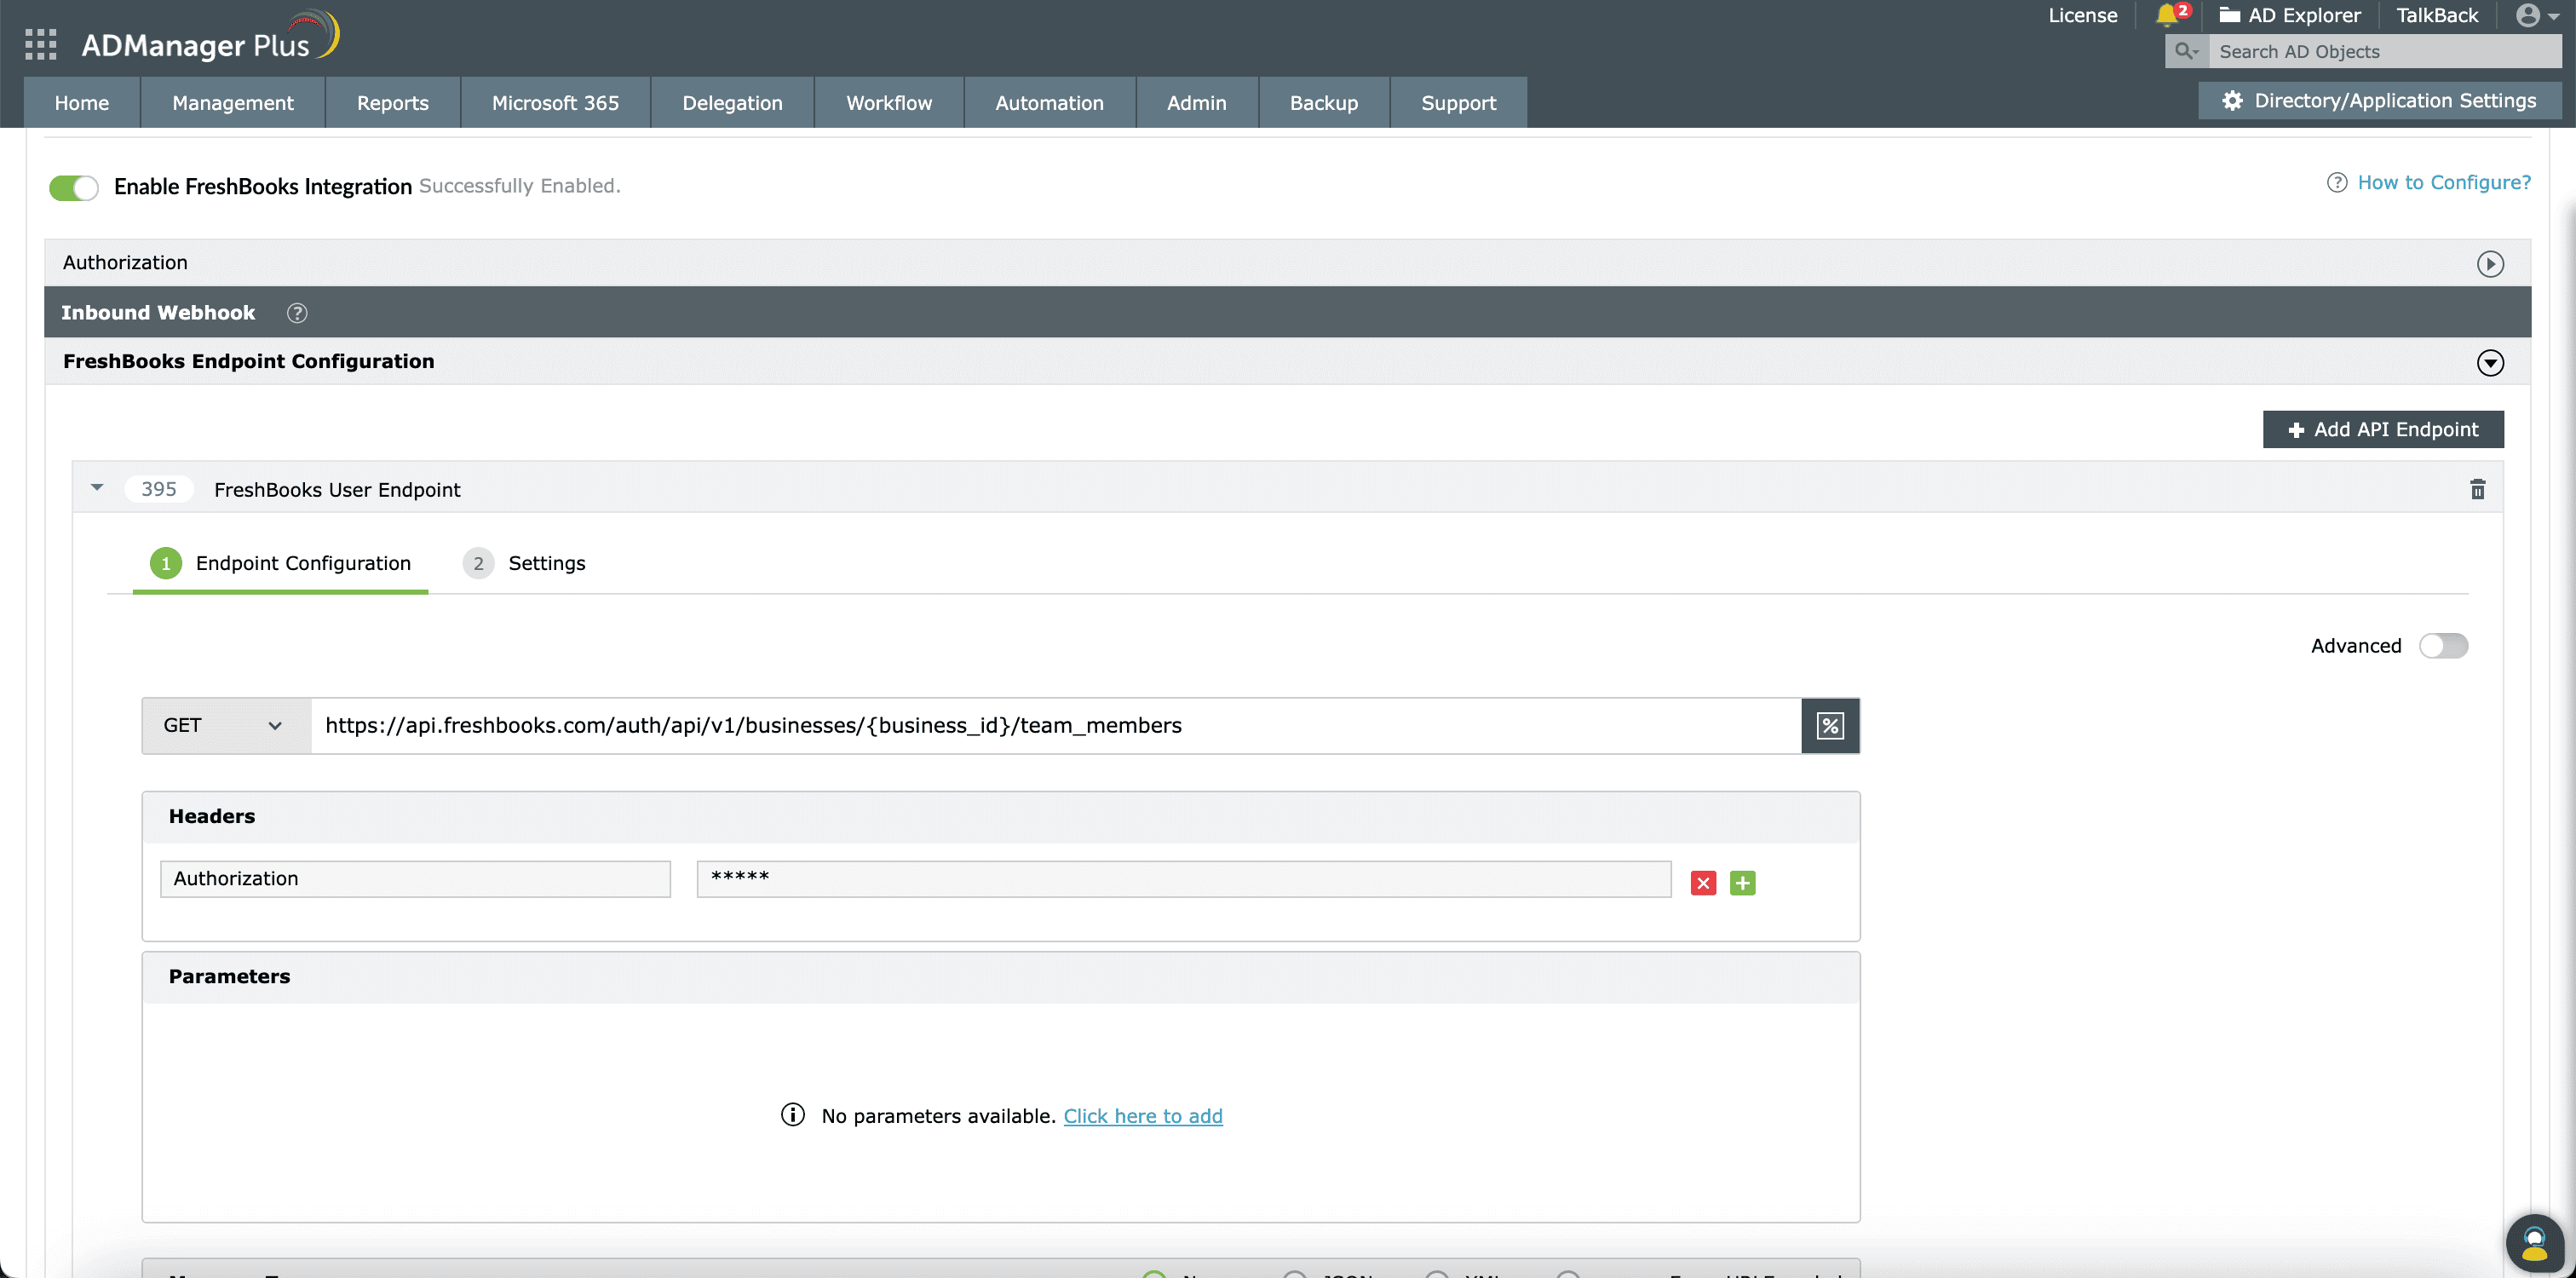
Inbound webhook configuration
Inbound webhooks enable you to fetch user data from Freshbooks and send it to ADManager Plus. The attribute mapping configured in this section can be selected as the data source during automation configuration. To configure an inbound webhook for Freshbooks:
- Under Inbound Webhook, click Freshbooks Endpoint Configuration.
- In the Endpoint Configuration tab, an endpoint, Freshbooks USERS ENDPOINT, comes preconfigured with Endpoint URL, API Method, Headers, and Parameters fields to fetch user accounts from Freshbooks. If you would like to use this preconfigured endpoint, {business_id} with the unique business ID of your FreshBooks account in the Endpoint URL field. However, if you would like to use a new endpoint to import users, you can configure one using the + Add API endpoint button and filling in the required fields as per Freshbooks's API documentation. Click here to learn how.
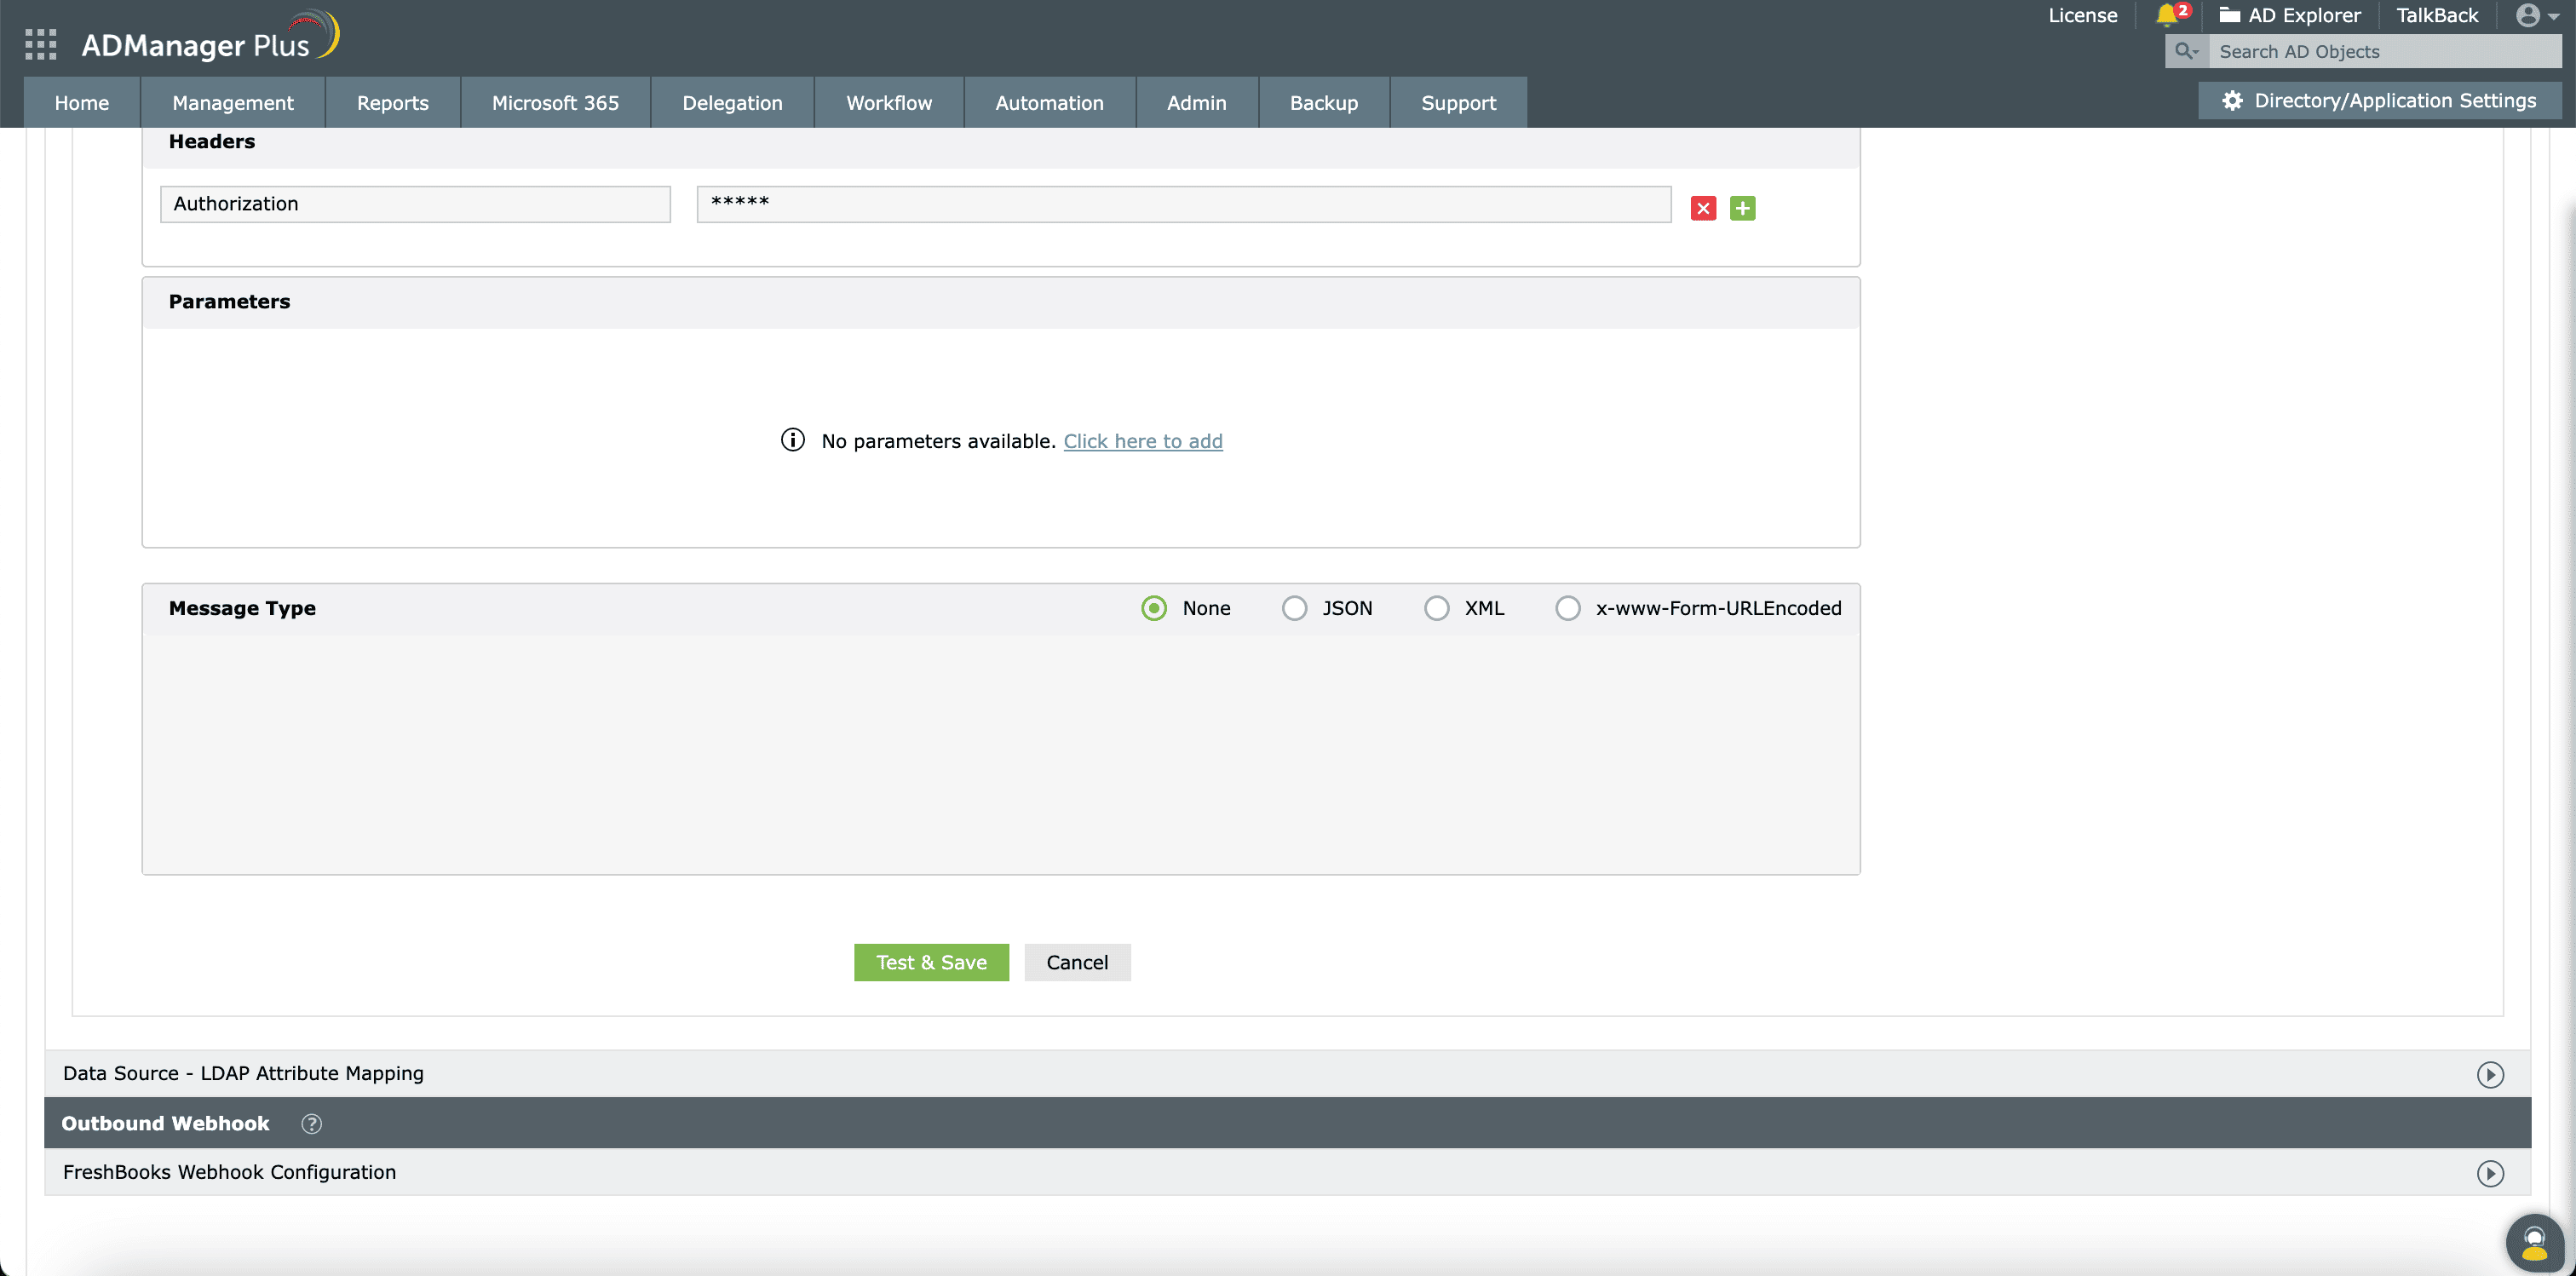
- The API key value pair is preconfigured as a header for authenticating API requests as configured during authorization configuration.
- Macros: You can add macros to your endpoint configuration to dynamically change it as per your requirement using the macro chooser component.
- Refer to Freshbooks's API documentation and configure additional headers and parameters, if required. In the Settings tab, the Repeat calling this endpoint option will be configured to fetch 30 records per call. This will be repeated until no next page token is received.
- Once done, click Test & Save. A response window will display all the requested parameters that can be fetched using the API call. After verifying if the requested parameters have been called to action, click Proceed.
- Refer to Freshbooks's API documentation to learn about the parameters that must be configured to fetch only specific parameters.
- You can configure multiple endpoints for Freshbooks using the + Add API endpoint button. Click here to learn how.
- Click Data Source - LDAP Attribute Mapping to match endpoints and to map AD LDAP attributes with the respective attributes in Freshbooks.
- Click + Add New Configuration and perform the following actions:
- Enter the Configuration Name and Description, and select the Automation Category from the drop-down menu.
- In the Select Endpoint field, select the desired endpoint and a Primary Key that is unique to a user (e.g., employeeIdentifier). Note: When multiple endpoints are configured, this attribute must hold the same value in all the endpoints.
- In the Attribute Mapping field, select the attribute from the LDAP Attribute Name drop-down menu and map it with the respective attribute in Freshbooks.
- If you would like to create a new custom format for this, click Add New Format.
- Click Save
Note:
Note: