☰
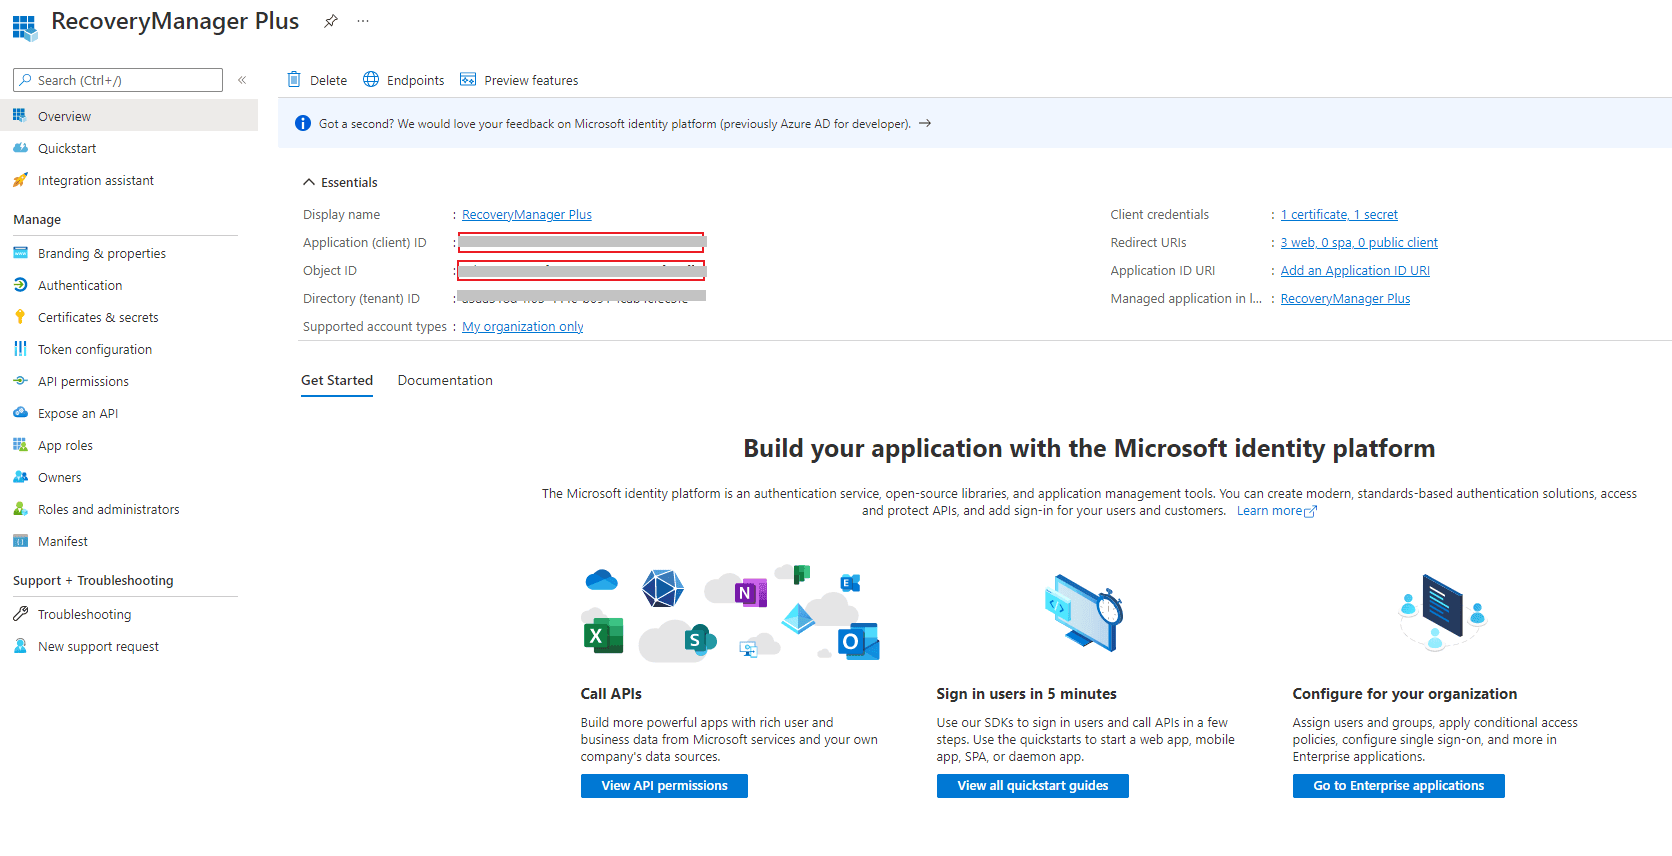
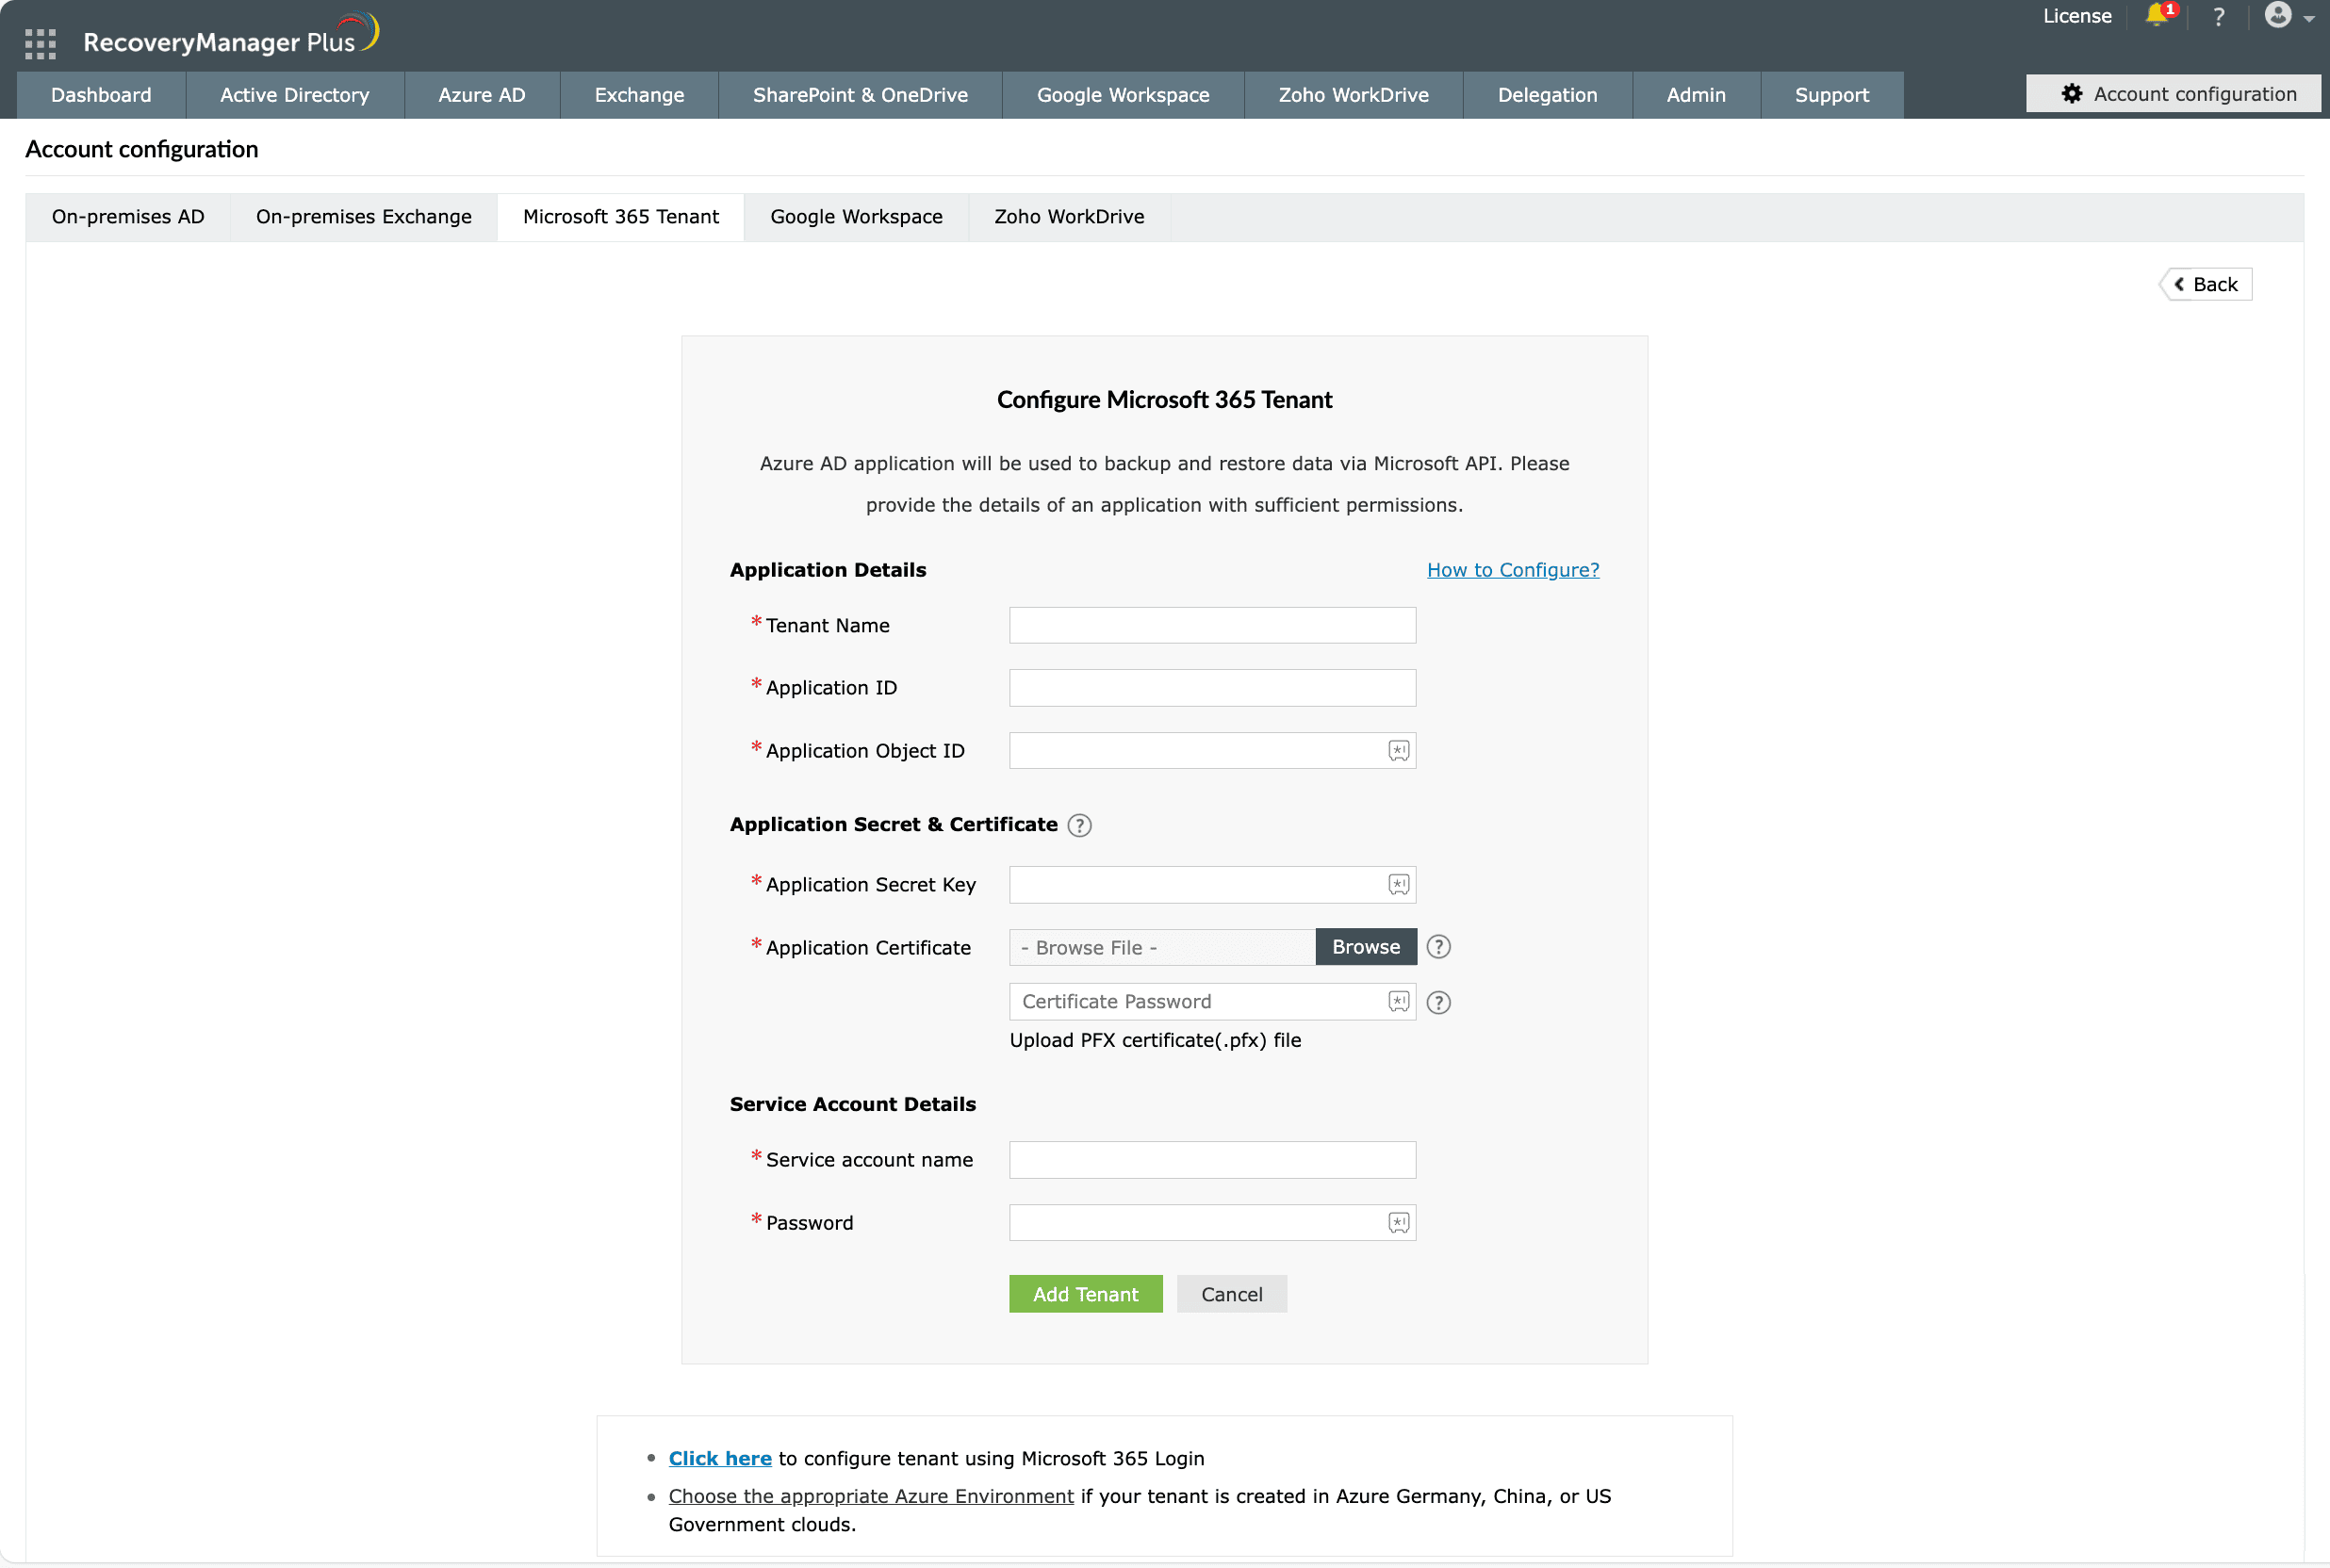
If the automatic configuration was not successful, the tenant must be configured manually. To do that, navigate to ccount Configuration > Microsoft 365 Tenant > Add New Tenant and select Click here to configure with an already existing Microsoft Entra application.
.\Create-SelfSignedCertificate.ps1 -CommonName "CertificateName" -StartDate YYYY-MM-DD -EndDate YYYY-MM-DD.
The certificate will be created with the name provided in the CertificateName position. In the YYYY-MM-DD field, provide the start and end date for the certificate. Once you run the PowerShell script, you will be requested to provide a password for the PFX file. The PFX and CER files will be exported to the current folder. The password you provided and the certificate files will be required in the later steps.There are two steps to configure a tenant manually.
To create an Entra application,
For example, http://localhost:8090/webclient/GrantAccess or https://192.345.679.345:8090/webclient/GrantAccess.

Note: The REDIRECT URI must adhere to the following criteria:
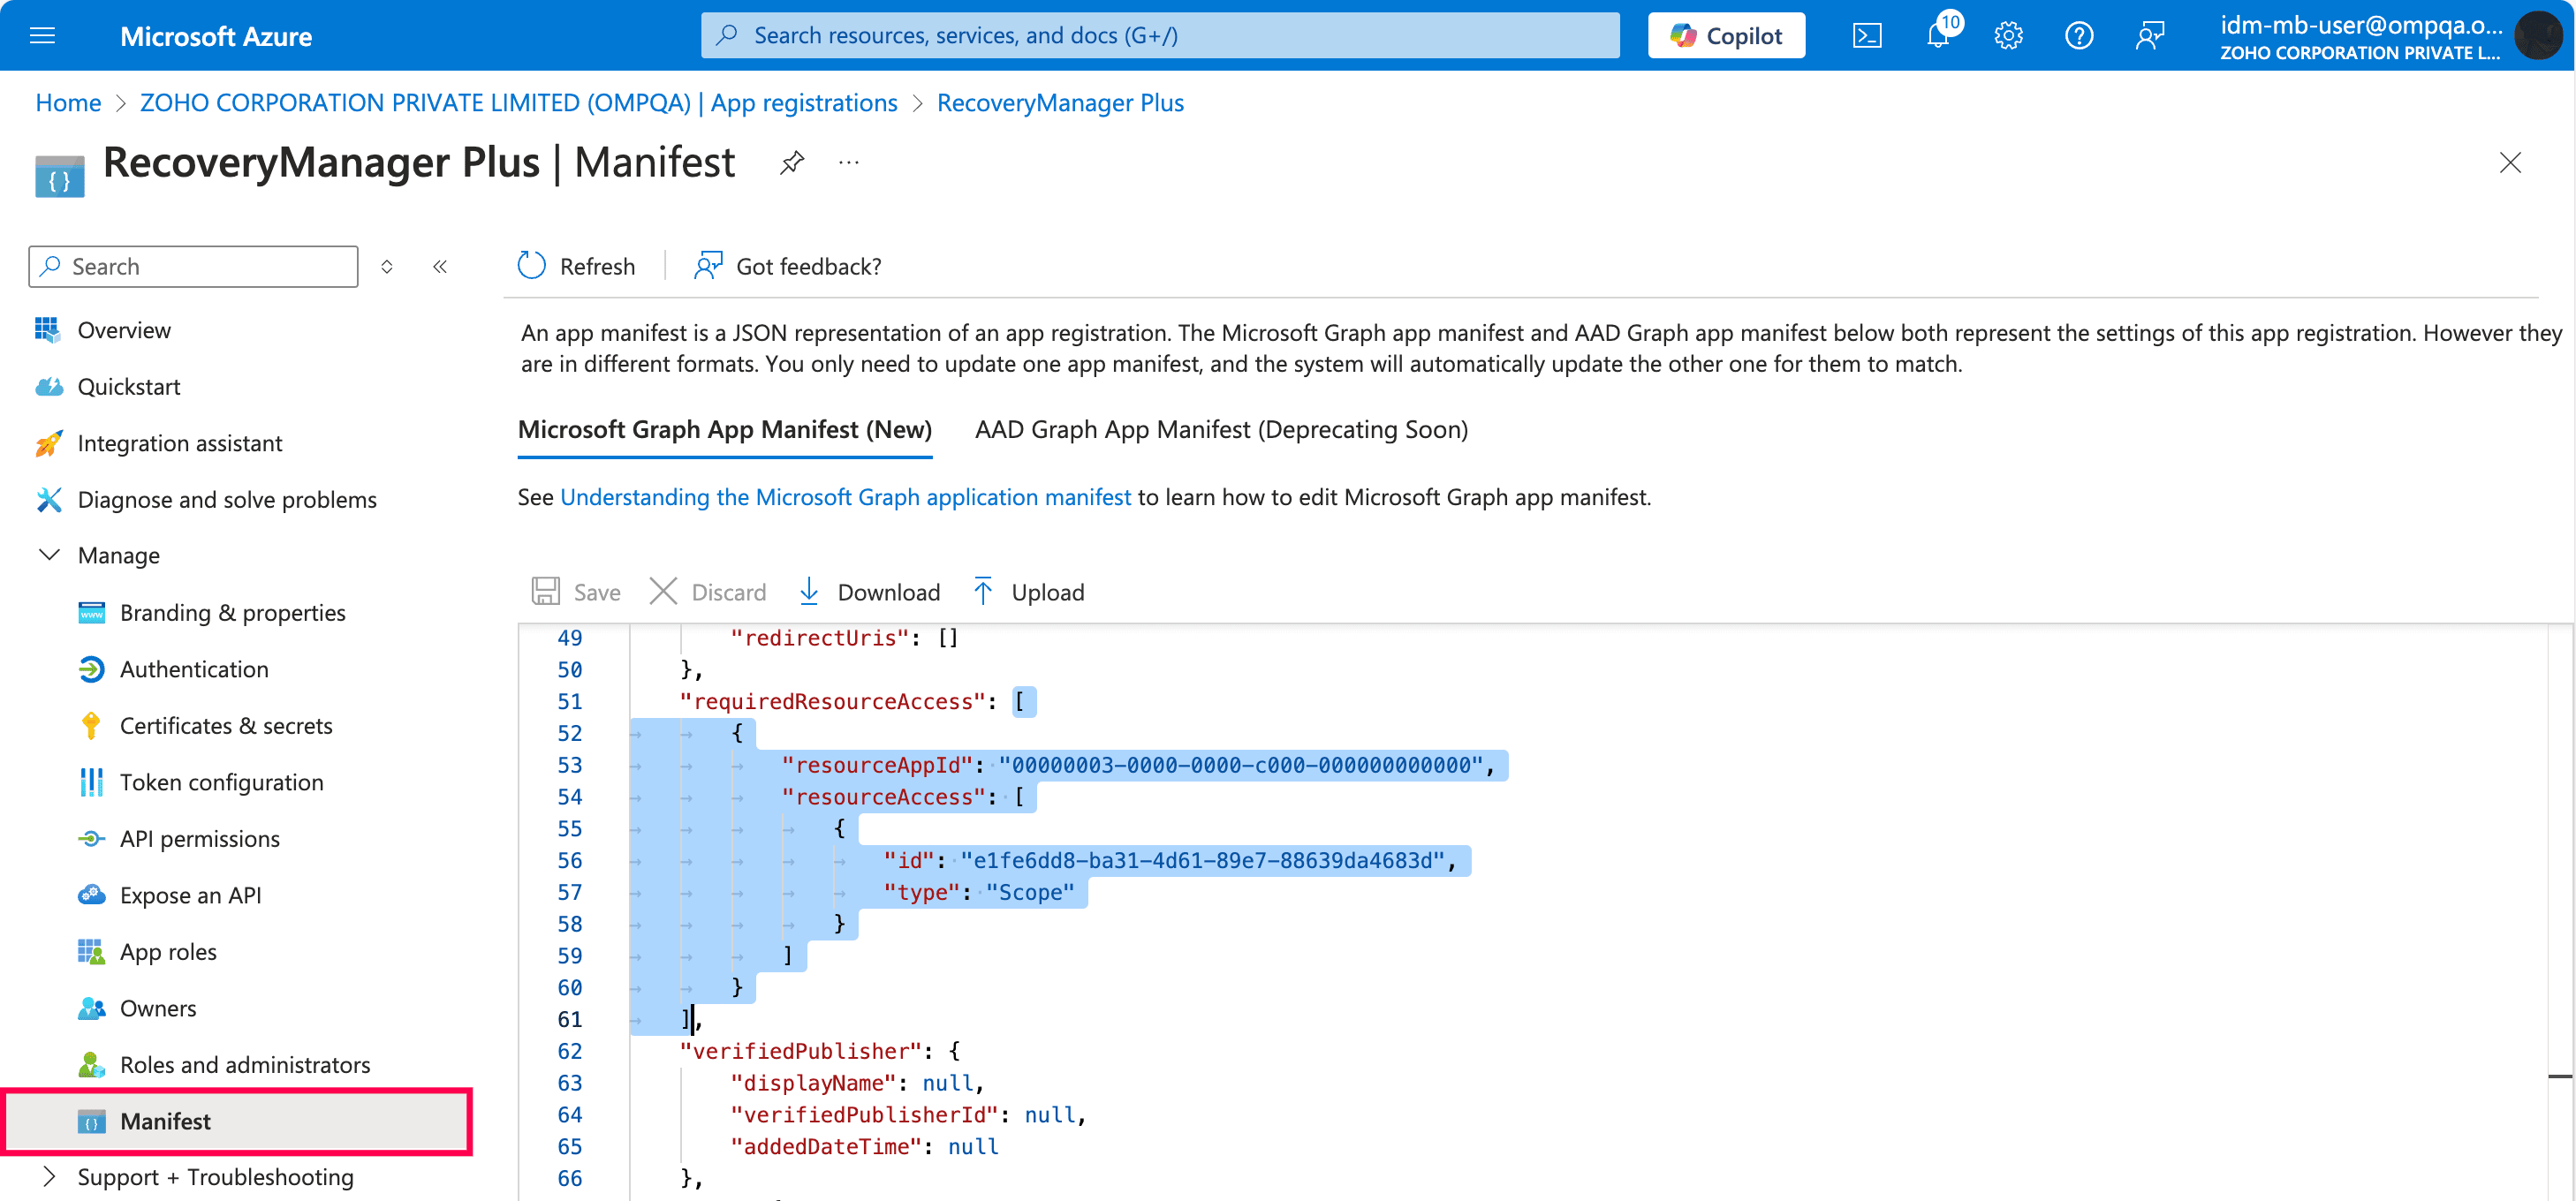

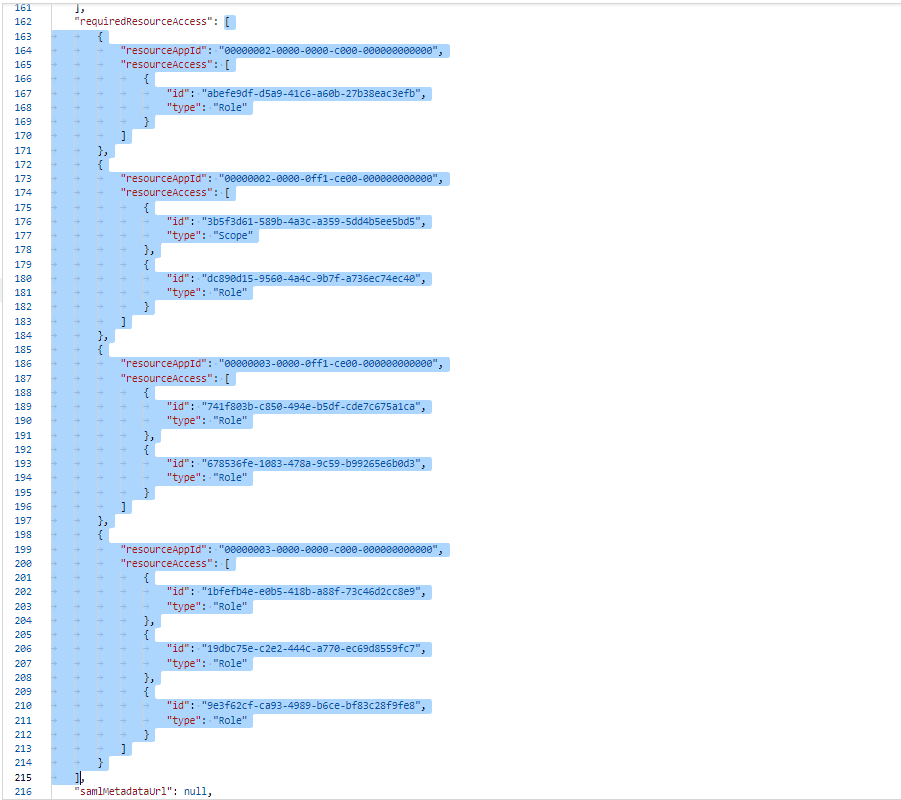
If you have configured all applications and pasted the file, it should look like the image below.

| Module | Role Name | Permission | Scope |
|---|---|---|---|
| Microsoft Entra ID | Azure Active Directory Graph | Domain.ReadWrite.All | Read and write all domain properties |
| Microsoft Graph → Application Permissions | AppRoleAssignment.ReadWrite.All | Manage app permission grants and app role assignments | |
| AdministrativeUnit.ReadWrite.All | Read and write all administrative units | ||
| Application.ReadWrite.All | Read and write all applications | ||
| AppRoleAssignment.ReadWrite.All | Manage app permission grants and app role assignments | ||
| Directory.ReadWrite.All | Read and write directory data | ||
| Domain.ReadWrite.All | Read and write domains | ||
| Group.Create | Create groups | ||
| Group.ReadWrite.All | Read and write all groups | ||
| Policy.Read.All | Read your organization's policies | ||
| Policy.ReadWrite.ApplicationConfiguration | Read and write your organization's application configuration policies | ||
| Policy.ReadWrite.Authorization | Read and write your organization's authorization policy | ||
| Policy.ReadWrite.ConditionalAccess | Read and write your organization's conditional access policies | ||
| RoleManagement.ReadWrite.Directory | Read and write all directory RBAC settings | ||
| AuditLog.Read.All | Read all audit log data | ||
| BitlockerKey.Read.All | Read all BitLocker keys | ||
| DeviceLocalCredential.Read.All | Read all device local credential properties, including passwords | ||
| Policy.ReadWrite.AuthenticationMethod | Read and write all authentication method policies | ||
| Policy.ReadWrite.DeviceConfiguration | Read and write organization's device configuration policies | ||
| User.ReadWrite.All | Read and write all users' complete profiles |

| Module | Role Name | Permission | Scope |
|---|---|---|---|
| Exchange Online | Office 365 Exchange Online | EWS.AccesAsUser.All | Back up and restore mailboxes |
| full_access_as_app | Use Exchange Web Services to back up and restore mailboxes | ||
| Exchange.ManageAsApp | Manage Exchange as Application |

| Module | Role Name | Permission | Scope |
|---|---|---|---|
| SharePoint Online and OneDrive for Business | SharePoint | Sites.FullControl.All | Backup and restore sites |
| User.ReadWrite.All | Read and write the full set of profile properties, reports, and managers of users |

Note: Copy and paste content only from the open square bracket to the closed square bracket. Ensure that all punctuation marks are retained correctly.
Copyright © 2023, ZOHO Corp. All Rights Reserved.
 ADManager Plus
 ADAudit Plus
 ADSelfService Plus
 M365 Manager Plus