Steps to modify an Entra application's permissions
In this section, you will learn how to modify the API permissions for a tenant that has already been successfully configured in RecoveryManager Plus.
Prerequisite: The tenant has to be successfully configured in RecoveryManager Plus and the Entra ID application status has to be enabled for it.
- Log in to the Microsoft Entra admin center portal.
- Click Microsoft Entra ID under Azure services.
- Choose App registrations under the Manage section.
- Select All applications.
- Click on the application which is configured in RecoveryManager Plus
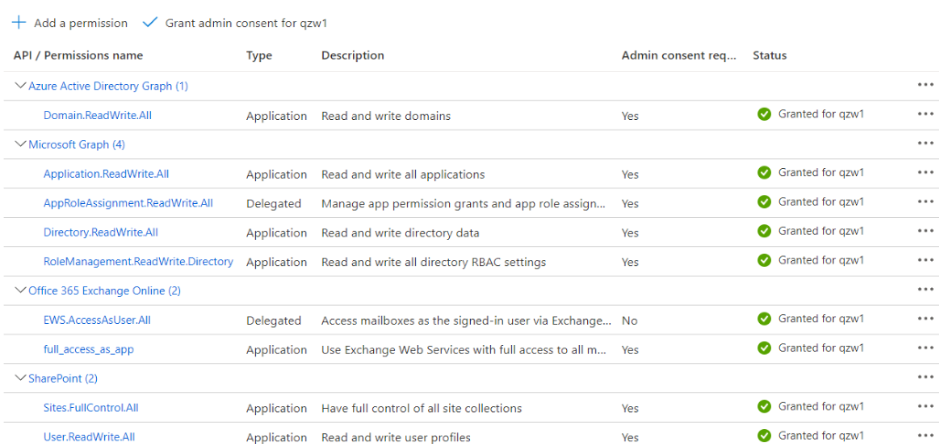
- In the API permissions page, check if admin consent has been granted for all permissions shown in the image below.
- If some permissions are unavailable, click Manifest from the left pane.
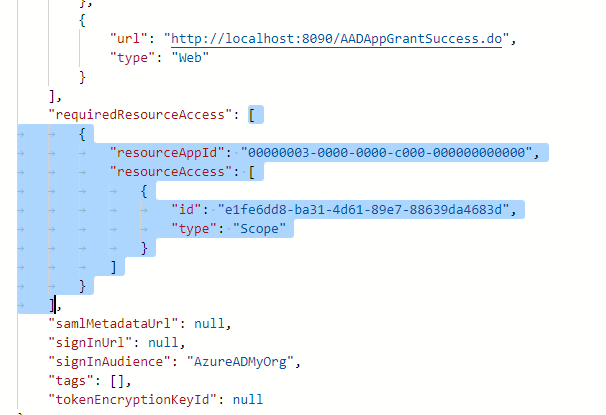
- Look for requiredResourceAccess array in the code.
- Copy the entire content from this file and paste them into the section highlighted in the image below. If you want to modify the permissions to be provided, skip this step and follow the steps mentioned in this section.
Note:
- If your tenant is being created in Azure Germany, copy the entire content from this file and paste them into the section highlighted in the image below.
- If your tenant is being created in Azure China, copy the entire content from this file and paste them into the section highlighted in the image below.
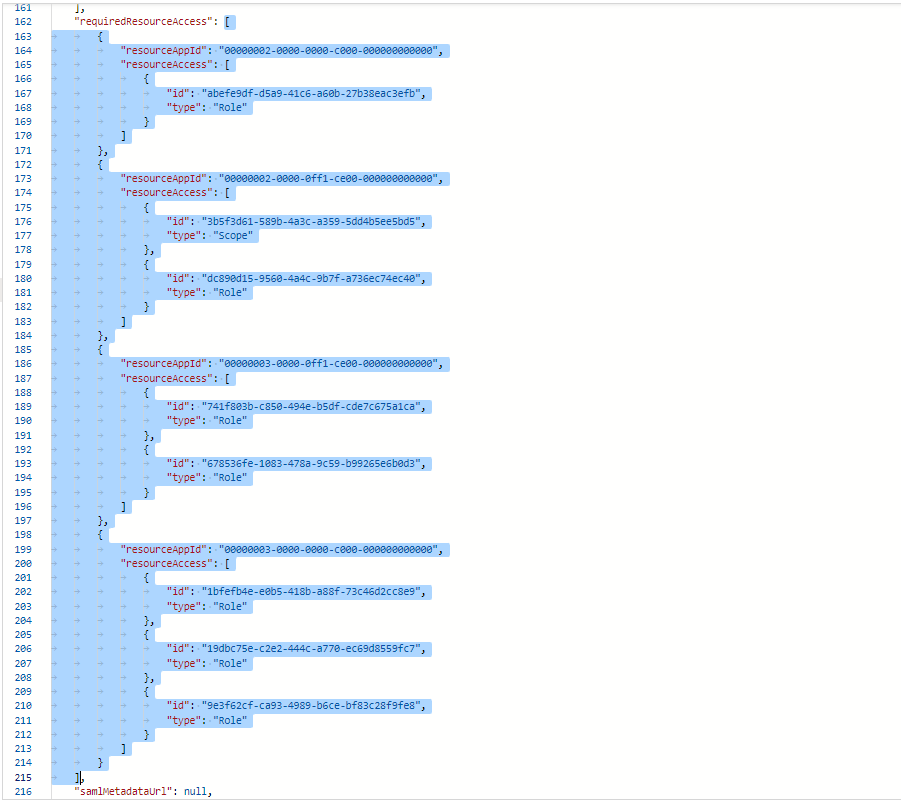
Note: Copy and paste content only from the open square bracket to the closed square bracket. Ensure that all punctuation marks are retained correctly. Once you have pasted the file, it should look like the image below.
- Click Save.
- Click API permissions from the left pane.
- In the Configured permissions section, click ✓ Grant admin consent for <your_company_name>.
- Click Yes in the pop-up that appears.
- Restart the product for the changes to take effect.
 ADManager Plus
 ADAudit Plus
 ADSelfService Plus
 M365 Manager Plus