Importing data from Microsoft Azure Data Lake
Analytics Plus allows you to connect to the data stored in the Azure Data Lake and create data visualisations that help in identifying the underlying trends and optimize operational efficiency. You can also schedule imports for periodic synchronization.
Data Import
What are the storage types in Azure Data Lake from which I can import data into Analytics Plus?
How long does it take for the data to be imported into Analytics Plus?
Import Settings
Data Blending
Manage Data Sources
Data Import
1. What are the storage types in Azure Data Lake from which I can import data into Analytics Plus?
Analytics Plus supports data import from the following Azure Data Lake storage types:
Containers
File share
Tables
2.How to import data from Azure Data Lake?
Note: The connection details will be saved, and you can use them later to import files or tables from the same storage types.
3. How long does it take for the data to be imported into Analytics Plus?
After setup, you might have to wait sometime for the initial fetch to happen. This depends upon the amount of data imported into Analytics Plus and also the response time of your Azure Data Lake server. You will receive an email notification once the import is complete. Please note that, if you access the workspace before the initial fetch, it will not display any data.
Import Settings
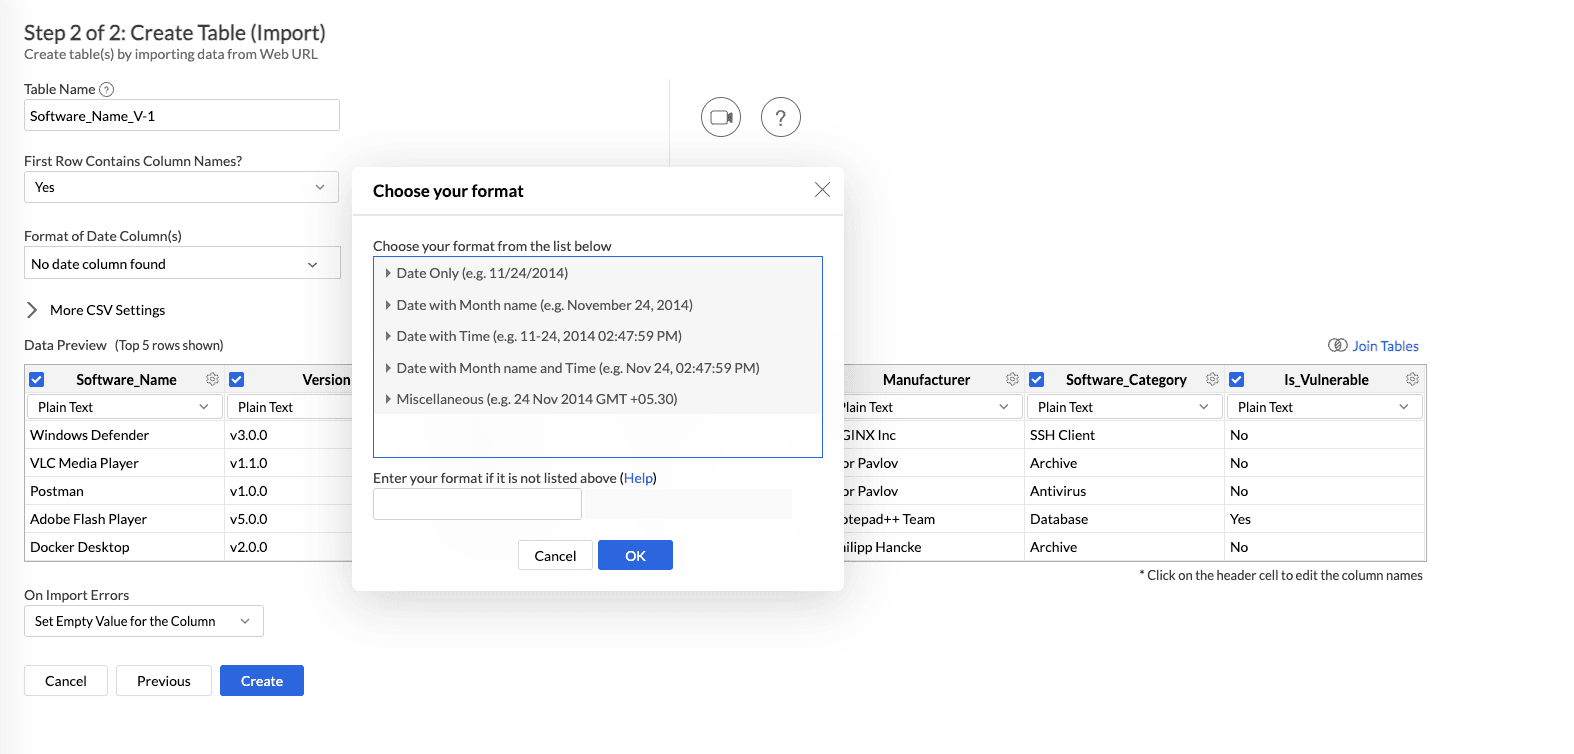
1. How to set custom date format?
Analytics Plus intelligently identifies the format of the date column while importing but if there's any difference in the identified format you can change it using the Format Date option while importing.
2. Can I change the data type of the columns imported in Analytics Plus?
Yes, you can change the data type of the columns imported into Analytics Plus. However, it is necessary that the data type of your column is compatible with the data type of the column in Azure Data Lake for successful data synchronizations. It is always recommended that you change the data type in both your Azure data Lake as well as your Analytics Plus workspace.
To change the data type, click the drop-down icon of the column and select the data type from the list.

3. Will I be notified of Import failures?
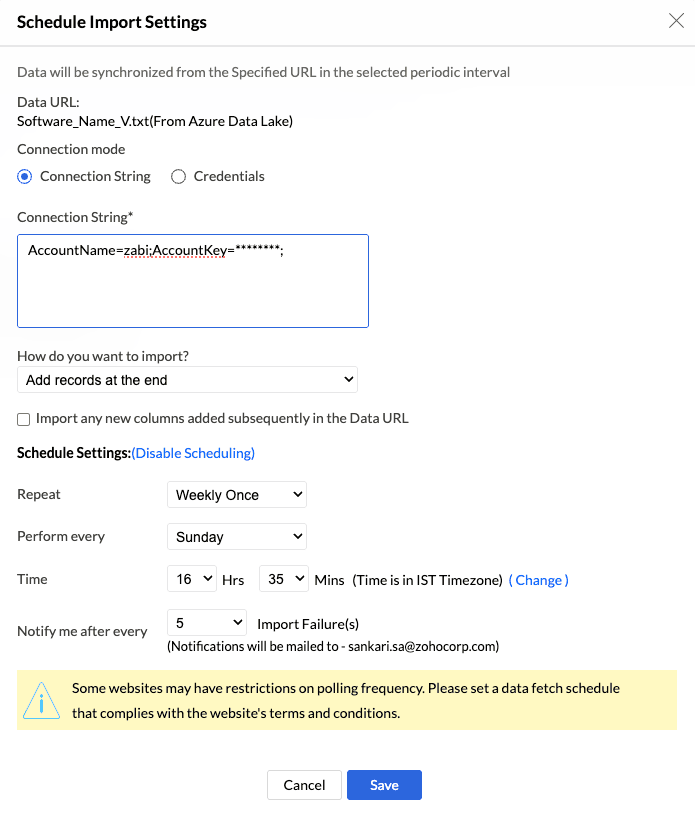
Yes. You can configure notifications for consecutive import failures. Specify the number of consecutive failures after which you want to be notified using the Notify me after every Sync Failure(s) option in the scheduled import settings.
4. Can I save my import settings?
Yes, Analytics Plus saves the import details and you can view the import details and make changes if needed.
To view the import details:
Click Import Data.
Select Refetch/Schedule Import from the drop-down.
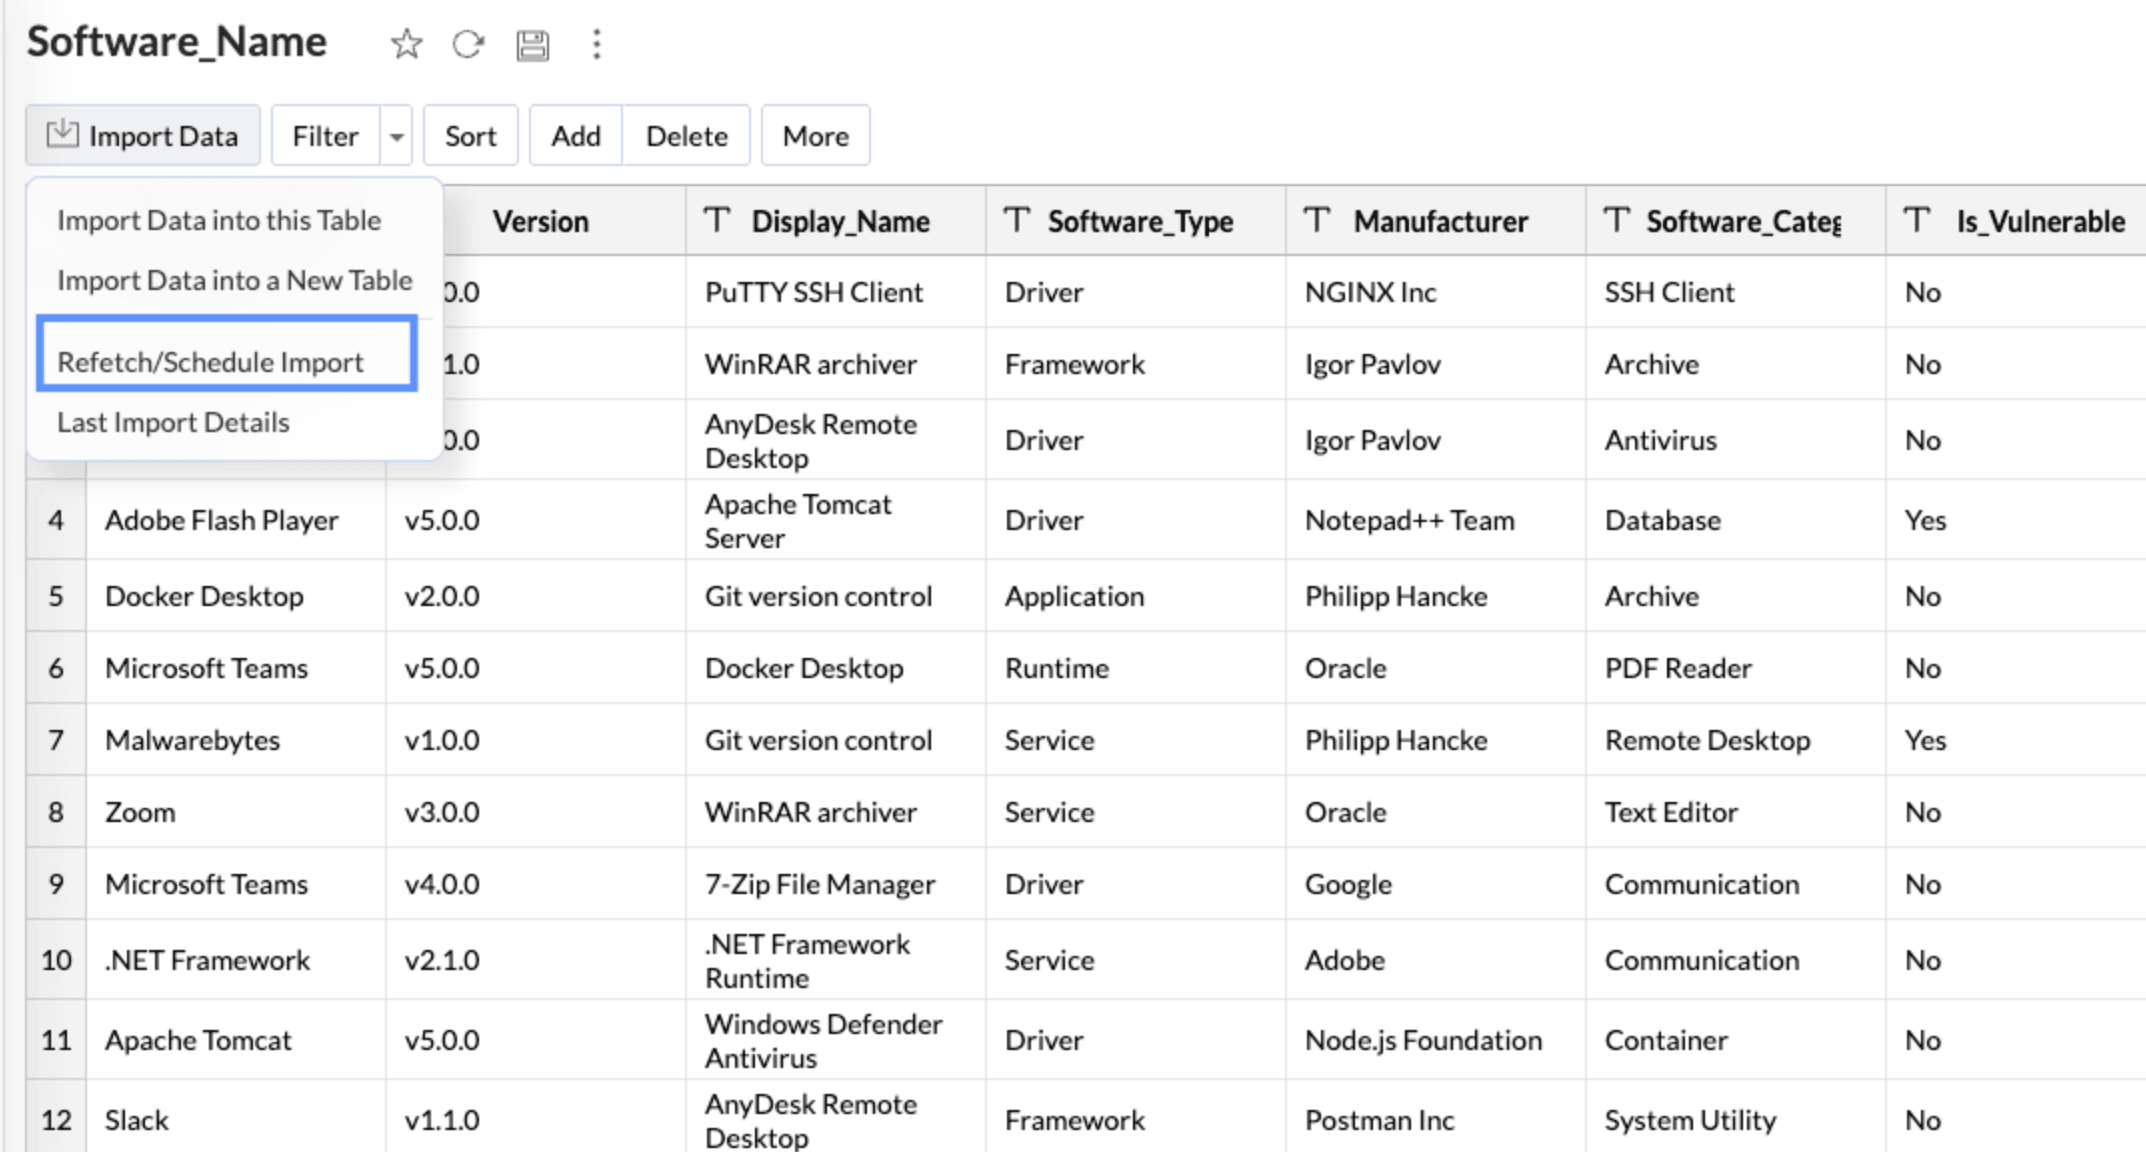
The Schedule Import Details dialog will open. You can view the following details:
Schedule: Provides the timing and the interval of when the data will be synced.
Next Fetch: Provides the details of when the next sync is due.
Last Fetch: Provides the details of when the data was last synced.
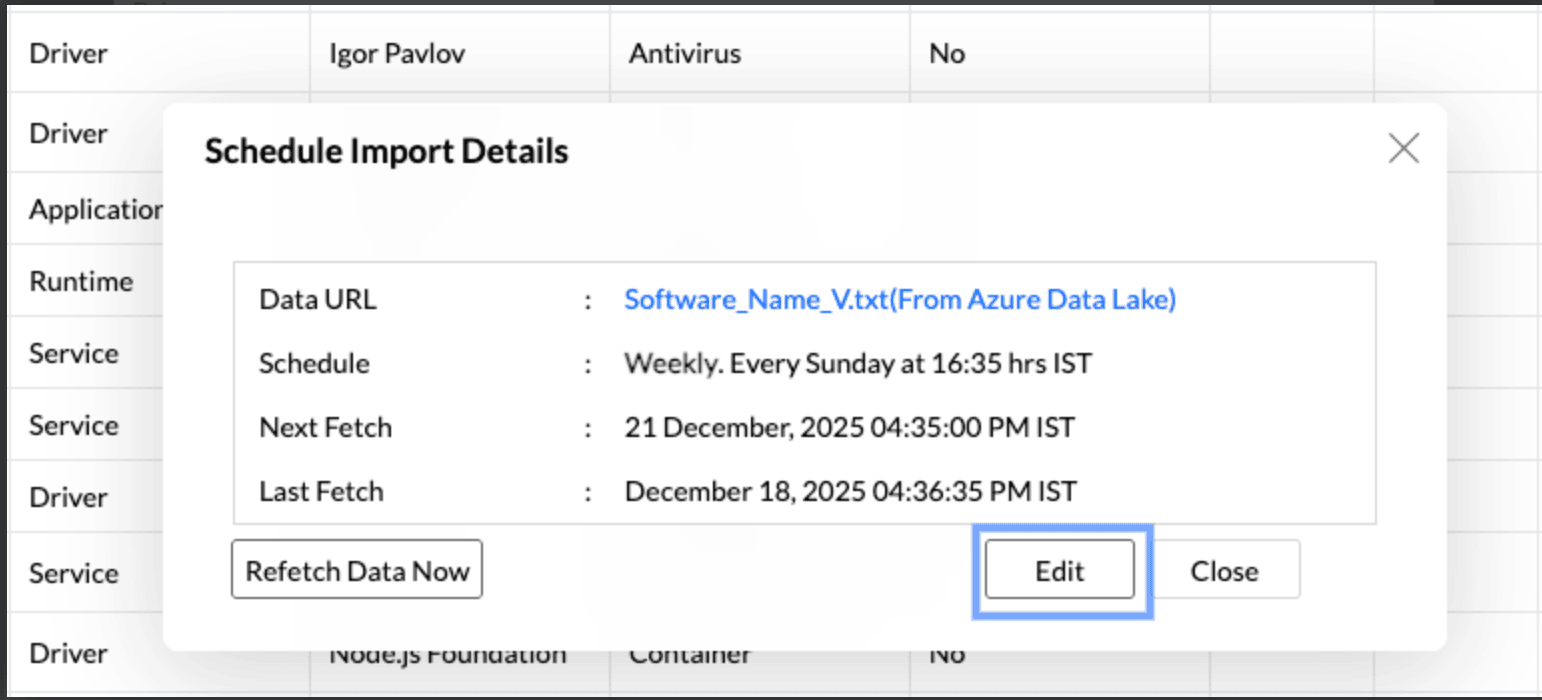
Click Edit to view the Import Settings
5. How to handle errors that occur during data import?
You can specify how Analytics Plus should handle error conditions (in case they occur) in the Import Your Data dialog of Import wizard.
The following are the possible options:
Set Empty Value for the Column (default) - Select this option to set empty value to the corresponding column value which had problems while importing.
Skip Corresponding Rows - Select this option to skip the corresponding rows in which an error occurs while importing.
Don't Import the Data - Select this option to abort the import process, if any error occurs during importing.
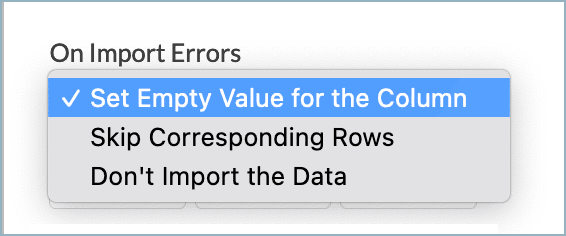
In case any error occurs during import, the details of the same would be shown in the Imported Data Summary dialog which would be shown on Import process completion.
Data Blending
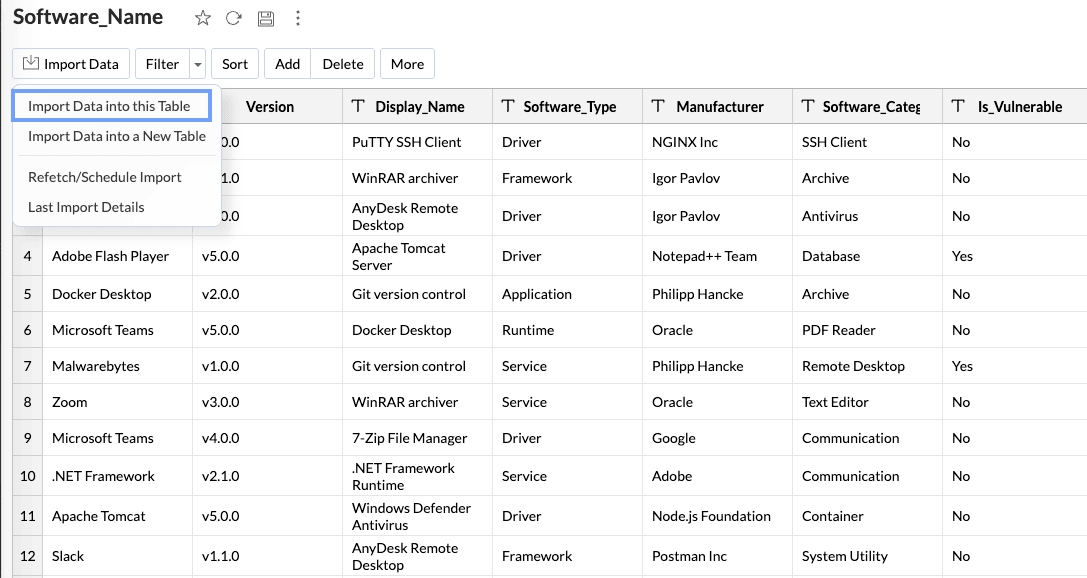
1. Can I import data into an existing table?
Yes, Analytics Plus allows you to import data into an existing table. You can import data from the same source (Azure Data Lake) or from a different source.
Note: To import data into an existing table, at least one column header should match the data that is set to import.
To import data into an existing table,
From the required table, click Import Data > Import Data into this Table.
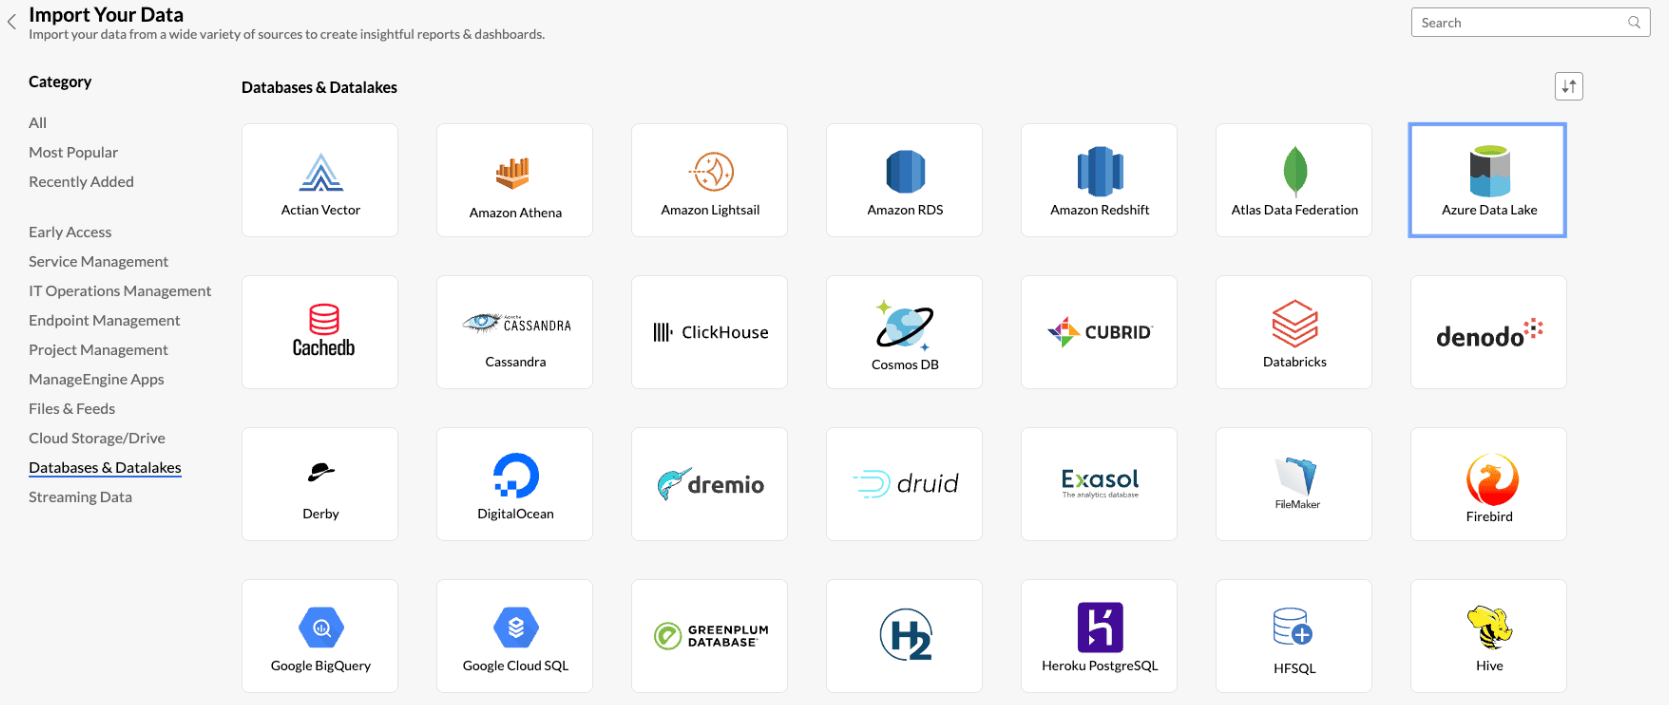
The Import Your Data tab will open listing the relevant data sources.
Choose Azure Data Lake from the listed sources.
The Import Data tab will open. Select How do you want to Import? from the drop-down menu.
You can configure a new connection as mentioned in this presentation or use the existing connection to import data. Select the file to import and click Next.
The Import settings tab will open.By default, Analytics Plus will map the corresponding column headers of the existing table with the table that is set for import. It also allows you to import data as a new column.
Click Import.
2. Can I import data into an existing workspace?
Yes, Analytics Plus allows you to import data into an existing workspace. You can join tables right at the time of import.
Follow the below steps to import data into an existing workspace.
Open the workspace for which you intend to import the data.
Click Create > New Table/Import Data.
Choose Azure Data Lake from the listed sources.
You can configure a new connection as mentioned in the setup presentation or use the existing connection details to import data. After selecting the file to import, click Next.
The Create Table (Import) page will open. Click Join Tables to define lookups.
The Join Tables - Combine the new tables with existing tables dialog will open.
Select the columns and specify the relation to be defined.
Click Save and Close.
Manage Data Sources
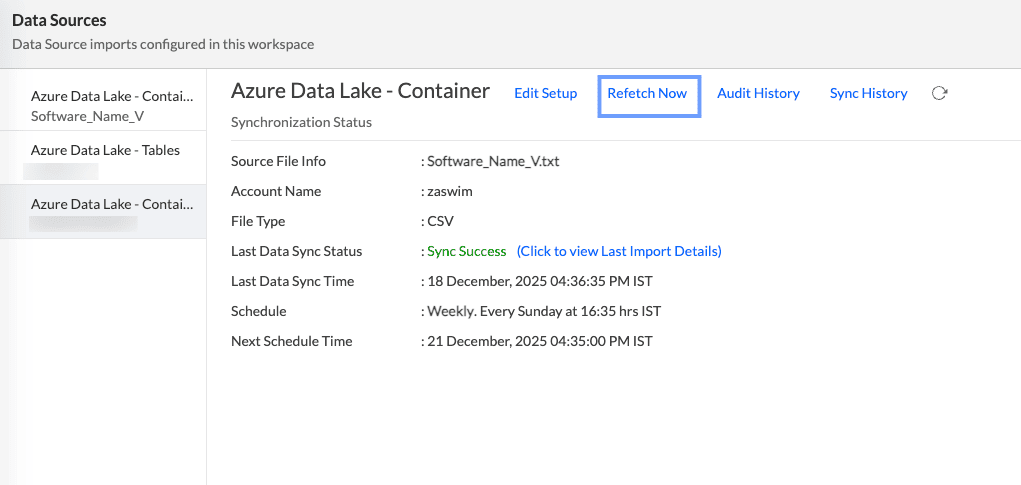
1. How do I edit the import setup?
Analytics Plus allows you to make changes to the import setup anytime during your analysis.
Follow the below steps to edit the setup,
Open the workspace for which you intend to edit the setup.
Click the Data Sources tab from the Navigation bar.
The Data Sources page will open. All the data sources in that workspace will be listed.
Click Edit Setup to make the changes.
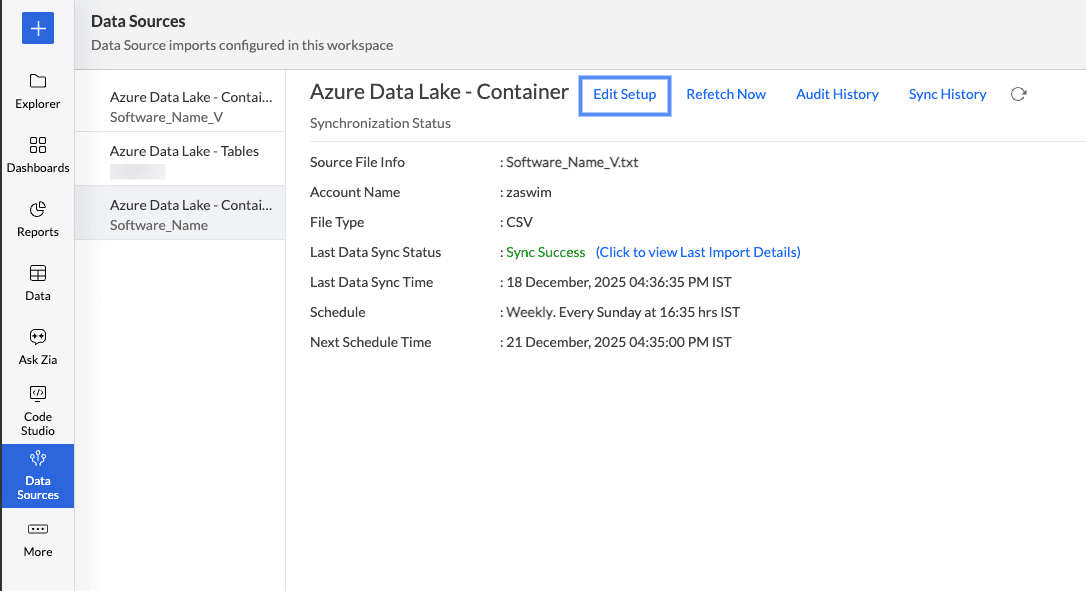
Modify the settings as required and click Save.
2.How do I synchronize my data instantly?
To synchronize the data immediately,
Open the required workspace.
Click the Data Sources tab from the left navigation bar.
In the Data Sources page that opens, click Refetch Now.
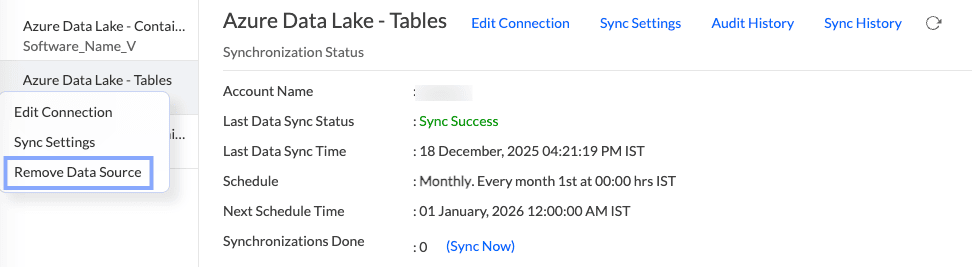
3. How do I remove the setup?
To remove the setup,
Open the required workspace.
Click the Data Sources tab from the navigation bar.
All the data sources for this workspace will be listed. Click the data source that you want to remove.
In the Data Sources tab that opens, click the Settings icon inline to the data source name on the right.
Select Remove Data Source option from the drop-down menu.