User Management
The Server Administrator can import, delete, activate or deactivate users, from the User Management page. You can import Active Directory users and enable single sign-on functionality for them using the Active Directory tabs. To learn more about Active Directory, click here. The SAML configuration tab can be used to configure single sign-on with third-party applications. To learn more about setting up a SAML configuration, click here.
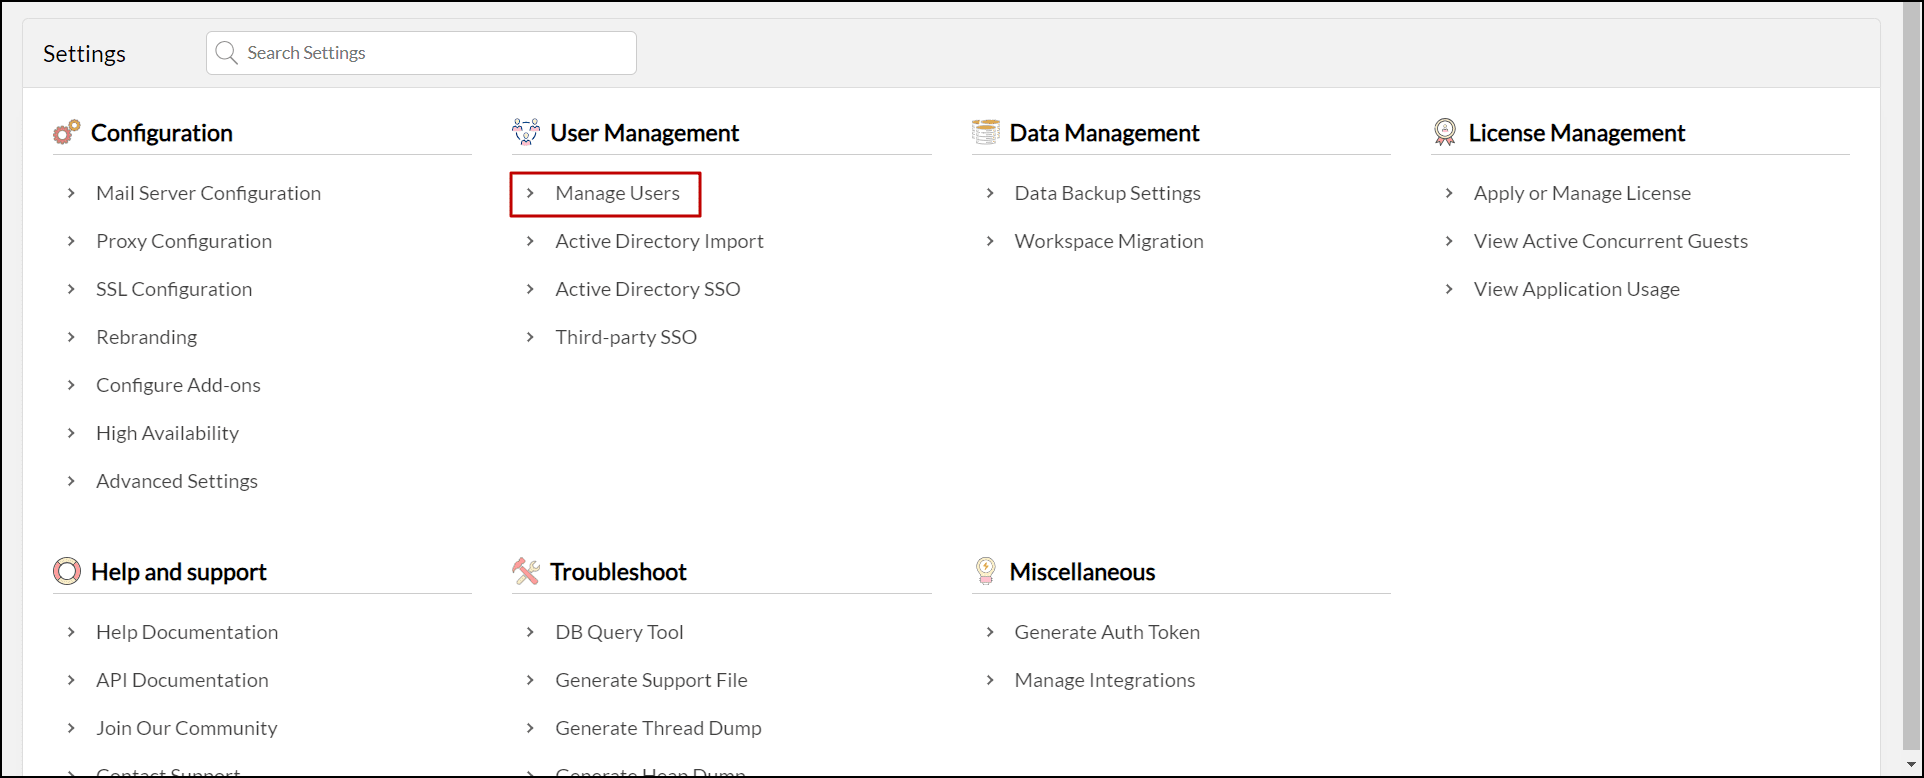
The following actions can be performed from the User Management section of the Settings page:
Roles in Analytics Plus
There are three roles in Analytics Plus.
Server Administrator
The Analytics Plus user who sets up the application will automatically become the Server Administrator. This role is not transferable. Server administrators can manage the application by configuring email settings, proxy settings, etc. To learn more about the various application settings, click here.
Manager
Users with the Manager role can create their own workspaces, be added as administrators to other workspaces and have read/write access to views shared to them.
Additionally, Analytics Plus administrators can delegate permissions to perform admin level changes such as adding or editing users, managing licenses, etc.
Viewer
Viewers can be provided read permissions to tables, reports and dashboards. However, viewers cannot:
- Create new views or workspaces
- Edit or share the shared views
Adding users
You can add users in Analytics Plus in three ways:
Add users individually
You can easily add users in Analytics Plus by following the steps below:
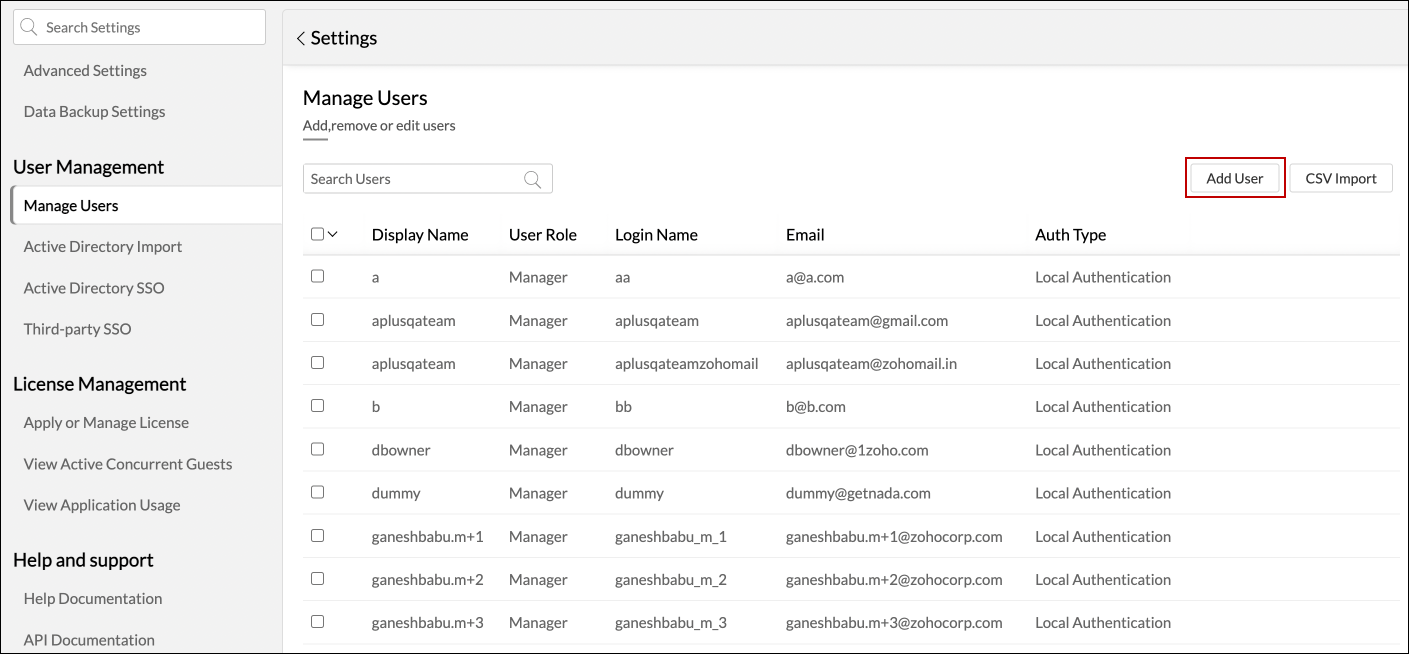
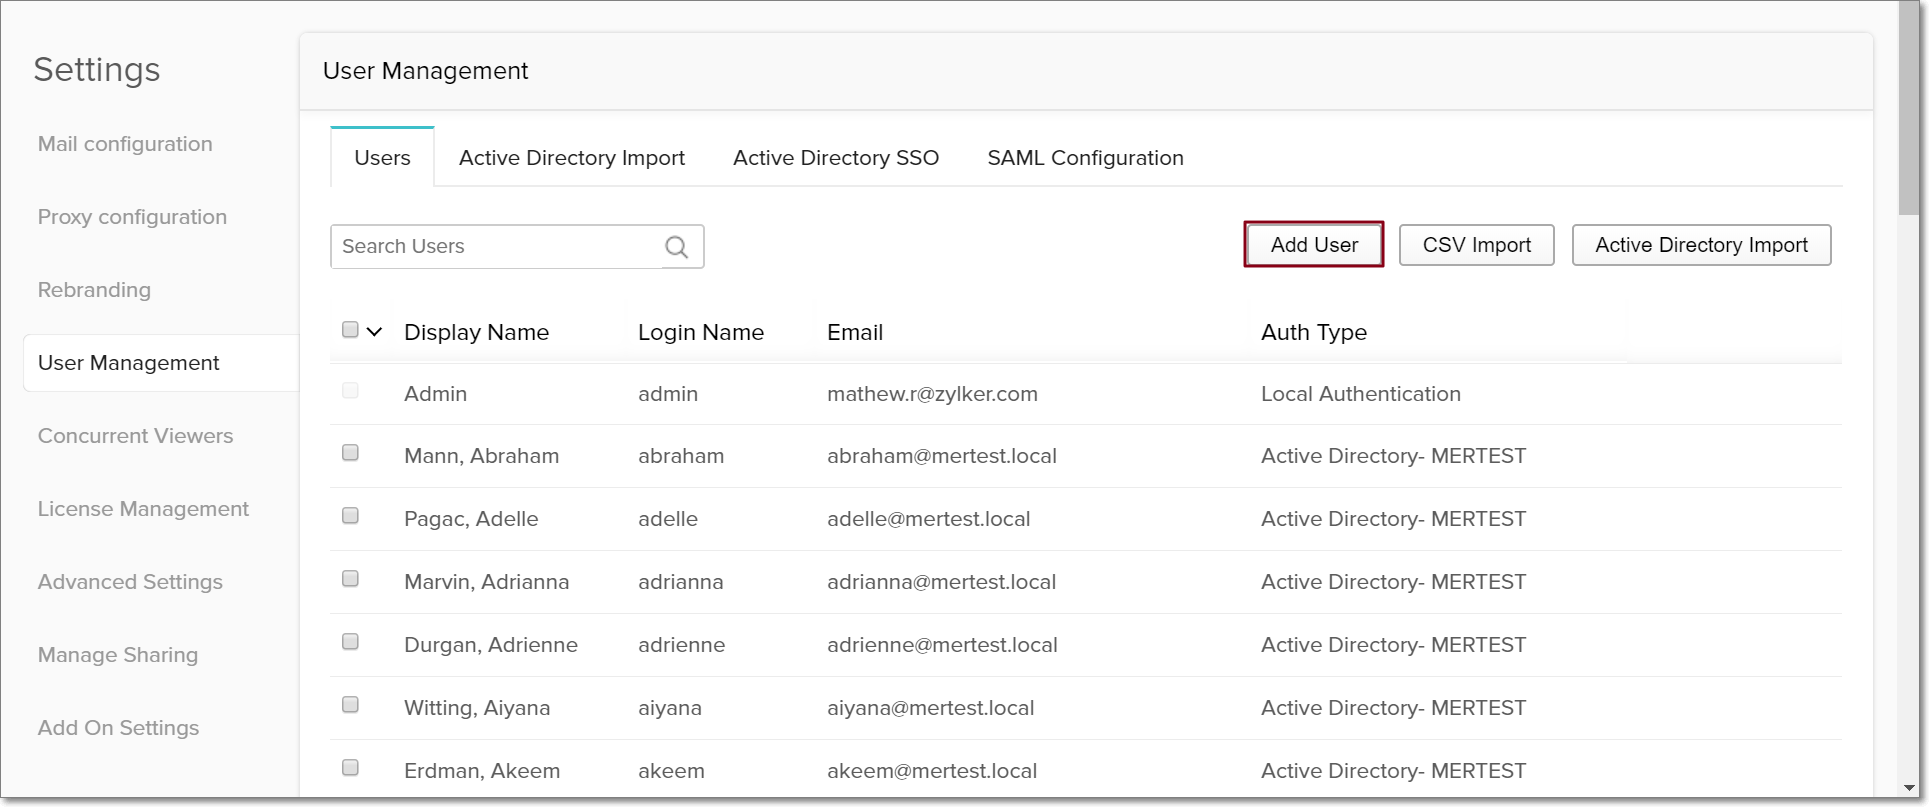
- Click the Add User button in the Users tab.
- Enter the display name, login name and the email addresses of the user to be added.
A login name can contain the following characters: Lowercase {a-z}, Uppercase {A-Z}, Numbers {0-9}, Symbols {Hyphen(-), Period(.), Underscore(_)}. Please note that the login names can begin or end with letters and numbers but not symbols.
- Choose the desired role from the User Role drop-down.
- Select the Allow user to perform configuration changes checkbox to enable users with the Manager role to perform admin-level changes such as adding or editing users, managing licenses, etc.
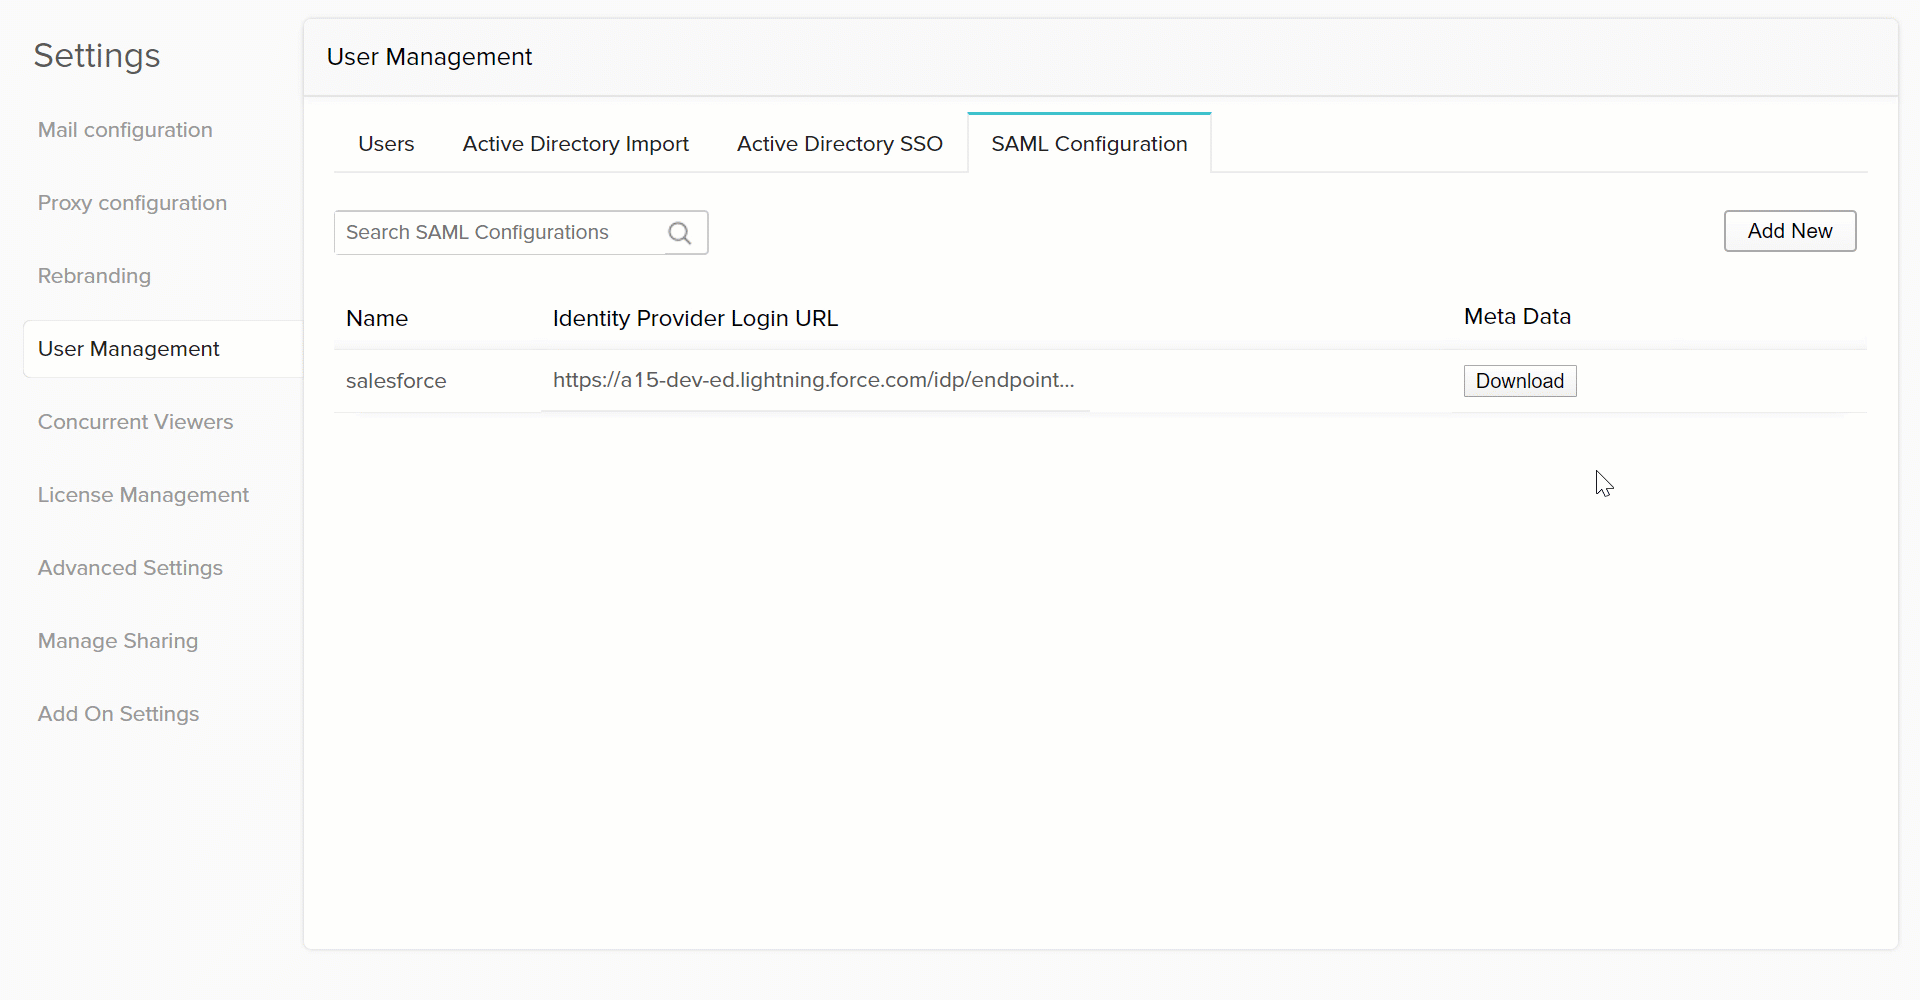
- Select the Enable Single sign-on button if you wish to let users access Analytics Plus seamlessly, without providing any login credentials. The Enable Single sign-on option will only be available if the SSO settings are configured in the SAML Configuration page. To learn more about single sign-on and to set up SAML configurations, click here.
- Click Save to add the user.
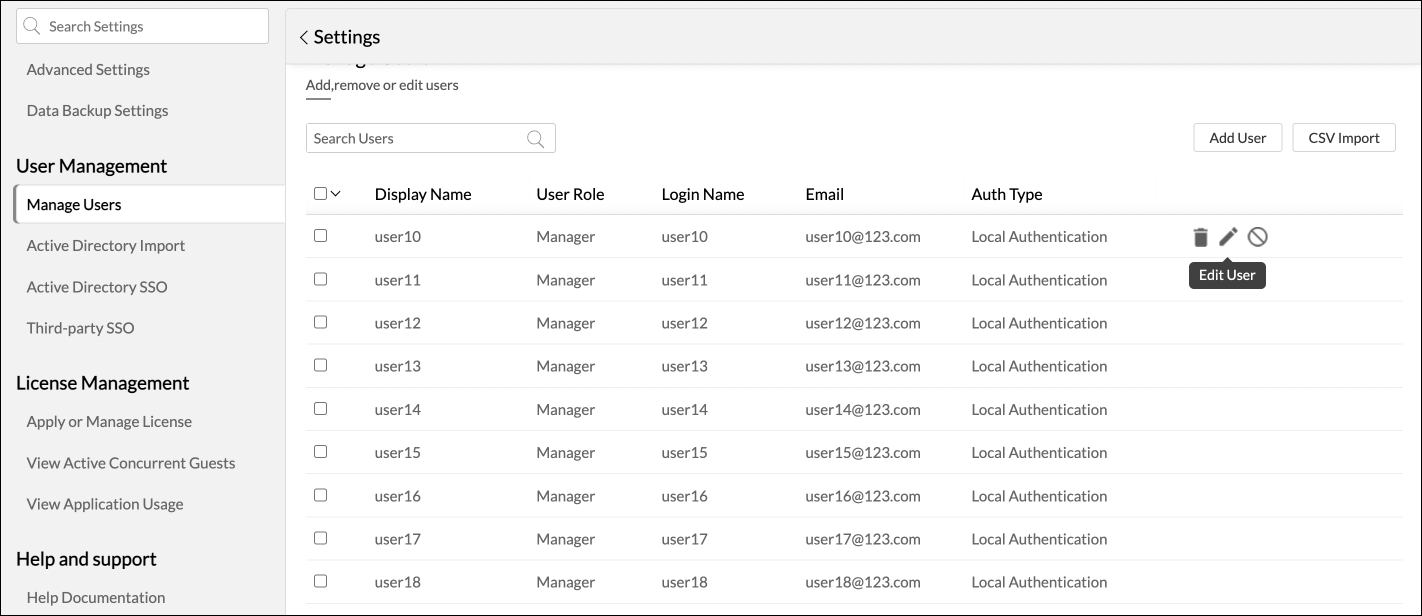
To edit the user information, click the Edit icon that appears on mouse over the required user from the user list view.
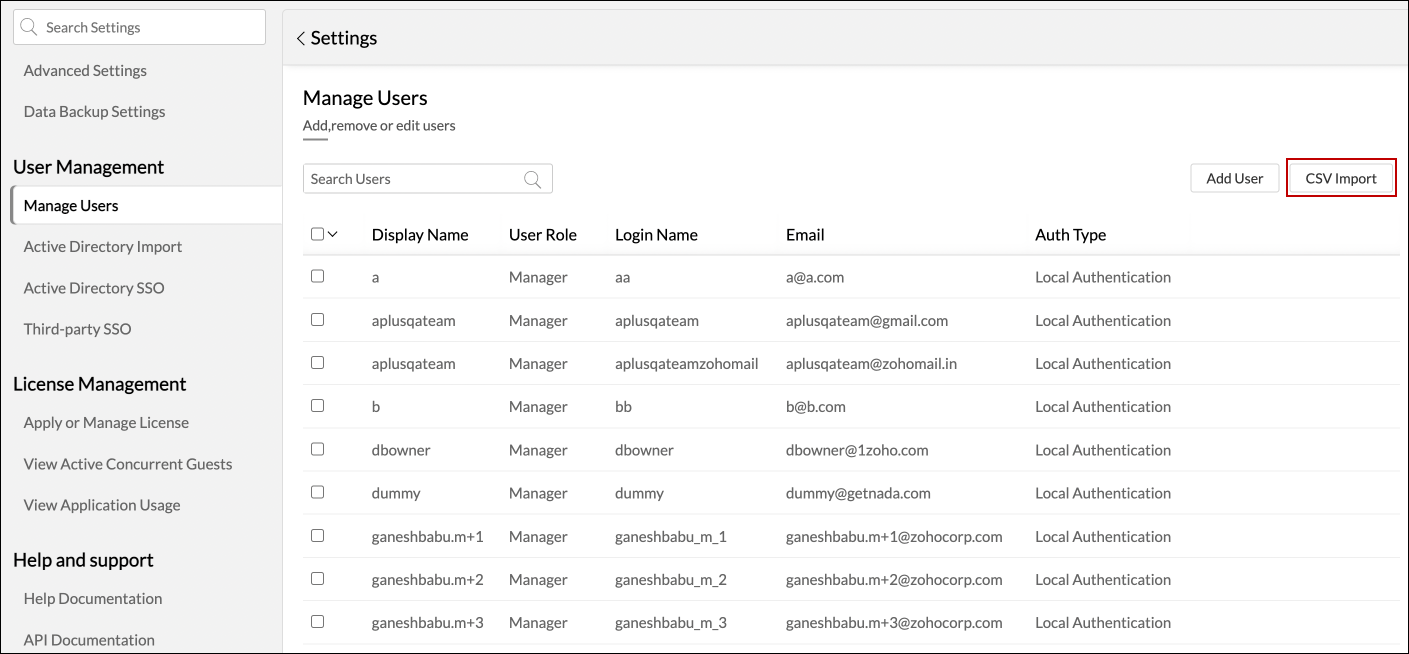
Import users from CSV
Analytics Plus allows you to add a group of users to Analytics Plus by importing CSV files containing several user details. Follow the steps below to import users from CSV files.
- Click the CSV Import button in the top right corner of the Users tab.
- In the page that appears, browse and select the CSV file, and click Import Users.
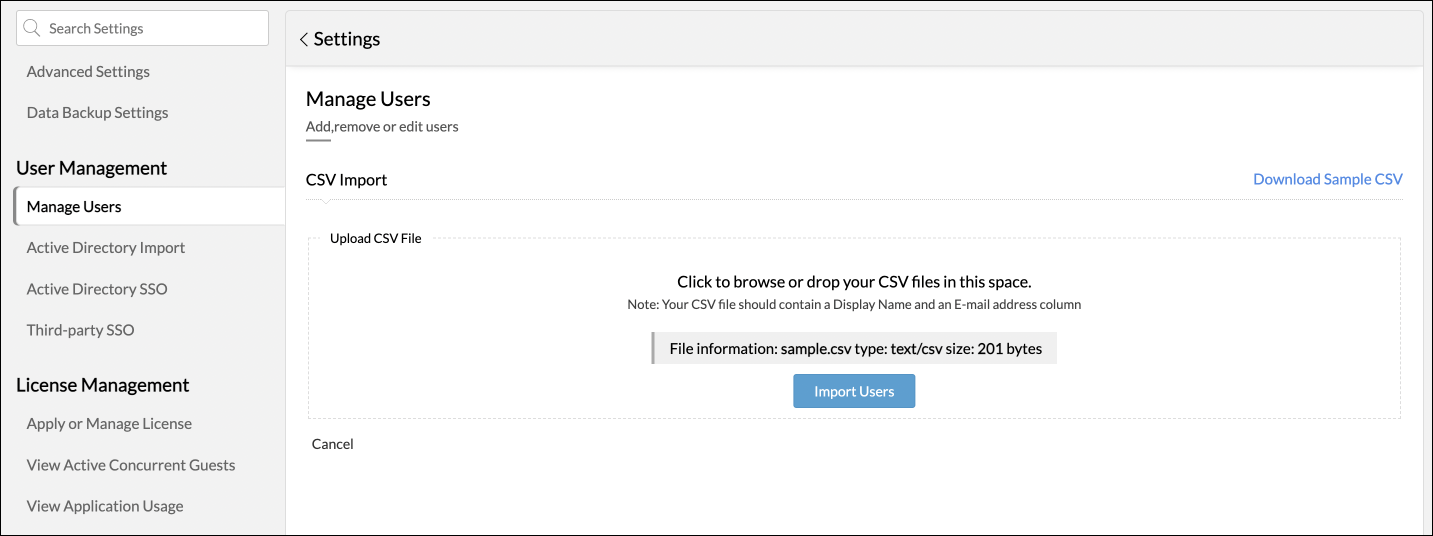
- Map the display name, login name and the email addresses to the corresponding columns in your CSV file.
A login name can contain the following characters: Lowercase {a-z}, Uppercase {A-Z}, Number {0-9}, Symbols {Hyphen(-), Period(.), Underscore(_)}. Please note that the login names can begin or end with letters and numbers but not symbols.
- Choose the desired role from the User Role drop-down.
- Select the Allow user to perform configuration changes checkbox to enable users with the Manager role to perform admin-level changes such as adding or editing users, managing licenses, etc.
- Select the Enable Single Sign-on option if you want to enable single sign-on for the imported users, and choose the required configuration. To learn more about single sign-on, click here.
- For new SSO users, you can also choose to enable or disable emails being triggered with their login information using the Send login details via e-mail checkbox.
- Click Import.

The details of the import process will be displayed in the import summary page.
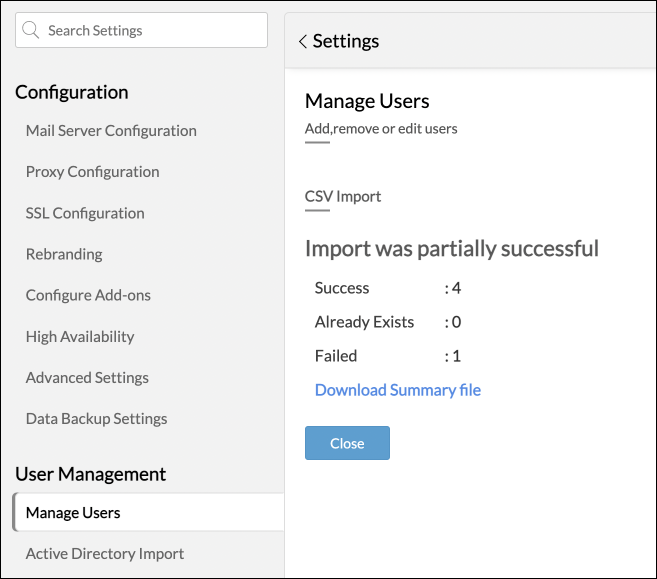
Note: The import process will fail if the number of users you import exceed the available license limit. To proceed with the import process, you can reduce the number of users being imported, or upgrade your license.
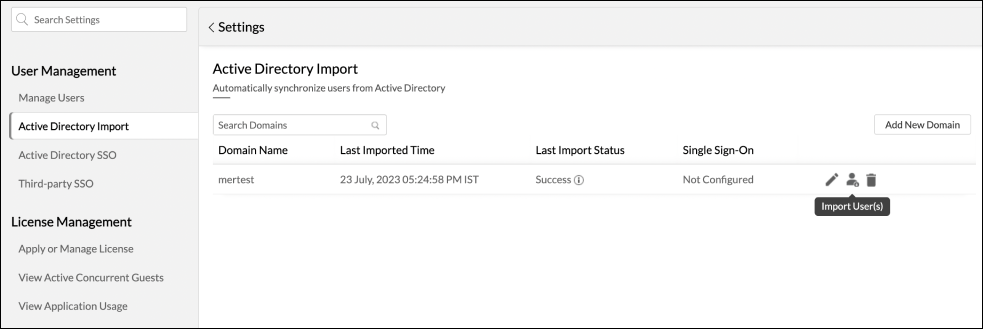
Import users from Active Directory
Analytics Plus also enables you to import your Active Directory users easily. Once an Active Directory domain is added to Analytics Plus, navigate to the Active Directory Import tab of the User Management page. To add a new Active Directory domain, and learn more about Active Directory, click here.
Pre-requisite: To import users from Active Directory, ensure you are able to ping the domain controller from the server where Analytics Plus is installed.
You can add users from Active Directory in two ways:
Follow the steps below to import Active Directory users.
- Click the Active Directory Import button in the User Management section.
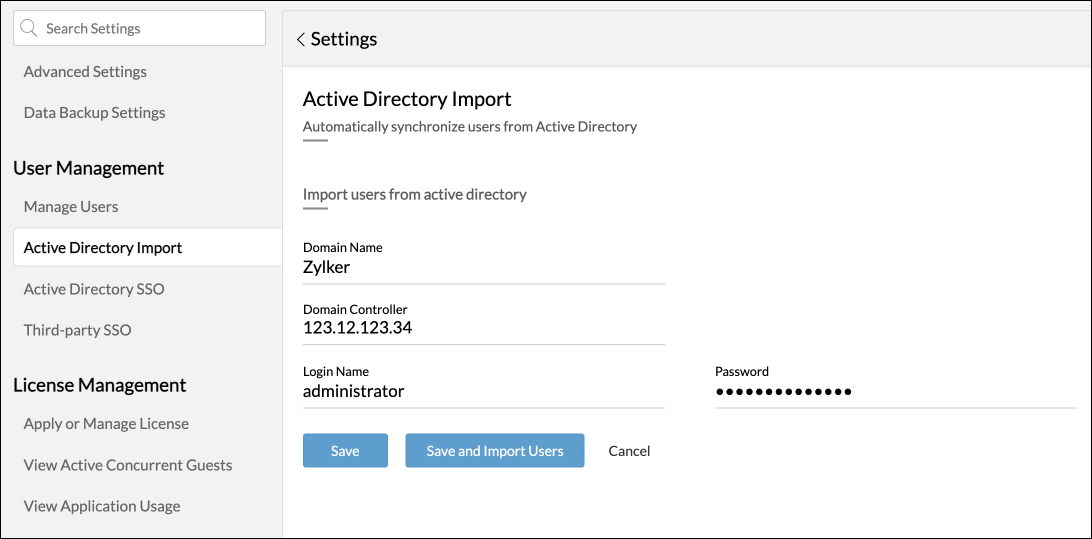
- Enter the required Active Directory domain, enter your credentials and click Save and Import Users.
- Search for and choose users individually, or select the required Organizational Units (OUs).
- Choose the desired role from the User Role drop-down.
- Enable the Send login details to all new users via e-mail checkbox to share the login details to all the new Active directory users via email.
- Select the Allow user to perform configuration changes checkbox to enable users with the Manager role to perform admin-level changes such as adding or editing users, managing licenses, etc.
- Click Import to import your Active Directory users.
Follow the steps below to import Active Directory users from the Active Directory tab.
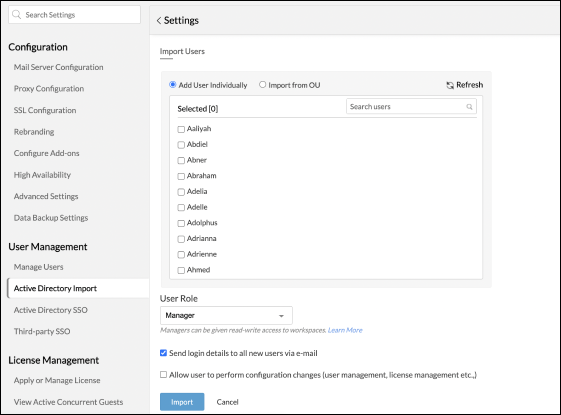
- In the Active Directory Import tab, click the Import Users(s) icon that appears on mouse over the required Active Directory name.
- In the page that appears, you can choose to import users individually, or import entire Organizational Units (OUs).
- Choose the desired role from the User Role drop-down.
- Enable the Send login details to all new users via e-mail checkbox to share the login details to all the new Active directory users via email.
- Select the Allow user to perform configuration changes checkbox to enable users with the Manager role to perform admin level changes such as adding or editing users, managing licenses, etc.
- Click the Import button to proceed with the import process.
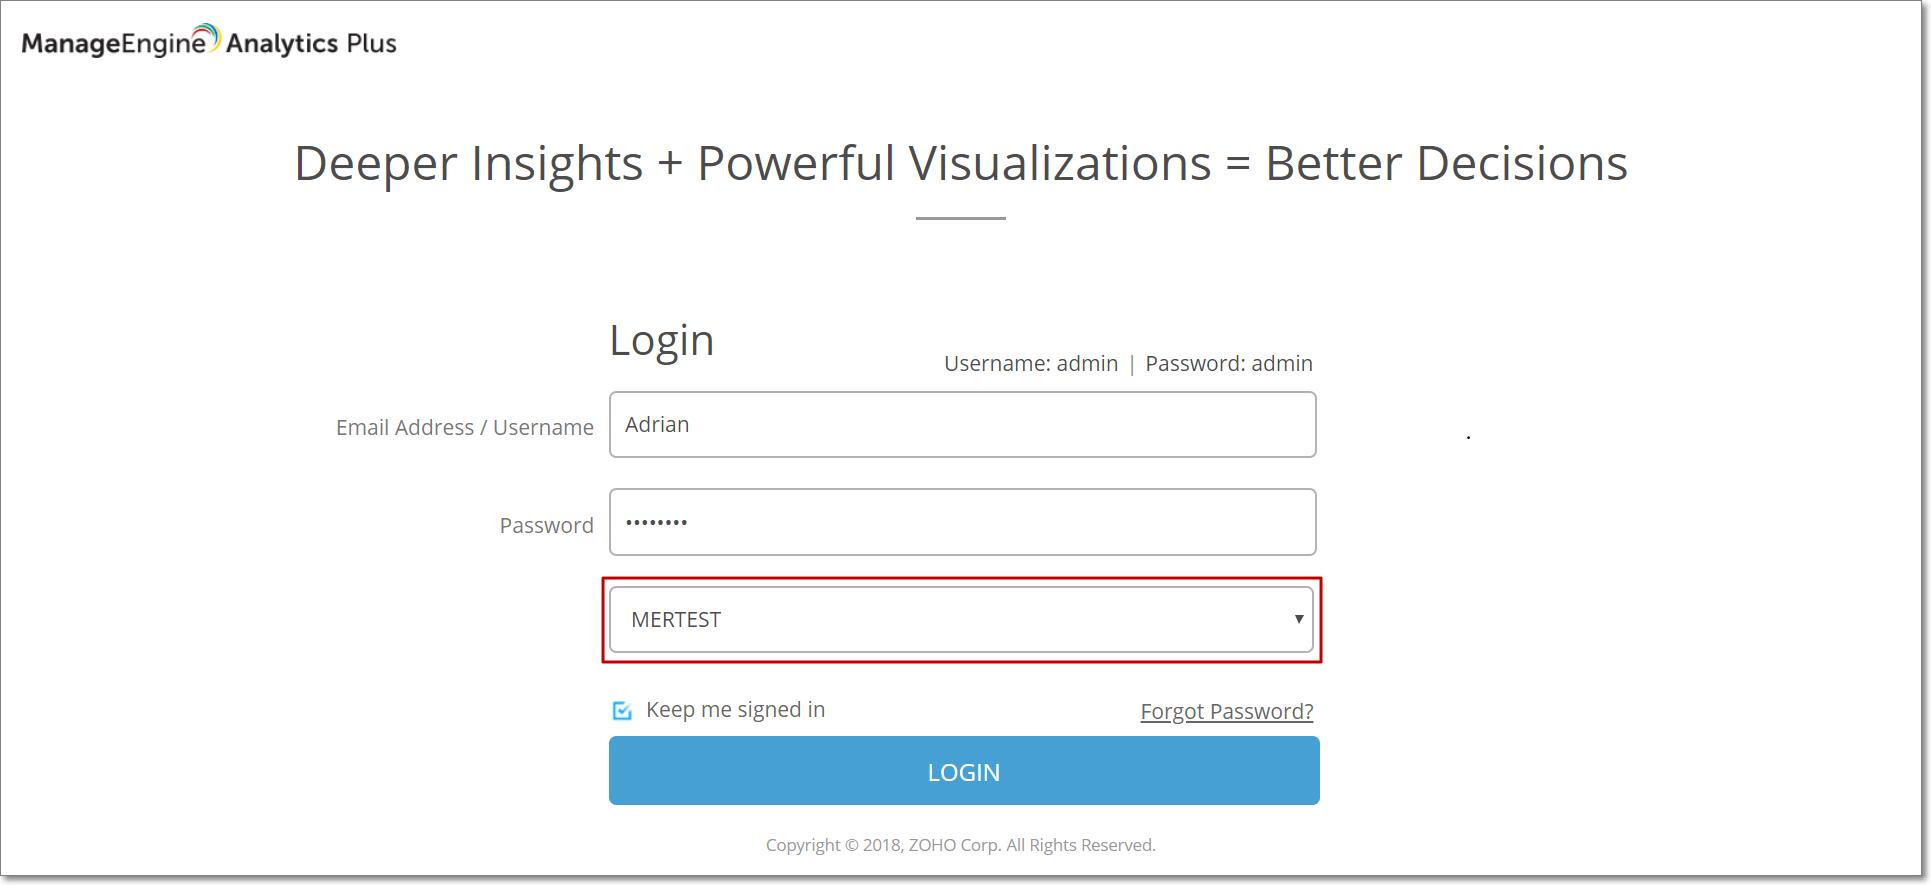
Note: Active Directory users need to select their appropriate Active Directory domain while logging in to Analytics Plus.
Note:
- Mail server configuration is mandatory to add new users or share views in Analytics Plus.
- Sharing a view to a new user will automatically create a user account. User login credentials will be sent via email.
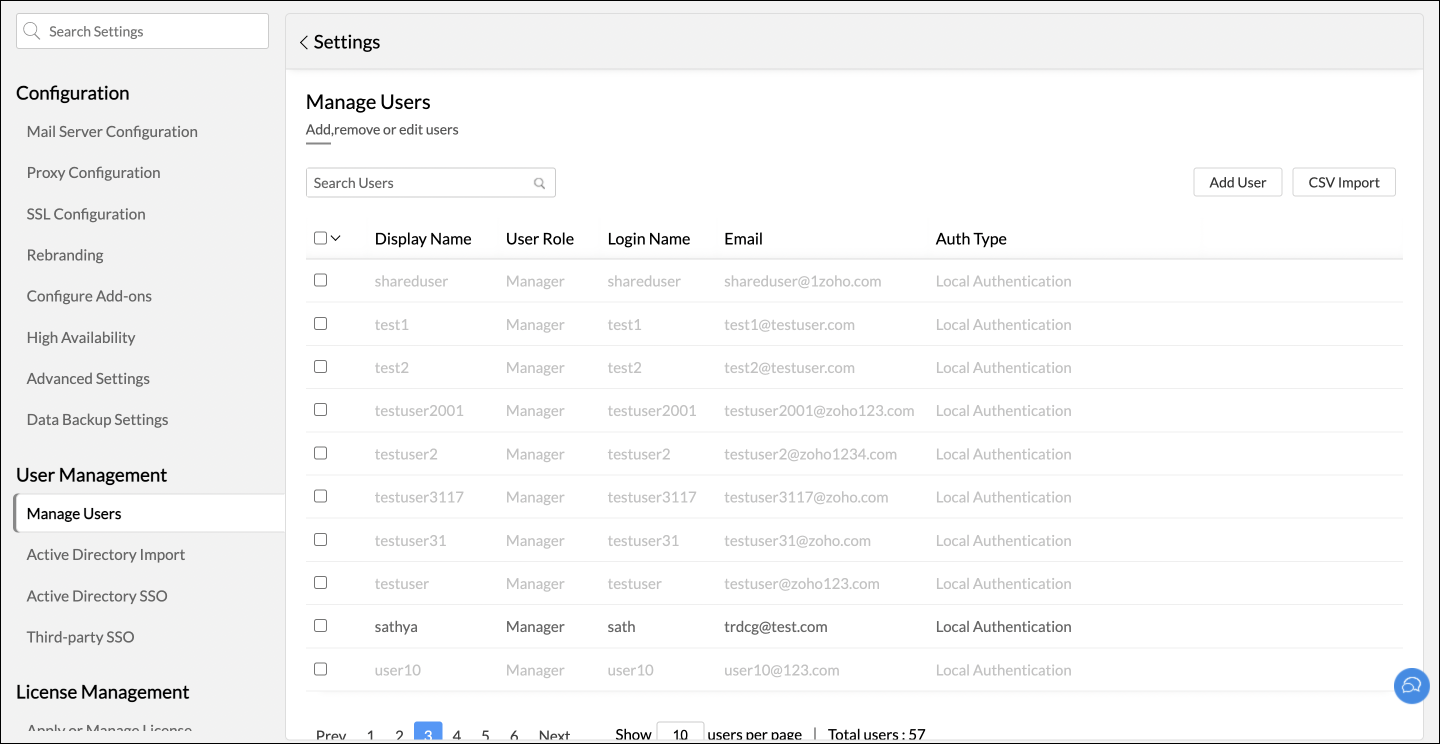
Managing Users
Analytics Plus enables you to manage all your users from the Manage Users tab on the Settings page. All users added to the Analytics Plus application will be listed here. You can edit, enable SSO, remove, change user roles, activate, deactivate, and reset password for users from here.
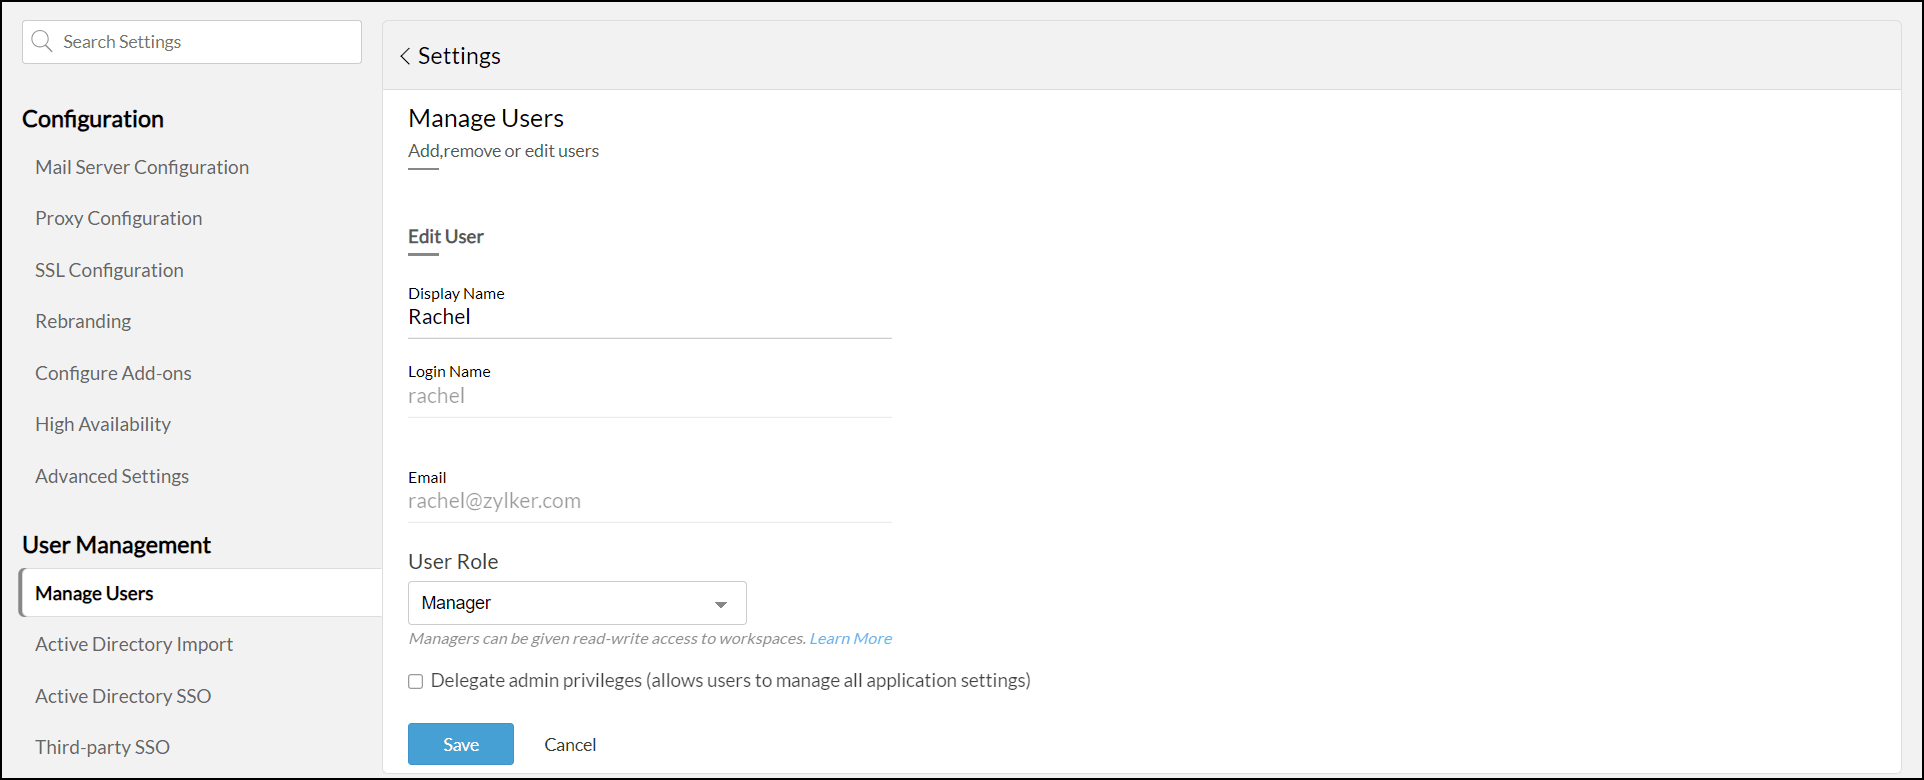
Editing the user information
To edit user information, follow the steps below.
- Navigate to the Settings page > Manage Users tab.
- Click the Edit icon that appears on mouse over the required user name.

- In the page that appears, make the required changes and click Save.
Enabling Single Sign-on for users
Analytics Plus supports single sign-on functionality to allow users to access Analytics Plus seamlessly, without having to provide login credentials.
There are two options to enable single sign-on for users:
- Single sign-on via SAML authentication: This option works best when you wish to use one of your in-house applications as an authentication provider. If users are already logged in to the application that is acting as the authentication provider, they will be logged in to Analytics Plus automatically.
- Single sign-on via Active Directory: This option is exclusive to users imported into Analytics Plus via Active Directory.
Once a single sign-on configuration is set up, single sign-on can be enabled for existing users easily.
To enable/disable single sign-on for users who use local authentication:
- Navigate to the Third-party SSO tab under the User Management page.
- Click the Edit SAML Configuration icon that appears on the mouse over the required SAML configuration.
- To enable single sign-on, select the users from the Available Users list and move them to the Single Sign-on Users list.
- To disable single sign-on, select the required users from the Single Sign-on Users list and move them to the Available Users list.
- Click Save Configuration to save the changes.
Click here to learn more.
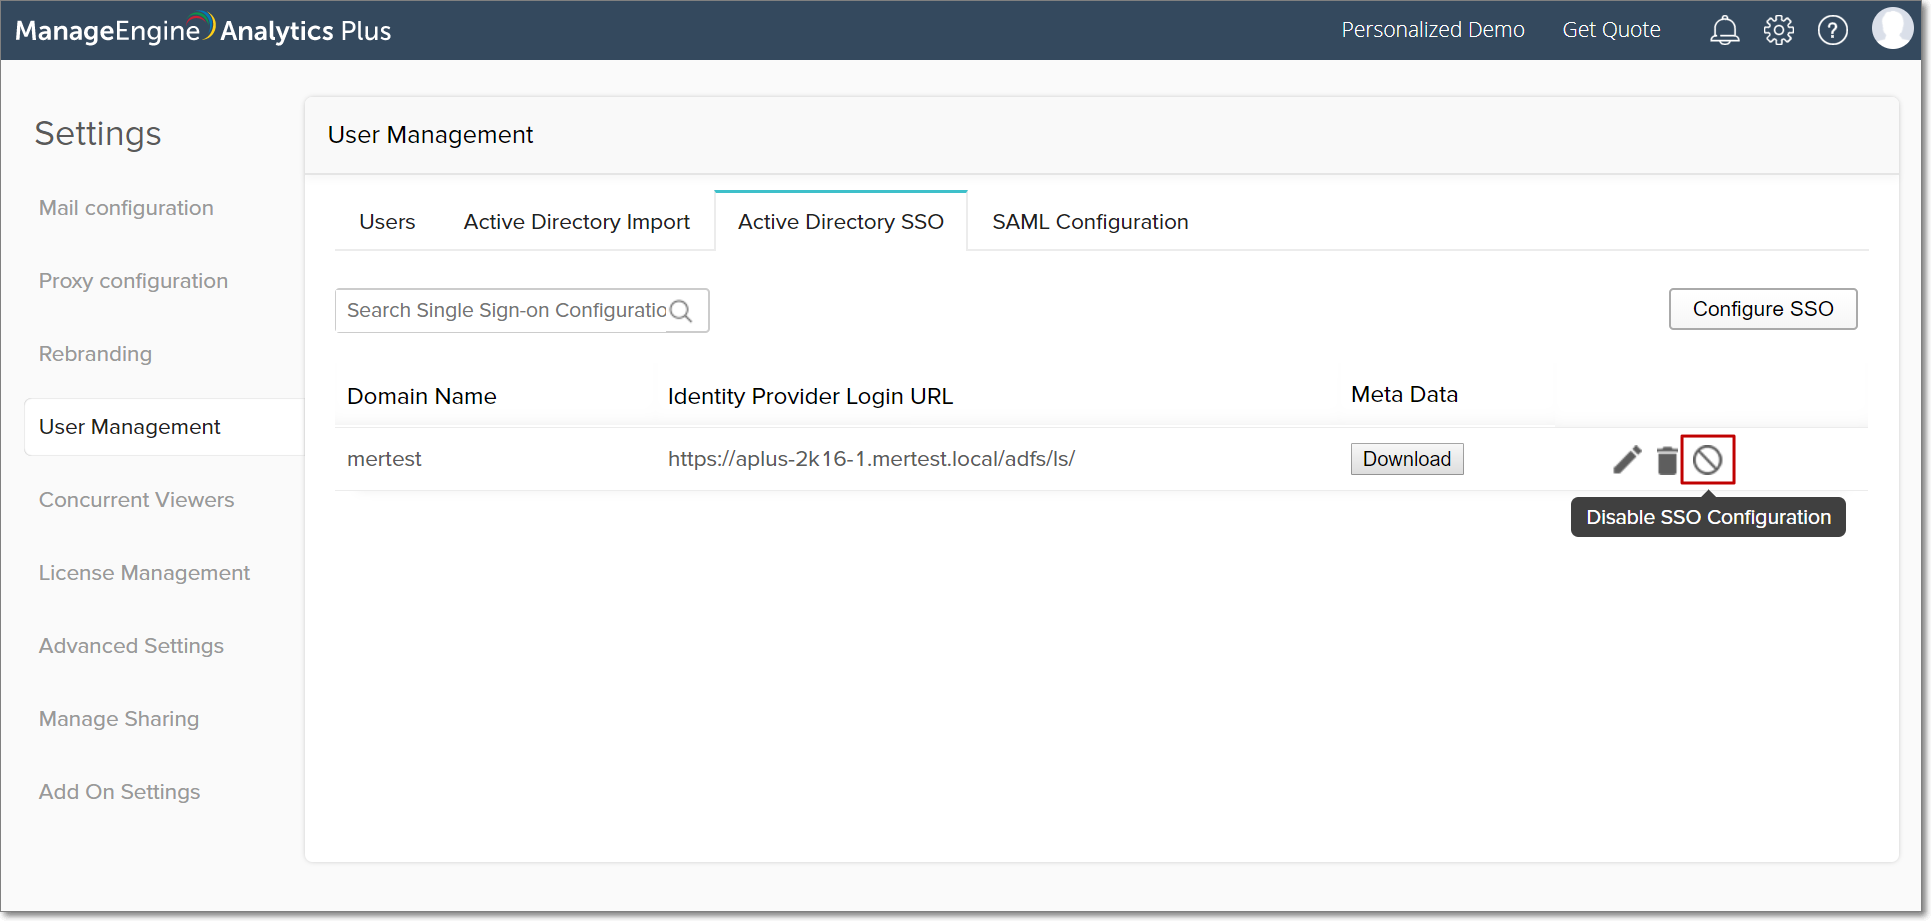
To enable/disable single sign-on for Active Directory users:
- If single sign-on is configured for a particular Active Directory domain, the single sign-on functionality is automatically enabled for all Active Directory users associated to that domain.
- To disable single sign-on for Active Directory users, navigate to the Active Directory SSO tab of the Users and click the Disable SSO Configuration button that appears on mouse over the configuration.
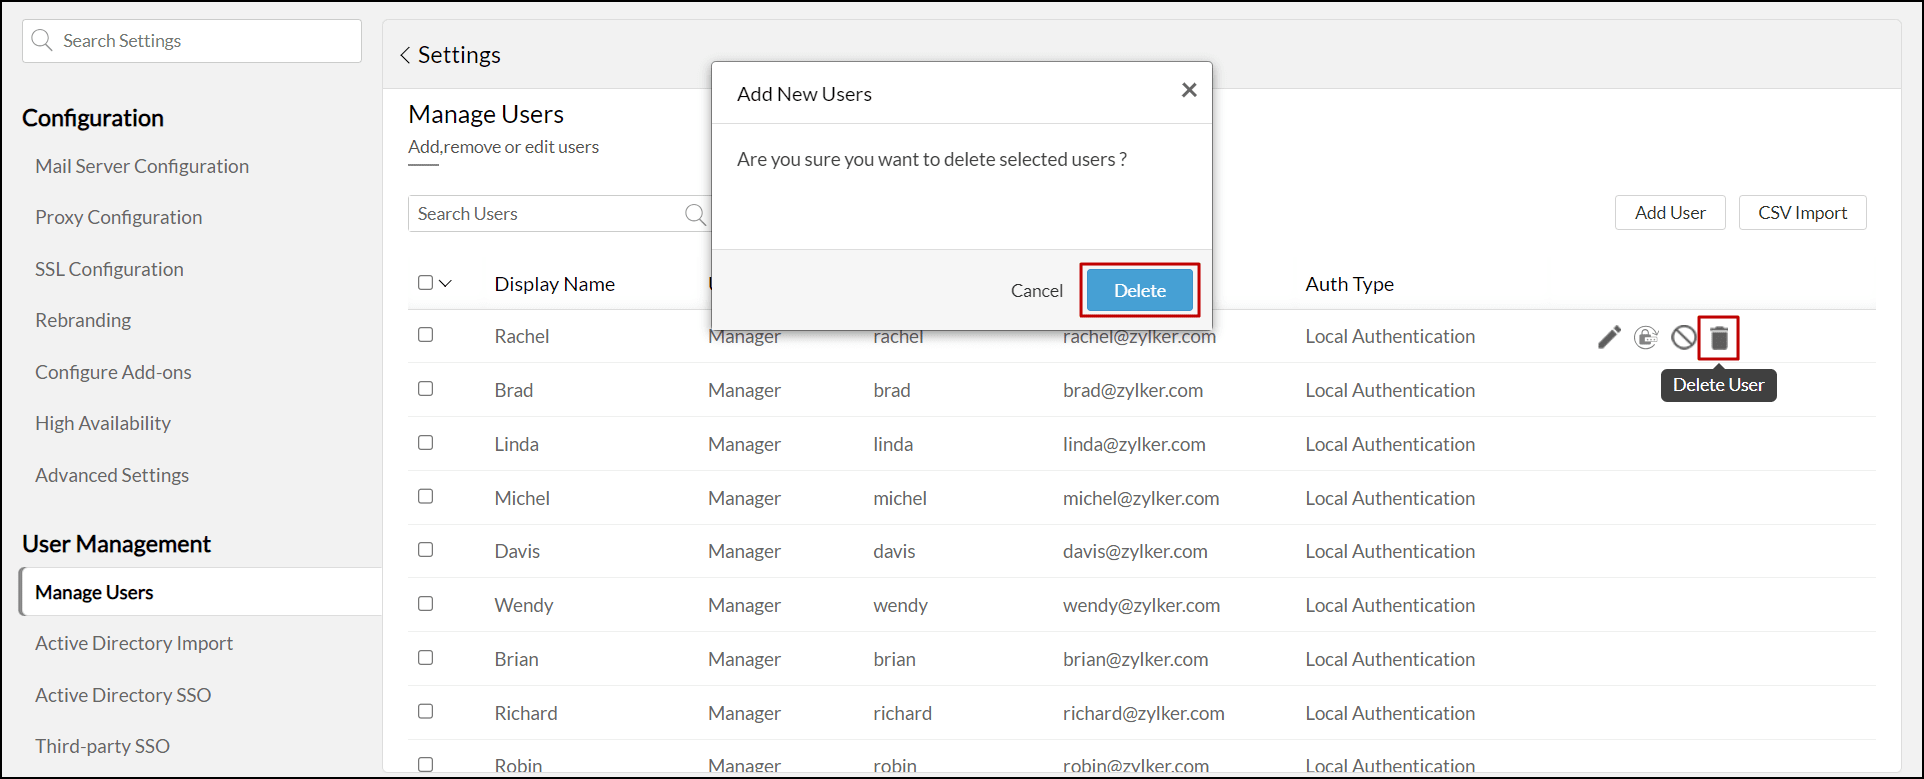
Deleting users
To remove a user from Analytics Plus, navigate to the Manage Users tab from the Settings page and click the Delete icon that appears on mouse over the required user name. In the confirmation pop-up, click the Delete button.
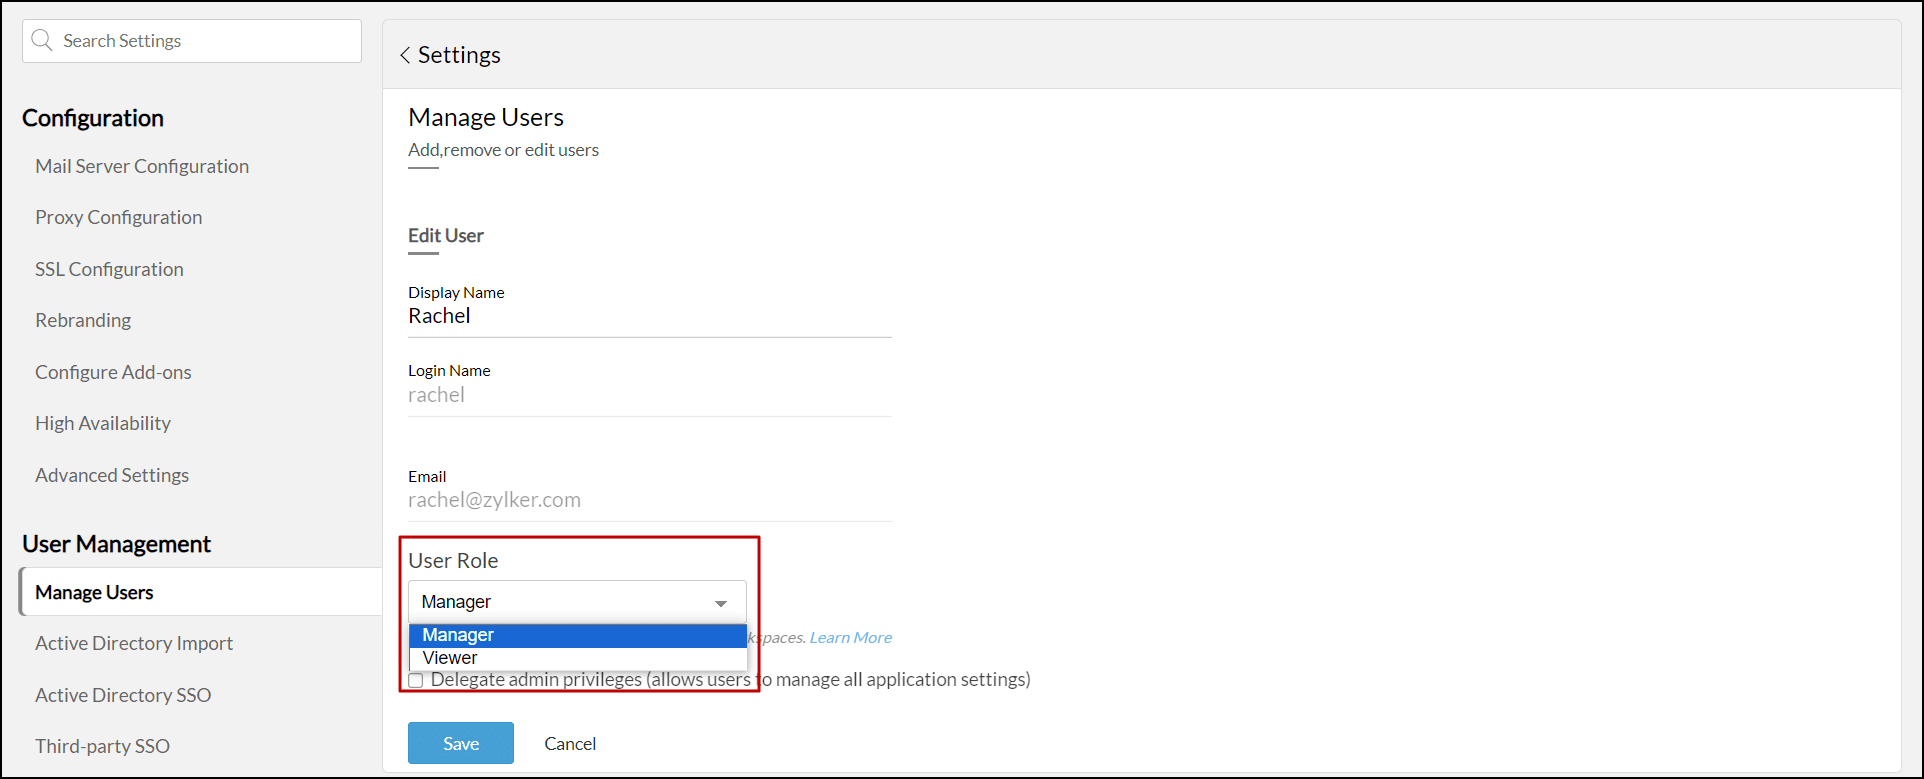
Changing user role
Analytics Plus allows you to change the user roles whenever required. Follow the steps below to do this.
- Navigate to the Settings page > Manage Users tab.
- Click the Edit icon that appears on mouse over the required user name.
- In the page that appears, choose the required role from the User Role drop-down, and click Save.
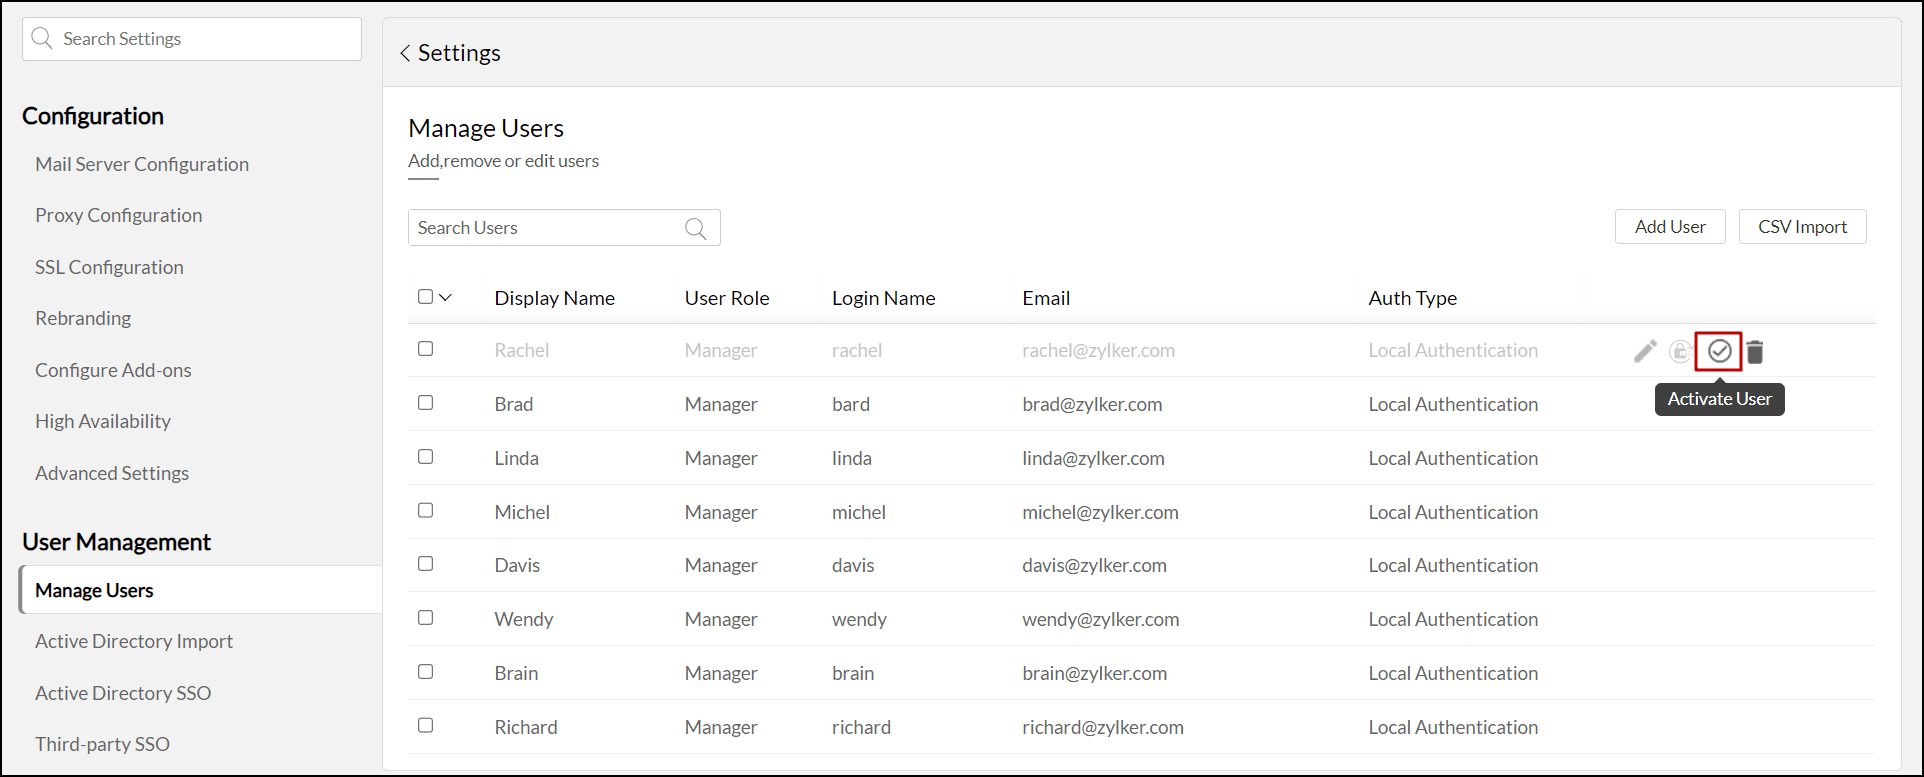
Activating or Deactivating users
Analytics Plus allows you to remove a user temporarily by simply Deactivating the user account. These accounts can be Re-activated anytime whenever required.
- To deactivate a user, navigate to the Settings page > Manage Users tab. Click the Deactivate user that appears on mouse over the required user name. In the confirmation pop-up, click Yes.

- To activate a user, navigate to the Settings page > Manage Users tab. Click the Activate User that appears on mouse over the required user name.
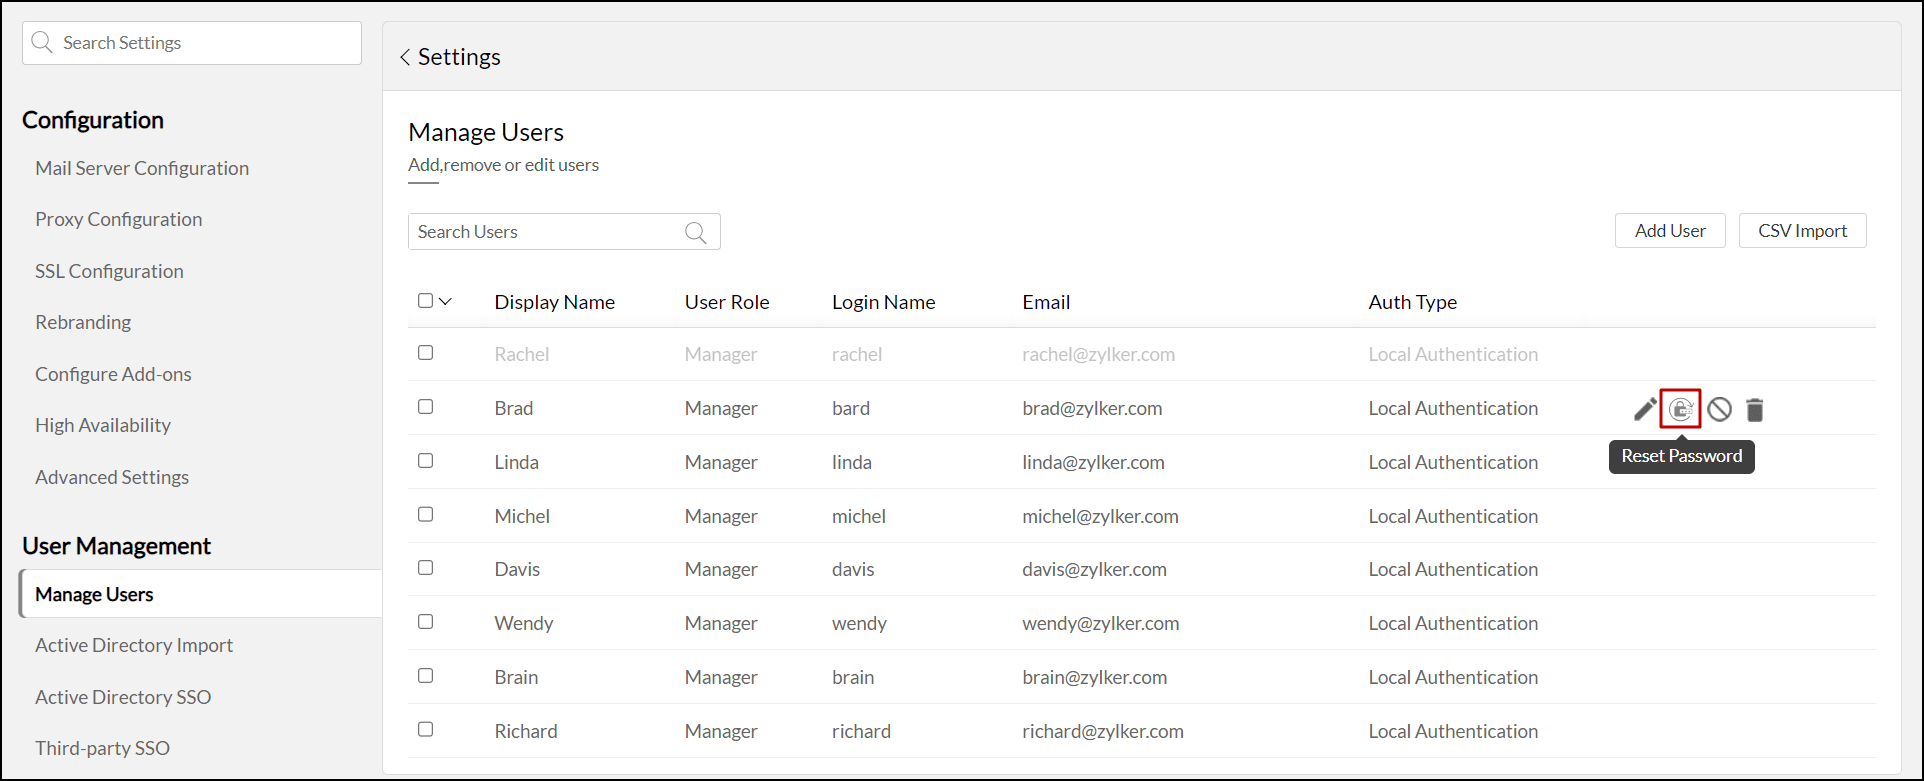
Reset password for users
Analytics Plus allows the Server Administrators to help other users reset their password by creating a temporary one-time password. To create a one-time password, follow the steps below.
- Log in using the Server Administrator's account.
- Navigate to the Settings page > Manage Users tab.
- Click the Reset Password icon that appears on mouse over the required user name.
- In the pop-up that appears, click Reset.
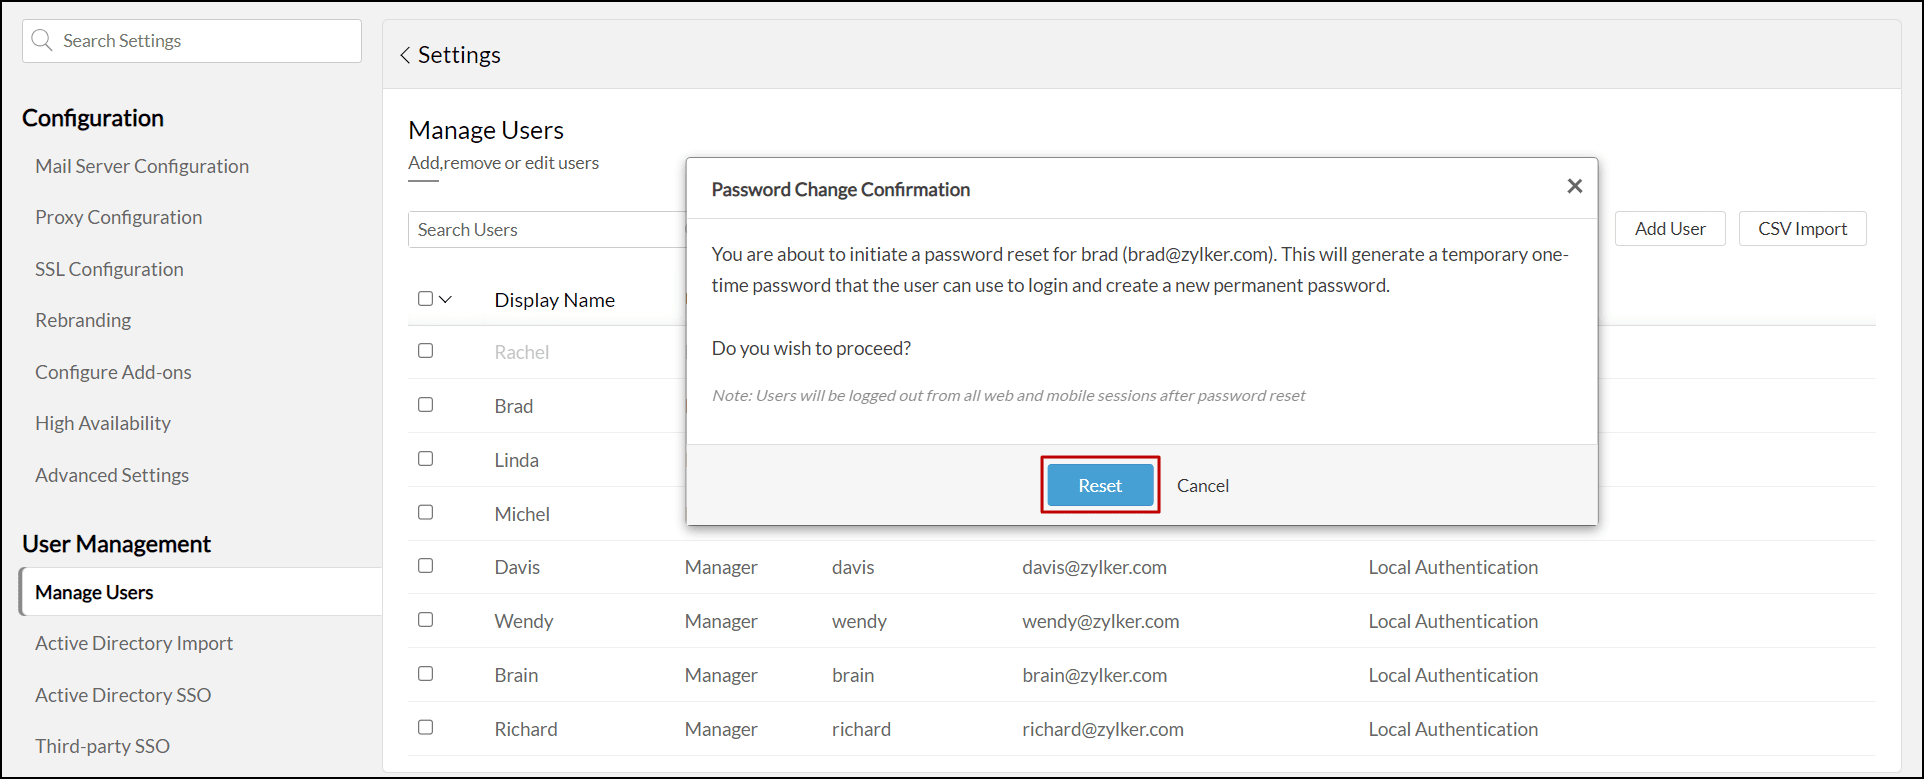
- Enter the Server Administrator's account password, and click Authenticate.
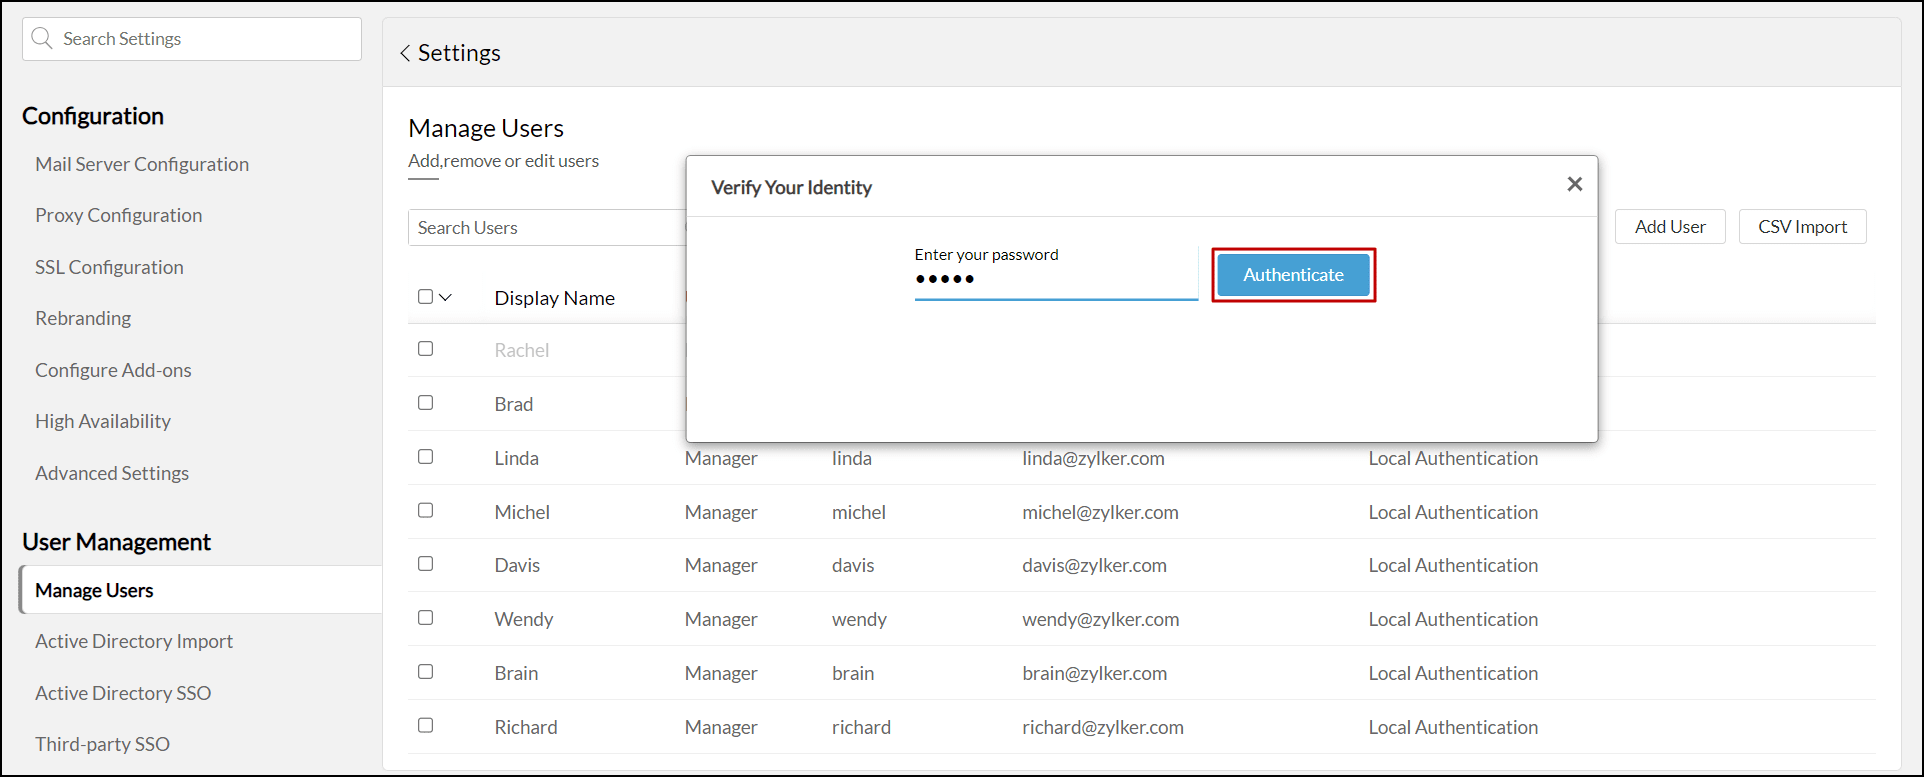
- Click Copy Password to copy the temporary one-time password and share it with the corresponding user.
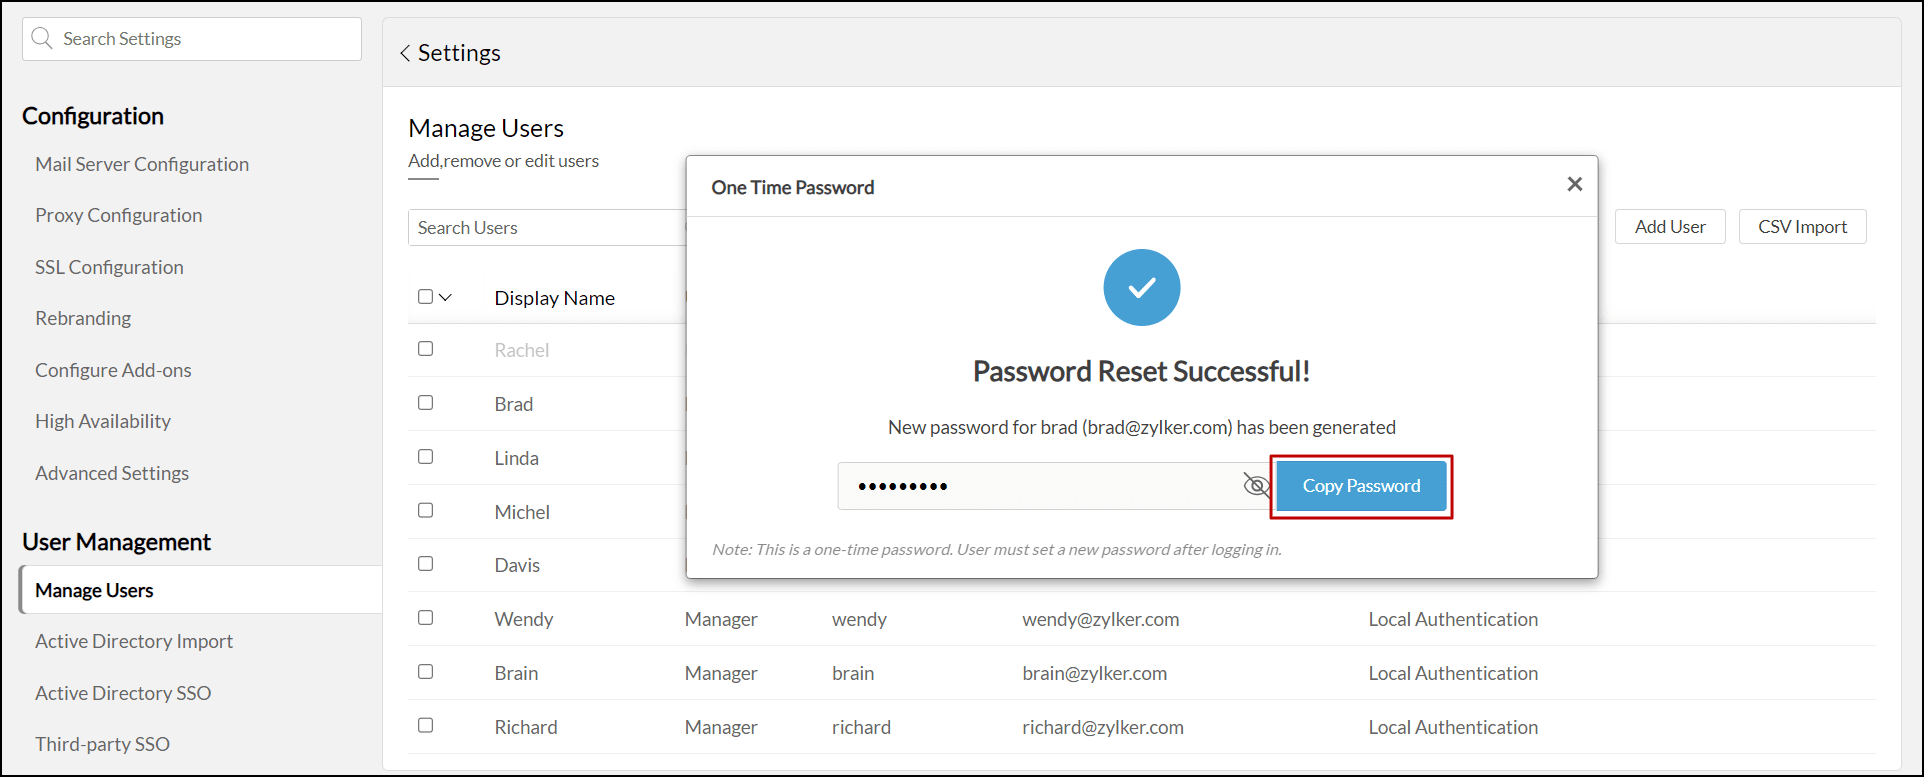
Note: The user should create a new password after logging in.