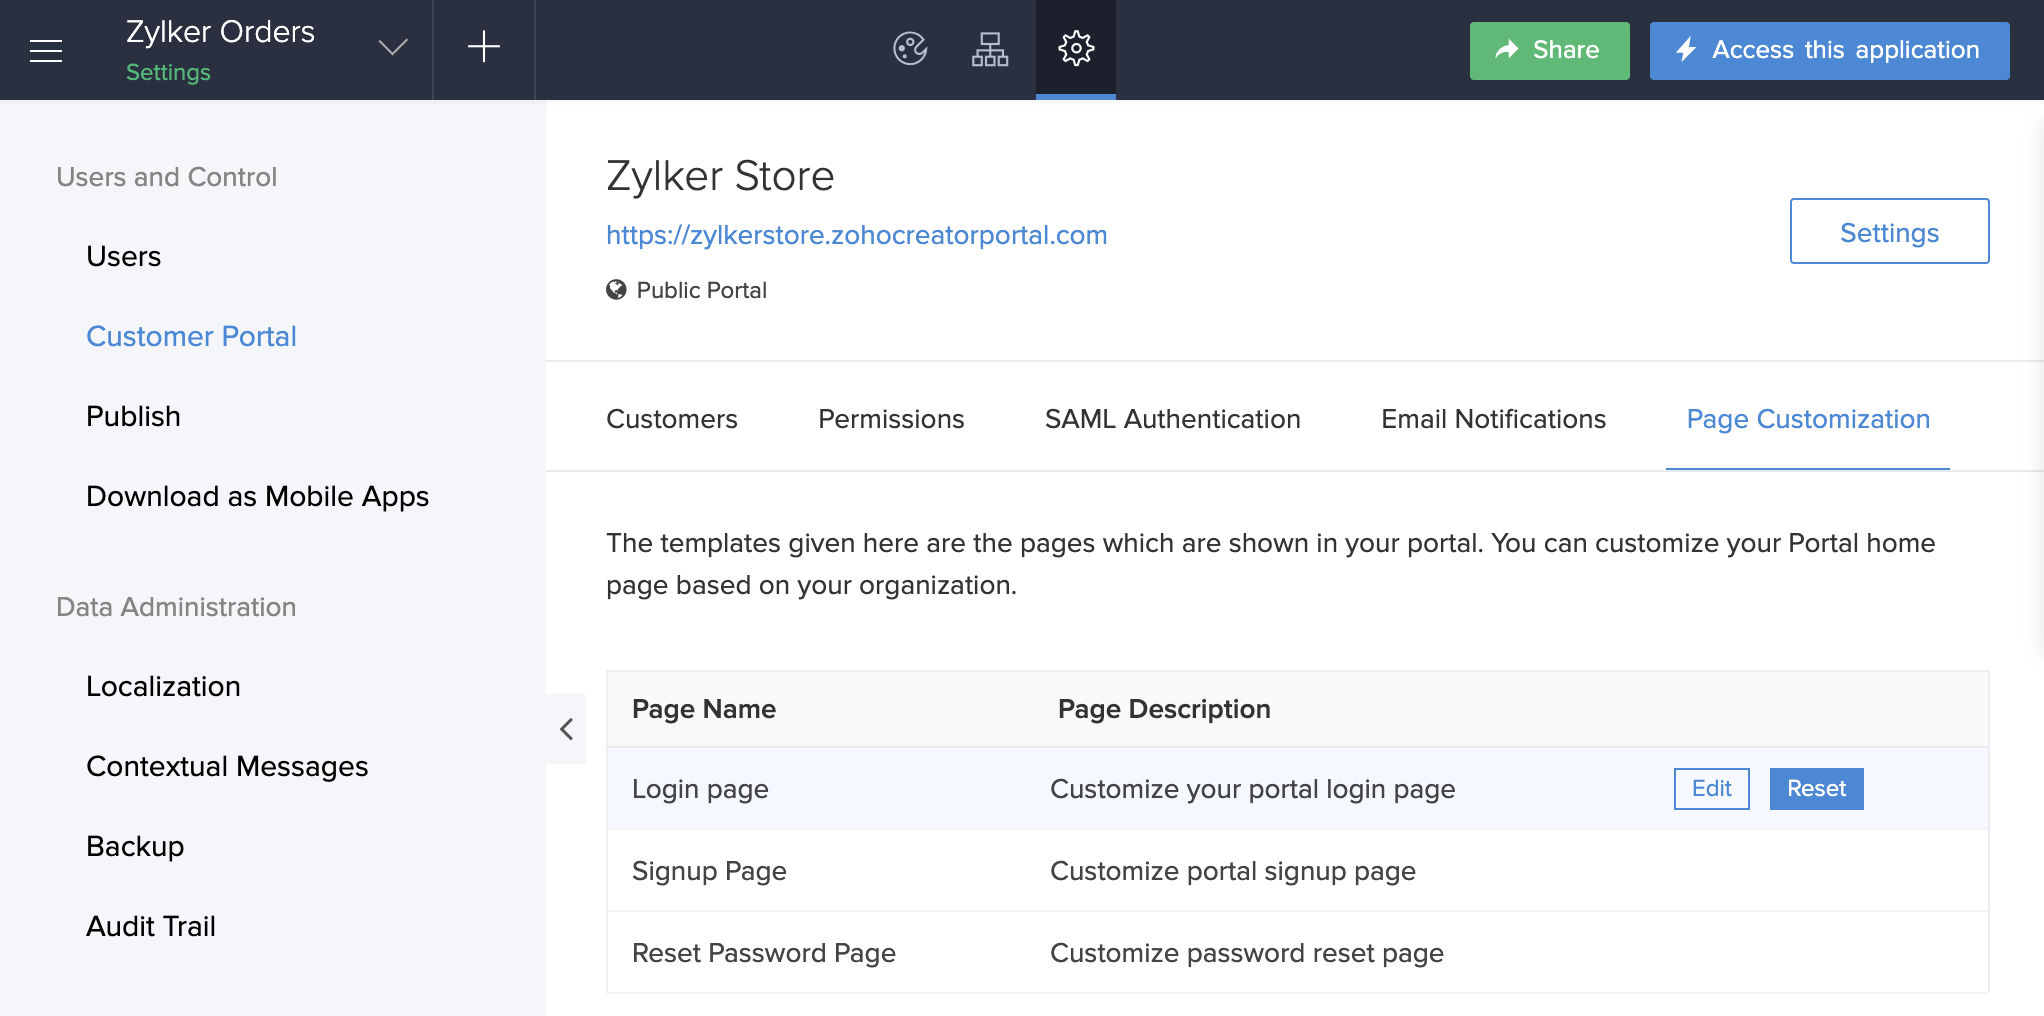
Customize the login, signup, and reset password pages of your customer portal
Refer to this page to learn about portal pages
- Edit your application.
- Navigate to the Settings page.
- Click Customer Portal under the Users and Control.
Navigate to the Page Customization tab. Your customer portal's pages will be listed.

Hover the mouse over the required portal page, then click the Edit button on the right.
Note: Clicking the Reset button on the right will reset the respective pages to their default design.
- The portal page designer will slide in. You can:
- Customize the page as required. Your changes will be saved automatically.
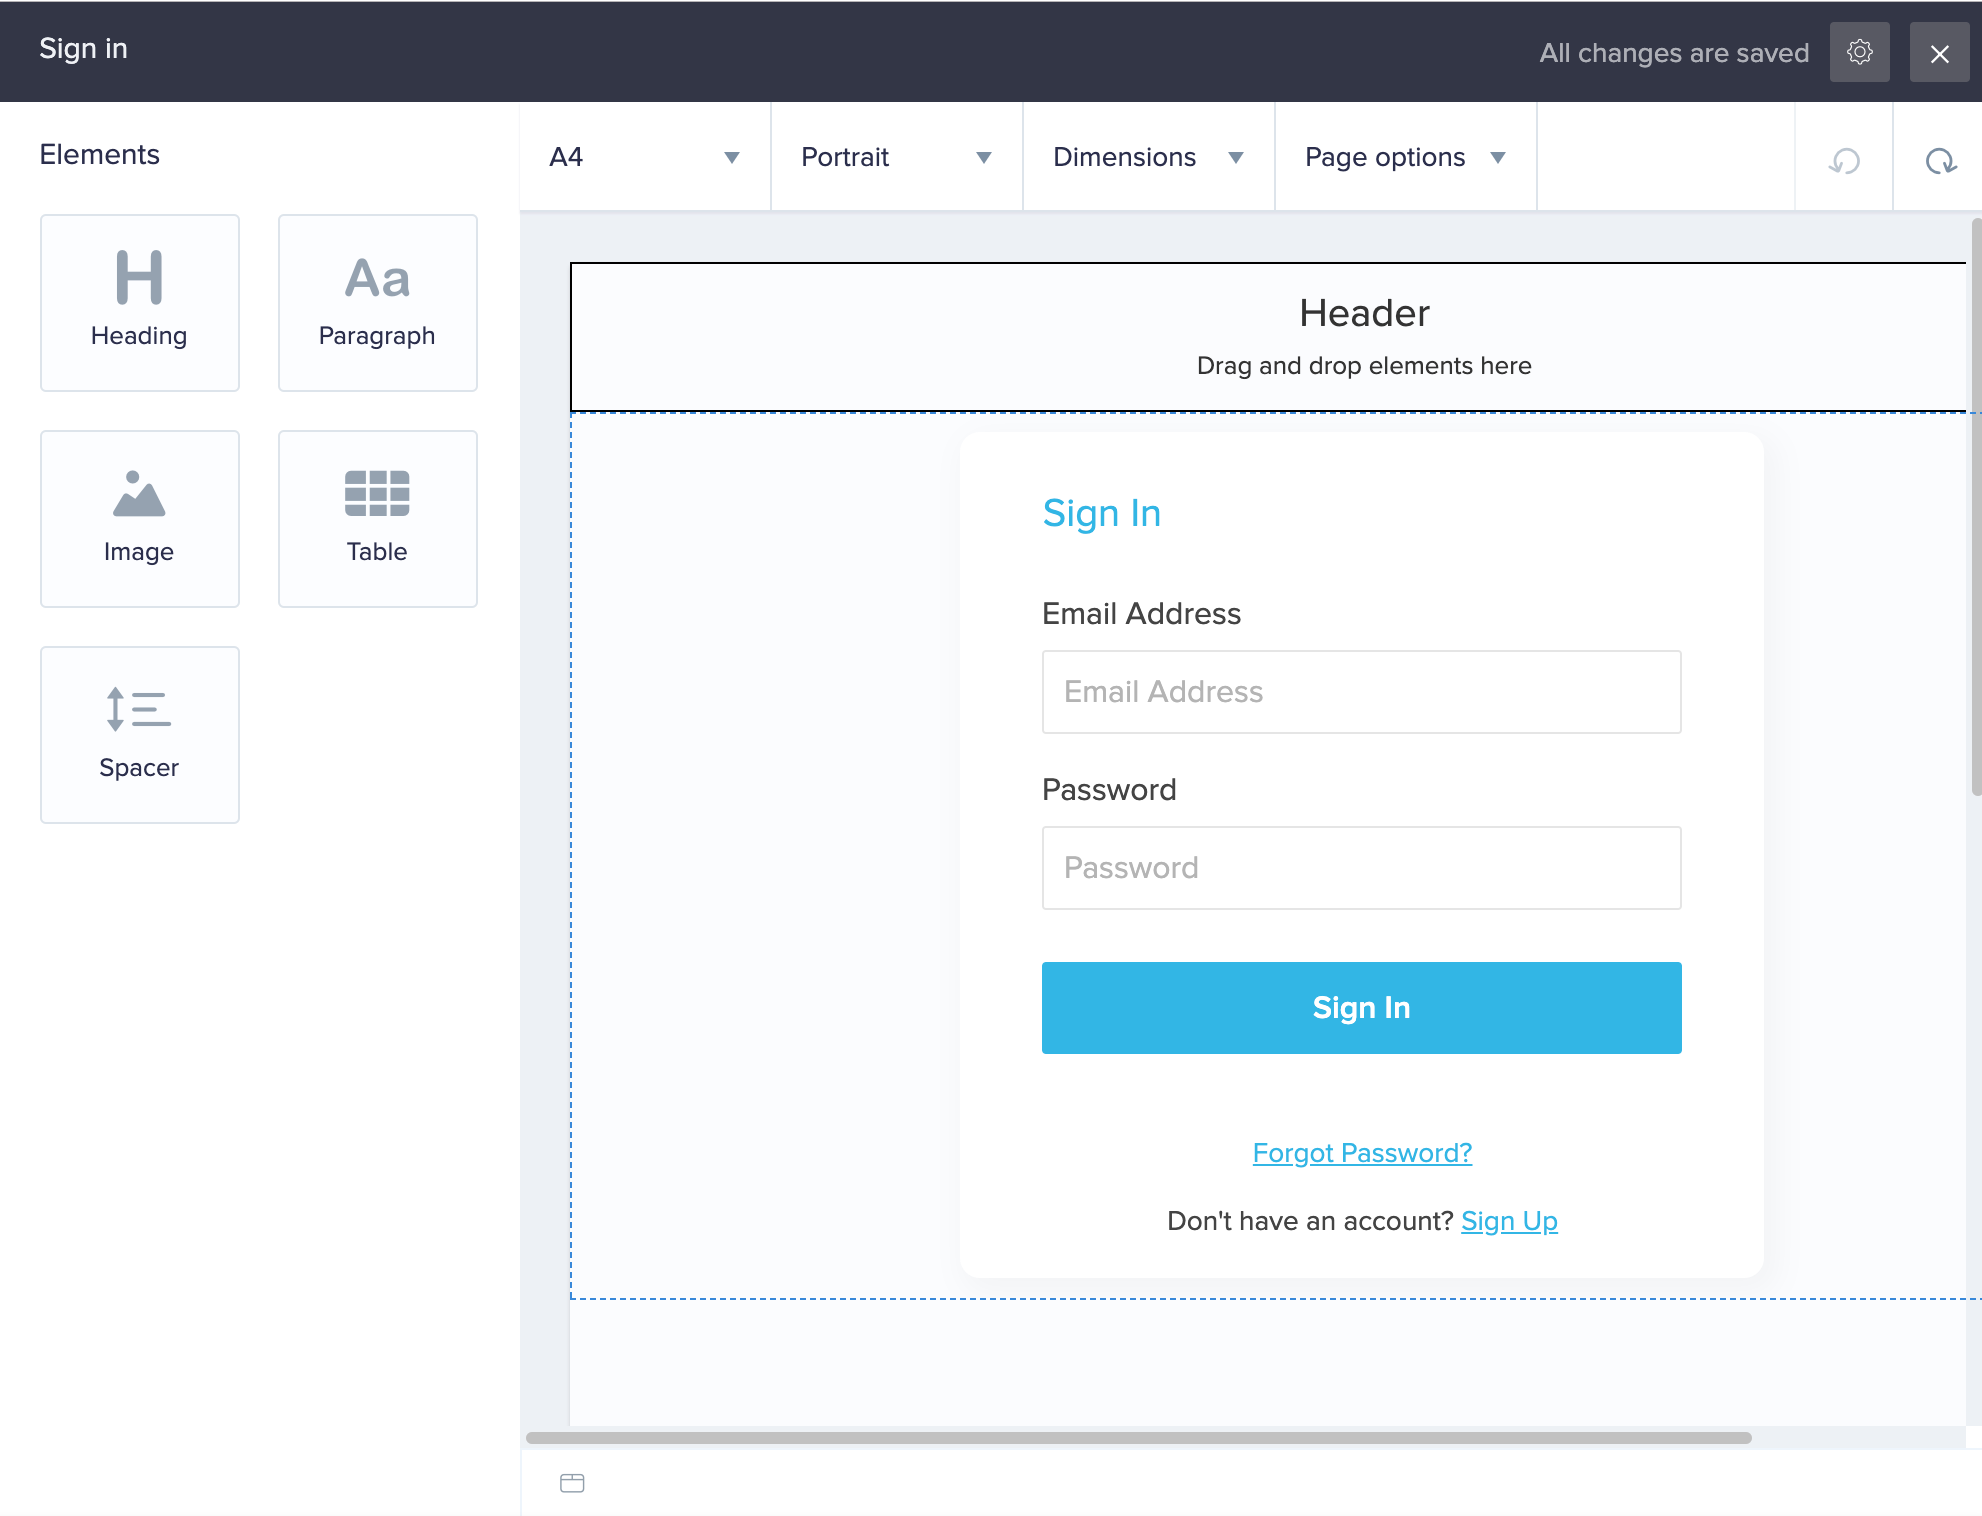
- Click the Close button at the top-right of the designer.
- The Reset button that appears when you hover beside a portal page resets the changes you have made in the designer.
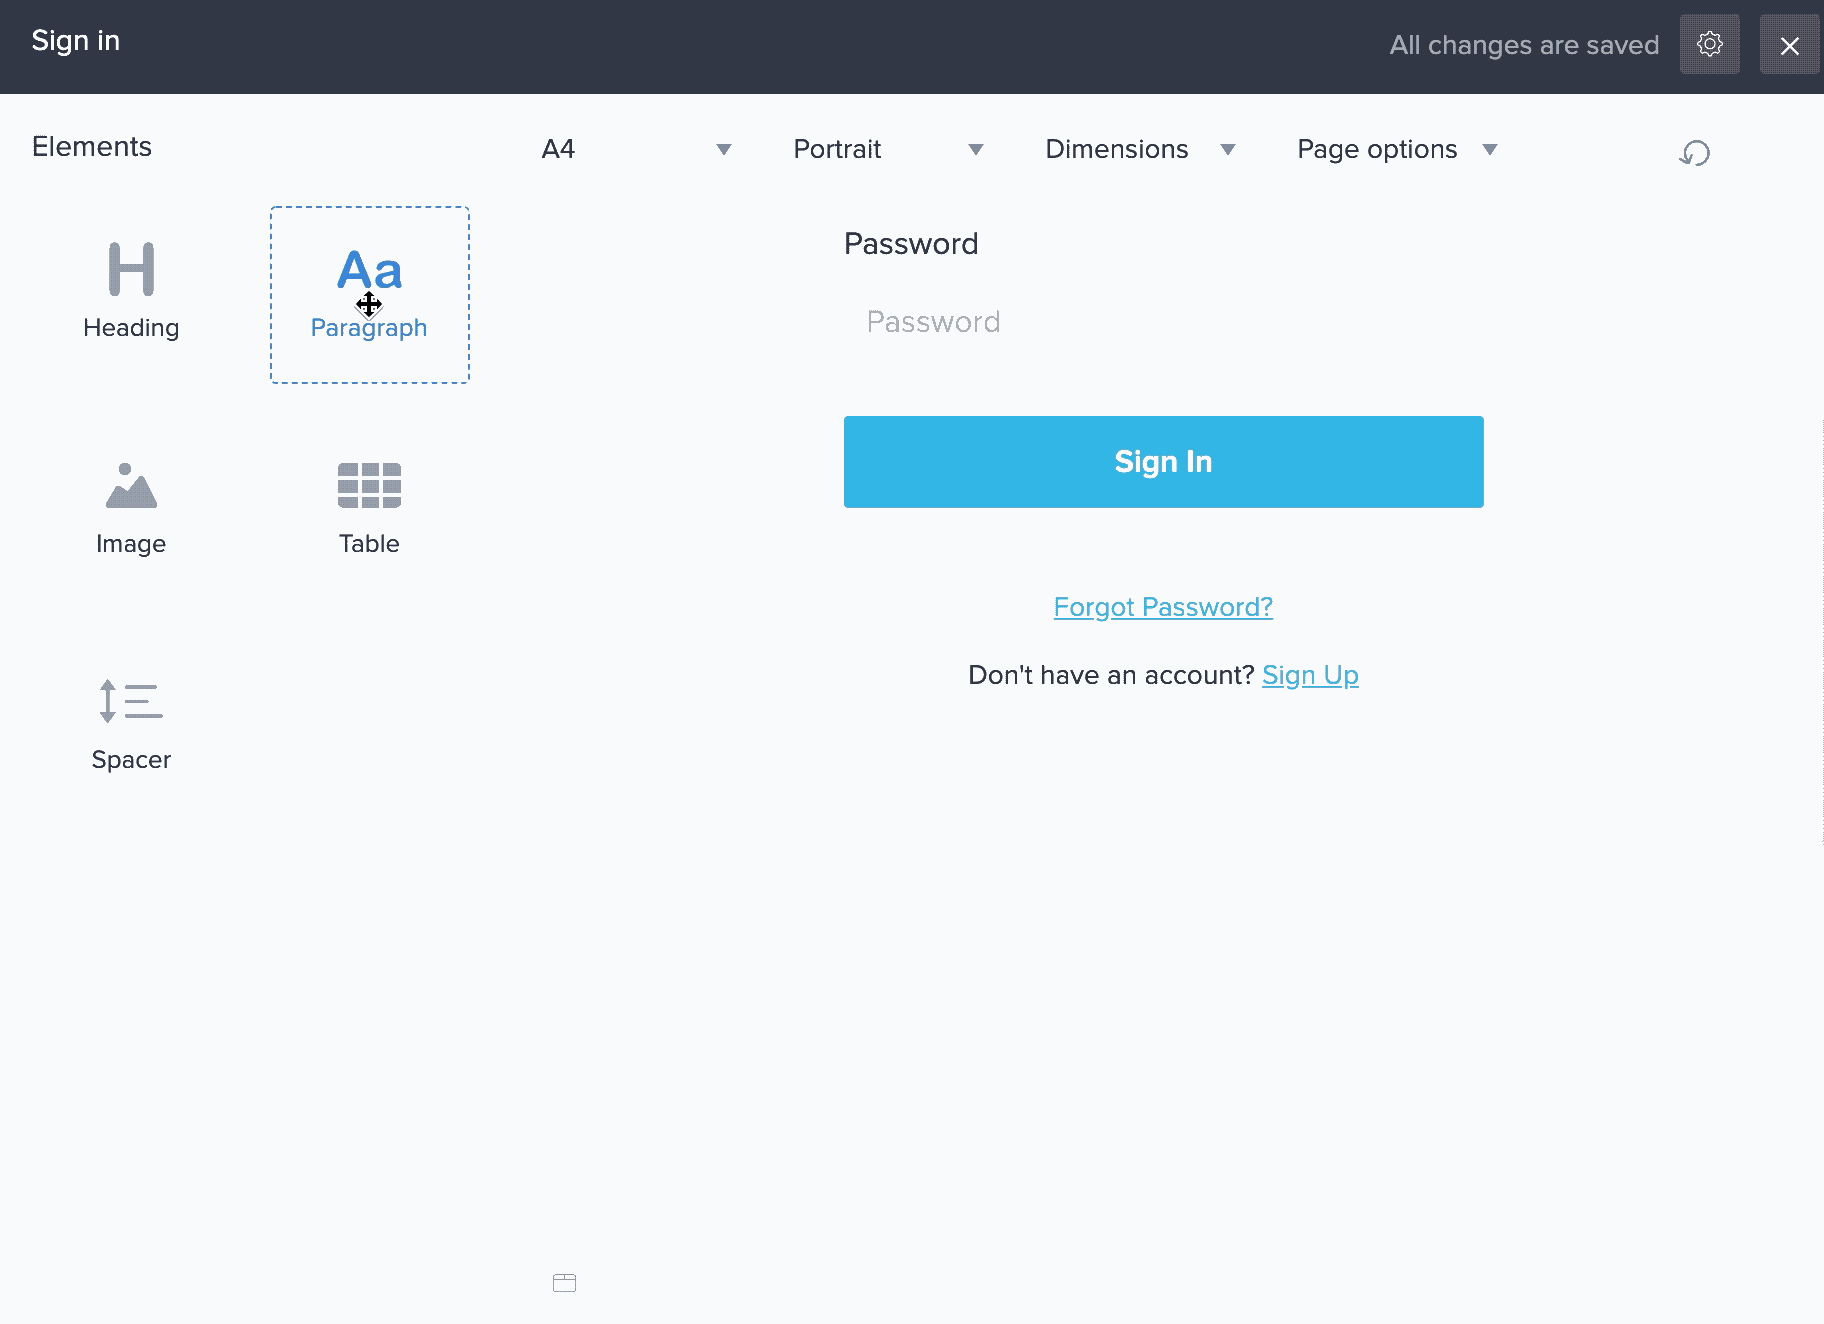
Adding an element to your page
The portal page designer features pre-designed elements that you can drag and drop to the required part of your page. To add one to your page:
- Navigate to the Elements tab on the left.
- Drag and drop the required element onto the page. Alternatively, you can also double-click the required element. Its toolbar will appear at the top of the designer.
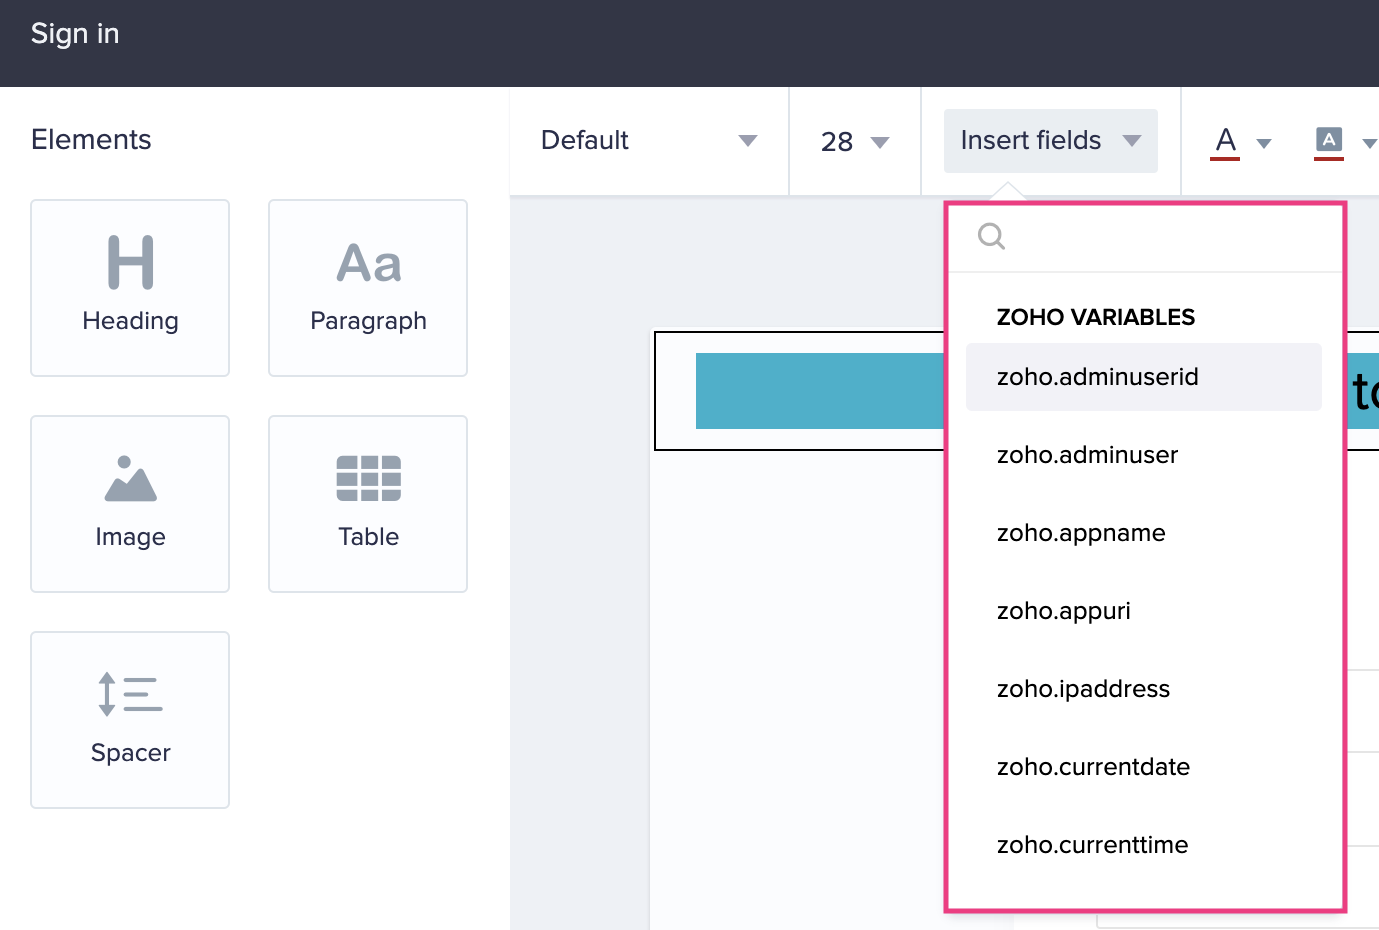
Adding system variables to your page
You can insert system variables inside the elements. To add them to your page:
- Navigate to the Elements tab on the left.
- Drag and drop the required element onto the page. Alternatively, you can also double-click the required element. Its toolbar will appear at the top of the designer.
- Click the Insert fields dropdown in the elements toolbar and choose the required system variable:
Customize page properties
You can:
Set the background and border
The portal page designer allows you to set the background and border for your portal page.To do this:
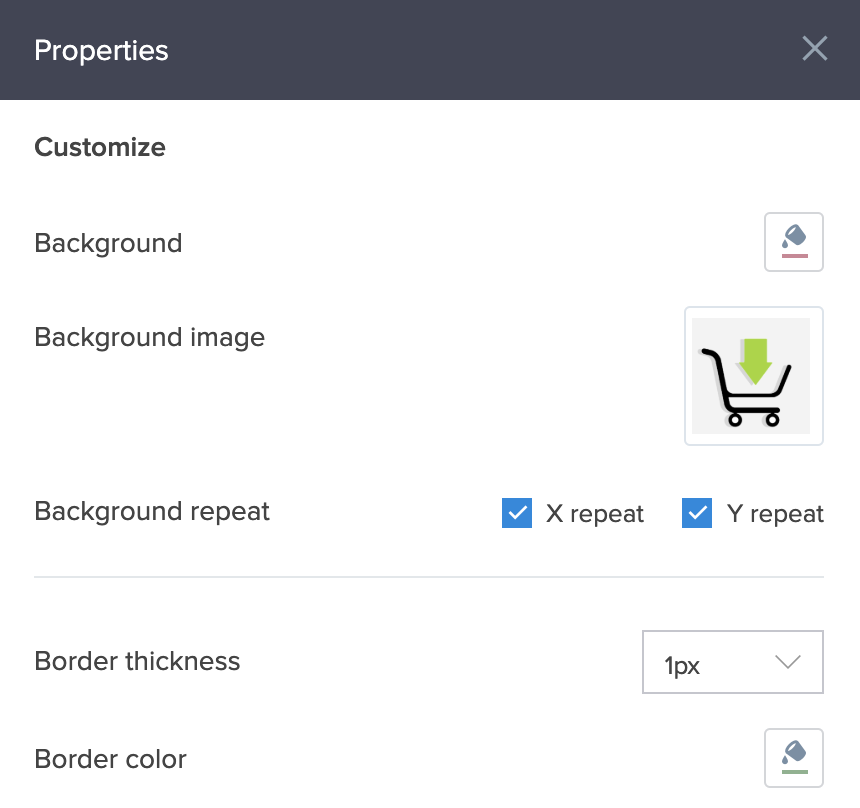
- Click the Settings icon at the top-right corner of the designer.
- The Properties pane will slide in from the right and you can edit the following:
- Background: The designer enables you to set the background color and a background image for your portal page. The background image can be repeated across the x-axis or y-axis, or both axes of the page.
- Border: A portal page can sport a border with a maximum thickness of 5 px. You can also set the border color.
Customize the page setup
You can perform the following customizations in the page designer: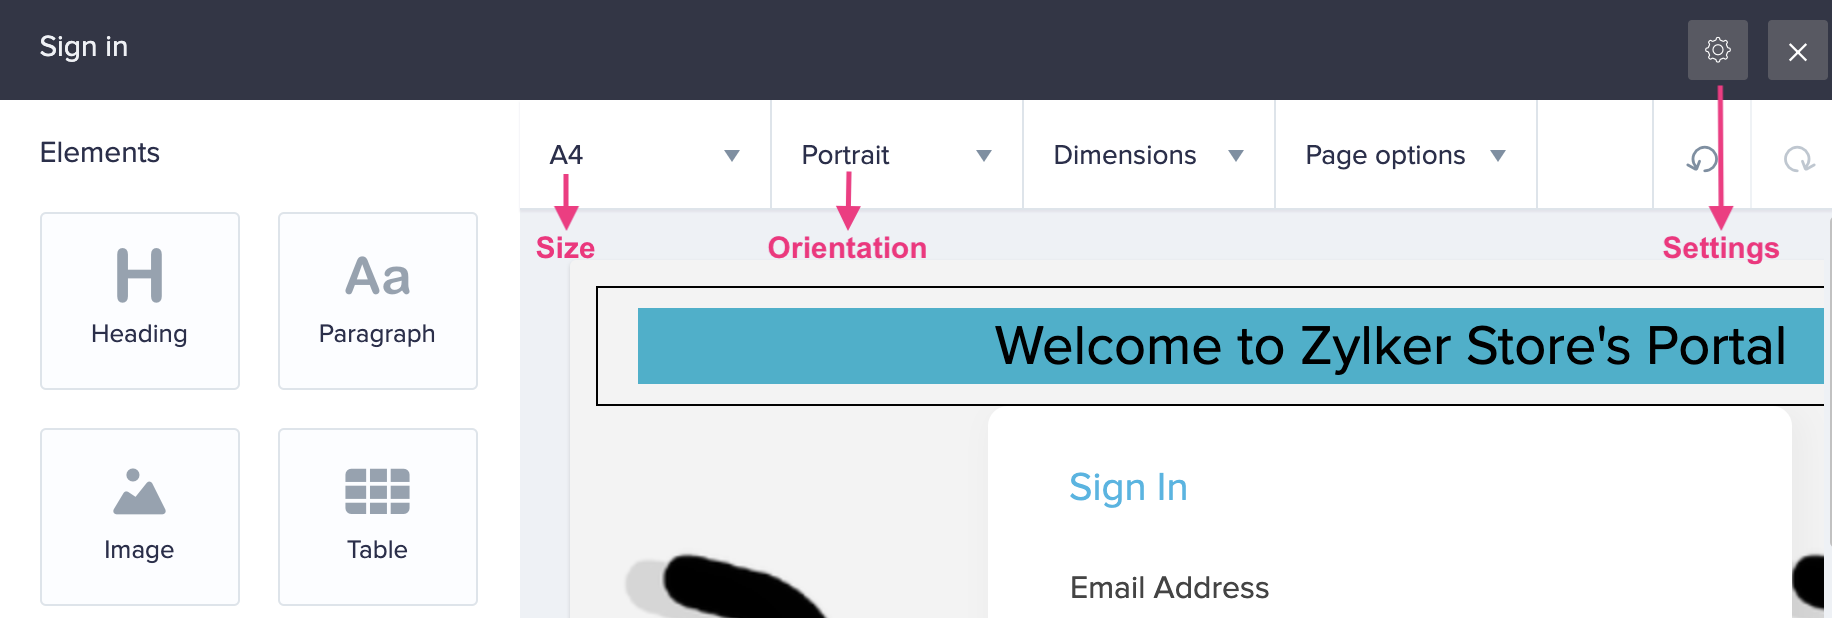
- Set Size: The page's size, such as A3 or A4, applies when your users access your portal pages. You can also set a custom width that doesn't exceed 2000 px.
- Set Orientation: Portrait or landscape
- Set Dimensions: Includes setting:
- Padding: This allows you to specify the space between the border and its components.
- Margin: This allows you to specify the space outside the border.
- Set Page Options - To show or hide the header and footer. The header is checked by default. Header and footer also support displaying border, background image and editing its HTML.
Row and column-specific customization
When you drag and drop an element on to the page designer, you can choose to place them in a row or column.You can also perform certain customizations with regard to the rows and columns as shown in the below GIF.
Consequently, the designer also allows you to set each column's width as desired. To do so:
- Hover over the right or left border of the column you wish to resize. You'll see the resize icon.
- Drag the column border to set the required width. A spacer will be added to accommodate the resizing.