Enable sending email notification on form submission
- Refer to this page to learn about sending an email on form submission
- Refer to this section to learn how to verify email addresses
- Open the form builder.
Click the Properties icon in the top-right of the form builder, as shown above. The Form Properties pane will appear on the right.

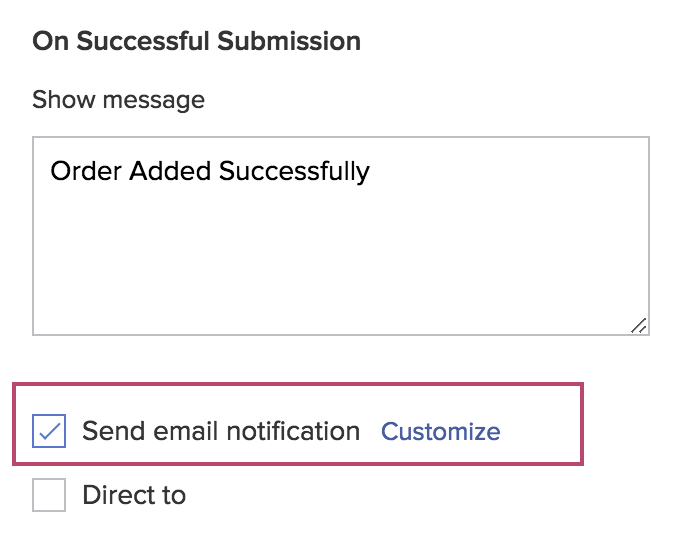
Check the checkbox next to Send Email Notification, then click the Customize link.
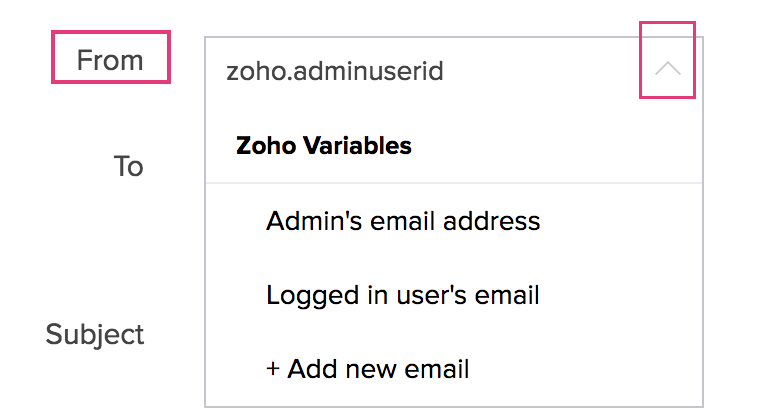
Set From with one of the following:
- Admin's email address. (This is selected by default)
- Logged in user's email
- + Add New Email - to set any other email address of yours as From. Refer to this section to learn how to verify an email address.
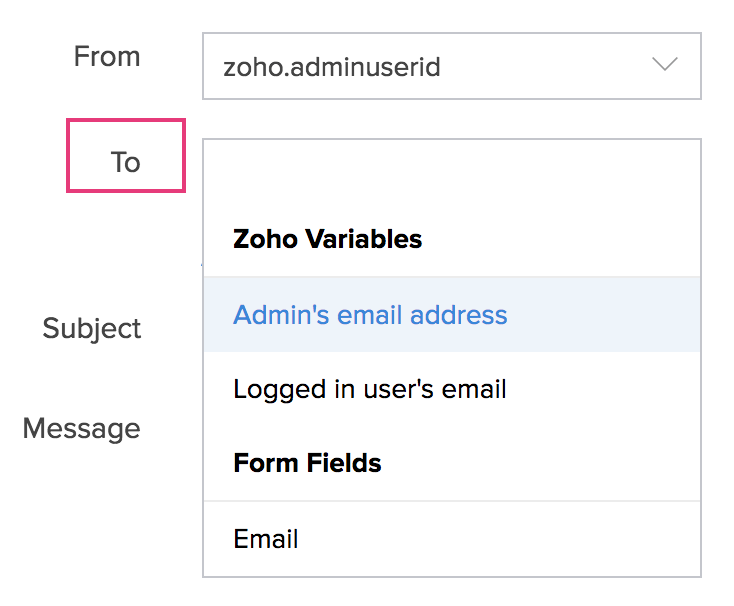
Set To with any of the following:
- Admin's email address
- Logged in user's email
- Form fields: Email fields present in the form
- Any other email addresses, by typing them
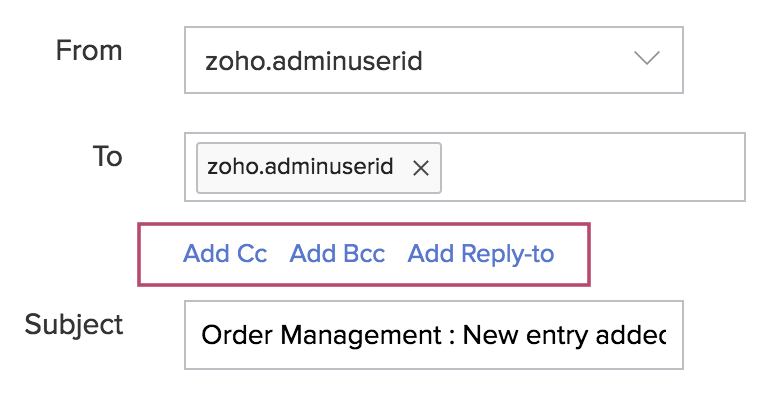
Click Add Cc, Add Bcc, and Add Reply-to to add Cc, Bcc and Reply-to email addresses. These are optional. You can set them with any of the following:
- Admin's email address
- Logged in user's email
- Form fields: Email fields present in the form
- Any other email addresses, by typing them
- Set the email's Subject. It can contain plain text and refer the data your users enter in your form's fields.
- Set the email's Message as required. It can contain rich text and refer the data your users enter in your form's fields.
- Check the checkbox next to Include user submitted data, then select the required form template (the Default Template is selected by default). This will enable you to include (in the email) the data your users submit (through your form) in a custom format (as defined in the selected form template).
- Click Done.
Verify email addresses
- Follow steps 1-3 given above to enable sending email notification on form submission.
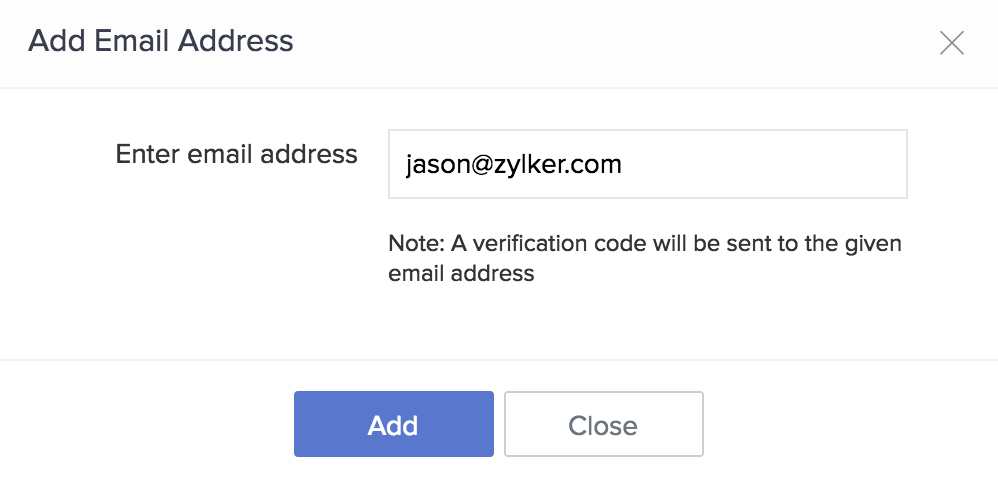
- Click the From dropdown and select + Add New Email.
Enter the required email address, then click Add. A verification code will be sent to this address by noreply@zohocreator.com.
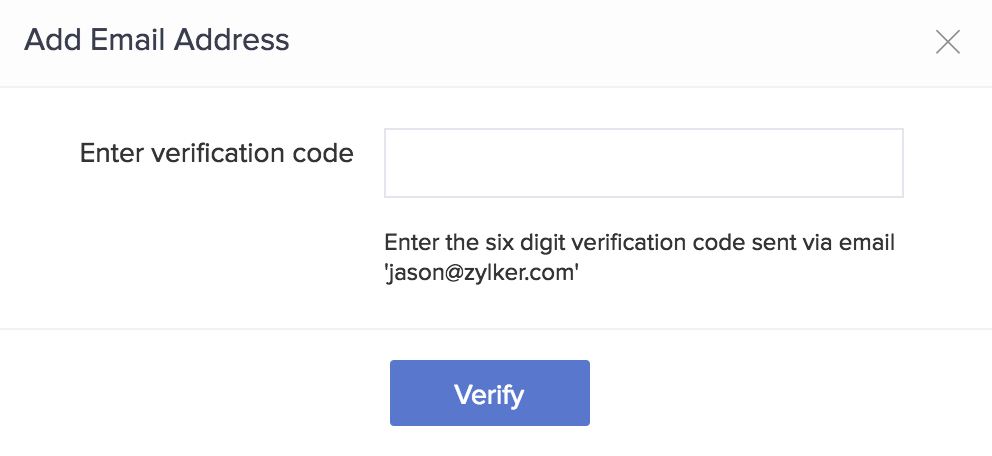
Enter the 6-digit verification code that you received, then click Verify.
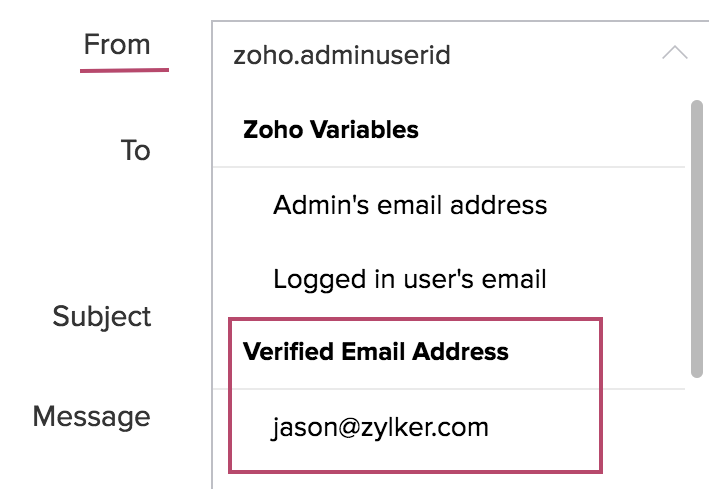
Upon successful verification, this email address will be listed in the From dropdown under Verified Email Address.
Once added, you can use a verified email address across all apps in your account. You can also use verified email addresses in send mail tasks.