Customizing Summary Views
Analytics Plus offers a variety of options that enable you to sort, format, apply themes, and customize the summary view based on your requirement.
Summary view settings
Analytics Plus allows you to customize different elements of the summary view, which includes updating the title and description, hiding row numbers, etc.
To do this, click the Settings icon in the toolbar. In the page that appears, you can customize the elements from the following three tabs: General, Format, and Display. Refer to the following sections to learn about the options in each tab.
General settings
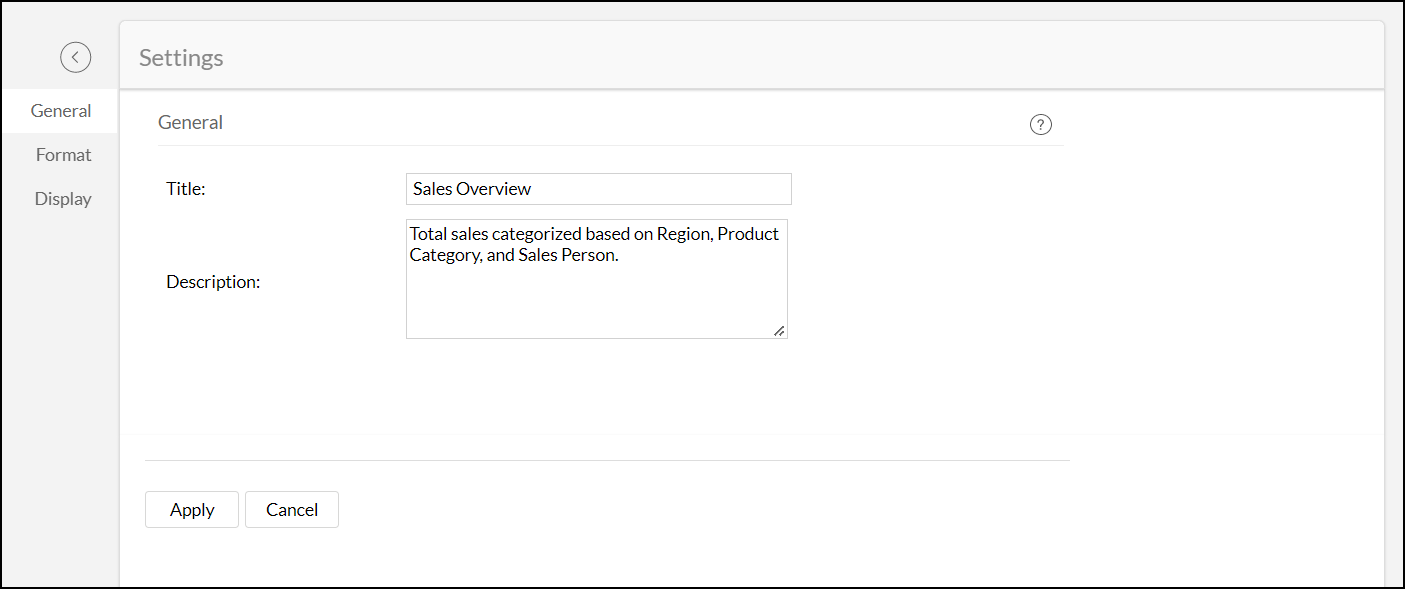
From the General tab, you can add the title and description for your summary view.
- Title: Modify the title of your summary report. This is a mandatory field.
- Description: Change the description of your summary view as required. This field is optional.
Format settings
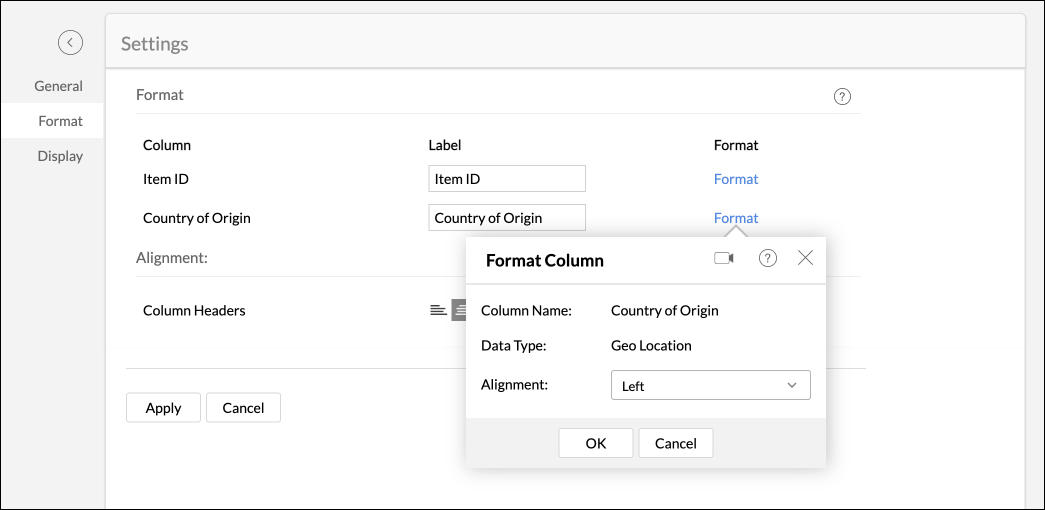
Analytics Plus lets you modify the label (column name) and format of the columns used in your summary view. To do this,
- Open the required summary table and click the Settings icon in the toolbar.
- In the page that appears, head to the Format tab.
- Modify the column display Label as required. You can also change or rename the column name directly from the Edit Design mode. Refer this section to learn more.
- Click the Format link adjacent to each label to change the format of the data. The options in the Format column dialog vary depending on the data type of the column. Click here to learn more about column formatting.
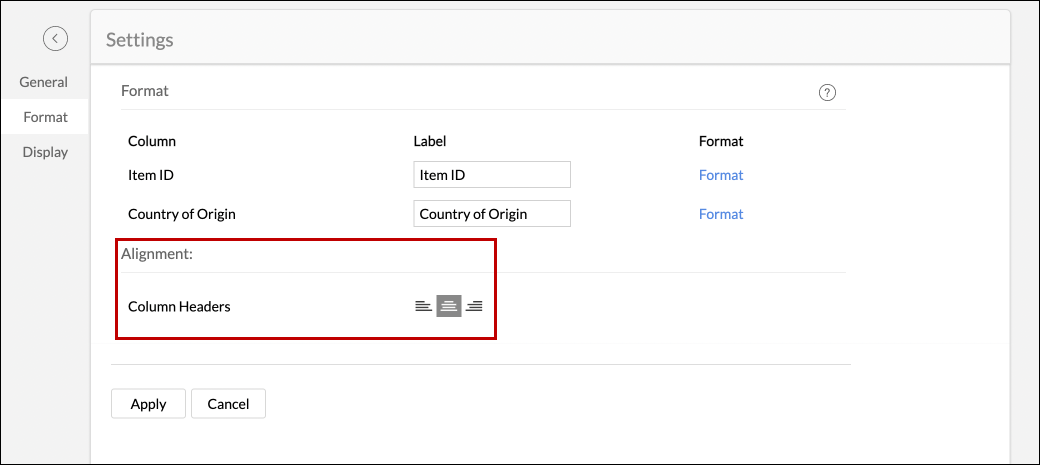
- The Alignment option allows you to align the Column Headers horizontally to the Left, Right, or Center positions.
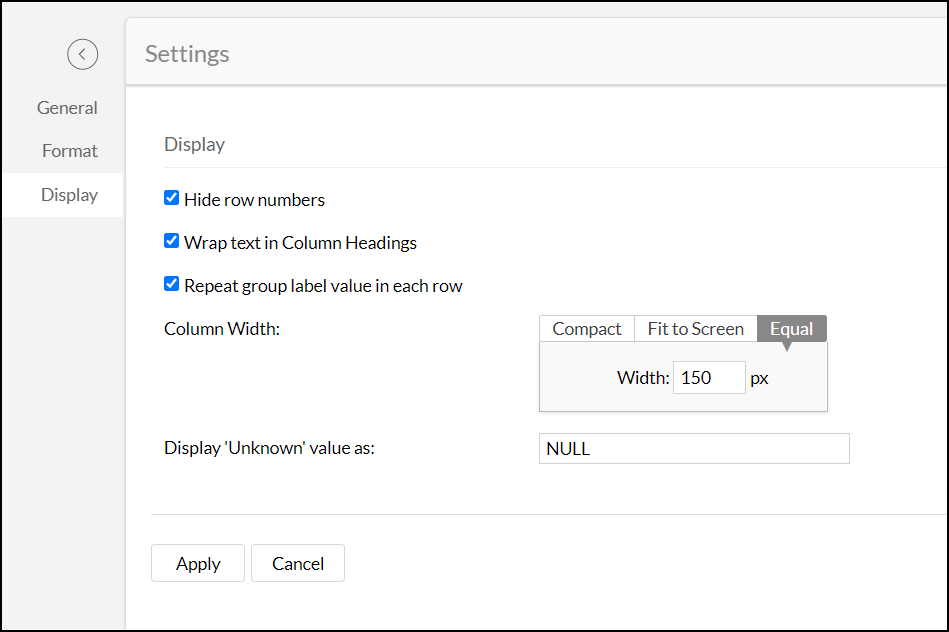
Display settings
From the Display tab, you can specify how the data needs to be displayed in the summary view. The following are the available options:
- Hide row numbers: This option allows you to hide the row index numbers displayed in the summary view.
- Wrap text in Column headings: This option lets you wrap column headers in the summary view and display them in multiple lines within the same cell.
- Repeat group label value in each row: This option enables you to repeat the group label name for all the rows.
- Column Width: Choose one of the following options.
- Compact: This option allows you to tightly pack the columns in the summary view, to save horizontal space and improve readability without the need to scroll sideways.
- Fit to Screen: This option enables you to scale up the summary view columns that fits the entire screen on which you are viewing it.
- Equal: This option allows you to set a uniform width to columns in the summary view.
- Display 'Unknown' value as: This option allows you to specify a label to be displayed when the columns dropped in the Group by shelf have empty values. By default, the summary view displays -No Value-.
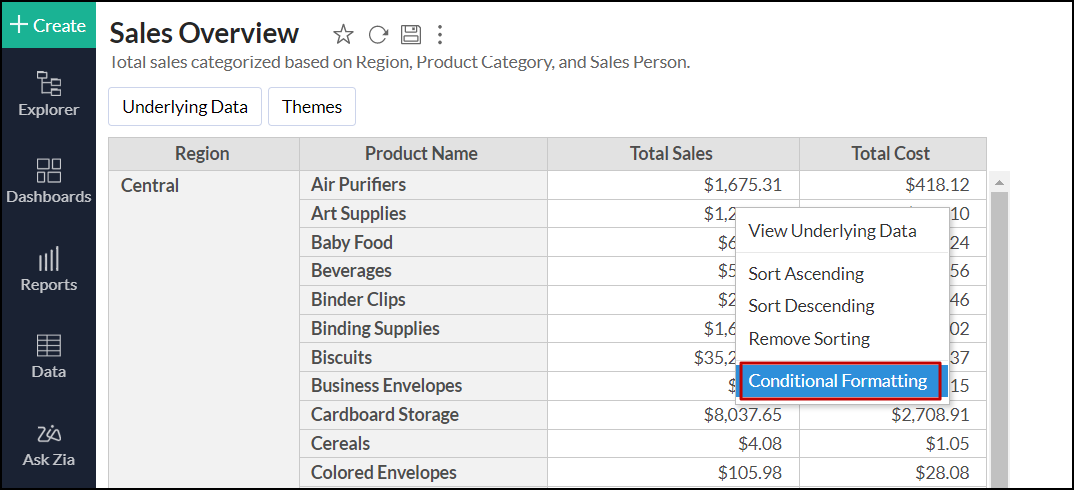
Conditional formatting
Analytics Plus enables you to visually highlight the data cells in the summary view based on specific conditions. You can apply different styles and colors to your data for easy analysis. Follow the steps below to apply conditional formatting to your summary view.
- Open the required summary view, and right-click on any cell of the column on which you need to apply conditional formatting.
- Click Conditional Formatting in the pop-up that appears.
- Select the required condition from the Condition drop-down. The available conditions vary based on the type of data that is being formatted.
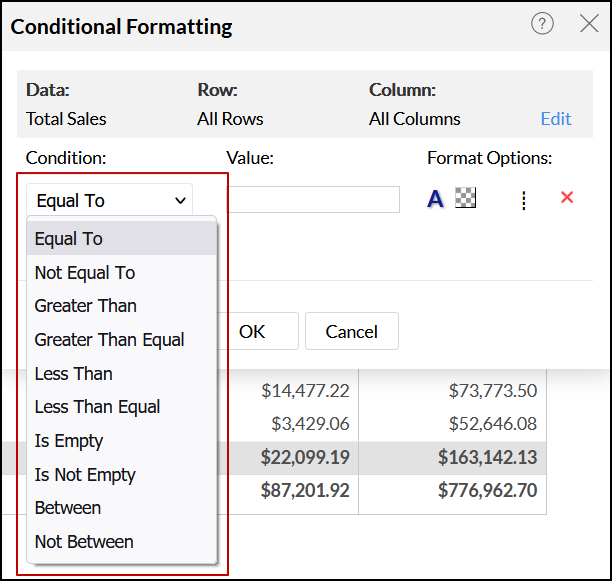
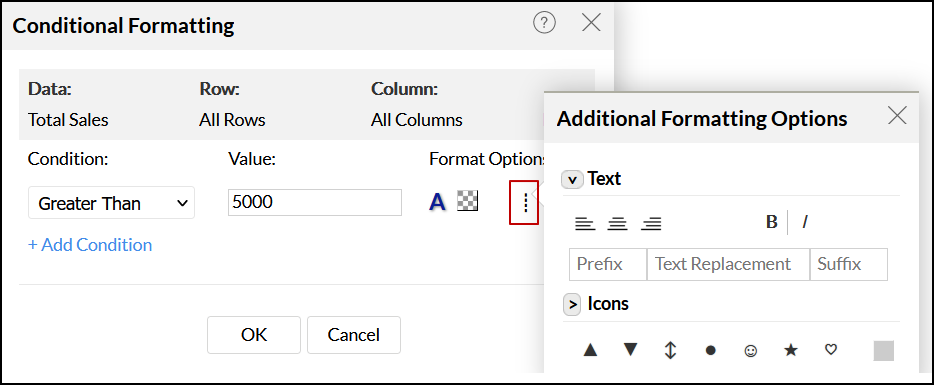
- Enter the threshold value in the Value section.

- Select the required font and background color using the icons in the Format Options section.
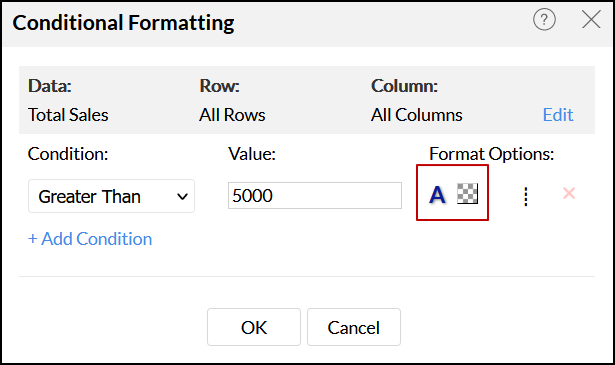
- Click the Additional Formatting Options icon to format your cell further.
You can add any number of conditions using the +Add Condition link. The specified conditions are evaluated from top to bottom, and the corresponding formatting options will be applied to the data cell that meets the condition.
If you wish to change the data, rows, or columns over which the conditional formatting is applied, click the Edit link and choose the desired value from the dropdown.
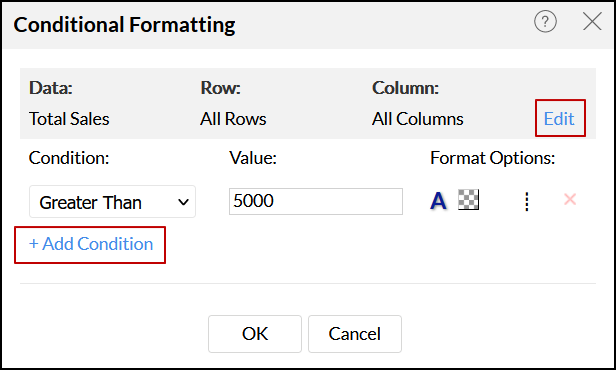
- Click OK to apply the specified formatting over the summary view.
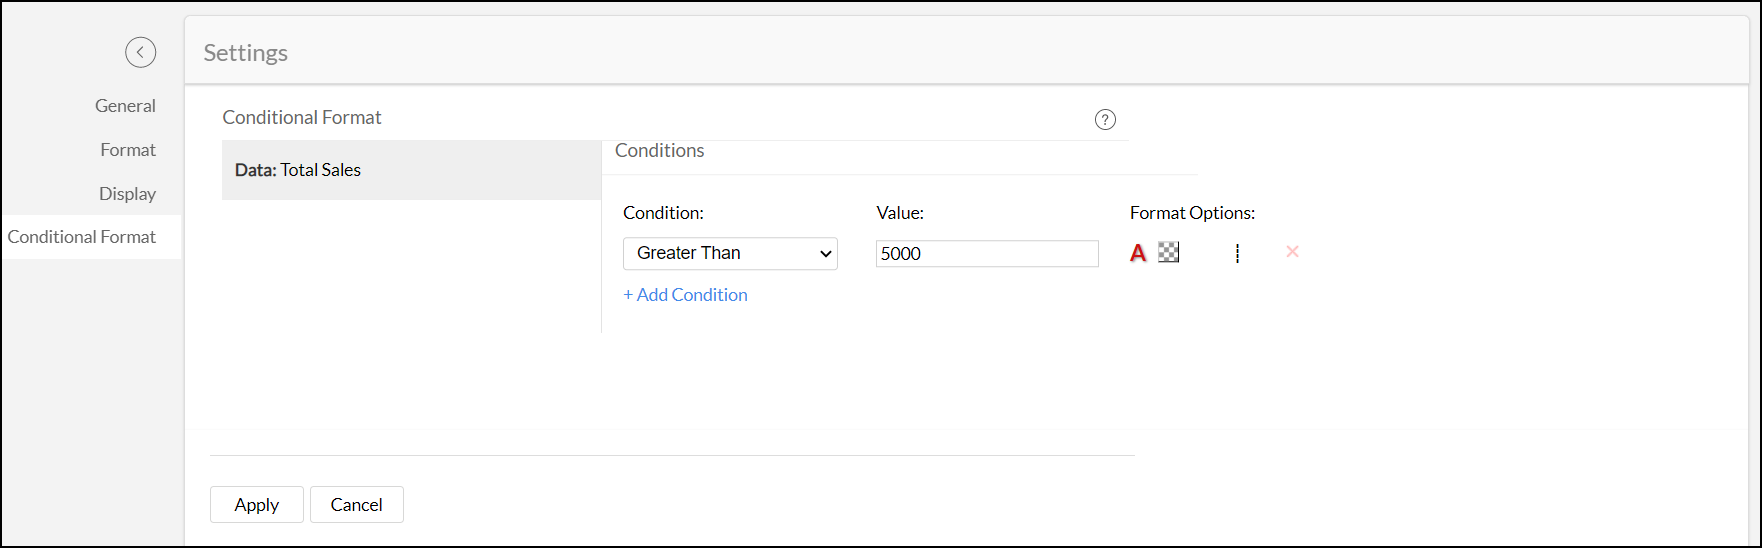
You can also view and modify the conditional formats applied over the summary view from the Settings page.
- Click the Settings icon, and head to the Conditional Format tab.
- Modify the conditions as required, and click Apply.
Applying themes
Analytics Plus allows you to customize the look and feel of the summary view using colorful themes. To change the default theme, follow the steps below.
- Open the required summary view and click the Themes button.
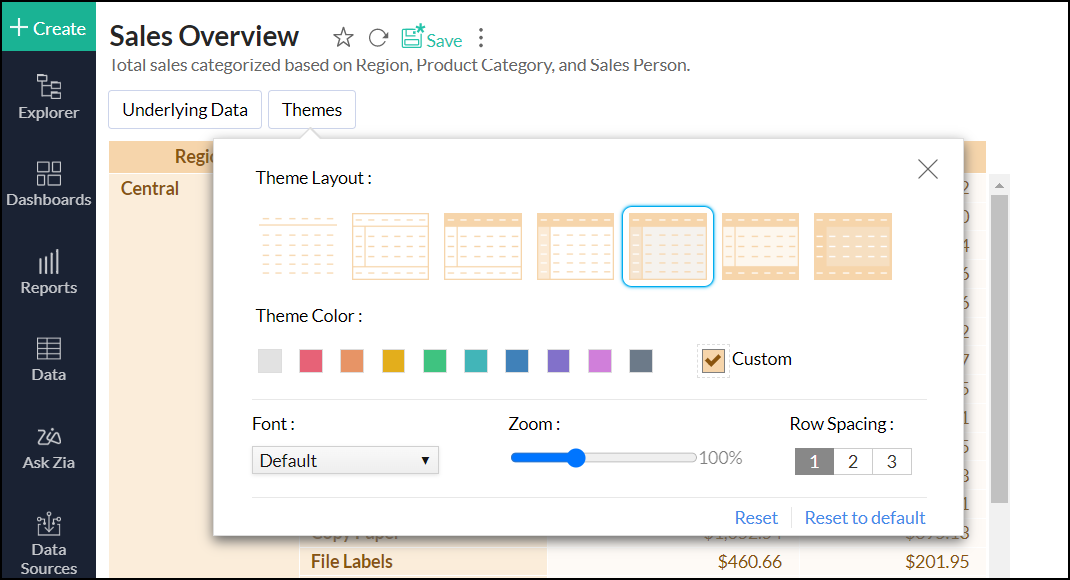
- Select an appropriate theme and customize it using the following options:
- Theme Layout: This option allows you to choose a layout from the available set of seven different layouts.
- Theme Color: This option enables you to select a theme color for the summary view. You can also choose a different color other than the colors displayed using the Custom color option.
- Font: This option lets you select the font type for the text.
- Zoom: This option allows you to increase or decrease the size of your summary view.
- Row spacing: You can alter the row spacing using the predefined options available.
As you choose the themes, the changes are dynamically applied in the background. If you wish to undo the changes, click Reset. To reset the theme to the default theme, click the Reset to default option.
Renaming column
Analytics Plus allows you to modify the column display label (column name) from the Edit Design mode. For this,
- Open the required summary view in Edit Design mode.
- Click the Edit icon that appears on hovering over the desired column name.
- Modify the name and press Enter to update it.
![]()
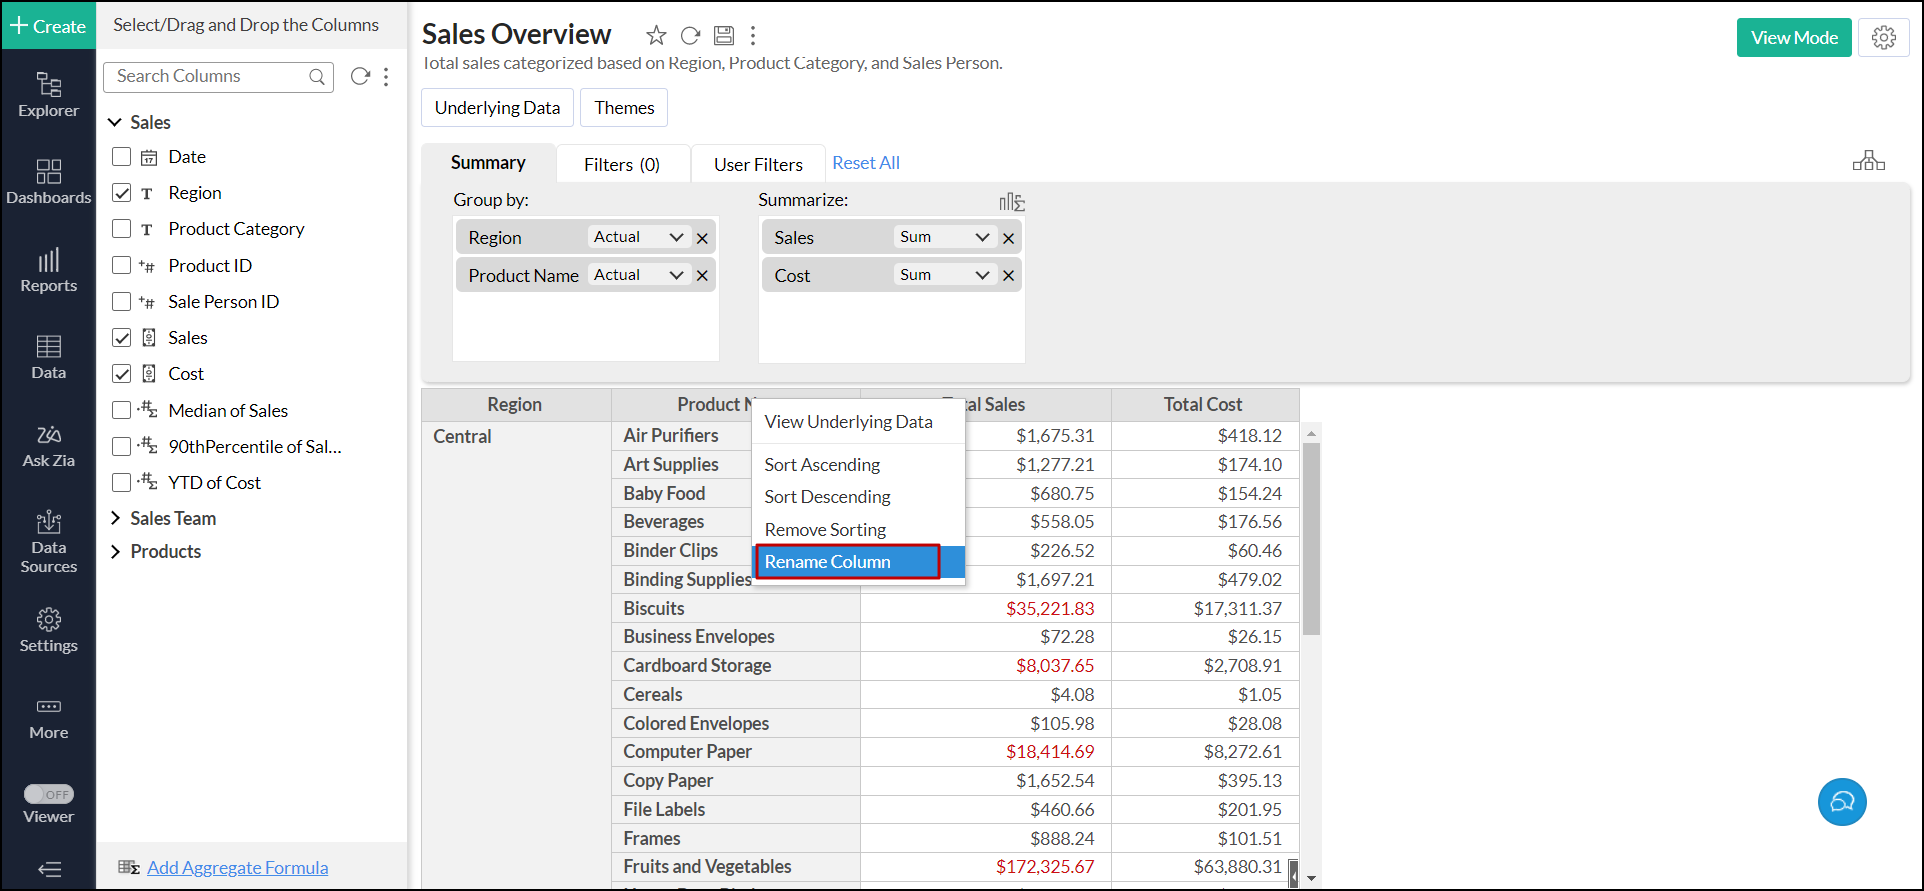
You can also right-click the column name and choose the Rename Column option to modify the column display label.