Managing Workflows in DEX Manager Plus
The Workflows feature in DEX Manager Plus lets IT administrators automate routine endpoint management tasks on a visual, logic-based canvas. A workflow checks real-time device conditions and runs actions based on rules you define, and it can run automatically the moment a DEX alert is triggered on an endpoint.
Use workflows to restart endpoints based on uptime or update status, prompt users before cleaning up unused files, notify IT teams of threshold violations, or remediate an issue automatically the instant an alert condition is detected on a device.
Working with workflows happens in two stages: you build the automation logic here in Workflows, then run it on your devices by creating a deployment in the Deployments module. This page covers the first stage.
- You must have the Workflows role to create, edit, and deploy workflows.
- To run a workflow from an alert, the DEX alert must already be configured. See Configuring DEX Alerts.
- Alert-triggered workflows (deployed in Trigger mode) are supported only on Windows endpoints.
What Is a Workflow?
A workflow is a logic-driven automation that responds to device conditions with predefined actions. It works as a decision tree: every step is a stage (a condition, action, delay, or message) shown visually on the canvas. A workflow starts at a Start node, flows through connected stages, and every path ends at an End node so the logic terminates cleanly.
Workflows are non-linear: each stage runs only if its conditions are met, and branching lets you define different outcomes within the same workflow. Some stages (such as Engage) are interaction- or time-based, while others (such as Remote Action or Restart) perform system-level operations. You design a workflow around a goal, such as remediating a specific issue or preparing systems for an upgrade, so the structure follows whatever outcome you need.
Open the Workflows Page
To open Workflows, go to DEX in the top navigation bar and click Workflows.
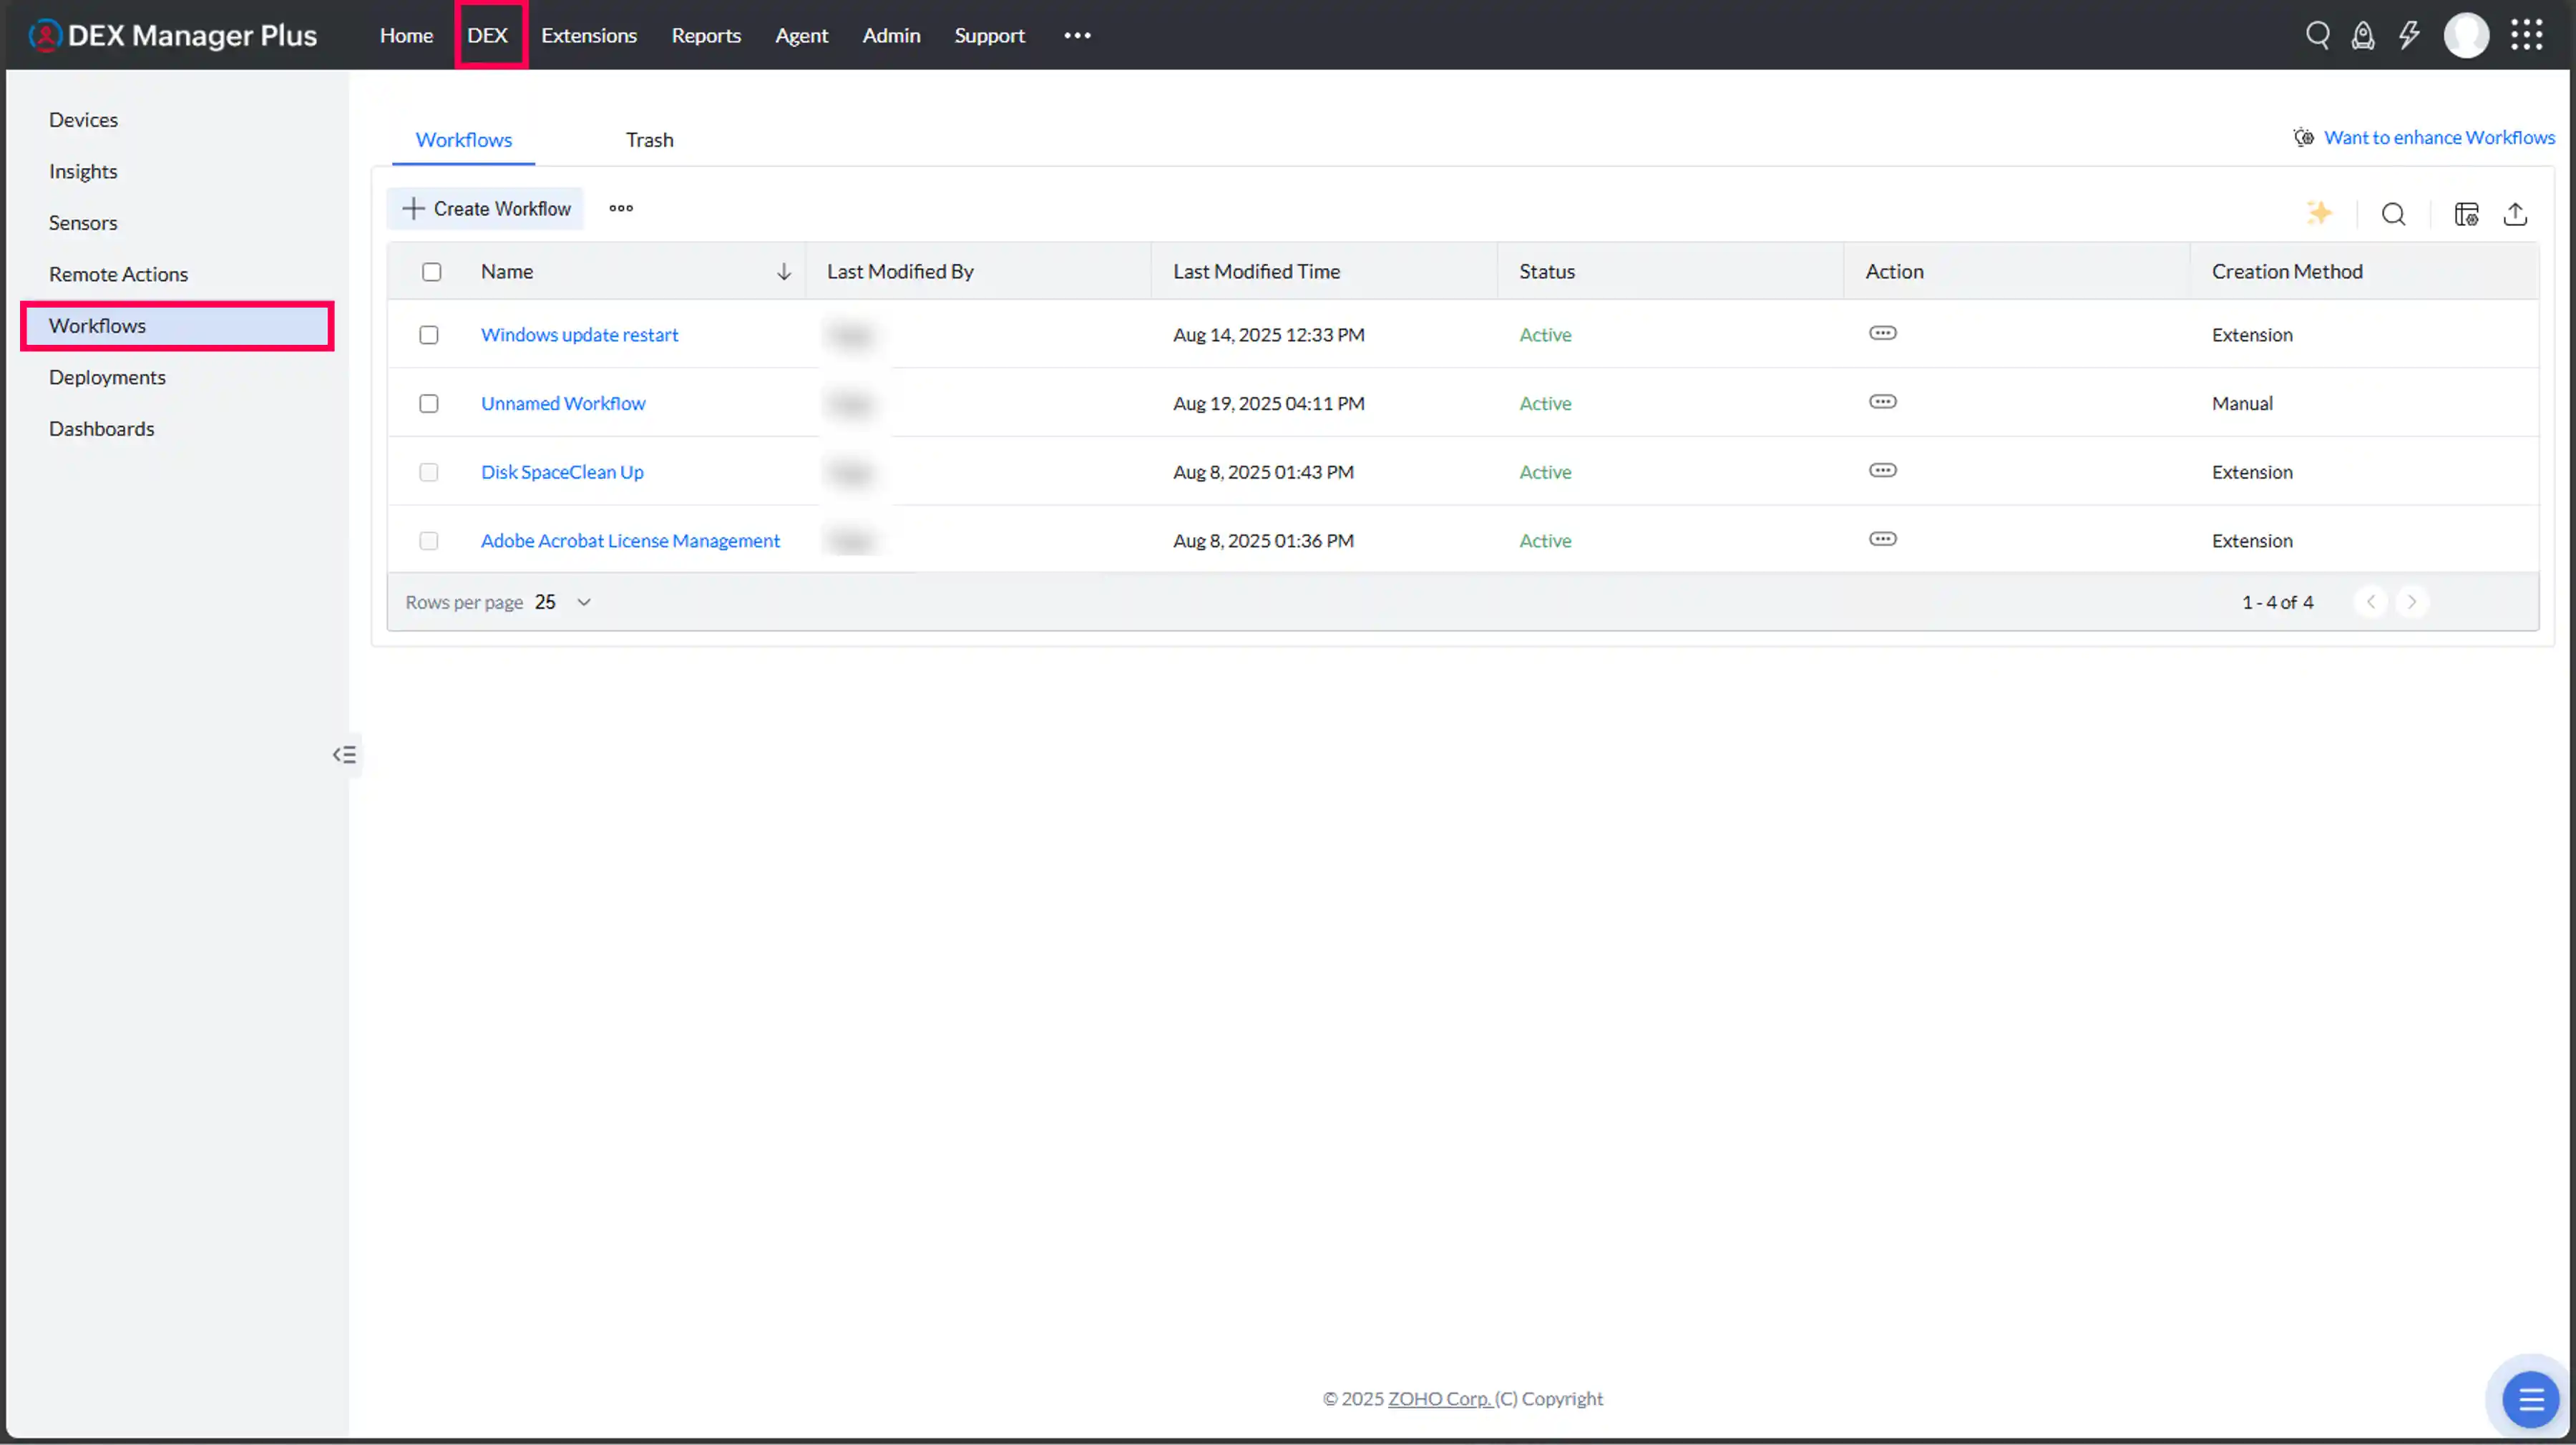
The Workflows page lists every existing workflow with its name and description, status (Active/Inactive), last modified time, creation method (Manual/Extension), and author and creation details. Click + Create Workflow to build a new one in the visual editor.
Workflow Components Reference
A workflow is assembled from the following components. Each one is configured in the right-hand pane with properties such as variable names, thresholds, recipients, durations, or scripts.
| Component | Description | When to Use |
|---|---|---|
| Sensor | Retrieves real-time data from managed devices (e.g., uptime, disk space, app activity). | To collect input required for evaluation. |
| Switch | Evaluates sensor data using logical conditions. | To branch workflow execution based on the input. |
| Case | Defines a condition within a switch (e.g., “> 5 GB”). | To create multiple paths for different outcomes. |
| Remote Action | Executes a system-level task via predefined script. | To remediate issues or enforce actions on the device. |
| Engage | Displays a prompt or message to the end user. | When user confirmation or visibility is required before continuing. |
| Send Mail | Sends an email notification to selected recipients. | To alert administrators or teams about execution status. |
| Delay | Pauses the workflow for a defined duration. | When waiting is necessary between actions. |
| Restart | Restarts the target device. No configuration required. | When rebooting the system is part of the response. |
| End | Terminates a branch of the workflow. | Required to complete all paths. |
How to Create a Workflow
Click + Create Workflow to launch the canvas. Drag the components you need onto it, connect them from the Start node through to an End node on every path, and configure each stage in the right-hand pane.
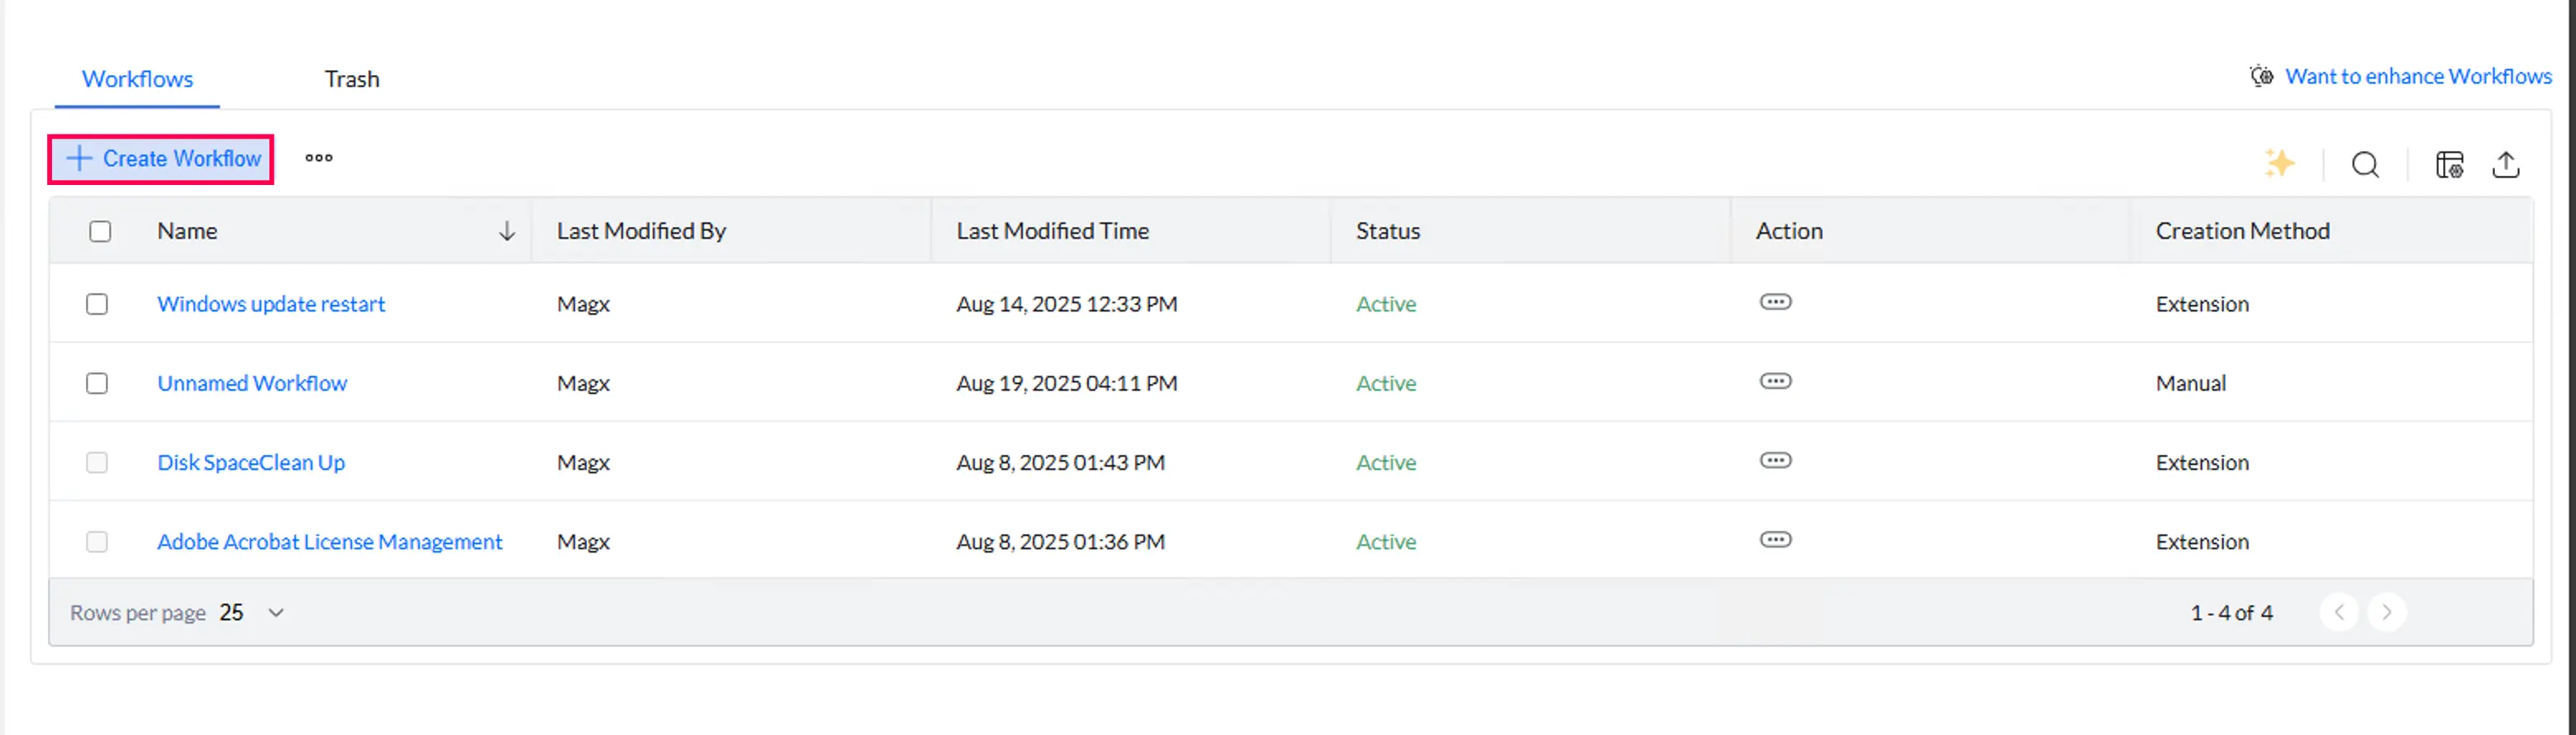
Begin by defining the objective, then decide what condition to monitor (Sensor), how to evaluate it (Switch and Case), and what response is appropriate (Remote Action, Engage, Restart, and so on). There is no mandatory sequence. Connect stages in whatever order produces the outcome you want.
Variables in Workflow
While building a workflow, you can use three types of variables to drive your logic:
- Device Properties: Built-in device details—such as network, disk, and battery readings—that DEX Manager Plus can collect from a managed endpoint once you configure the device property in the workflow.
- Sensor fields: Device data collected through sensors, which you can reference directly without adding a Sensor stage.
- Previous stage outputs: Values produced by earlier stages in the same workflow, such as a user’s response from an Engage stage.
You can evaluate any of these in a Switch to branch the logic, or reference them in later stages such as Engage or Send Mail.
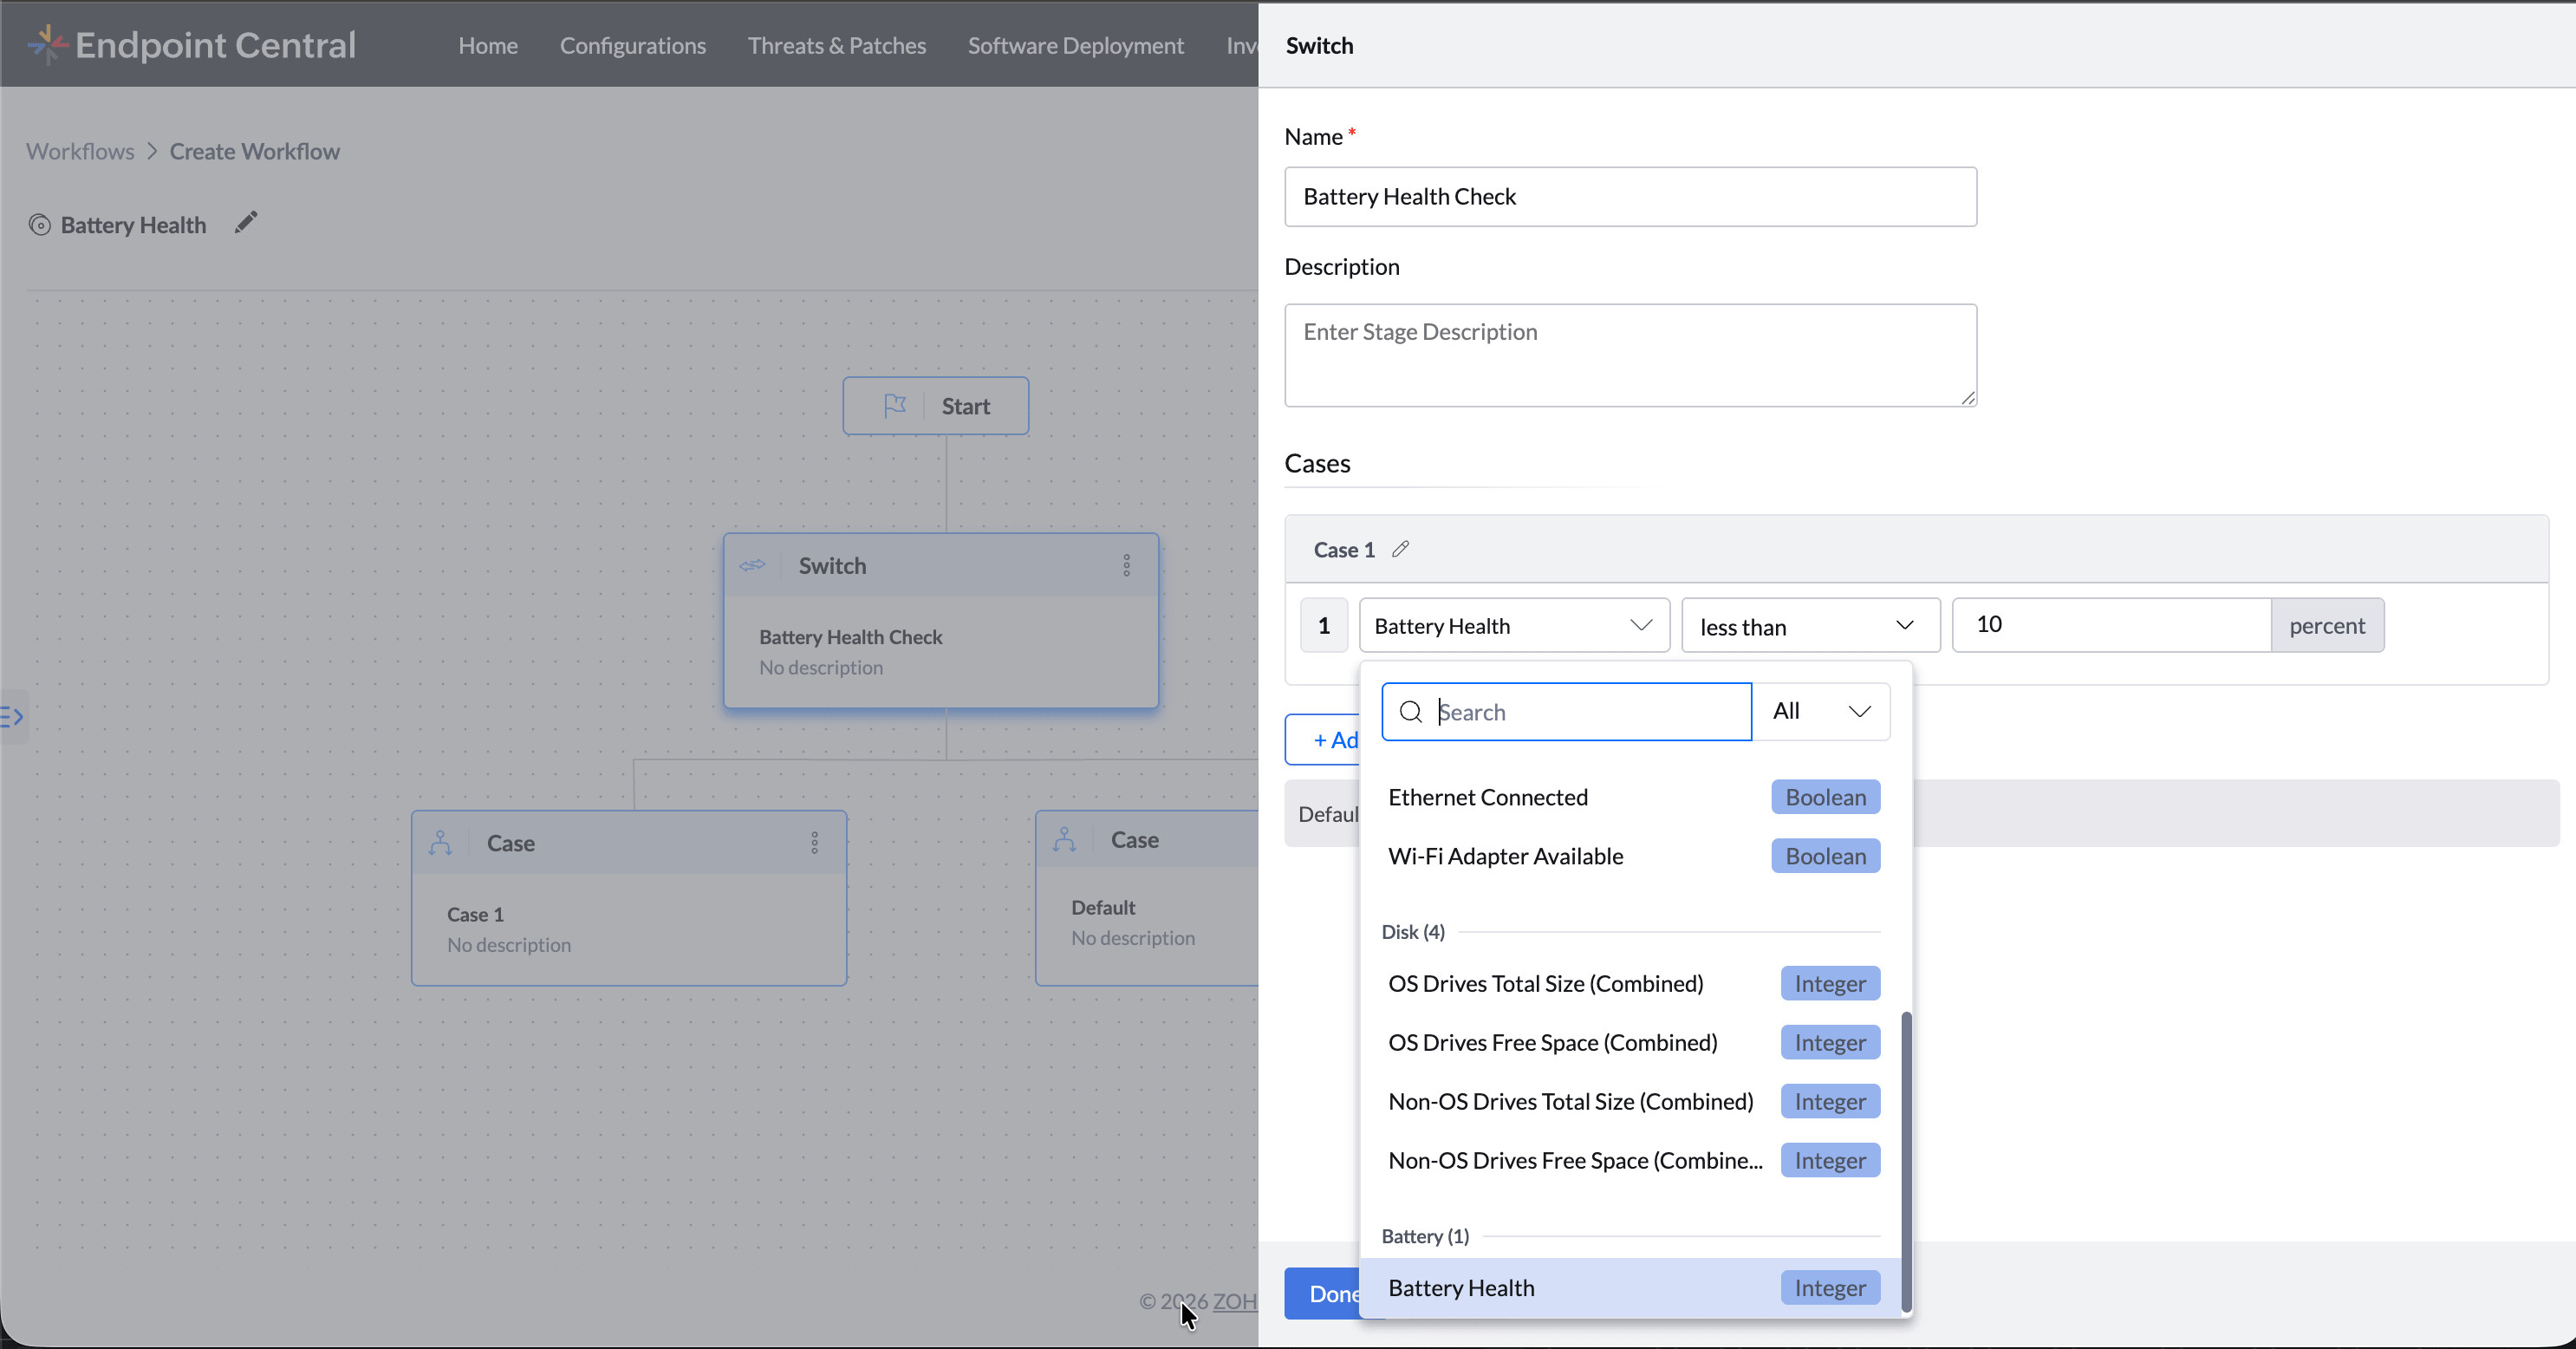
For details on each variable type, how to use them across workflow stages, and the full list of available device properties, see Device Properties in DEX Workflows.
Example: Clean Up Disk Space When It Runs Low
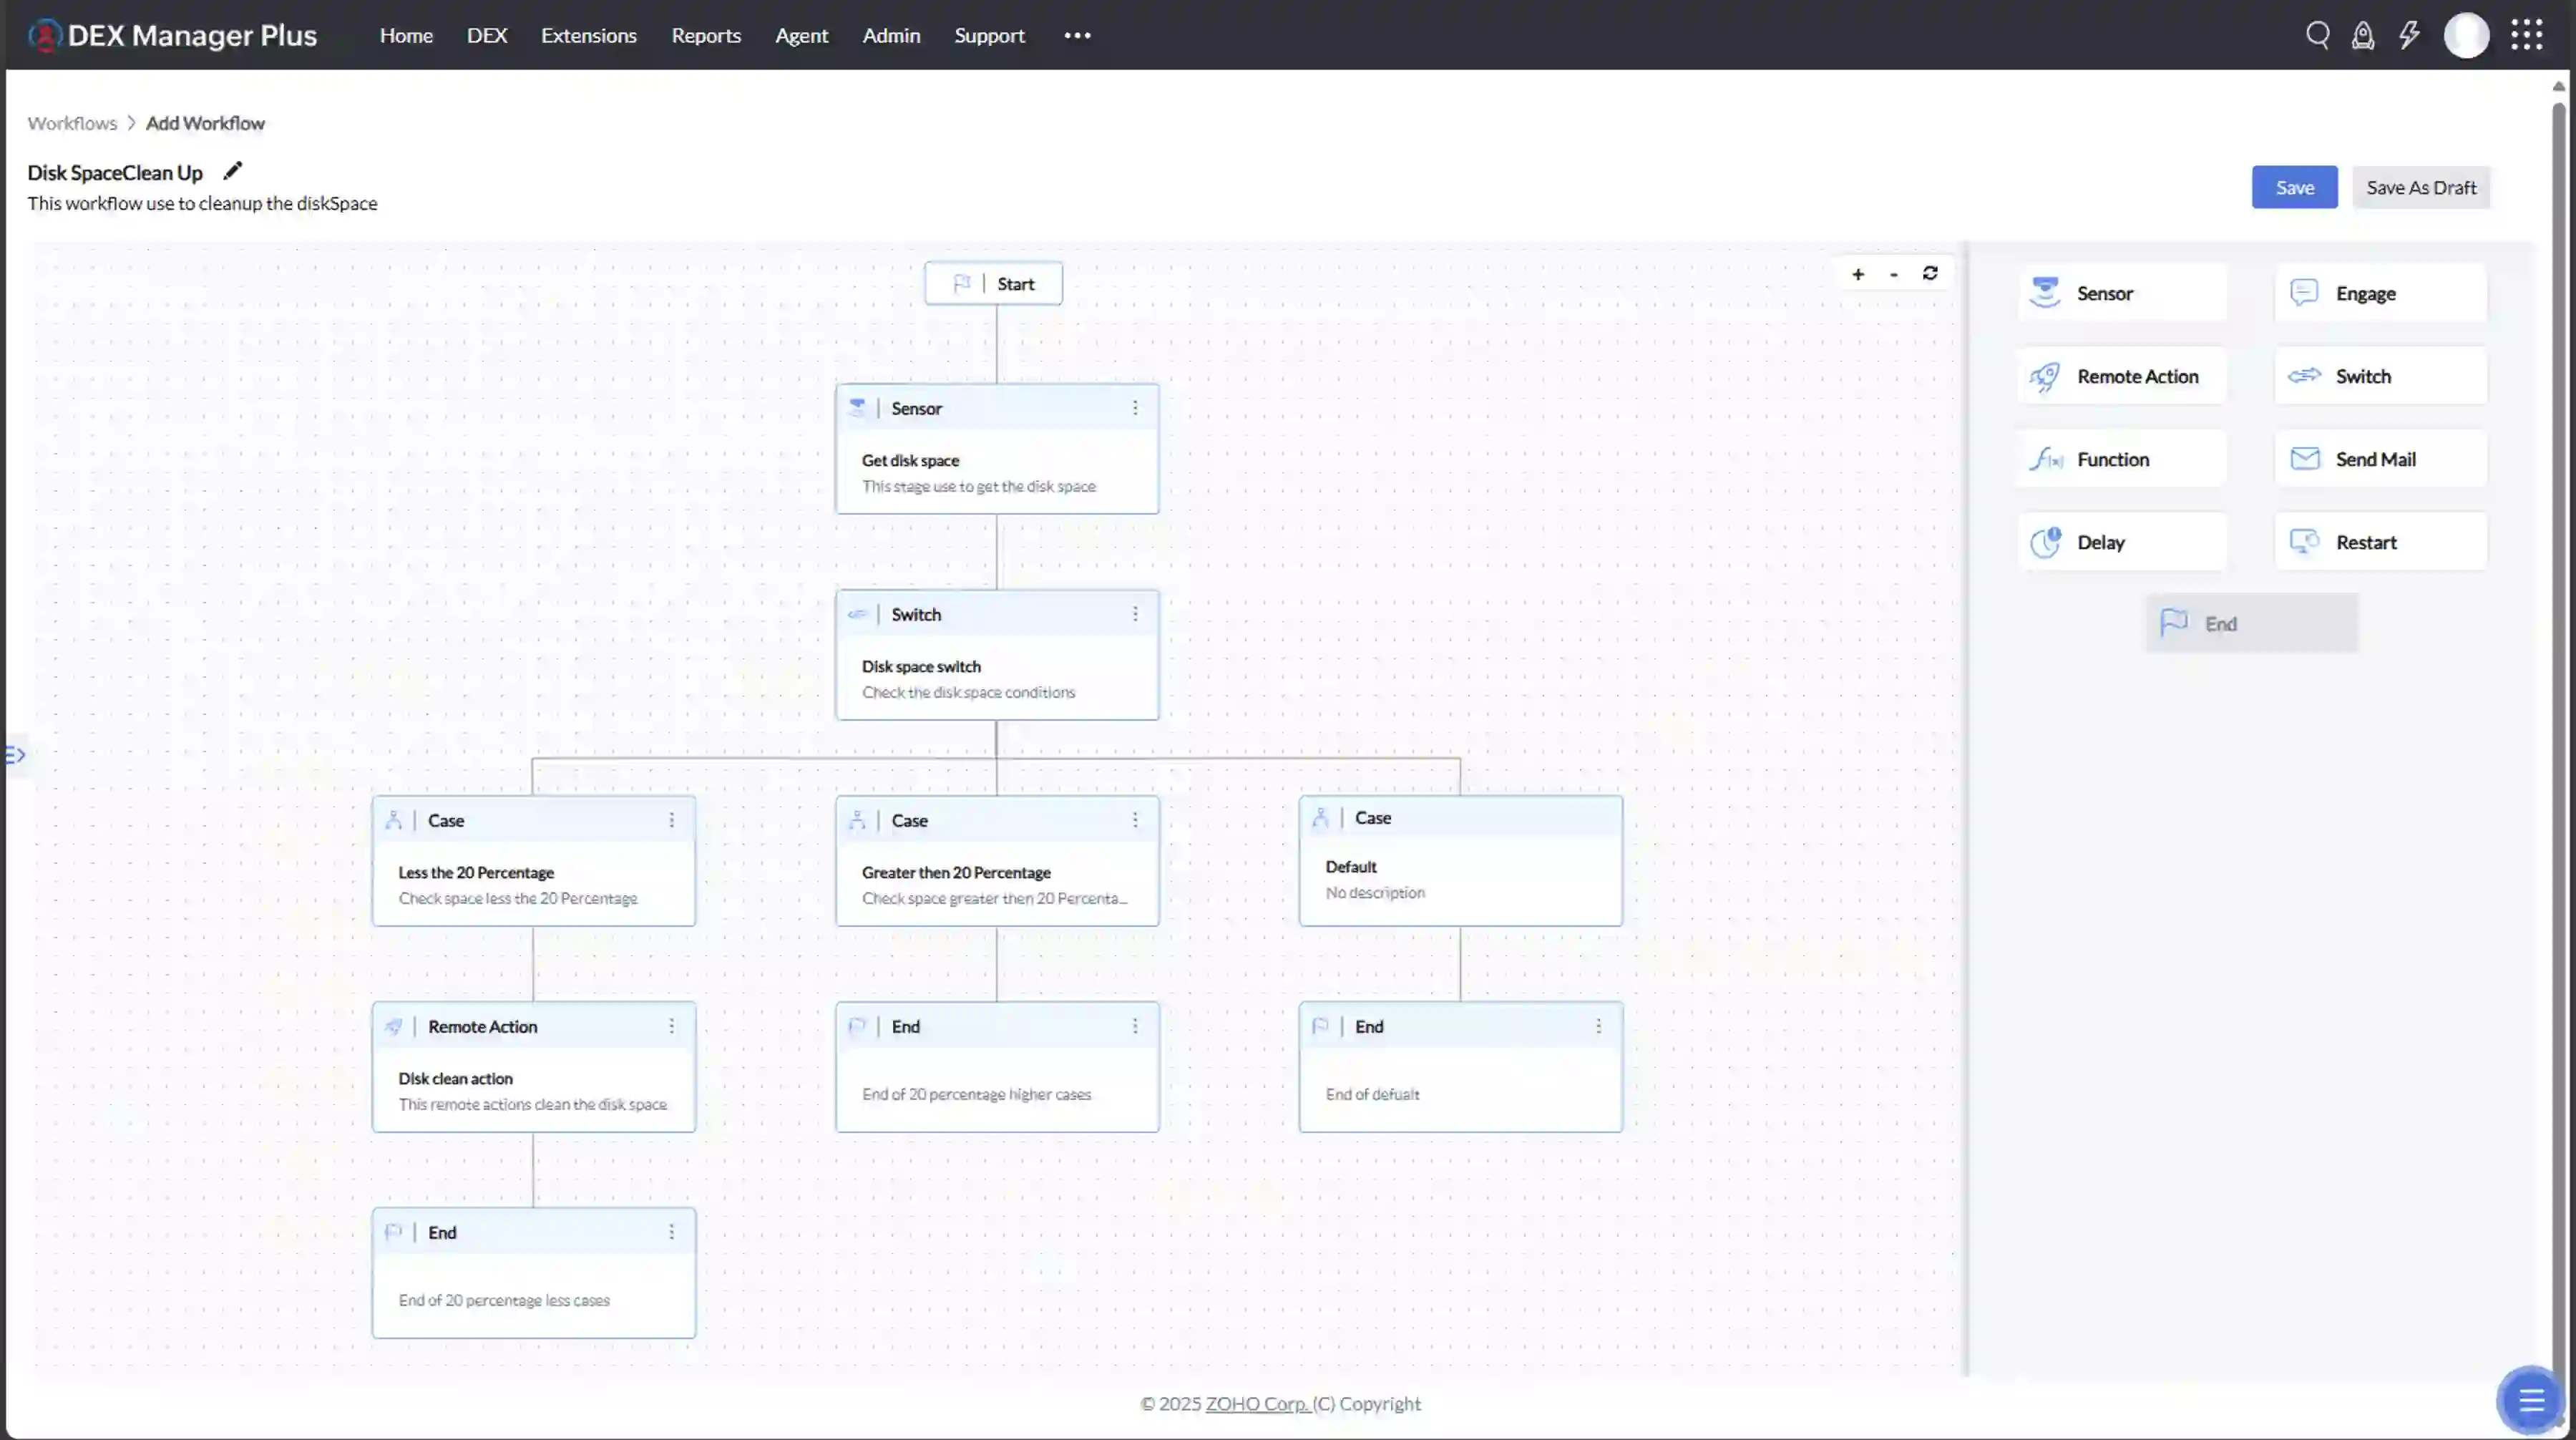
- Sensor: Get disk space usage from the device.
- Switch: Apply a condition to evaluate available disk space.
- Case 1, Less than 20%: Remote Action performs disk clean-up to free space > End.
- Case 2, Greater than 20%: End (no action needed).
- Case 3, Default: End (handles any unexpected value).
Each branch evaluates disk space so that clean-up runs only when storage is critically low. Once built, save the workflow. To run it on your devices, create a deployment from the Deployments module, a separate area of the product where you control execution across device groups. To run it automatically on an alert, see Run a Workflow Automatically on an Alert.
Run a Workflow Automatically on an Alert (Enable Deployment Trigger)
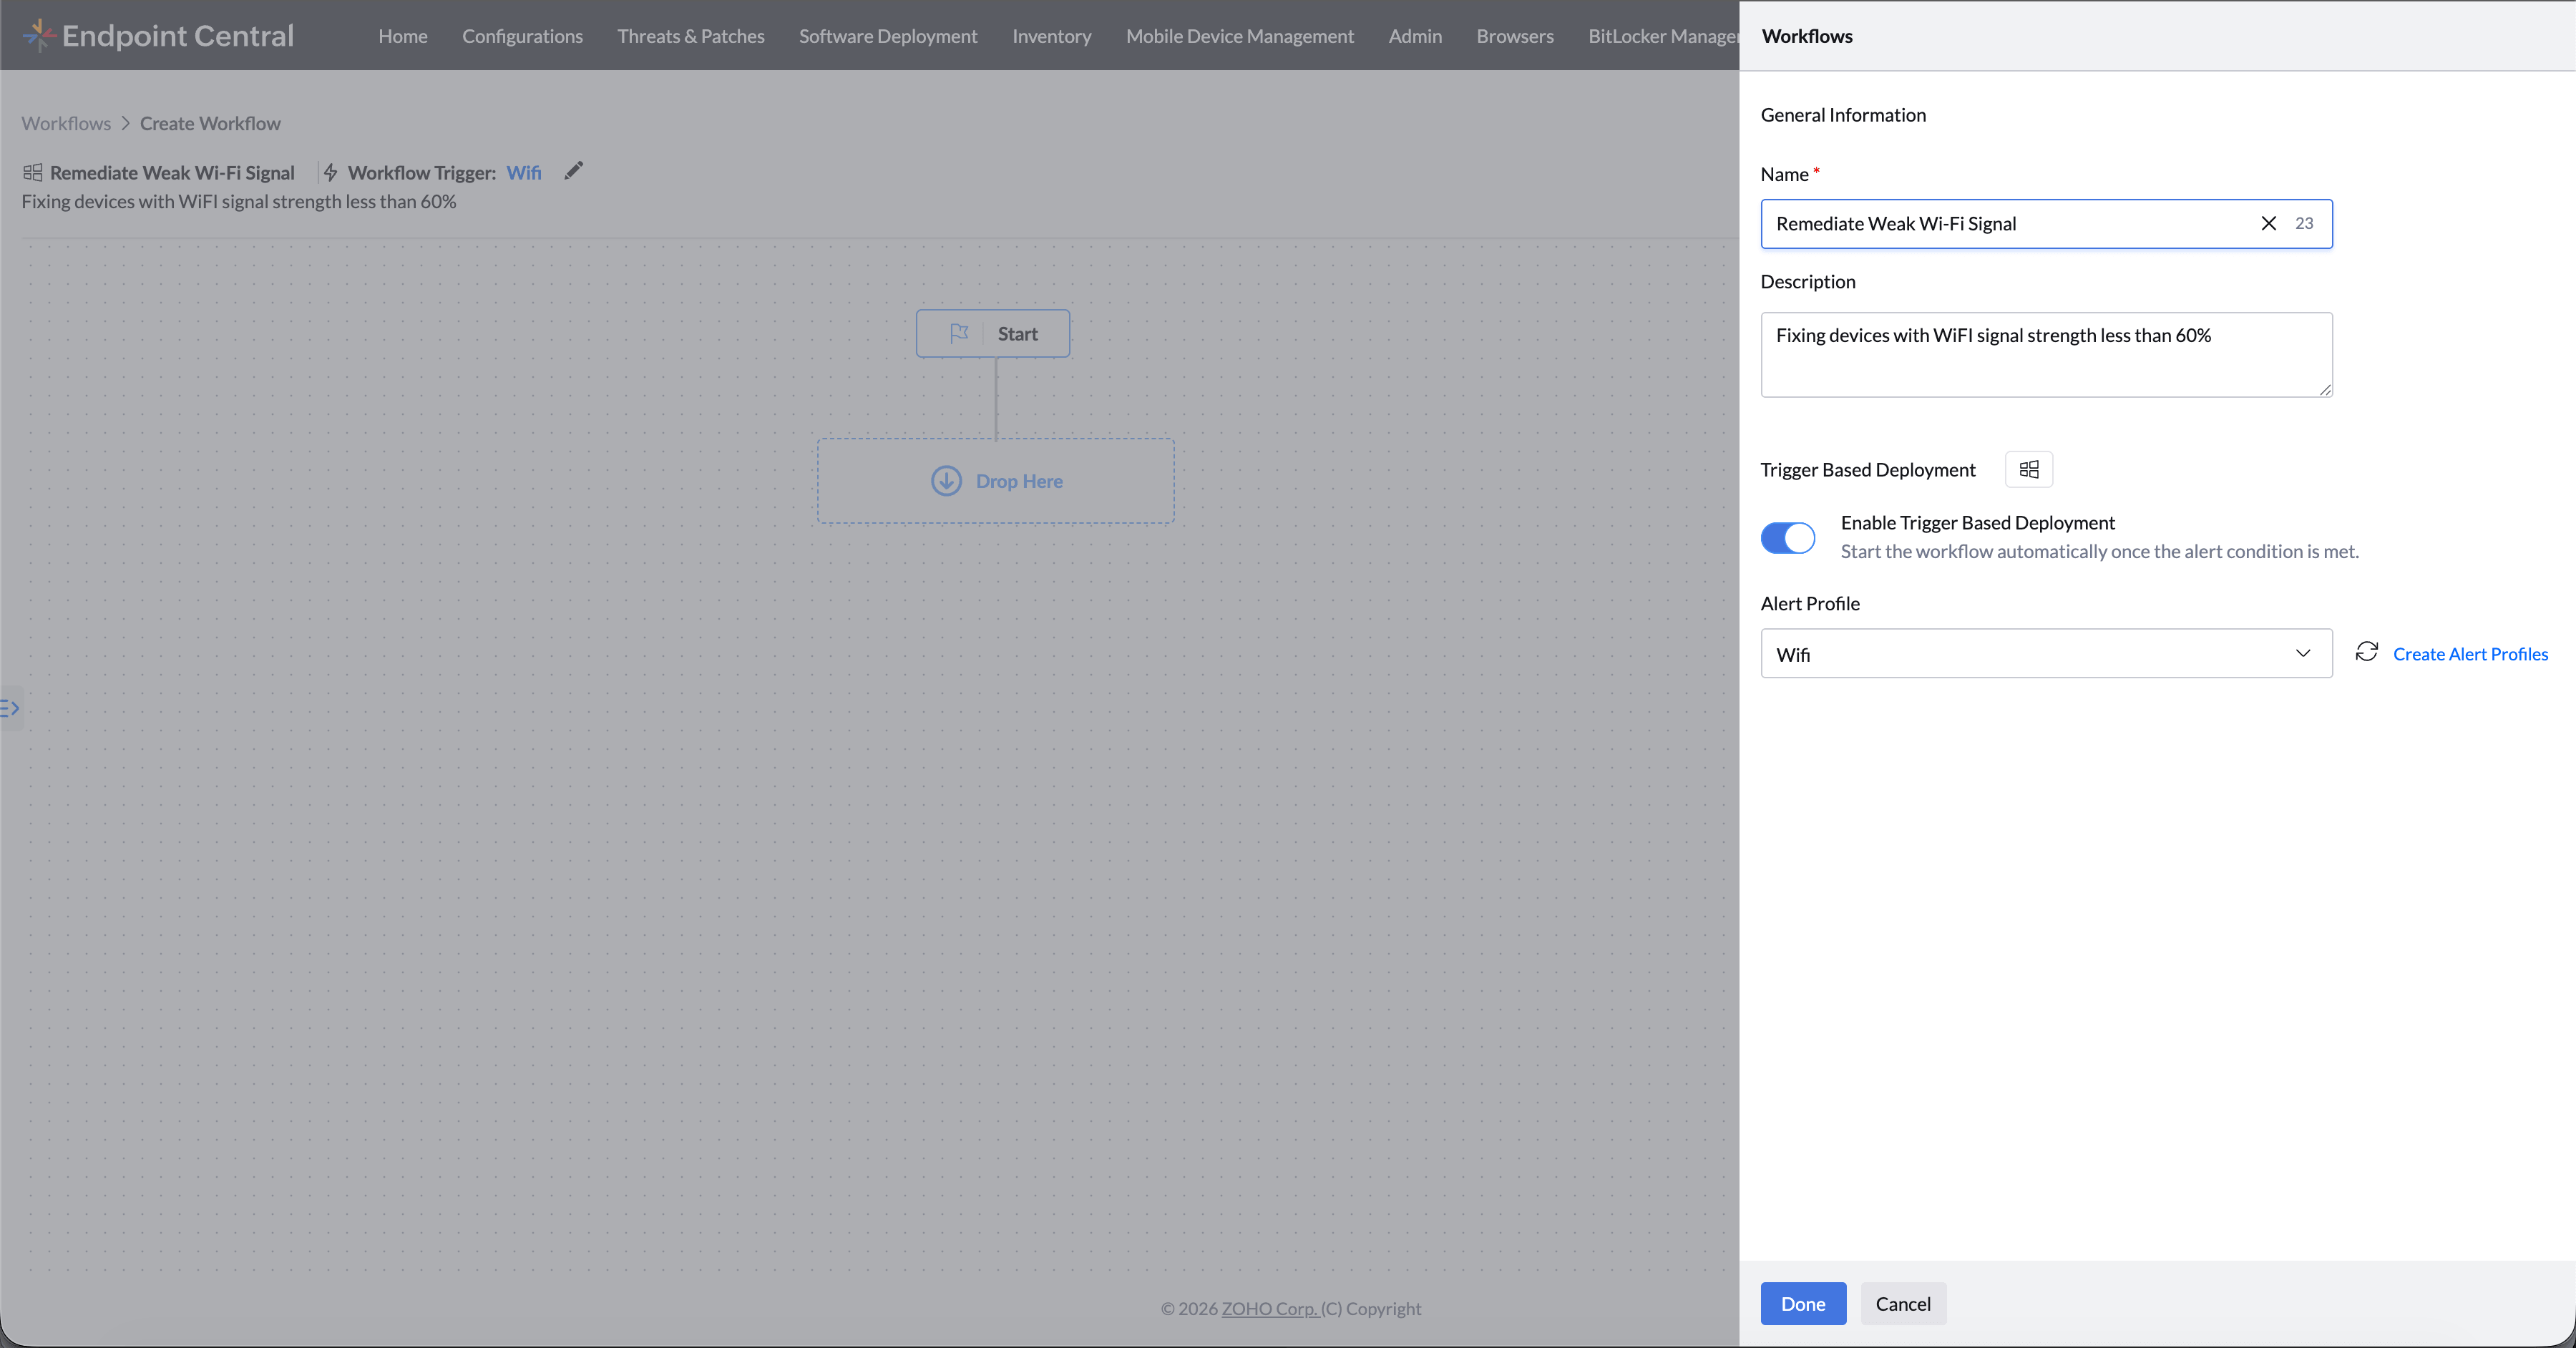
To run a workflow automatically on an alert, turn on Enable Deployment Trigger and map an Alert Profile while building the workflow. This marks the workflow as alert-aware; the workflow still runs only after you deploy it in Trigger mode from the Deployments module.
- While creating or editing the workflow, find the Event based deployment section in the workflow panel.
- Turn on Enable Deployment Trigger. This option marks the workflow as alert-aware so it can later be deployed in Trigger mode.
- Under Available Alert Profiles, select the alert profile that should start the workflow (for example, “Wi-Fi signal strength is less than 95”). If you need a new one, use Create Alert Profiles.
- Build the workflow stages on the canvas, then click Save. The workflow header shows the mapped profile as Event Trigger: [profile name].
Deploy in Trigger Mode
Enabling the trigger here does not run the workflow. To make it run, go to the Deployments module and deploy the workflow in Trigger mode. For the full procedure, see Deploying in Trigger Mode.
Only workflows with Enable Deployment Trigger turned on can be deployed in Trigger mode. If you deploy such a workflow in Immediate or Scheduled mode instead, the trigger settings are bypassed and the workflow runs without waiting for the alert condition.
Example: Auto-Remediate Low Disk Space on Alert
- Alert Profile: Free disk space drops below 20% on a managed device.
- Workflow: Engage informs the user > Remote Action performs disk clean-up > Send Mail notifies the IT team > End, with Enable Deployment Trigger turned on and the low disk space alert profile mapped.
- Deployment: The workflow is deployed in Trigger mode to the target Custom Group from the Deployments module.
- Result: Whenever any targeted device drops below the threshold, clean-up runs immediately on that device, without an administrator needing to monitor alerts manually.
Generating Workflows Using Ask Zia
DEX Manager Plus integrates Ask Zia — an AI-powered virtual assistant — directly within the Workflows module. IT professionals can generate custom workflows instantly by describing their automation requirements in natural language, eliminating the need to manually configure workflows from scratch.
Powered by OpenAI technology, Ask Zia understands your endpoint management requirements and generates ready-to-use workflows in seconds. This enables your team to automate routine administrative tasks, streamline IT operations, and improve productivity with minimal effort.
Steps to Generate a Workflow Using Ask Zia
Navigate to DEX > Workflows.
Click the Ask Zia button available next to Add Workflow or within the Add Workflow view.
A chat panel opens on the right side of the screen.
Select a suggested prompt or enter your own requirement. For example:
"Create a workflow to restart devices that have not been rebooted in the last seven days"
"Generate a workflow to clear temporary files when disk usage exceeds 90%"
Based on your requirement, Zia generates a workflow with the appropriate triggers, conditions, and actions.
Review the generated workflow, make any necessary modifications, and save it.
Ask Zia must be enabled before use. To enable Zia, navigate to Admin > Zia Configuration. For more details, refer to the Zia configuration guide.
Troubleshooting
Common Workflow Patterns
| Pattern | Description |
|---|---|
| Evaluate and act | Check a condition, then apply an action if matched (e.g., “If CPU > 80%, stop the process”). |
| Prompt the user first | Inform or prompt the end user before making changes (e.g., “Ask before clearing files”). |
| Multi-branch logic | Evaluate several conditions and respond differently per outcome (e.g., “If X, do A; if Y, do B”). |
| Notify and conclude | Send a status update to admins, then end the flow (e.g., “Send Mail > End”). |
| Alert-driven remediation | Turn on Enable Deployment Trigger and map an alert profile to the workflow, then deploy it in Trigger mode from the Deployments module so remediation starts the moment the alert condition is met (e.g., “On low disk space alert > clean up disk > notify IT”). |
Best Practices
- Use descriptive labels for each stage to keep workflows readable and easy to collaborate on.
- Always define a default case in switches to handle unexpected input.
- Use Engage stages sparingly to avoid excessive prompts to end users.
- Add a Delay only when needed, for example before a restart, after informing the user.
- Test workflows on a pilot group before deploying organization-wide. Pilot deployments are created and managed from the Deployments module.
- For time-sensitive, unpredictable issues, use Trigger mode in the Deployments module; reserve Immediate and Scheduled modes for one-time fixes and routine maintenance.
- Before going to the Deployments module to deploy in Trigger mode, confirm Enable Deployment Trigger is turned on and an alert profile is mapped for the workflow.
- Review device-level execution summaries in the Deployments module periodically. A device where the same alert is triggered repeatedly may need deeper investigation rather than repeated remediation.