Last updated: August 13, 2026
Enroll Windows devices through Self Enrollment
This page guides users through enrolling Windows devices using the self-enrollment method in ManageEngine MDM. Learn how to access the Self Enrollment URL, authenticate with Microsoft Entra ID credentials, and complete the enrollment by entering the required email address, MDM Server URL, and passcode. The page also covers two enrollment paths — direct enrollment or via Windows Settings — along with troubleshooting tips for common issues such as authentication failures and package download errors, and next steps like configuring profiles and distributing work applications.
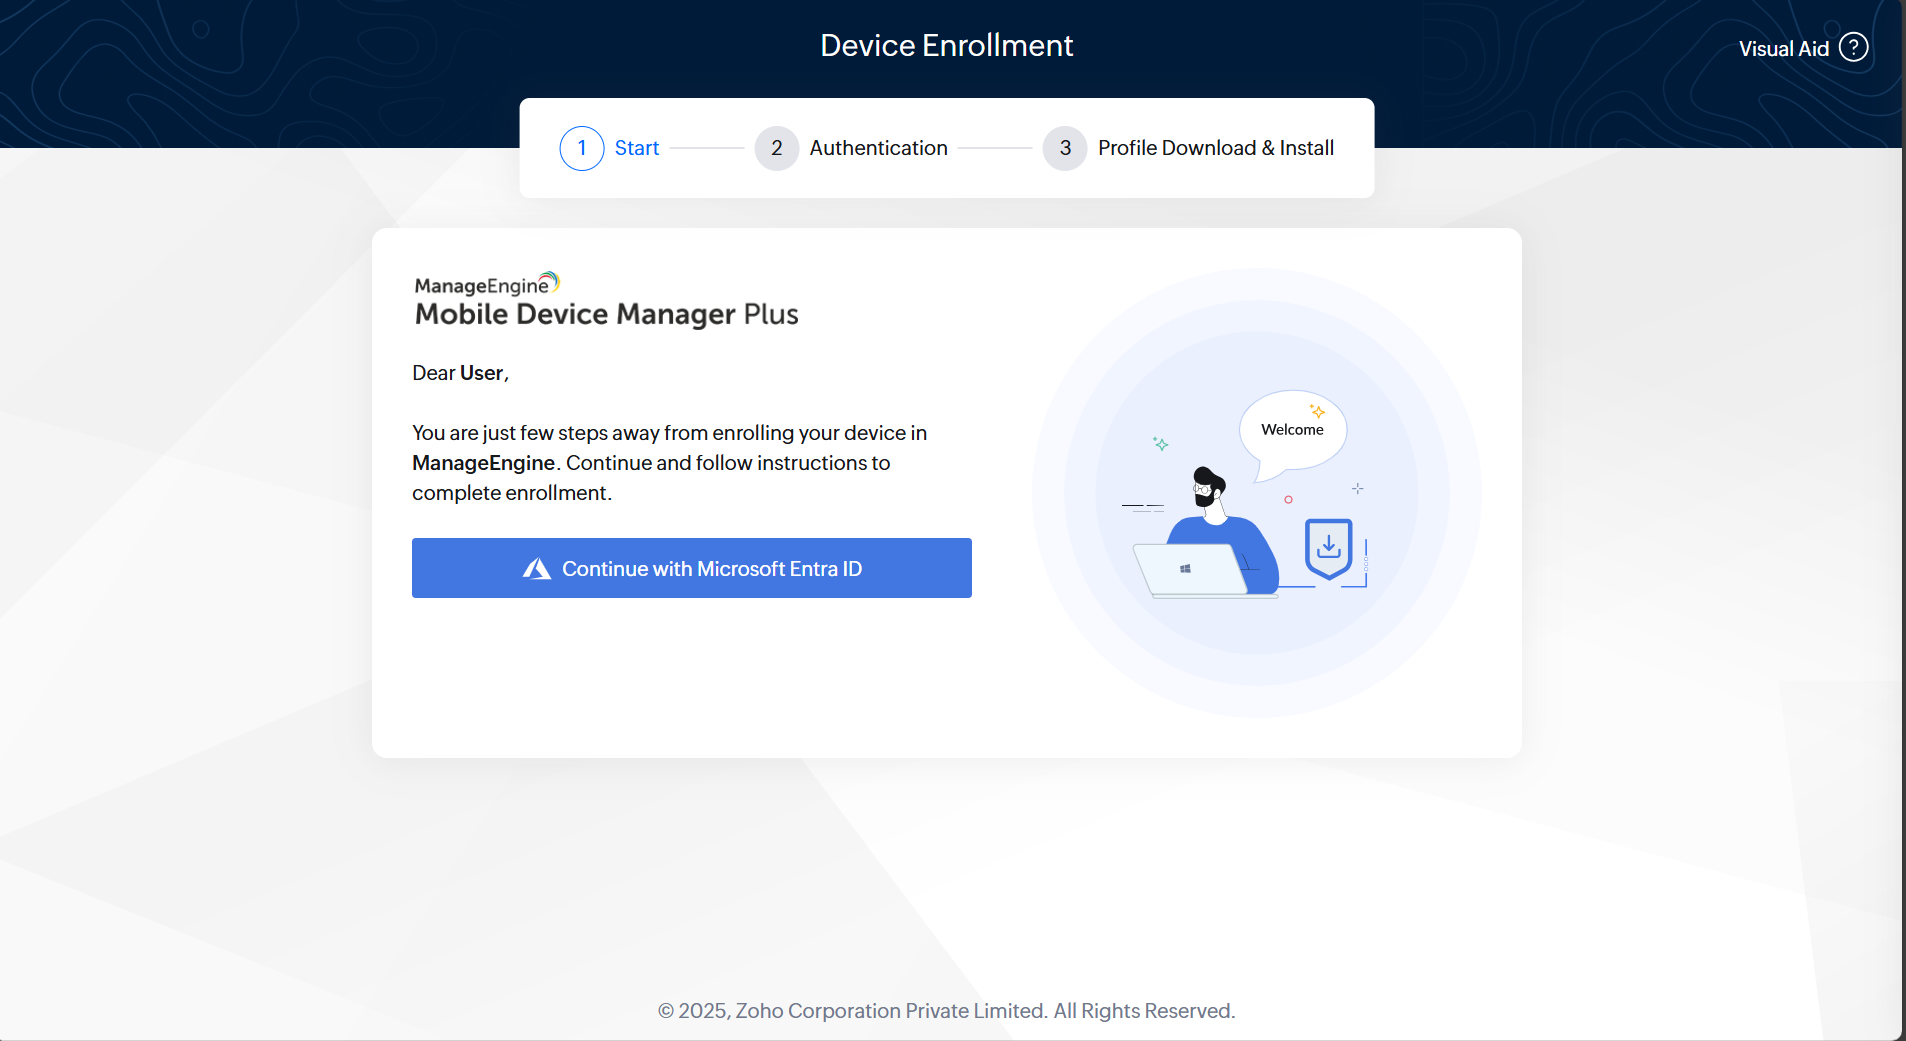
- To begin the enrollment on a Windows device, first access the Self Enrollment URL. Open a web browser and enter the provided URL given by the administrator.
Click the Continue with Microsoft EntraIDand Authenticate by providing the required credentials. This will direct you to the enrollment portal, where you can follow the subsequent instructions to complete the enrollment.
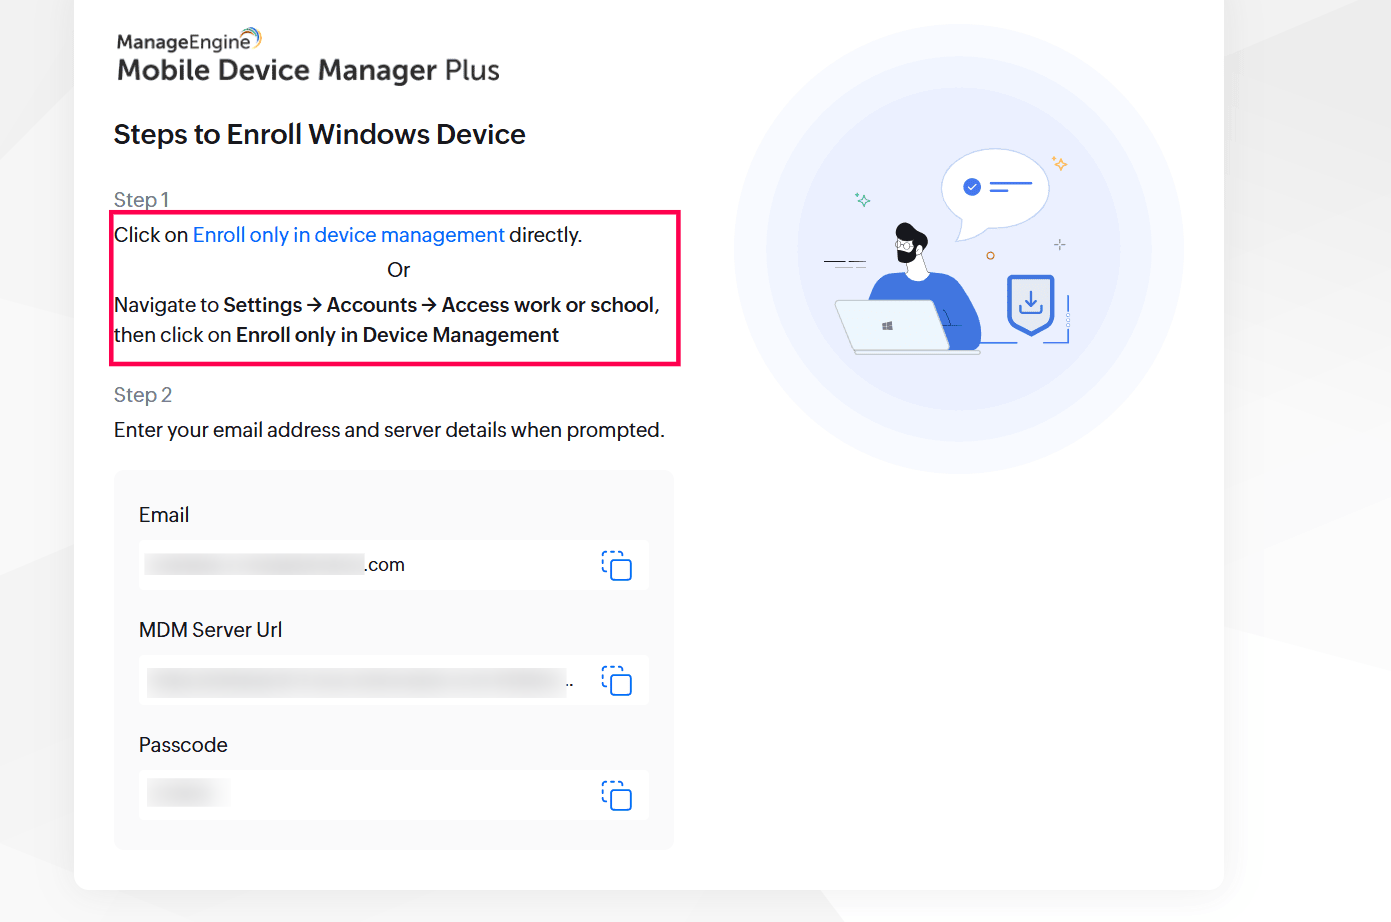
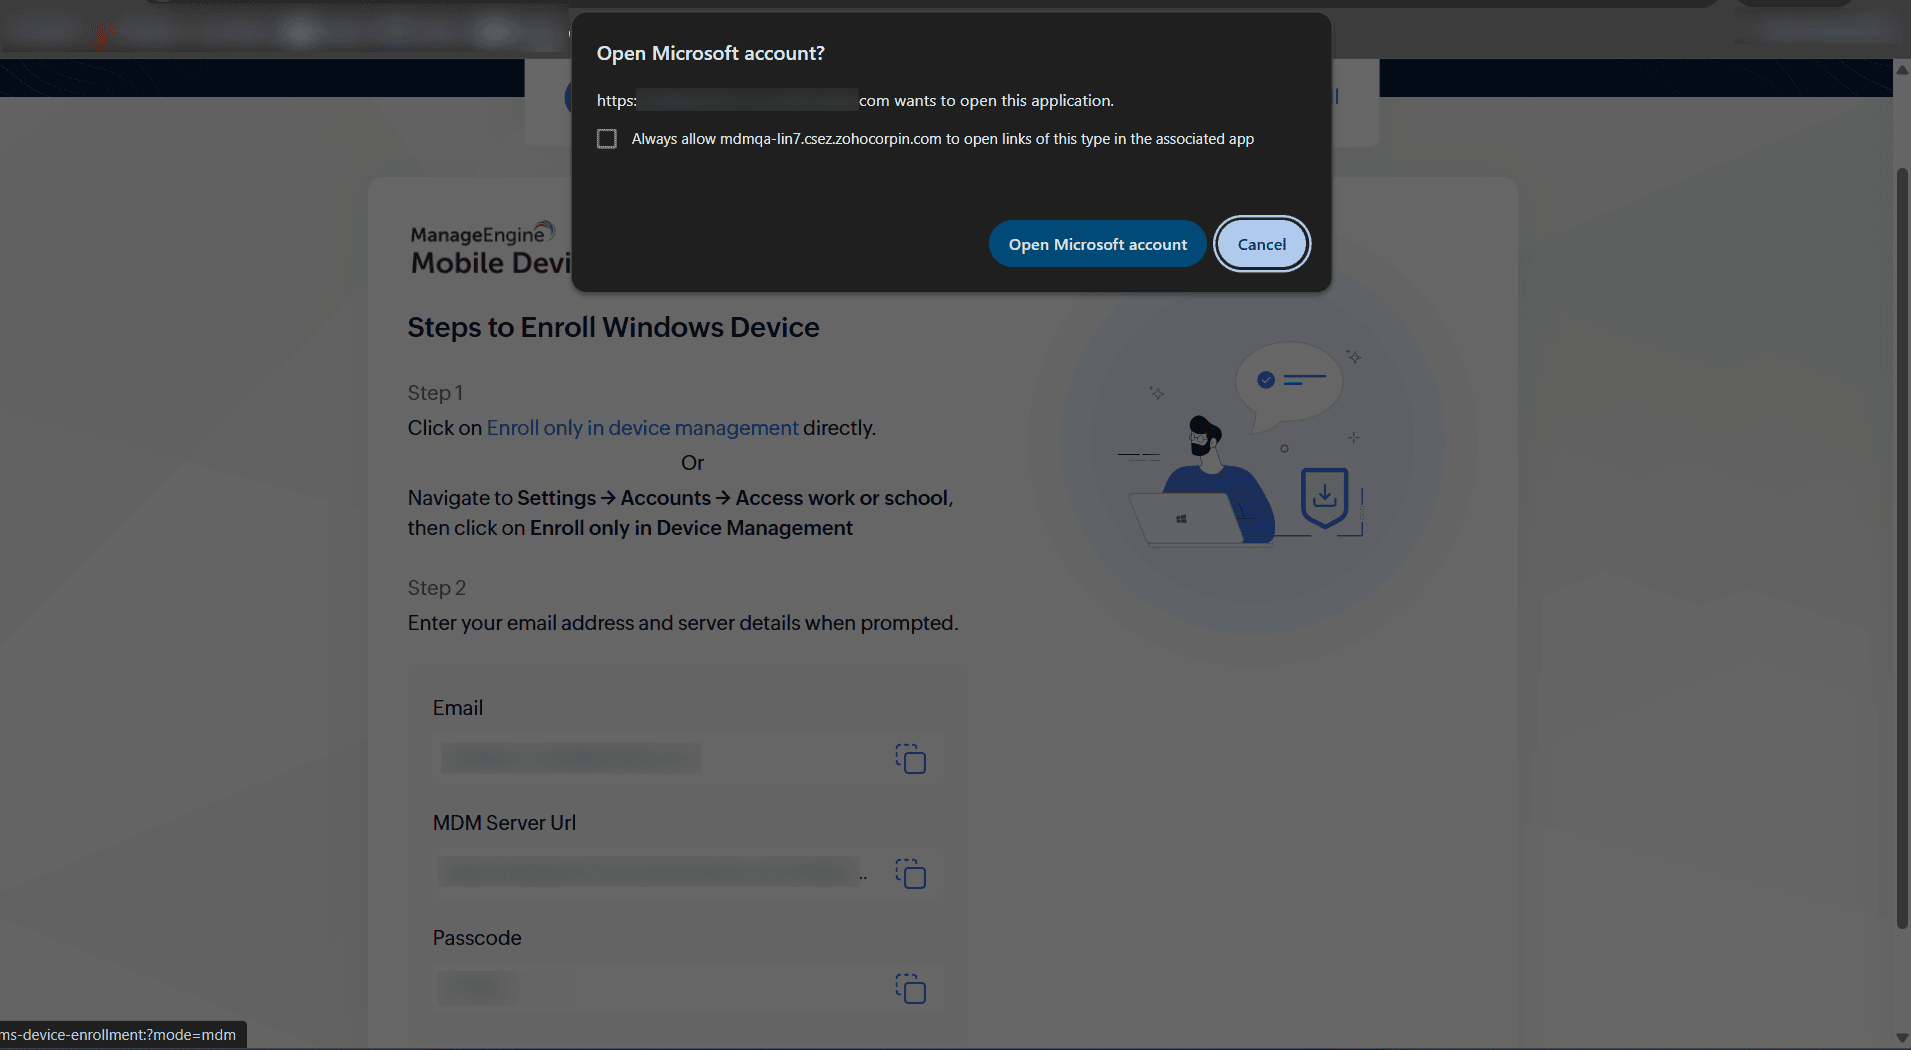
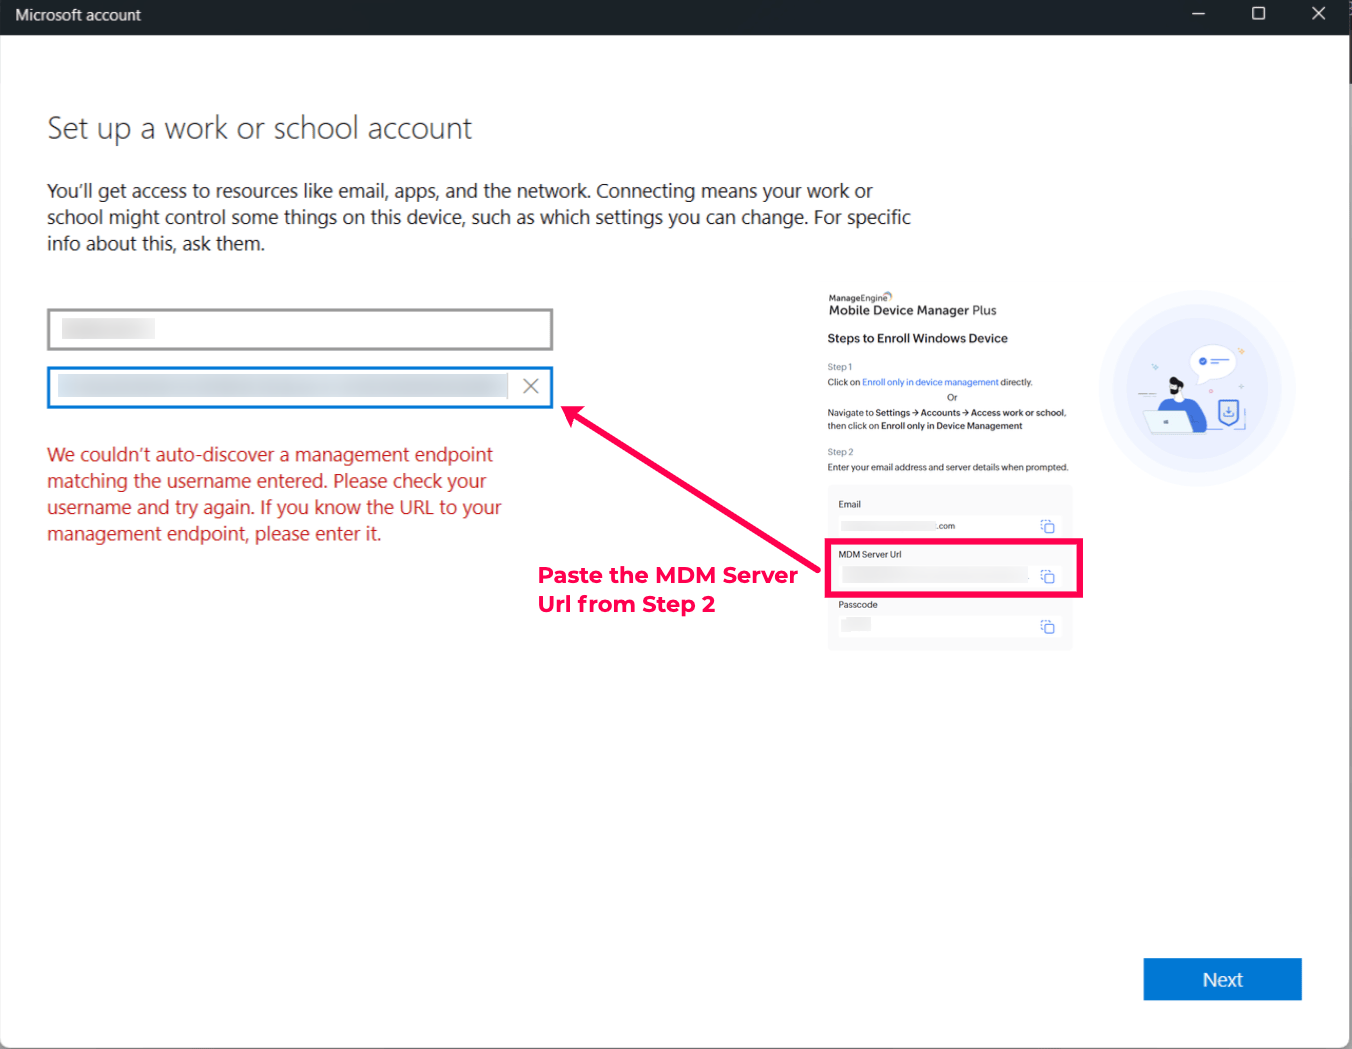
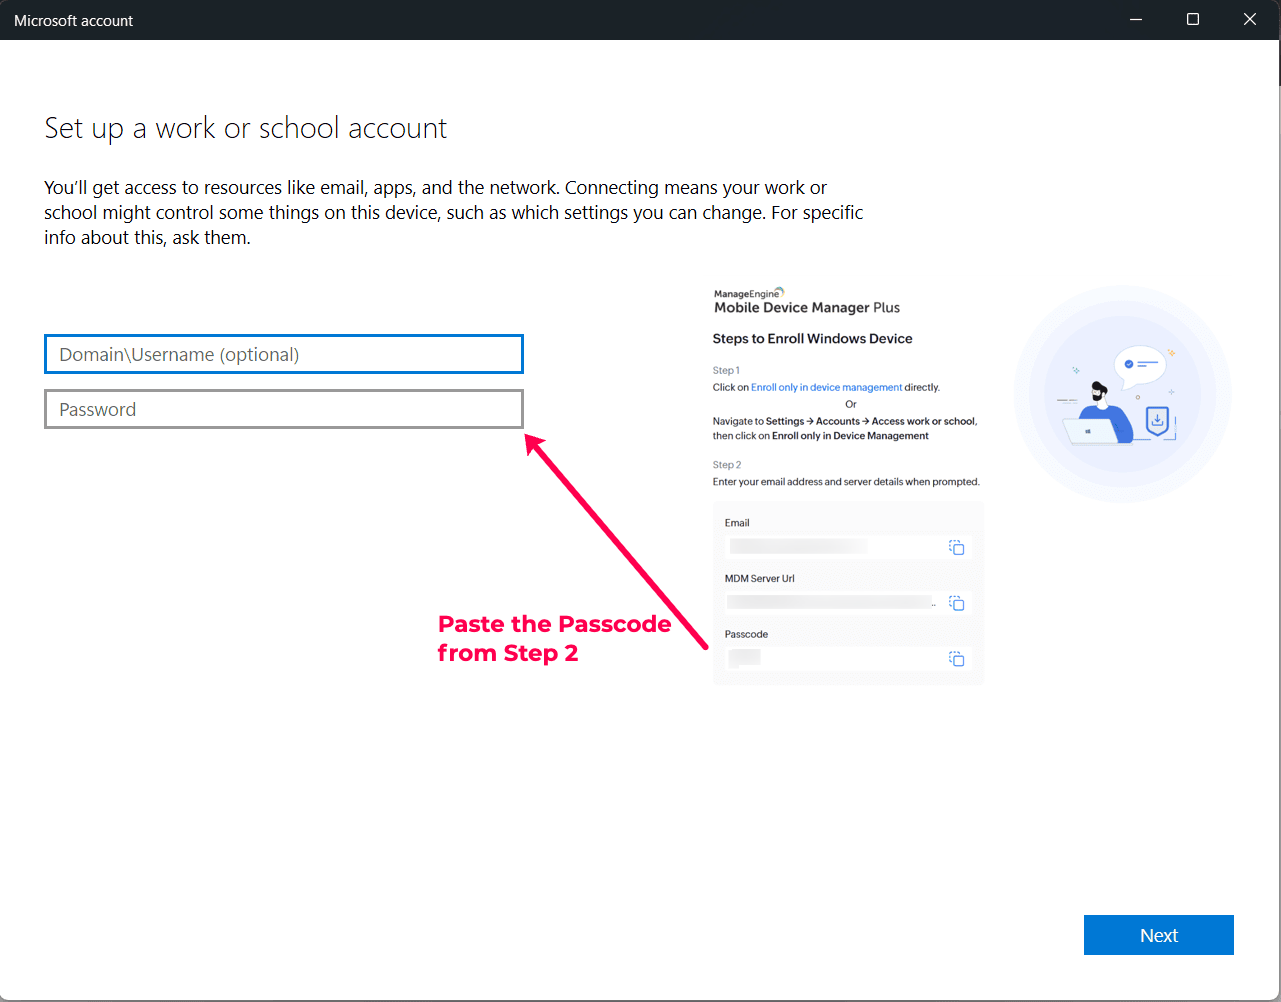
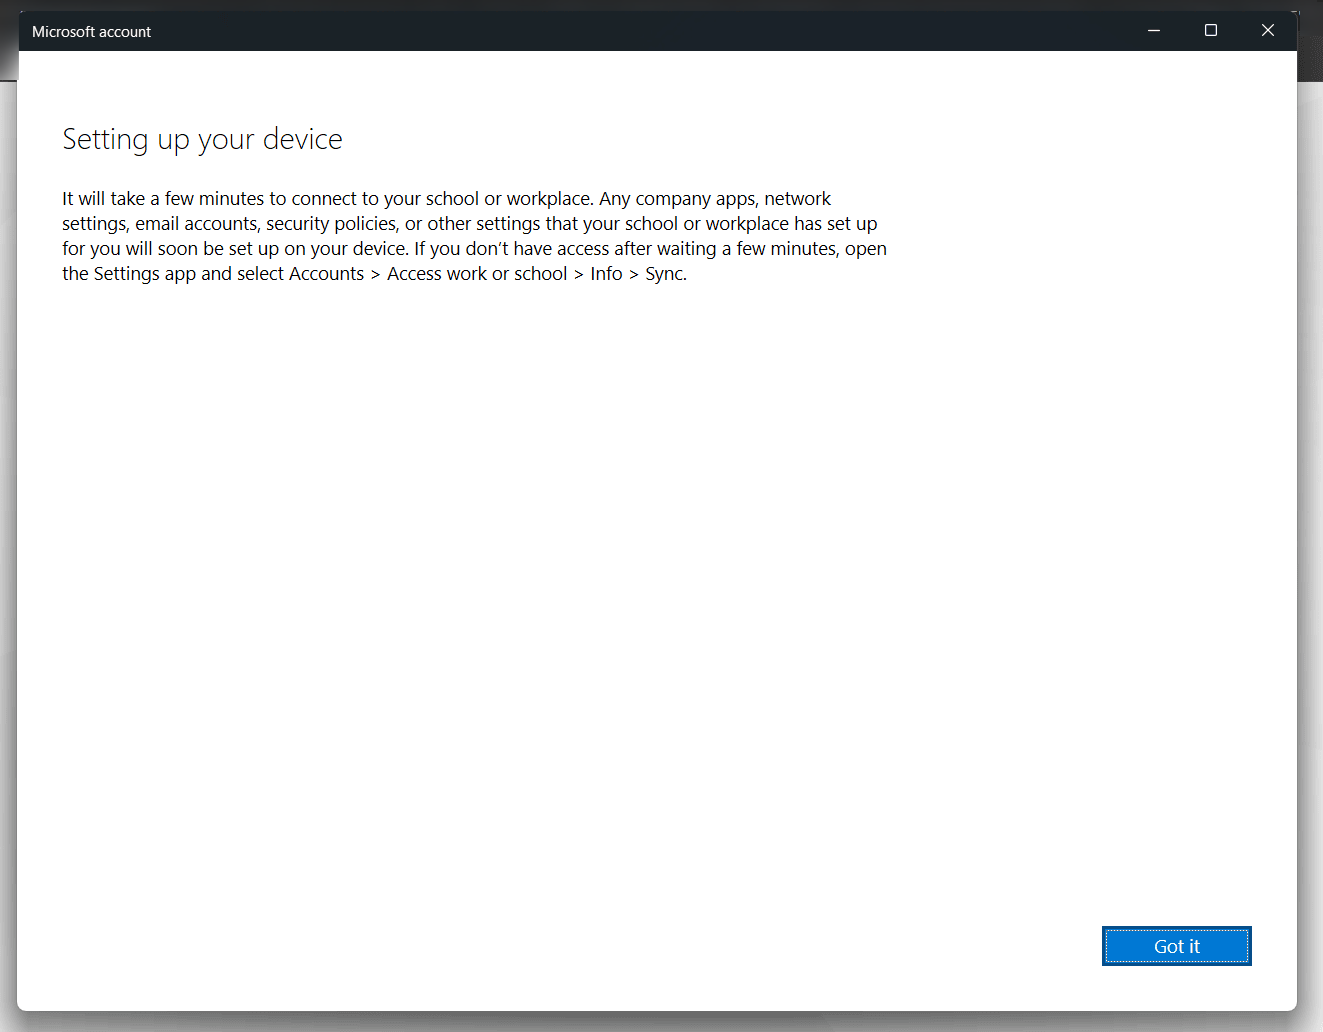
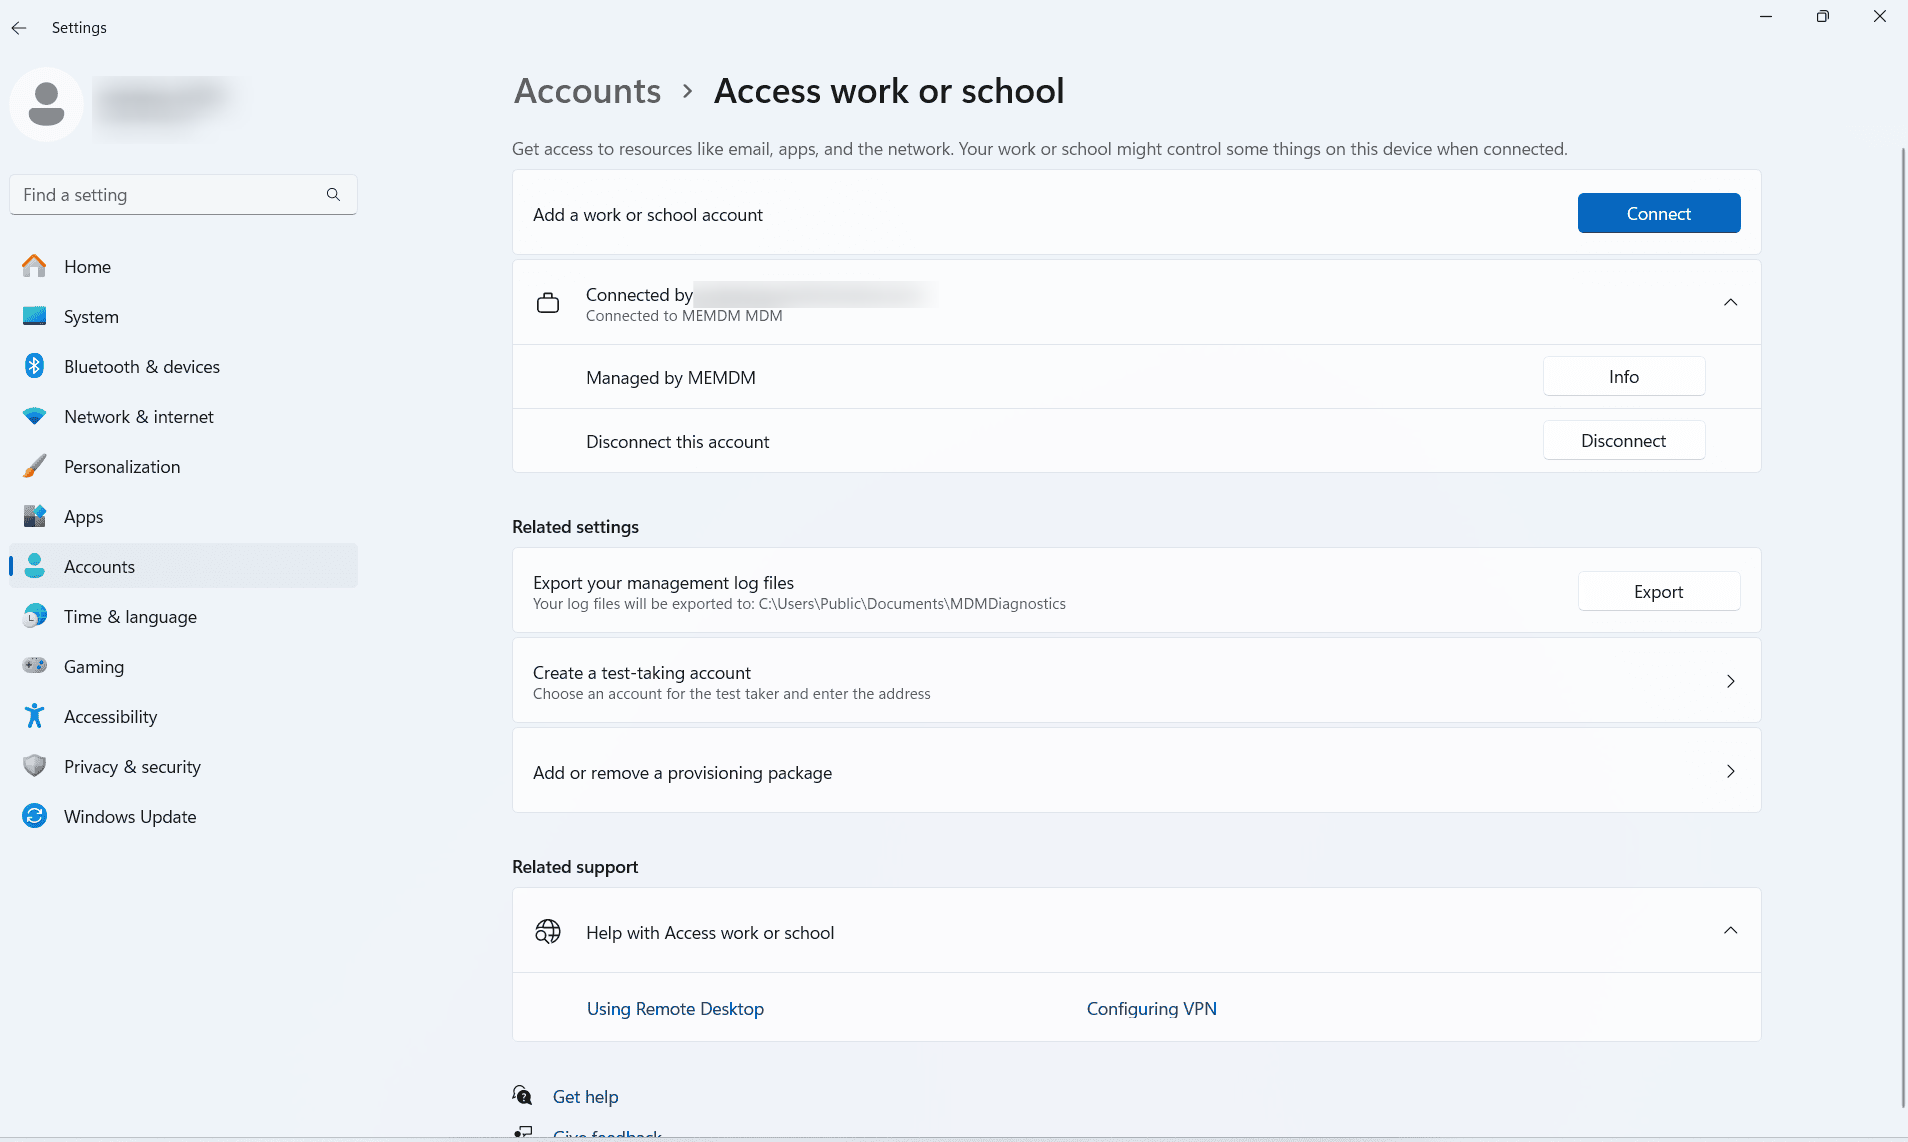
- There are two option to initiate the enrollment, ClickEnroll only in device management directly and ClickOpen Microsoft Account to Set up a Work or school account when propmted. Alternatively, Navigate to Settings->Accounts->Access work or school->Click Enroll only Device Management and proceed with the enrollment.
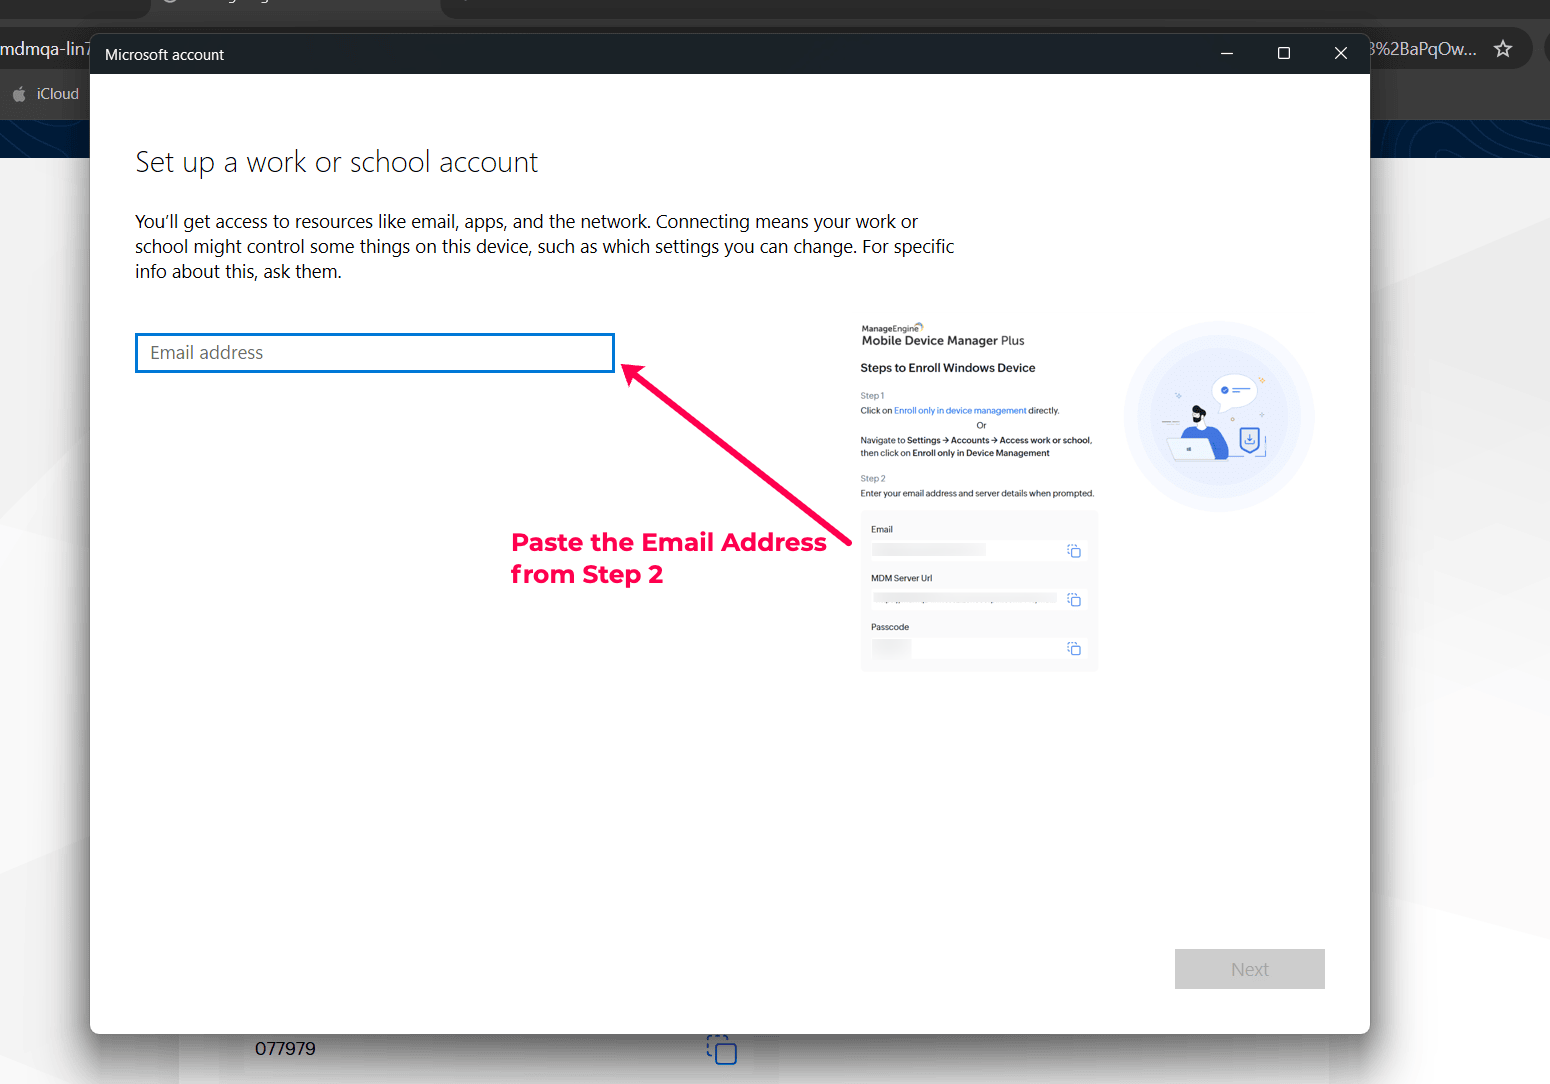
- Copy the email address from Step 2 of Steps to enroll Windows device page and Paste the email address once promted.
- Copy the MDM Server URL from step 2 of Steps to enroll Windows device page and paste as the MDM Server URL and proceed with Next.
- Domain\Username is option will appear which can be skipped as this is optional.
- Copy the Passcode from step 2 of Steps to enroll Windows device page and paste as the Password and proceed with the enrollment.
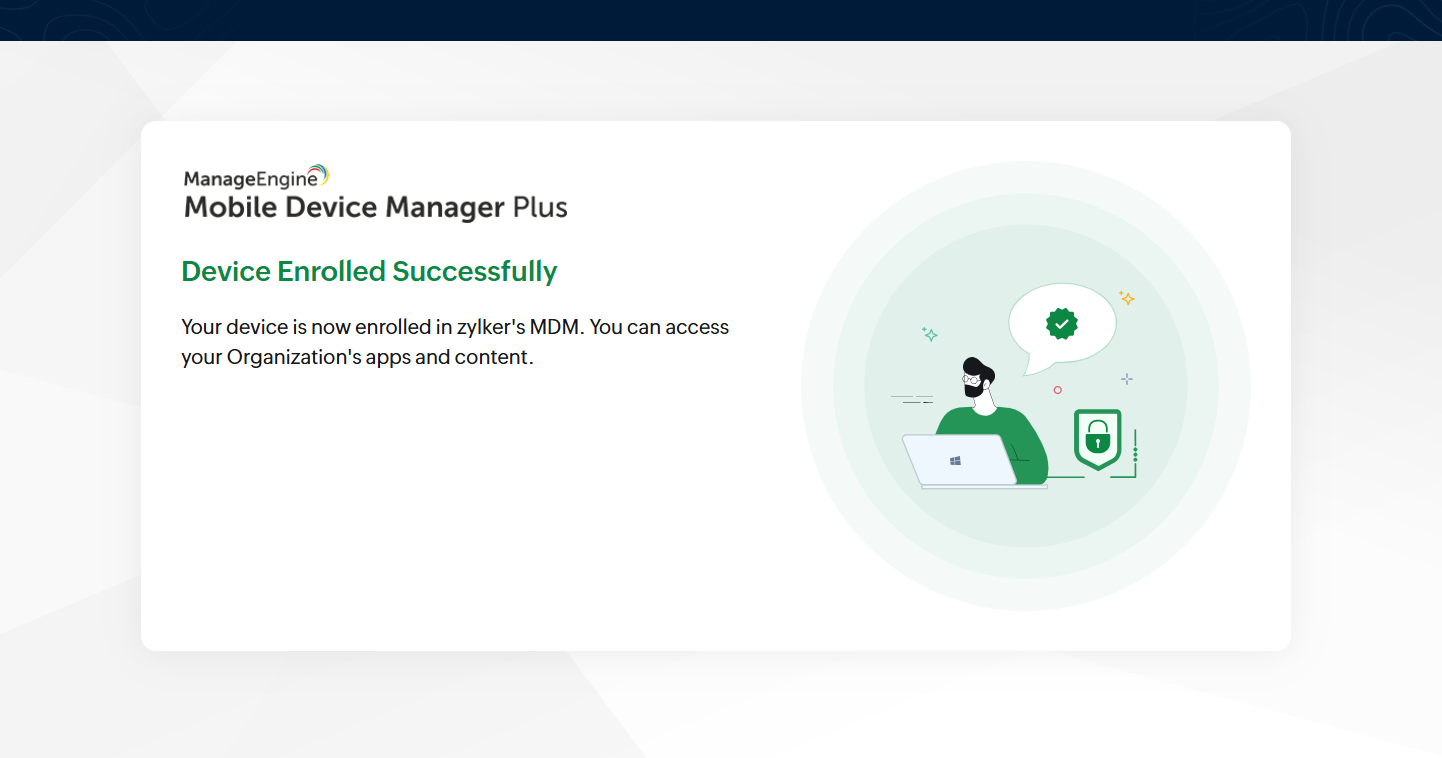
- Upon successful enrollment, a successful message will apear in the Steps to enroll Windows device page.
- Navigate to Settings->Accounts->Access work or school and can view the device is managed by MDM.
Troubleshooting Tips
If users experience issues during the Self Enrollment process, here are some troubleshooting steps:
Windows Device Self Enrollment
- Authentication Issues: Verify the username and password are correct, or confirm with the administrator that the device is eligible for self-enrollment.
- MDM Enrollment Package Download Failure: Ensure the device has a stable internet connection and sufficient storage space to download and install the package.
- Profile/Policy Installation Problems:Check that the Windows device meets the organization's security policies (e.g., encryption, firewall settings).
What's Next?
Configure Profiles and Policies
Once the MDM profile is installed, Admin can configure a variety of profiles and policies to enhance device security and functionality. For detailed instructions on these configurations, visit the Device Restrictions and Configurations section.
Distribute Work Applications
After enrollment, administrators can distribute work applications silently via the app repository. For more details, refer to our App Management section.
Frequently Asked Questions
Do I need admin assistance to self-enroll a Windows device?
No. Self Enrollment lets you enroll your Windows device by accessing the Self Enrollment URL and authenticating with your Microsoft Entra ID credentials, without any admin intervention.
Where do I get the email address, MDM Server URL, and passcode needed during enrollment?
These details are shown on the Steps to enroll Windows device page during enrollment and simply need to be copied and pasted at the corresponding prompts.
What should I check if authentication fails during self-enrollment?
Verify that the username and password are correct, and confirm with your administrator that the device is eligible for self-enrollment.
What if the MDM enrollment package fails to download?
Ensure the device has a stable internet connection and sufficient storage space to download and install the enrollment package.