Integrating Check Point Harmony Mobile Threat Defense (MTD) with MDM
MDM provides a unified console to oversee both device management and mobile threat defense across your mobile device fleet. Administrators can efficiently monitor the device security, view threat alerts, and generate comprehensive reports on security incidents. MDM can be easily integrated with Check Point Harmony Mobile and can be deployed to a huge device inventory. MDM and Check Point MTD work together to protect devices, detect threats, and enforce security policies, allowing users to seamlessly carry out their tasks without any interruption. This document describes how to integrate Check Point Harmony Mobile Threat Defense with MDM.
Pre-requisites
Ensure that you meet the following pre-requisites before integrating Check Point Harmony Mobile with MDM:
- Create an account with Check Point Infinity portal, if you don't have one for your organization.
- Create a separate group
in MDM for the devices that need to be synced and monitored using Check Point Harmony MTD. - If you wish to monitor threats in personal devices (BYOD), then you can create a separate group for Android Work Profile devices using which Check Point can identify the personal devices.
- Managed Google Play and Apple Business Manager should be configured to silently distribute Harmony Protect app to the devices.
Integrating Check Point Harmony Mobile with MDM
- On the MDM Console, navigate to Admin > Integrations > Mobile Threat Defense.
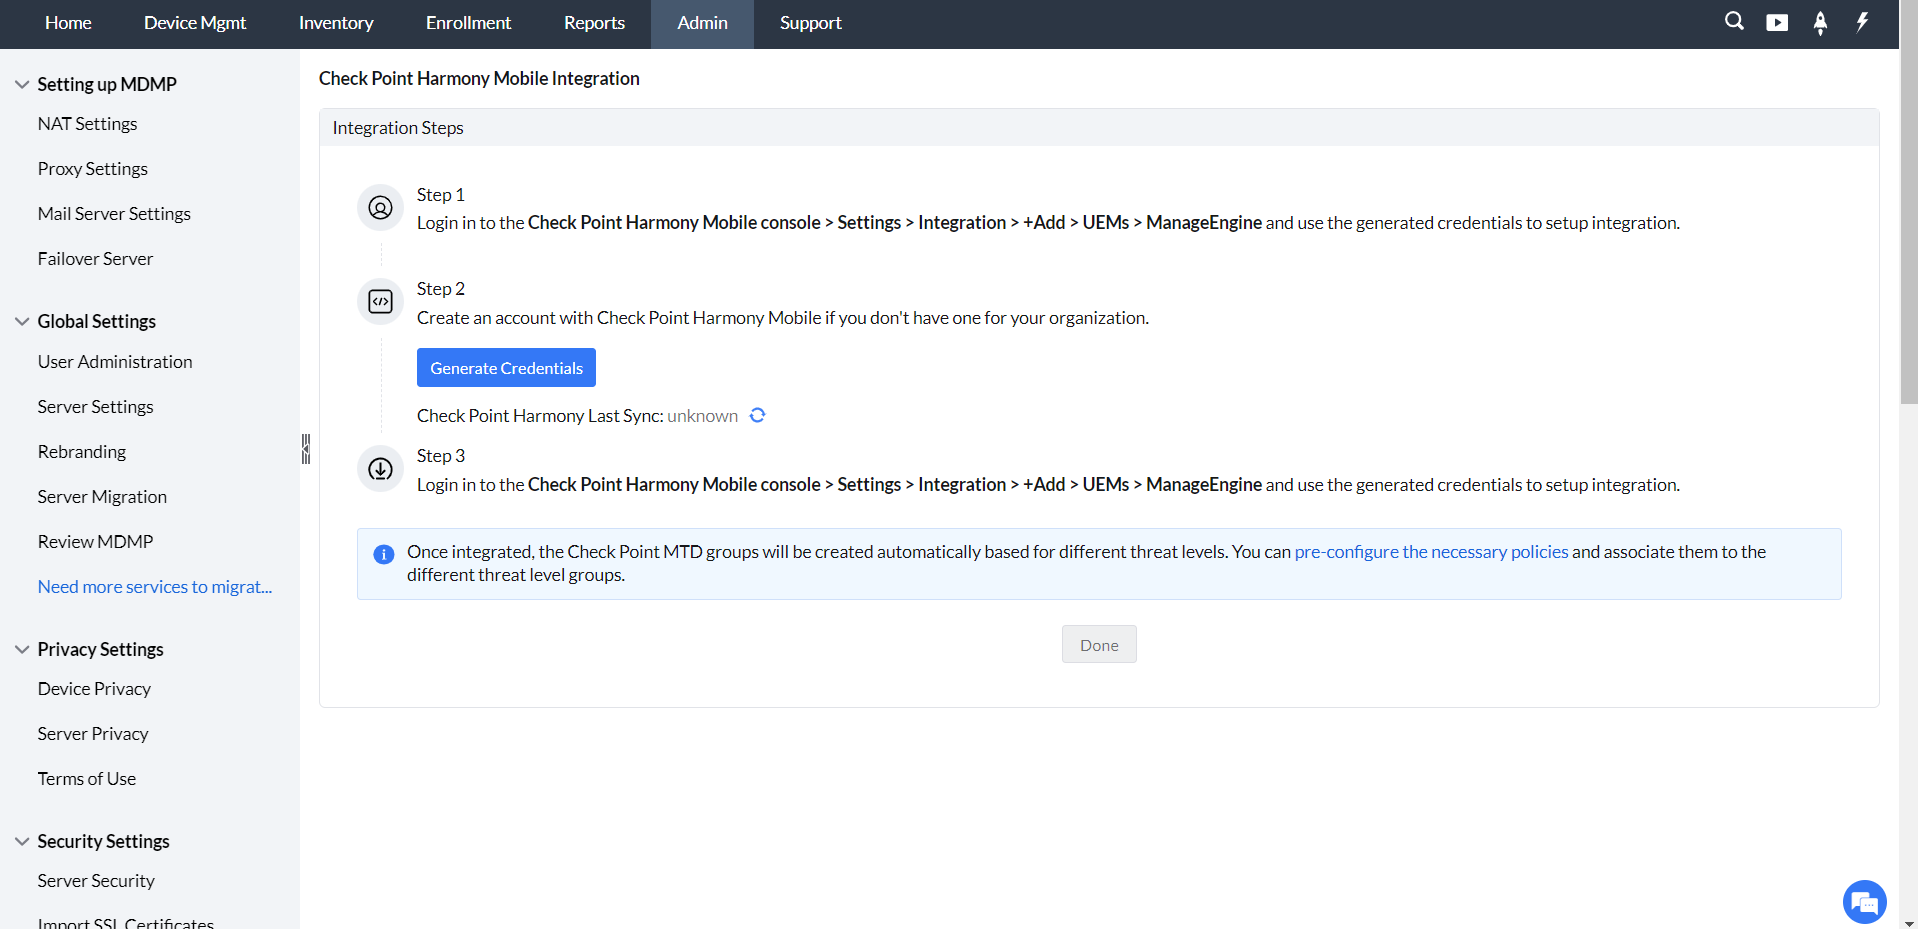
- Click on Start. Now click on Generate Credentials to generate a set of credentials which has to be used on the Check Point Harmony Mobile console.
Note: For security reasons, these credentials cannot be viewed again if you have closed the popup once. - Login to your Check Point Harmony Mobile console, navigate to Settings > Integrations > Add > UEMs.
- Select ManageEngine as the UEM provider and click on Next.
- Server details:
a. Provide the Server address, Username and Password which you have generated previously using MDM.
 b. Click Verify and then Next.
 - Synchronization:
a. From the Groups dropdown select the Group(s) that you want to be synced from MDM.
b. Under Android Enterprise Groups, select the group which has Android Work Profile (BYOD) devices. This field is optional.
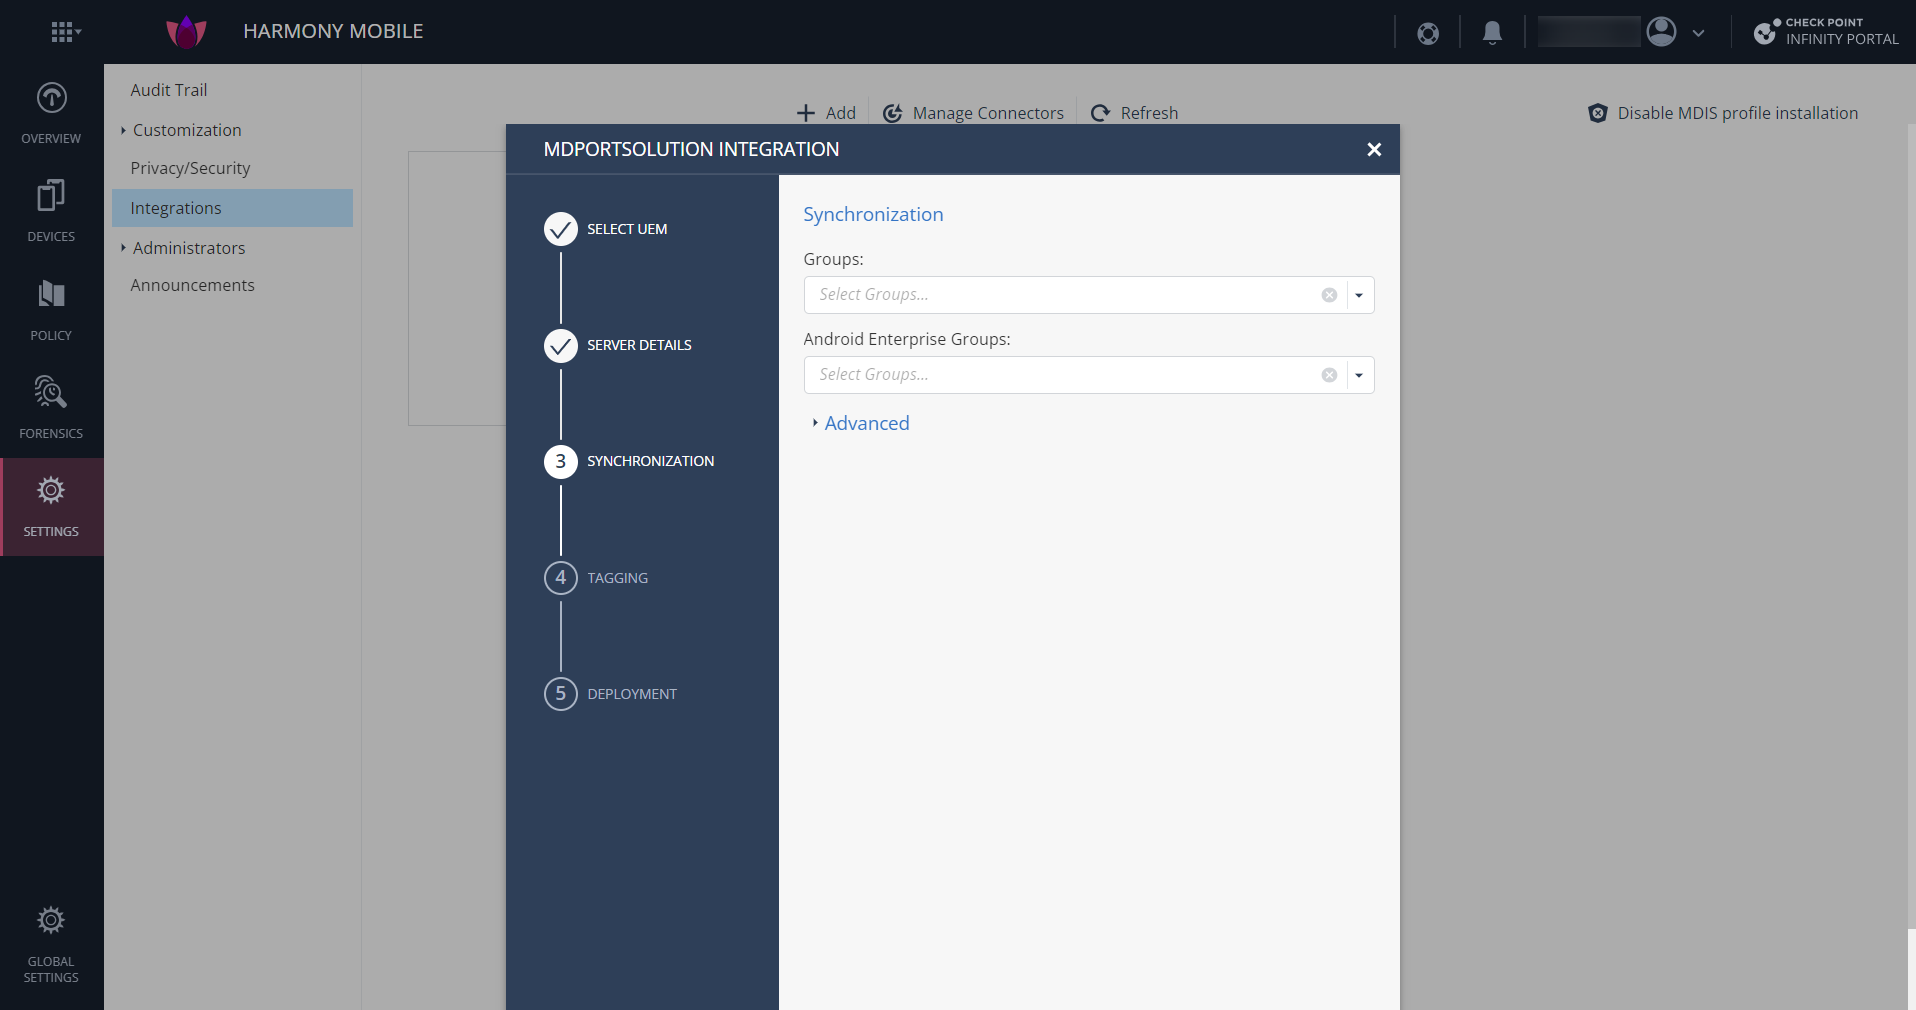 c. Click Verify and Next.
 - Tagging:
a. Tag device status and Tag device risk should be enabled for the MDM to communicate the deployment status of Harmony Mobile Protect app and the risk level of the device.
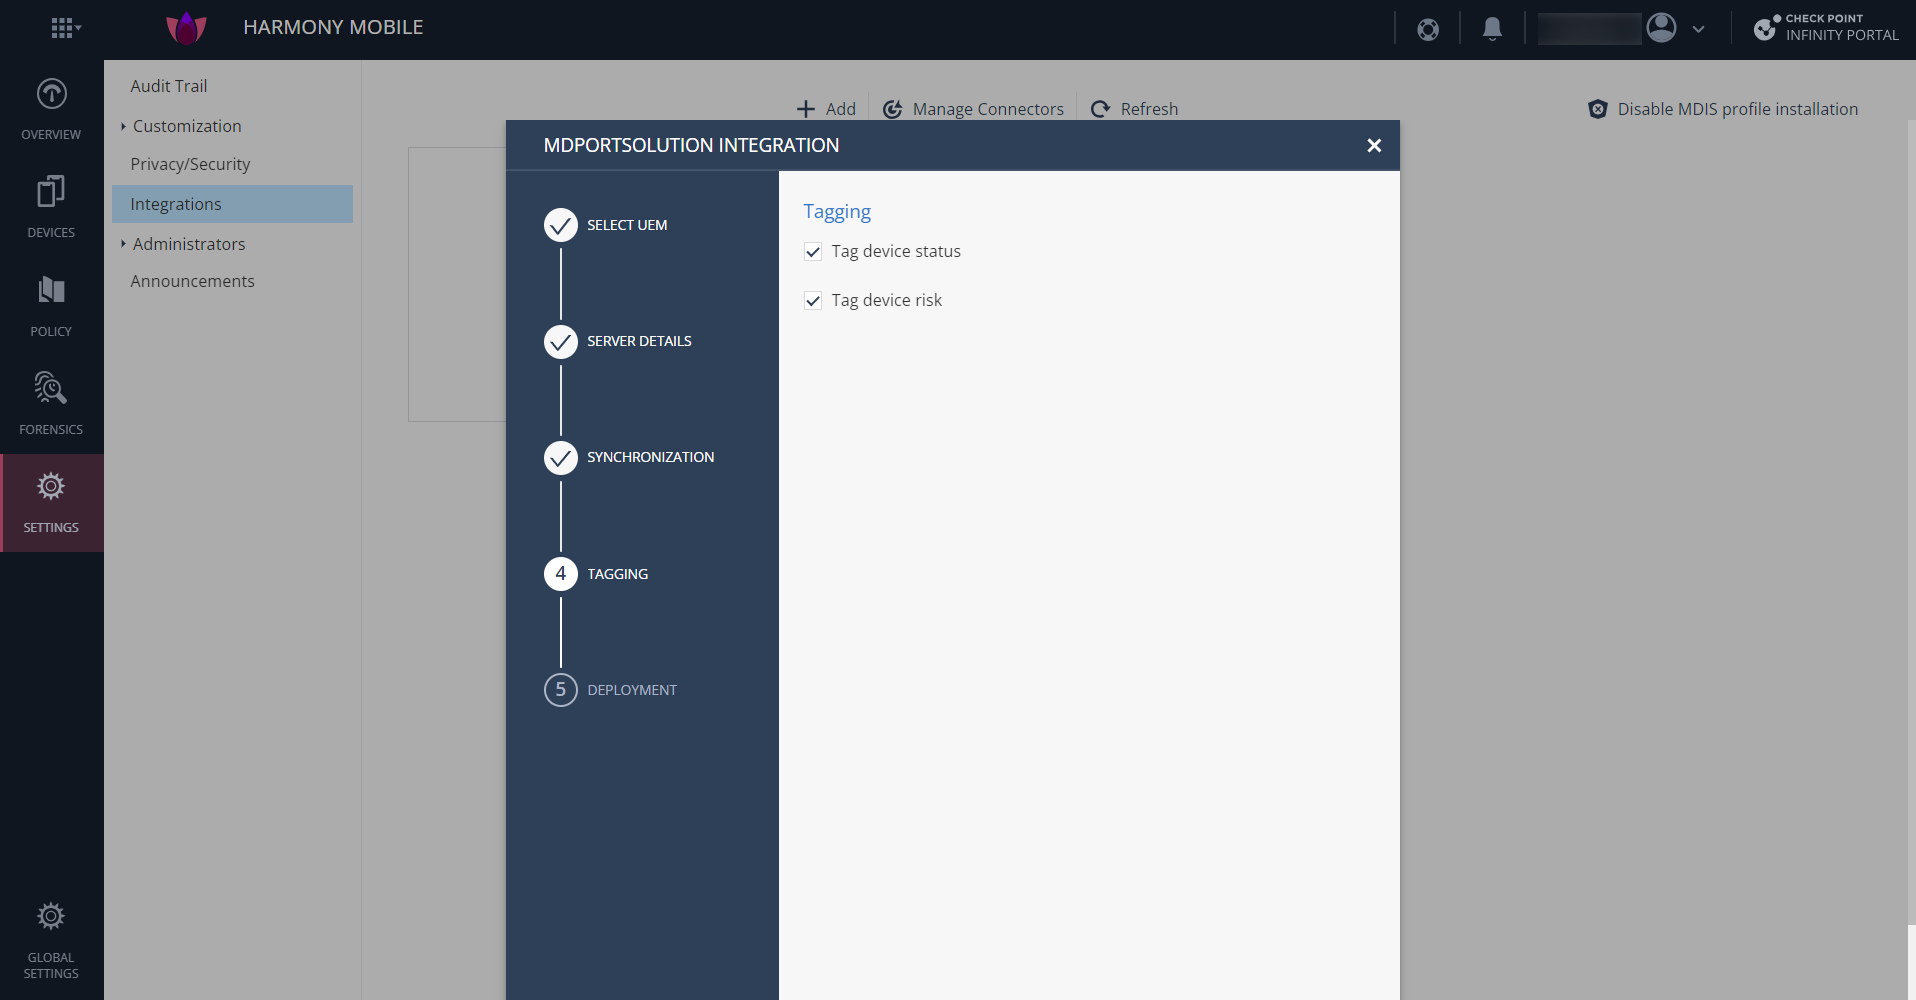 b. Click Verify and Next.
 - Deployment:
a. Check the "Allow auto device addition prior to device sync" option. If this option is not checked, the devices cannot synced to the Harmony Mobile dashboard.
b. A unique token will be generated which has to be used in the MDM app configuration to tell the device which dashboard it needs to register.
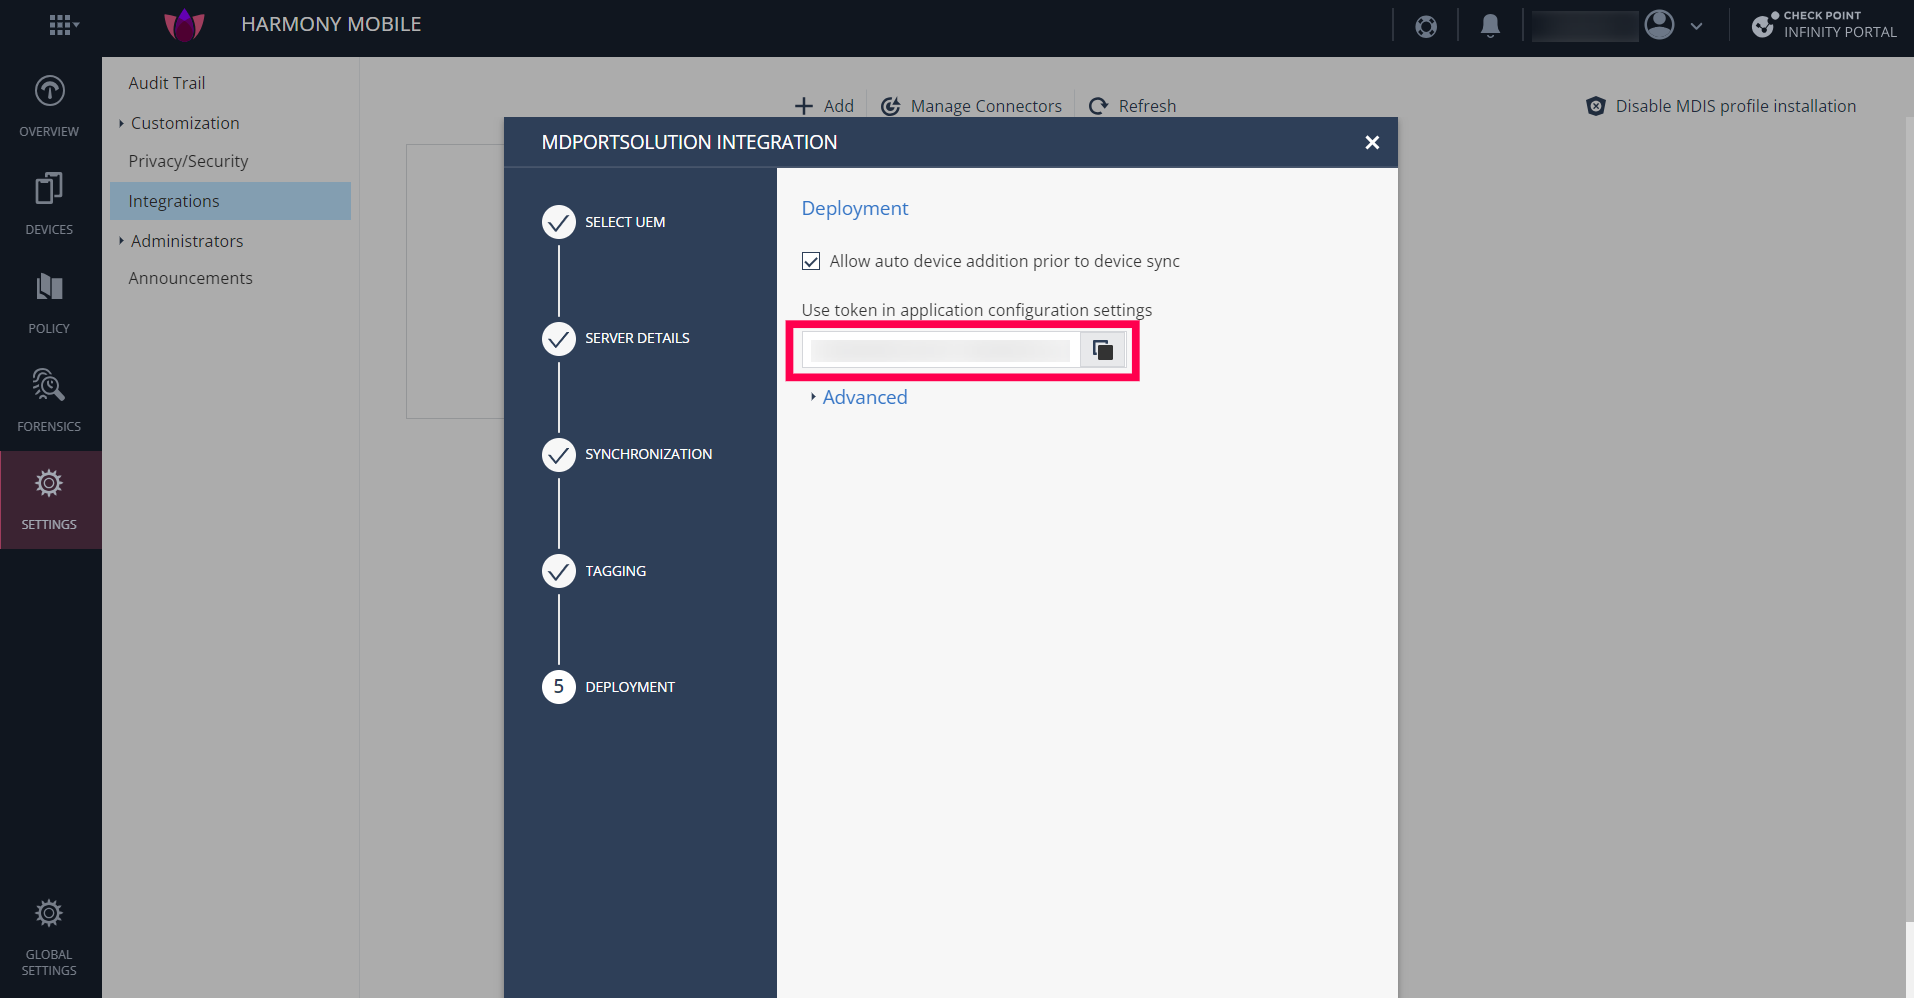 c. Click on Finish.

Now navigate back to the MDM Console and click on Sync.
Check Point Harmony MTD will be successfully integrated with MDM.
MTD Groups
After integration, Check Point MTD analyzes the threats and categorizes the devices into different groups. These groups are automatically created by MDM. You can check this by navigating to the MDM Console > Device Mgmt > Groups & Devices > Groups. The following are the groups created by Check Point Harmony Mobile:
- CHKP_Status_Provisioned: Devices that are provisioned and synced with the Harmony Mobile dashboard. Harmony Mobile Protect app has to be deployed to this group.
- CHKP_Status_Active: The devices with the Harmony Mobile Protect app installed and registered with Harmony Mobile dashboard will be moved to this group.
- CHKP_Status_Inactive: If the device hasn't communicated with the Harmony Mobile dashboard, the it will be moved to this group.
- CHKP_Risk_High: The devices with high risk level will be moved to this group.
- CHKP_Risk_Medium: The devices with medium risk level will be moved to this group.
- CHKP_Risk_Low: The devices with low risk level will be moved to this group.
- CHKP_Risk_None: The devices with no risks will be moved to this group.
Deploying Harmony Mobile Protect app
After integrating Check Point with MDM, you need to deploy the Harmony Mobile Protect app to the devices to monitor the threats using Check Point MTD.
1. Lacoon server address:
US - gw.locsec.net
Ireland (EU Region) - eu-gw.locsec.net
Australia (Asia Region) - au-gw.locsec.net
Canada - ca-gw.locsec.net
UK - uk-gw.locsec.net
India - in-gw.locsec.net
2. Token - Can be obtained from Check Point Portal -> Settings -> Integrations -> Edit -> Deployment.
3. Infinity Portal Account ID: Can be obtained from Check Point Portal -> Global Settings -> Account Settings -> Account ID.
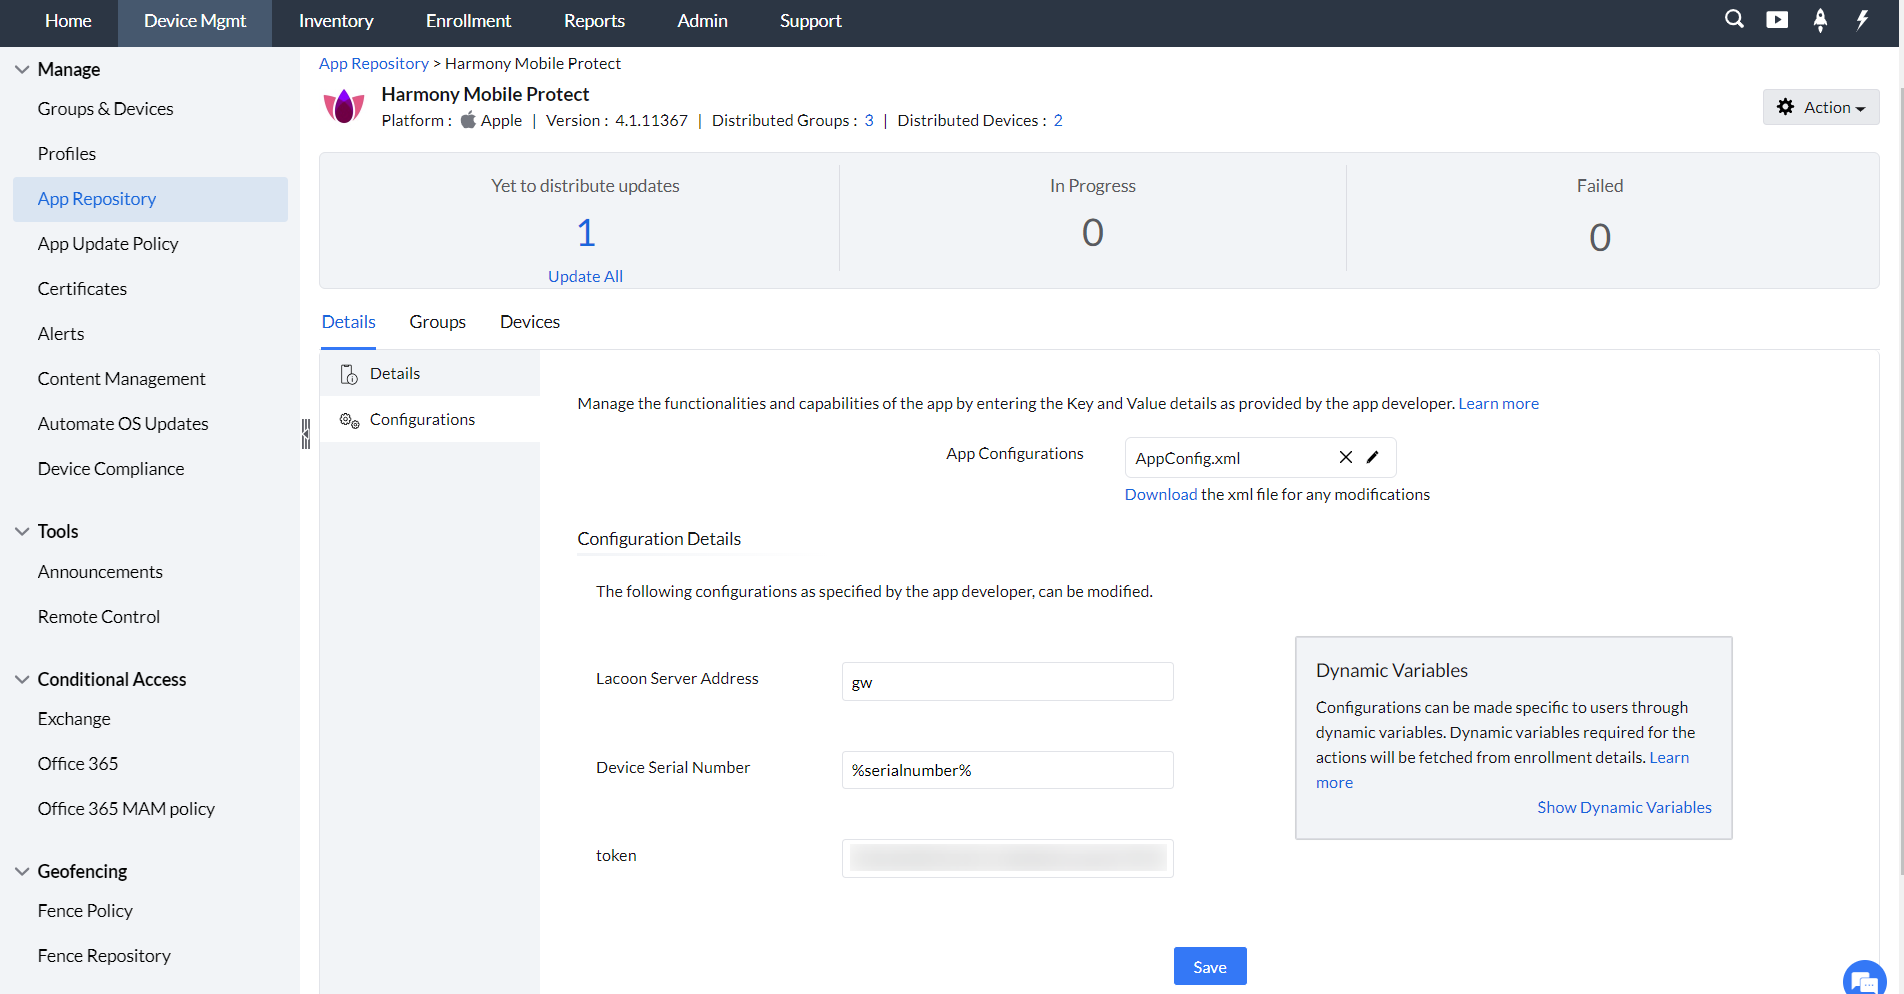
For iOS devices:
- Add Harmony Mobile Protect app to the App Repository.
- Go to the App Configurations and use the below given details to configure XML file and upload it.
<?xml version="1.0" encoding="UTF-8"?>
     <!DOCTYPE plist PUBLIC "-//Apple//DTD PLIST 1.0//EN" "http://www.apple.com/DTDs/PropertyList-1.0.dtd">
     <plist version="1.0">
     <dict>
     <key>Lacoon Server Address</key>
     <string>gw(enter lacoon server address)</string>
     <key>Device Serial Number</key>
     <string>%serialnumber%</string>
     <key>token</key>
     <string>(enter token)</string>
     </dict>
</plist> - Click on Save and the click Distribute.
- Select the groups that are synced with Check Point Harmony dashboard.
- Ensure Silent Installation is enabled to distribute the app silently on the devices without user intervention.
- Now the app will be silently installed on the selected iOS devices.
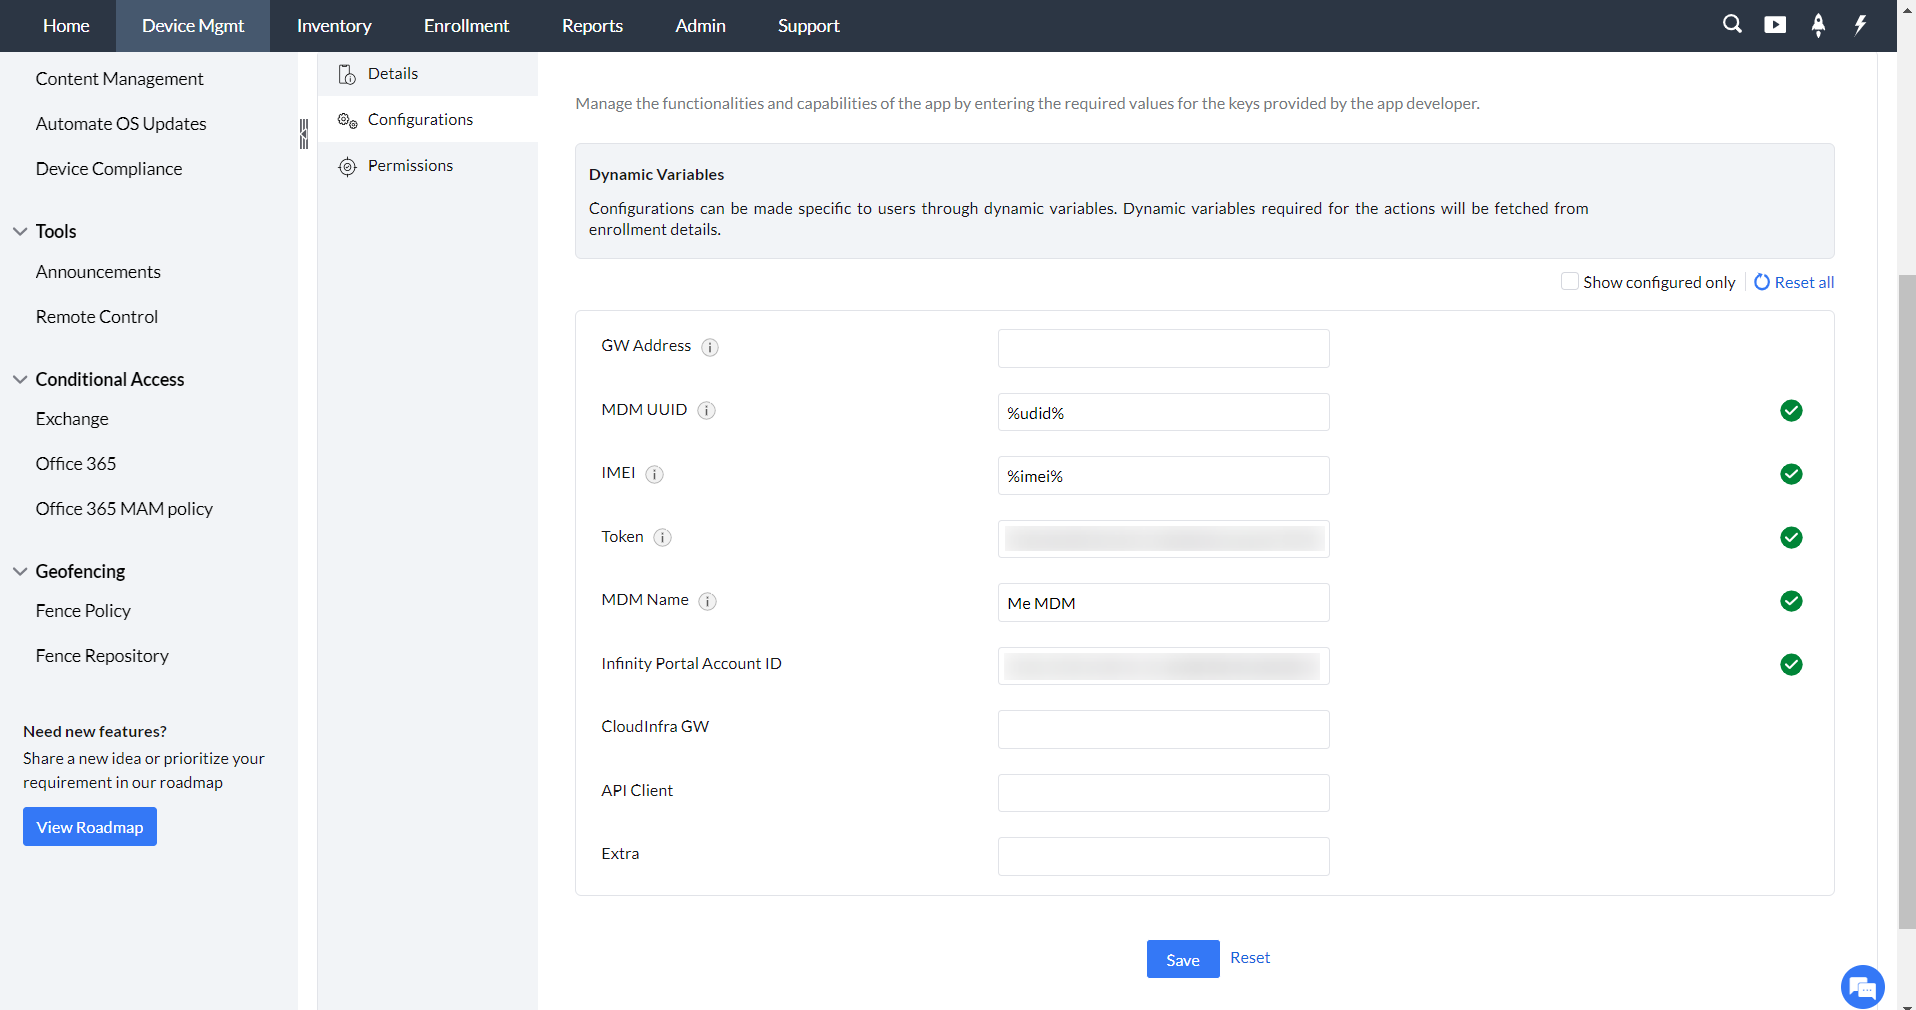
For Android devices:
- Add Harmony Mobile Protect app to the App Repository.
- Ensure that the following App Permissions are enabled:
a. Location
b. Camera
c. Phone
d. Storage - Go to the App Configurations and use the below given details to configure the app.
GW Address: lacoon server address
MDM UUID: %udid%
IMEI: %imei%
Token: Enter the Token obtained from Check Point Portal -> Settings -> Integrations -> Edit -> Deployment.
MDM Name: ME MDM
Infinity Portal Account ID: Specify the ID obtained from Check Point Portal -> Global Settings -> Account Settings -> Account ID. - Click on Save and the click Distribute.
- Select the groups or devices to which you want to distribute this app.
- Ensure Silent Installation is enabled to distribute the app silently on the devices without user intervention.
- Now the app will be silently installed on the selected Android devices.
After installation users have to manually launch the app to complete the registration. You can automate this activation by following the below mentioned steps.
Automate App Deployment on devices (Zero Touch Activation)
For Android devices:
With MDM, admins can automate the app activation using Custom Configuration for Android devices. If you have configured and added the Harmony Mobile Protect App to the App Repository, VPN Always ON will be automatically enabled. Once the app gets installed on the device, MDM will automatically activate the app and register the device with Check Point Harmony dashboard.
For iOS devices:
Follow the below mentioned steps to automate the app deployment:
- On the MDM console, navigate to Device Mgmt > Profiles > iOS/iPadOS.
- Create a Custom Configuration profile.
- Upload the below given XML file to configure the profile.
<?xml version="1.0" encoding="UTF-8"?>
<!DOCTYPE plist PUBLIC "-//Apple//DTD PLIST 1.0//EN" "http://www.apple.com/DTDs/PropertyList-1.0.dtd">
<plist version="1.0">
<dict>
	<key>PayloadContent</key>
	<array>
		<dict>
			<key>IPv4</key>
			<dict>
				<key>OverridePrimary</key>
				<integer>0</integer>
			</dict>
			<key>PayloadDescription</key>
			<string>Configures VPN settings</string>
			<key>PayloadDisplayName</key>
			<string>VPN</string>
			<key>PayloadIdentifier</key>
			<string>com.mdm.checkpoint</string>
			<key>PayloadType</key>
			<string>com.apple.vpn.managed</string>
			<key>PayloadUUID</key>
			<string>com.mdm.checkpoint</string>
			<key>PayloadVersion</key>
			<integer>1</integer>
			<key>UserDefinedName</key>
			<string>Check Point Local Tunnel</string>
			<key>VPN</key>
			<dict>
				<key>AuthName</key>
				<string>%username%</string>
				<key>AuthenticationMethod</key>
				<string>Certificate</string>
				<key>DisconnectOnIdle</key>
				<integer>0</integer>
				<key>IncludeAllNetworks</key>
				<integer>0</integer>
				<key>OnDemandEnabled</key>
				<integer>1</integer>
				<key>ProviderBundleIdentifier</key>
				<string>com.checkpoint.capsuleprotect</string>
				<key>RemoteAddress</key>
				<string>www.checkpoint.com</string>
				<key>OnDemandRules</key>
				<array>
					<dict>
						<key>Action</key>
						<string>Connect</string>
						<key>InterfaceTypeMatch</key>
						<string>WiFi</string>
					</dict>
					<dict>
						<key>Action</key>
						<string>Connect</string>
						<key>InterfaceTypeMatch</key>
						<string>Cellular</string>
					</dict>
				</array>
			</dict>
			<key>VPNSubType</key>
			<string>com.checkpoint.capsuleprotect</string>
			<key>VPNType</key>
			<string>VPN</string>
			<key>VendorConfig</key>
			<dict>
				<key>zero_touch</key>
				<string>true</string>
			</dict>
		</dict>
	</array>
	<key>PayloadDisplayName</key>
	<string>Checkpoint Local VPN</string>
	<key>PayloadIdentifier</key>
	<string>mdm.86265160-CCF7-446C-AF66-586F388DA8E4</string>
	<key>PayloadRemovalDisallowed</key>
	<false/>
	<key>PayloadType</key>
	<string>Configuration</string>
	<key>PayloadUUID</key>
	<string>40FCC72A-0B56-4F8C-8074-11068CBFECF8</string>
	<key>PayloadVersion</key>
	<integer>1</integer>
</dict>
</plist> - Click on Save and Publish the profile.
Once you distribute this profile to the devices, Check Point Harmony app will get activated successfully on the device without any user intervention.
SSL Trust Certificate for On Device Network Inspection
If you use the On device Network Protection (ONP) feature with the https inspection option turned on, you need to create a SSL certificate in the Harmony Mobile dashboard and then set the configuration on the MDM server to push it to the devices. This certificate is used for the ONP SSL inspection.
- In the Harmony Mobile dashboard, go to Policy > Network Protection.
- Under the HTTPs Settings, select the HTTPS Inspection checkbox.
- Under Inspection CA, select Central CA for UEM Deployment.
- Click Generate CA Certificate and download it.
- Navigate back to MDM console, navigate to Device Mgmt > Certificate > +Add Certificate.
- Now upload the certificate file which you have downloaded from the Check Point dashboard.
- Create a Certificate profile for iOS and Android. Select the uploaded certificate.
- Save and Publish the profile, and then distribute it to the devices.
Monitoring threats and pre-configuring policies
Check Point MTD will closely monitor the potential mobile threats such as malware, malicious apps, network attacks, and device vulnerabilities. The devices are automatically categorized into groups based on the identified threats. These groups include High, Medium and Low risk categories. Using MDM, you can preconfigure security policies and restrictions to safeguard your mobile devices and the sensitive data present on them. You can block critical business apps for the groups that have high threat risk devices. You can also lock down the devices in kiosk mode based on the different threat levels. By pre-configuring security policies to the groups based on risk level, admins can mitigate security risk and protect critical data on devices.
Testing a High Risk Activity Detection and Policy Enforcement
If the user's device is at risk, either because of a harmful app or activity, Harmony Mobile notifies the user through in-app notifications, and updates the risk level to the Mobile Device Manager Plus server for that device. For instance, if the administrator blocks an app like WhatsApp, the device will be labeled as High Risk and moved to CHKP_Risk_High group in the MDM.
Blocking a Test App:
- Login to the Harmony Mobile dashboard.
- Go to Forensics > Application and click the app you want to block.
- Select Edit app exception and click the policy you want to modify.
- The Application Exceptions section in the Application policy appears.
- From the Action drop-down list, select Block.
- Click on Add and Save.
Now the selected app will be marked as High Risk and the devices with this app installed on them will be moved to CHKP_High_Risk group. All the preconfigured policies will be applied to the devices to protect the device and data from High risk threats.
Removing Check Point Harmony Mobile integration
You can remove the Check Point MTD integration at anytime. To remove this integration follow the below mentioned steps.
- On the MDM console, navigate to Device Mgmt > Admin > Integrations > Mobile Threat Defense.
- Click on Remove integration.
- Once you remove the integration, all the groups created by Check Point will be removed from MDM.
Note:
For complete removal of Check Point MTD integration, you should delete the integration from the Check Point Harmony Mobile console > Settings > Integrations.