# How to migrate using UEM Migration tool
**Last Updated On**: 16 Jul 2026
**21 minutes read**
## Prerequisites
- Configure the APNS certificate and Knox enrollment on the destination server.
- Create the credentials in **Credential Manager** on the destination server exactly as they exist on the source server, ensuring there are no case sensitivity errors, spaces, or extra characters (only if credentials are used in configuration).
- If you are migrating an On-Premises product, verify that the NAT used on the source/destination server matches the domains listed in the SSL certificate of the source server.
- Ensure both the source and destination servers are reachable from the machine where the migration tool is installed, with a reliable network connection.
- Ensure both the source and destination licenses are active and that the license is not downgraded.
- Ensure the email ID is configured for the local admin user in MDM Users on the source server.
- Check that the source server is updated to the latest version. If not, upgrade to the latest build before migration ([check latest build here](https://www.manageengine.com/products/desktop-central/service-packs.html)).
- Ensure destination server prerequisites are met before proceeding with data migration.
### Important
Please make sure the following network settings are in place before starting the migration. These are required to transfer and sync data successfully.
### Outbound
- **Source Server (MSP Server):** Allow the required domain and port to connect with the machine where the migration tool is installed. Only outbound connections are needed. (If the source server and migration tool are on the same network, this step is not needed.)
- If you are migrating from, or to, a Cloud product, allow access to `*.manageengine.com` and `*.zoho.com` for outbound connections. The domain may vary based on your cloud setup. All connections use port 443.
If you need specific domains to be whitelisted, allow the following:
- https://patchdb.manageengine.com
- https://mdm.manageengine.com
- https://mdmdatabase.manageengine.com
- https://www.zoho.com
- https://manageengine.com
- https://creator.zoho.com
**Based on International Data Center:**
- https://mdm.manageengine.in/com/uk
- https://endpointcentral.manageengine.in/com/uk
- https://download-accl.zoho.com/in/uk
- https://downloads.zohocdn.com/in/uk
- https://accounts.zoho.com/in/uk
- https://upload-accl.zoho.com/in/uk
- https://uploads.zohocdn.com/in/uk
### Inbound (iOS Devices)
If you are migrating iOS devices, you can do it in either of these ways:
1. **Using ME MDM App**
2. **Using Webclip:** If you prefer this option, make sure port `7383` is allowed for inbound connections. (Optional)
## Agent details that are migrated using the UEM migration tool
| Category | Migrated details |
|---|---|
| **Scope of Management** | - Agents meta in SOM view
- Custom groups
- Remote office (Distribution server needs to be installed manually)
- Domains without credentials
- Replication Policy details |
| **Software packages** | - Manually-created software packages
- Template package (only live & unmodified packages are migrated)
- Auto-Update template
- Auto-Update policies |
| **Patch** | - **Settings:**
- Patch DB Settings
- Cleanup settings
- Download settings
- System Health Policy
- Office Click To Run
- Script Repository
- Test Group
- Decline Patch
- Deployment Policy
- Automate patch deployment |
| **Configurations** | All configurations and configuration templates will be migrated, except:
- Mac configurations
- Configurations linked to non-live or modified template packages
- Configurations with file uploads larger than 250 MB
**Note:** The following settings will also be migrated:
- Configuration settings
- USB settings
- **Windows:** All configurations except Secure USB, User Management, and WiFi will be migrated.
- **Mac:** Custom script, Message box, File folder operation, Install/uninstall software, Install/uninstall patch — only these configurations will be migrated.
- **Linux:** Custom script, Message box, Install/uninstall patch — only these configurations will be migrated.
Certain configurations (e.g., file folder operations, folder backup) may require credentials to execute successfully. These configurations need to be redeployed to the targets with the necessary credentials. |
| **Mobile Device Management** | - Apps:
- Store apps
- AFW account
- Profiles
- Groups
- Users
- Devices
- Managed Google Play |
| **Vulnerability Manager** | - Software Vulnerability Exception
- System Misconfiguration Exception
- RDS Software Exception
- Peer To Peer Software Exception
- Web Server Misconfiguration Exception
- Policy Group
- Compliance Audit
- Quarantine Policy |
| **Bitlocker** | - BLM Policy
- BLM Policy Management |
| **Device Control** | - DCP Settings
- DCP Trusted Device
- DCP Policy
- DCP Policy Deployment |
### Note
- Data in features other than the ones mentioned above must be created manually.
- Active Directory-based Custom Groups, default Custom Groups, and AD users (along with their associated groups and tasks) will not be migrated.
- Script files larger than 250 MB will not be migrated.
## To perform the migration
1. Download the [UEM Migration Tool](https://www.manageengine.com/ems/migration-tool.html) on the machine running the central server.
2. Install the downloaded EXE file and set up credentials to access the migration tool. Once you sign in, you will be able to view the migration tool console.
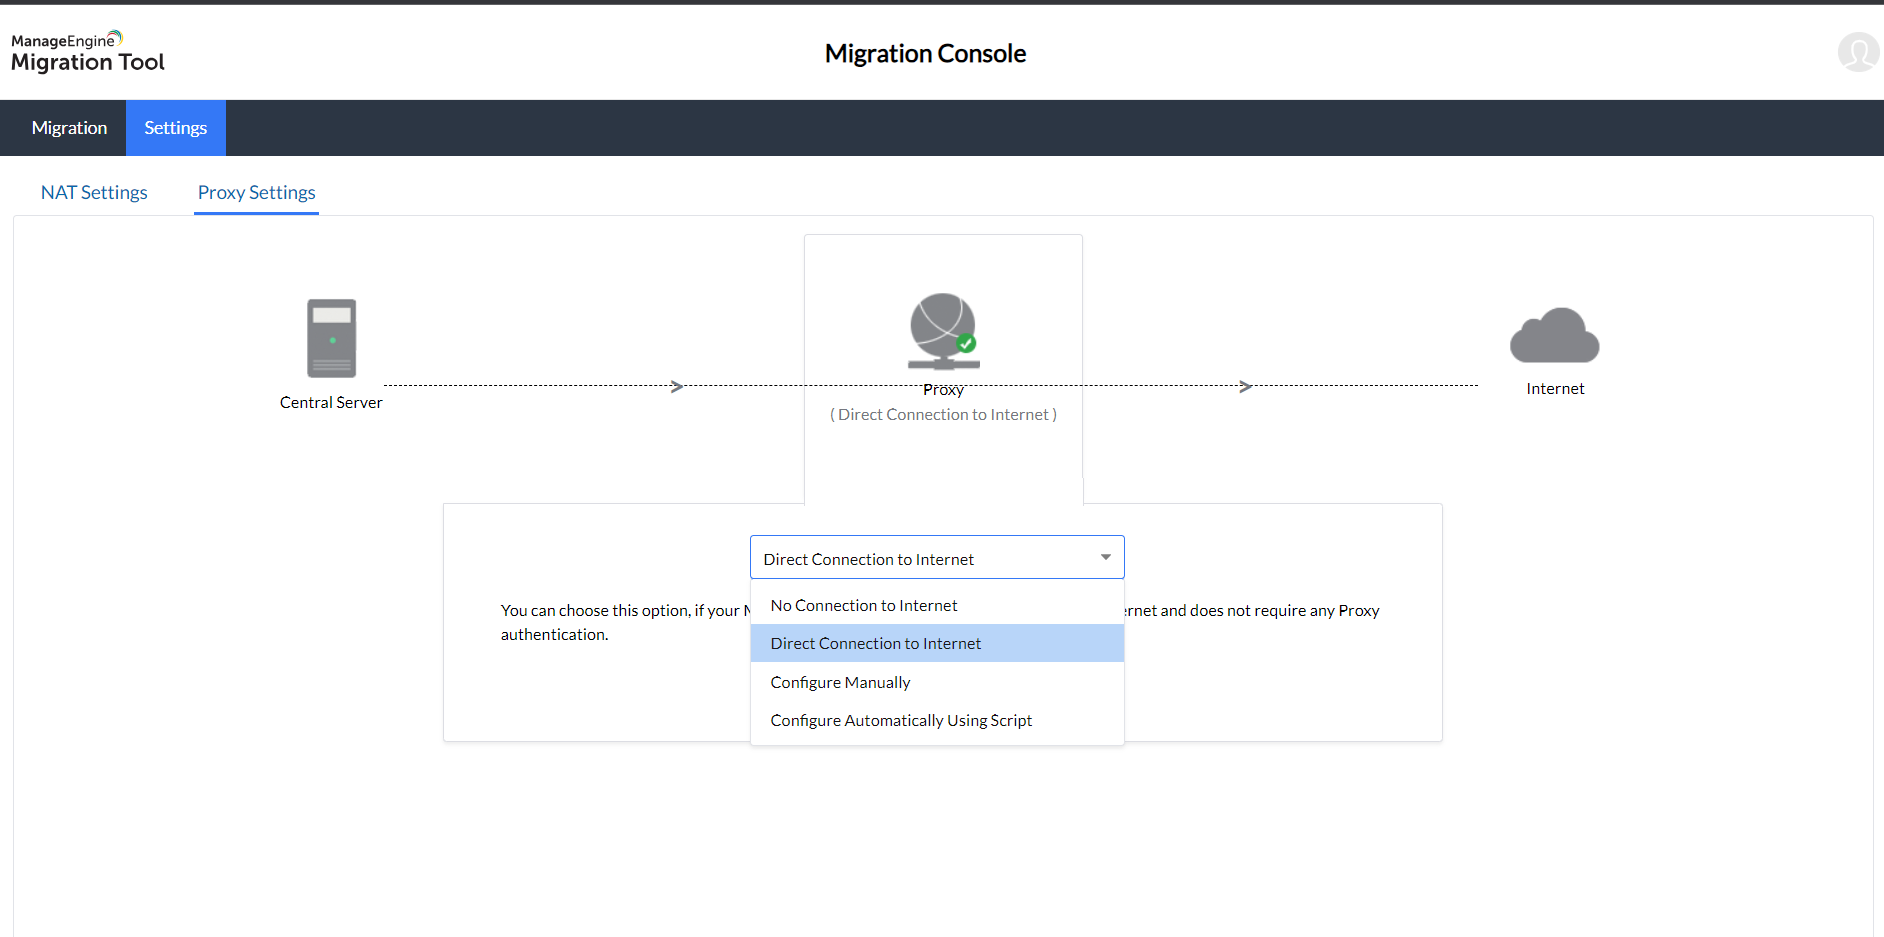
3. Configure [Proxy Settings](https://www.manageengine.com/products/desktop-central/help/configuring_desktop_central/configuring_proxy_server.html). Supported options:
1. **No Connection to Internet**
2. **Direct Connection to Internet**
3. **HTTP Proxy configuration**
4. **Automatic configuration using script**
To set up proxy settings, click **Settings → Proxy → Choose the connection type** from the dropdown → **Save**.
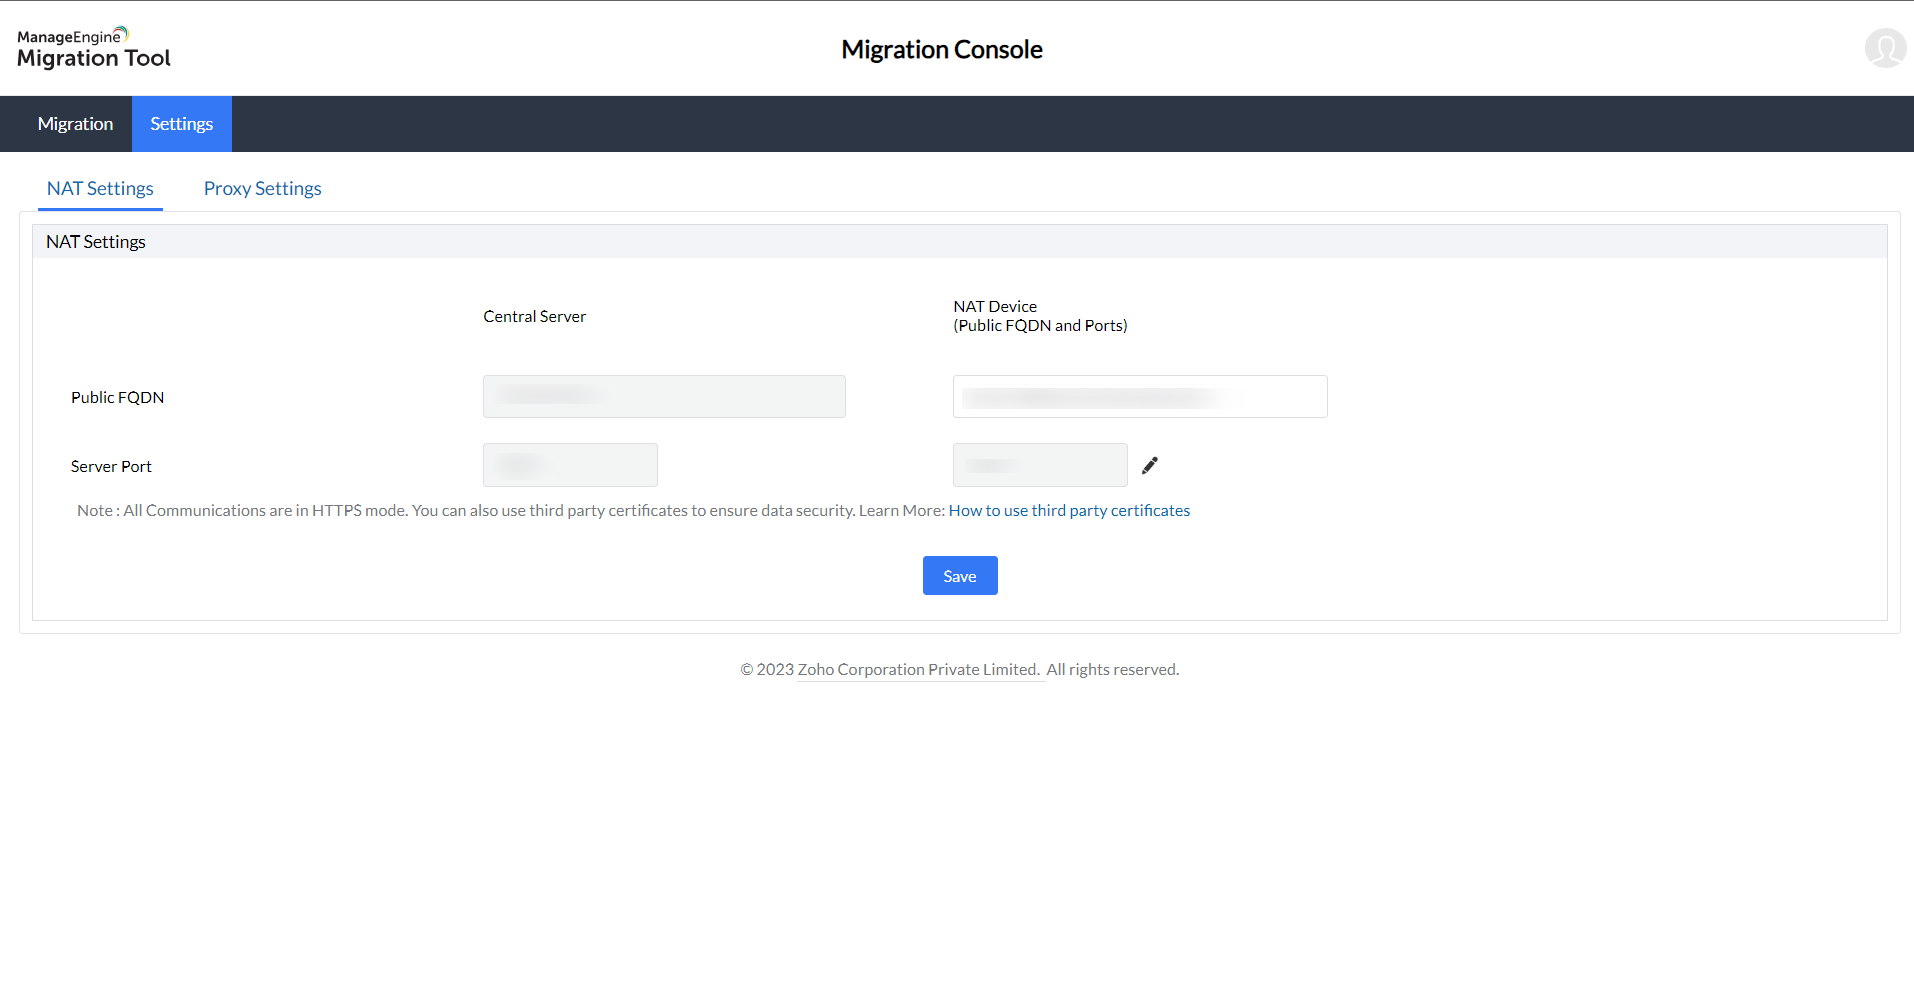
4. For Apple devices, configure [NAT settings](https://www.manageengine.com/products/desktop-central/help/configuring_desktop_central/nat-settings.html) by clicking **Settings → NAT** and adding the required IP address or FQDN, then click **Save**.
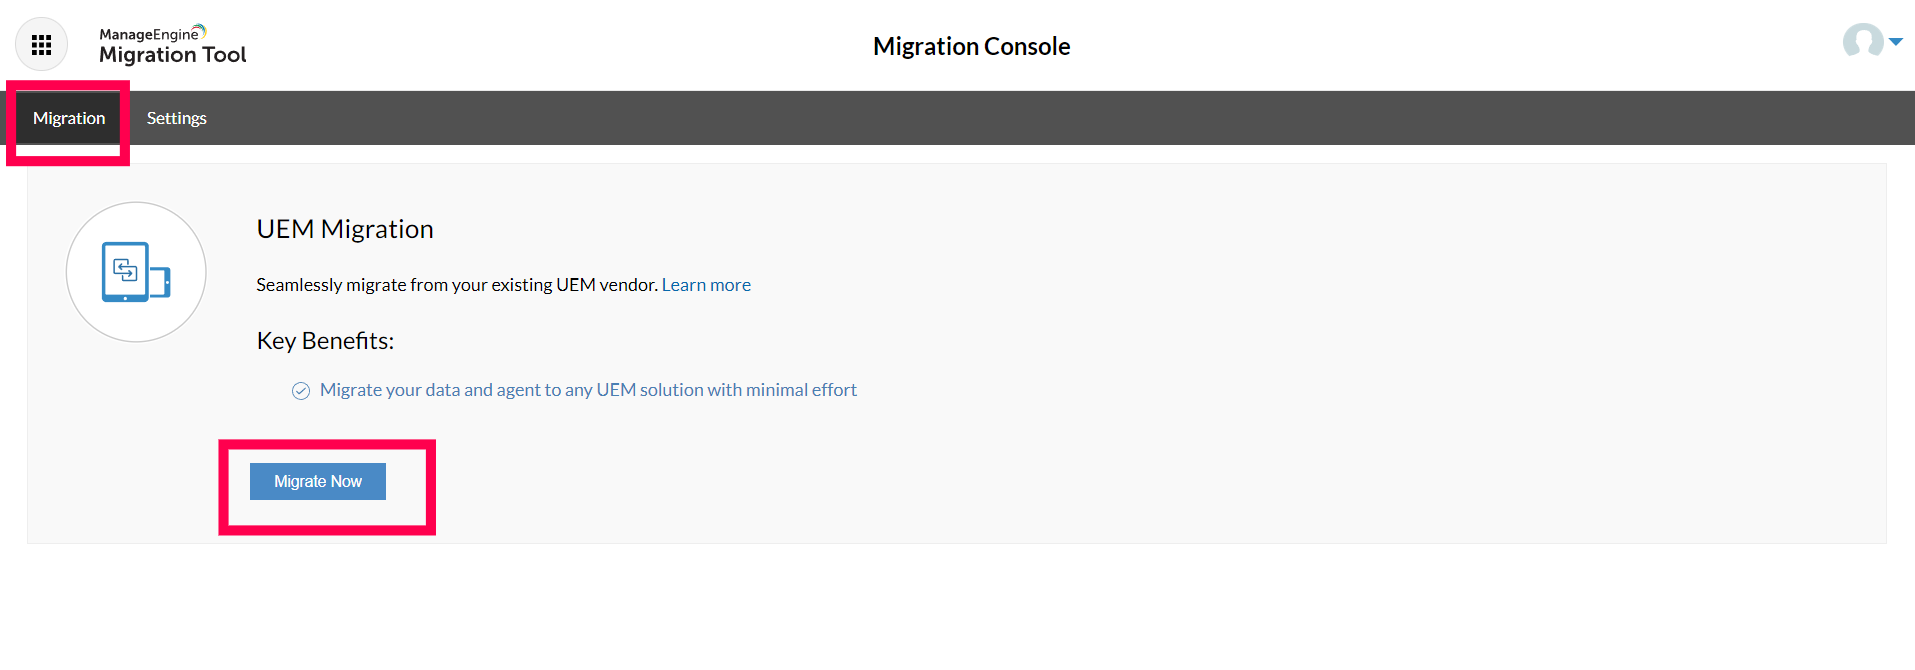
5. Navigate to the **Migration** tab and click **Migrate Now** to proceed.
## Steps to authenticate for On-Premises product
### Note
This authentication step is explained for migrating from Endpoint Central On-Premises to Endpoint Central Cloud. You can choose the appropriate authentication depending on the on-premises product you are migrating. If you are migrating from a Cloud product, refer to [Steps to authenticate for Cloud product](https://www.manageengine.com/products/desktop-central/help/general/migrate-to-endpoint-central.html#steps-to-authenticate-for-cloud-product).
1. Select the required product for migration (the product whose data needs to be migrated). For example, select **Endpoint Central On-Premises** as the product name and provide the source server authentication details.
2. Since the source server is an on-premises product, you will need to enter the API key.
### Note
If the source server or destination server is an on-premises product, an API key will be required.
**To generate the API key, follow the steps below:**
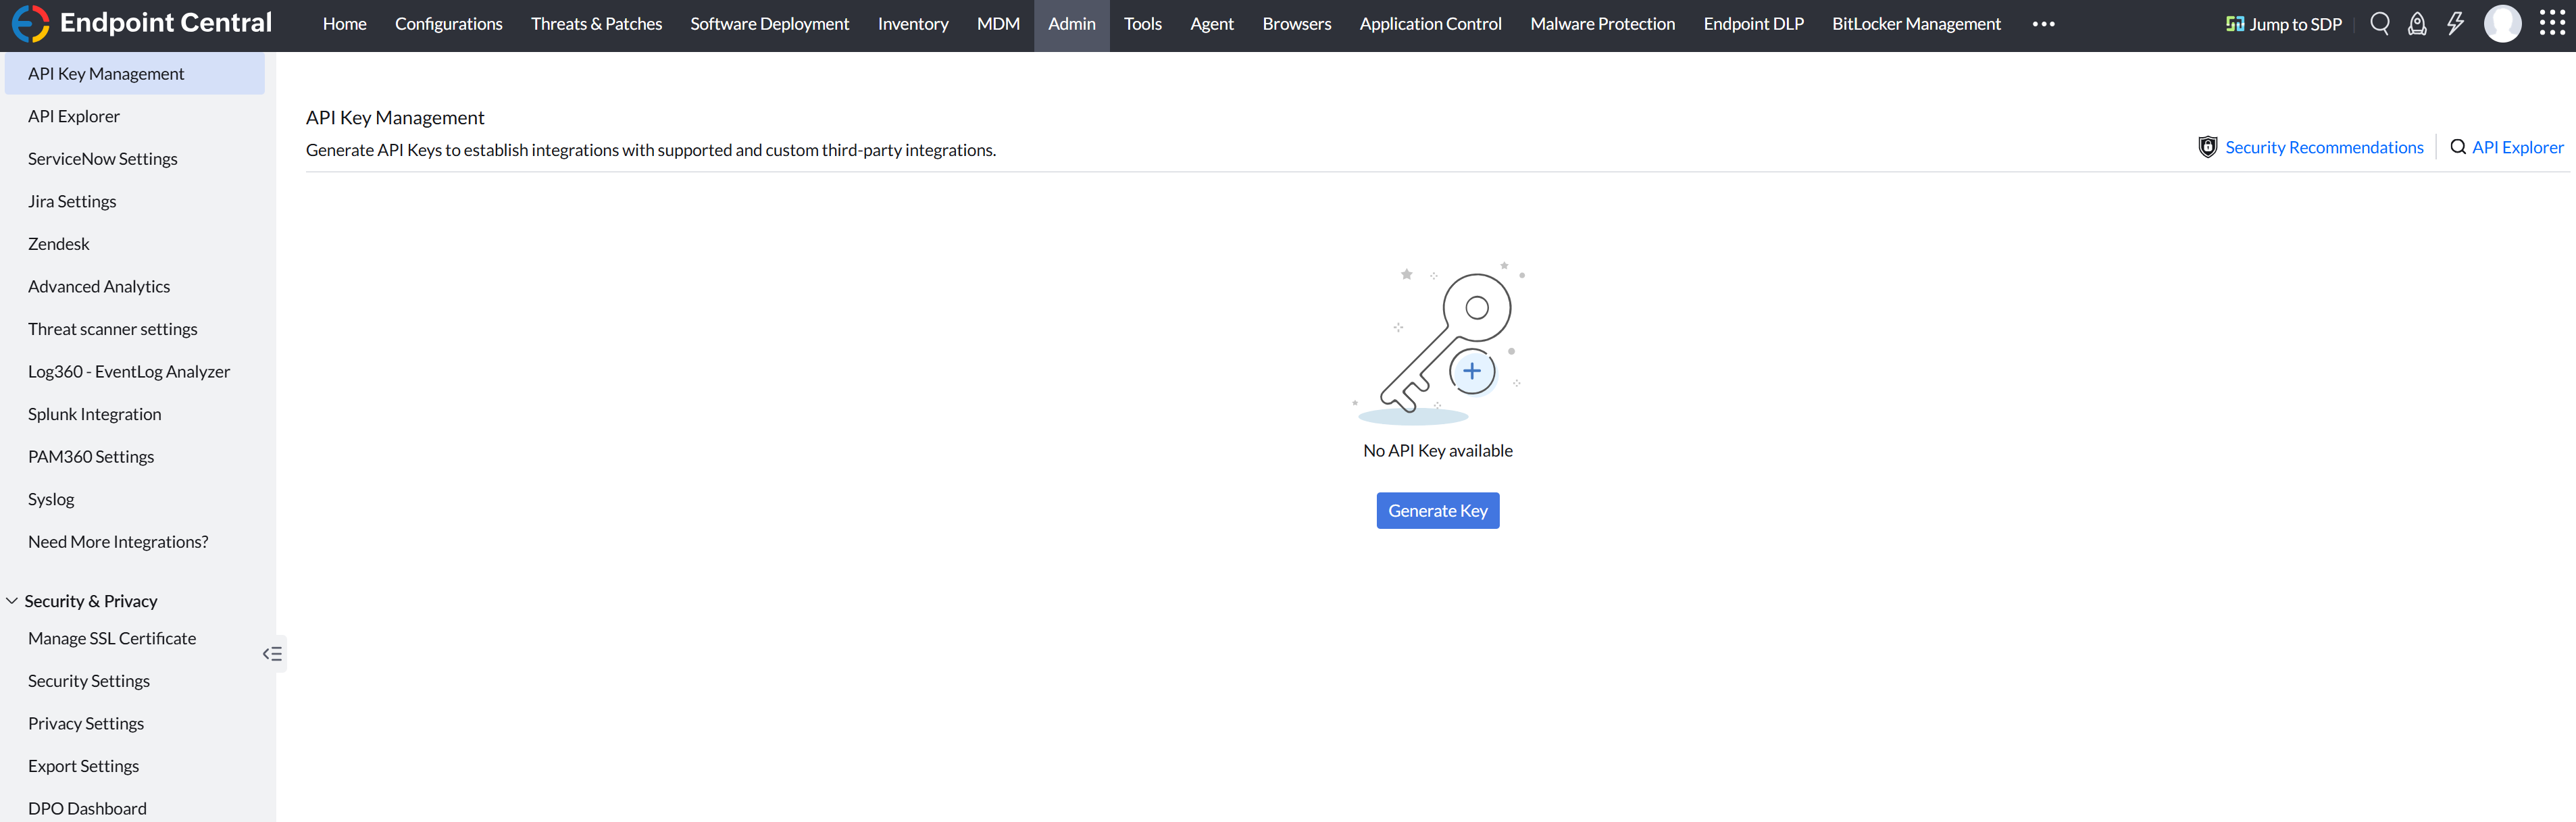
1. Navigate to **Admin > Integrations > API Key Management**.
2. Select the **Generate Key** option.
3. Choose the option **Custom Integration**.
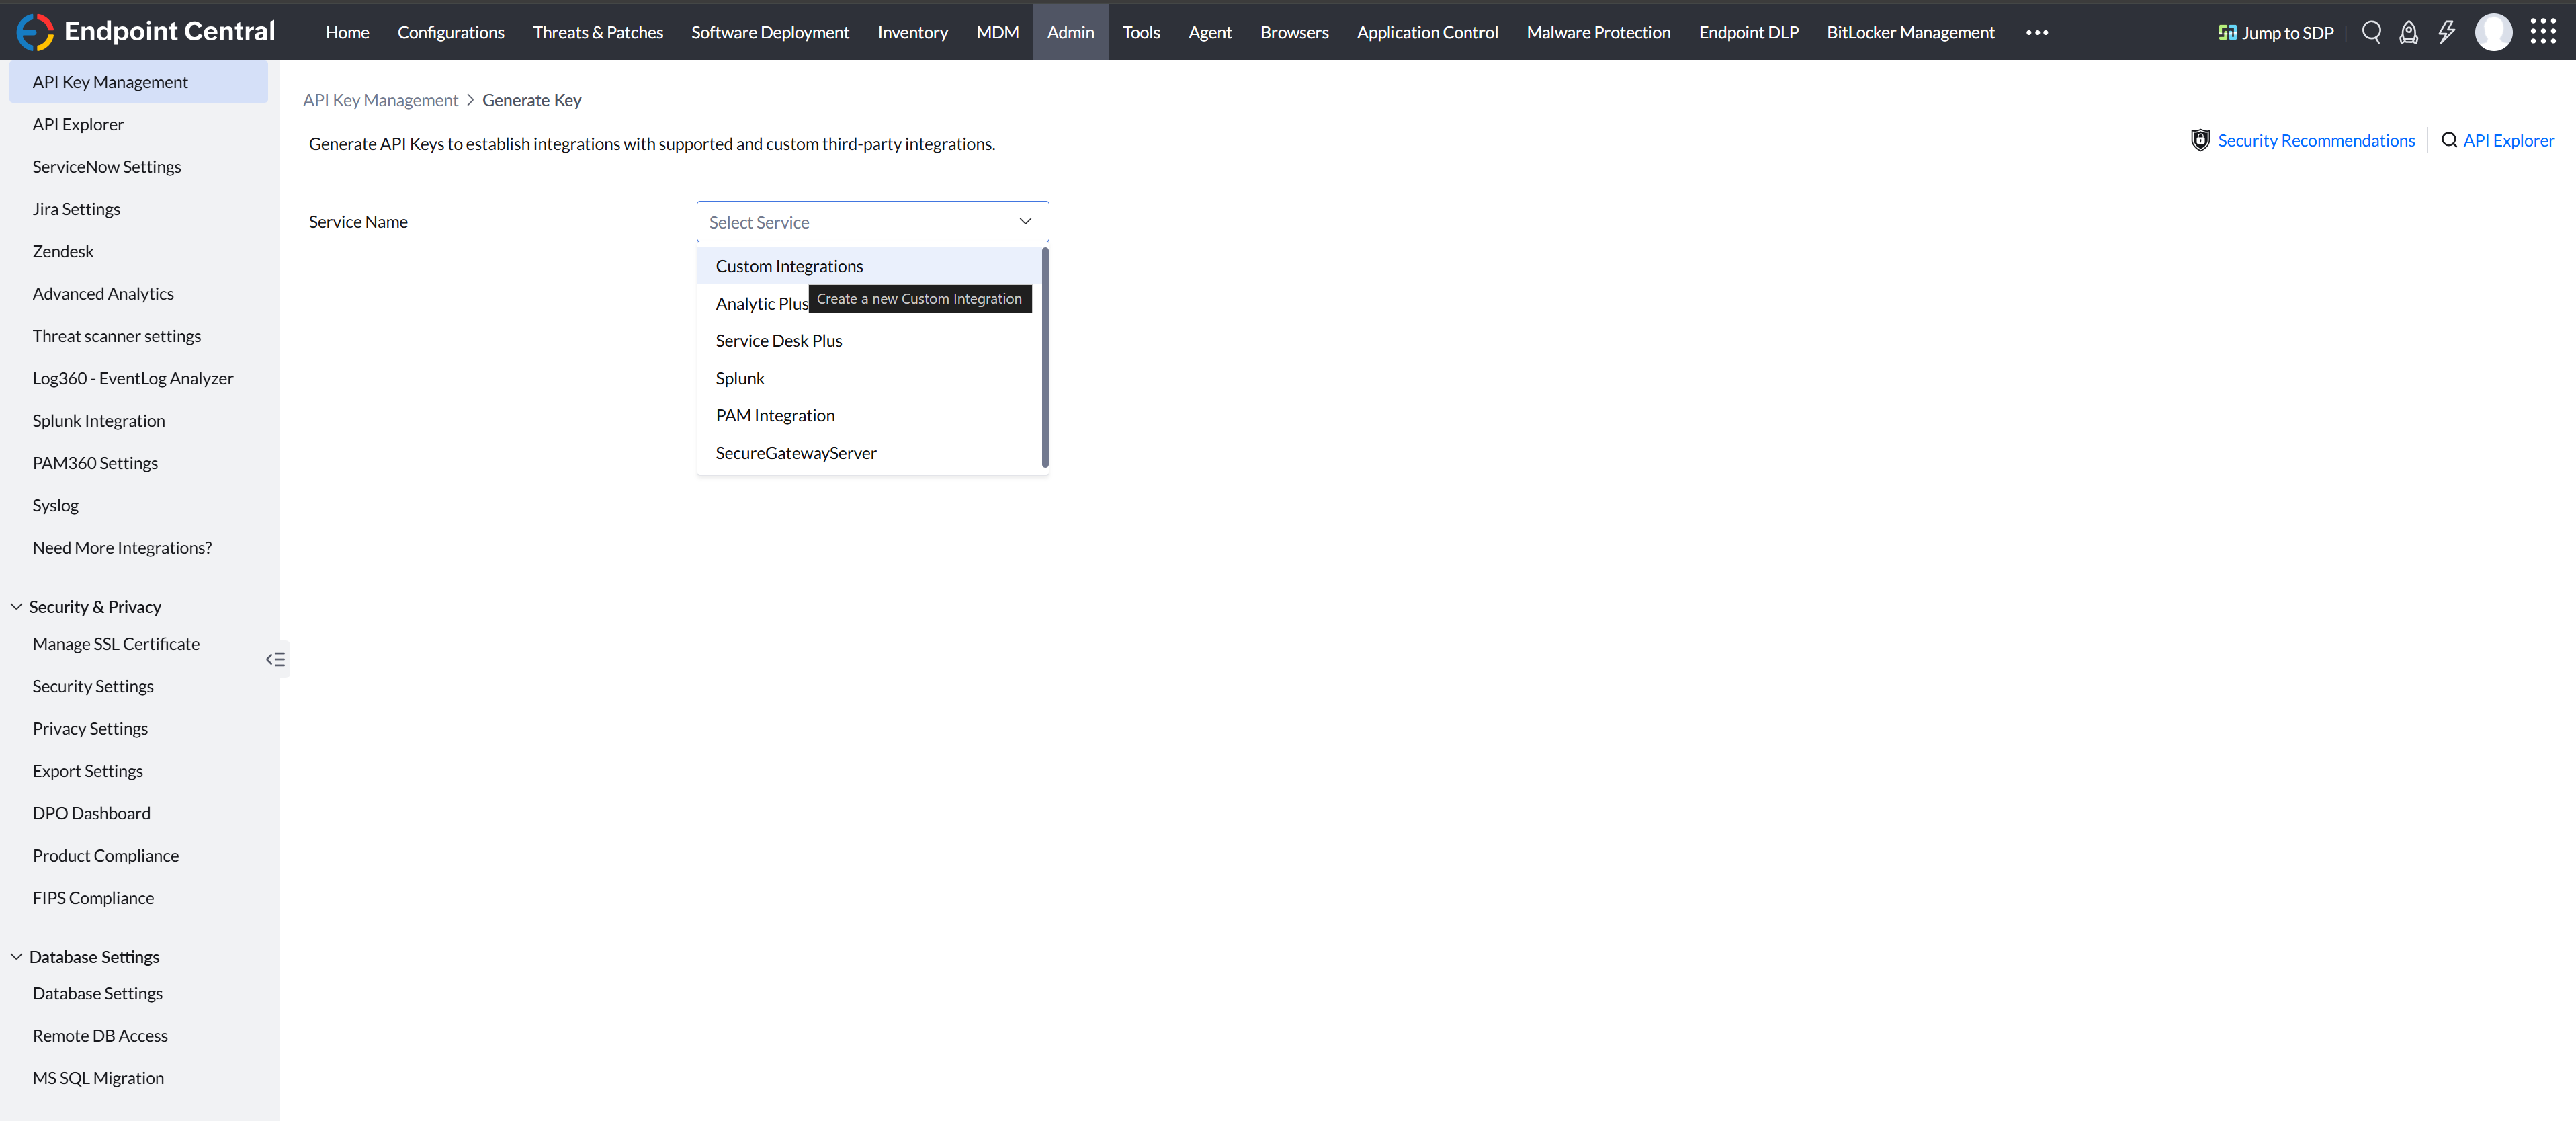
4. Enter any service name and enable all permissions for all modules.
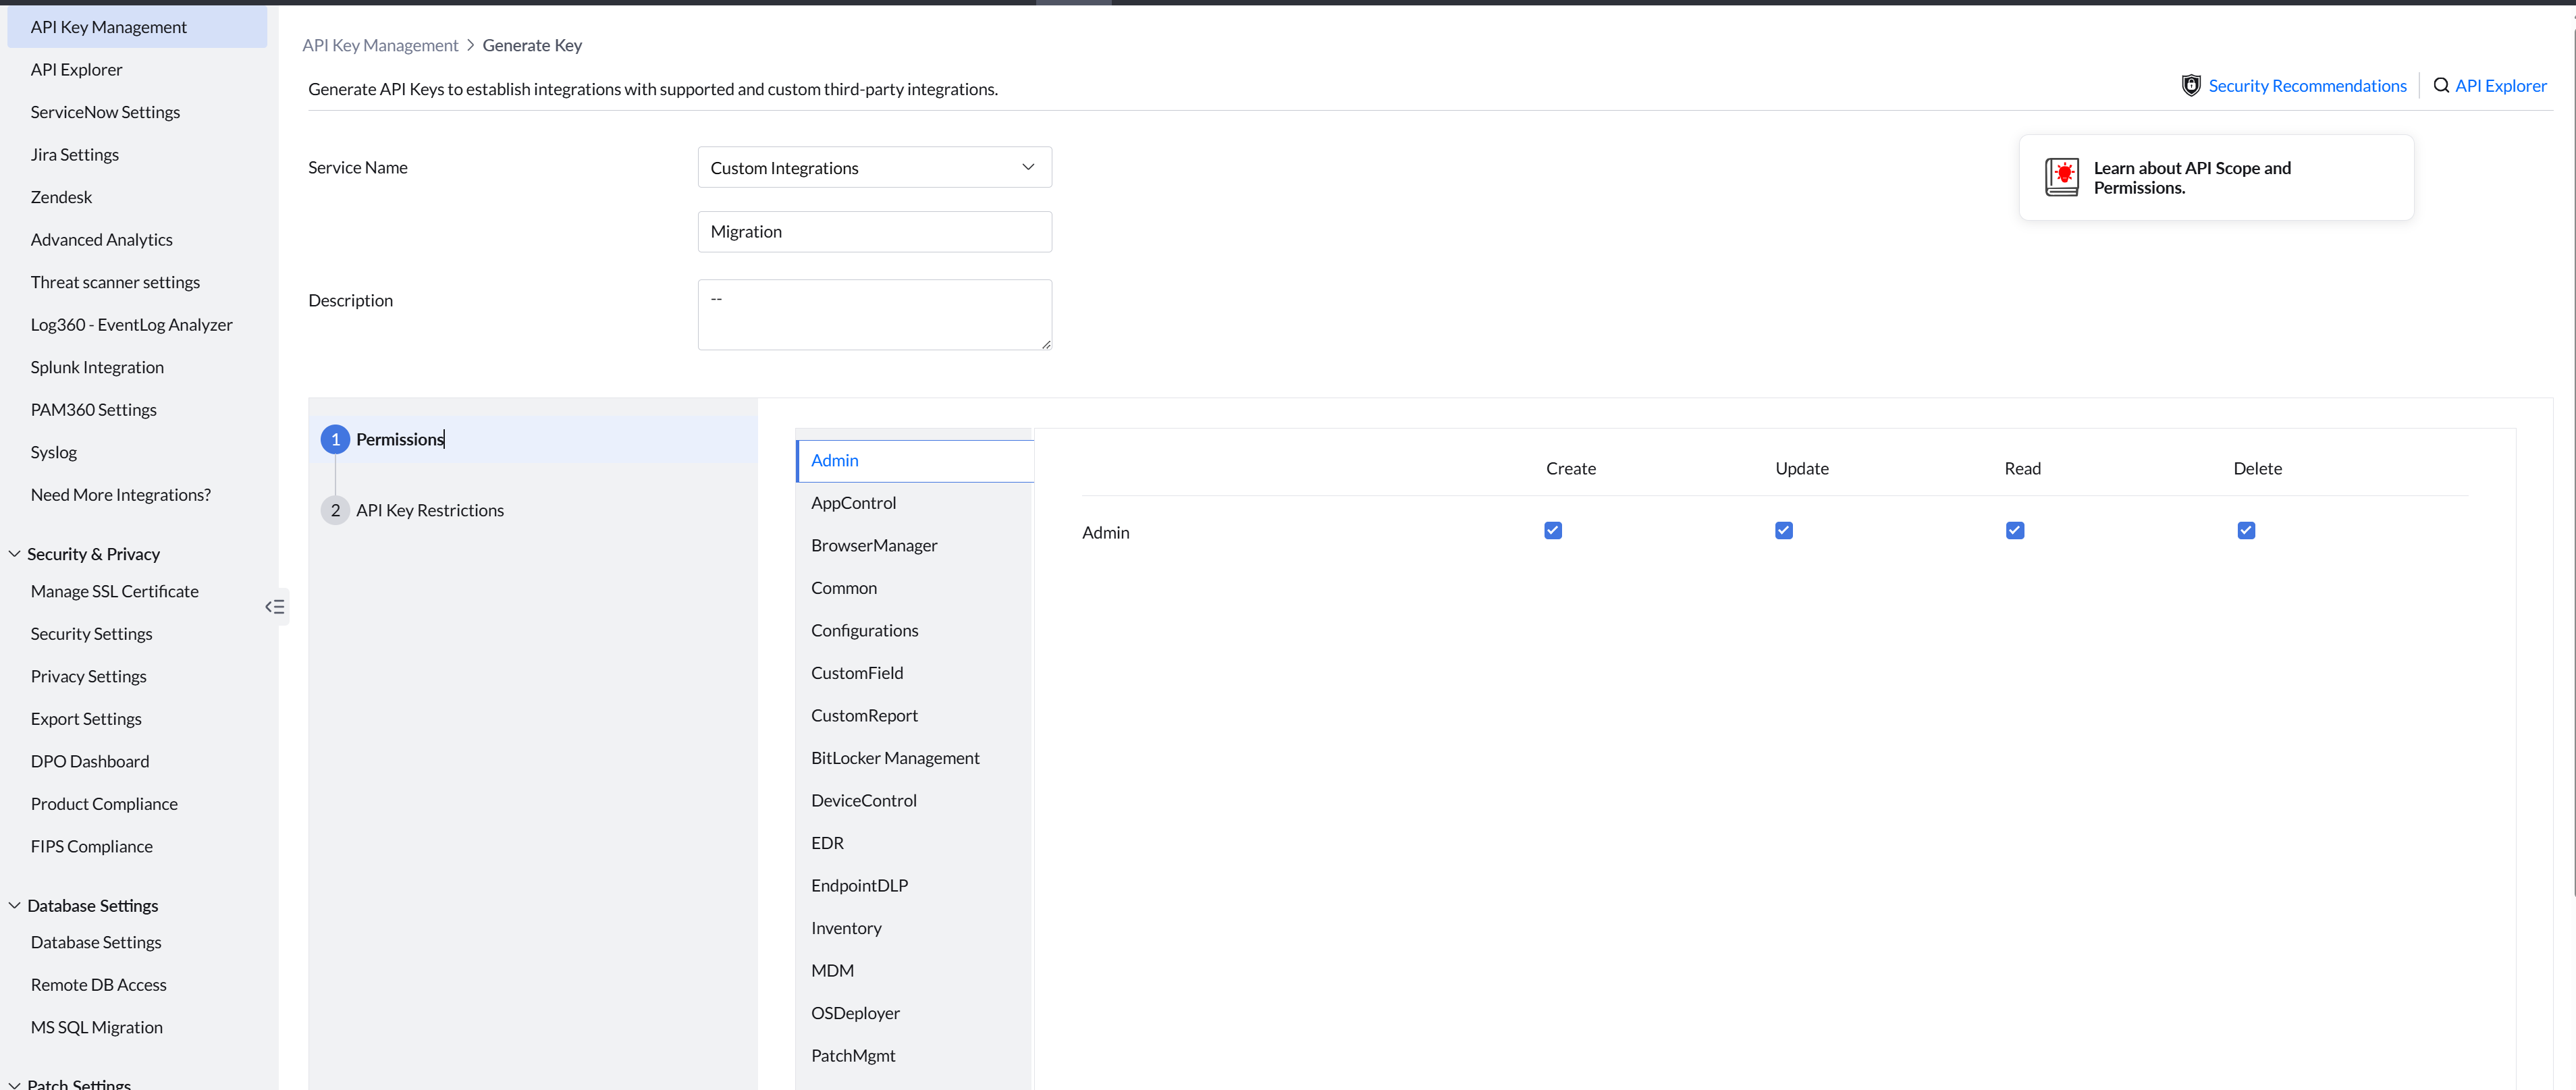
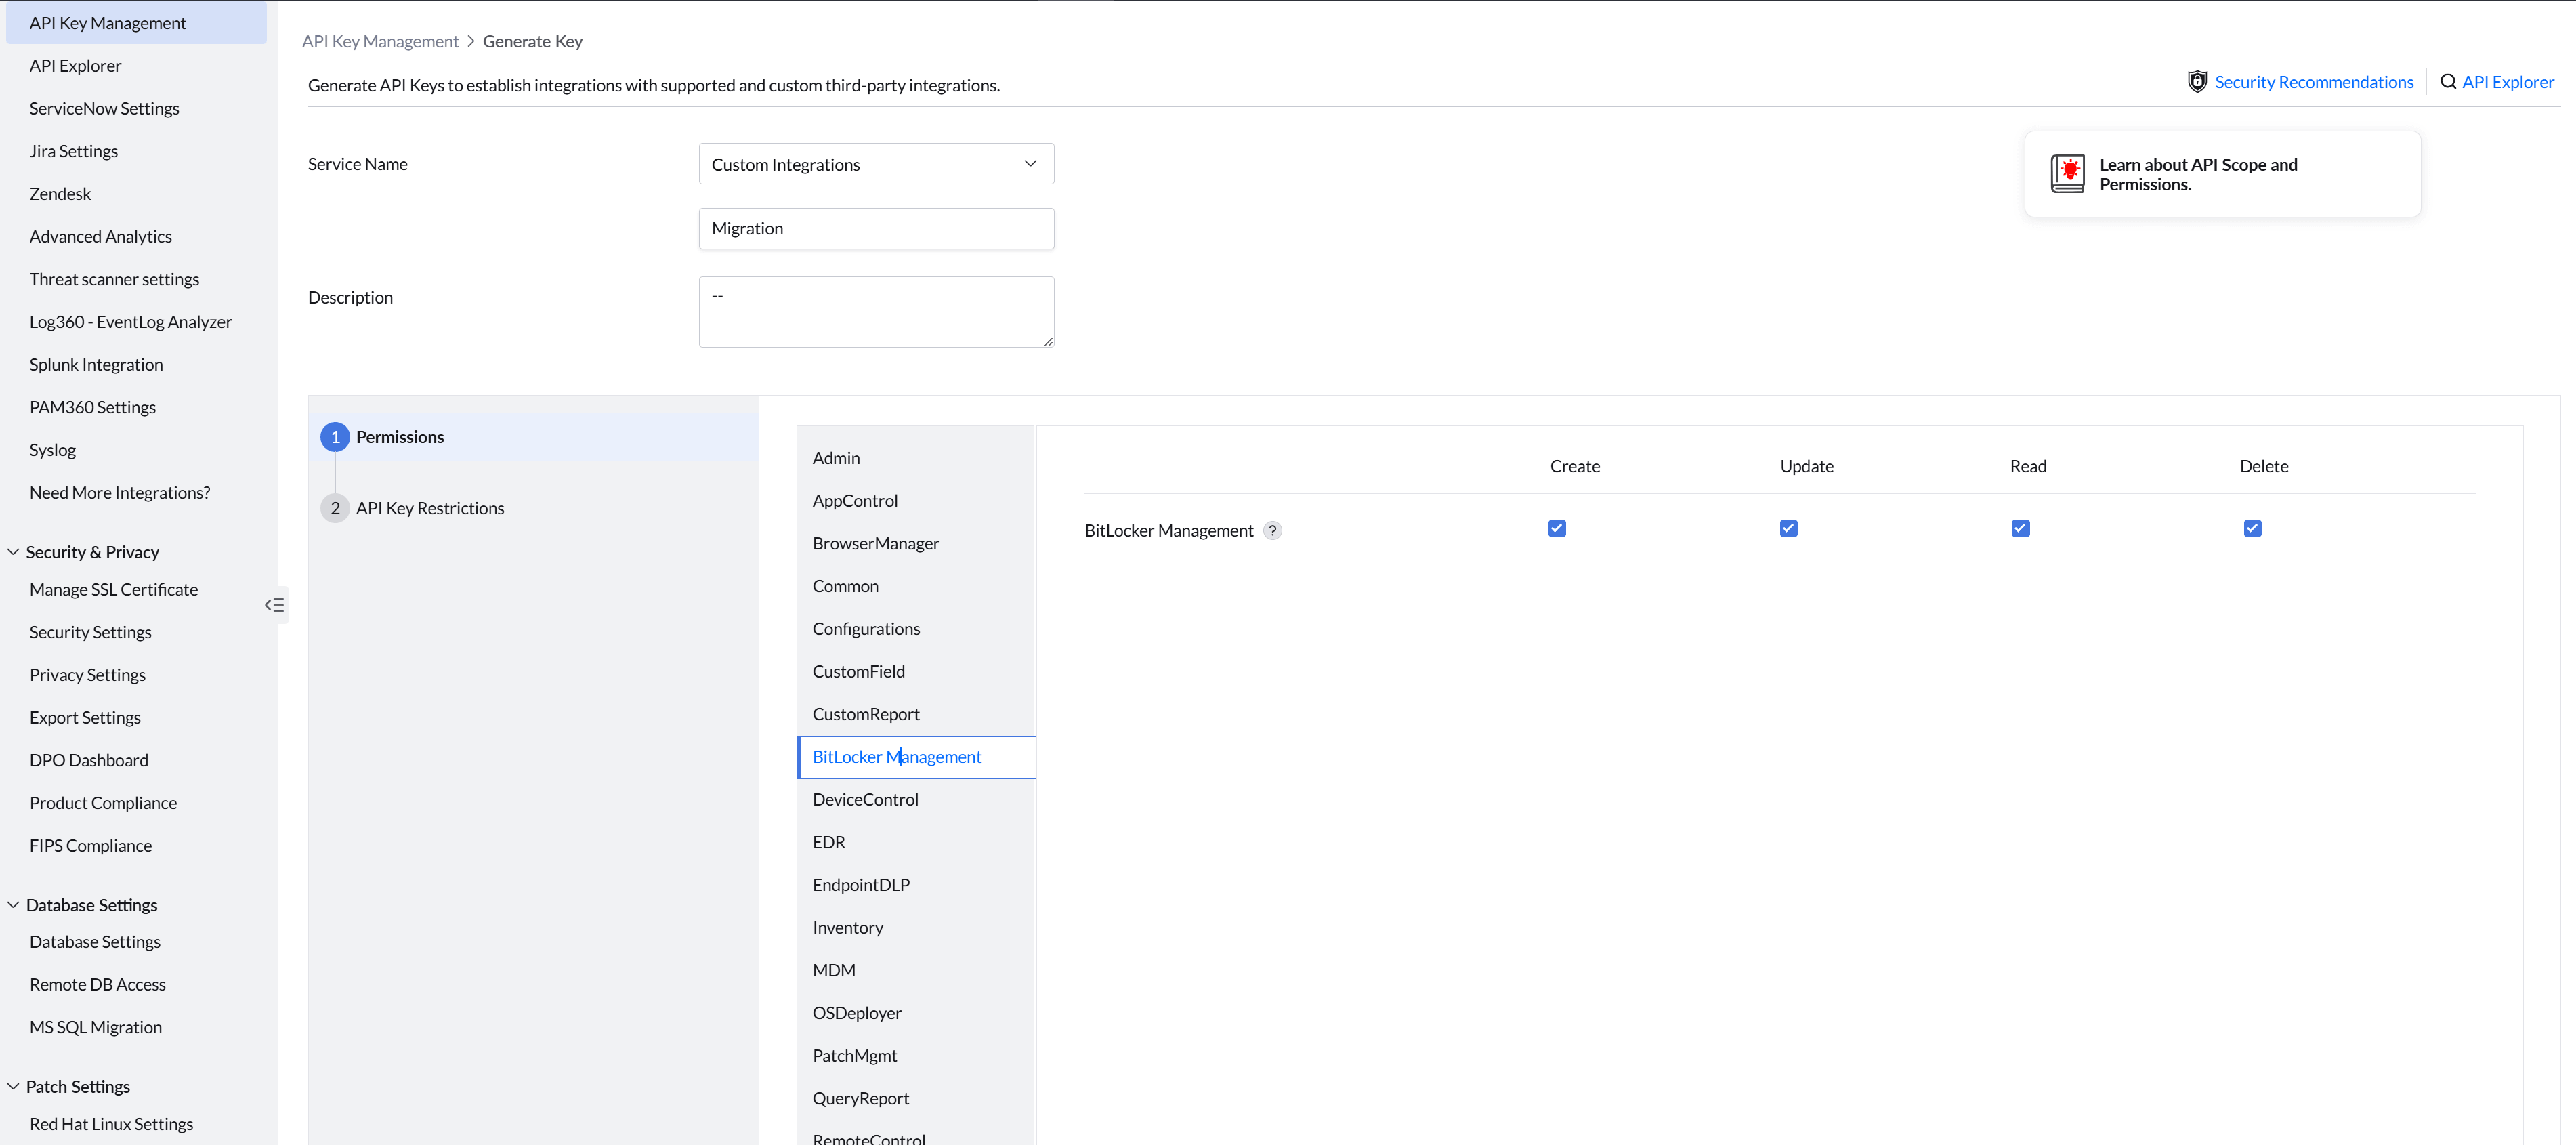
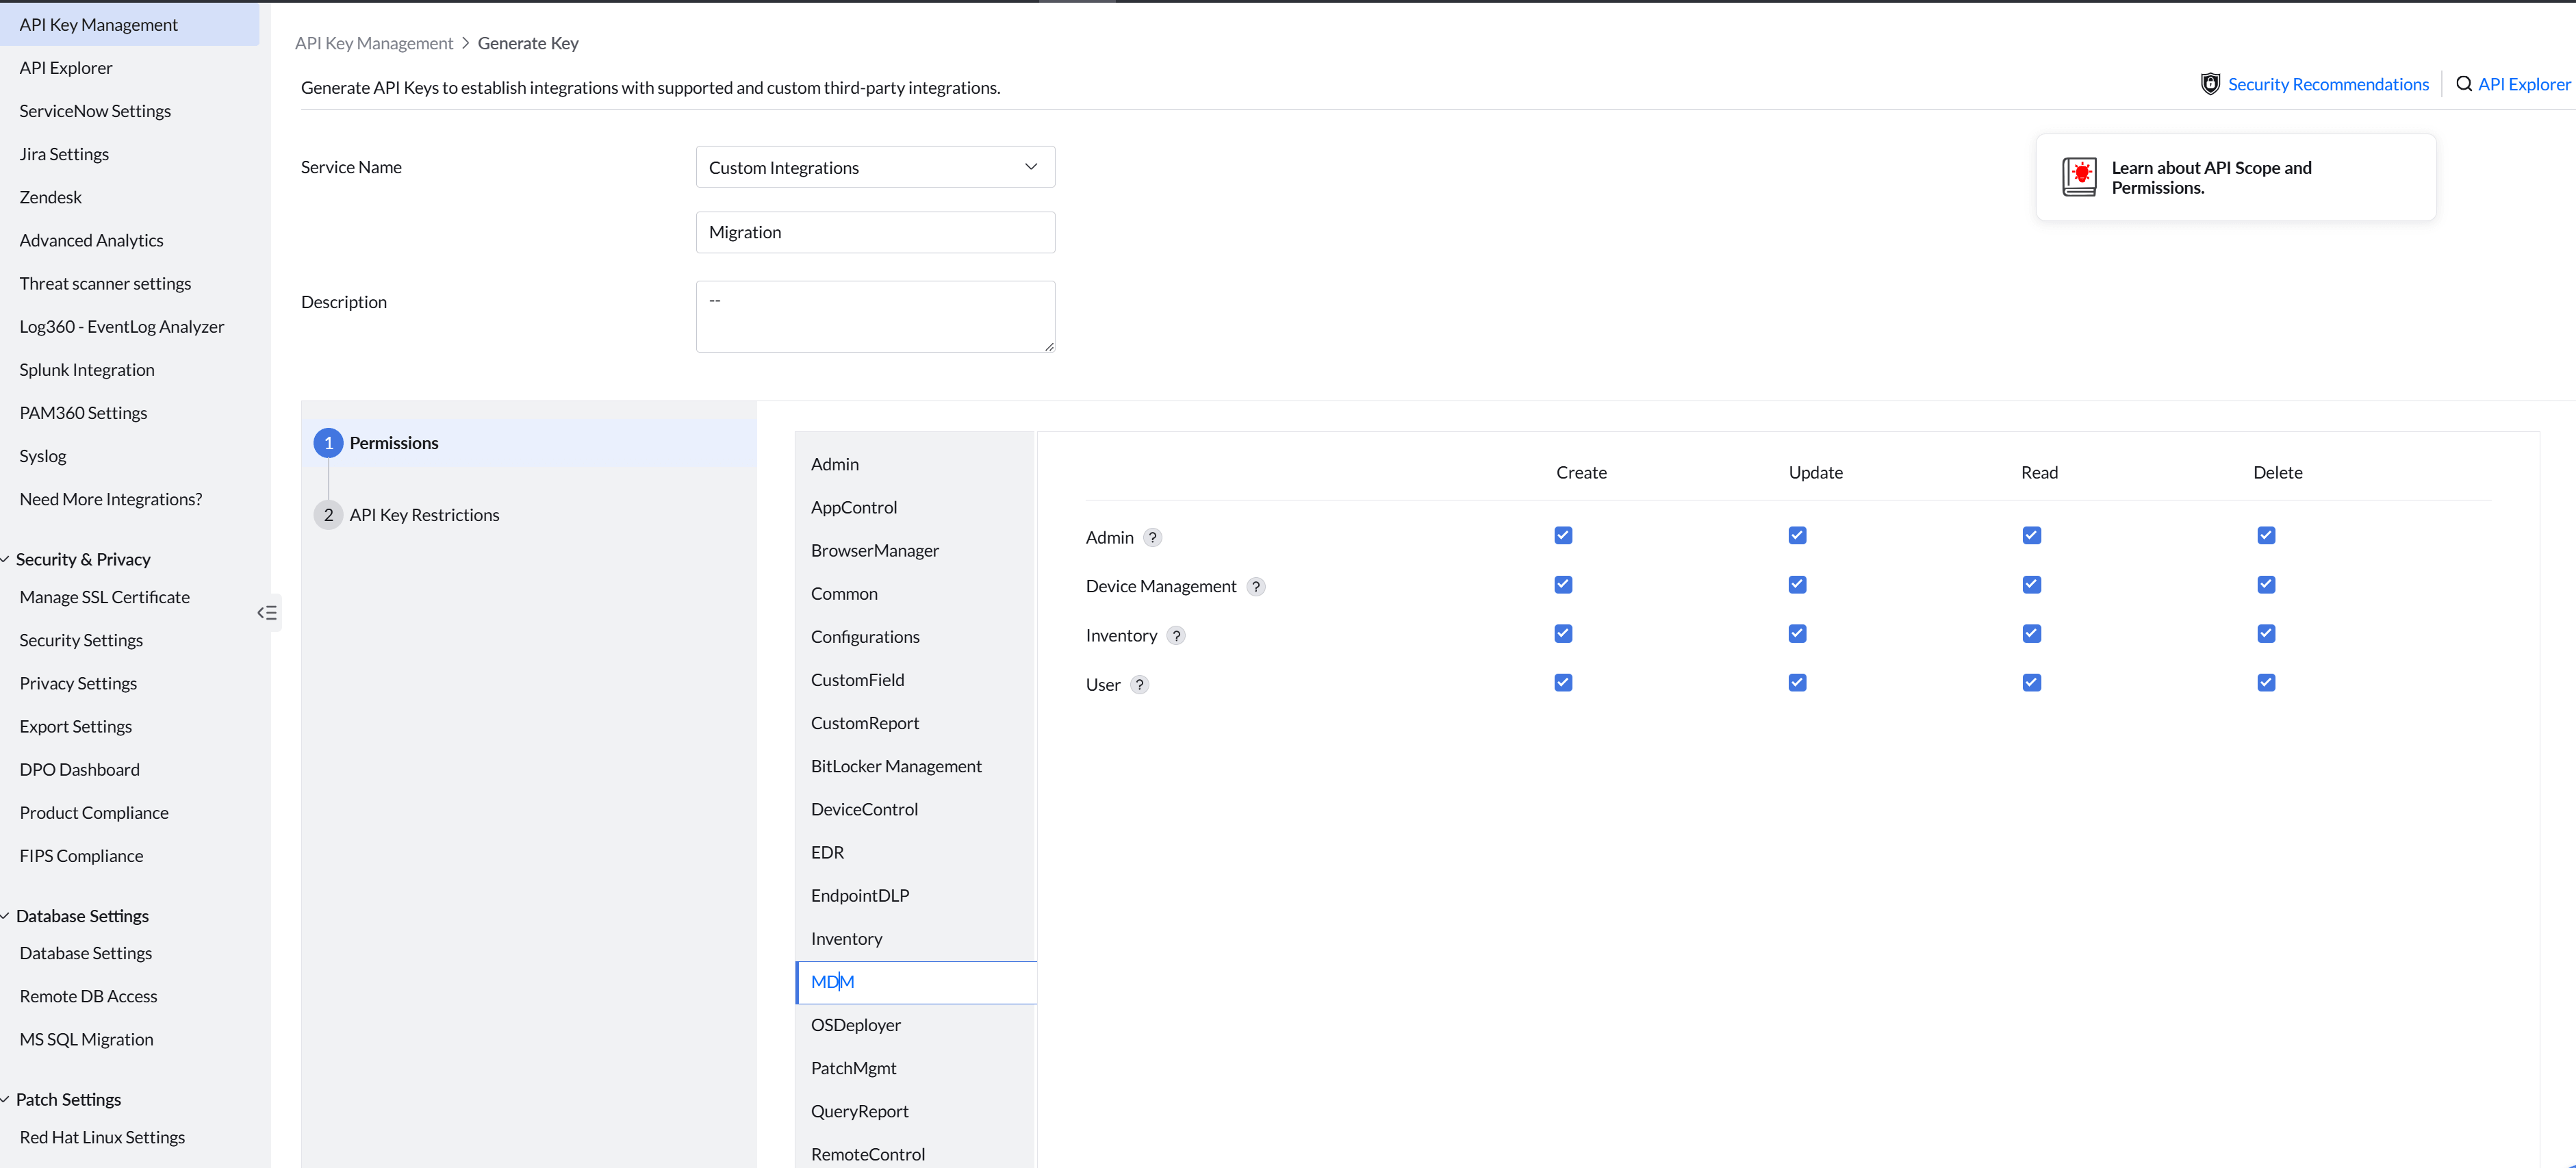
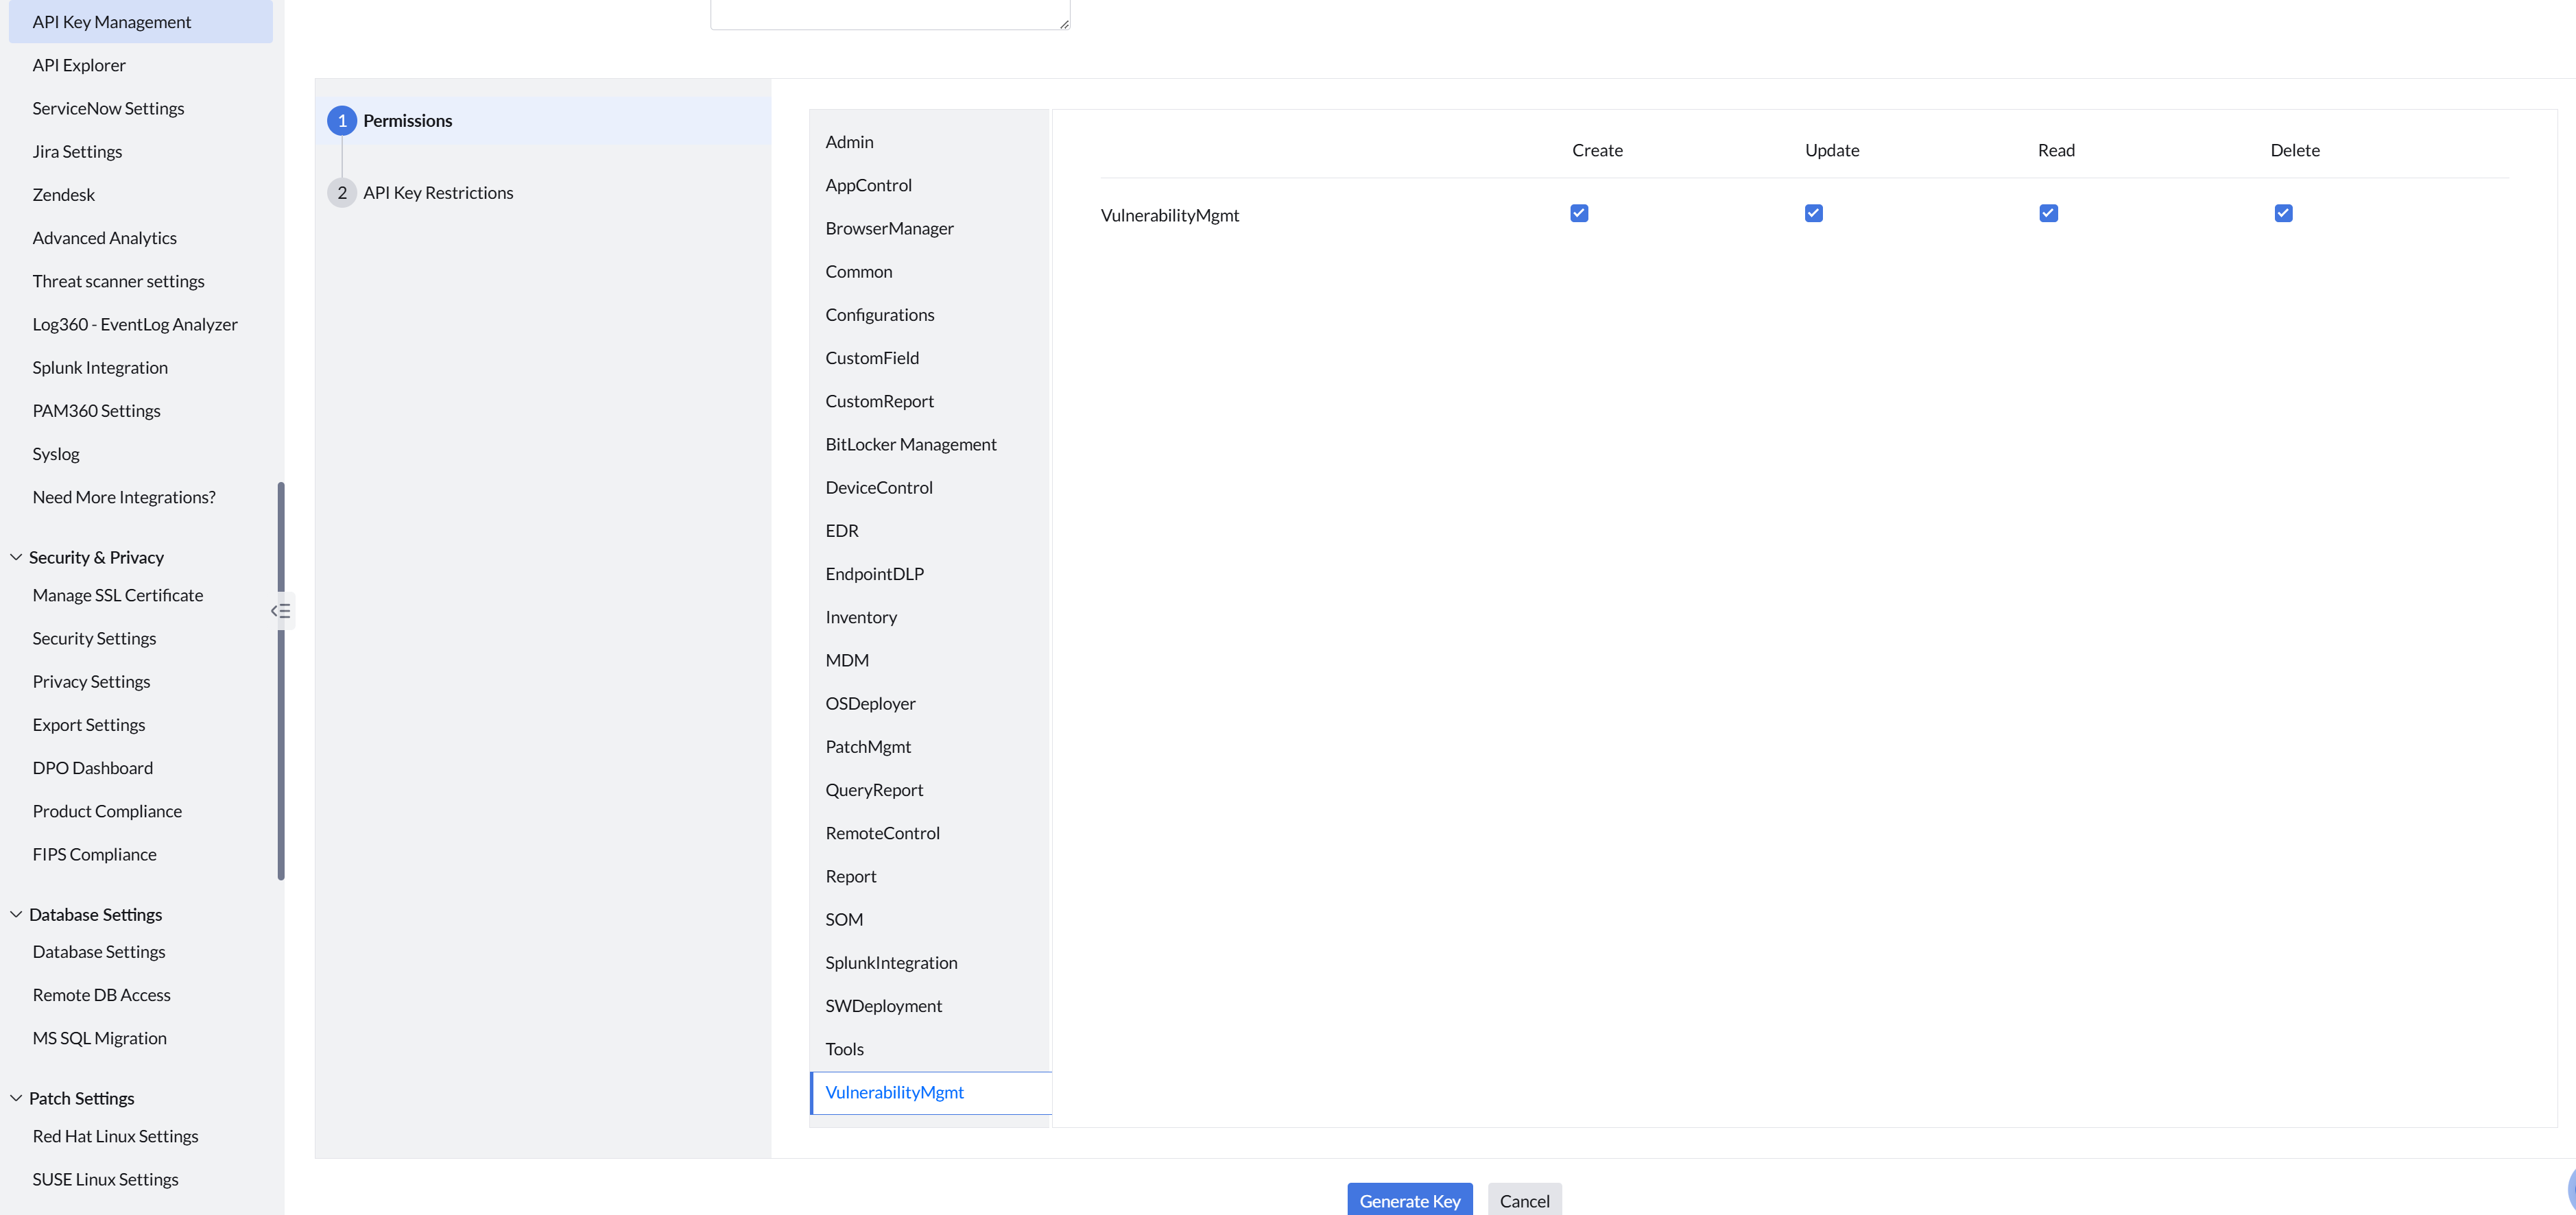
5. Ensure all checkboxes are enabled for all modules.
6. Click **Generate Key**. The API key will be generated with all permissions.
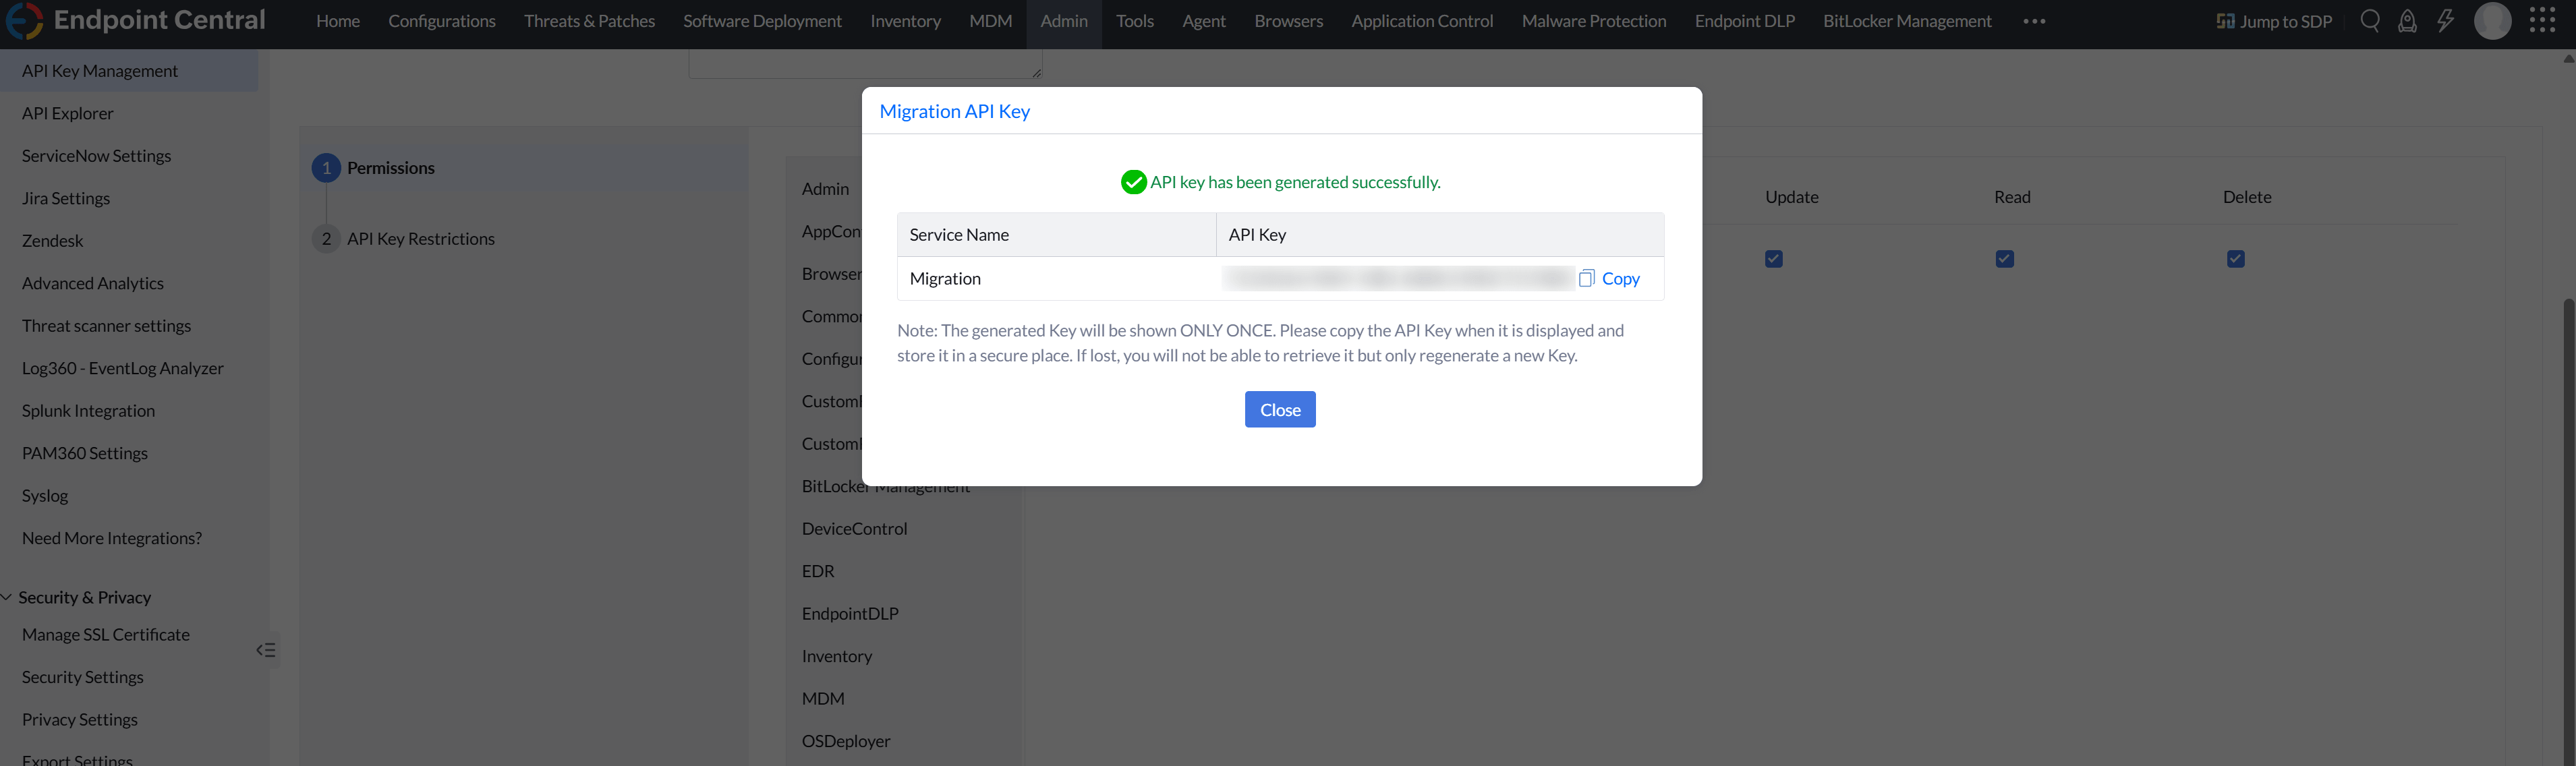
7. Enter the Server URL in FQDN format in the Server URL field and click **Proceed**. You will be navigated to the destination server page.
## Steps to authenticate for Cloud product
### Note
This authentication step is explained for migrating from Endpoint Central Cloud to Endpoint Central On-Premises. You can choose the appropriate authentication depending on the cloud product you are migrating. If you are migrating from an On-Premises product, refer to [Steps to authenticate for On-Premises product](https://www.manageengine.com/products/desktop-central/help/general/migrate-to-endpoint-central.html#onprem).
1. Select the required product to be migrated (the product where data needs to be migrated). For example, select **Endpoint Central Cloud** as the product name and provide all the destination server authentication details. Click **Authenticate**.
2. You will be navigated to the cloud accounts page to sign in. After logging in with your destination cloud server account, you will be redirected to the **Consents** page. Click **Accept** after reading all the terms and agreements.
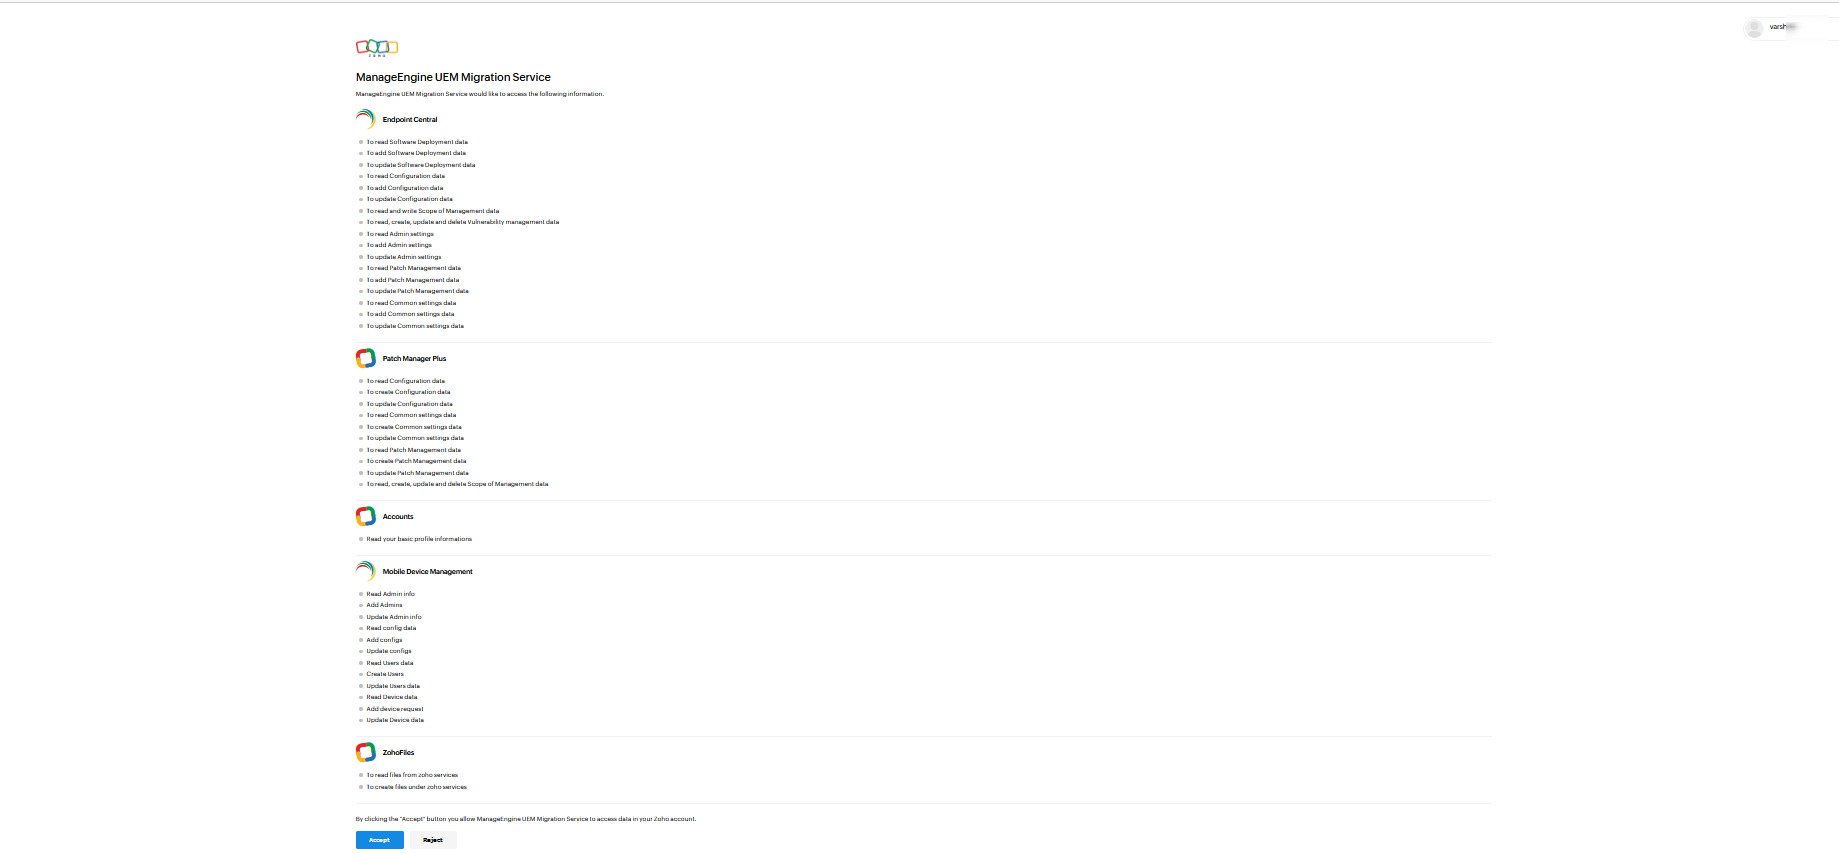
3. After authentication is complete, you will be navigated to the confirmation page. Click **Migrate Now**.
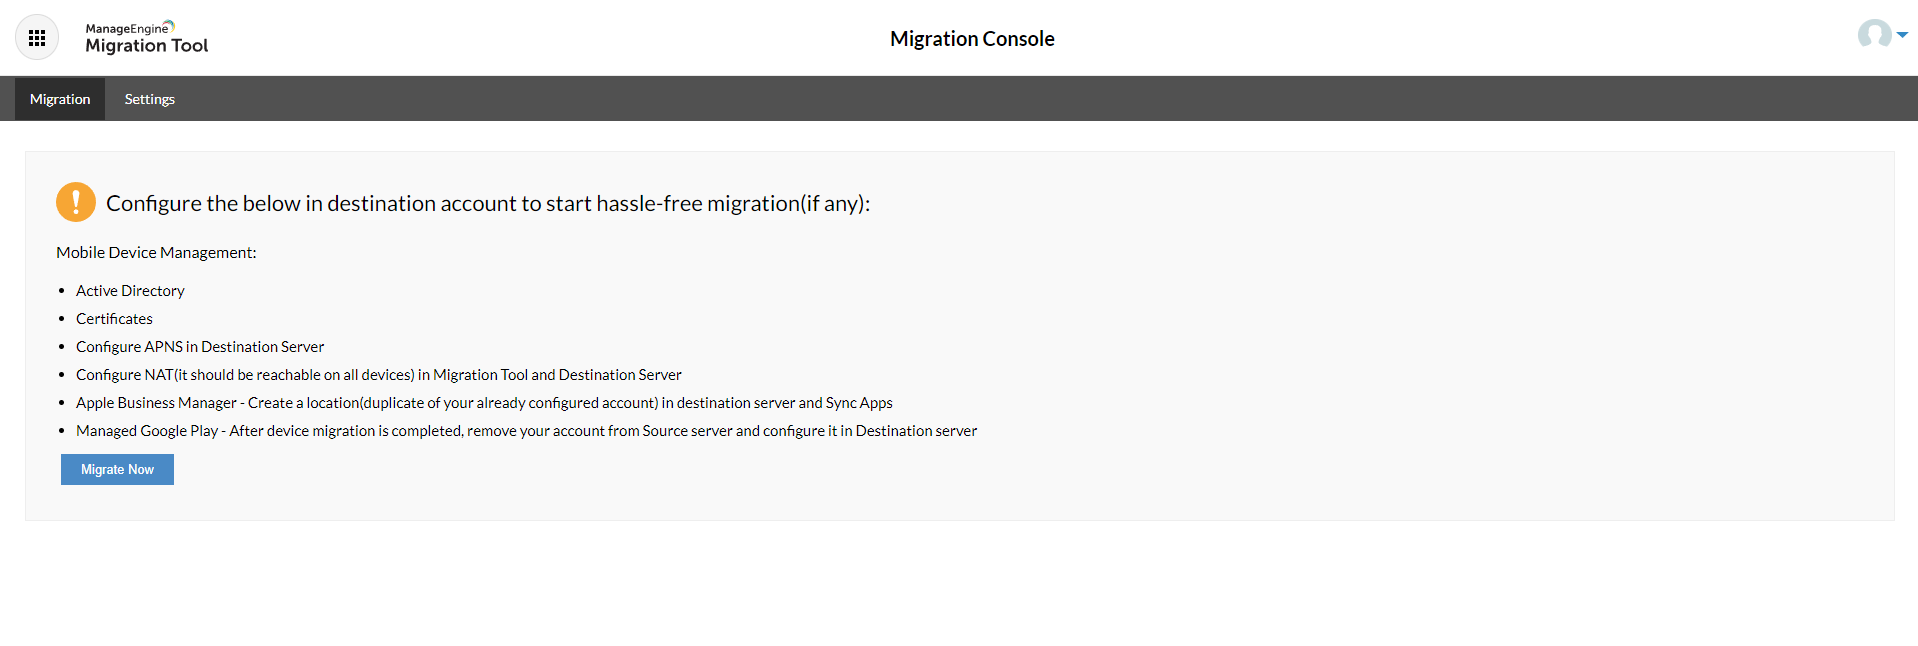
4. A pop-up will appear confirming the source and destination server details. Click **Accept and Migrate**.
## How to migrate between UEMS Cloud products?
1. Select the source server name as the product name.
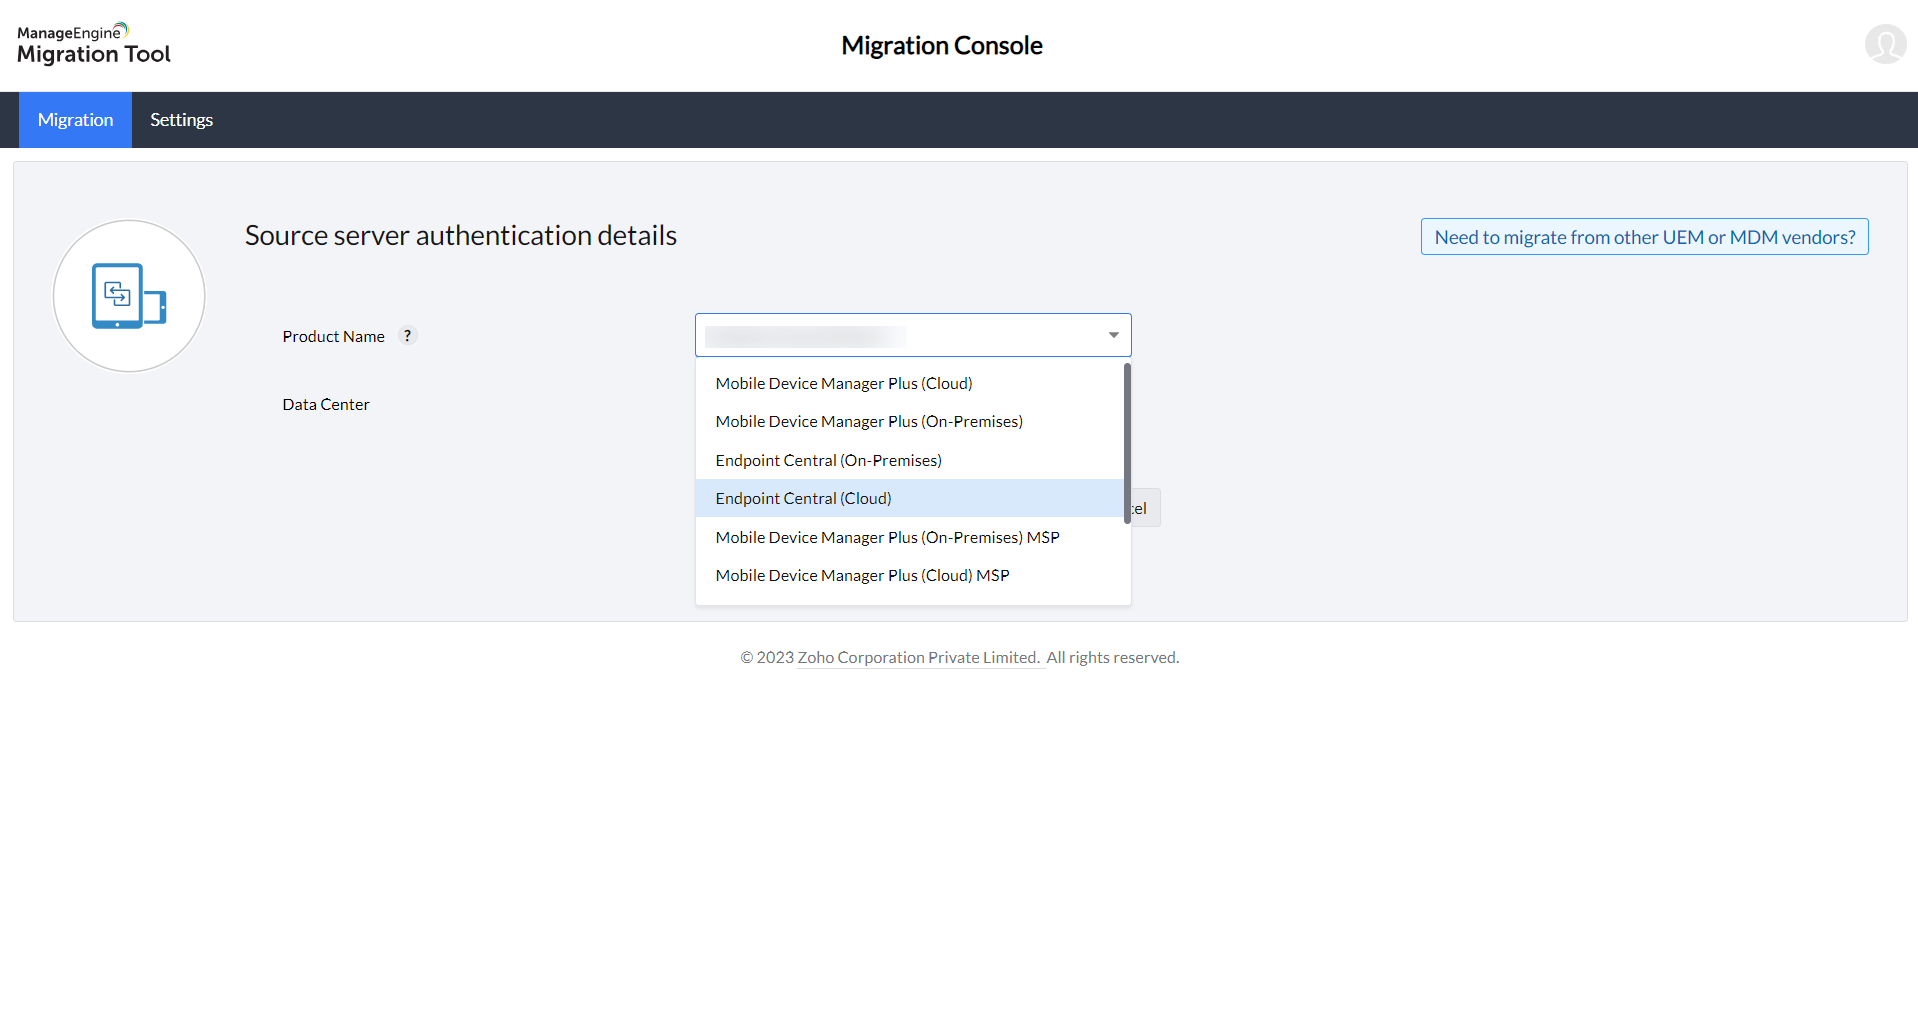
2. Select the **Data Center** in which your account is present.
3. Click **Authenticate**. You will be redirected to the accounts page to log in.
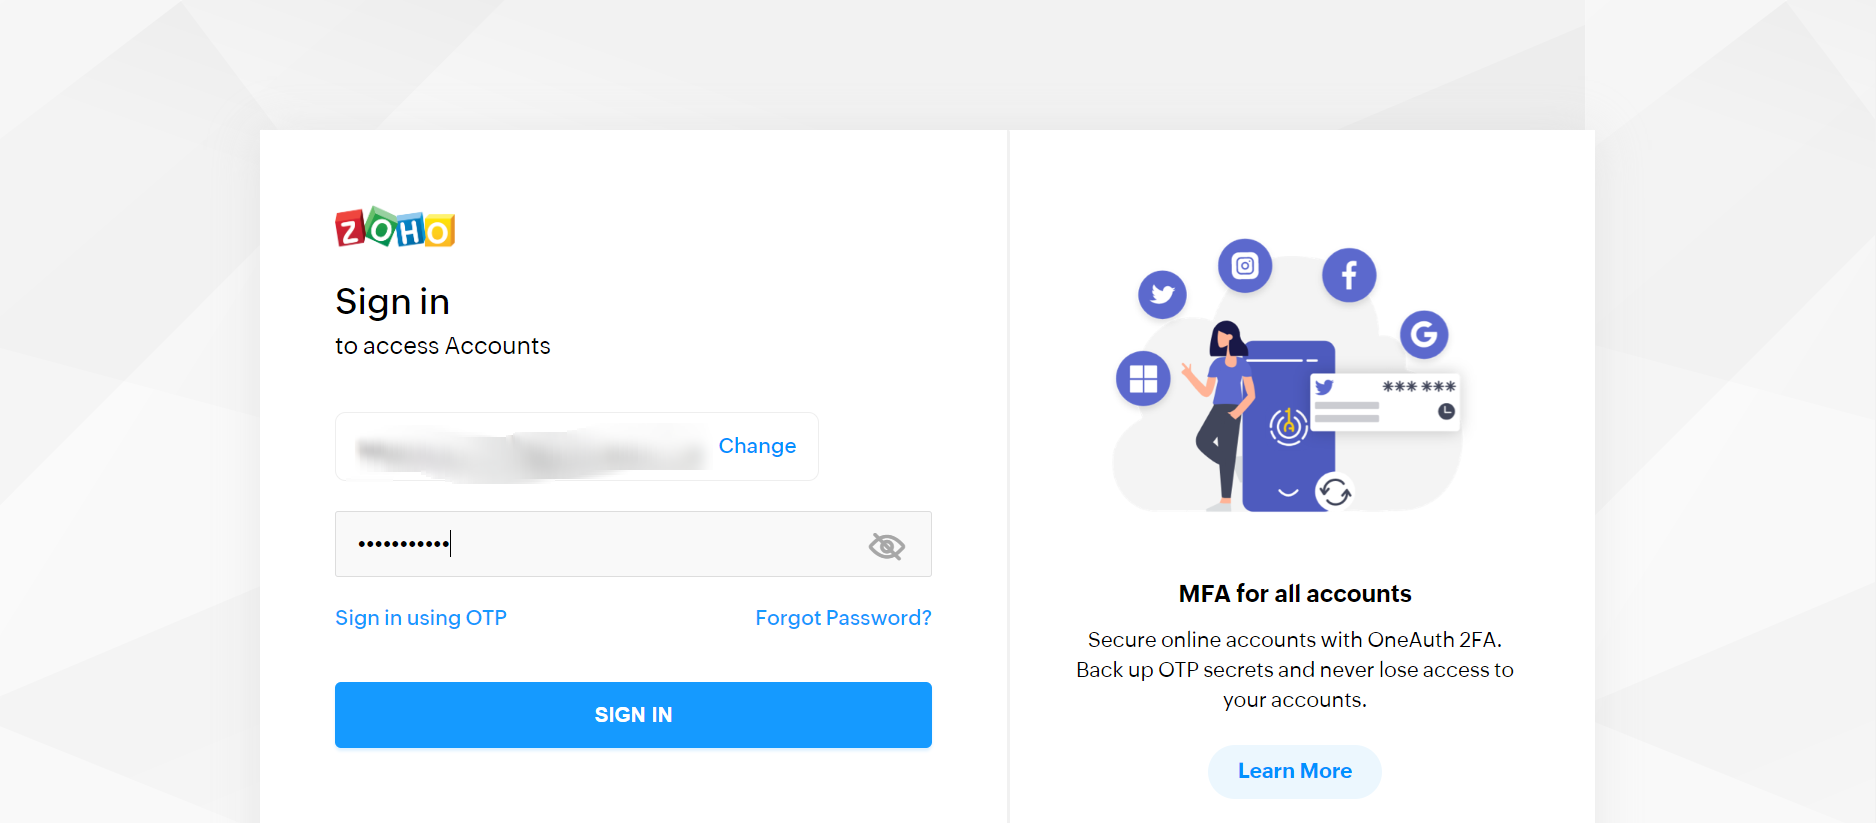
4. Click **Accept** on the Consents page.
5. After authentication is complete, you will be navigated to the destination server authentication page. Choose the **Cloud product** as the product name and provide all the destination server authentication details.
6. You will be redirected to your cloud account's sign-in page. Enter the email and password associated with your cloud account, then click **Accept** on the Consents page. Confirm that the email shown on the destination server page is accurate. If not, click **Reauthenticate**.
7. After signing in, you will be navigated to the confirmation page. Click **Migrate Now**.

8. A pop-up will appear confirming the source and destination server details. Click **Accept and Migrate**.
## Module customisation
After completing authentication, proceed to the next step to customise the modules for migration. **Choose the data modules to migrate.**
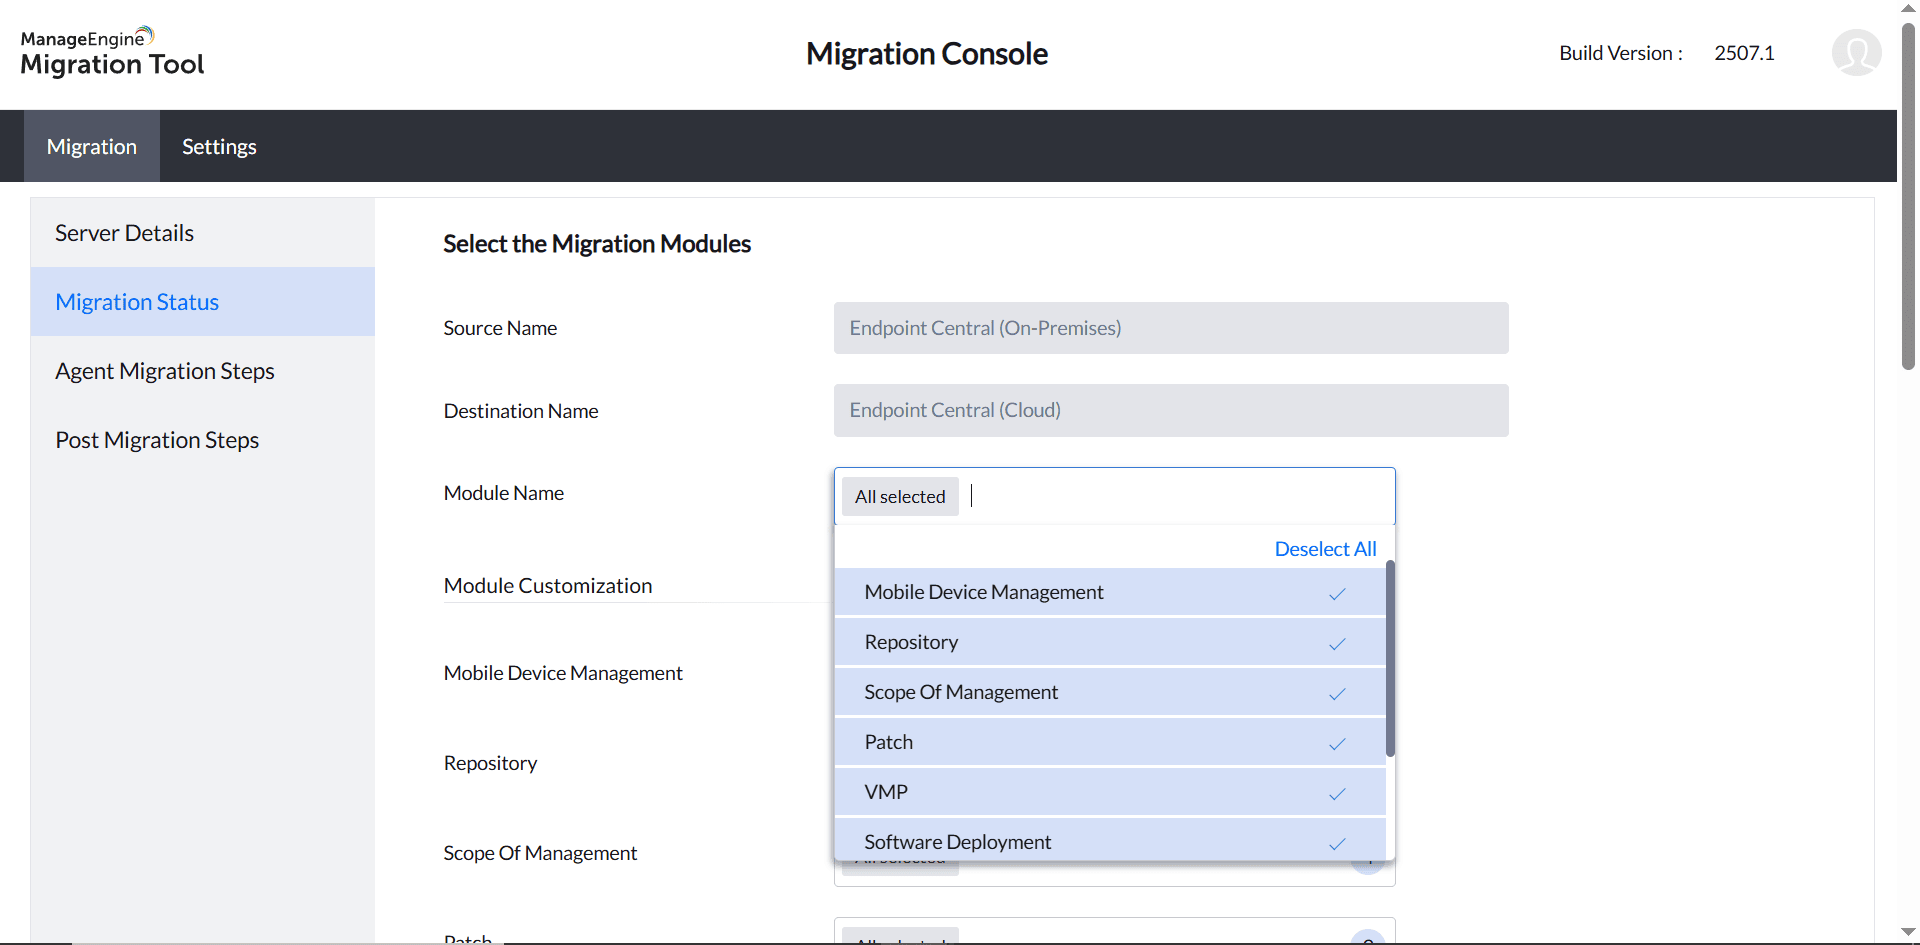
Each module represents a category such as:
- **Users**
- **Groups**
- **Devices**
- **Apps**
- **Profiles**
- **Enrollment Tokens**
Select the required modules, keeping in mind any dependencies. For example, the Groups module depends on the Users module — if the Users module is not selected, Groups cannot be migrated.
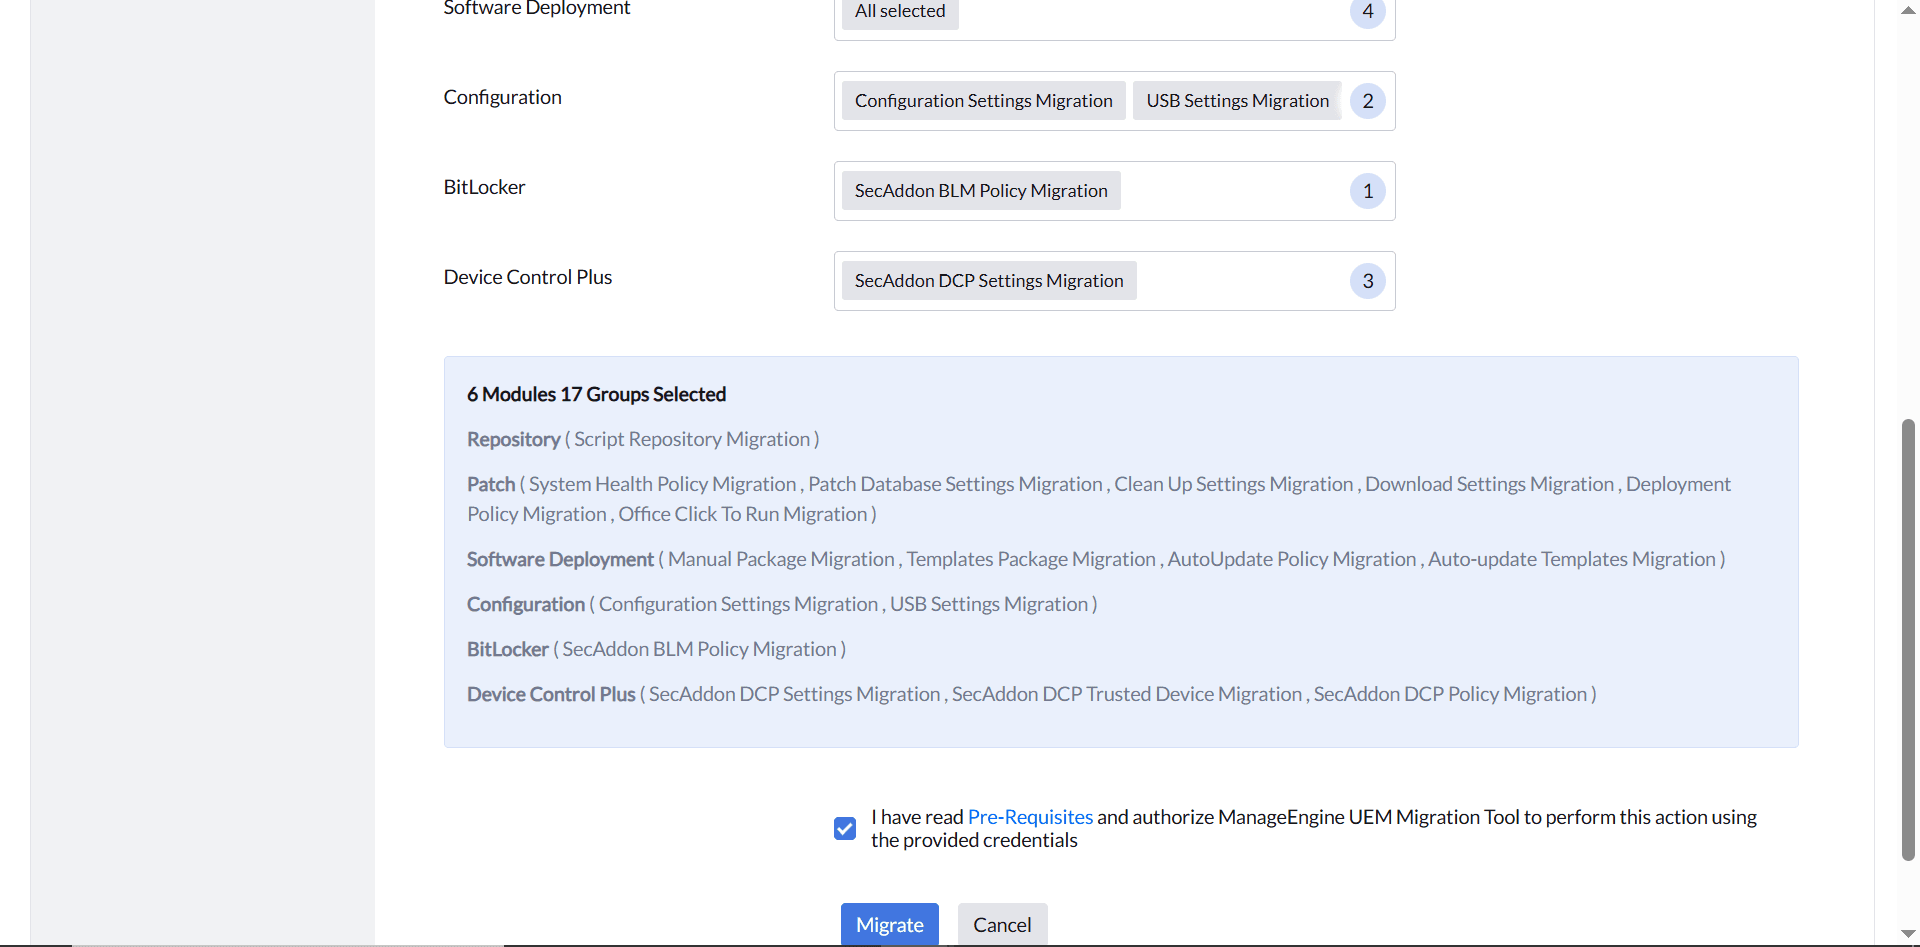
Select the checkbox to view the list of prerequisites in a pop-up. Ensure all prerequisites are completed before proceeding. Click **Agree and Proceed** to continue.
## Migrate the data
Now that you've selected the necessary modules, initiate the actual data migration.
1. Click **Migrate Now** to begin the data migration.
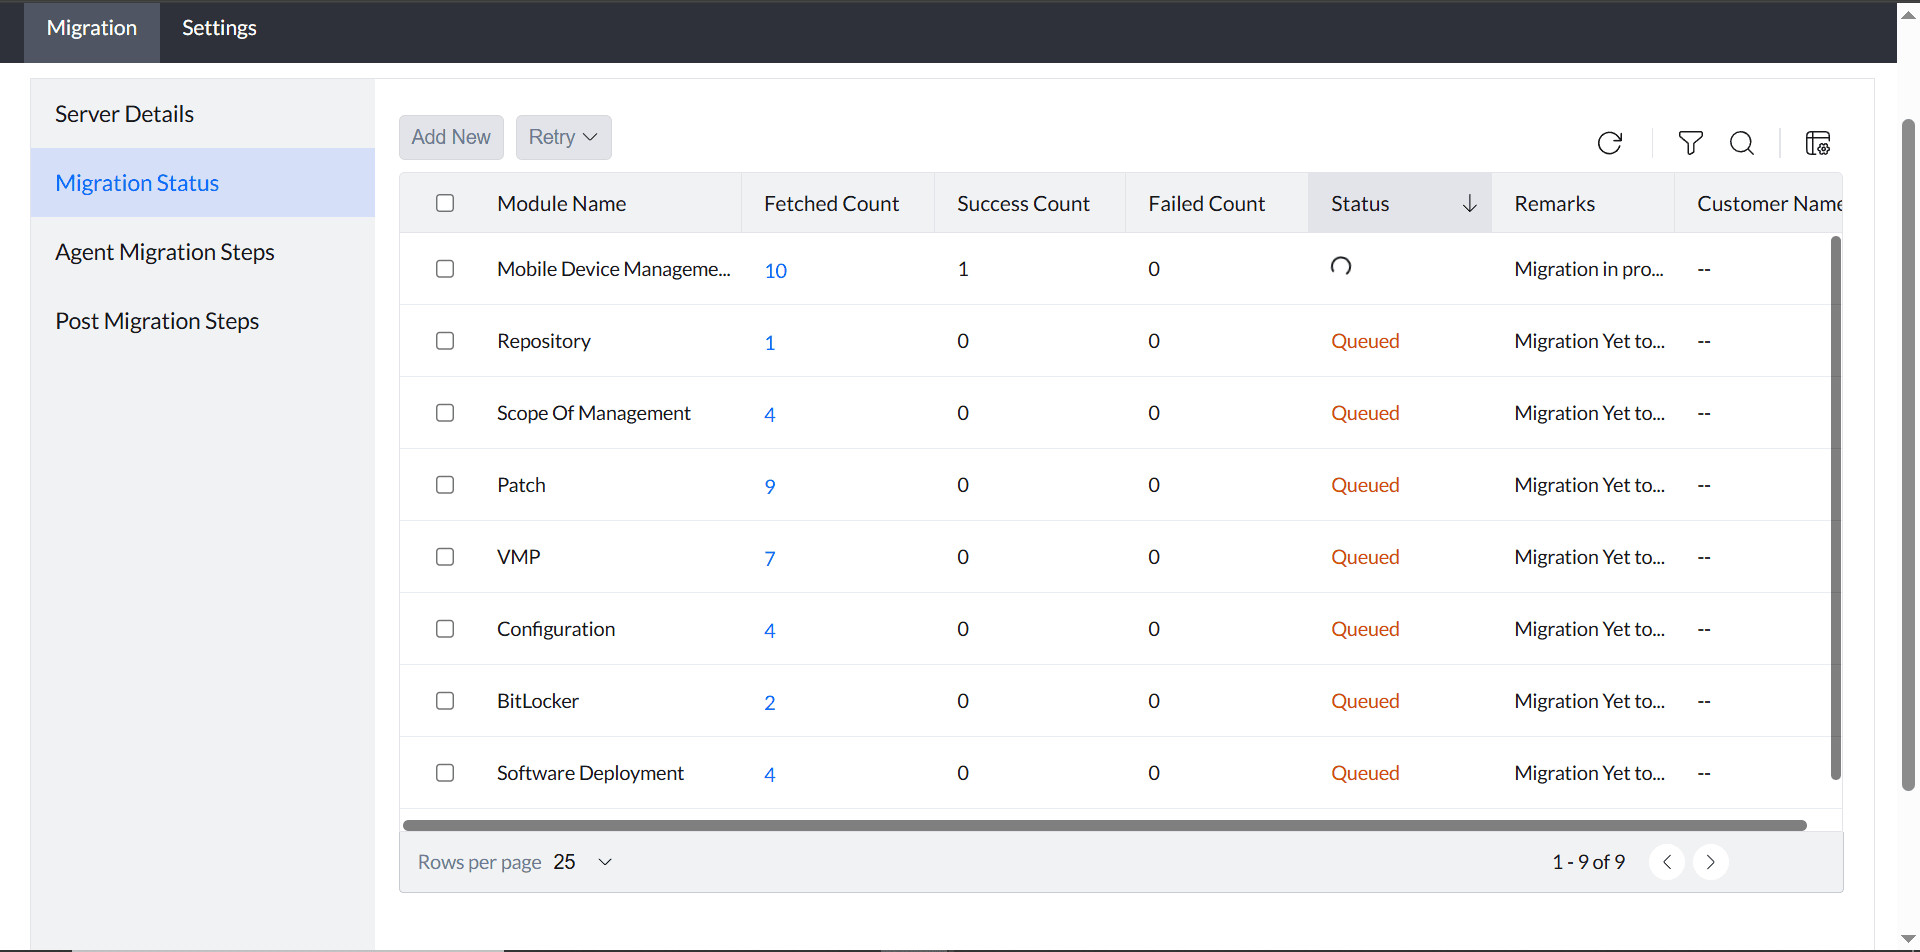
2. Monitor the status on the **Migration Status** page.
### Note
- If a module migration fails, click **Retry**. If it still fails, report the issue to support.
- If a dependent module fails, it will be marked as **Skipped**. While migration is in progress, you cannot retry, edit server details, or delete the configuration.
- After the initial selection, you can use the **Add New** button to migrate additional features or modules that were not selected earlier.
## Retry option for migration failure
All modules will be migrated from the source to the destination account. If any module encounters an unsuccessful migration, select that module and click **Retry**.
## Device migration
Once all modules have been successfully migrated, follow the steps below to migrate your agents to the cloud server.
### Migrate Windows/Mac/Linux devices
To migrate these agents, refer to [Agent Migration from On-Premises to Cloud](https://www.manageengine.com/products/desktop-central/help/desktop-central-agent-migration-from-op-to-cloud.html).
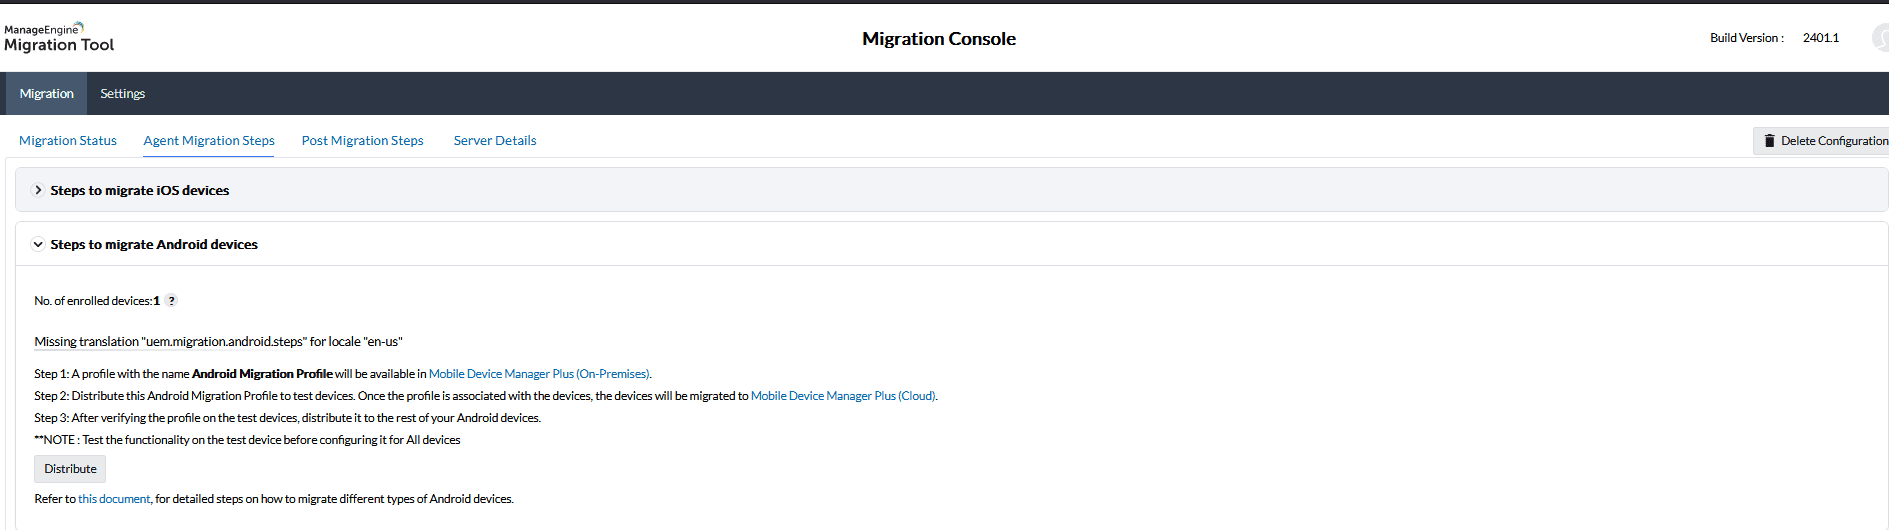
### Migrate Android devices
Android devices must be migrated with a migration profile applied to the device, or re-enrolled post-migration.
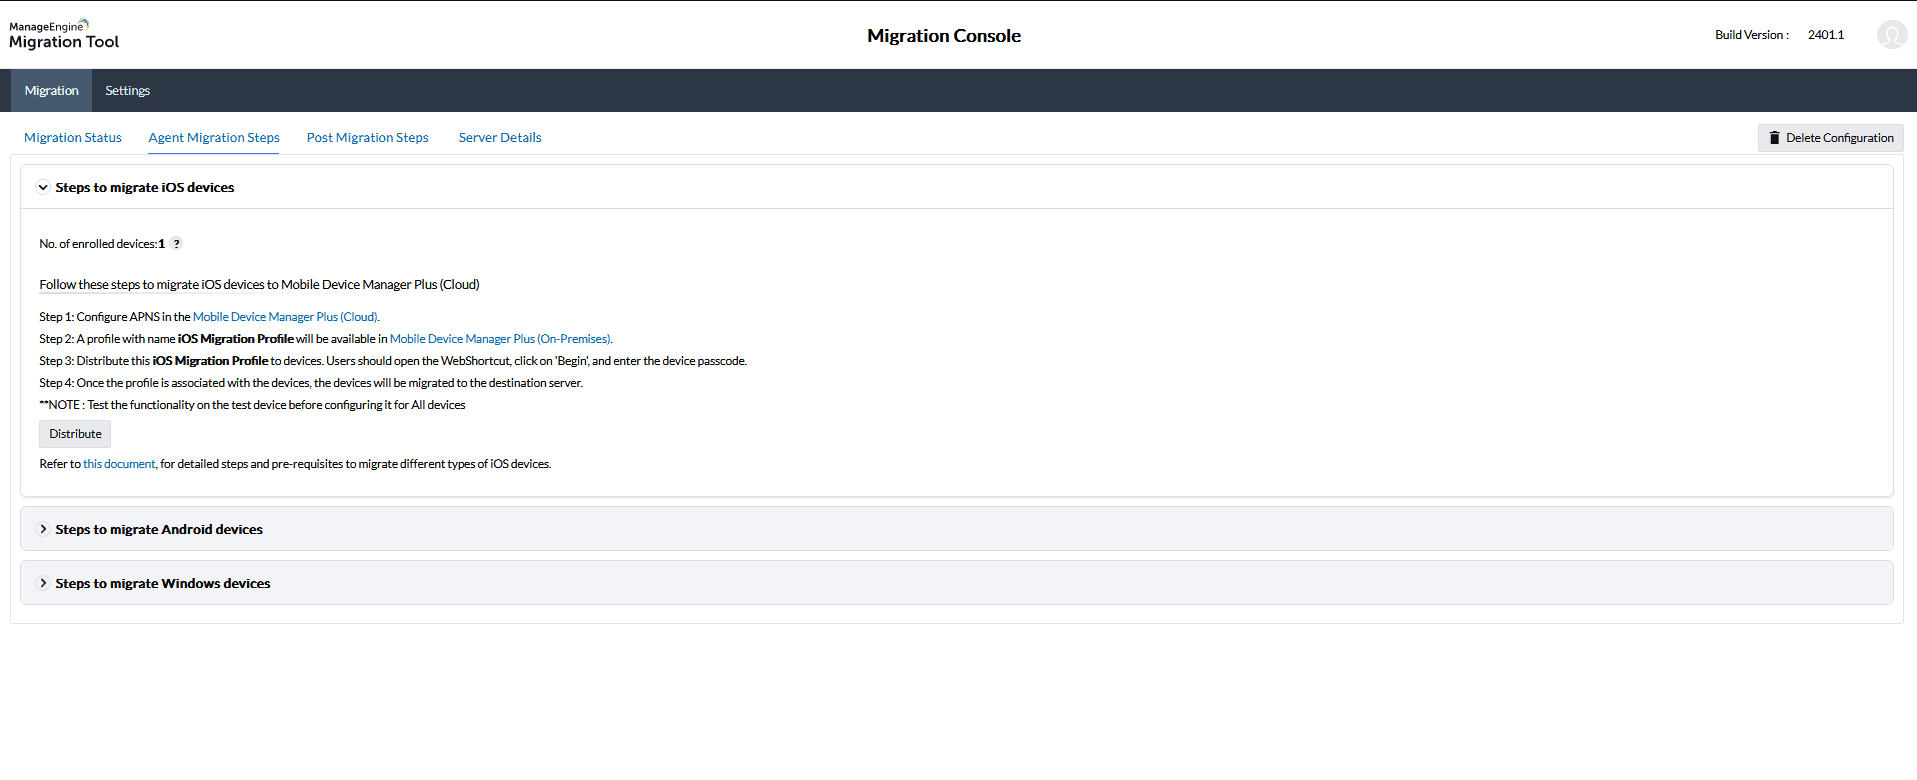
### Migrate iOS devices
## How to migrate the MDM part of Windows endpoints from Endpoint Central On-Premises to Endpoint Central Cloud
This step is required **only after deploying** the Endpoint Central agent through the source UEM and confirming the connection is established between the Endpoint Central server and agents.
Refer to the [agent installation document](https://www.manageengine.com/products/desktop-central/agent-installation.html) to install agents on Windows endpoints.
If you want to re-enroll devices under MDM, use Endpoint Central configurations by changing **%EXE_PATH%** to **%EXE_PATH% -f** in the `enrollment.bat` file inside scripts, and configure the Domain Controller configurations as mentioned in the document.
### Important
Do not use this method for machines enrolled using Azure AD enrollment, as it will brick the device.
## How to migrate the MDM part of Mac endpoints from Endpoint Central On-Premises to Endpoint Central Cloud
This guide covers the migration process for both ABM-enrolled and non-ABM Mac devices, including those managed by third-party vendors like JAMF, for the On-Premises to Cloud migration.
1. On the **Endpoint Central Cloud console**, navigate to **Agent → SoM Settings**.
2. Under the **Enable MDM Profile** tab, disable **Mac Devices** and click **Save**.
3. Install the agent from Endpoint Central Cloud on the target Mac devices.
4. After installation, create a **custom script configuration** using the provided script and dependency file.
5. Use the following arguments for the script file:
- **EC OP Auth Key:** Obtain the API key from the *API Explorer*.
- **DC Cloud URL:** Example — `endpointcentral.manageengine.com`
- **DC OP URL:** Example — `https://fqdn:8383/`
- **Whether device is enrolled in ABM:** Yes or No
6. Deploy the script from the Endpoint Central Cloud console.
7. The device will prompt for new profile installation. The end user must click **Prompt** and enter their password to enroll the device.
### Note
- For **ABM-enrolled Mac devices running macOS Sonoma**, use `me-mac-migration.sh` without the dependency file. The admin must run the script locally and enter admin credentials.
- Remote migration is not supported for Sonoma devices due to macOS limitations.
- **Non-ABM devices** will migrate without any issues, regardless of the macOS version.
## Post-migration actions
- Manually move the agent devices after successful migration. By default, new agents will be located under the default remote office. They can then be relocated under the respective remote offices — [Remote office management](https://www.manageengine.com/products/desktop-central/help/configuring_desktop_central/managing_computers_wan.html).
- Tasks created for deploying configurations and automated patch deployment will be saved as drafts and will remain suspended. They can be manually deployed to the targets after moving the agents to the respective remote office.
- Domain metadata will be added; domain credentials can be entered to sync the domains.
- Distribution servers for remote offices need to be manually installed.
- Inventory scan details will be populated after agent migration.
- Only software packages that are manually created, and template packages that are live and unmodified, will be migrated.
- After migration, mobile devices will be moved to the respective group. Individual profiles that are device-specific will not be migrated and need to be manually redeployed.
- Only AFW and enterprise apps will be migrated. Apple ABM/ASM tokens need to be manually added in the Cloud server.
Reach out to us for [personalized migration assistance and dedicated support](https://www.manageengine.com/ems/migration-tool.html).