×![]()
×
×![]()
×
×
How to configure Office 365 in mail server settings?
How to configure Office 365 in mail server settings?
This document explains the steps involved in configuring Office 365 in Mail Server Settings on Endpoint Central.
Authentication methods
OAuth Authentication
Prerequisites
- TLS 1.2 must be enabled on the server machine running Endpoint Central.
- SMTP Client Authentication must be enabled in Microsoft 365. Refer this for more info
In order to achieve the OAuth authentication for configuring the mail server, follow the steps given below:
- Login to Endpoint central and click Admin -> Server Settings -> Mail Server.
- Specify the information given below:
- Server Name : smtp.office365.com
- Port : 587
- Sender Email Address: Any email address with an independent mailbox (not a shared one)
- Test Email Address: Any Email Address
- Email Type: SMTP
- Enable TLS: Yes
- Username: Any Email address with an Exchange Online License and Application Administrator role.
Note
- To add Application Administrator role in Azure (admin.cloud.microsoft→ Users → search for the authenticating user → Roles → Application Administrator).
- The email ID provided in the Username field will be used for authentication.
- If Username and Sender Email Address differ, Send on Behalf permission is required.
Follow the instructions given below to verify Exchange Online License:
Exchange Online License
Login to Microsoft admin center and navigate to Users -> Active Users -> Properties -> Licenses and apps.
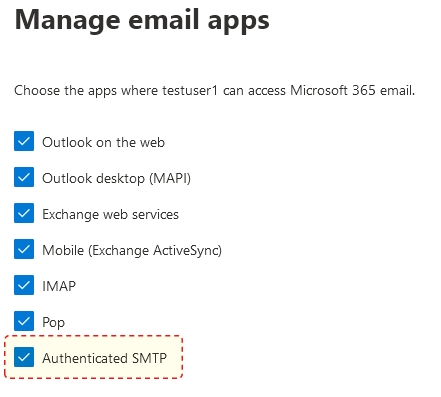
Enable Authenticated SMTP via Mail -> Email apps.
If Username and Sender Email Address are the same
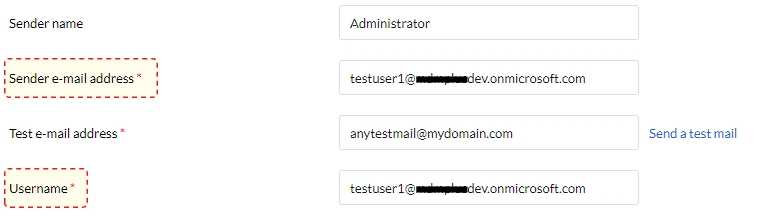
Verify criteria before saving.
If Username and Sender Email Address are different
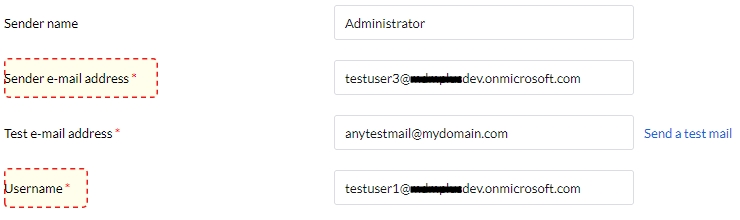
Ensure Send on Behalf permission is configured.
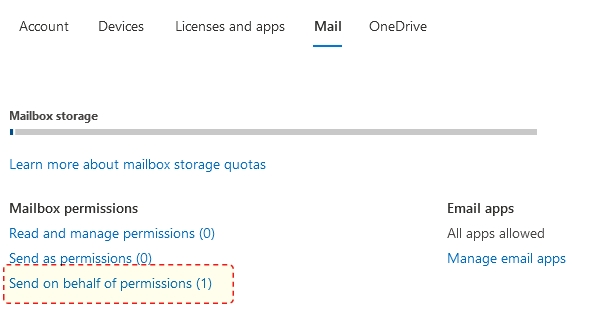
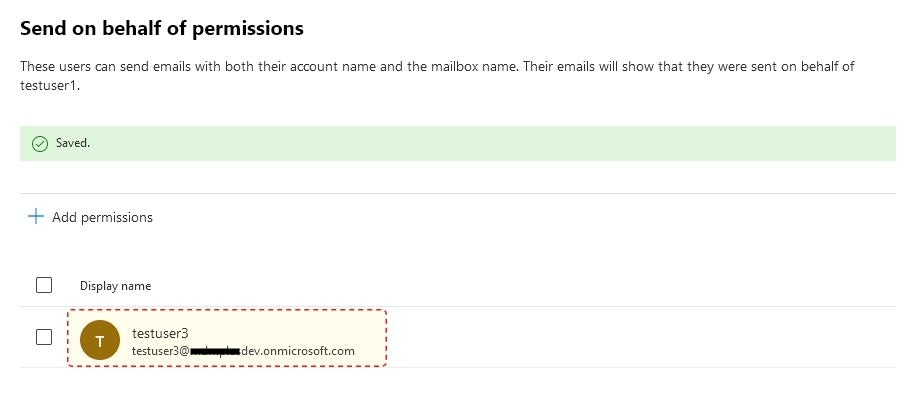
To add Send on Behalf permission:
- Go to Microsoft admin center -> Users -> Active Users
- Select user → Mail tab → Send on behalf
App Registrations
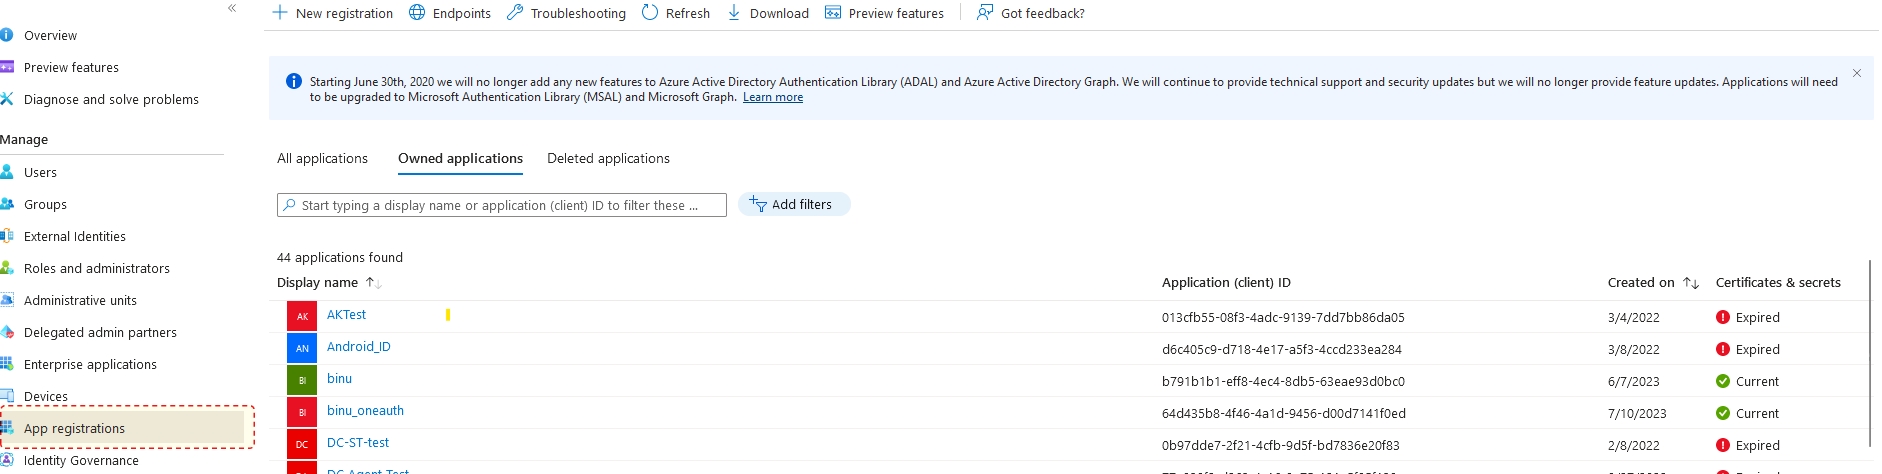
- Navigate to App Registrations -> New registration
- Enter name and account type
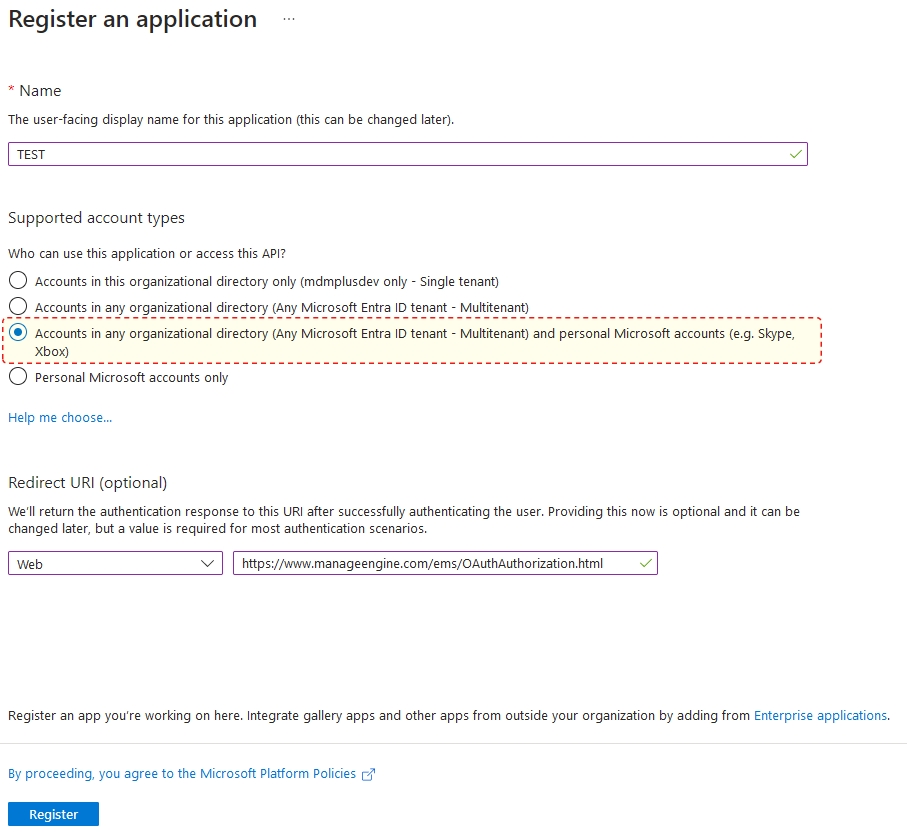
- Copy Redirect URL from Endpoint Central

- Paste Redirect URL and register
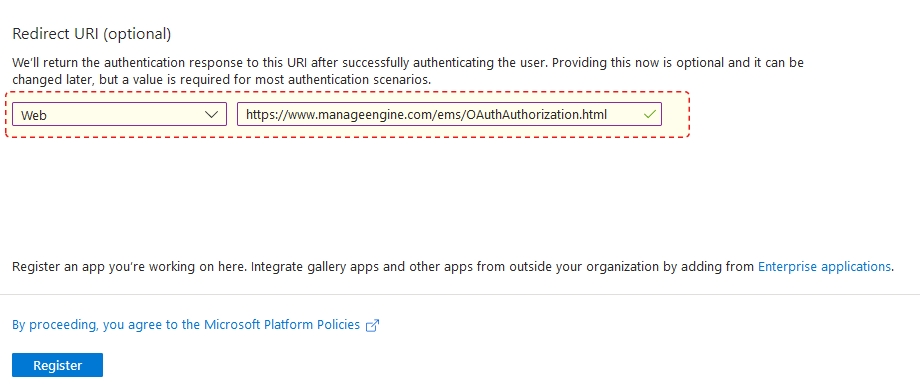
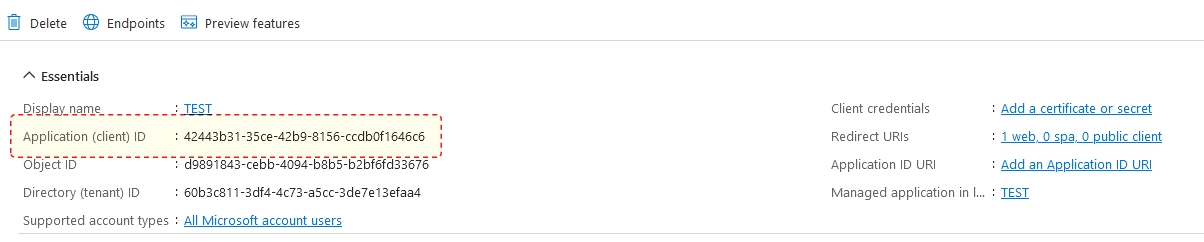
Client Secret
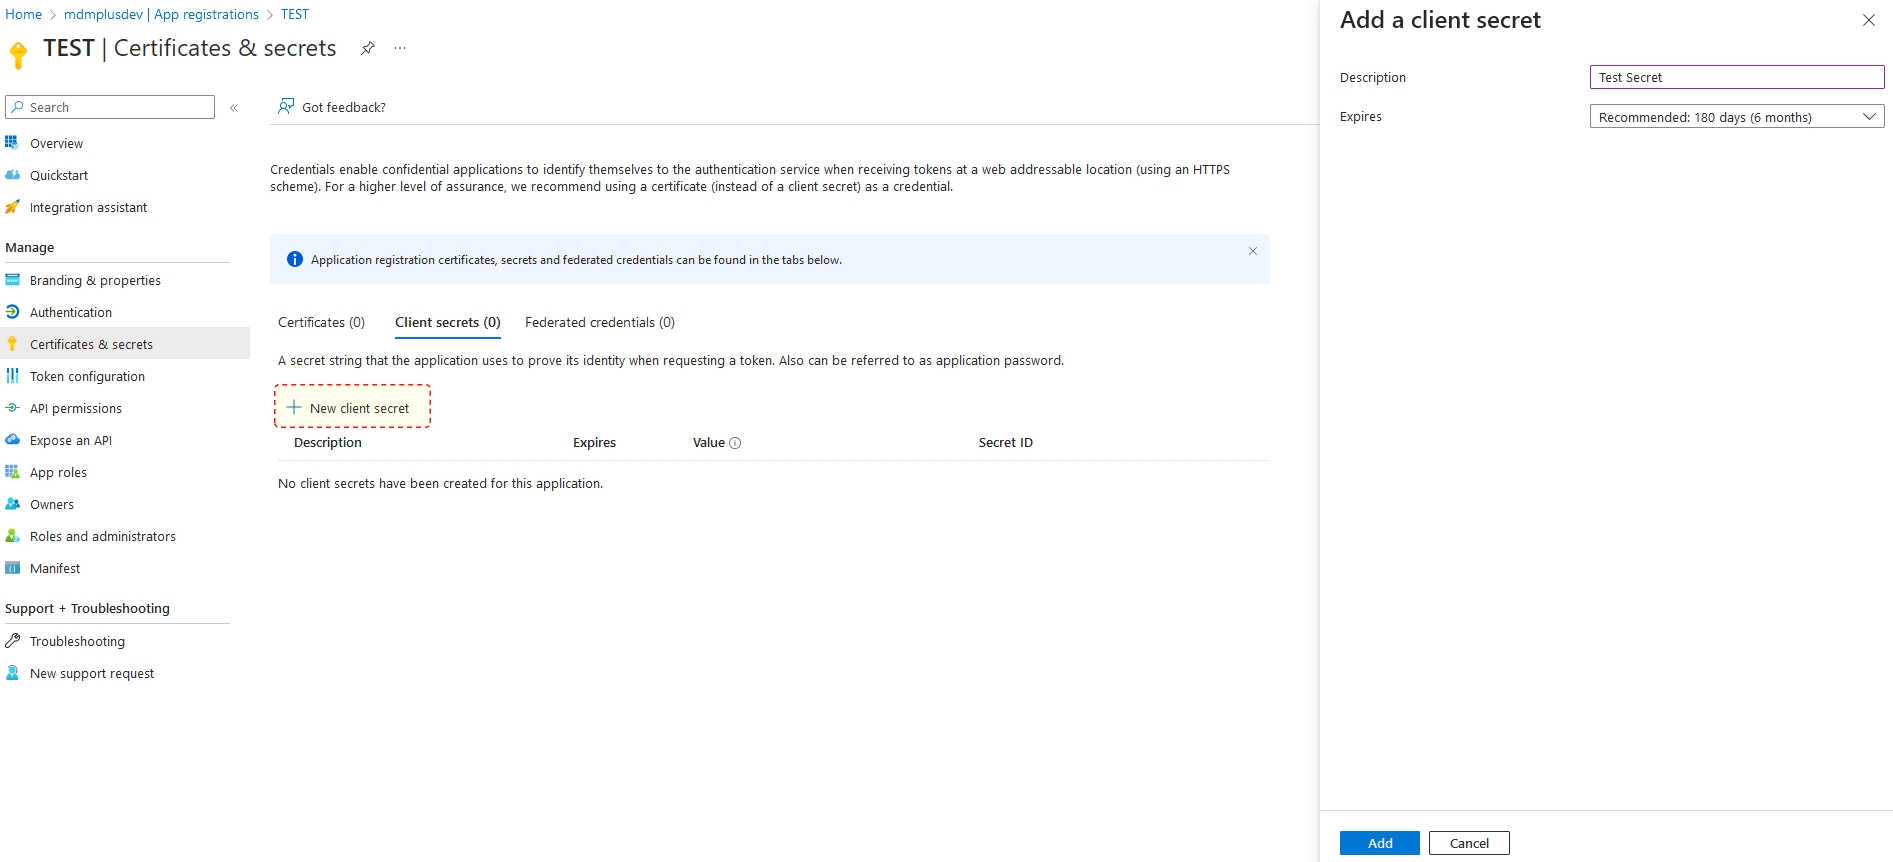
- Create new client secret
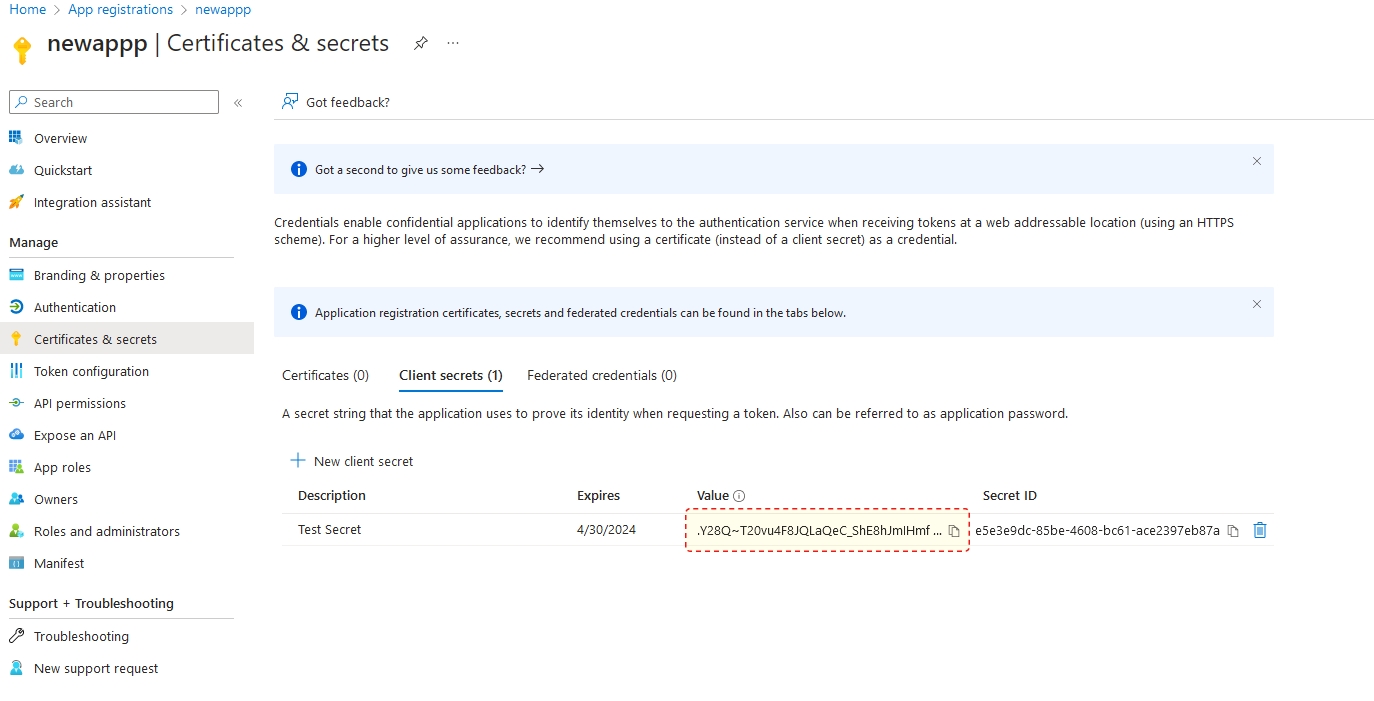
Recommendation
Choose the longest expiry period available.
Enter Client ID and Client Secret in Endpoint Central.
API Permissions
- SMTP.Send — Send emails
- offline_access — Token refresh
- User.Read — Read profile
Steps:
- Go to App → API Permissions
- Add Microsoft Graph → Delegated
- Grant admin consent
Important
Ensure Username matches Azure authentication account.
Now, you have successfully configured OAuth Authentication.
Basic Authentication
Note
OAuth is recommended.
- Click Admin -> Server Settings -> Mail Server Settings
- Server Name : smtp.office365.com
- Port : 587
- Sender Email Address: Any email address with mailbox
- Test Email Address: Any Email Address
- Email Type: SMTP
- Enable TLS: Yes
- Username: Send on Behalf enabled user
- Password: Specify password
You have successfully configured Office 365.