Managing Threat and Vulnerability Exceptions
All vulnerabilities, misconfigurations, and high-risk software discovered in your network appear under the Threats tab in the Endpoint Central web console. If you wish to exclude a displayed item from being interpreted as a threat, you can do so using the Threat Exception feature.
Applies to:
- Windows
Exception Types
Exceptions can be of either of the following types:
False Positive
When components, applications, or configurations in your systems are incorrectly identified as threats, you can mark them as false positives while defining exceptions.
Acceptable Risk
Identified threats (vulnerabilities, misconfigurations, or high-risk software) can be excluded as acceptable risk if they pose little to no risk. Conditions include, but are not limited to:
- When they are found to be affecting mission-critical servers that have a very narrow patching window and cannot afford extended downtime.
- When the patches released for those low-risk vulnerabilities are found to be problematic during patch testing and may cause downtime or disrupt application functionality.
- When your organization has legitimate use cases for certain business-critical practices that may also pose risk under specific conditions. For instance, shared folders facilitate centralized administration and provide a common location for users to store and access files, but folders shared with write permissions are displayed as misconfigurations under the Threats tab because ransomware and other malware can identify and spread through computers that have writable shared folders.
- When compensating controls such as host-based or network-based intrusion prevention systems are already in place to mitigate the security risk of the detected threats.
Exception Validity
While adding an exception, you can define its validity as either Permanent or Temporary:
- Permanent: Use this when the exception should continue to remain in effect until it is removed manually.
- Temporary: Use this when the exception is only required for a limited period and may need to be reviewed later.
Defining the Exception Scope
A threat may be found affecting multiple systems. You can control the scope of the exception by choosing the custom group to which the exception should be applied.
- A default group named All Computers Group is created by Endpoint Central. If you wish to exclude a threat for all machines in your network, choose All Computers Group in the custom group field. The excluded threat will no longer appear anywhere in the console except in the Manage Exceptions view under the Threats tab.
- If you want to exclude a threat for a specific group of machines, you can create separate custom groups based on OS, servers, or remote offices and specify that custom group while defining exceptions. Learn how to create custom groups. This is especially useful when you wish to exclude remediation for a particular group of machines. For instance, if a vulnerability or misconfiguration is excluded for a specific custom group such as Windows servers, and it is found to be affecting any other machines outside this custom group, it will still be displayed in the appropriate view under Threats, and remediation can be applied only to the affected machines outside the group for which the threat is excluded.
- When a new machine is added to the static custom group for which exceptions are defined, run a scan on the machine. Allow approximately 90 minutes after the scan completes for the threats excluded for that custom group to be excluded for the newly added machine.
- When a vulnerability is added as an exception, the corresponding patch will not be declined. You will still find those patches in the missing patches view. Patch deployment will not be affected in any way by adding vulnerability exceptions. However, if you wish to decline the patch, you can do so from the Patches tab.
Adding Exceptions
To add vulnerabilities, misconfigurations, or high-risk software to the exception list, navigate to the appropriate view under the Threats tab and follow the steps below:
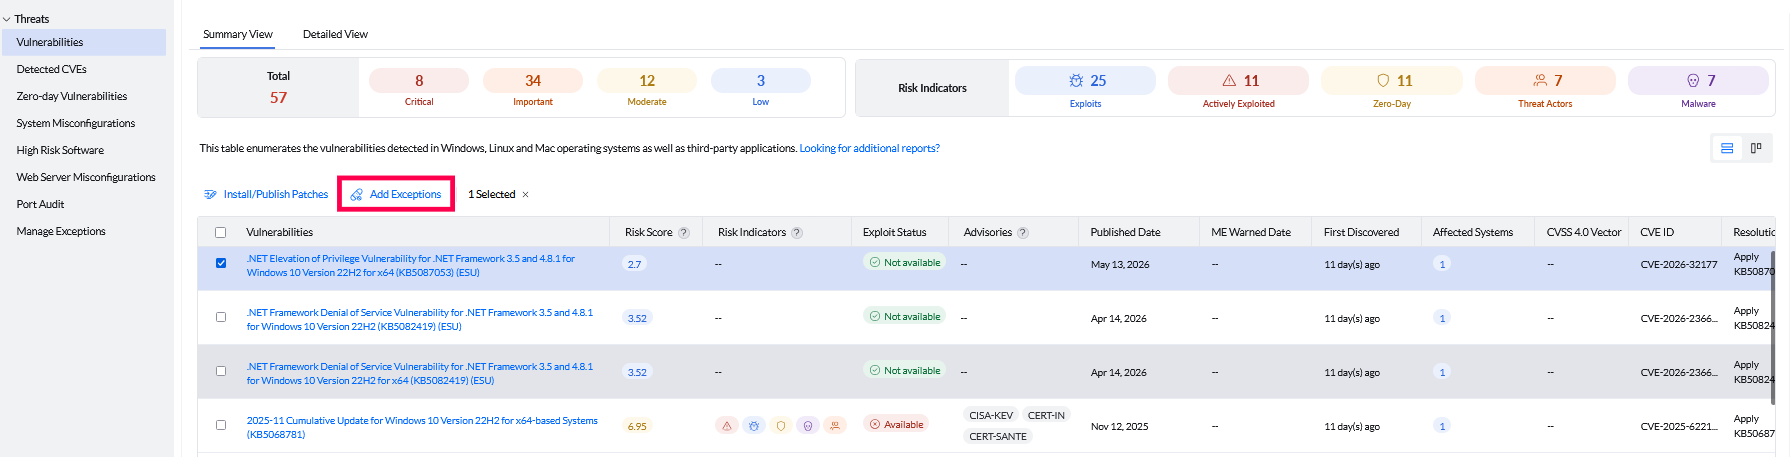
- Locate and select the items you want to exclude from being displayed as threats, and click Add Exceptions.
- Select a custom group to which you wish to exclude those threats.
- Choose the exception type: False Positive or Acceptable Risk.
- Specify the reason for exclusion.
- Choose the Exception Validity as Permanent or Temporary based on how long the exception should remain in effect.
- Click Save to add the selected items to the exception list.
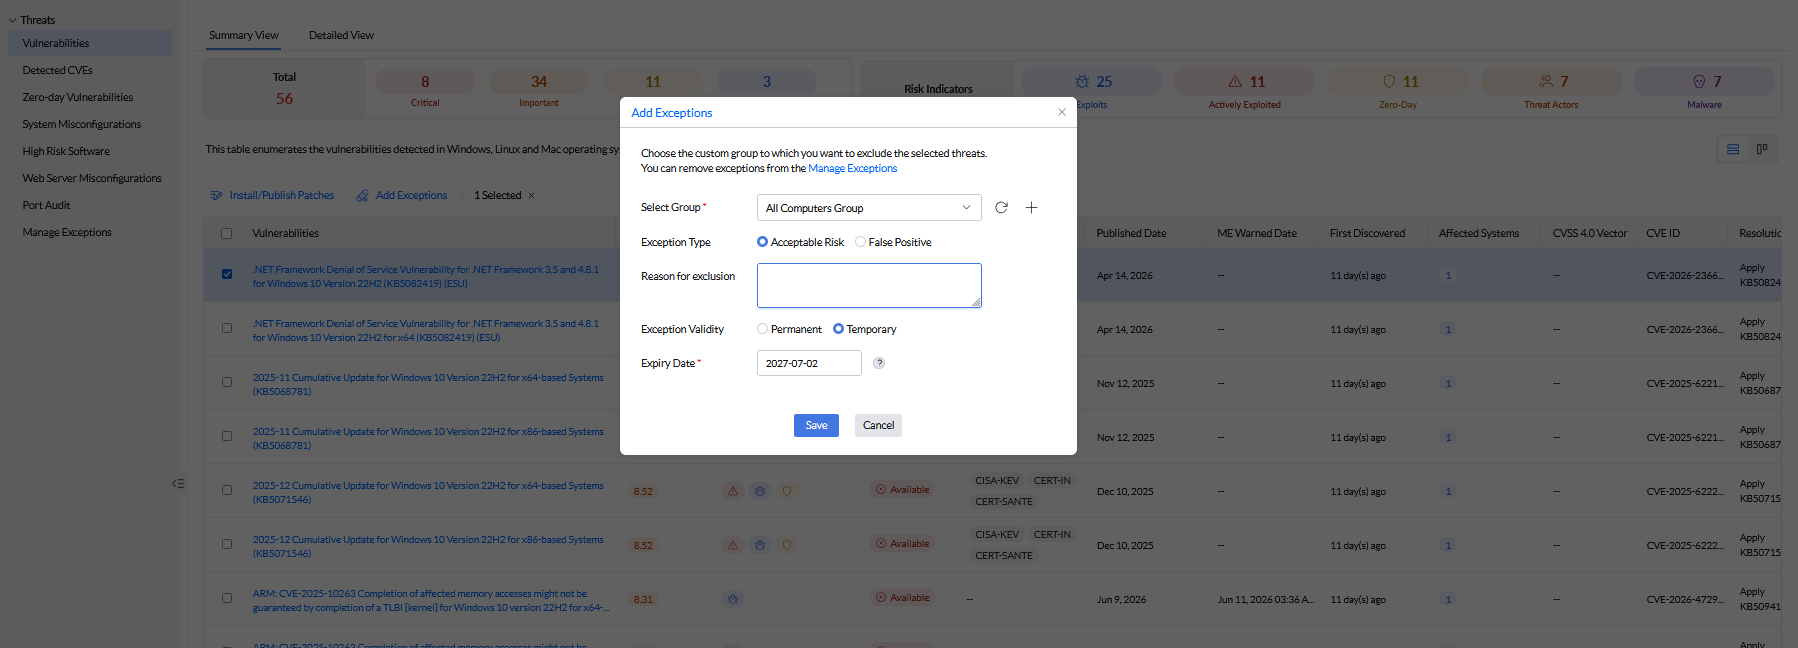
You can also add and view exceptions individually for each system by clicking the particular system under the Systems tab and accessing the drilled-down view of vulnerabilities, misconfigurations, and high-risk software present in those systems.
Managing and Modifying Added Exceptions
After an exception is created, you can modify its details from the Manage Exceptions view. Navigate to Threats → Manage Exceptions.
Select the required custom group to view the exceptions defined for that group. The following details are available for each excluded item:
- Excluded Time: The date and time when the exception was added.
- Excluded By: The user who added the exception.
- Exception Type: Indicates whether the item is excluded as a False Positive or an Acceptable Risk.
- Exception Validity: Indicates whether the exception is marked as Permanent or Temporary.
- Reason for Exclusion: The reason specified while adding or modifying the exception.
- Expires In: The remaining validity period of the exception. For permanent exceptions, this value is displayed as Never.
- Expiry Date: The date on which a temporary exception will expire. For permanent exceptions, this value is displayed as Never.
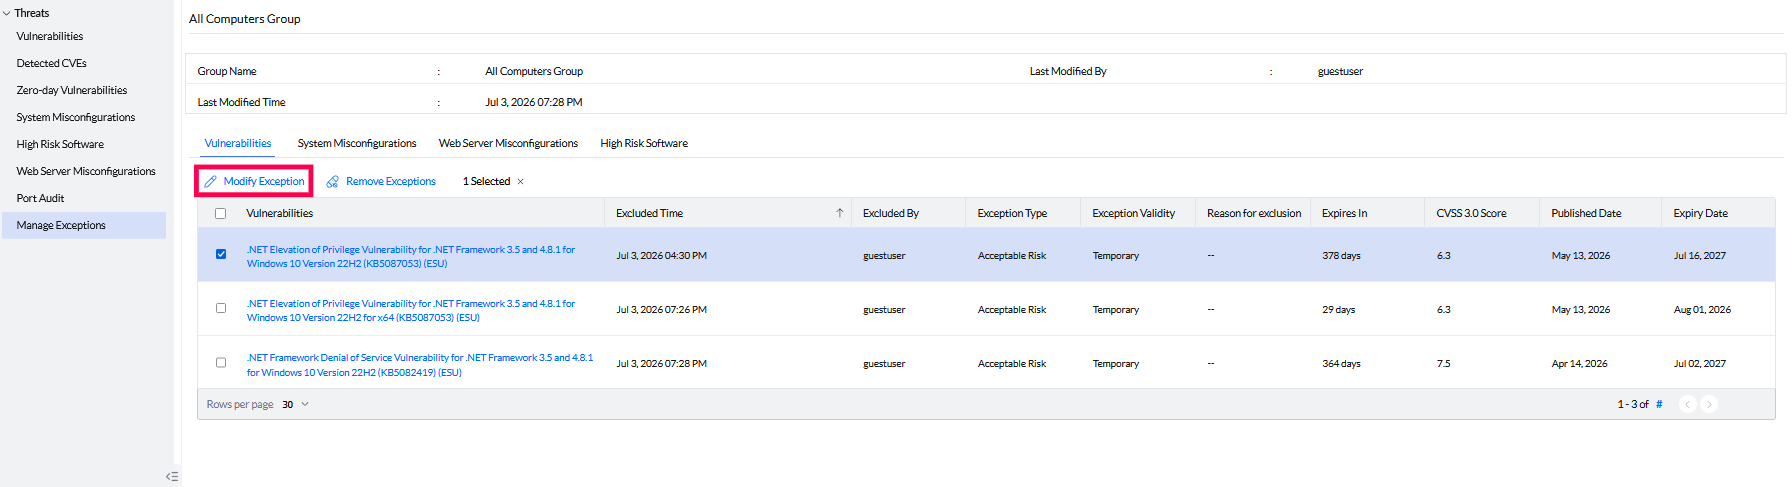
Modify an Exception
- Click Modify Exception for the required item.
- Update the exception details such as Exception Type, Reason for Exclusion, and Exception Validity.
- Click Update to save the modified exception details.
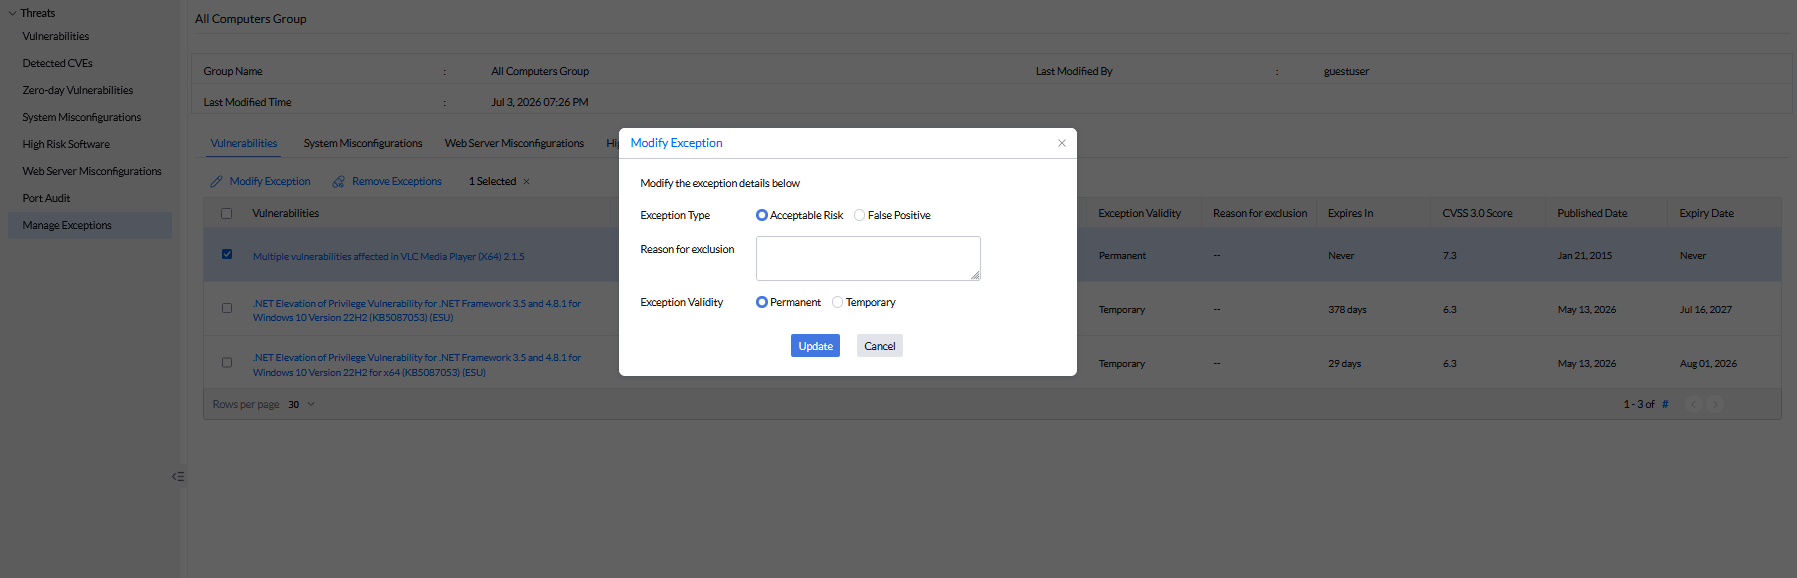
Remove an Exception
Click Remove Exception under the Action column to remove all exceptions for a custom group.