- Overview
- Configuration
Okta
Simplify Okta Authentication with ADSelfService Plus Integration
Okta is a cloud-based identity and access management platform that enables organizations to securely manage user authentication and access across various applications and resources. Integrating ADSelfService Plus with Okta provides secure SSO access, with advanced authentication and passwordless login for a seamless user experience.
Simplify user login using SSO
Enable one-click SSO, allowing users quick access to Okta’s suite without login friction.
Enhanced security for application access
Implement MFA methods like FIDO2 and biometrics, ensuring that only verified users can access Okta, thus enhancing security for sensitive resources.
Improved user experience with passwordless login
Allow users to access Okta without the hassle of managing passwords, reducing login delays and minimizing password-related support requests, benefiting both users and IT teams.
Configuring OpenID SSO for Okta
These steps show you how to configure the single sign-on (SSO) functionality using OpenID between ManageEngine ADSelfService Plus and Okta.
- Do not terminate the session before the configuration is complete in both the identity provider and the service provider.
- Please enable HTTPS is the product to ensure proper functioning of single sign-on.
- Login to ADSelfService Plus as Admin.
- Go to Configuration > Password Sync/ Single Sign On and click Add Application. Select Okta from the list. Note: You can also use the search bar, in the top-left, to search for the application.
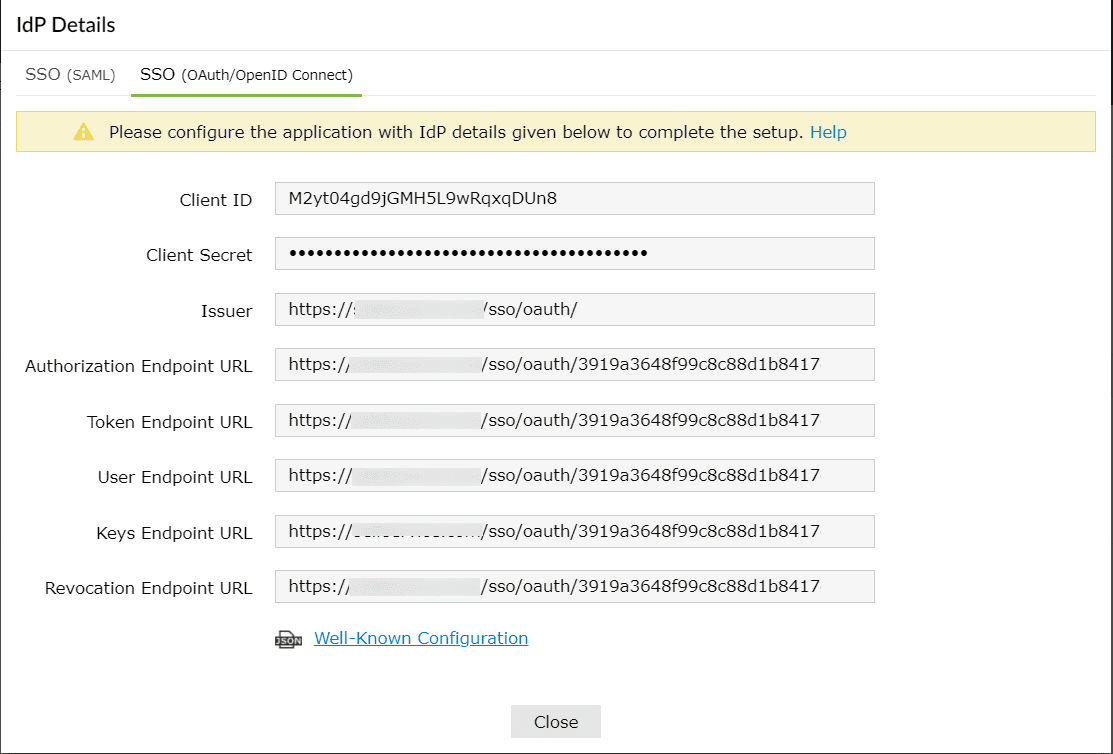
- Click on IdP Details and select the SSO (OAuth/OpenID Connect) tab.
- Copy Client ID, Client Secret, Issuer, Authorization Endpoint URL, Token Endpoint URL, User Endpoint URL, and Keys Endpoint URL.
Okta (service provider) configuration steps
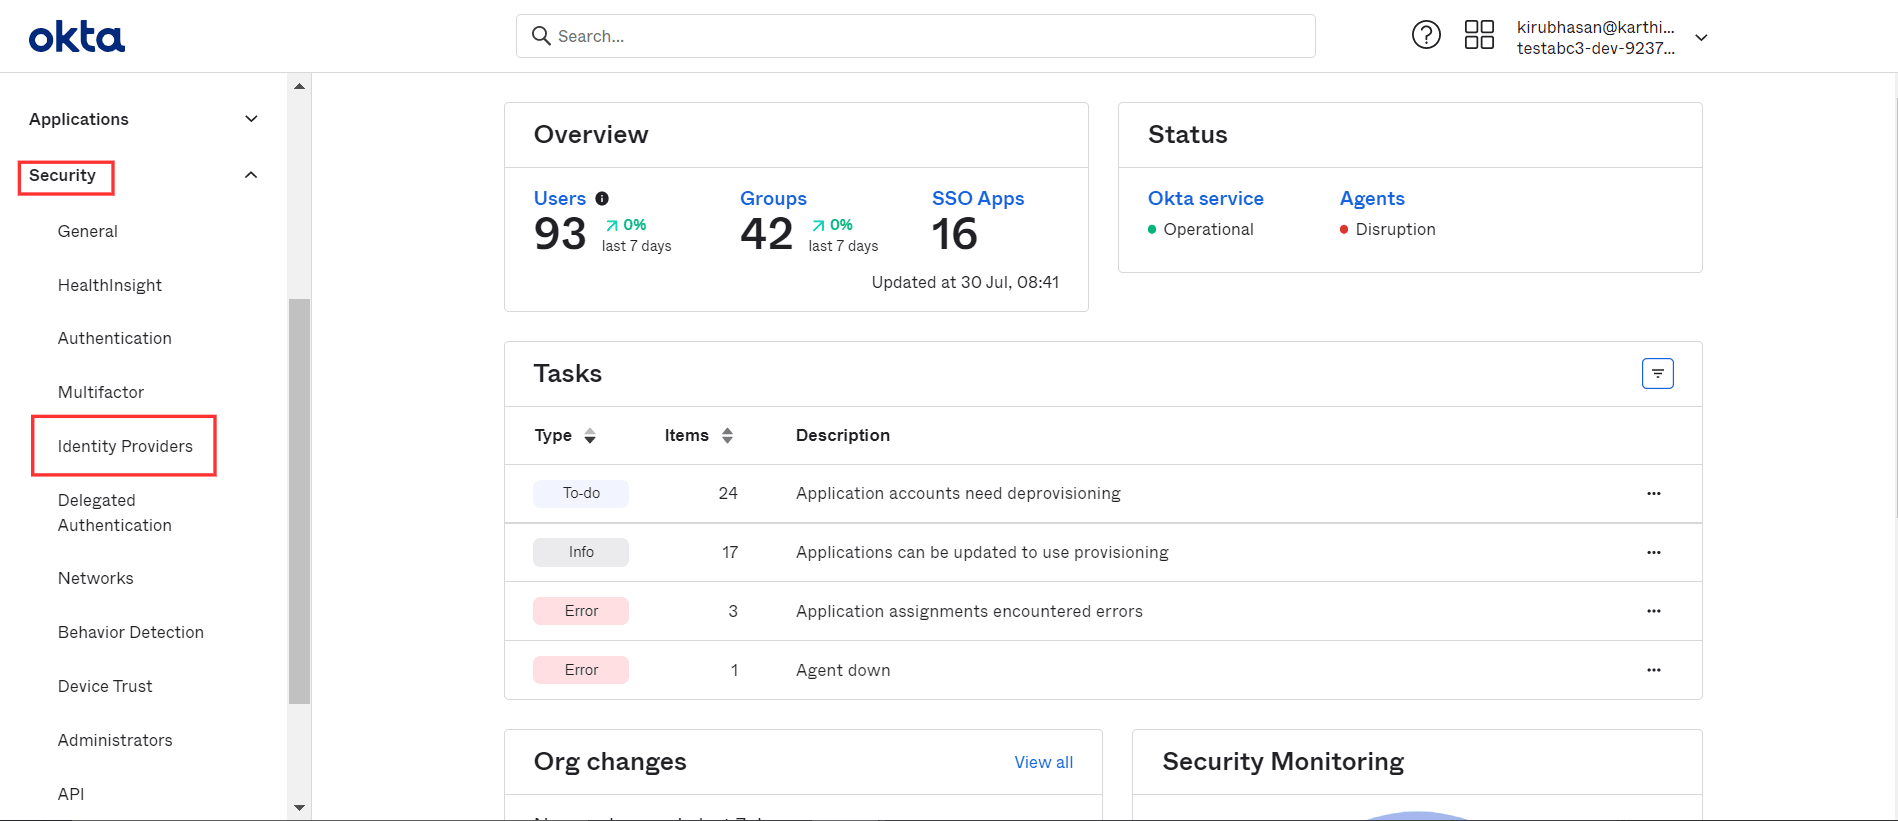
- Login to Okta as administrator.
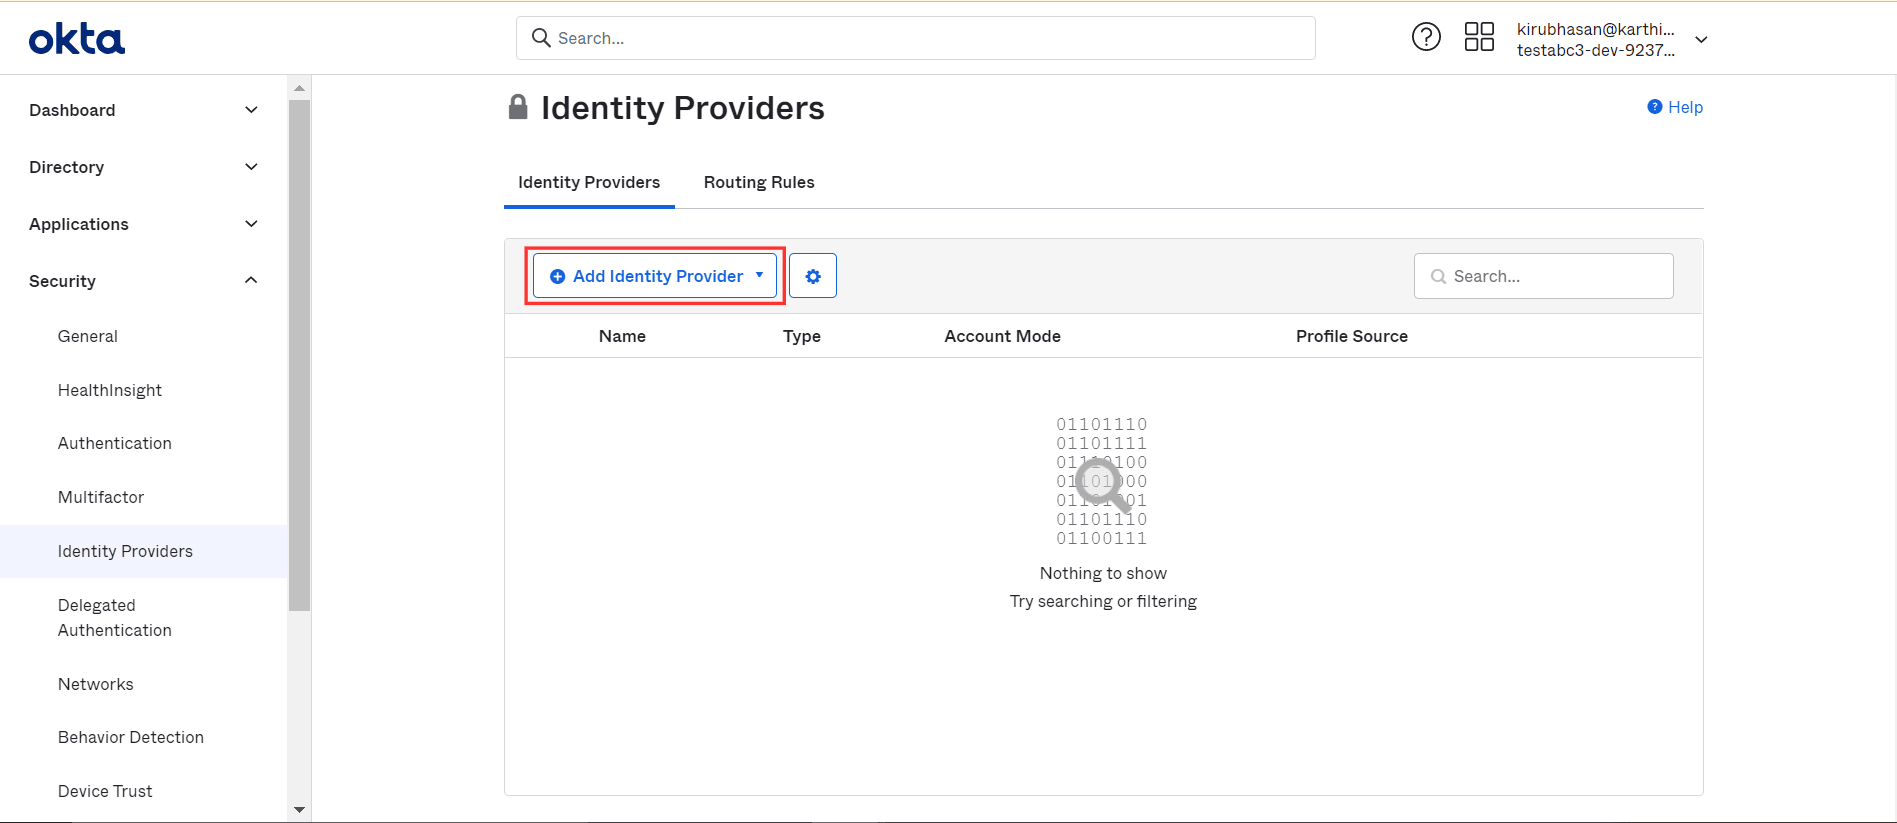
- Go to Security → Identity Providers → Add Identity
Provider → Add OpenID Connect IdP.
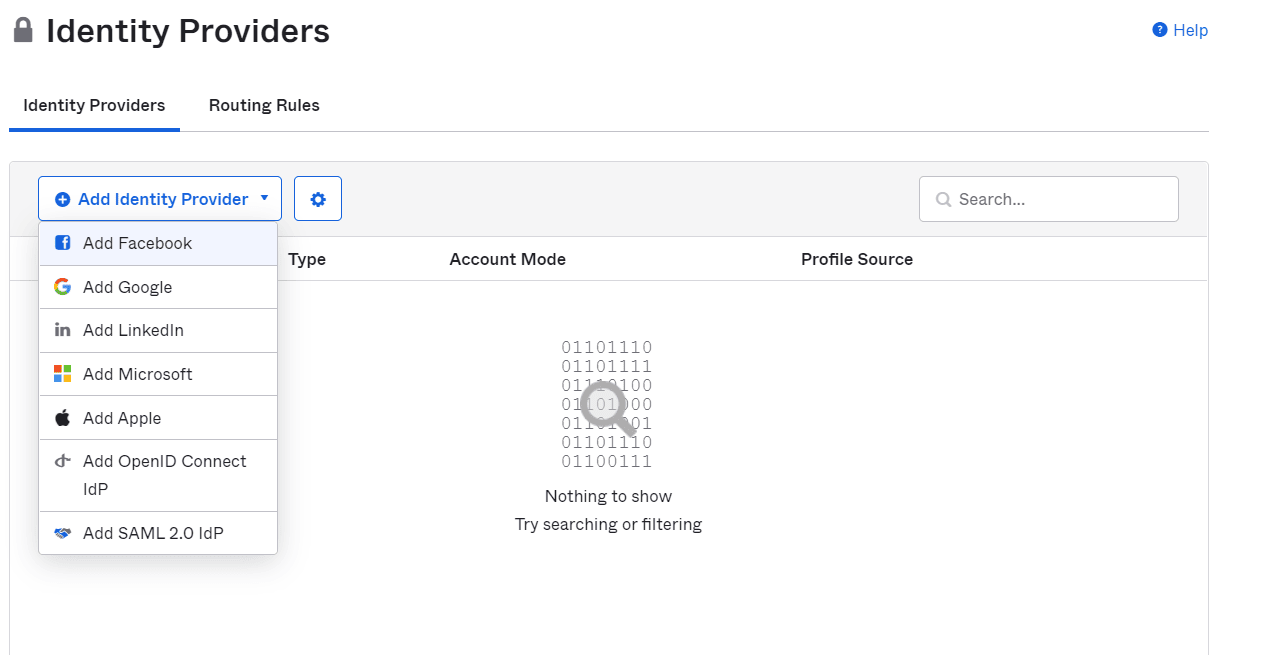
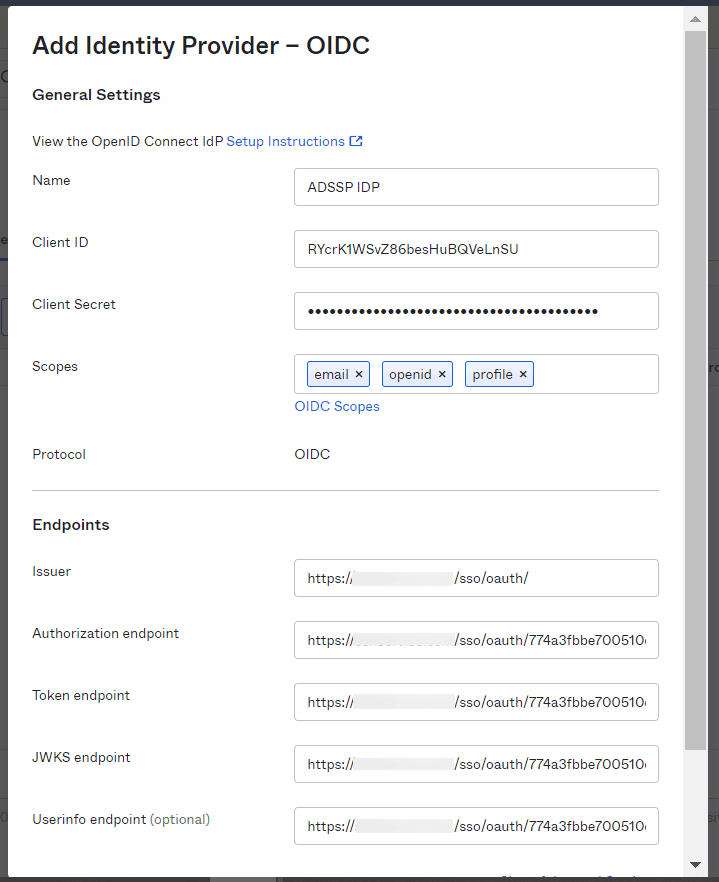
- Enter a Name of your preference.
- Fill the required fields with details copied in step 4 of Prerequisites:
- Client ID: Client ID
- Client Secret: Client Secret
- Mention "email, openid, profile" in the Scopes field.
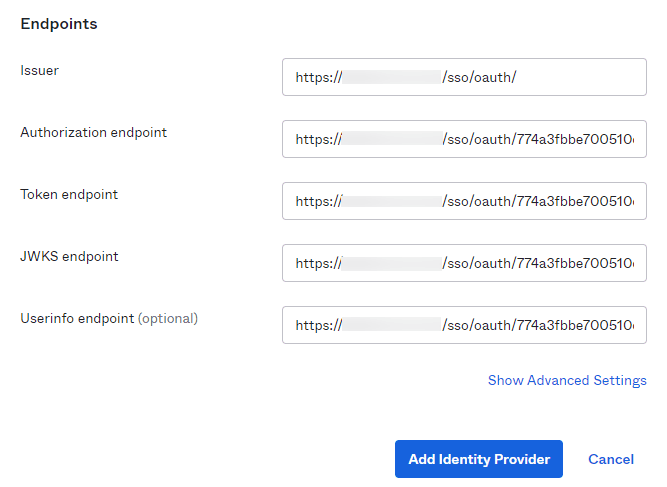
- Issuer: Issuer
- Authorization endpoint: Authorization Endpoint URL
- Token endpoint: Token Endpoint URL
- JWKS endpoint: Keys Endpoint URL
- Userinfo endpoint: User Endpoint URL
- Click Add Identity Provider at the bottom to save the
settings.
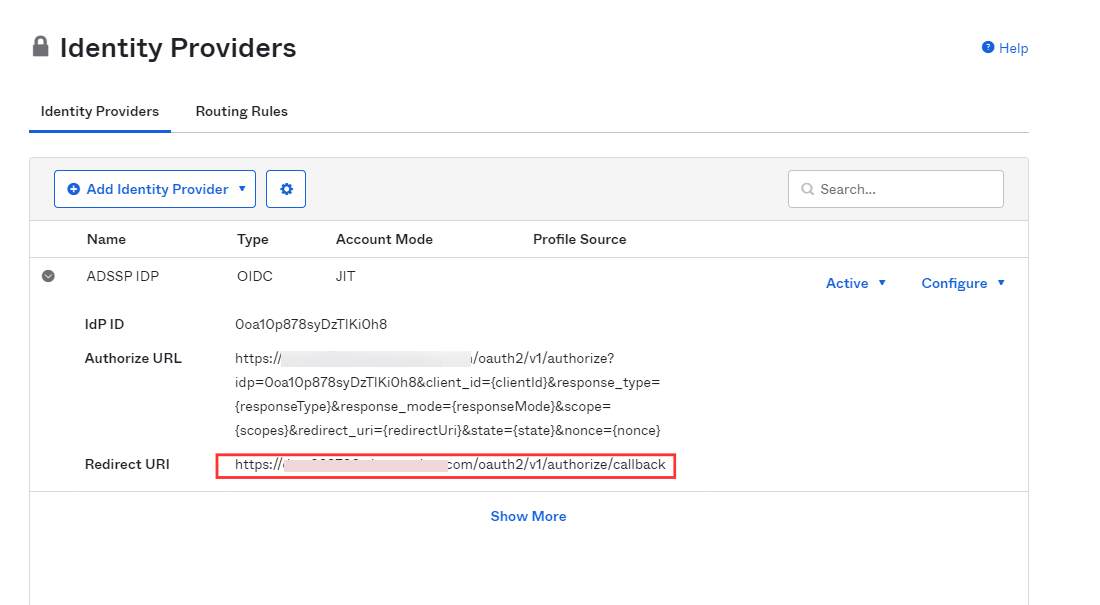
- After saving, copy the Redirect URI as it will be
required in later steps.
- To add the instance of ADSelfService Plus to Okta's login screen, go to
the Routing Rules tab and click Add Routing
Rule.

- In the popup that appears, set the User matches field to Regex on Login. Set the value as '.*'.
- Select the ADSelfService Plus instance for Use this Identity
provider condition.
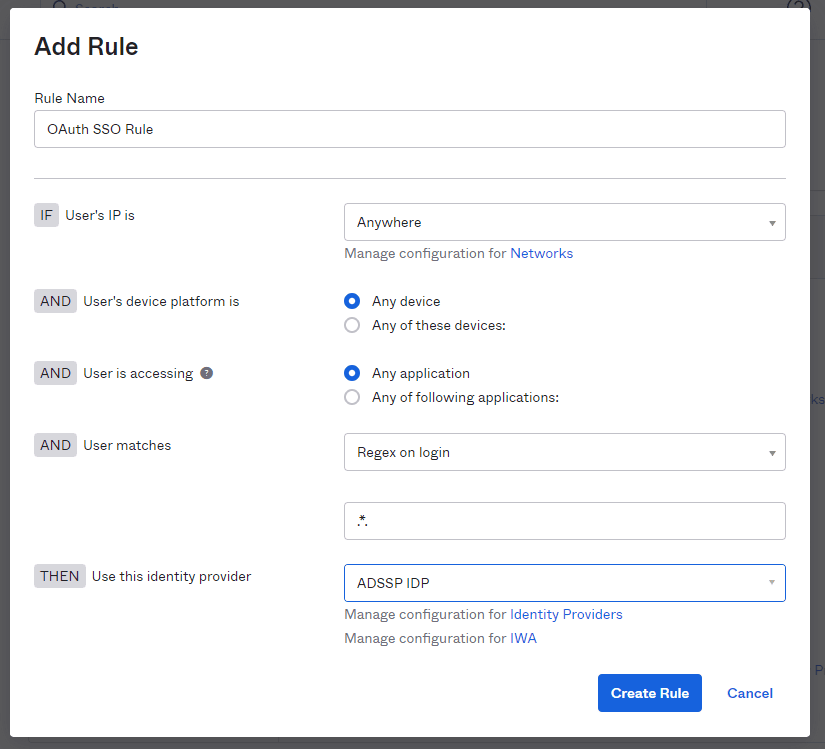
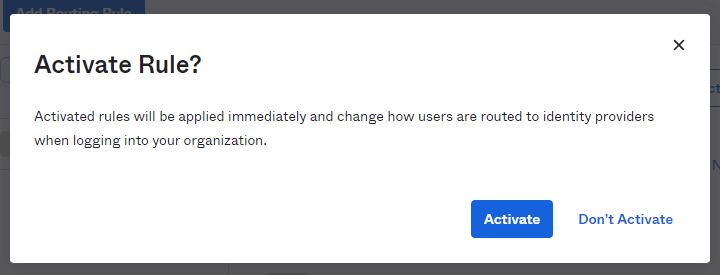
- Click Create Rule to complete the settings.
- In the pop-up that appears, click Activate.
ADSelfService Plus (identity provider) configuration steps
- Switch back to ADSelfService Plus' Okta configuration page.
- Enter the Application Name and Description as per your preferences.
- Enter the Domain Name of your Okta account. For example, if your Okta username is johnwatts@thinktodaytech.com, then thinktodaytech.com is your domain name.
- Select policies from the Assign policies dropdown, to decide for whom this setting will be applicable.
- Check the box next to Enable OAuth/OpenID Connect.
- Enter the Redirect URI you saved in step 6 of Okta configuration in Login Redirect URL field.
- Scopes specify the level of access the access token
has. The scopes are generally provided in the authorization request so,
you don't have to specify them here. If the scopes are not mentioned by
your service provider, you must add them in this field
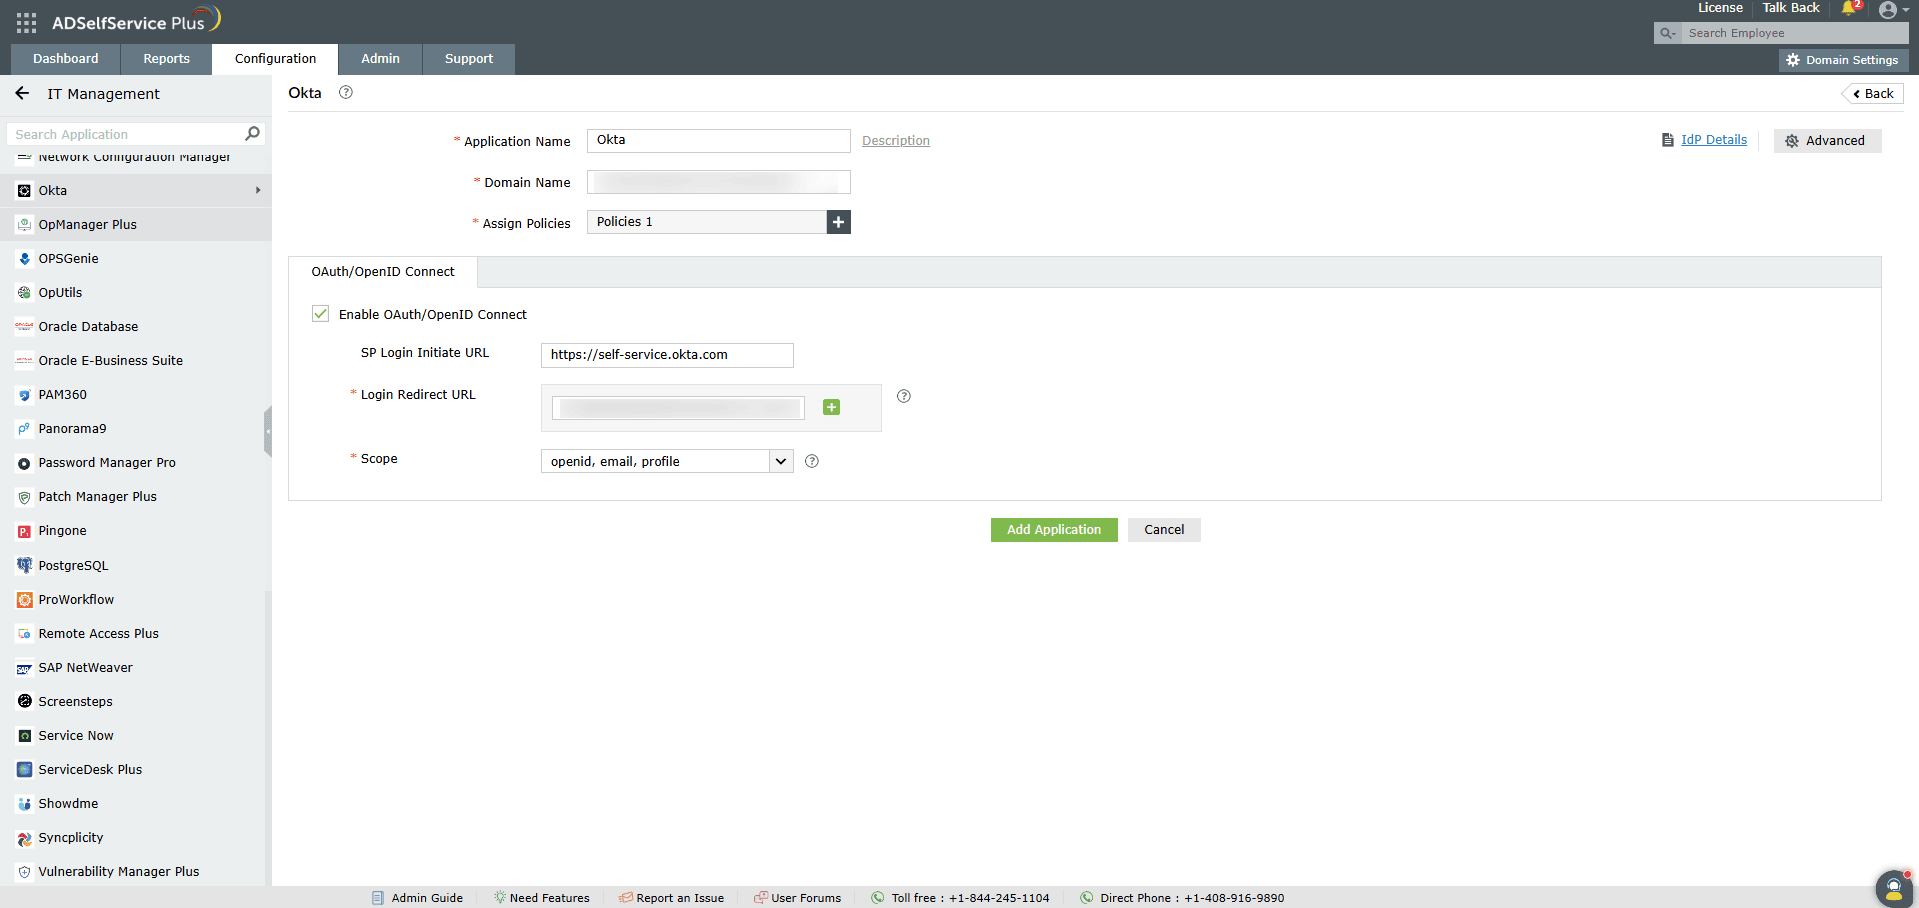
- Click Add Application to save these settings.
- The Well-known Configuration URL in IdP details pop-up contains all the endpoint values, supported scopes, response modes, client authentication modes, and client details. This is enabled only after you save the application in ADSelfService Plus. You can provide this to your service provider if required.