How to automate SharePoint Online, OneDrive for Business, and Microsoft Teams backups
In this article:
Objective
This article explains how to automate SharePoint Online, OneDrive for Business, and Microsoft Teams backups in RecoveryManager Plus, enabling IT administrators to dynamically include or exclude sites based on custom conditions. This feature eliminates manual effort, enhances backup reliability, and improves data governance by ensuring all relevant sites are consistently backed up without manual intervention.
Use case
As organizations frequently create new SharePoint Online sites and subsites for various departments and projects, managing backups manually becomes increasingly difficult. For example, a site named Marketing may include several subsites for campaigns, workshops, and press releases. The IT team often faces challenges in keeping backup schedules updated, leading to a higher risk of missing critical data.
Solution
With RecoveryManager Plus, administrators can automate the backup of all subsites under a parent site like Marketing. By configuring an automation policy using the Site Type filter to select SharePoint Online and applying the Sites filter to target the Marketing site, any new subsites created within it are automatically included in future backups. This removes the need for manual updates and helps maintain consistent data protection and compliance.
Prerequisites
- The account used to configure a tenant in RecoveryManager Plus must be assigned the SharePoint Administrator role.
Steps to follow
The following steps demonstrate how to automate site selection when creating a new backup schedule or for existing SharePoint Online, OneDrive for Business, or Microsoft Teams backups in RecoveryManager Plus.
Enabling automation while creating a new backup schedule:
- Log in to RecoveryManager Plus as an administrator.
- Navigate to the SharePoint & OneDrive tab > Backup Settings.
- Click the Create Backup button located in the top-right corner of the screen.
- Select the tenant that contains the SharePoint Online, OneDrive for Business, or Microsoft Team site(s) you wish to back up from the Tenant drop-down.
- In the Backup Details section, provide a name for the backup schedule.
- In the Select Sites field, choose the sites you want to back up by clicking the add icon
 or import them from a CSV file by clicking the import icon
  .
.
- In the pop-up that appears, RecoveryManager Plus provides two views to see the list of sites in your Microsoft 365 tenant: Tree View and List View.
- Tree View is the default view that displays a hierarchical view of your sites and subsites. Select the sites that you want to back up by marking the check box beside the site name. To exclude child sites from being backed up, check the Don't inherit child sites check box. You can also search for a particular SharePoint Online, OneDrive for Business, and Microsoft Team site by their URL or name in the search bar at the top.
- List View displays all sites and subsites in alphabetical order. Use the search icon
 to find specific sites for backup. You can select all the sites by selecting the check box beside the Title text.
- Click the Filter by Criteria option available at the top-right corner of the Select Sites popup to filter sites based on certain conditions.
- You can filter based on attributes like Site Title, Site URL, Site Type, Parent Site, or Sites. You can also apply conditions such as Starts with, Ends with, Contains, or Does Not Contain for the selected attribute. Add more conditions using the add icon
 .
.
- You can also decide the type of the condition (AND/OR) when you have multiple conditions. You can remove the conditions set using the close icon
 .
.
- Click OK when you’ve selected all the sites you want to back up.
- If you wish to back up Microsoft Teams channels, enable the Teams Channels Backup toggle.
- To automate the backup schedule, enable the Automate Site Selection toggle bar.
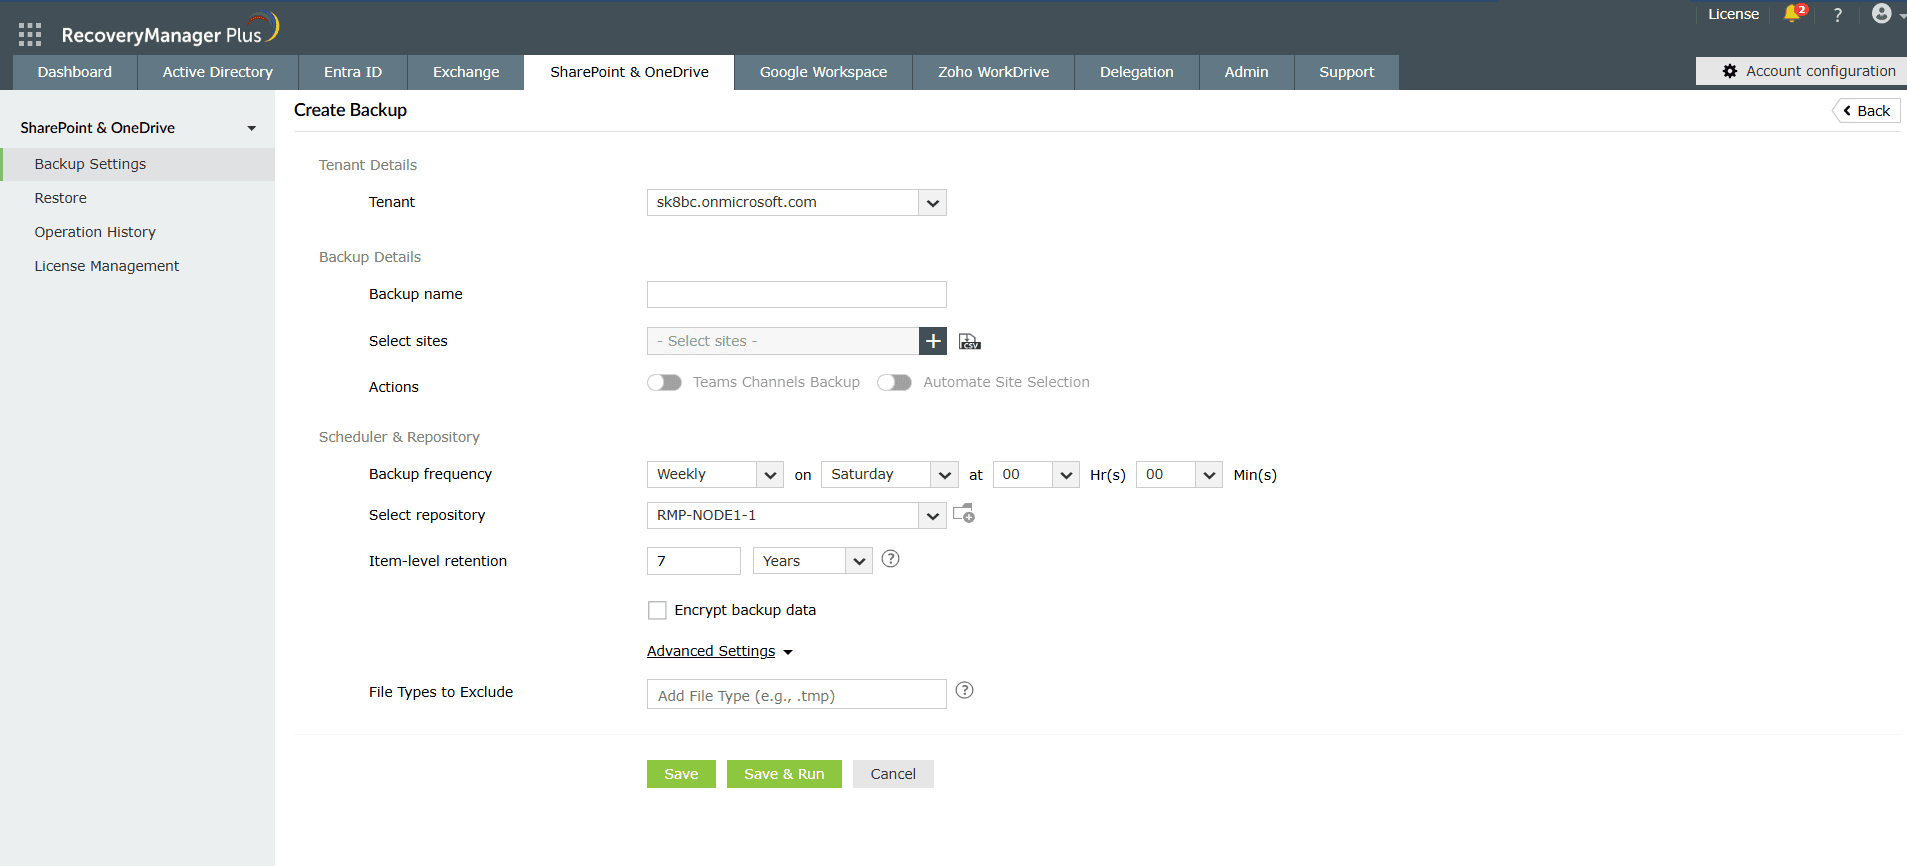
Figure 1: Automating site selection for SharePoint Online, OneDrive for Business, and Microsoft Teams backups in RecoveryManager Plus.
Select the site criteria you wish to include in the automation policy.
Enable the Automate Site Selection toggle to configure automation for the selected site.
- Set the conditions based on the Site Title, Site URL, Site Type, Parent Site, or Sites in the Automation Settings pop-up.
- Use filters such as Starts With, Ends With, Contains, and Does Not Contain to configure the automation policy based on certain conditions.
- Click the add icon to add more conditions. A schedule will run every day to discover the created, modified, and deleted sites, and these sites will be validated against the condition set. If any of these sites satisfies the conditions, it is automatically added to the selected backup job.
- Select the Validate existing sites selection with automation criteria check box to periodically validate the existing sites in this backup schedule against the criteria and add sites that satisfy the criteria and remove sites that don't satisfy the criteria. Click Save.
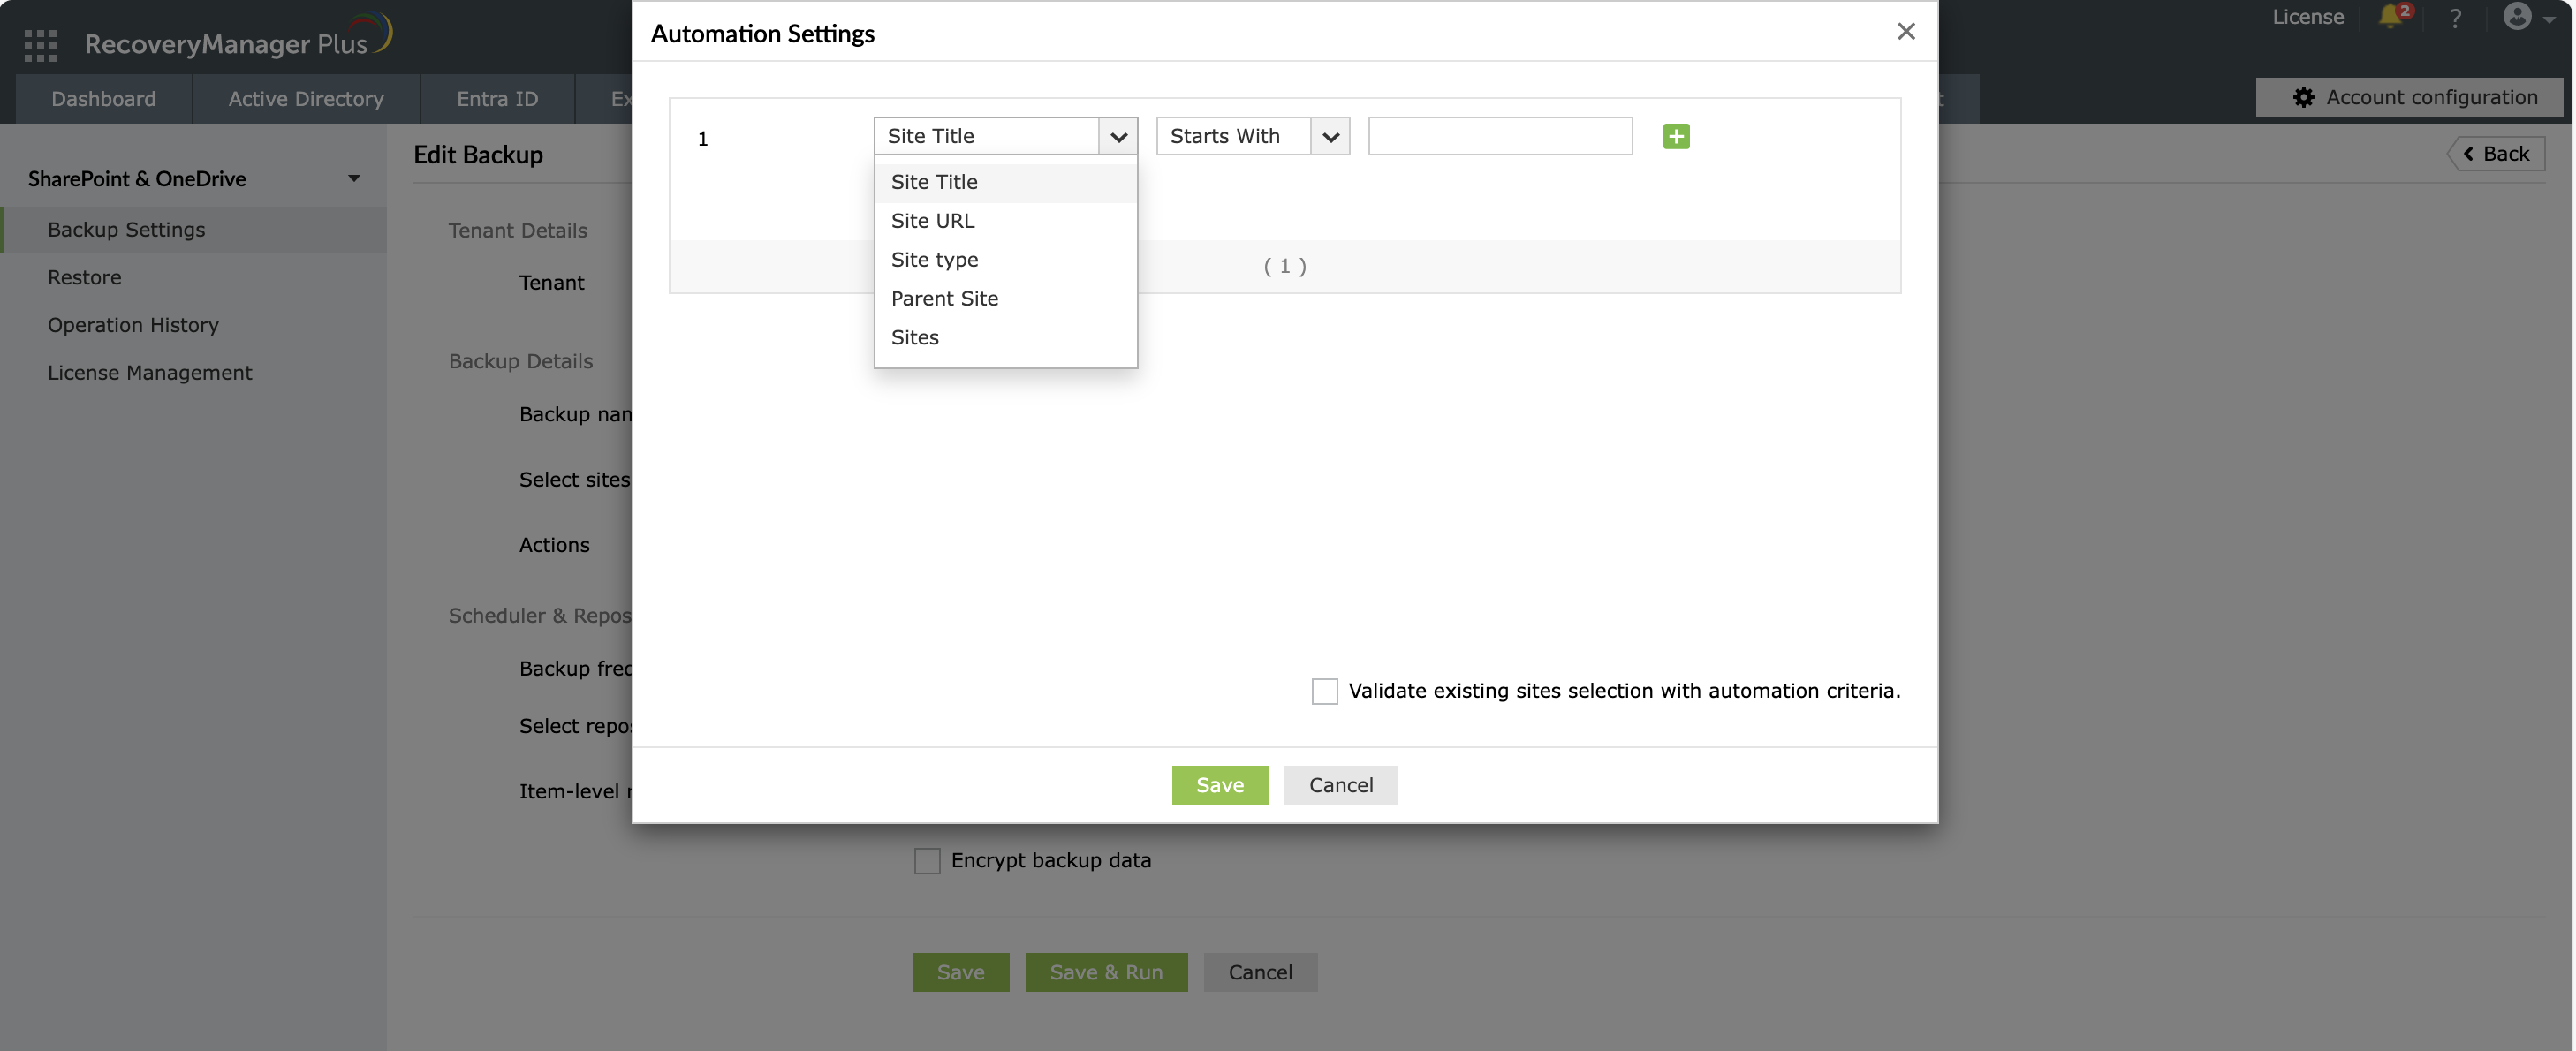
Figure 2: Automating site selection for SharePoint Online, OneDrive for Business, and Microsoft Teams backups in RecoveryManager Plus.
Configure the automation policy using the available filters
Check the box to verify the existing site selection with the automation criteria.
- Select the desired frequency at which the schedule must run from the options available in the Backup Frequency drop-down:
- Daily: The scheduler will run once every day at the scheduled time.
- Weekly: The scheduler will run once every week on the specified day and time.
- Monthly: The scheduler will run once a month on the specified date and time.
- Select the repository in which you wish to store the backups from the Select Repository drop-down.
- In the Item-level Retention field, enter the number of days, months, or years for which SharePoint Online, OneDrive for Business, and Microsoft Teams backups should be stored. Backed-up data older than the specified item-level retention will be discarded.
Note: The minimum item-level retention for SharePoint Online, OneDrive for Business, or Microsoft Teams backups is 30 days.
- If you wish to encrypt your backup data, check the Encrypt Backup Data check box and provide the Encryption Key.
- In Advanced Settings, specify the file types to be excluded from backups in the File Types to Exclude field.
- Click Save to run the backup at a specified time or Save & Run to trigger the backup immediately.
Enabling automation for existing backup schedules:
- Log in to RecoveryManager Plus as an administrator.
- Navigate to the SharePoint & OneDrive tab > Backup Settings.
- Search for the backup schedule for which you wish to apply automatic site selection using the search icon .
- Click the edit icon
 under the Actions column of the corresponding backup schedule.
- Enable the Automate Site Selection toggle under the Backup Details section and follow step nine from Enabling automation while creating a new backup schedule.
- Click Save to run the backup at a specified time or Save & Run to trigger the backup immediately.
By following these steps, you can automate site selection for SharePoint Online, OneDrive for Business, and Microsoft Teams backups with RecoveryManager Plus.
Related topics and articles
Last updated on: 10-10-2025
