Browser Router
Automatically redirect legacy web applications to the browser that can actually run them, keeping older systems accessible without disrupting everyone else's workflow.
Overview
About Browser Router
Route specific sites to a different browser based on criteria you define.
Redirecting traffic between browsers
Browser Router lets admins redirect website traffic from one browser to another based on specific criteria. For example, if a company website only works in Internet Explorer, admins can redirect users from Chrome to Edge in Internet Explorer mode, ensuring uninterrupted access to older systems and technologies.
Why It Matters
Importance of Browser Router
Keeping legacy web apps usable without forcing everyone onto an outdated browser.
Supporting legacy applications
Browser Router is crucial for organizations still relying on legacy web applications and websites designed for older browsers like Internet Explorer. By automatically redirecting users to Internet Explorer when they access these legacy resources, IT admins can ensure uninterrupted access, prevent disruptions, and maintain productivity.
Setup
Implementing Browser Router
Create and deploy a Browser Router policy.
Creating and deploying the policy
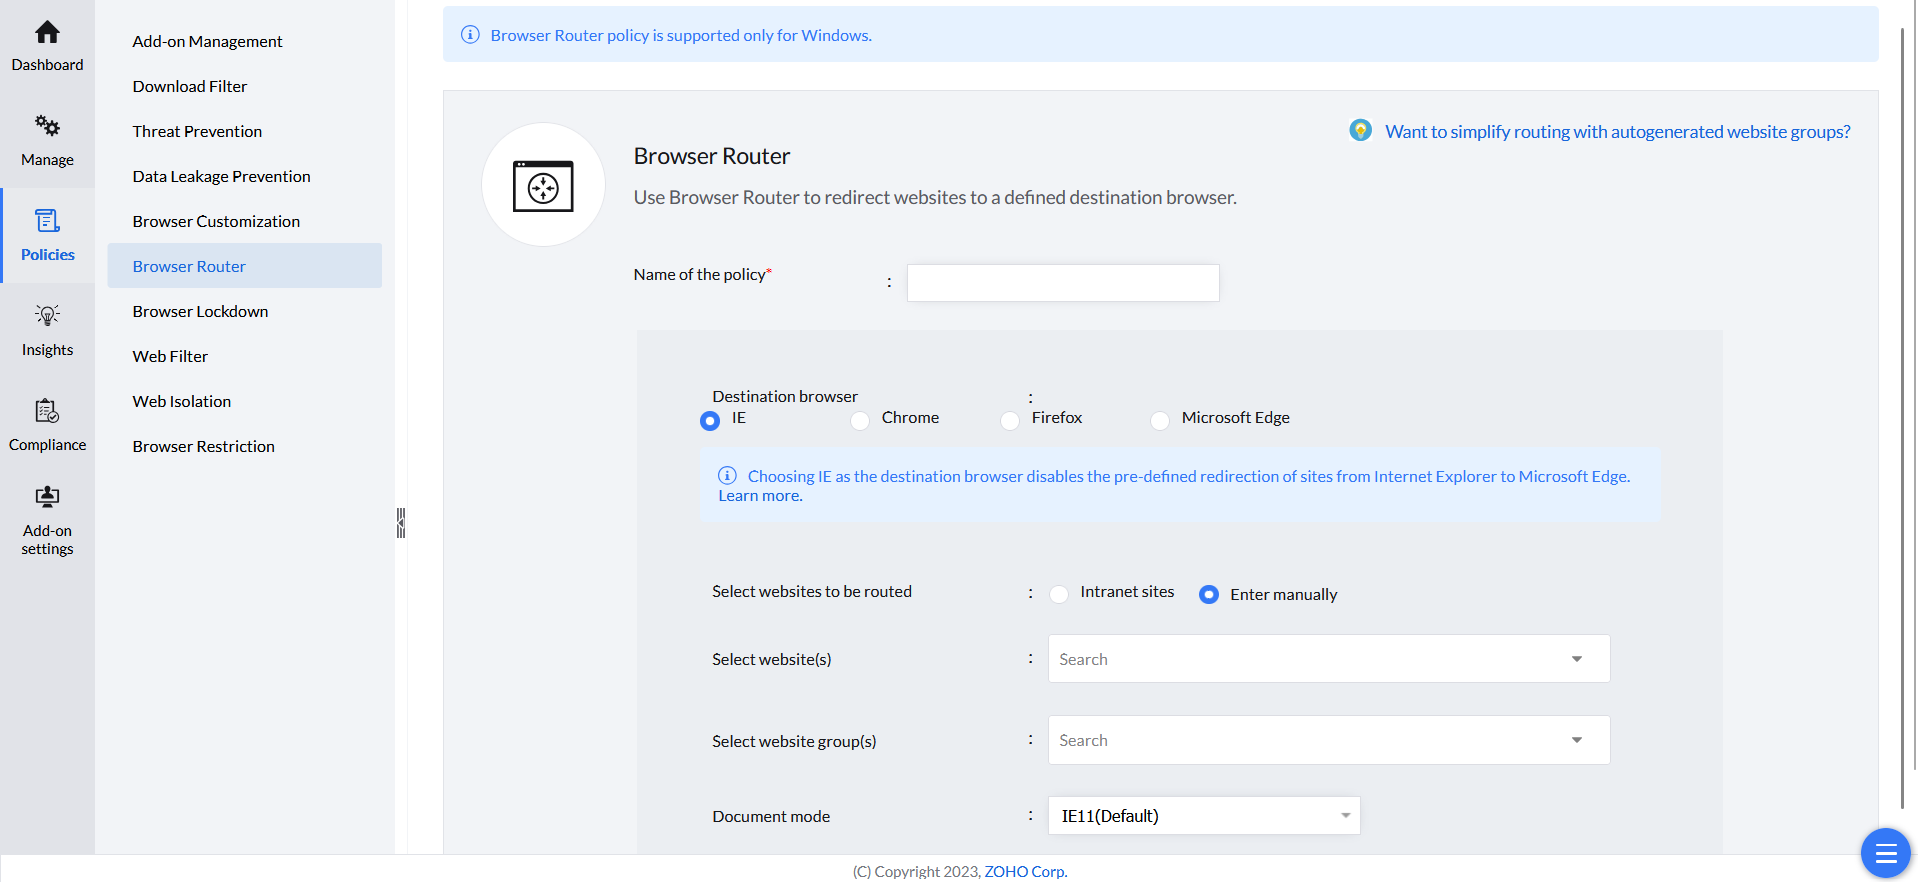
- In the Endpoint Central MSP console, go to Browsers → Policies → Browser Router.
- Click Create Policy.
- Give the policy a name.
- Choose the destination browser the pages should be redirected to.
- Enter the web applications to route using one of three methods: Enter Manually to type in individual website URLs directly; select a pre-defined site group to route a set of sites at once; or select Intranet Sites to route intranet traffic, since intranet apps often run on older technology best suited to a specific browser.
- Click the + button to add other websites to be routed to different browsers.
- Click Save to save the policy as a draft, or Save & Publish to publish it.
- Deploy the policy with the computers or groups of computers you want it applied to.