Deployments: Setup and Monitoring
Overview
A deployment pushes a resource — a workflow, a sensor, or an alert profile — out to a chosen set of devices. In the Deployments module, you pick what to deploy, target the device groups, and decide when it runs: right away, on a schedule, or (for workflows) automatically when an alert condition is met on a device. You can then track how each deployment progresses and how it resolves on individual devices.
This is where the workflows, sensors, and alert profiles you have built go live. This page walks through creating a deployment, deploying a workflow in Trigger mode, and monitoring the results.
Why Deployment Matters
| Functionality | Value |
|---|---|
| Controlled Execution | Define when and where workflows, sensors, and alert profiles run. |
| Selective Targeting | Deploy only to relevant device groups. |
| Flexible Scheduling | Run immediately or schedule for later execution. |
| Alert-Based Automation | Run a workflow automatically when an alert condition is met on a device, using Trigger mode. |
| Execution Monitoring | Track status, outcomes, and error logs across all deployments. |
Prerequisites
- The workflow, sensor, or alert profile you want to deploy must already be created and saved. See Workflows, Sensors, or Alert Profiles as applicable.
- You must have the Workflow role to create deployments.
- The Custom Groups you want to target must already be created. See the Custom Groups document for details.
- To deploy a workflow in Trigger mode, the workflow must have Enable Deployment Trigger turned on and an Alert Profile mapped to it. See Run a Workflow Automatically on an Alert to set this up.
Accessing the Deployments Module
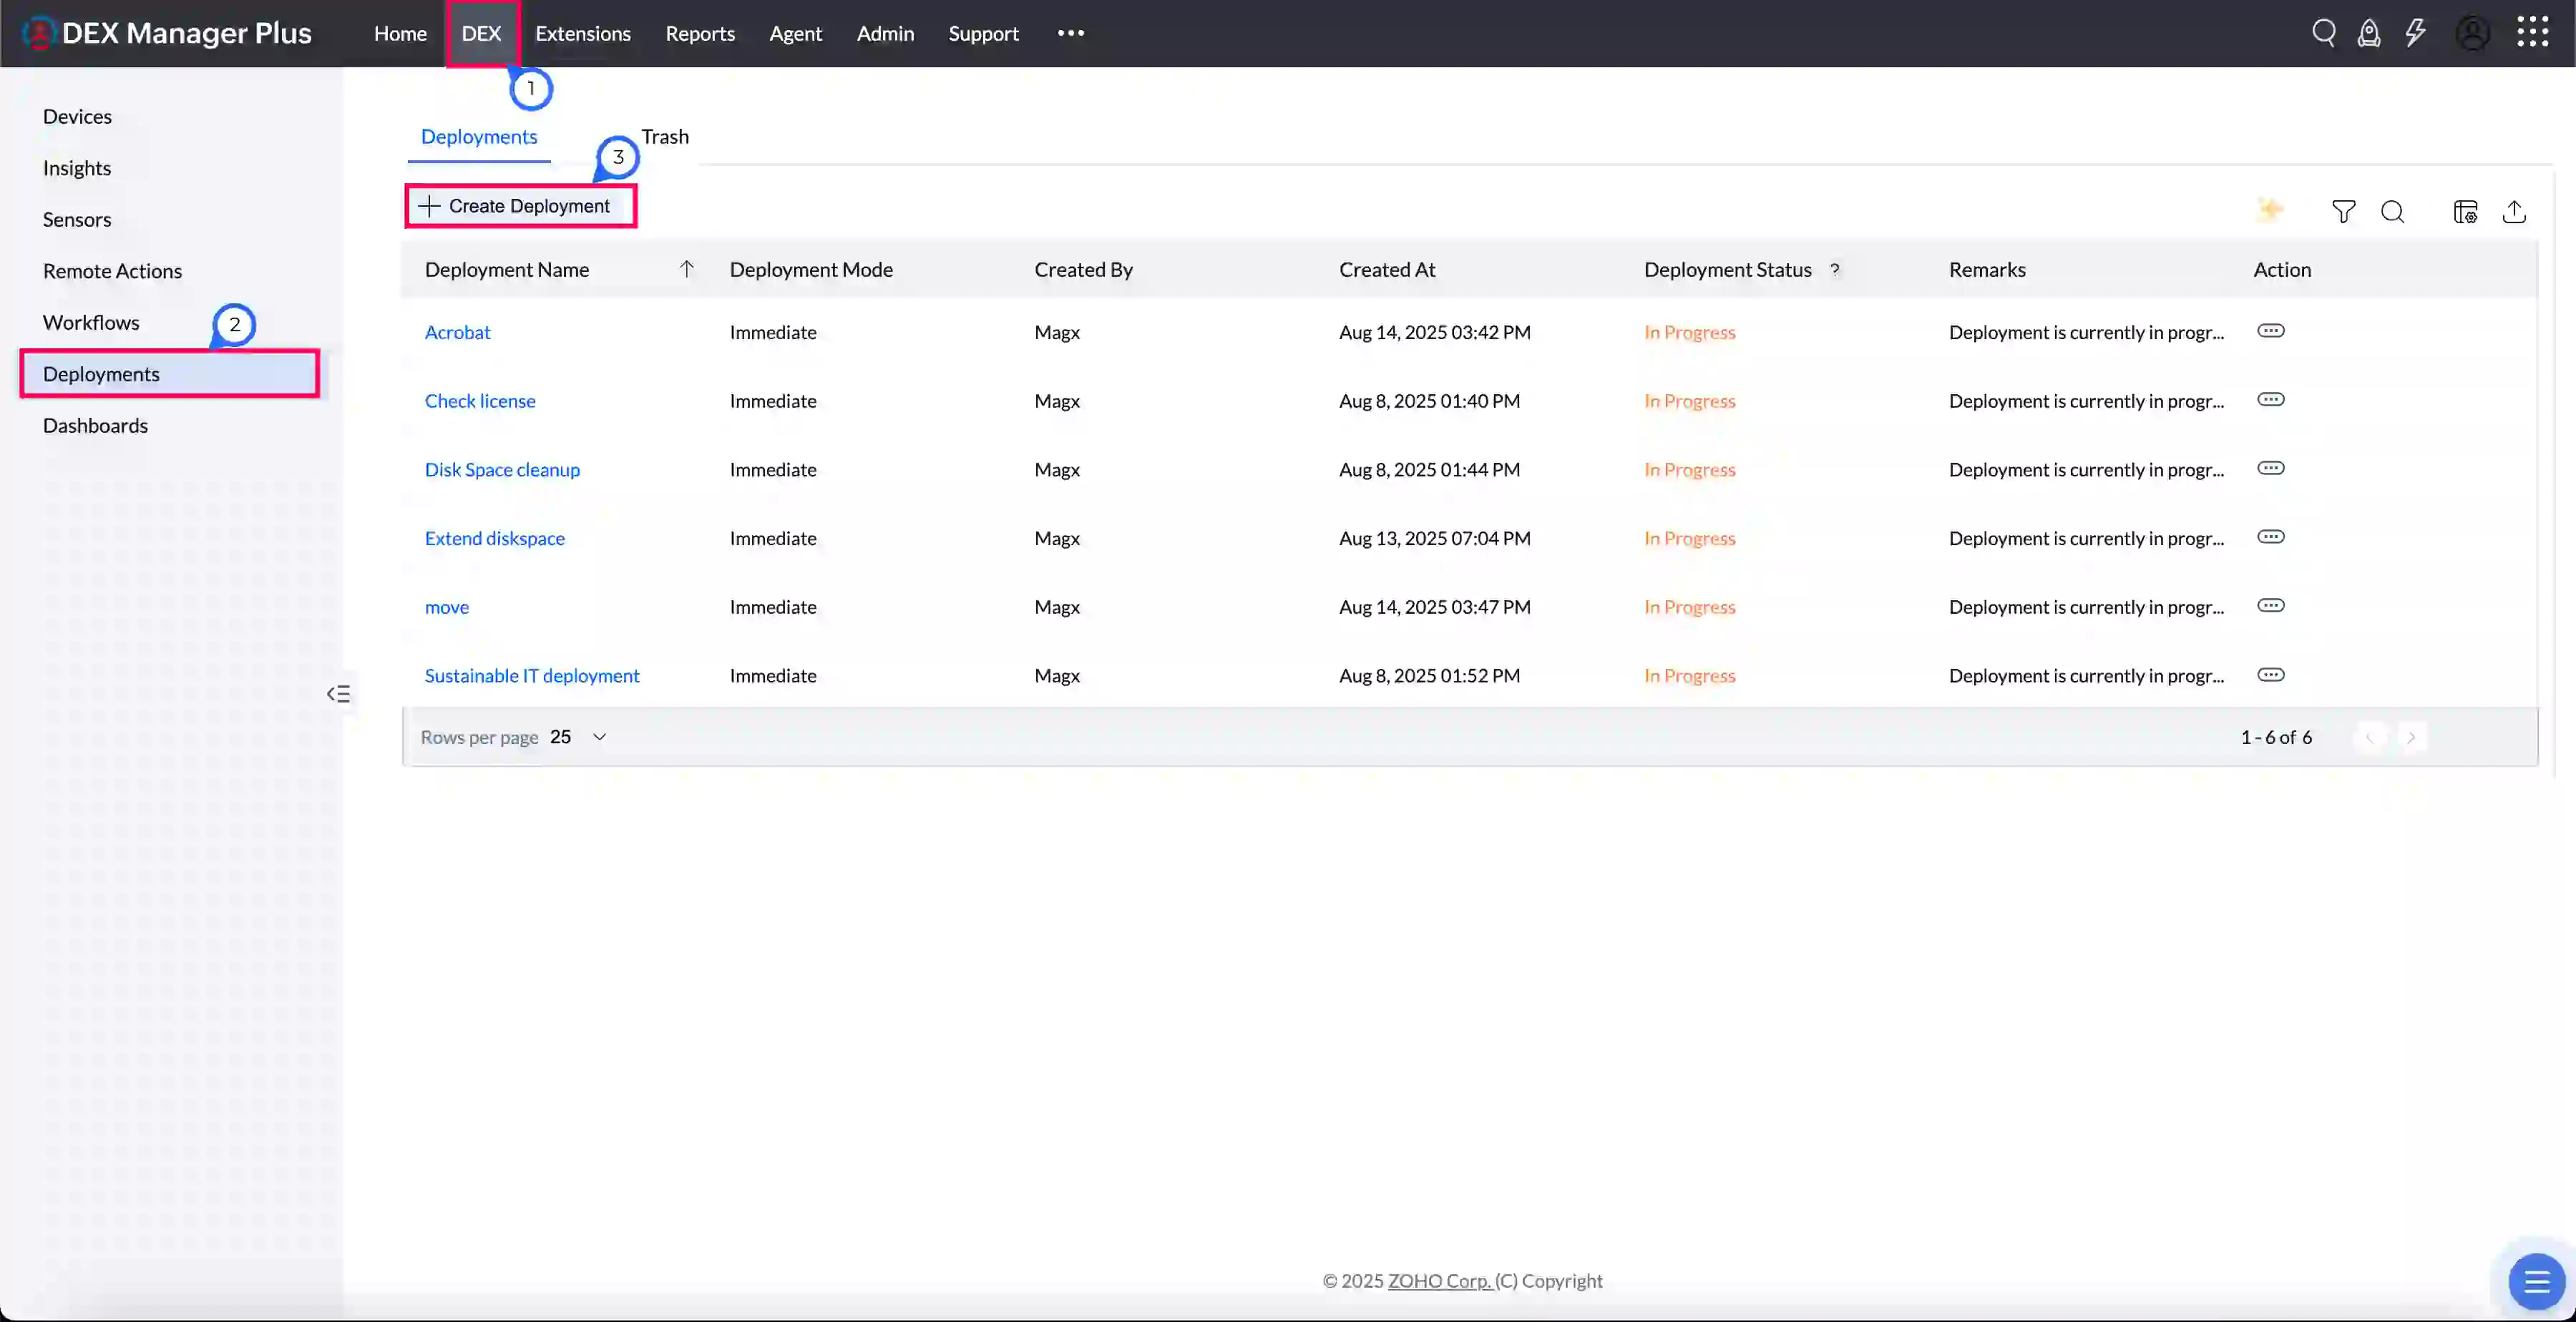
Navigate to DEX > Deployments from the left-hand pane.
The Deployments tab displays a list of all active, scheduled, and completed deployments.
Click Create Deployment to begin a new rollout.
Creating a Deployment
Step 1: Enter Deployment Details
| Field | Description |
|---|---|
| Deployment Name | Give the deployment a unique, descriptive title. |
| Description (optional) | Add context to explain the intent or scope of the rollout. |

Step 2: Define Resources
Set the Type to what you want to deploy — Workflow, Sensor, or Alert Profiles — then pick one or more items of that type from the Resources list. What each type does once deployed:
| Type | What deploying it does |
|---|---|
| Workflow | Runs the workflow's automation logic on the target devices. |
| Sensor | Collects data from the target devices, according to how the sensor's script is configured. A sensor runs only on devices matching its OS platform. |
| Alert Profiles | Starts monitoring the target devices against the alert profile's condition (for example, “Wi-Fi signal strength is less than 50% for 60 minutes”). |
You can add multiple items, and combine workflows with sensors in a single deployment to collect data alongside execution.

Step 3: Select Target Devices
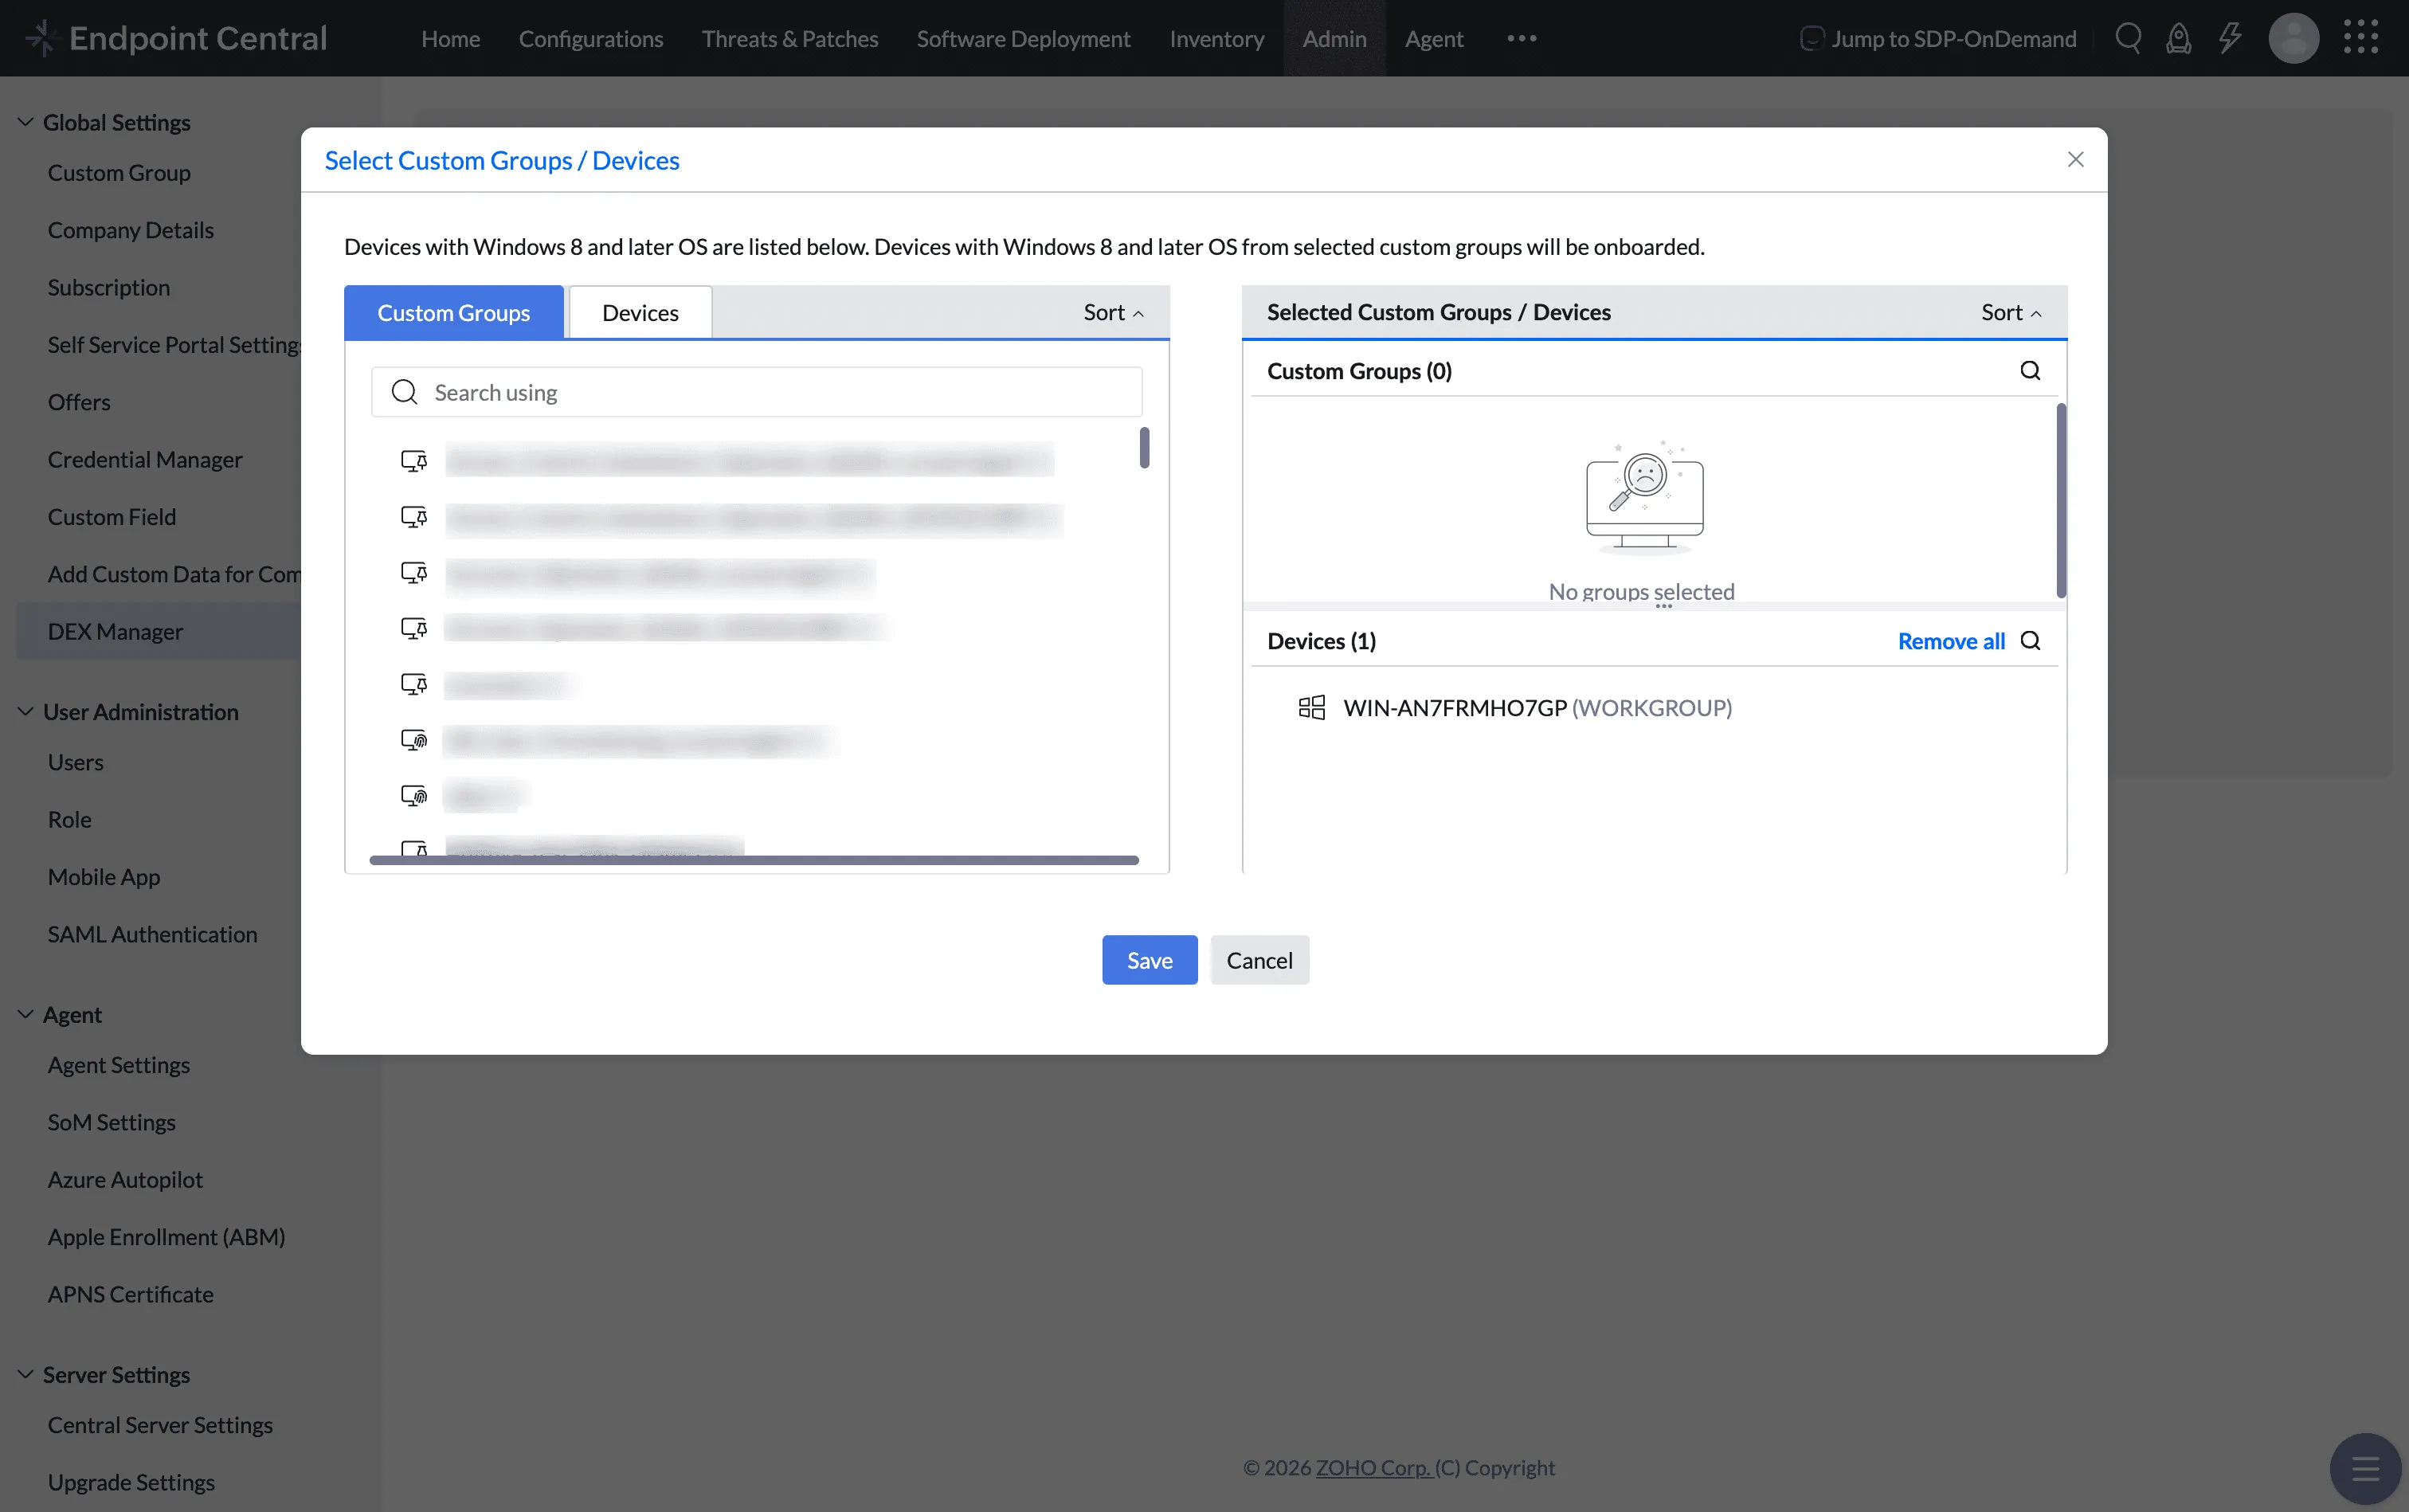
Choose one or more Custom Groups to define the scope. Use the include / exclude option in target selection to narrow down the target devices.
Step 4: Choose Deployment Mode
| Mode | Description |
|---|---|
| Immediate | Runs as soon as possible. |
| Schedule | Runs at a specific date and time. |
| Trigger | Runs a workflow automatically on a device when its mapped alert condition is met. Available only for workflows that have Enable Deployment Trigger turned on. |
The modes available depend on what you are deploying:
| Type | Immediate | Schedule | Trigger |
|---|---|---|---|
| Workflow | Yes | Yes | Yes |
| Sensor | Yes | Yes | — |
| Alert Profiles | Yes | — | — |

If you choose Schedule, select a frequency (Once, Daily, or Weekly), define the active period, and set the Run Time for the initial deployment.
If you choose Trigger, no schedule is needed. The workflow runs automatically once its mapped alert condition is met on a target device. See Deploying in Trigger Mode for the full steps.
Step 5: Deploy
Click Deploy to run or schedule the execution.
Deploying in Trigger Mode
Trigger mode runs a workflow automatically on a device the moment its mapped alert condition is met, with no schedule and no manual start. You select Trigger as the deployment mode and choose the target devices; the alert that starts the workflow was mapped earlier, when the workflow was created.
Before You Start
The workflow must have Enable Deployment Trigger turned on and an Alert Profile mapped to it. Only these workflows can be deployed in Trigger mode. To set this up, see Run a Workflow Automatically on an Alert.
Steps
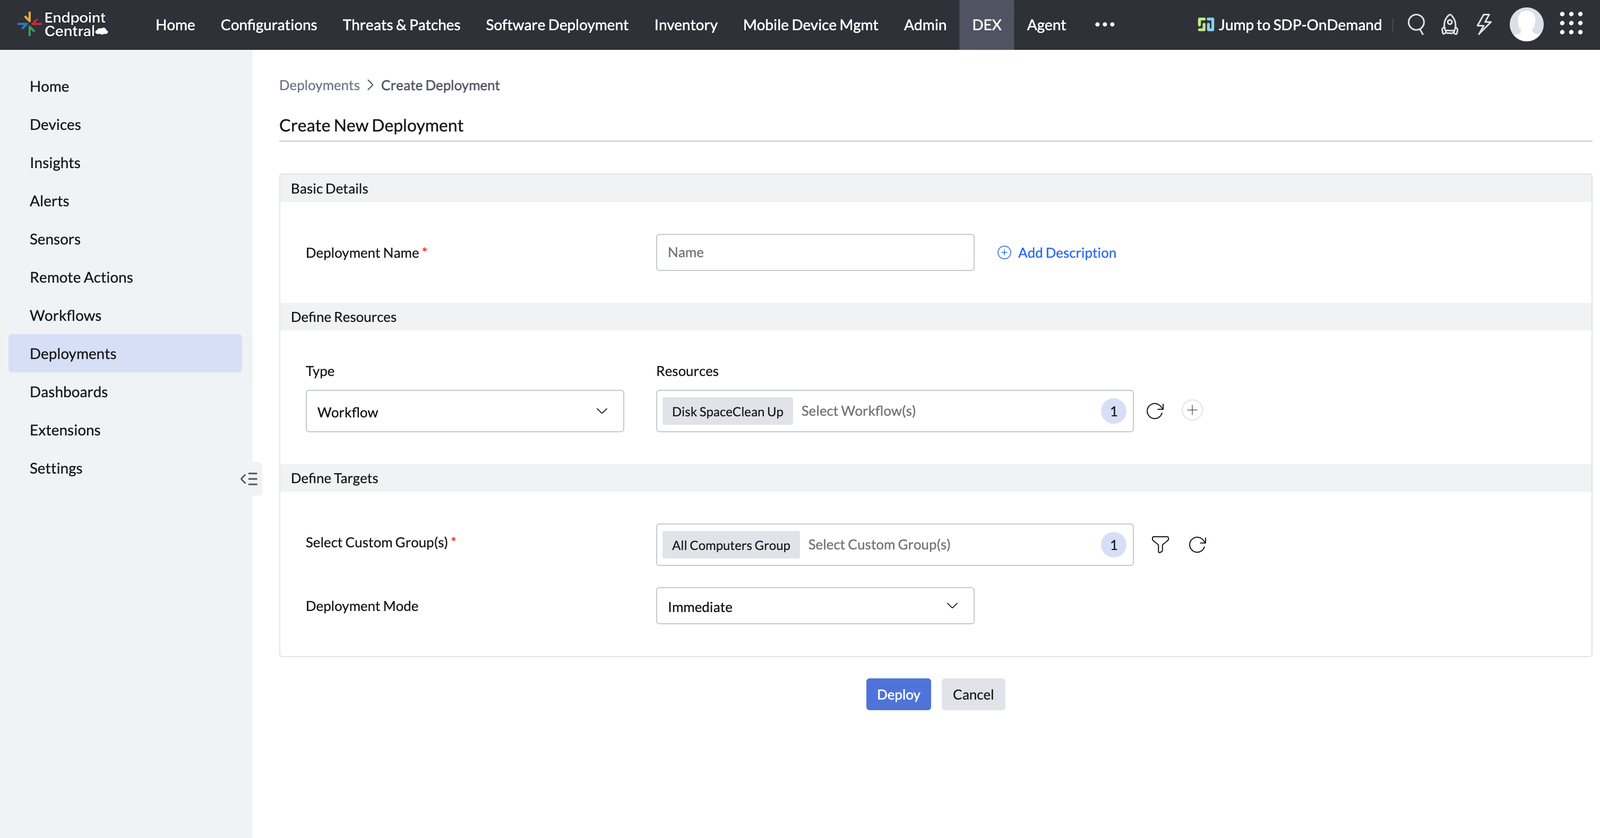
- On the Deployments page, click Create Deployment.
- Under Basic Details, enter a Deployment Name (and an optional description).
- Under Define Resources, set Type to Workflow and select the workflow that has Enable Deployment Trigger configured.
- Under Define Targets, select one or more Custom Group(s) as the target.
- Set Deployment Mode to Trigger.
- Click Deploy. Each targeted device begins monitoring for the alert condition, and the workflow runs on that device when the condition is met.
After a successful Trigger deployment, each device shows a status such as Success with the remark that the workflow was deployed and the device is being monitored for the trigger condition. To follow what happens as alerts occur, see Monitoring Deployment Status.
Creating an API Trigger Deployment
API Trigger mode lets you configure a workflow deployment in advance and execute it on demand for a specific computer through an API request. The deployment has no automatic schedule and remains ready until an API request triggers it.
Before You Start
- Create and save at least one workflow that you want to use as the deployment resource.
- Create a Custom Group containing the computers that can be targeted by the deployment. See Custom Groups.
- Only a deployment configured with API Trigger mode can be executed through the API.
Create the Deployment
- On the Deployments page, click Create Deployment.
- Under Basic Details, enter a Deployment Name and an optional description.
- Under Define Resources, set Type to Workflow, and then select the workflows to execute.
- Under Define Targets, select one or more Custom Groups.
- Set Deployment Mode to API Trigger.
- Click Deploy. The deployment is saved and remains ready for an API request; it does not run automatically.
Information Required to Trigger the Deployment
Use the following identifiers to execute a workflow from an API Trigger deployment:
| Identifier | Description |
|---|---|
| Deployment ID | Identifies the API Trigger deployment that contains the workflow and target scope. |
| Resource Version ID | Identifies the version of the workflow to execute from the deployment. |
| Target Device ID | Identifies the computer on which the selected workflow is to be executed. |
Monitor the Deployment
After sending an API request, open the deployment to review its device-level execution status and determine whether the request was received and how the selected workflow completed. See Monitoring Deployment Status.
Monitoring Deployment Status
After deployment, return to the Deployments tab to monitor outcomes. This list shows every deployment regardless of what was deployed or how.
| Column | Description |
|---|---|
| Deployment Name | Click to view detailed device-level results. |
| Created By / At | Tracks creator and timestamp. |
| Status | Indicates progress: In Progress, Success, Failed, or Suspended. |
| Remarks | Shows summary messages or error notes. |
| Action Menu | Options to suspend, resume, edit, or delete the deployment. |
Trigger Deployment Views
Trigger deployments have a richer view than Immediate or Scheduled ones, because they keep running as alerts recur. Open a Trigger deployment to see three tabs: Summary, Deployment Status, and Workflows. The Summary tab includes the following views:
| View | What It Shows |
|---|---|
| Deployment Summary | Distribution of devices by deployment state: Yet To Start, Yet To Update, Suspended, Failure, and Success. |
| Trigger Execution Outcome | Breakdown of execution outcomes across all occurrences: Skipped, Failed, Success, Triggered, In Progress, and Stopped. |
| Trigger Execution Trend | Execution outcomes over time (for example, the last 7 or 30 days), so you can see how often the workflow is triggered and how it resolves. |
The Deployment Status tab lists each device with its status and remark (for example, “Workflow deployed successfully. Monitoring device for trigger condition”). The Workflows tab shows the workflows included in the deployment.
Best Practices
| Practice | Why It Helps |
|---|---|
| Use meaningful deployment names | Improves traceability and audit clarity |
| Always test deployments in small groups | Reduces risk and ensures logic accuracy |
| Use scheduling for off-hours or change windows | Minimizes end-user disruption |
| Use Trigger mode for unpredictable, time-sensitive issues | Remediates a device the moment the alert condition is met, without manual monitoring |
| Before deploying in Trigger mode, confirm Enable Deployment Trigger is turned on for the workflow | Only workflows with Enable Deployment Trigger turned on can be deployed in Trigger mode |
| Review Trigger Execution Outcome for devices with a high Skipped count | Repeated skips usually mean the alert is firing again during the configured cool-off period or before the earlier remediation cycle has fully settled. |