Configuring PXE Boot in Microsoft Windows Network Infrastructure
Preboot Execution Environment (PXE) boot allows new devices joining a Windows environment to load their operating system image directly from the network, without requiring local installation media. It’s widely used for automated OS deployments, device provisioning, and zero-touch onboarding of endpoints.
With DDI Central, configuring PXE boot is simple and can be done at the subnet, policy, or global level, depending on how broadly you want to apply it.
The only way to configure a PXE Boot for devices within your Windows network infrastructure is via options.
Standard PXE Boot DHCP Options
PXE boot for a Windows network ecosystem relies on three standard DHCP options defined by RFCs. These options inform clients where to find their boot server and the image file to load.
Boot File Size (Option 13)
- Purpose: Specifies the size of the boot file in 512-octet blocks. Helps clients know how much memory buffer is required.
- Typical Value:691200 (for large image sizes, but values vary by environment).
Boot Server Host Name (Option 66)
- Purpose: Identifies the TFTP server or boot server that holds the boot file.
- Data type: String
- Sample Value:192.168.1.100 (IP address) or tftp.company.com (hostname).
Note: When setting a hostname for a TFTP server, if the name resolves to both A and AAAA records but your resolver ignores the AAAA lookup, specify the server’s IP address instead of its hostname.Bootfile Name (Option 67)
- Purpose: Specifies the name of the boot file to be downloaded from the server.
- Sample Value:boot\x64\wdsnbp.com (Windows Deployment Services).
Ways to configure PXE Boot options in DDI Central
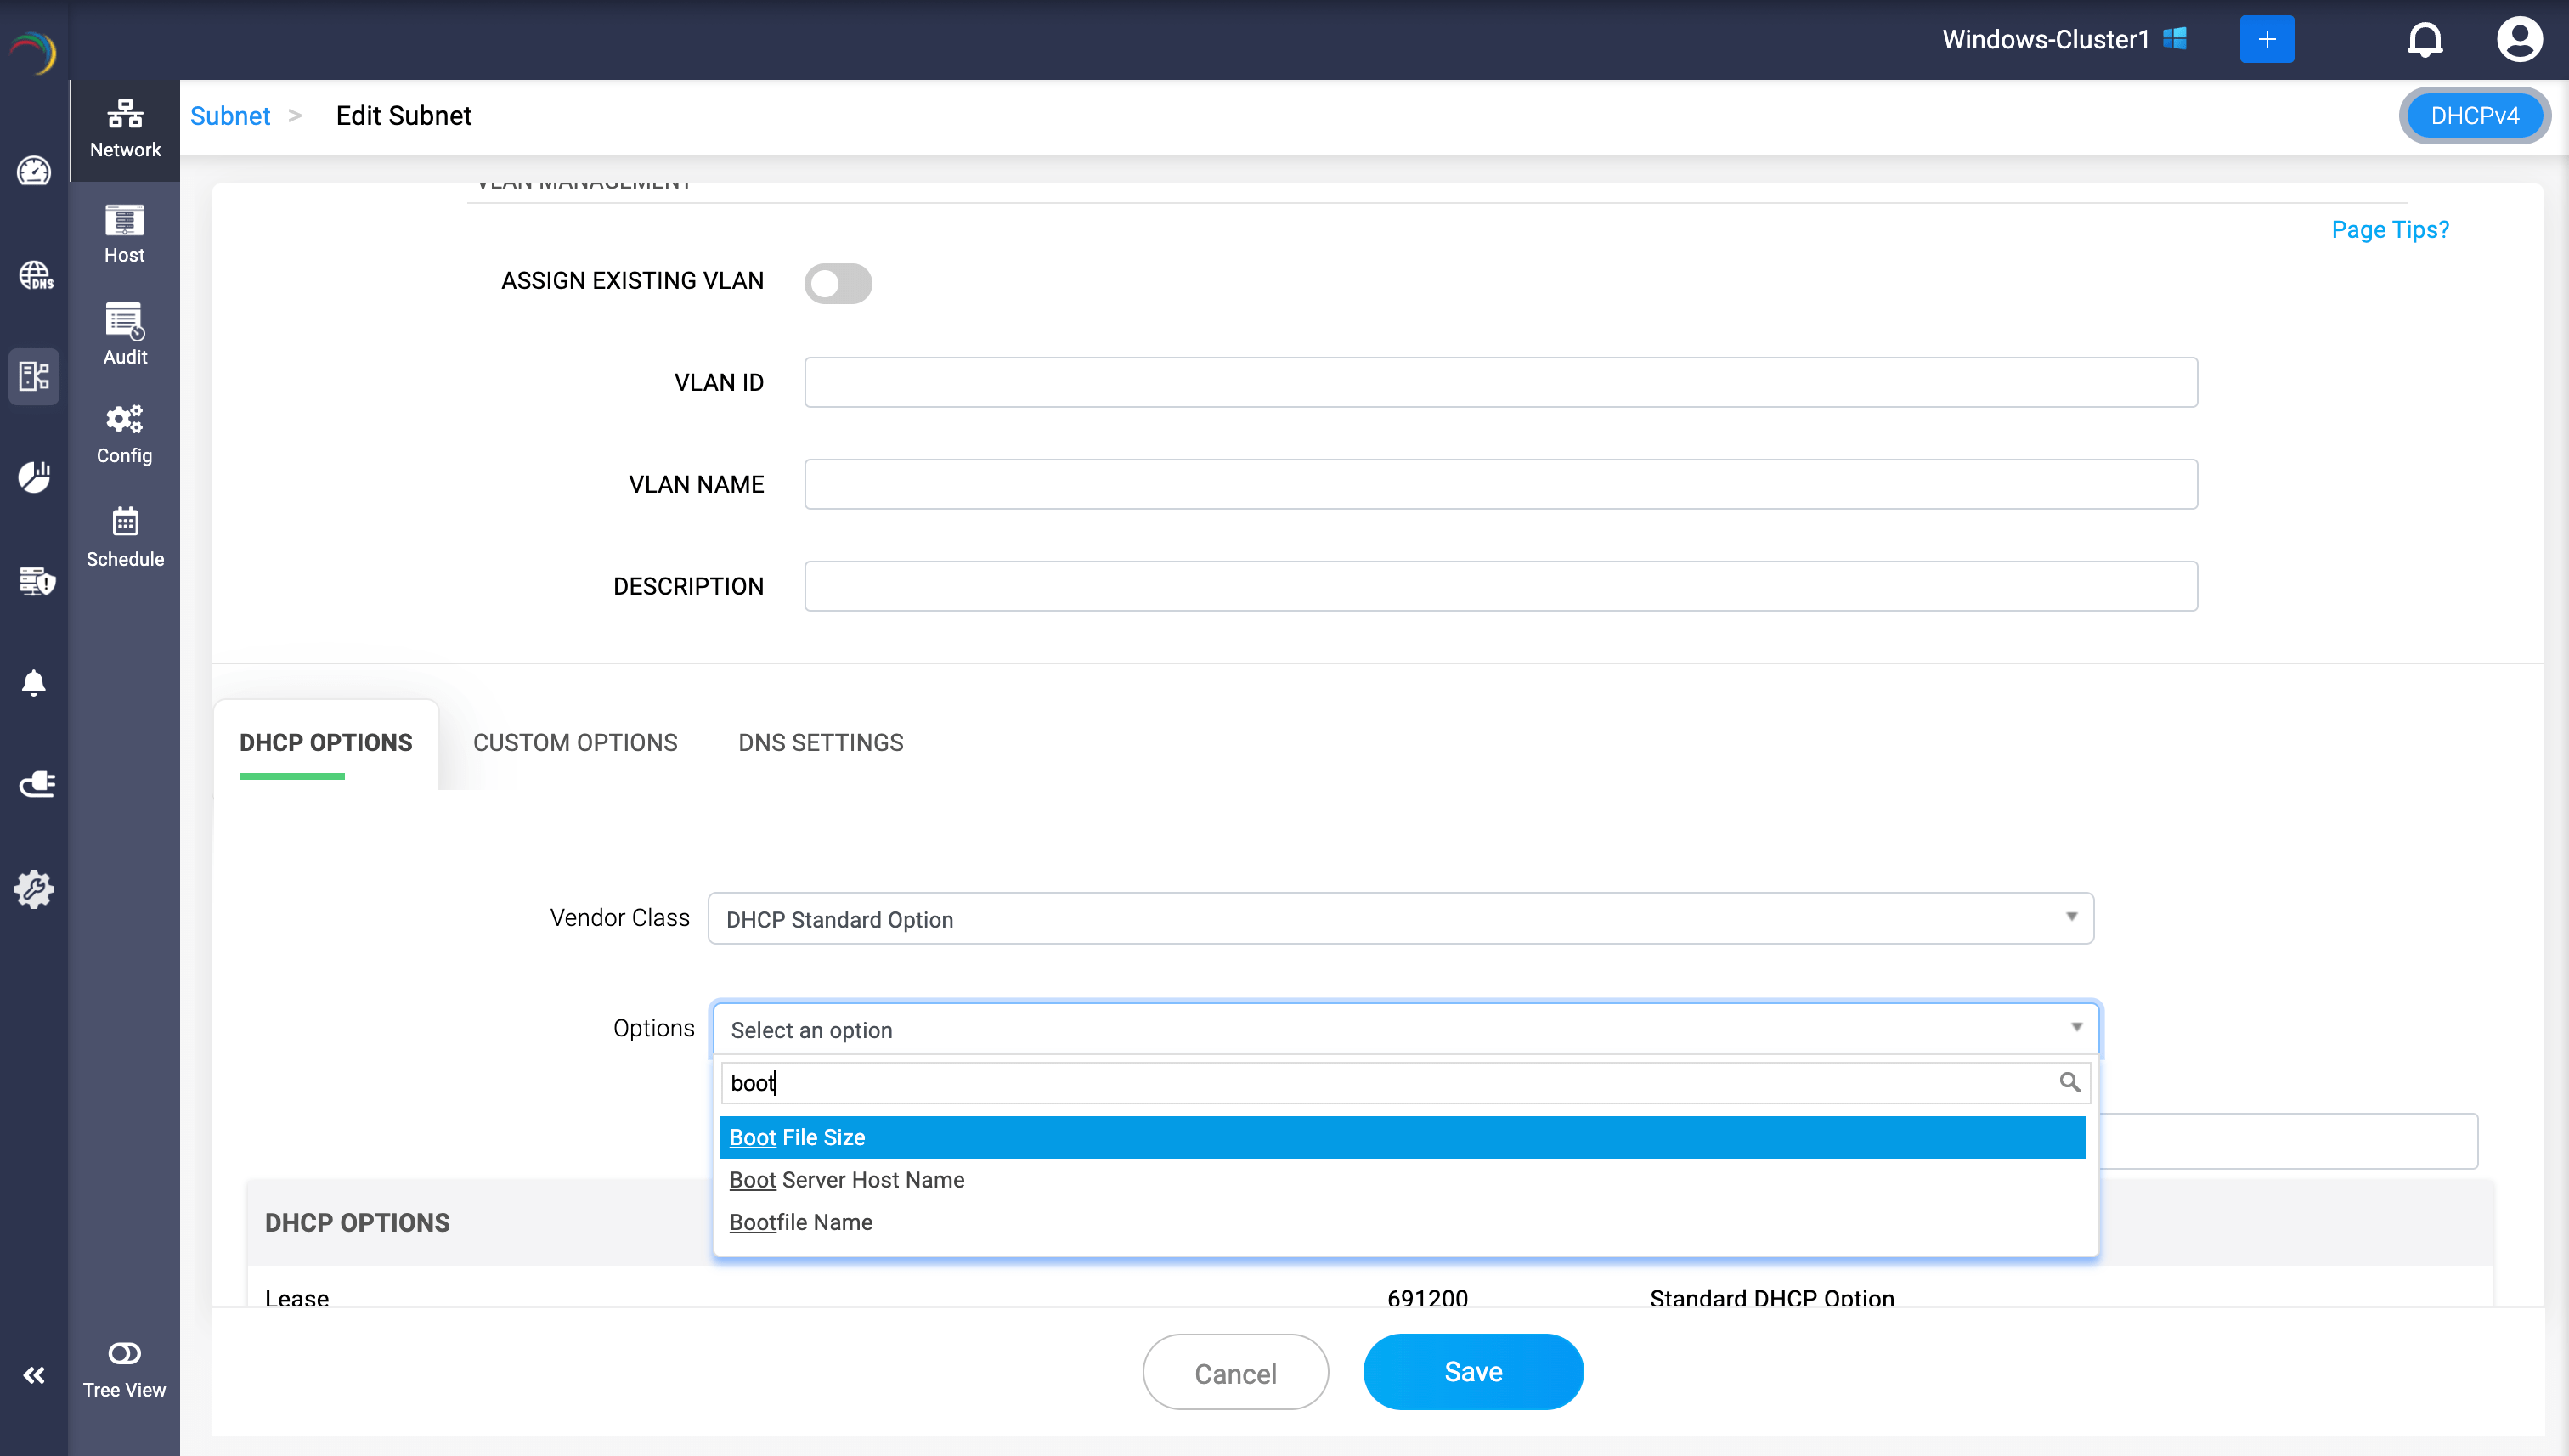
1. At the Subnet level
Configure PXE boot for all devices under a specific subnet.
- Navigate to: DHCP → Network.
- Select the desired subnet and click Edit, or create a new subnet.
- Scroll to the DHCP Options panel.
- Set Vendor Class to DHCP Standard Option.
- In the Options field, type boot to display PXE options (Boot File Size, Boot Server Host Name, Bootfile Name).
- Enter values and click Add after each entry, then Save.
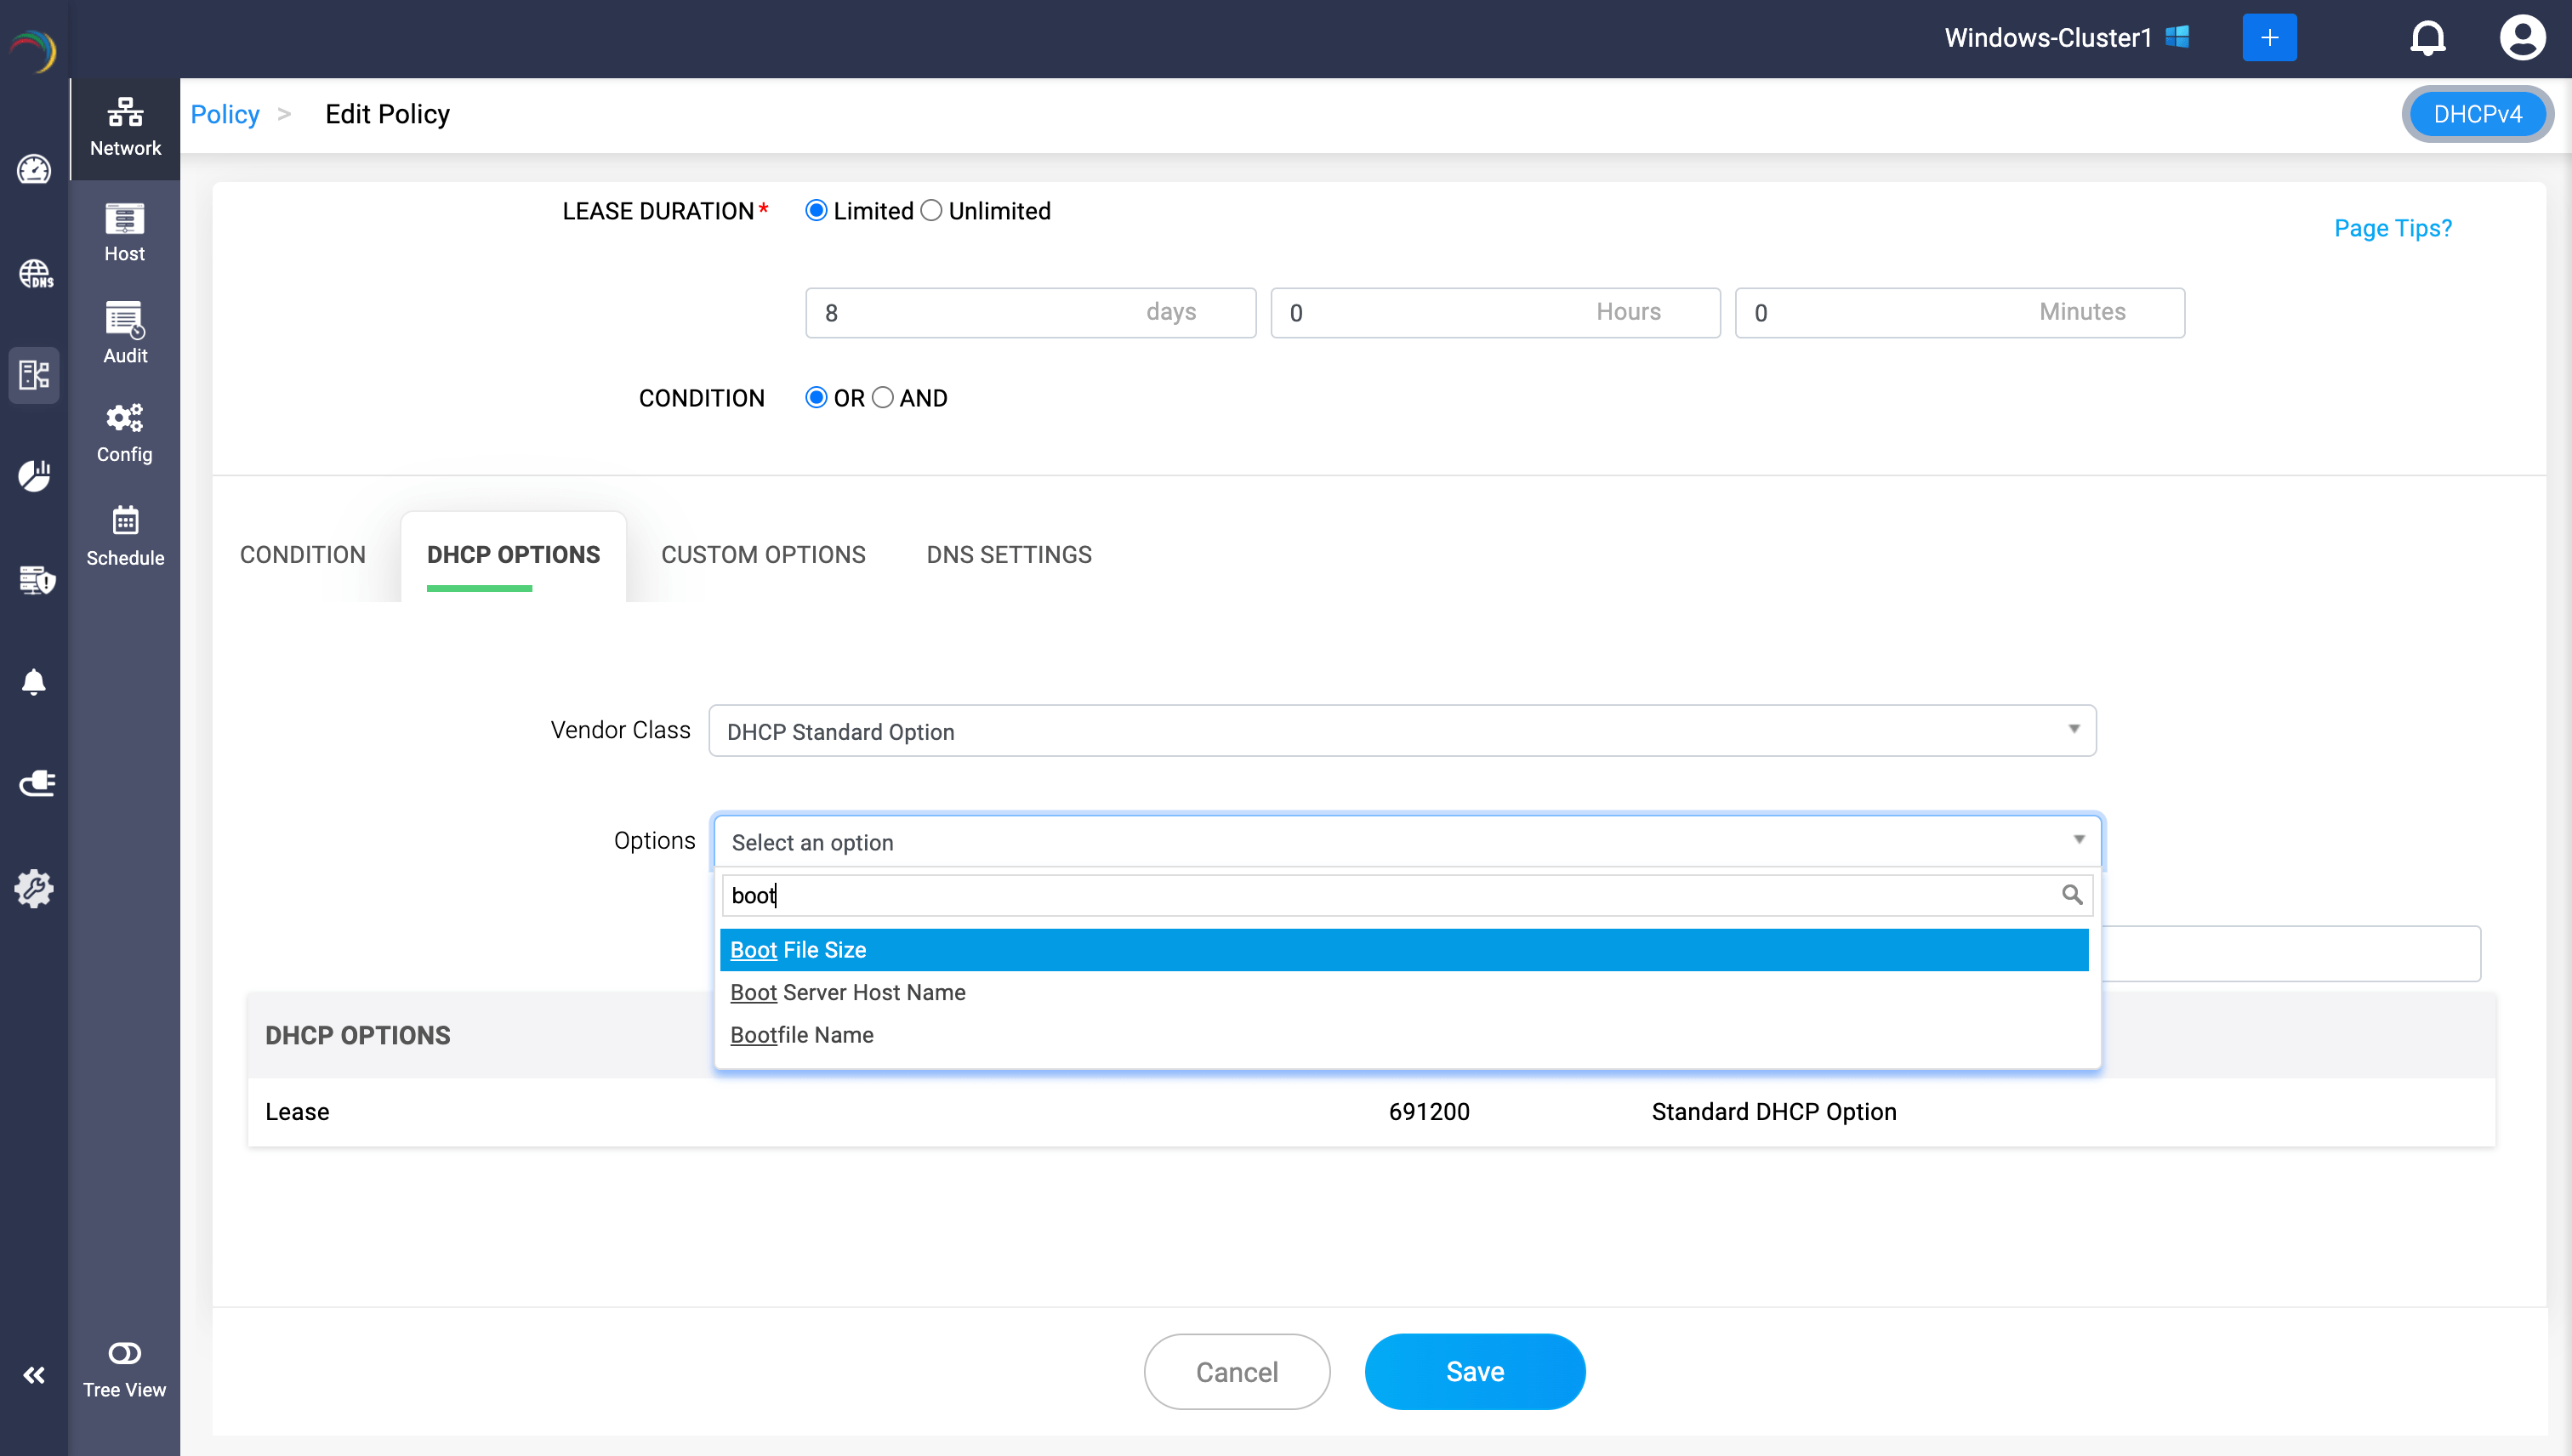
2. At the Policy level
Target PXE boot to specific devices that fulfill certain conditional criteria.
- Go to: DHCP → Network → Policy.
- Choose an existing policy or create a new one.
- In the Edit Policy window, go to the DHCP Options tab.
- Set Vendor Class to DHCP Standard Option.
- Search for boot and select the relevant options.
- Provide the values (server, file name, size) and click Add after each entry. The entries will be accepted into the dedicated option list for the policy.
- Now click Save to finalize the configurations for the chosen DHCP policy.
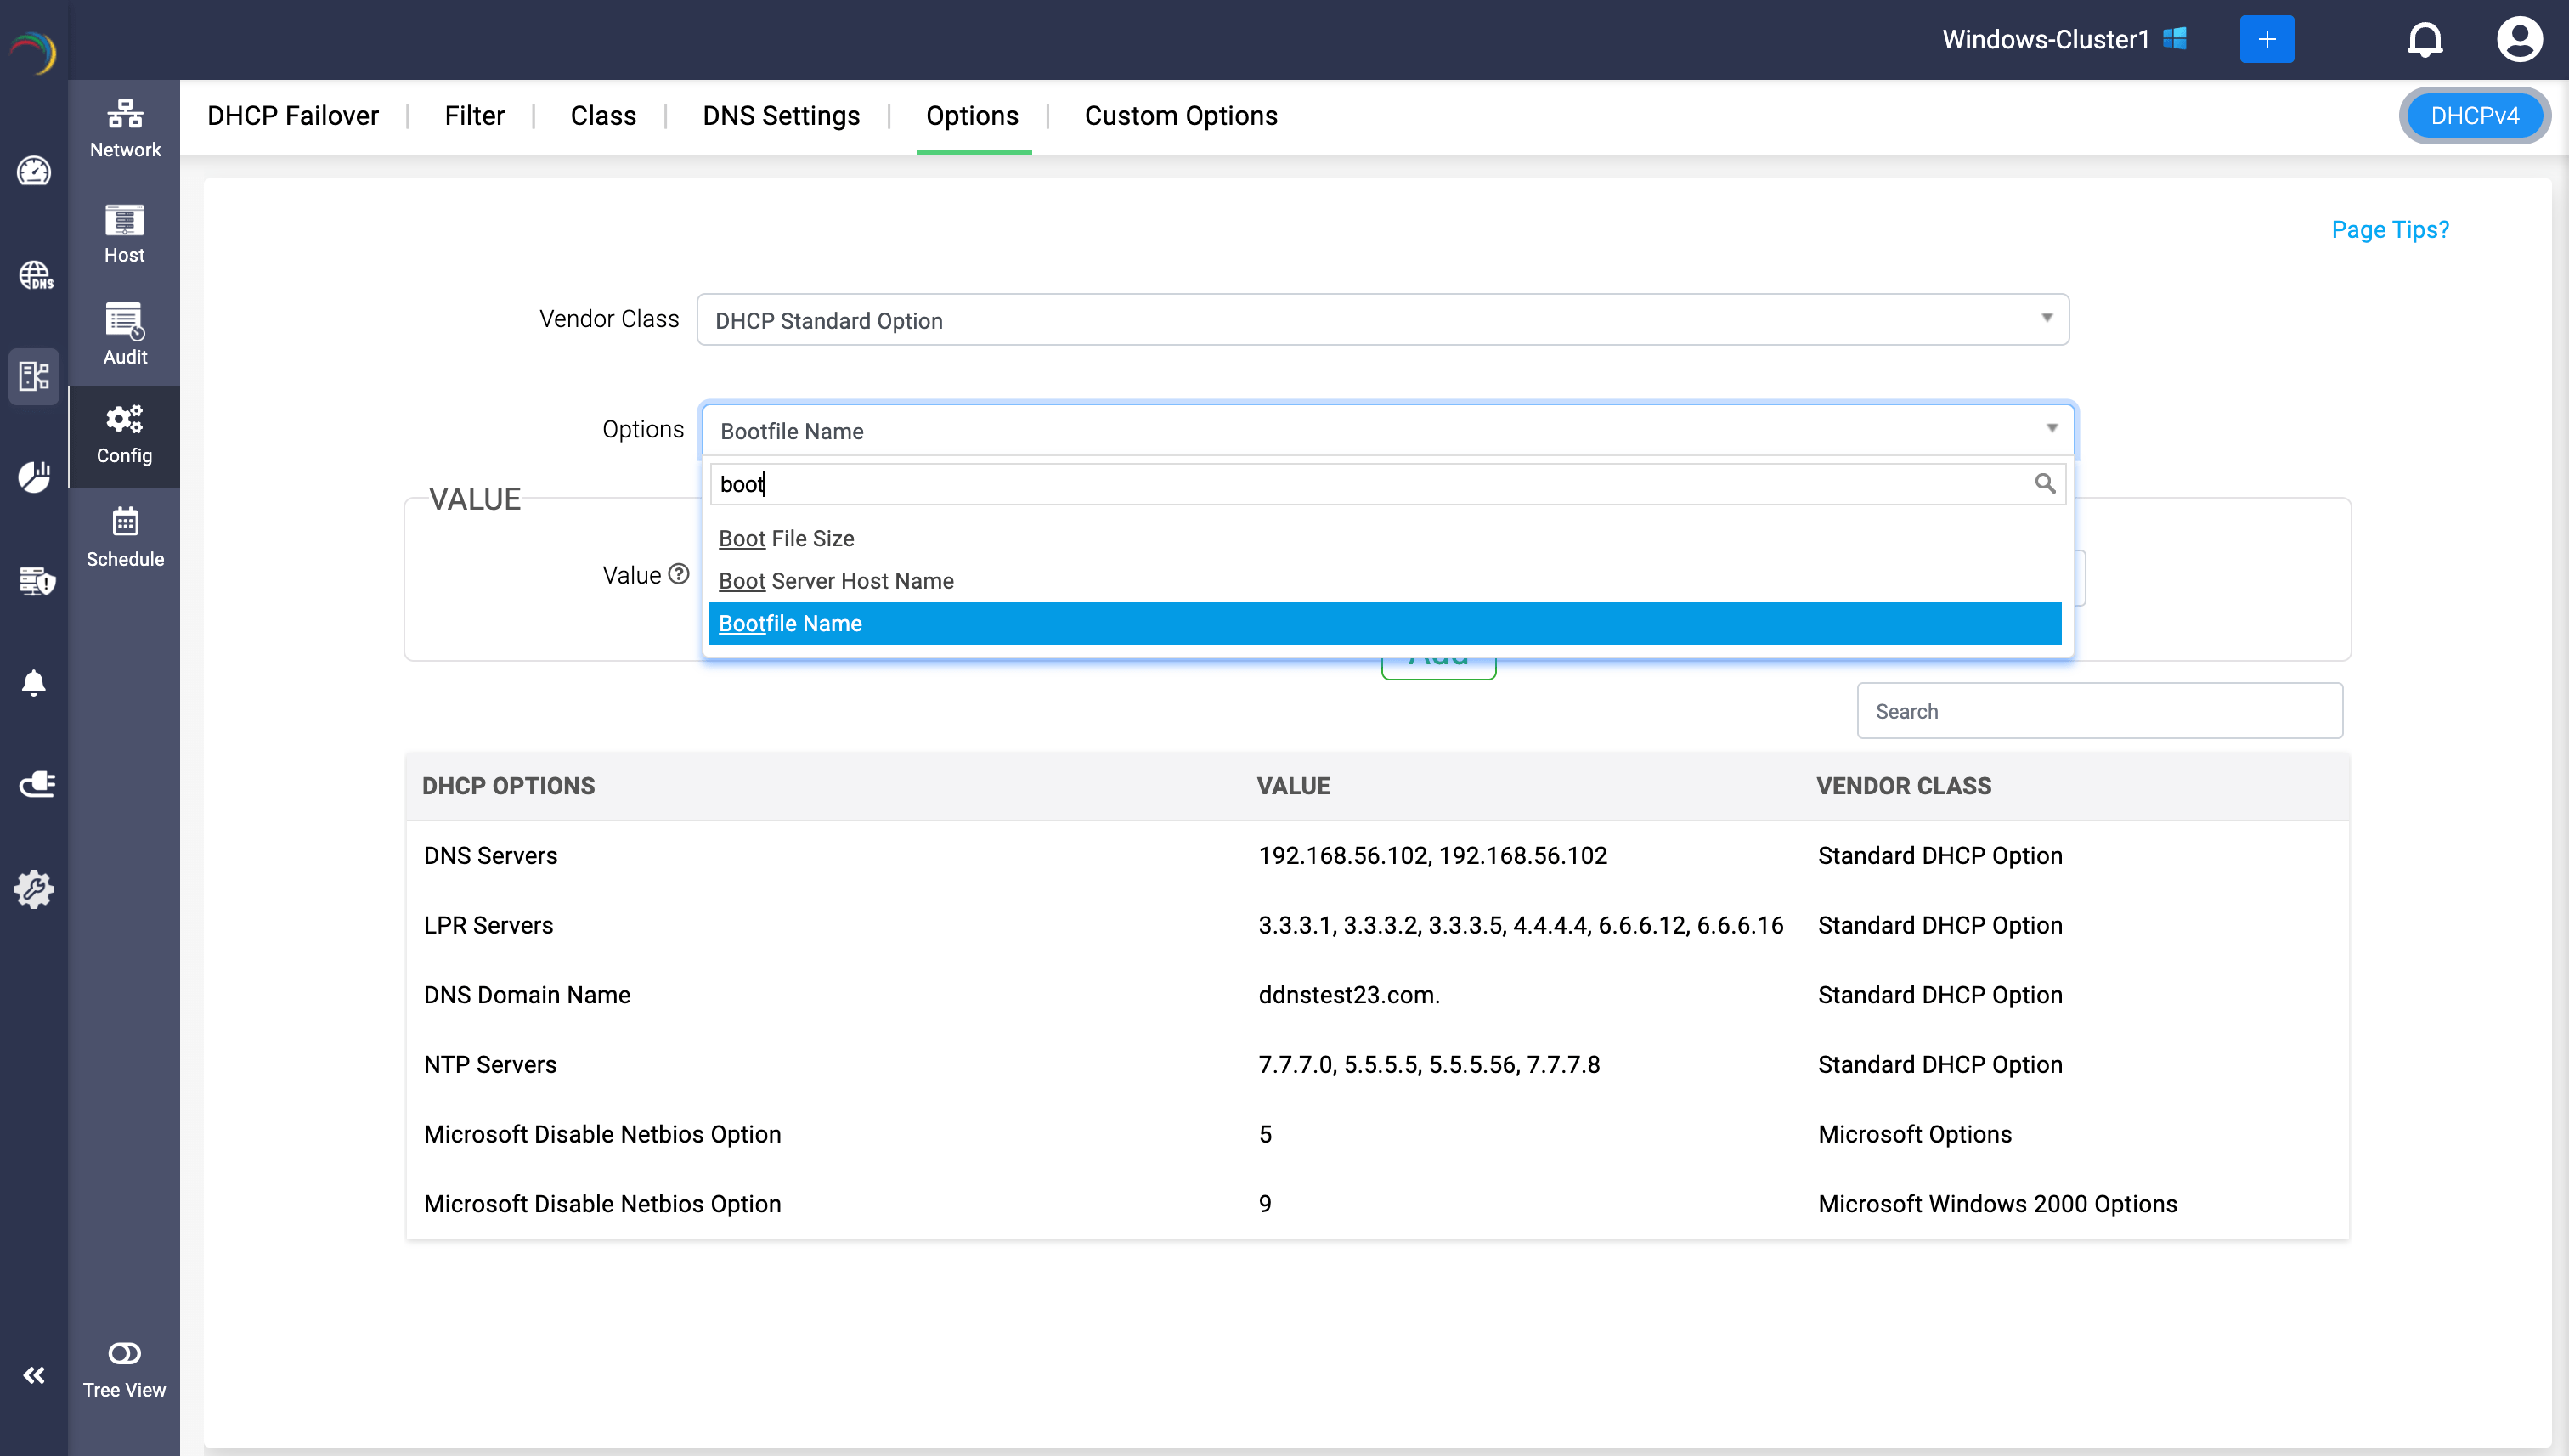
3. At the Global Level
Apply PXE boot universally across all subnets and DHCP servers in the cluster.
- Navigate to: DHCP → Config → DHCP Options.
- Define the boot options globally in DDI Central.
- Any configuration set here is automatically propagated across all DHCP servers in the cluster.
- See the global DHCP options documentation for precedence rules.
- Note: Global options take effect for all devices joining the network unless overridden at the subnet or policy level.
DDI Central gives administrators hands-on control over PXE boot by allowing the three standard DHCP options—Boot File Size (13), Boot Server Host Name (66), and Bootfile Name (67)—to be applied flexibly at the subnet, policy, or global level. This is a one-time configuration—once set, the options automatically come into play whenever new devices join the network, ensuring the correct PXE boot parameters are applied consistently. By centralizing these configurations, IT teams can automate endpoint provisioning and maintain uniformity across distributed networks—without resorting to complex PowerShell scripts or manual setup for large-scale environments.