Steps to configure SAML SSO for Chargebee
About Chargebee
Chargebee is a subscription billing and revenue management platform for SaaS and recurring revenue businesses. It streamlines billing, payments, and compliance.
The following steps will help you enable SSO for Chargebee from Identity360.
Prerequisites
- The MFA and SSO license for Identity360 is required to enable SSO for enterprise applications.
- Log in to Identity360 as an Admin, Super Admin, or Technician who has Application Integration and Single Sign-on permissions.
- Navigate to Applications > Application Integration > Create New Application, and select Chargebee from the applications displayed.
Note: You can also find Chargebee from the search bar located at the top.
- Under the General Settings tab, enter the Application Name and Description.
- Under the Choose Capabilities tab, select Single Sign-on and click Continue.
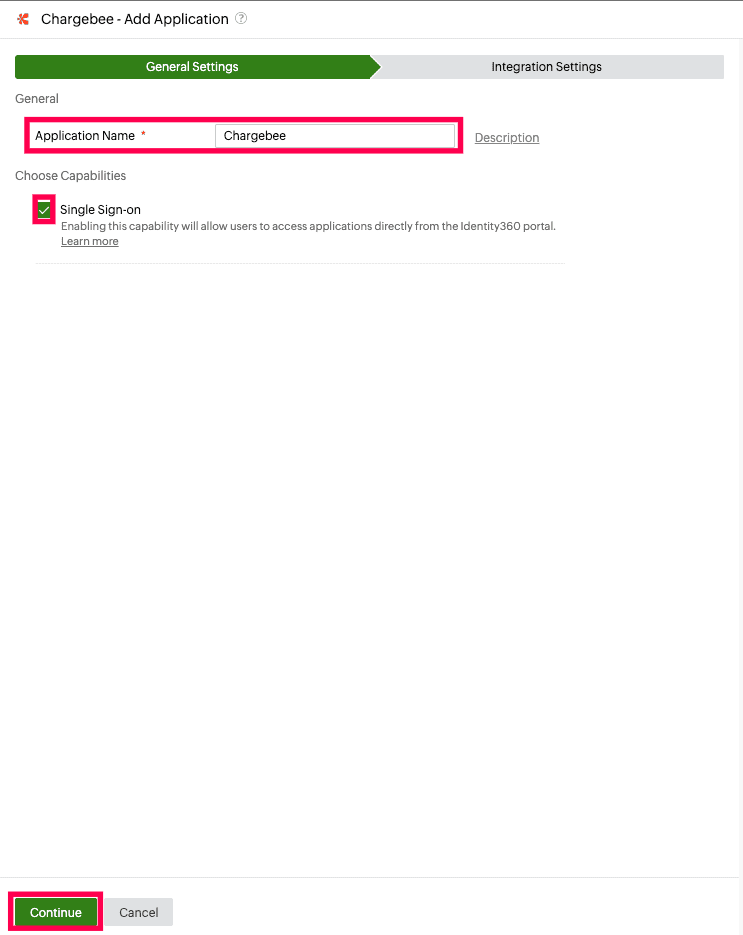 General Settings of SSO configuration for Chargebee.
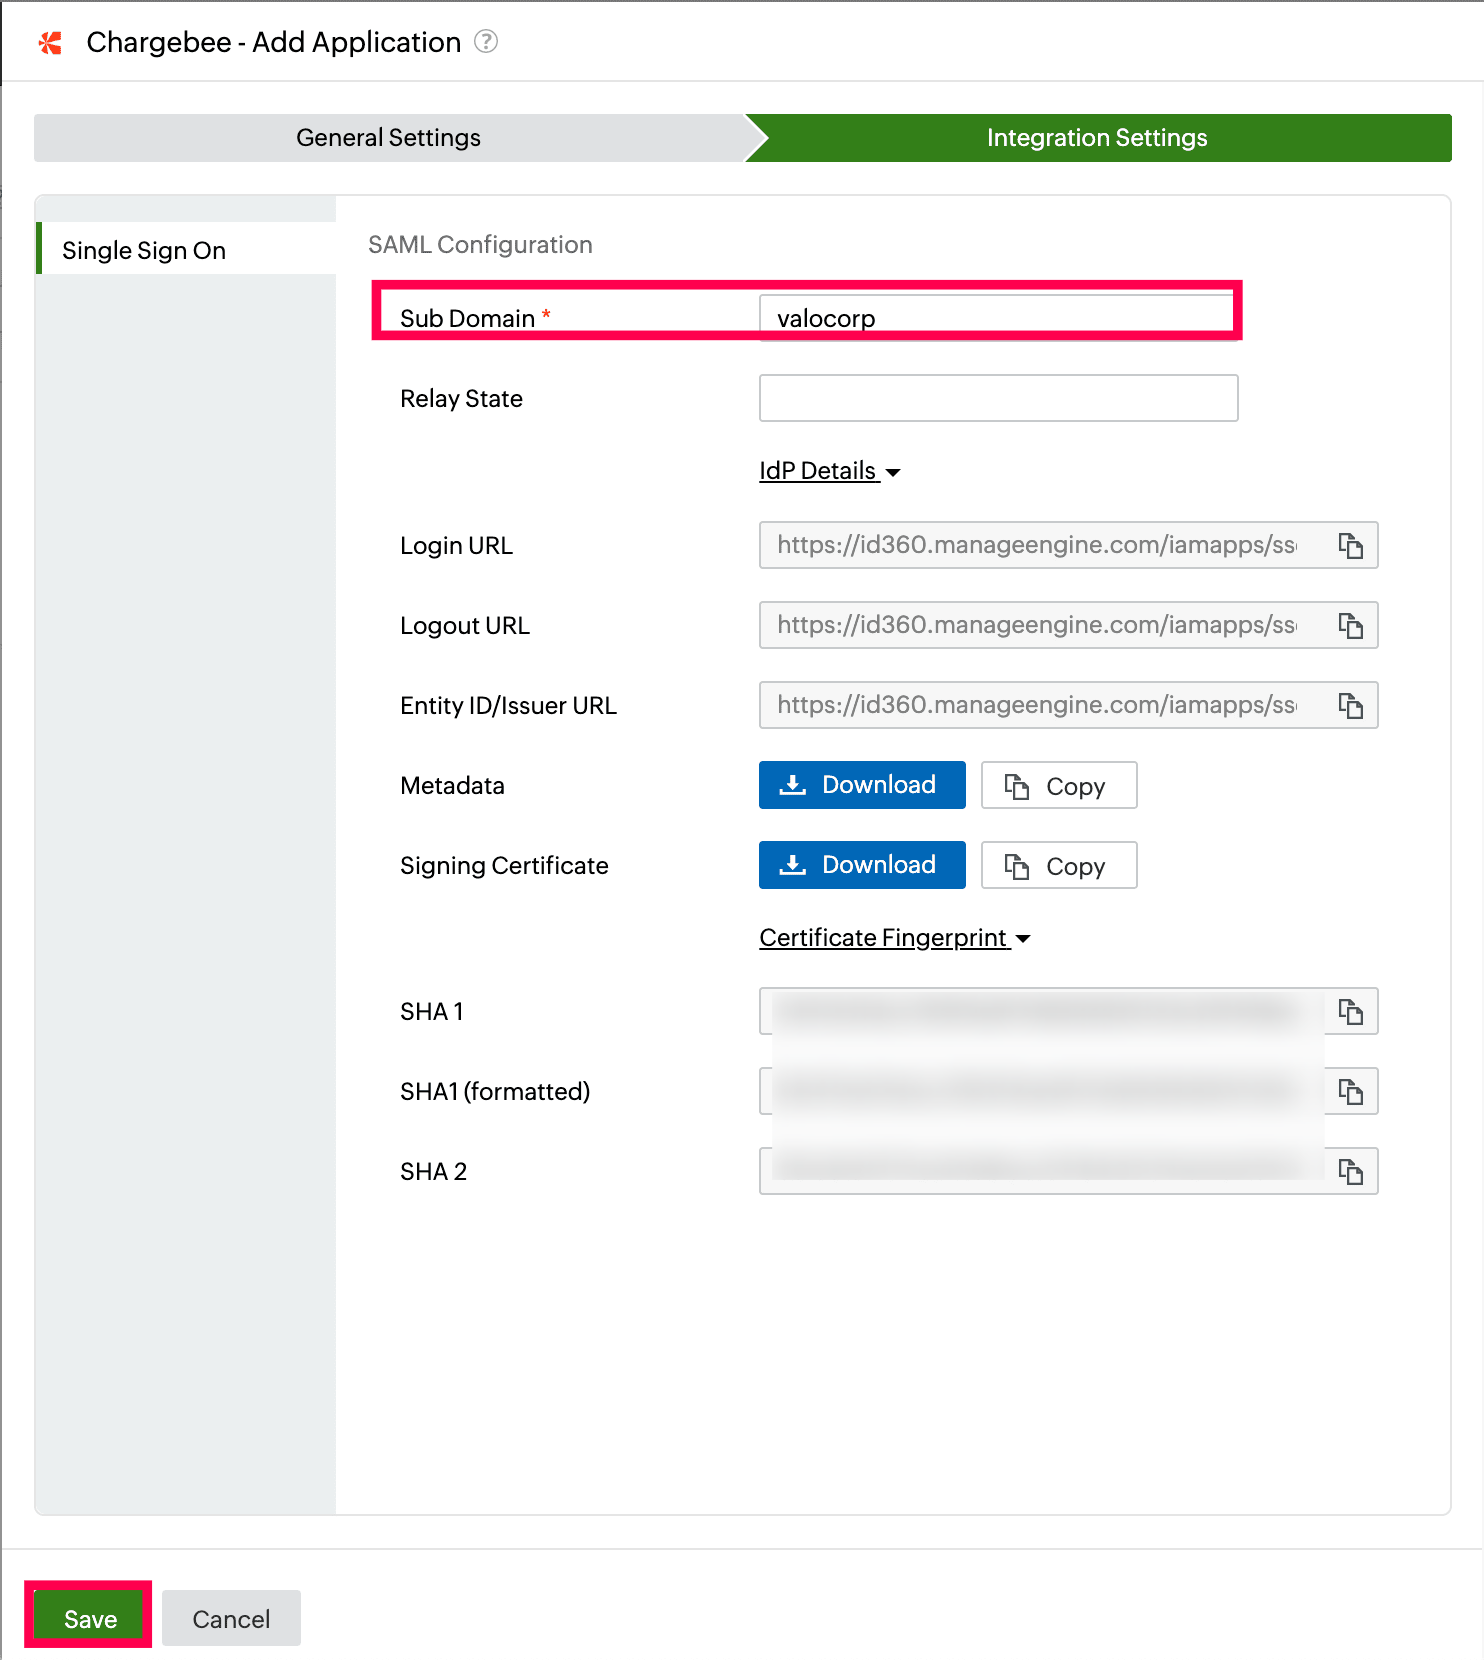
- Under Integration Settings, navigate to the Single Sign On tab and click IdP Details. Copy the Login URL and Signing Certificate values, which will be used during the configuration of Chargebee.
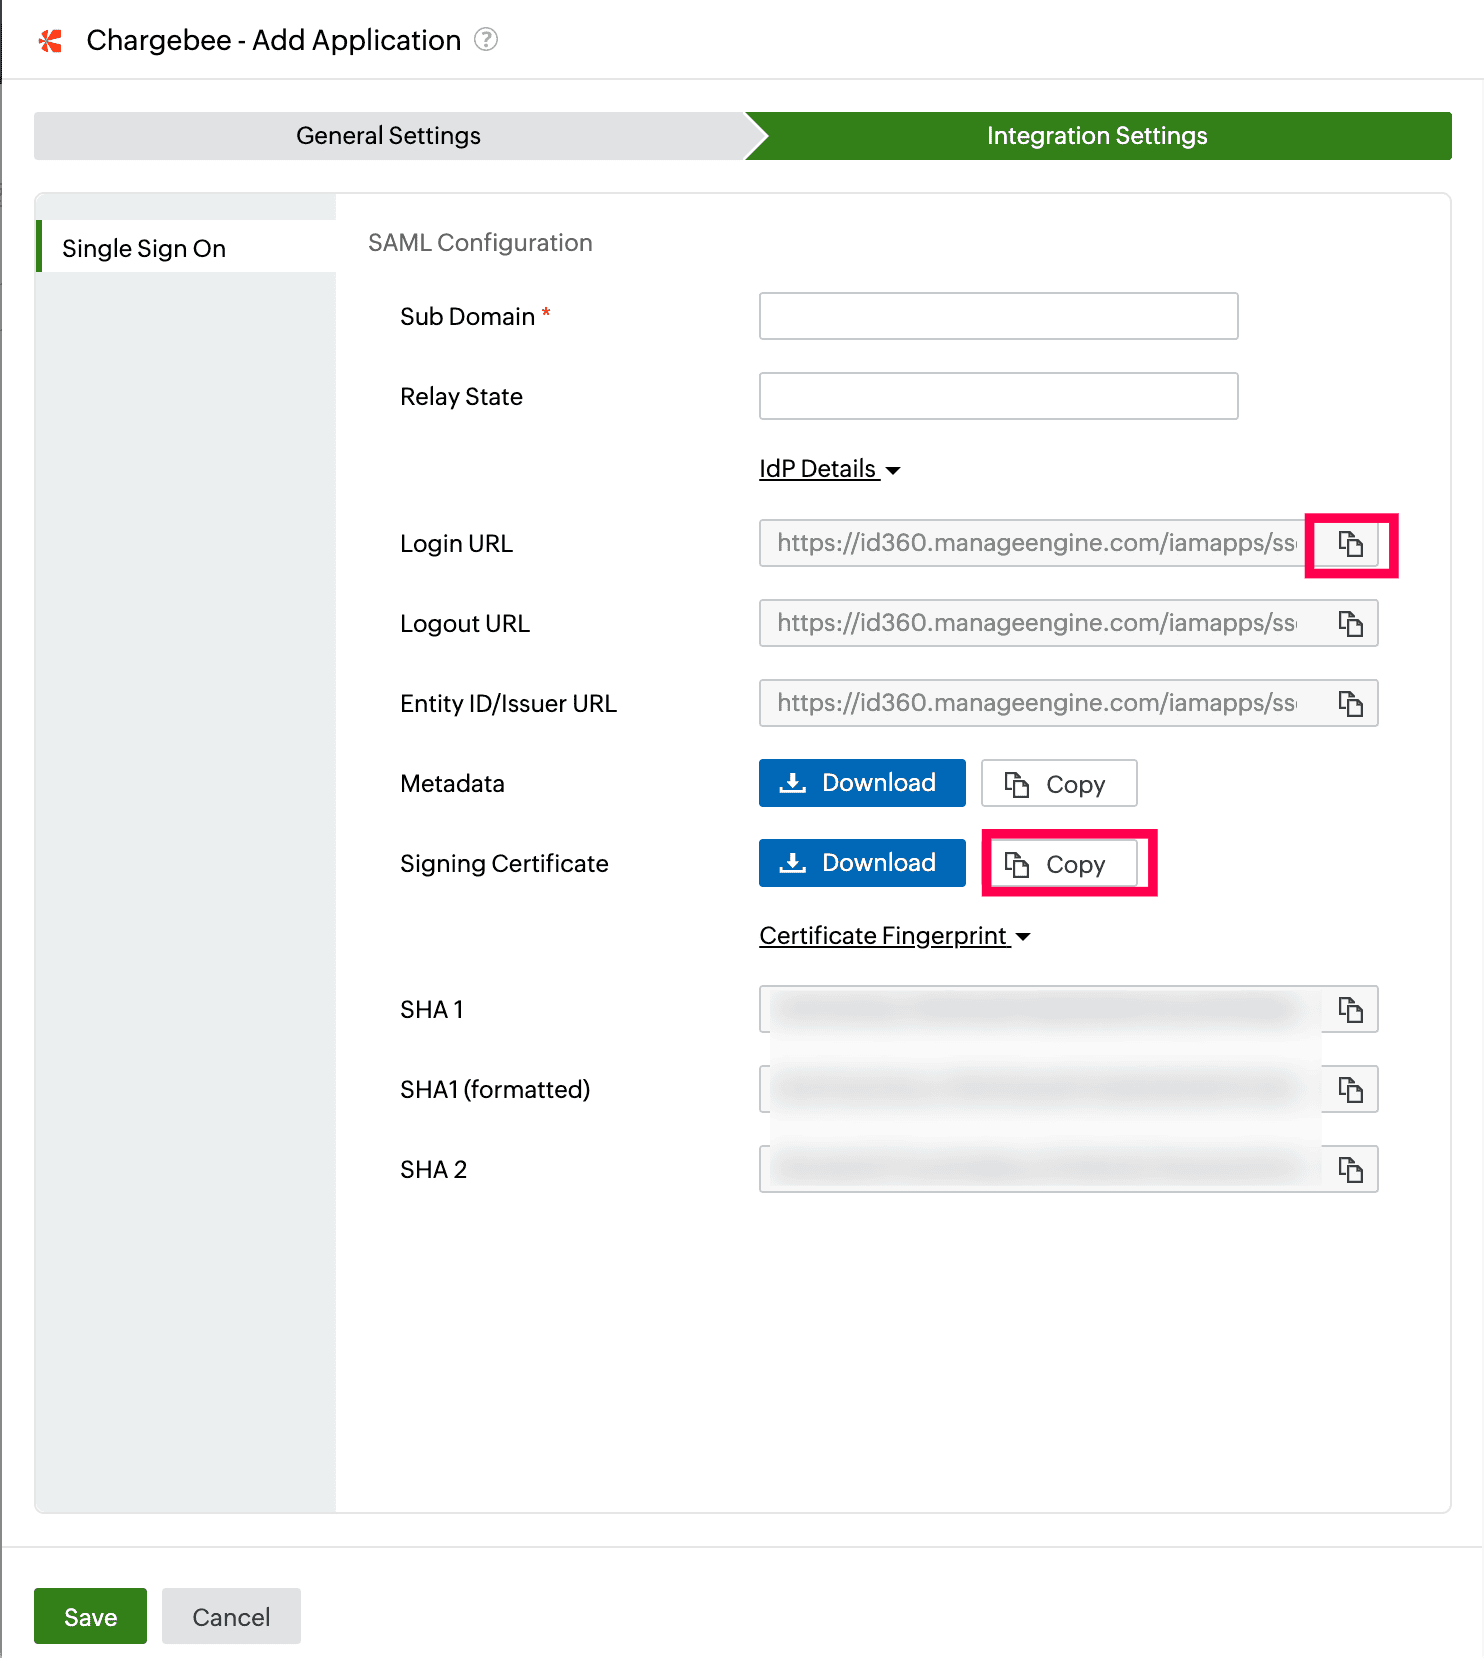 Integration Settings of SSO configuration for Chargebee.
Chargebee (service provider) configuration steps
- Log in to Chargebee as an administrator.
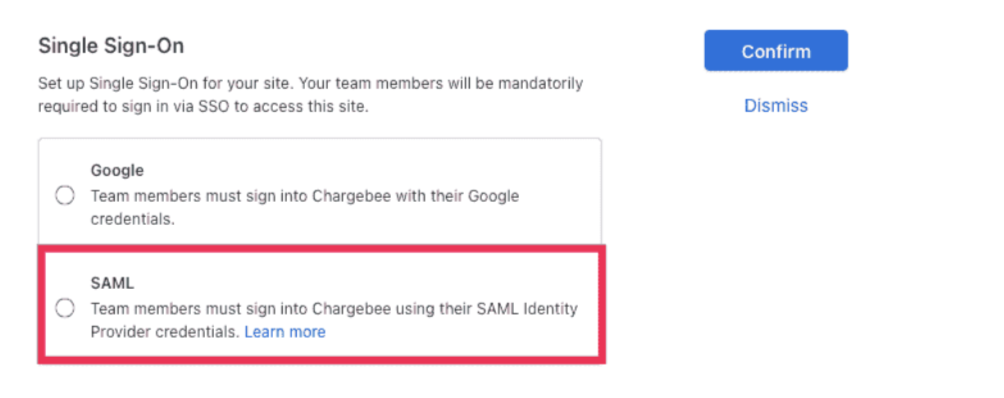
- Navigate to Settings > Security. Under Single Sign-On (SSO), click Set up.
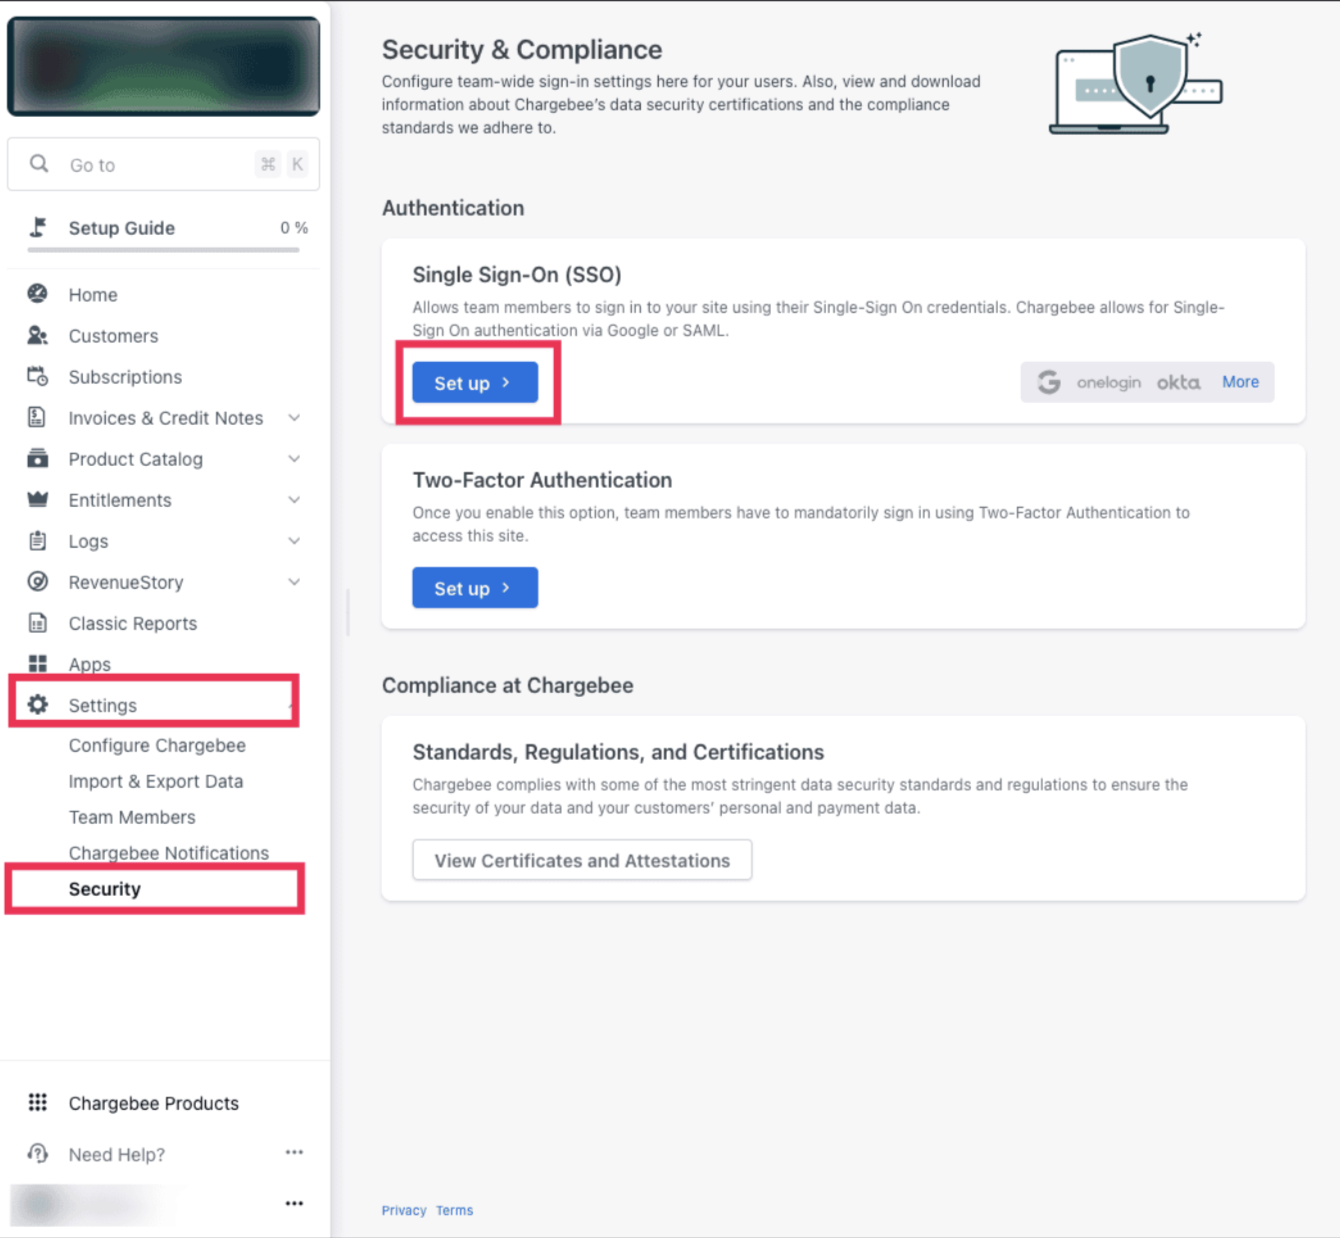 Portal view of Chargebee.
- In the pop-up window, click the SAML radio button.
 Setting up SAML SSO in Chargebee.
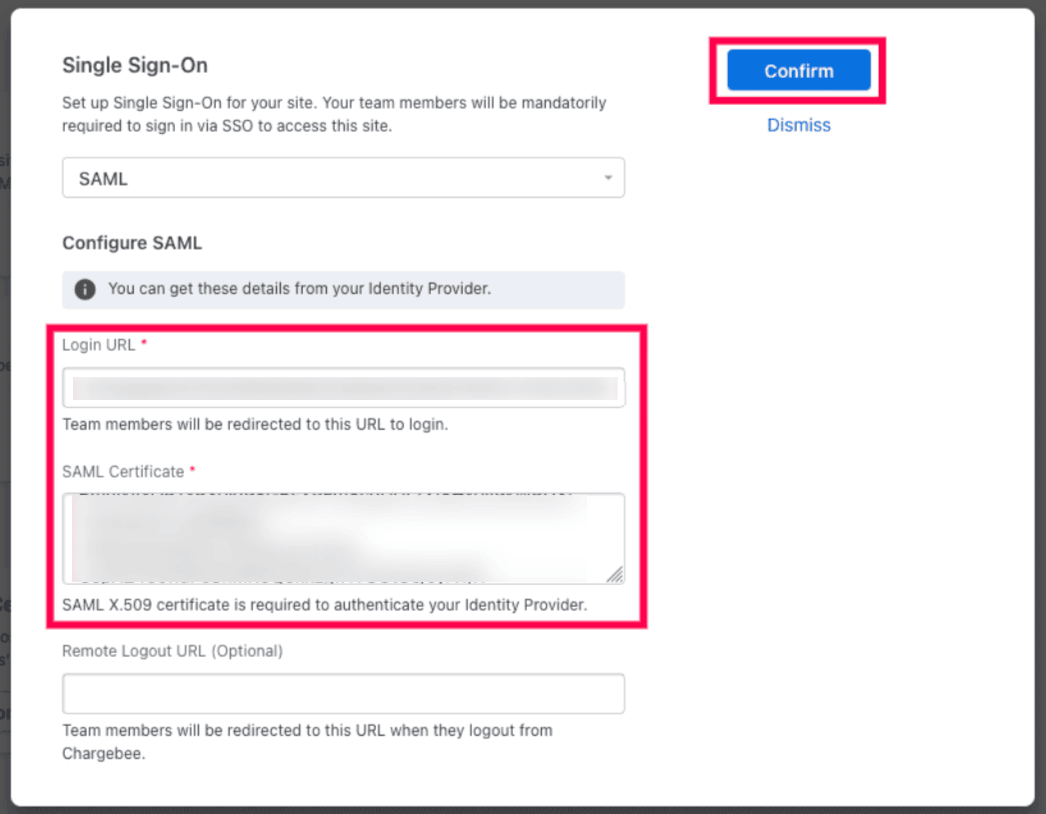
- In the Login URL and SAML Certificate fields, paste the Login URL and Signing Certificate values copied in step 6 of the prerequisites.
- Click Confirm.
 SSO configuration in Chargebee.
Identity360 (identity provider) configuration steps
- Switch to Identity360's application configuration page.
- Enter your Chargebee Sub Domain value. For example, if your Chargebee account URL https://valocorp.chargebee.com, then your subdomain is valocorp.
- Enter the Relay State parameter, if necessary.
Note: Relay State is an optional parameter used with a SAML message to remember where you were or to direct you to a specific page after logging in.
- Click Save.
 Integration Settings of SSO configuration for Chargebee.
Your users will now be able to sign in to Chargebee through the Identity360 portal.
Note: For Chargebee, both SP-initiated and IdP-initiated flows are supported.
Steps to enable MFA for Chargebee
Setting up MFA for Chargebee using Identity360 involves the following steps:
- Set up one or more authenticators for identity verification when users attempt to log in to Chargebee. Identity360 supports various authenticators, including Google Authenticator, Zoho OneAuth, and email-based verification codes. Click here for steps to set up the different authenticators.
- Integrate Chargebee with Identity360 by configuring SSO using the steps listed here.
- Now, activate MFA for Chargebee by following the steps mentioned here.
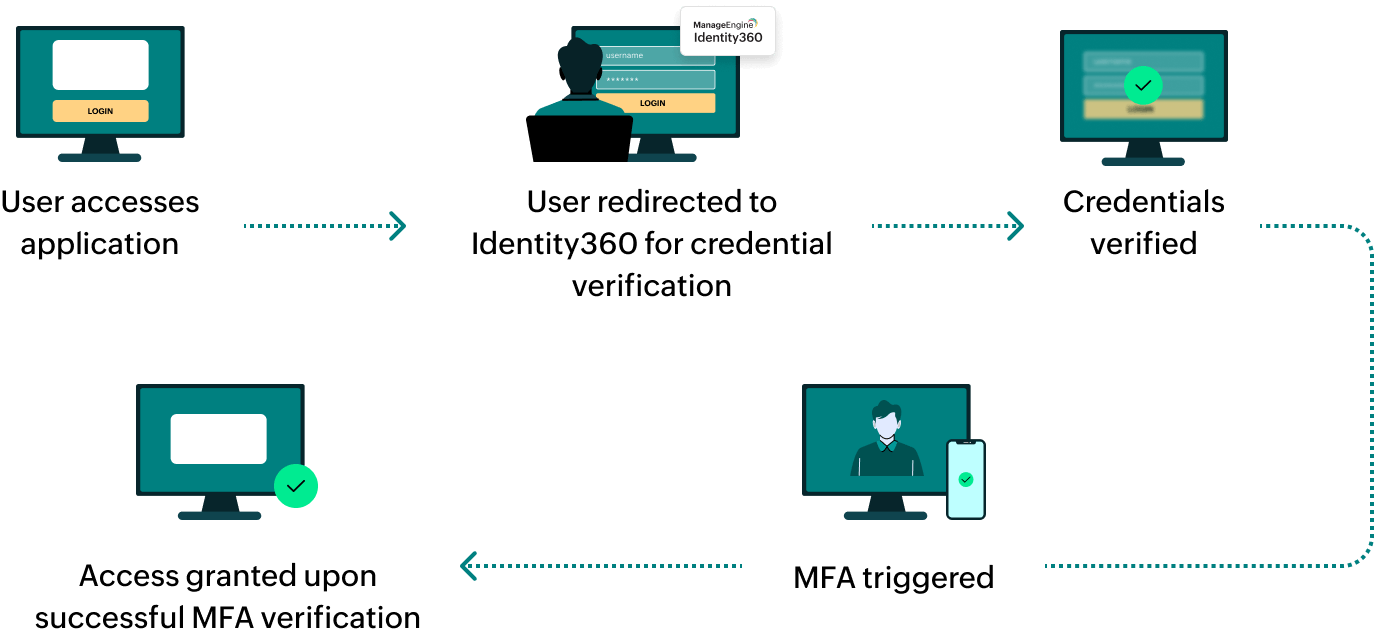
How does MFA for applications work in Identity360?