Configure life cycle management for Microsoft Entra ID
About Microsoft Entra ID
Microsoft Entra ID, previously known as Azure Active Directory (Azure AD), is a cloud-based IAM solution that enables organizations to manage user identities and access permissions securely. Microsoft Entra ID provides users with a range of functionalities for efficient and secure access to organizational resources.
By integrating Microsoft Entra ID with ManageEngine Identity360, you can enable the following life cycle management capabilities:
- Import and sync
Import and synchronize user accounts from Microsoft Entra ID into Identity360, manage their identities in Universal Directory, and sync them to other directories and applications. This enables admins to oversee all user-related actions from a single console.
- Provisioning
Provision and modify users' access and account attributes across enterprise applications based on their role changes in Microsoft Entra ID. Provisioning and orchestration eases onboarding and life cycle management, boosting productivity and efficiency.
Provisioning features supported
- Creation: Automatically set up a new user account in Microsoft Entra ID via provisioning when a user is created in Identity360.
- Modification: Modify user attributes in Microsoft Entra ID as and when their profiles get modified in Identity360.
- Disablement: Promptly deactivate a user account in Microsoft Entra ID when the respective account is disabled in Identity360.
- Deletion: When a user is deprovisioned through Identity360, the user account will be automatically deleted in Microsoft Entra ID.
- Session termination: Terminate sessions for designated users or for those who are offboarded and no longer a part of the organization via Identity360's centralized console.
Note: Once you enable provisioning for Microsoft Entra ID, all the actions will be automatically synced with Entra ID, as and when they are performed in Identity360.
The following steps will help you configure the supported life cycle management capabilities for Microsoft Entra ID from Identity360.
Prerequisites
- Log in to Identity360 as an Admin or Super Admin, or as a Technician with a role that has the Directory Integration permission.
- Sign in to the Microsoft Entra portal using the credentials of a Global Administrator account.
Microsoft Entra tenant configuration
Setting up your Microsoft Entra tenant can be done through one of two methods: automatic configuration or manual configuration. You can opt for either approach depending on your requirements.
Note: If the automatic configuration was not successful due to permission issues, the tenant must be configured manually. To do that, click Configure manually.
Automatic Microsoft Entra tenant configuration
You can enable automatic Microsoft Entra tenant configuration through the following steps:
- In the Identity360 portal, navigate to the Universal Directory tab and click Manage Directory under the Directory Integration section.
- Click the Add Directory button.
- Click Configure in the Azure Active Directory card under the Import From Directories section.
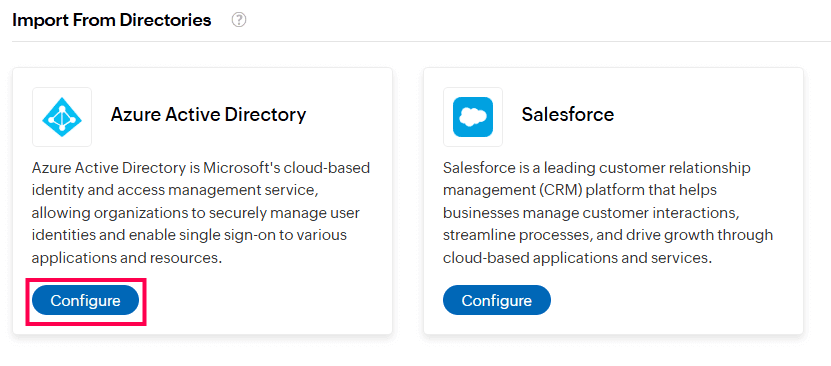
Configuring Azure Active Directory in Identity360
- Click Authorize Identity360 and follow the instructions to automatically add the tenant to Identity360. This is the default method to add a Microsoft Entra tenant to Identity360.
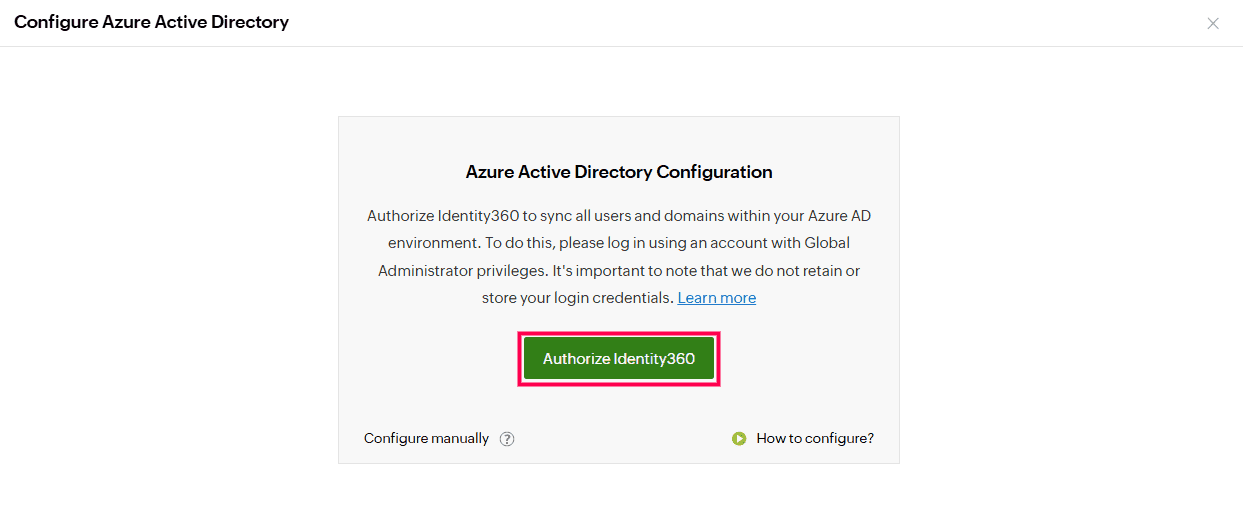
Automatic tenant configuration in Identity360 portal.
- Click Proceed. You will be redirected to the Microsoft Entra admin page.
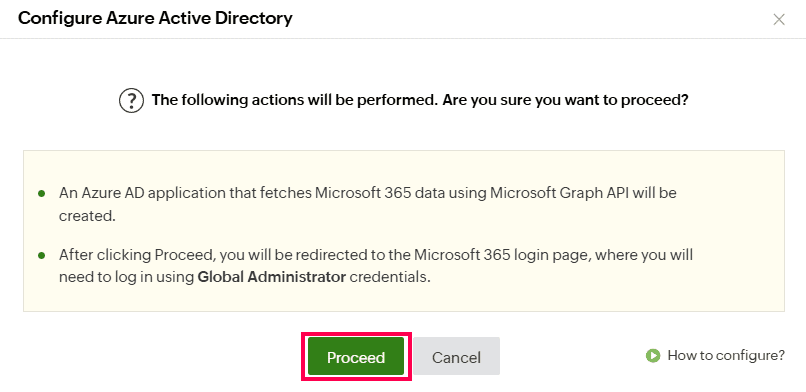
Integrating Azure Active Directory with Identity360.
- Complete the authentication process prompted for the admin account with Global Administrator privileges.
- Once you are logged in, a list of scopes required for Identity360 will be displayed, and you will be prompted to provide permission for accessing user and domain details from your Microsoft Entra environment. Click Accept.
- You will be redirected back to the Identity360 portal.
- The Microsoft Entra tenant is now integrated with Identity360.
Manual Microsoft Entra tenant configuration
Manual tenant configuration involves the following two steps:
- Create a Microsoft Entra application
- Configure the Microsoft Entra application in Identity360
Steps to create a Microsoft Entra application
- In the Microsoft Entra portal, under the Identity section in the left pane, select Applications.
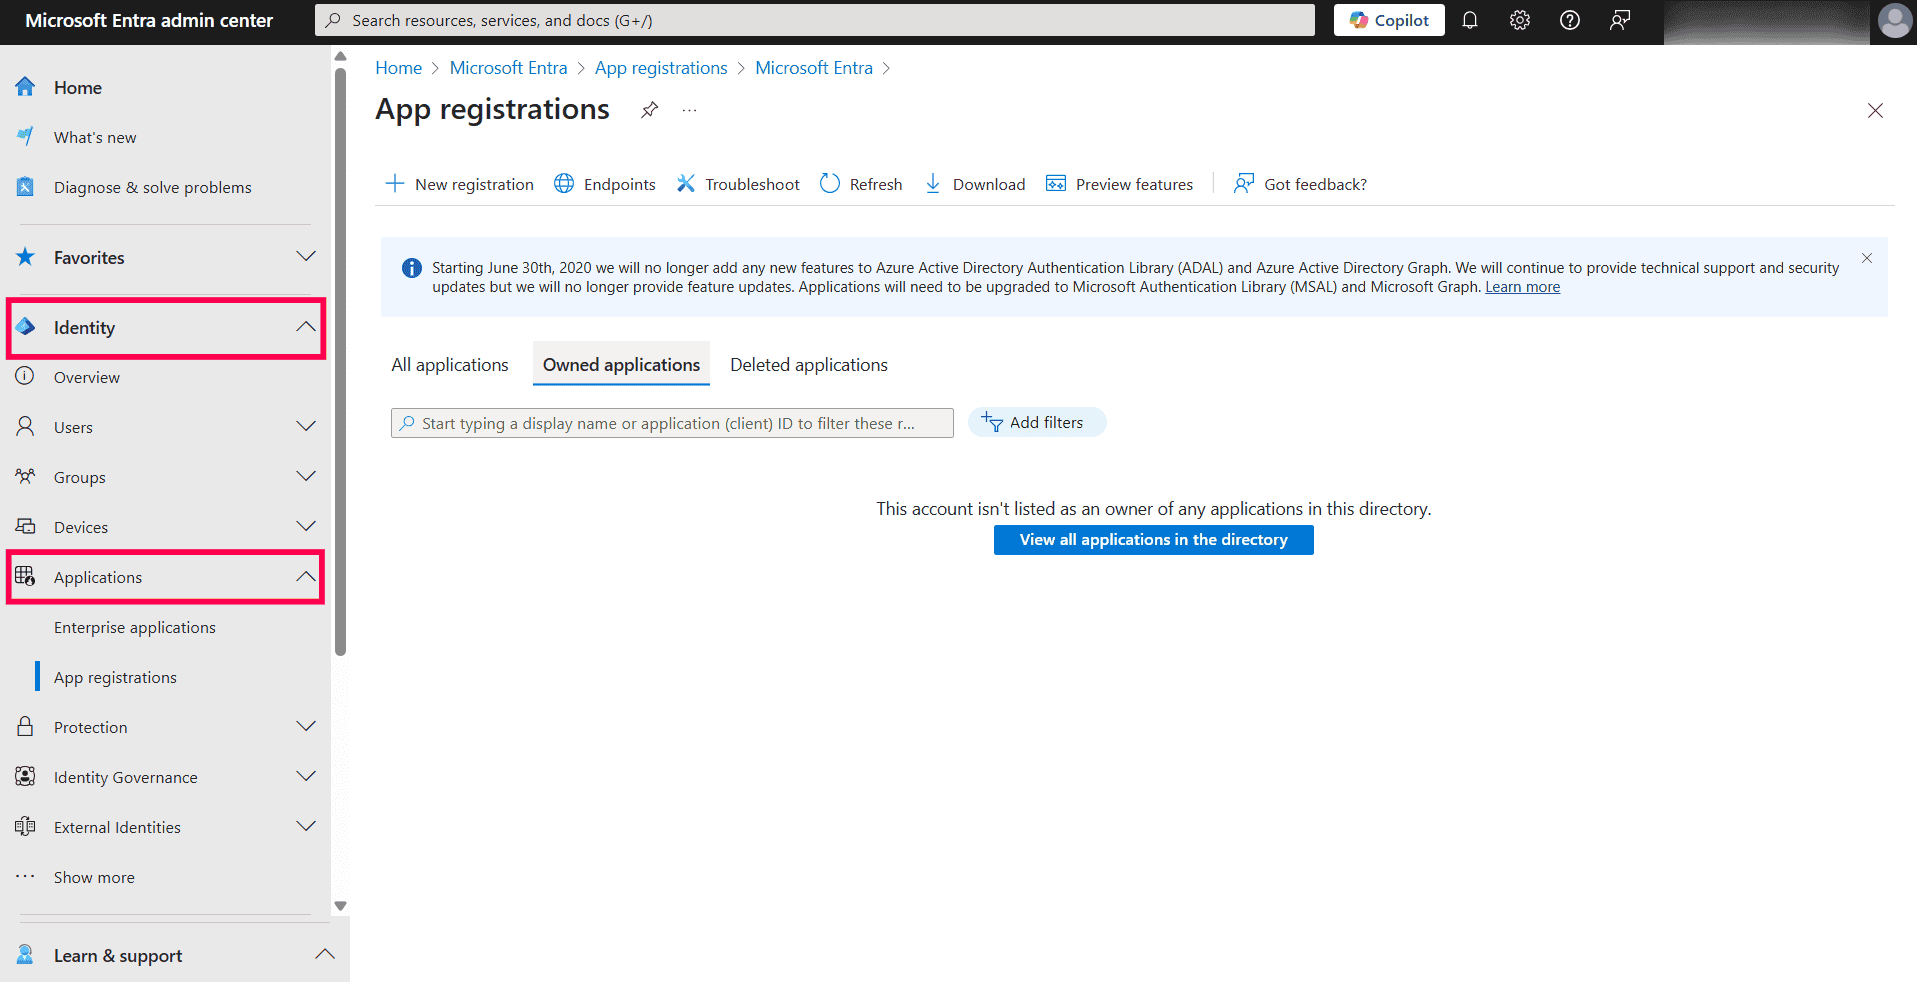
Applications dashboard in Microsoft Entra admin center.
- Select App registrations and click New registration.
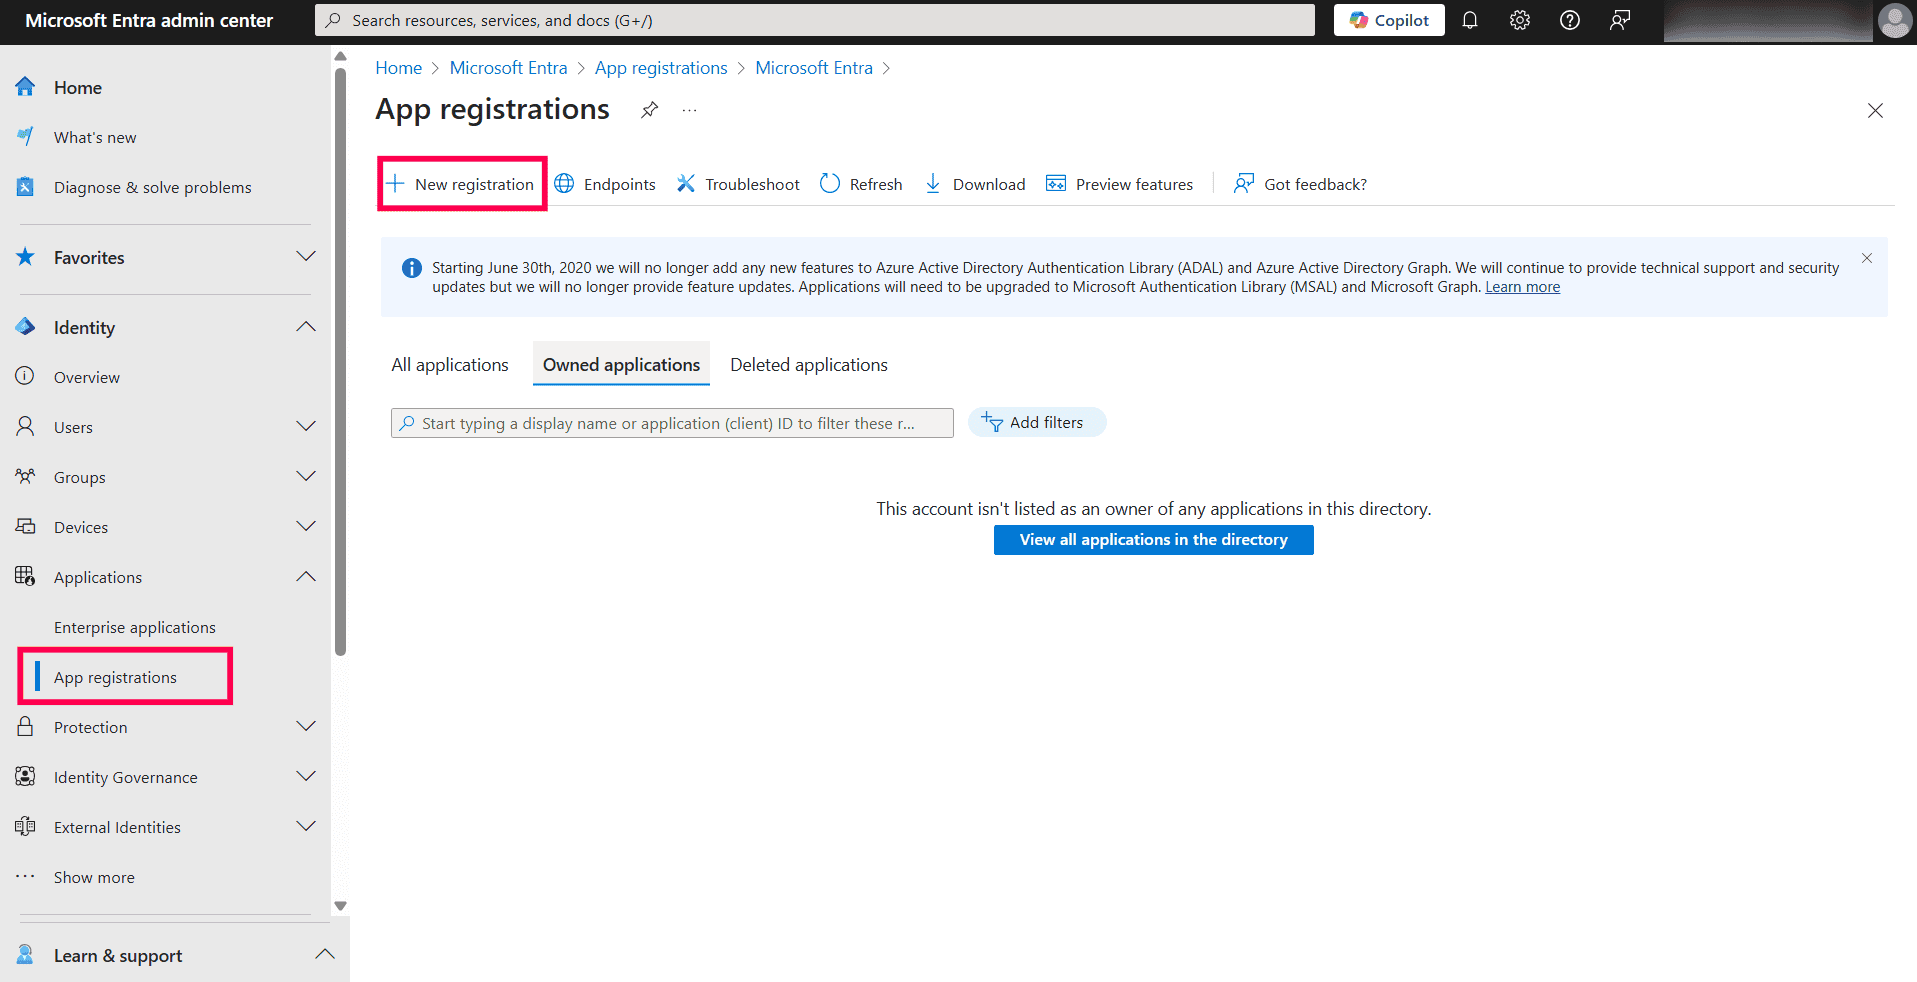
Registering a new application in Microsoft Entra admin center.
- Provide a Name for the Identity360 application to be created.
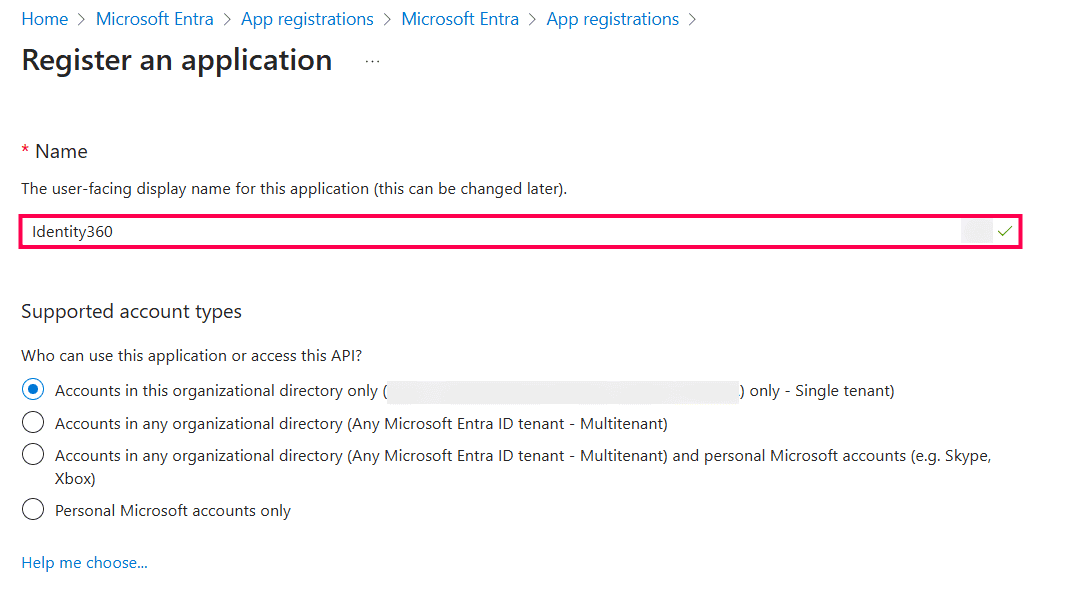
Registering Identity360 application in Microsoft Entra admin center.
- Select a Supported account type based on your organizational needs.
- Leave the Redirect URI (optional) field blank; you will configure it in the next few steps.
- Click Register to complete the initial app registration.
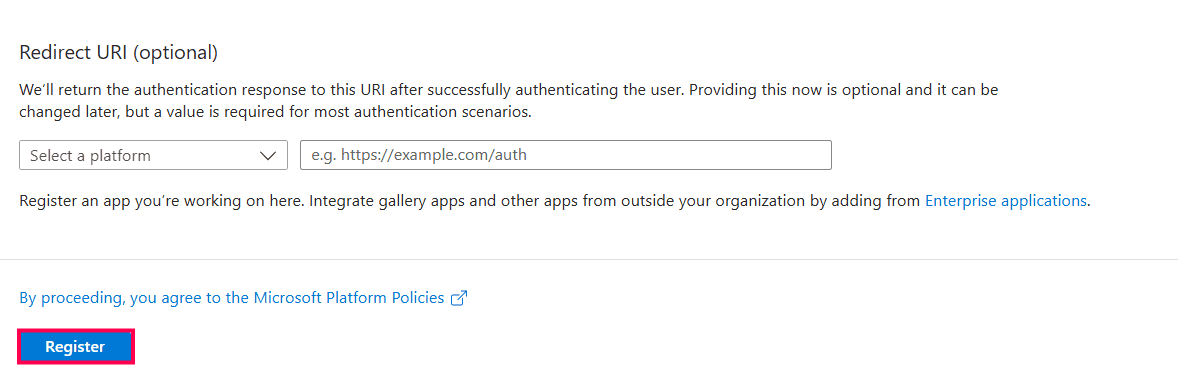
Completing Identity360 app registration in Microsoft Entra ID.
- You will now see the Overview page of the registered application.
- Click Add a Redirect URI.
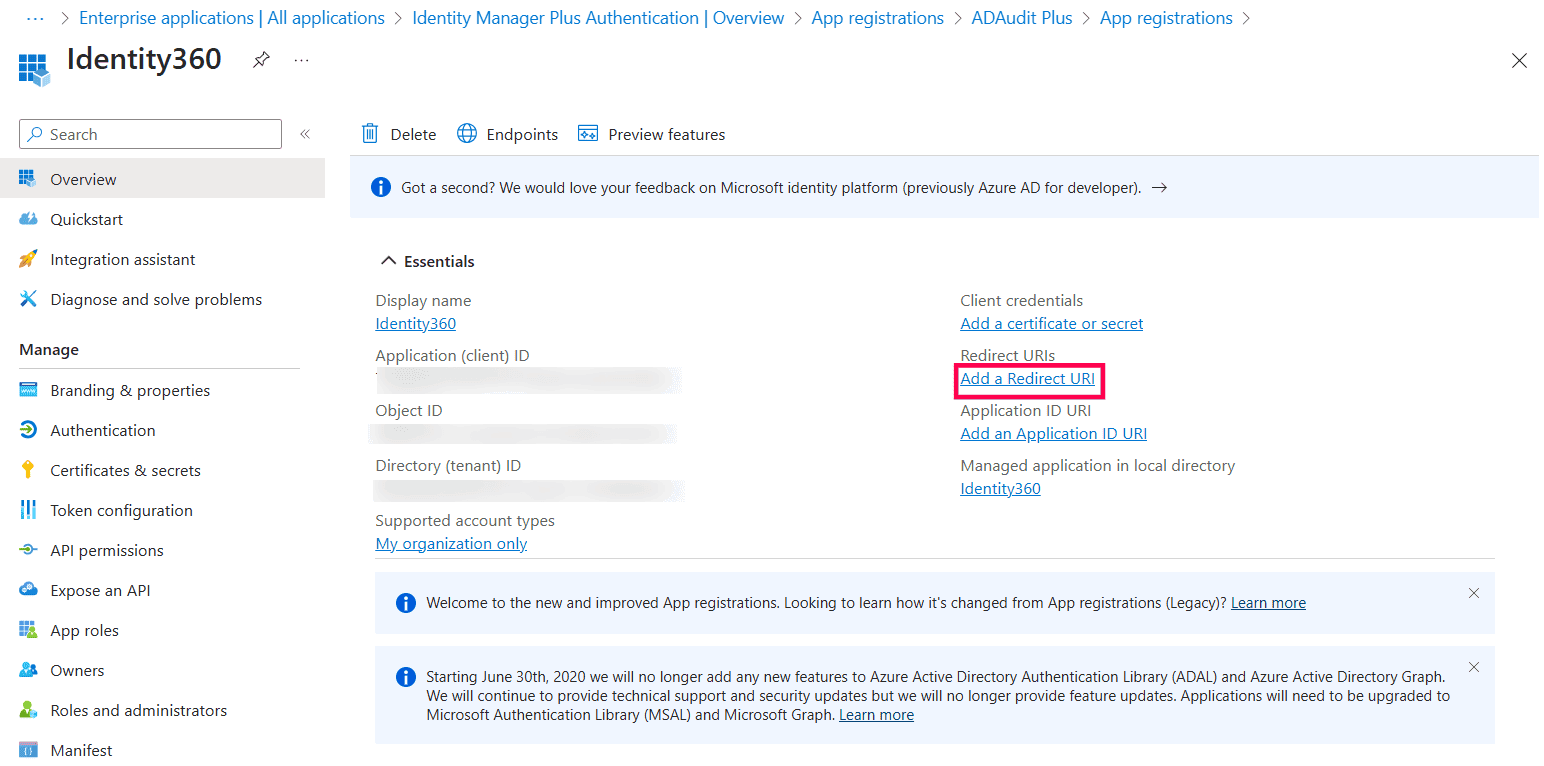
Identity360 application overview page in Microsoft Entra ID.
- Click Add a platform under Platform configurations.
- In the Configure platforms pop-up, click Web under Web applications.
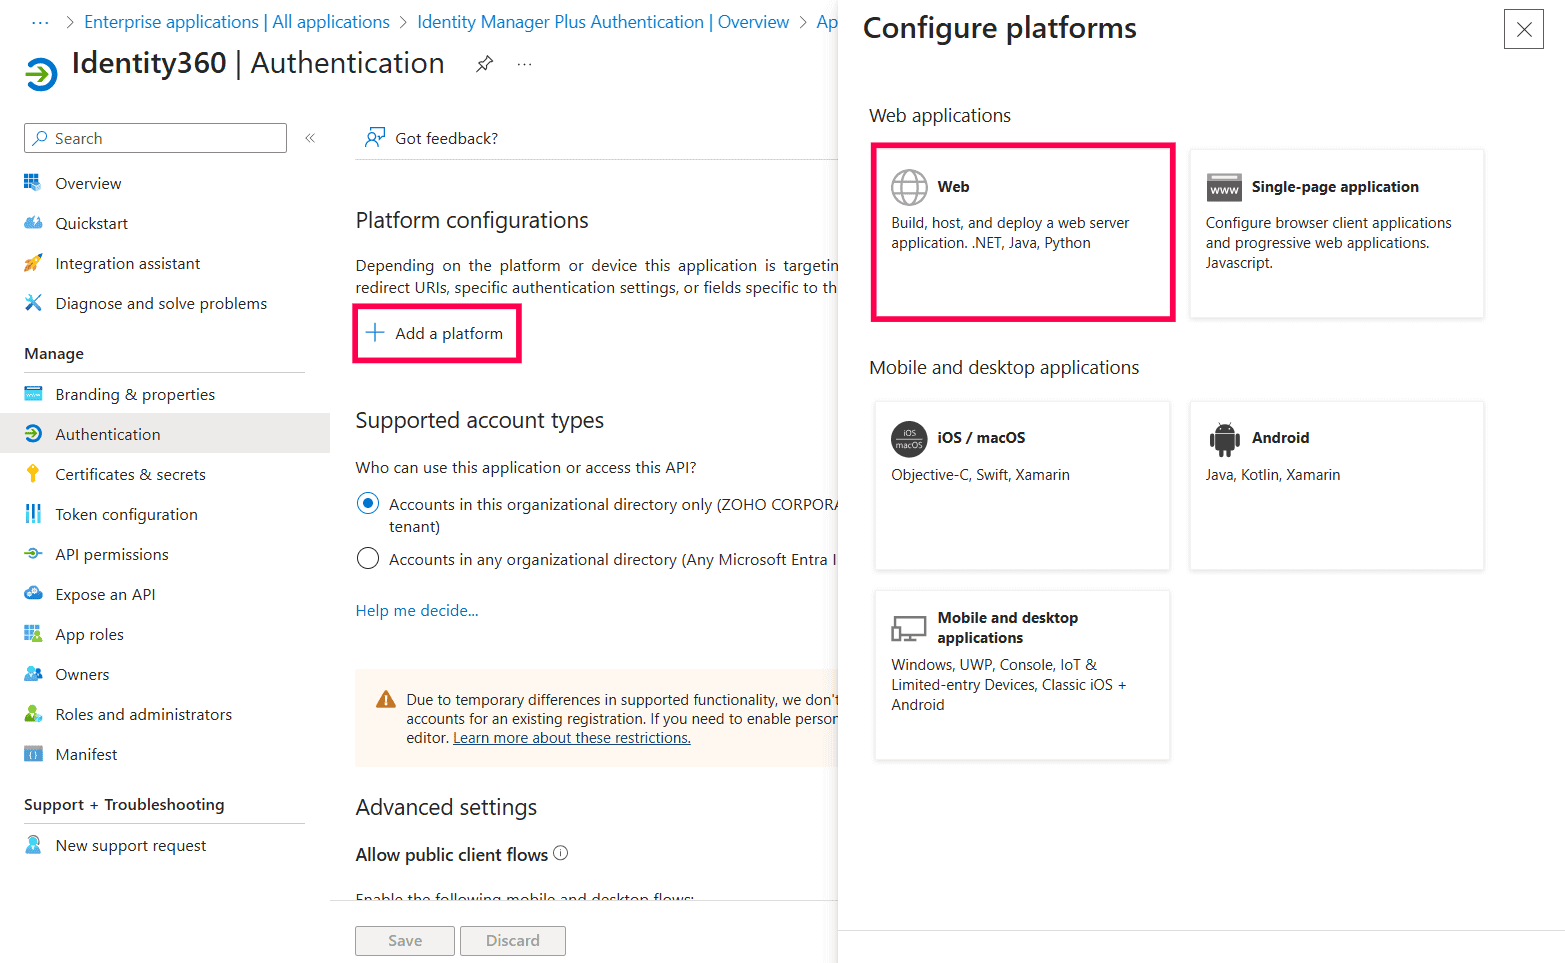
Configuring platforms in Microsoft Entra ID.
- In the Redirect URI field, enter the following value:
- https://identitymanager.manageengine.ca/api/public/v1/oauth/redirect
- You can leave the Logout URL and Implicit grant fields empty. Click Configure.
Configuring Redirect URI in Microsoft Entra ID.
- On the Authentication page, under Redirect URIs, click Add URI.
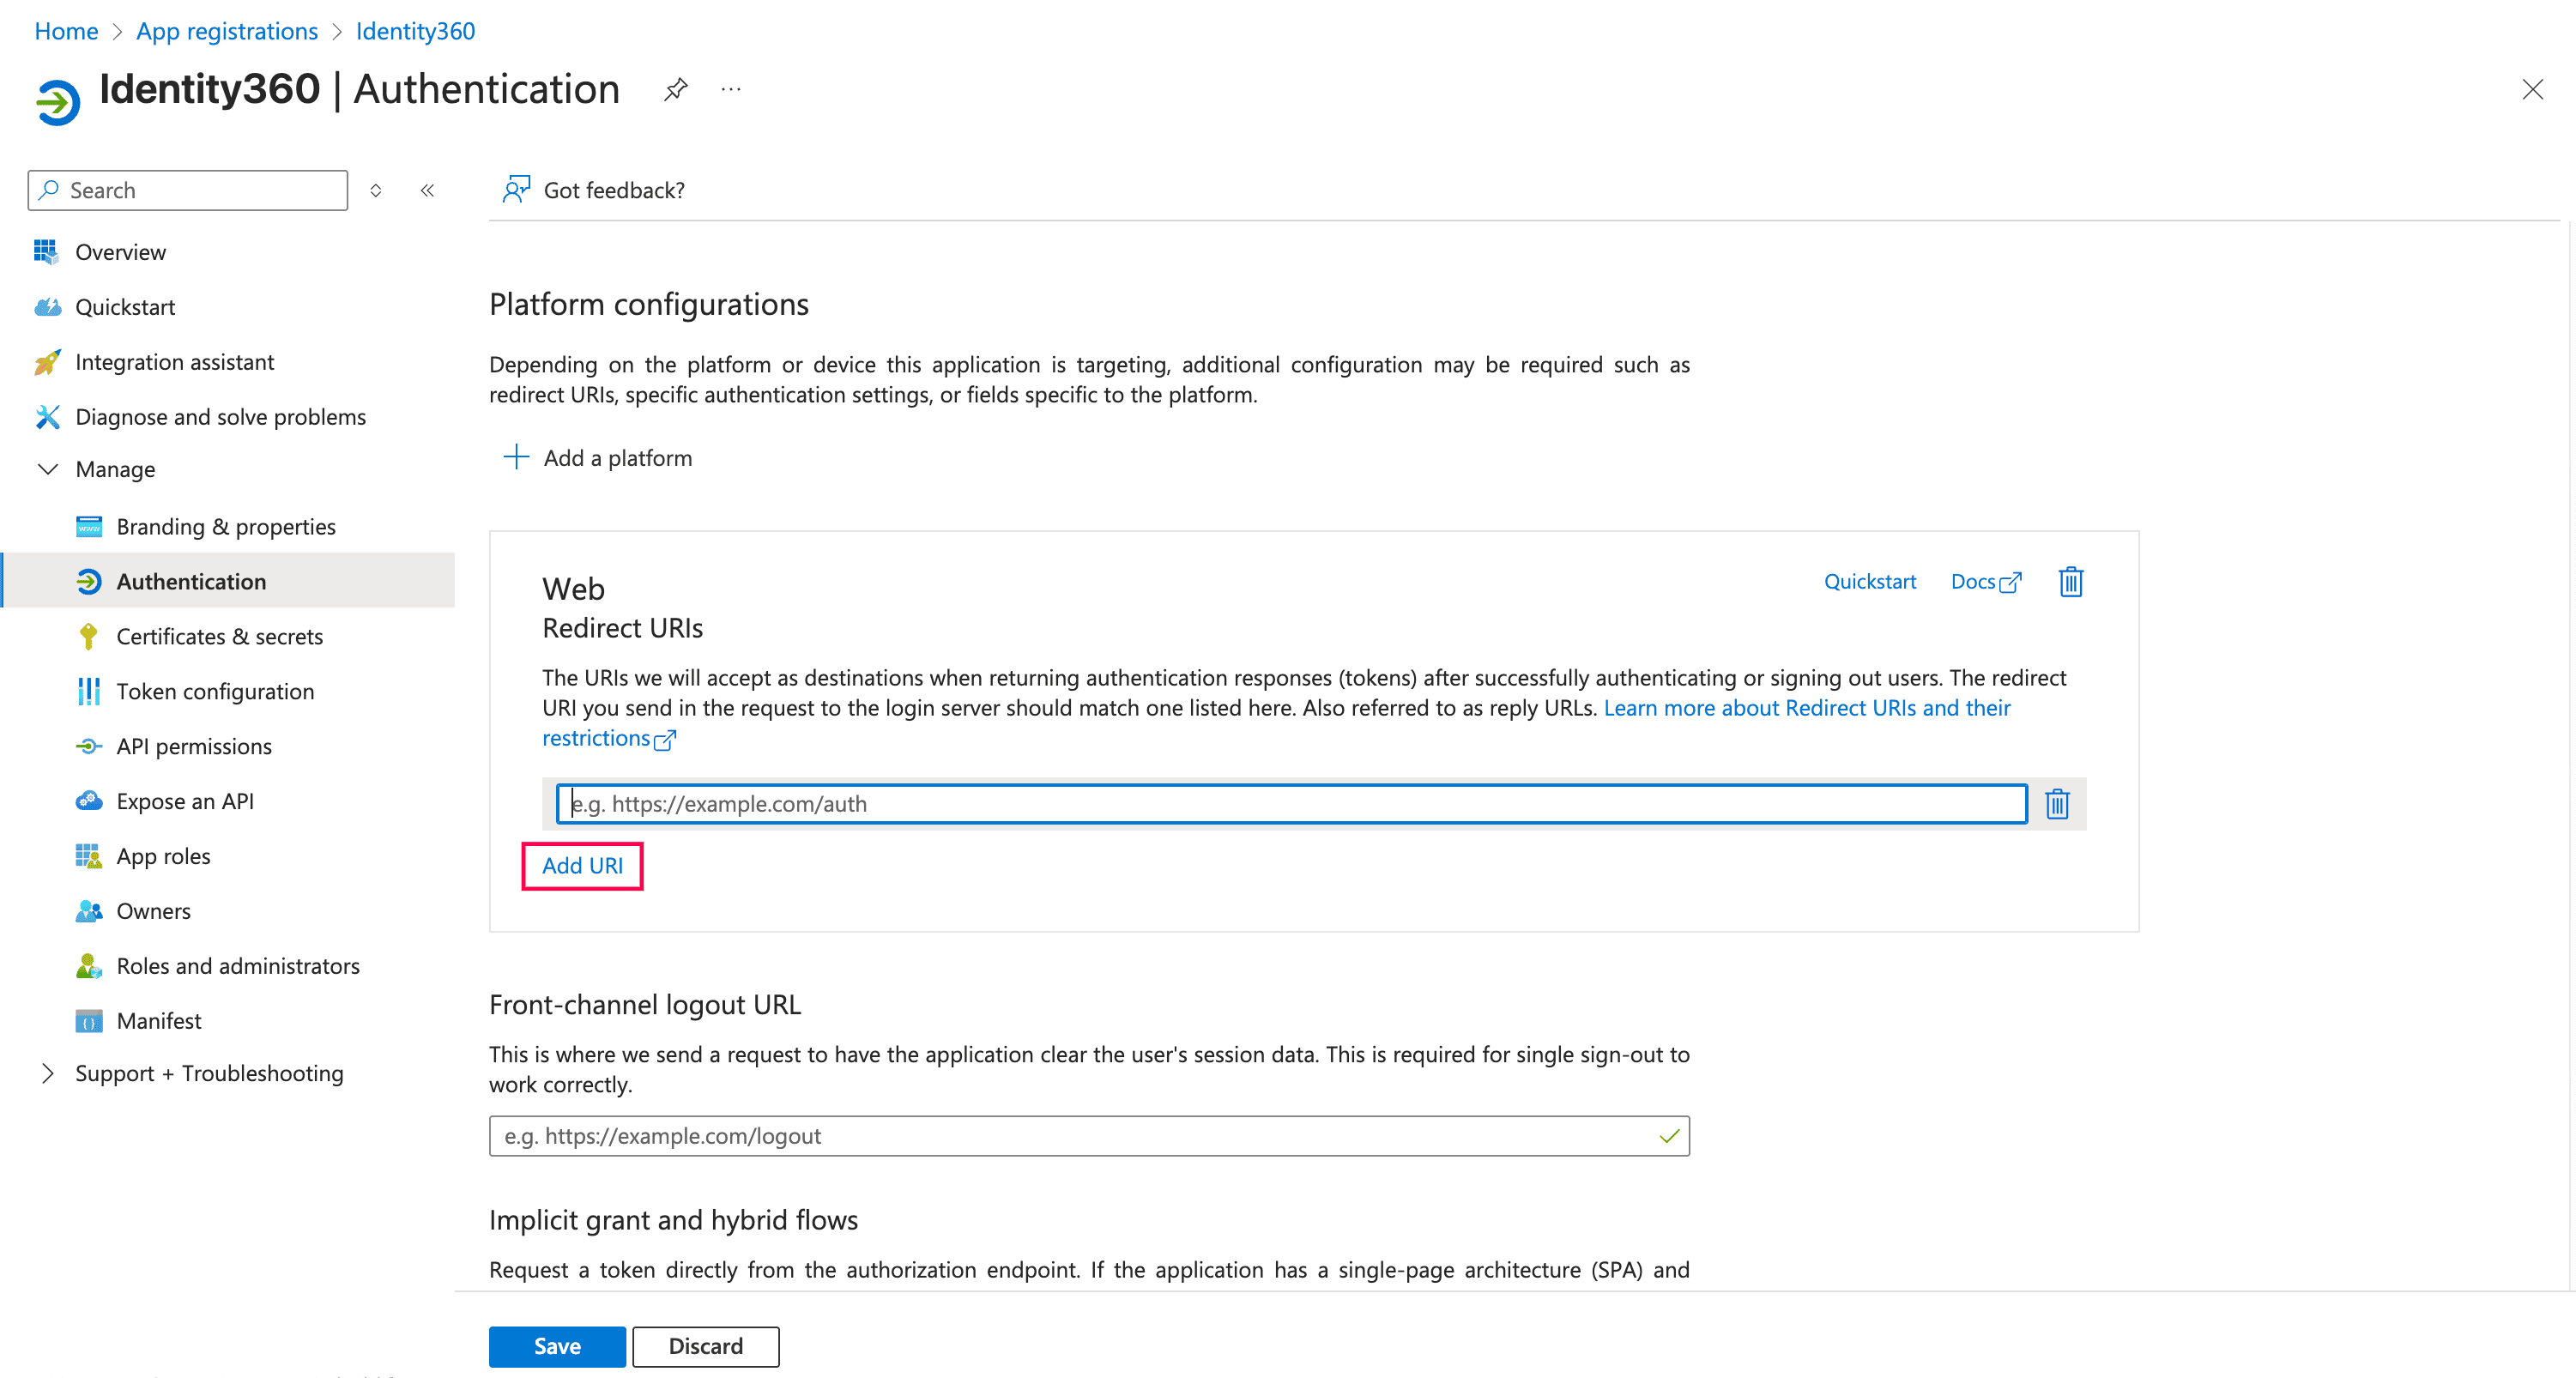
Configuring authentication settings of Identity360 in Entra ID.
- Enter the applicable redirect URI:
- https://id360.manageengine.<data_center>/configure-azure-ad
- https://id360.manageengine.<data_center>/access-management-cb
Note: You can identify your data center based on the domain used in your product login.
For example, if id360.manageengine.com is your product login, then .com is your data center.
- Click Save.
- Click Manifest from the left pane.
- Copy the entire contents from this file and paste them into the section highlighted in the image below.
Application scopes mentioned in the file:
Microsoft Graph scopes
- Application.ReadWrite.All
- Directory.ReadWrite.All
- Group.ReadWrite.All
- RoleManagement.ReadWrite.Directory
- User.ReadWrite.All
Office 365 Exchange Online
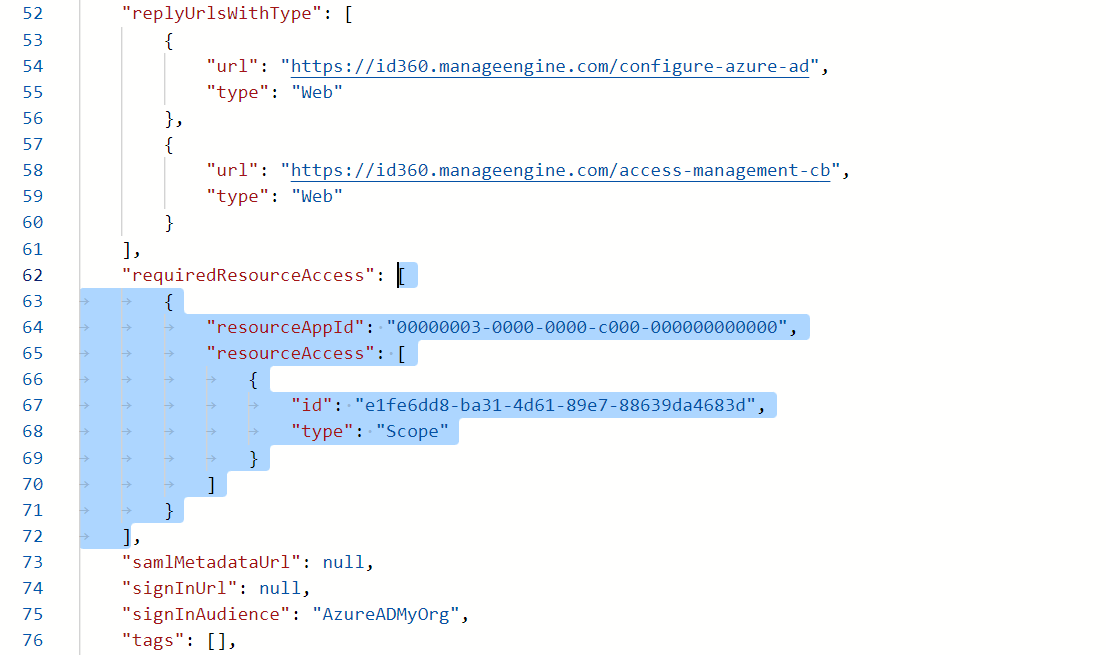
Configuring manifest settings of Identity360 in Entra ID.
Note: Copy only the content from the open square bracket to the closed square bracket and paste it as shown in the image below. Ensure that all punctuation marks are retained correctly.
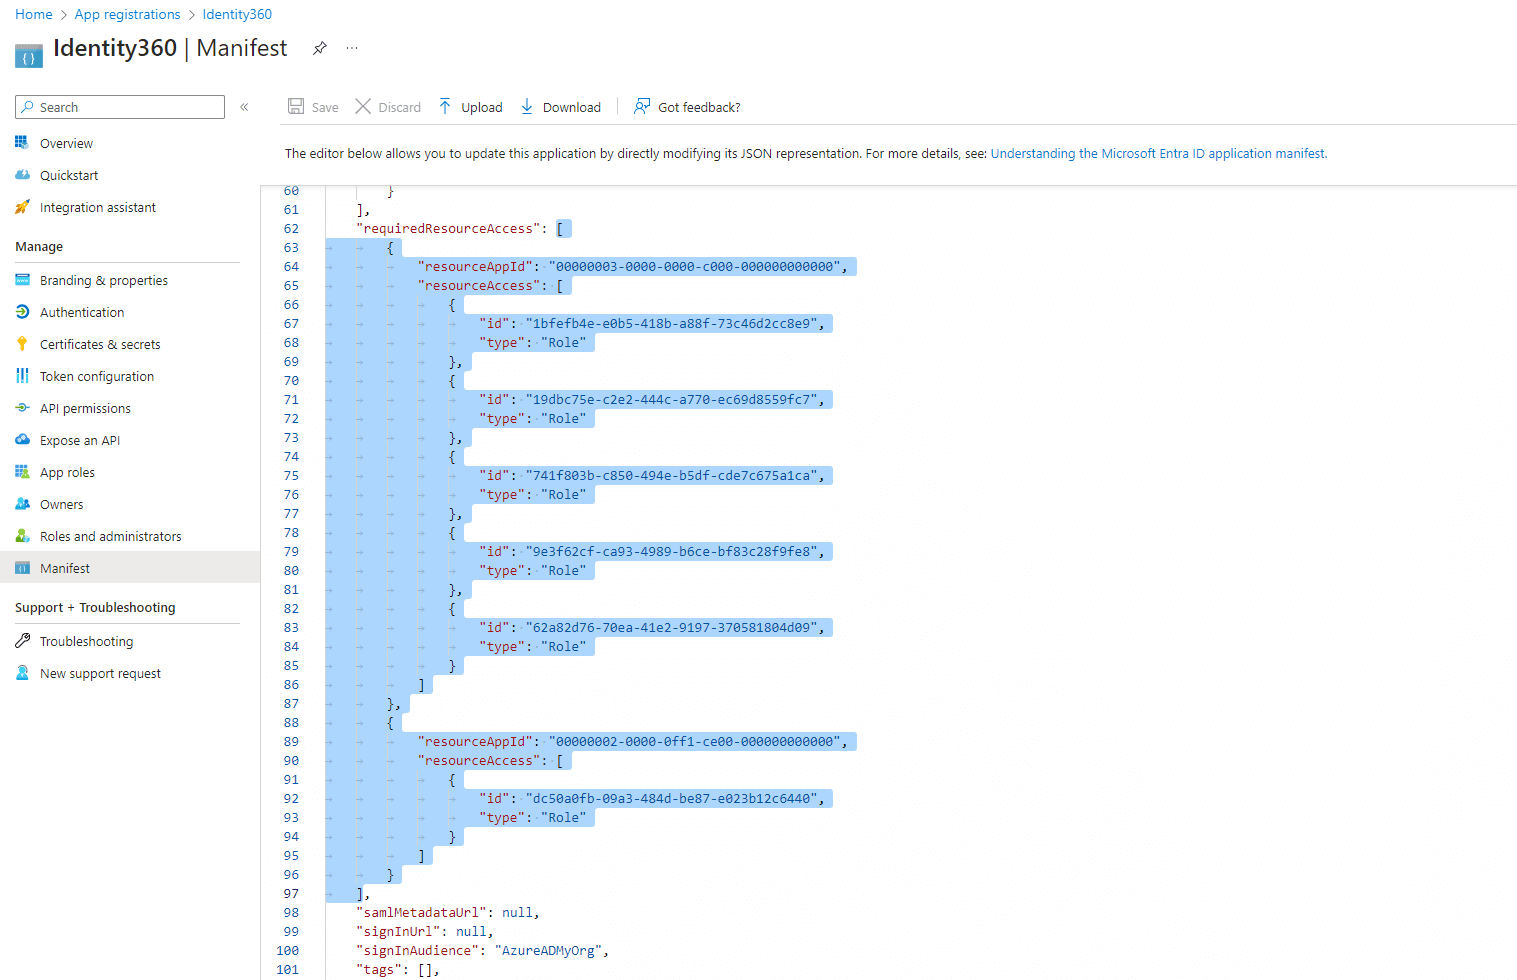
Completing the manifest configuration of Identity360 in Entra ID.
- Click Save.
- Click API permissions from the left pane.
- In the Configured permissions section, click ✓ Grant admin consent for <your_company_name>.
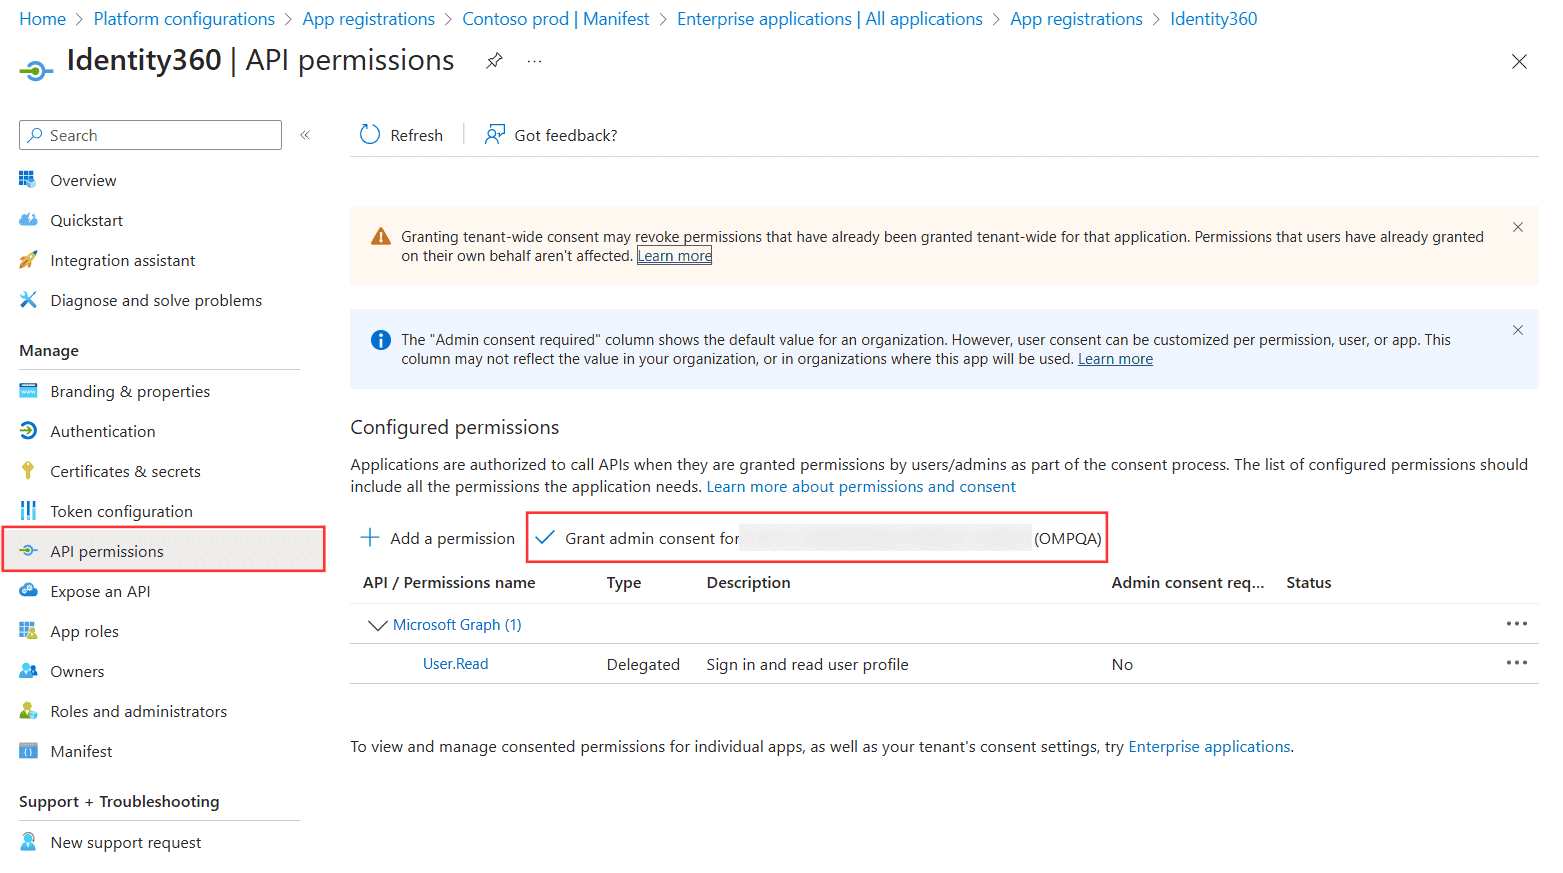
Configuring API permissions of Identity360 in Entra ID.
- Click Yes in the pop-up that appears.
- Click Certificates & secrets from the left pane.
- Under the Client secrets section, click New client secret.
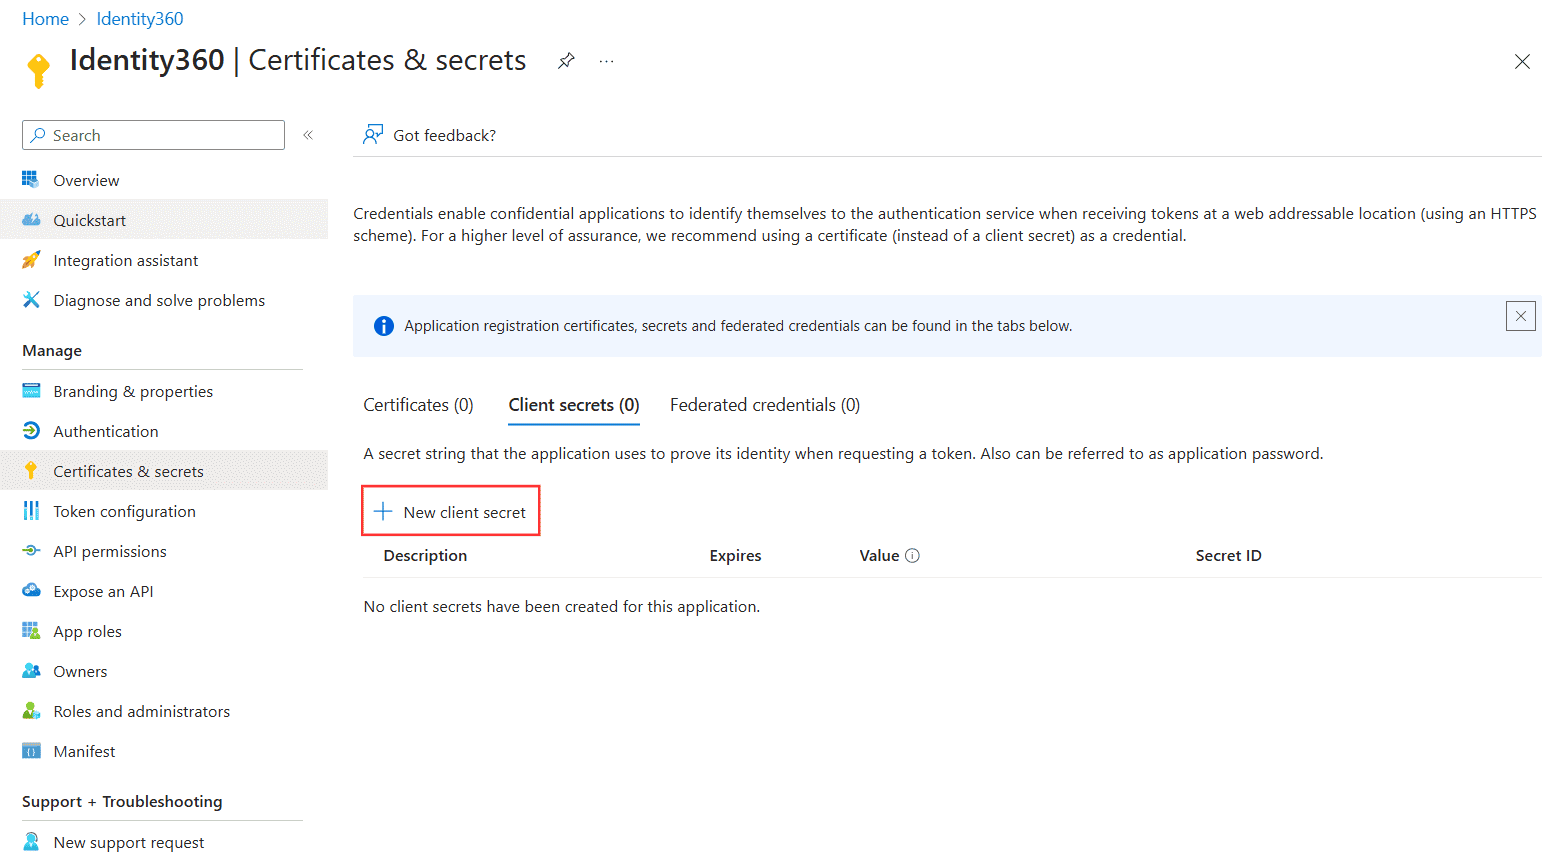
Configuring certificates and secrets settings of Identity360 in Entra ID.
- This section generates an app password for Identity360. In the Description field of the pop-up, provide a name to identify the app to which the password belongs.
- Choose when the password should expire.
- Click Add.
- Copy the string under Value and save it. This is the Application Secret Key, which you will need later.
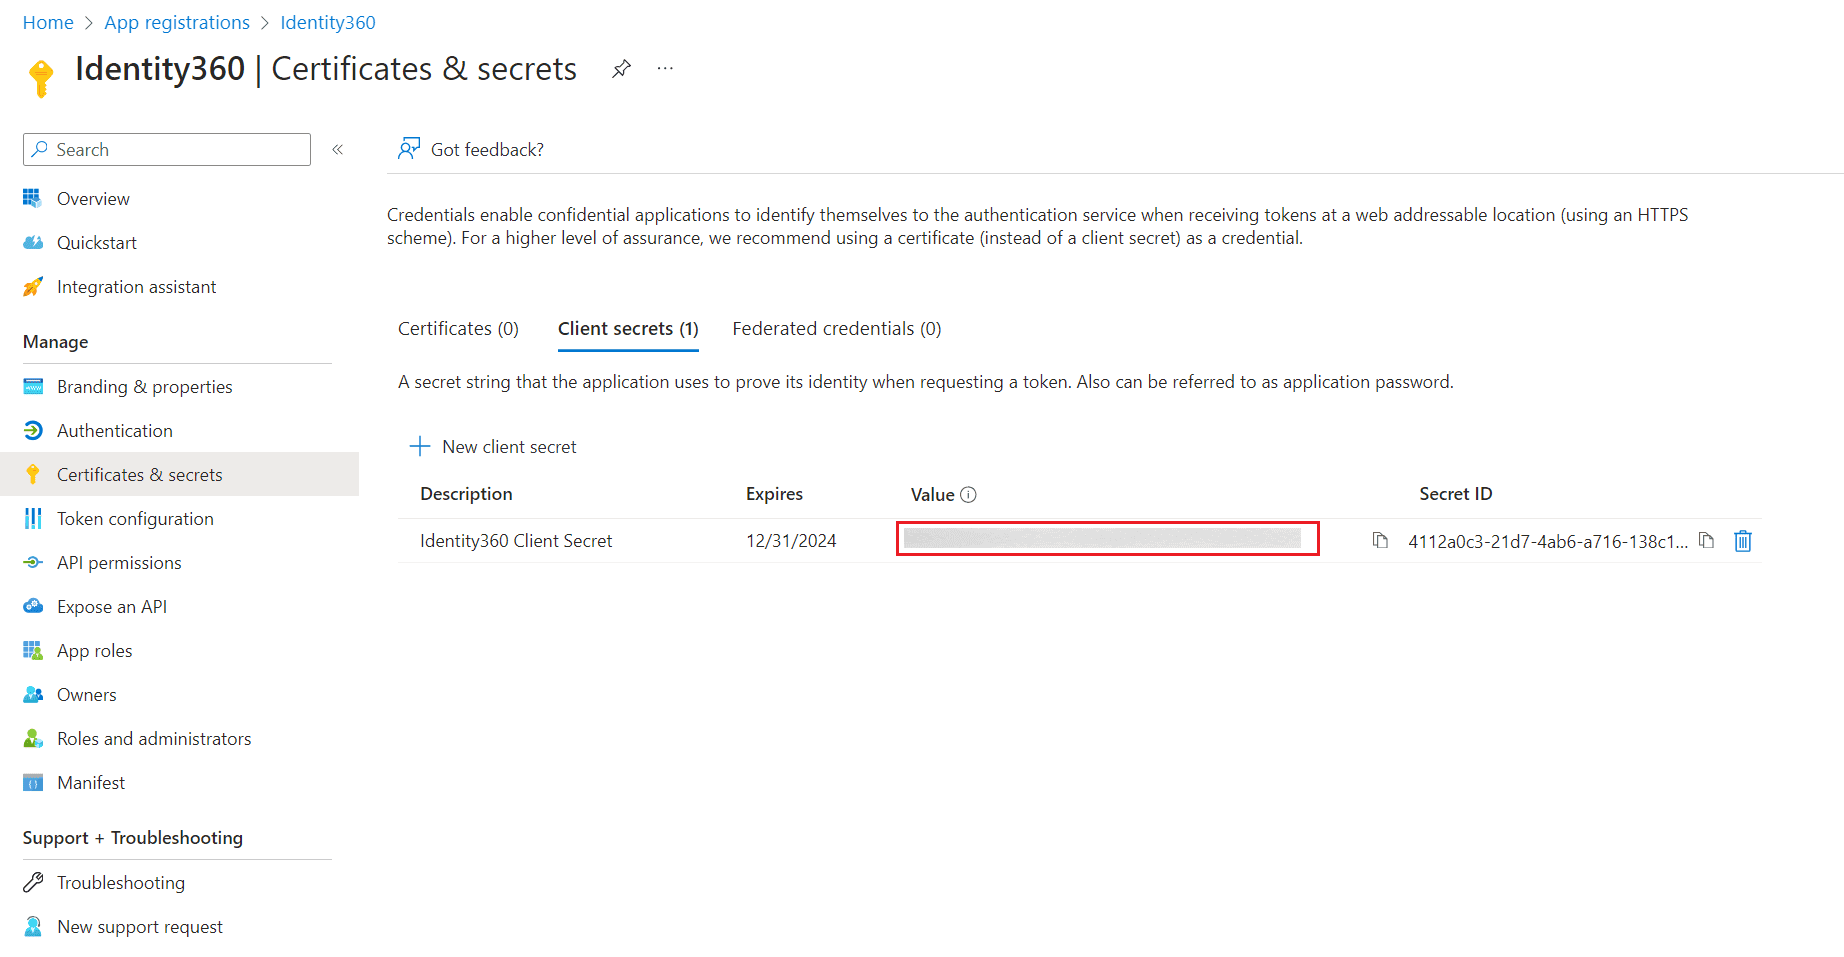
Generating the Client Secret of Identity360 in Entra ID.
- Now go to the Overview section in the left pane.
- Copy the Application (client) ID and Object ID values and save them. You will need these values to configure your tenant in the Identity360 portal.
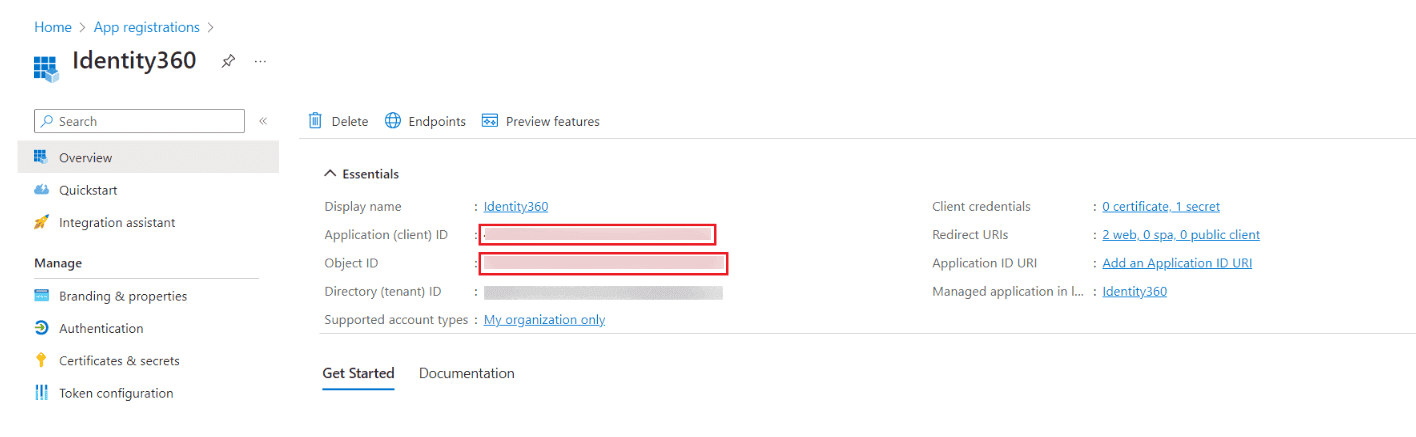
Copying the Application ID and Object ID of Identity360 in Entra ID.
- Search for Microsoft Entra ID roles and administrators using the search bar.
- Click Privileged Authentication Administrator. Under the Membership pane, click Add assignments and select the Application as member. Under the Settings pane, click Active under Assignment type.
- Click Exchange Administrator. Under the Membership pane, click Add assignments and select the Application as member. Under the Settings pane, click Active under Assignment type.
Note: Both Application (client) ID and Application Name can be used to search for the application.
Steps to configure a Microsoft Entra app in Identity360
- Click Configure manually to add the tenant to Identity360 manually if the automatic configuration was not successful due to permission issues.
Manual tenant configuration in Identity360 portal.
- Enter your Tenant Name. For example, test.onmicrosoft.com.
- Enter the Application ID and Application Object ID of the Microsoft Entra application configured for Identity360 in their respective fields. Paste the values copied from Step 29.
- Enter the Application Secret Key of the Microsoft Entra application configured for Identity360 in the respective field. Paste the value copied from Step 27.
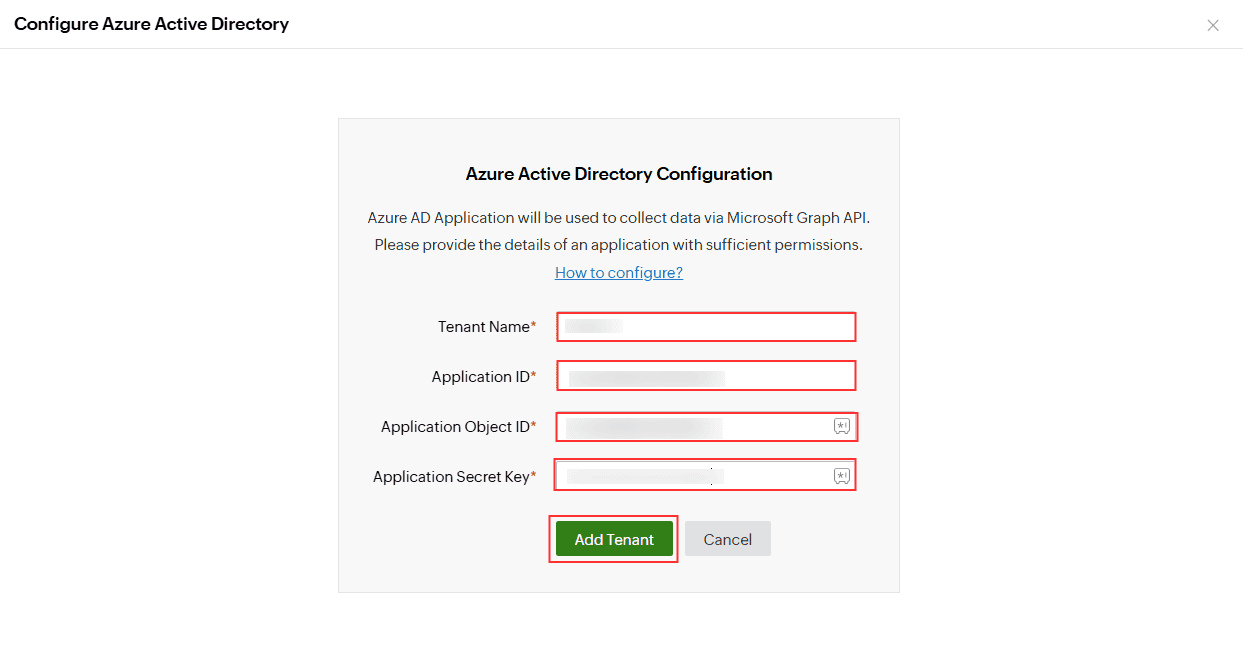
Completing manual tenant configuration in Identity360 portal.
- Click Add Tenant.
- The Microsoft Entra tenant is now integrated with Identity360.
To manage the users in your Microsoft Entra tenant from Identity360, use the All Users option.
You've now configured a Microsoft Entra application with Identity360.
Steps to modify a Microsoft Entra tenant
- Navigate to Universal Directory > Manage Directory > Azure Active Directory.
- Under the Action column, click the edit icon of the respective tenant you want to modify.
- You can edit the values in the Application ID and Application Object ID fields.
Copying the updated Application ID and Object ID of Identity360 in Entra ID.
- You can also modify the Application Secret Key.
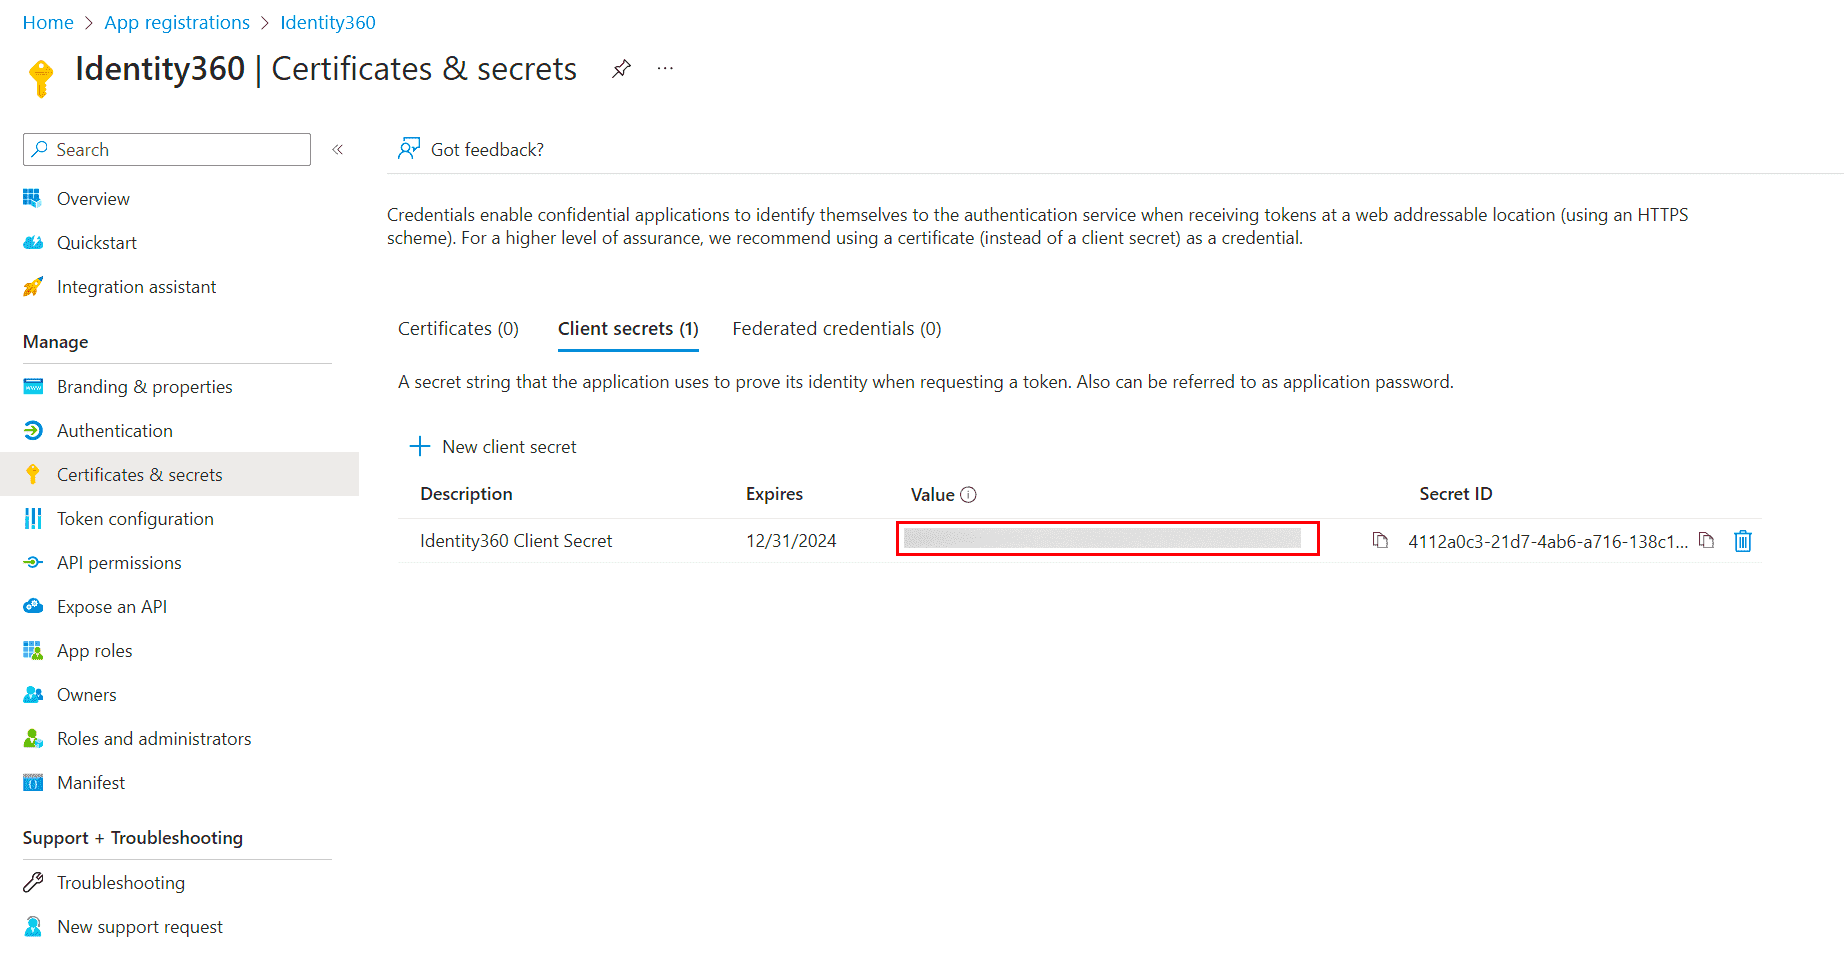
Regenerating the Client Secret of Identity360 in Entra ID.
- After you have made the changes, click Update.
Don't see what you're looking for?
-
Visit our community
Post your questions in the forum.
-
Request additional resources
Send us your requirements.