Allow/restrict IPs and external authentication
Last updated on:
Overview
This page outlines advanced authentication and access control options to secure user logins. You can enable external authentication via Active Directory or RADIUS, and control inbound traffic with Allow/Restrict IPs. These settings ensure only trusted users and devices can access the product.
External authentication
External authentication lets you integrate Active Directory (AD) or RADIUS servers with the product.
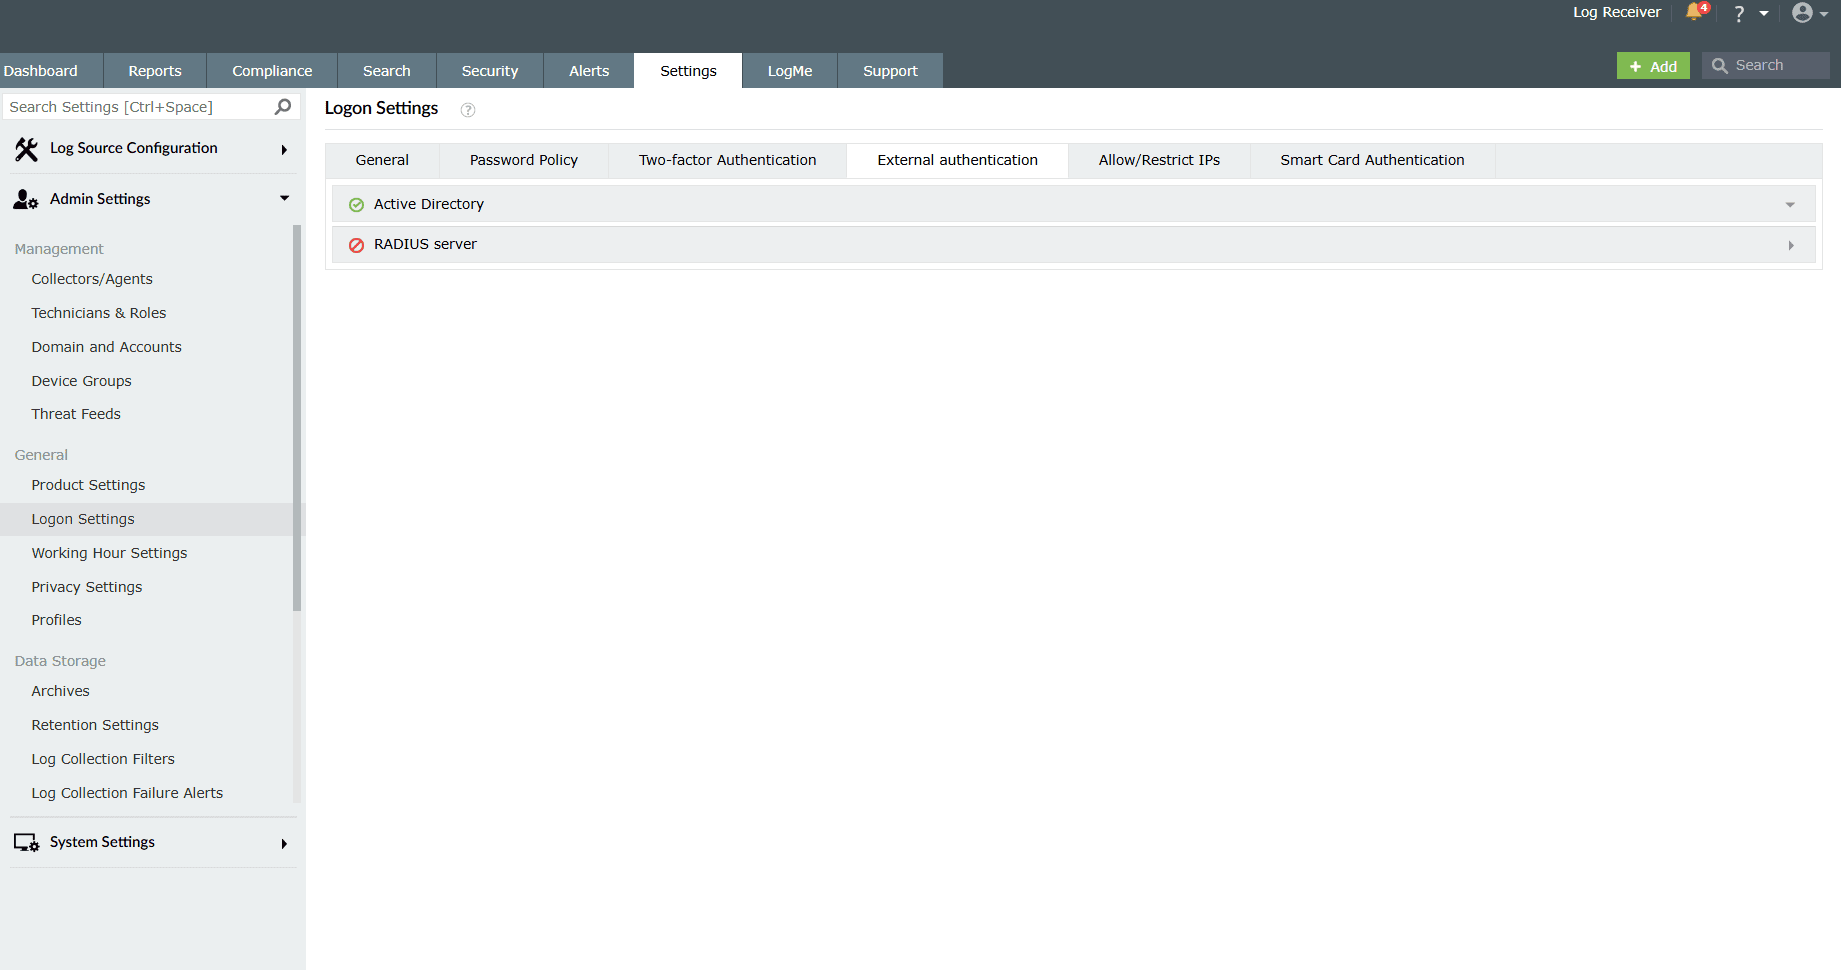
Active Directory
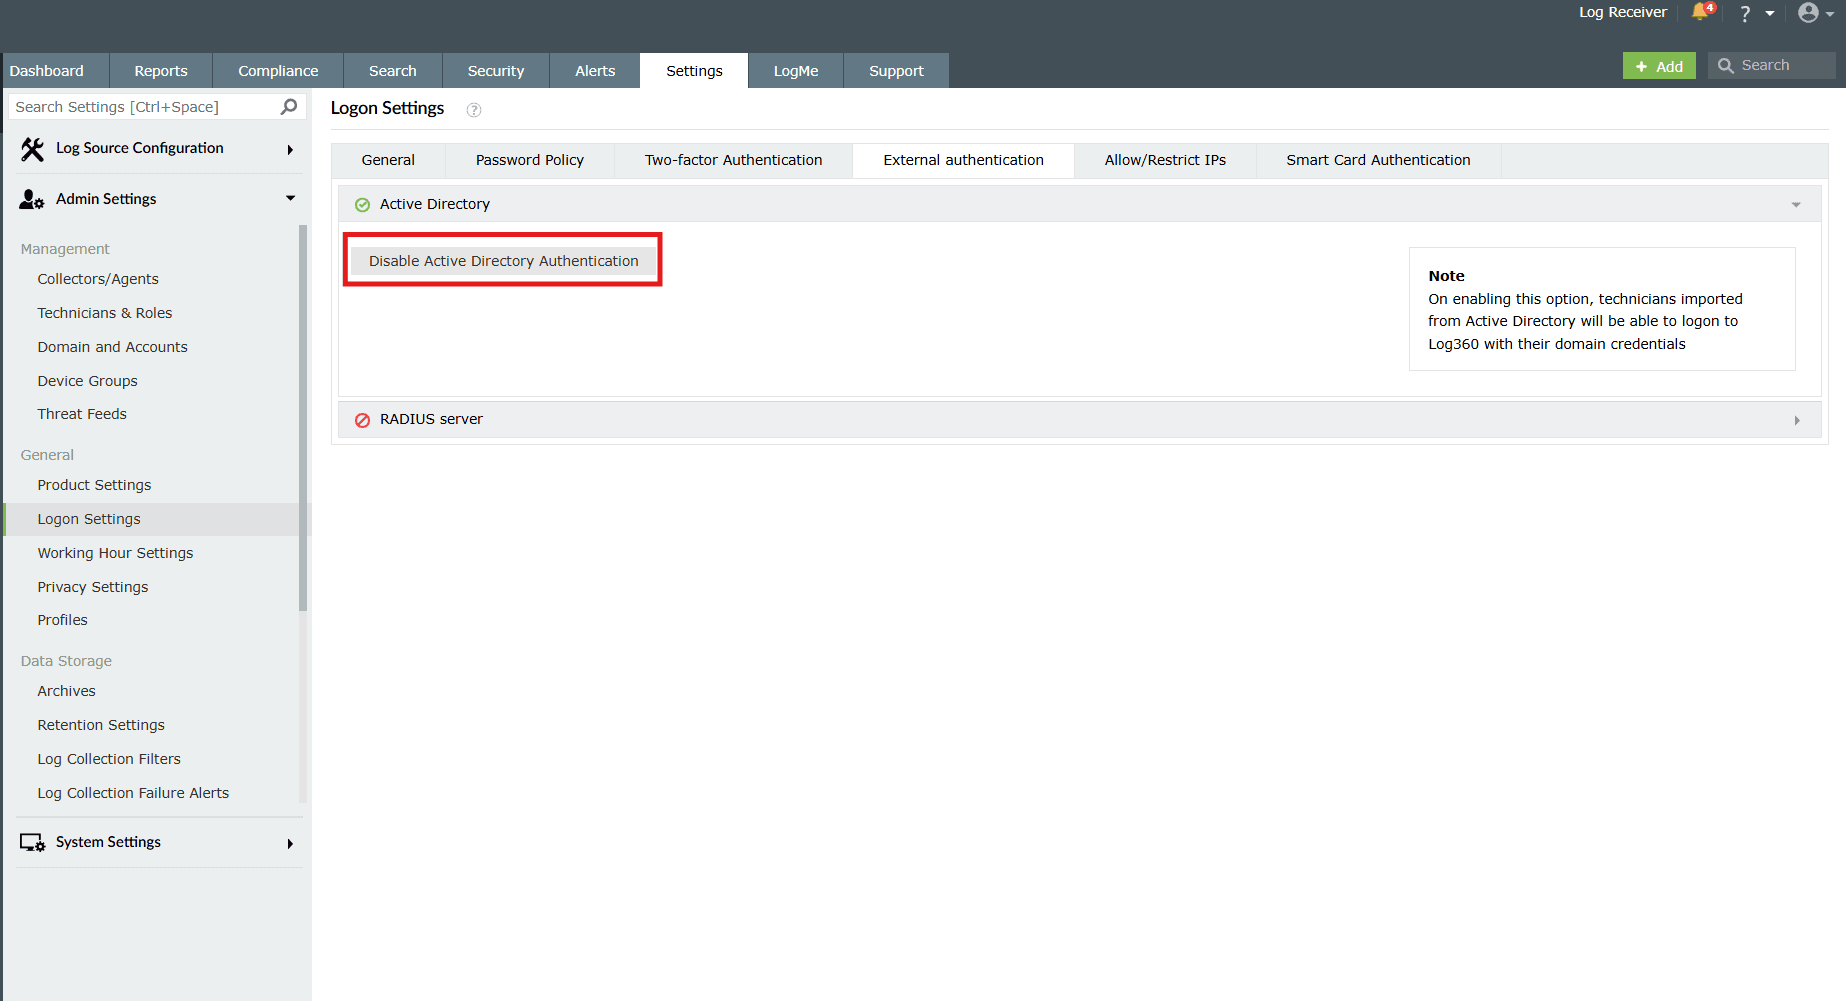
Active Directory authentication allows AD technicians to log in to the product using their AD credentials. If this feature is disabled, AD technicians will no longer be able to access the product.
By default, this setting is enabled. Click on the Disable Active Directory Authentication button if you wish to disable this setting.
RADIUS Server
Remote Authentication Dial-In User Service (RADIUS) is an industry standard client/server authentication protocol that enhances security by protecting networks from unauthorized access.
Phase 1: Integrate RADIUS with Log360
- Log in to the RADIUS server.
- Navigate to clients.conf file.(/etc/raddb/clients.conf).
- Add the following snippet in the clients.conf file.
- client Log360ServerName
{
ipaddr = xxx.xx.x.xxx
secret = <secretCode>
nastype = other
} - Restart RADIUS server.
Phase 2: Configure the product console for RADIUS
- Navigate to the RADIUS Server authentication in the product console.
- This setting is disabled by default. Enable it by clicking on the empty checkbox in order to access the related configurations.
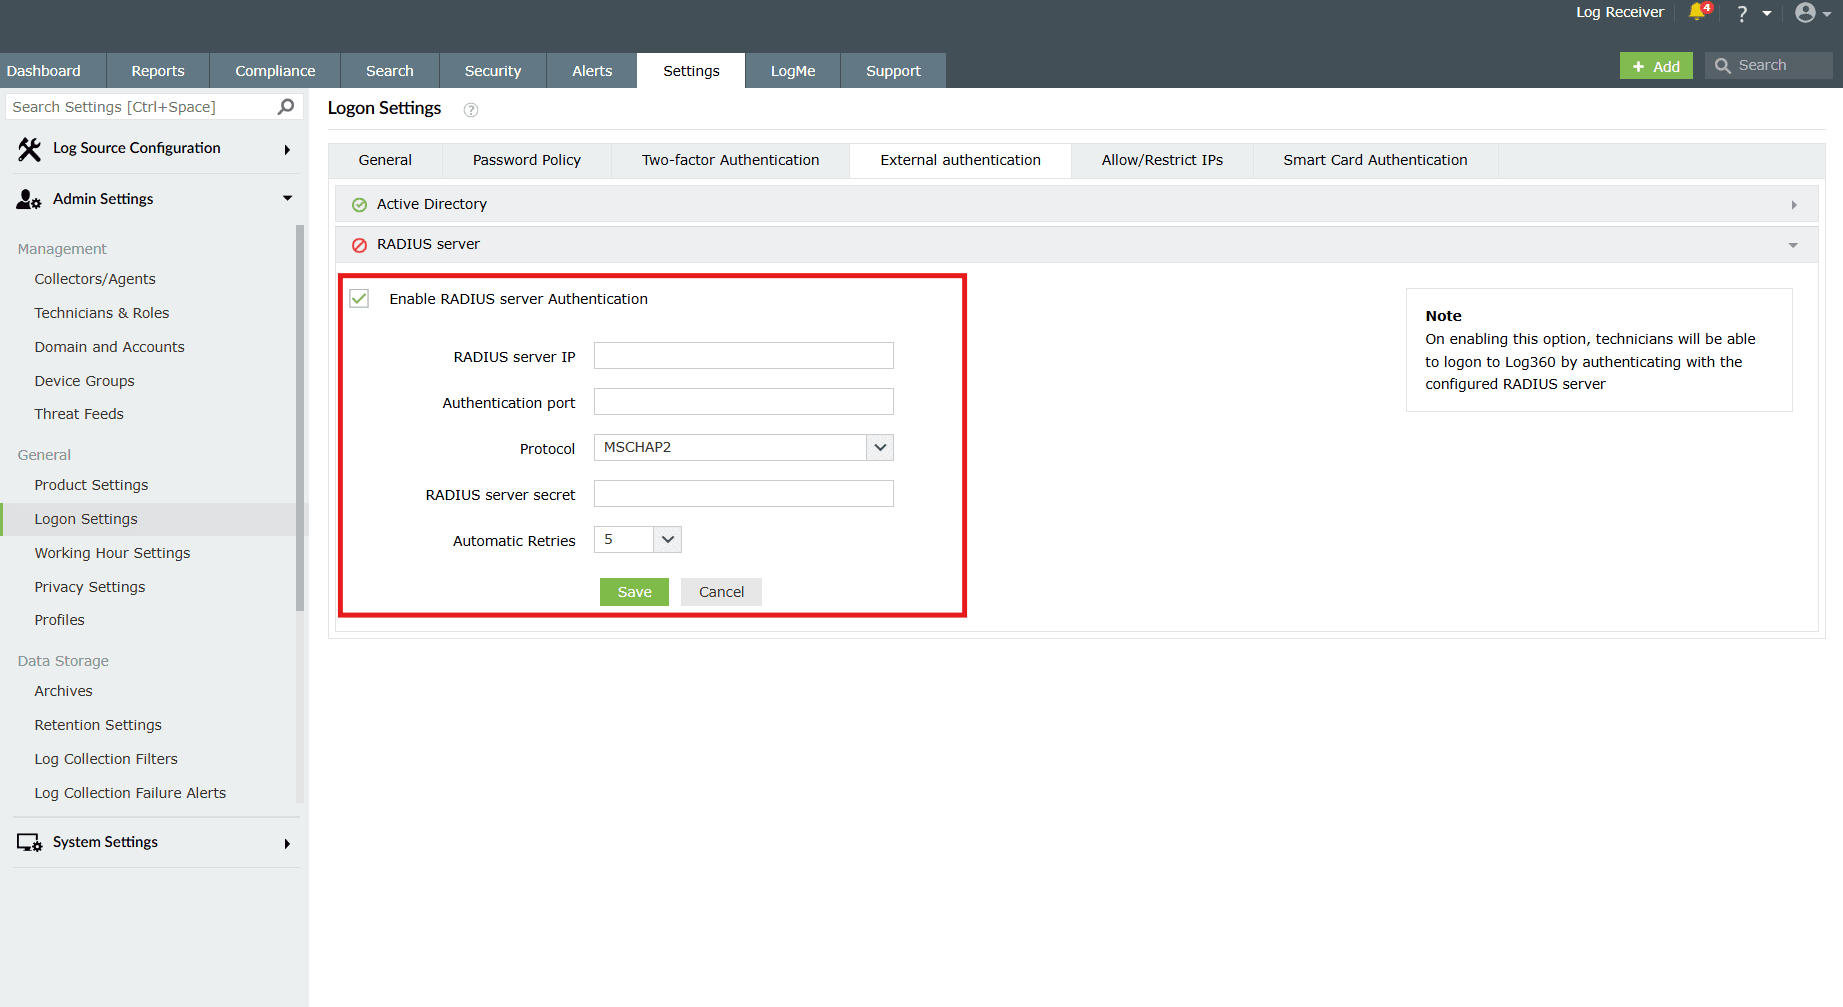
Image 3: RADIUS authentication in external authentication logon settings - Fill in the required fields:
- RADIUS server IP: Enter the IP address of the RADIUS server.
- Authentication port: Enter the port number for RADIUS authentication.
- Protocol: Select the protocol used for RADIUS authentication from the drop-down list. The available protocols are PAP, CHAP, MSCHAP and MSCHAP2.
- RADIUS server secret: Provide the security key that was added to the clients.conf file in RADIUS server.
- Automatic Retries: Define the number of times the system will retry RADIUS authentication if the initial attempt fails.
- After making the necessary configurations, click on Save.
Allow/Restrict IPs
One way to add another layer of security is by allowing or restricting inbound connections to specific IPs or IP ranges. This adds an additional layer of security by allowing connection from only trusted sources and blocking unwanted and malicious traffic.
The IP restriction can be applied for the entire product, specific URLs within the product, or APIs. By default, all of them are in a restricted state. You must manually enable them in order to allow IPs from those components.
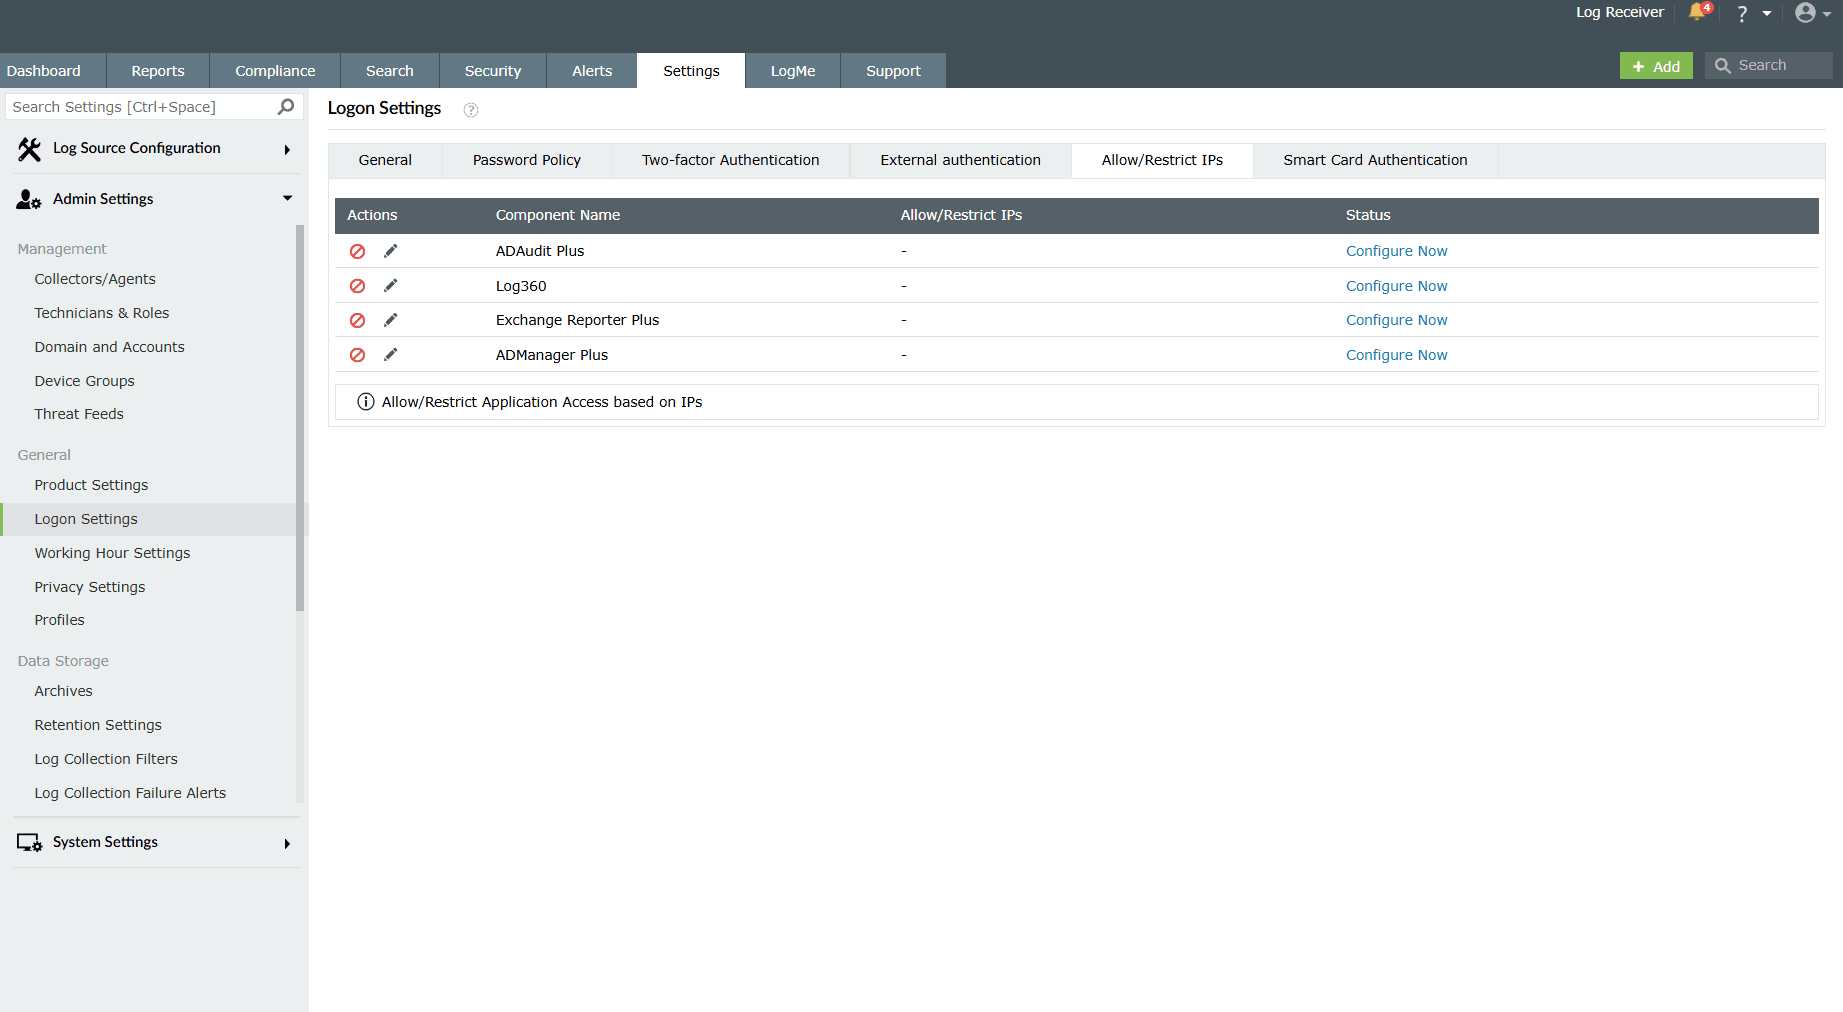
Allow IPs from a specific component(s):
- Click on the currently restricted icon
 under the Actions column to allow IPs from the respective component(s).
 - As soon as you perform this action, the icon changes to
 and the configuration box slides open for that component.
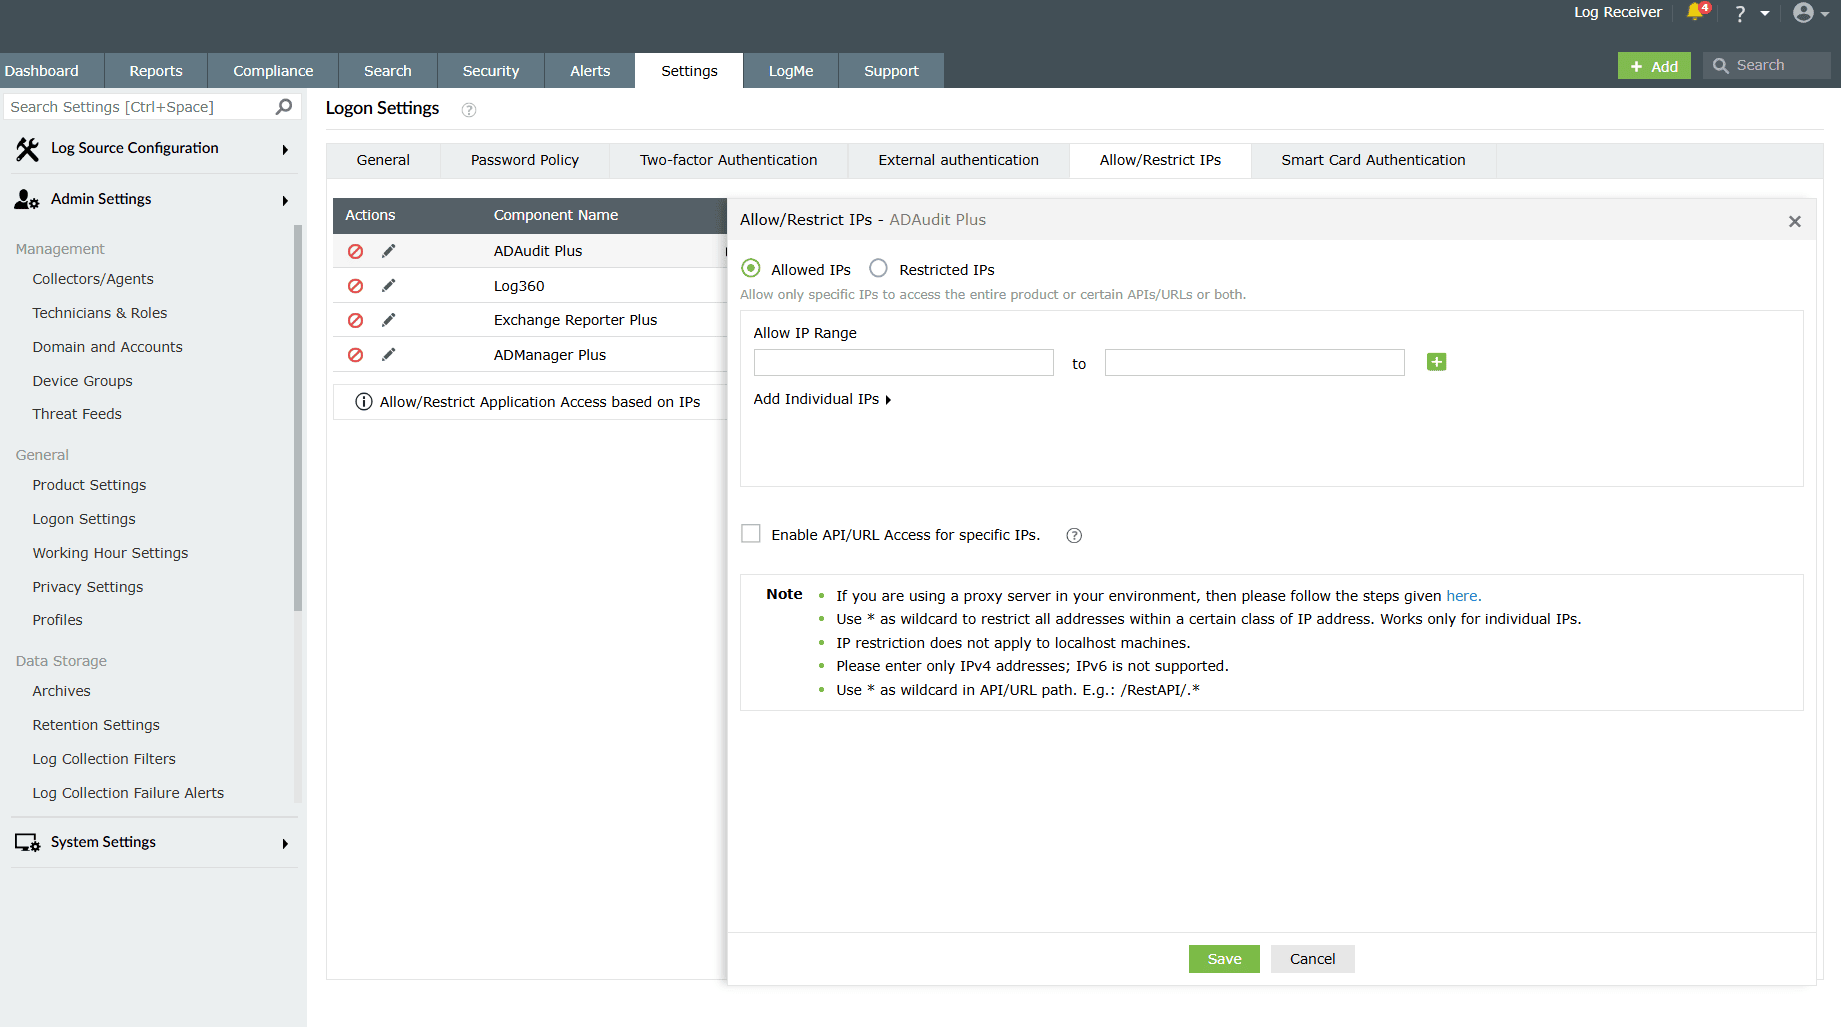
Image 5: Allow/restrict IPs in logon settings - Select the Allowed IPs or the Restricted IPs option.
- Allowed IPs option will allow you to specify a range of IPs that alone should be allowed.
- Restricted IPs option will allow you to specify a range of IPs that alone should be restricted.
- Based on your requirements, enter the desired IP addresses.
- Adding multiple IP ranges: Click [
 ] icon if you want to allow or restrict access to multiple IP address ranges.
 - Allow/restrict individual IPs: Click Add Individual IPs if you want to allow or restrict access to individual IP addresses (or hostname IP addresses). You can add multiple IP addresses by separating the values using comma.
- Adding multiple IP ranges: Click [
Appendix for reference:
- Use * as a wildcard character: Individual IP addresses can include wildcard characters, so that all addresses within a certain class of address will be restricted. For example, denying access to address 192.168.2.* would restrict access to all addresses within that subnet.
- You can also enter hostname instead of IP addresses.
- You can allow or restrict only IPv4 addresses. IPv6 is not supported.
- The Remote Integrated Child Components (RICC) server IP address cannot be restricted in Log360
- The implementation of IP restriction for forward proxy is not supported.
- After initially configuring IP Restriction or Reverse Proxy in Log360, a manual restart of the child products is necessary.
- When the child products are installed remotely and the Reverse Proxy is set up in Log360, manually add the parent product server's IP as an internal proxy in the child product. Following this, manually restart the child products.
If you have changed the 3rd party reverse proxy settings of the product or any of its integrated components for which you are enabling IP-based restriction, then:
- Add the following line to the server.xml file (default location: <InstallationDirectory>/conf/server.xml):<ValveinternalProxies="192\.168\.0\.10|192\.168\.0\.11"trustedProxies="172\.168\.0\.10|176\.168\.0\.11" />
- Edit the values of internalProxies and trustedProxies as per your environment.
- Enter IP address while specifying the values for internalProxies and trustedProxies, and use the vertical bar (|) character to enter multiple values.
- Restart for the changes to take effect.
- Repeat these steps for the integrated components as well.
In case you wish to allow specific IPs or URLs from specific products:
Click on the checkbox "Enable API/URL Access for specific IPs" to access the configuration:

- Enter the API/Product URLs in the box provided.
Sample URL paths: /Admin.do, /Configuration.do, /Dashboard.do
Sample API paths: /RestAPI/WC/Integration, /RestAPI/WC/LogonSettings
NOTE- Use * as a wildcard character to restrict access to a broader range of APIs or URLs. For example, use /RestAPI/WC/.* to restrict all API calls that start with /RestAPI/WC/.
- The API/URL path should start with /. For example, /Admin.do and /RestAPI/WC/.
- Enter only the path of the API or URL. For example, if the entire product URL is https:testserver:8095/Admin.do, then enter only /Admin.do.
- Only alphanumeric characters (A-Z, a-z, 0-9) and the following special characters are allowed: period (.), forward slash (/), and asterisk (*).
- Enter the IP addresses as per your requirement. Click [] icon if you want to allow access to multiple IP address ranges.
- Finally, click Save to save the settings. Upon successful completion of the action, the below pop-up appears.

If any changes are made to the 3rd party reverse proxy for the product, or any of its integrated components, then:
- Add the following line to the server.xml file (default location: <InstallationDirectory>/conf/server.xml):<ValveinternalProxies="192\.168\.0\.10|192\.168\.0\.11"trustedProxies="172\.168\.0\.10|176\.168\.0\.11" />
- Edit the values of internalProxies and trustedProxies as per your environment.
- Enter IP address while specifying the values for internalProxies and trustedProxies, and use the vertical bar (|) character to enter multiple values.
- Restart Log360 for the changes to take effect.
- Repeat these steps for the integrated components as well.
- The purpose of configuring InternalProxies and TrustedProxies is to determine which IP addresses are regarded as internal or trusted. By configuring these settings, organizations can improve their network security by controlling the access and use of IP addresses within their network.
- InternalProxies are IP addresses that are trusted and from within the organization network. These IP addresses are typically used by internal services, such as printers and servers.
- TrustedProxies are IP addresses that are external to the network but still maintain a high level of trust and reliability. These IP addresses are typically associated with external services like websites and databases.
Managing IP restriction
You can also make the following changes to this setting:
- Enable/disable IP-based restriction: Use the icon under the Actions column to enable or disable IP-based restriction. Icon means IP-based restriction is enabled for a component and icon means IP-based restriction is disabled.
- Edit IP-based restriction settings: Click
 icon to edit. The same configuration box slides in, and you can add, delete, or edit the IP ranges and individual IP addresses. You can also perform this
 - Summary details: Click the link under the Allow/Restrict IPs column to view the IPs that are allowed or restricted from accessing a component.
Read also
This document explained the general and password policy logon settings. You can also explore other logon settings such as two-factor authentication, external authentication, and allow/restrict IPs for enhanced login security. For more understanding, refer to the below help documents: