Managing reverse proxy
Last updated on:
In this page
Overview
This page explains how to configure a reverse proxy in the product console and details the steps to enable and disable it. Reverse proxy can be configured using context-based mode, port-based mode, or both, based on your deployment needs.
Enabling context-based reverse proxy
- Log into the product console as an administrator.
- Navigate to the Settings tab.
- Under System Settings, click Reverse Proxy.
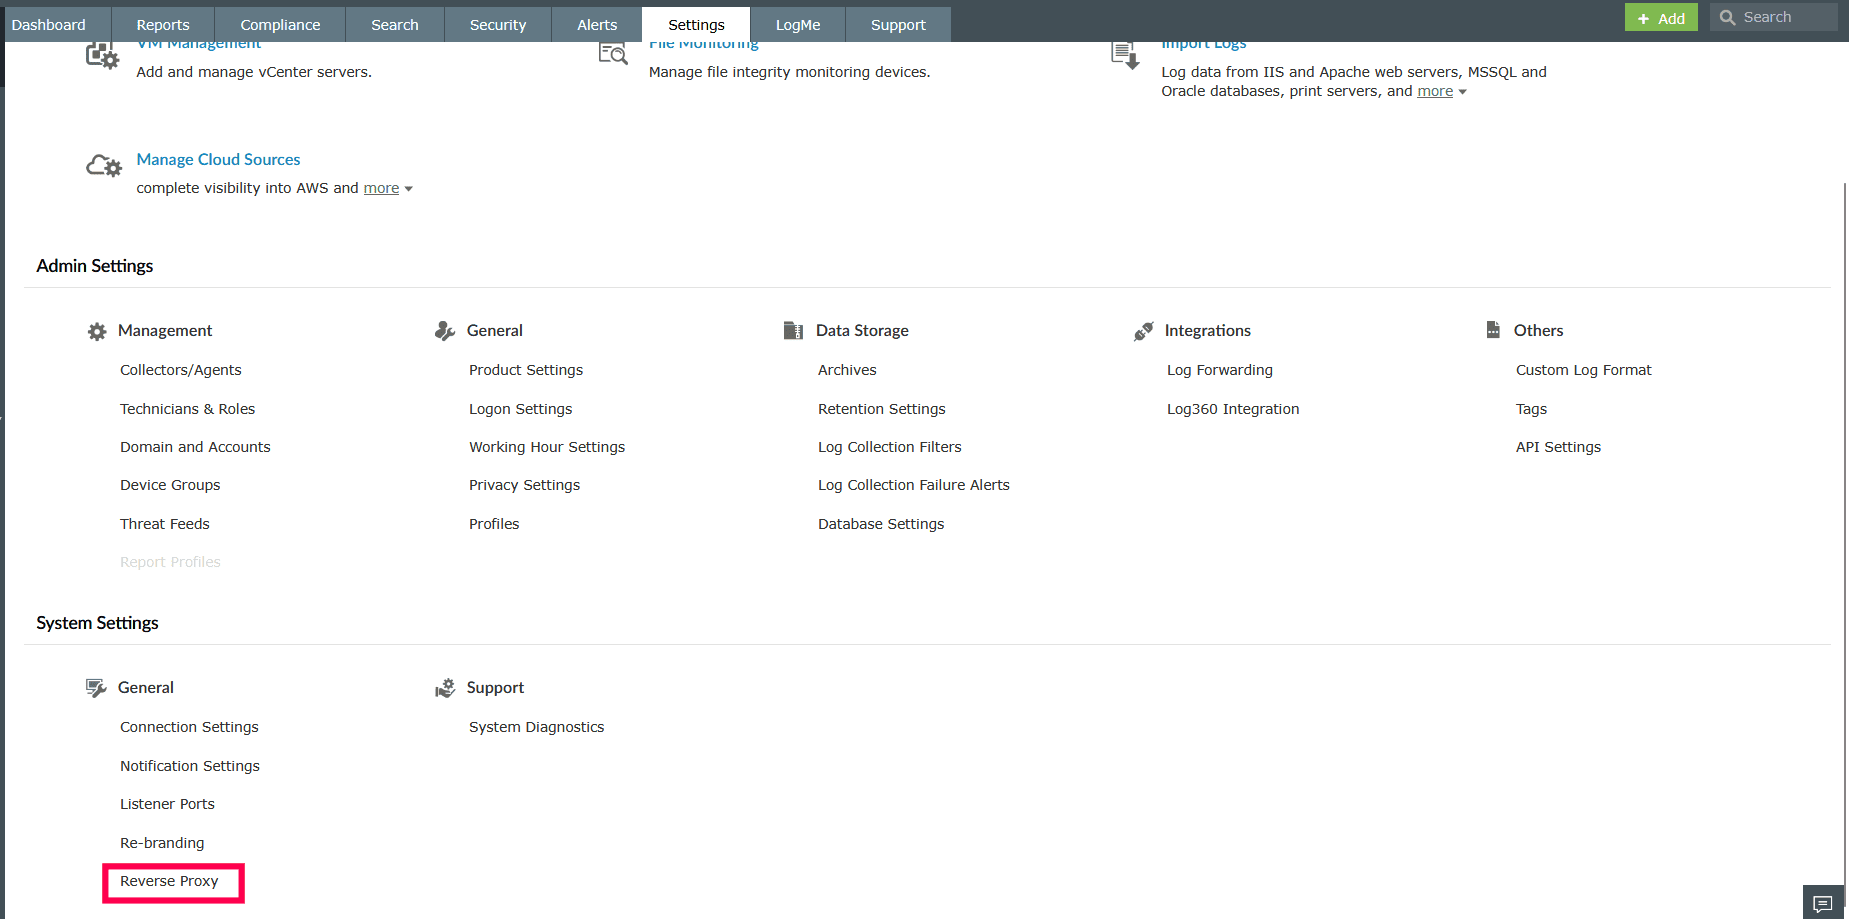
Figure 1: Enabling reverse proxy - In the Context-Based tab, select the checkbox Enable Context-Based Reverse Proxy.
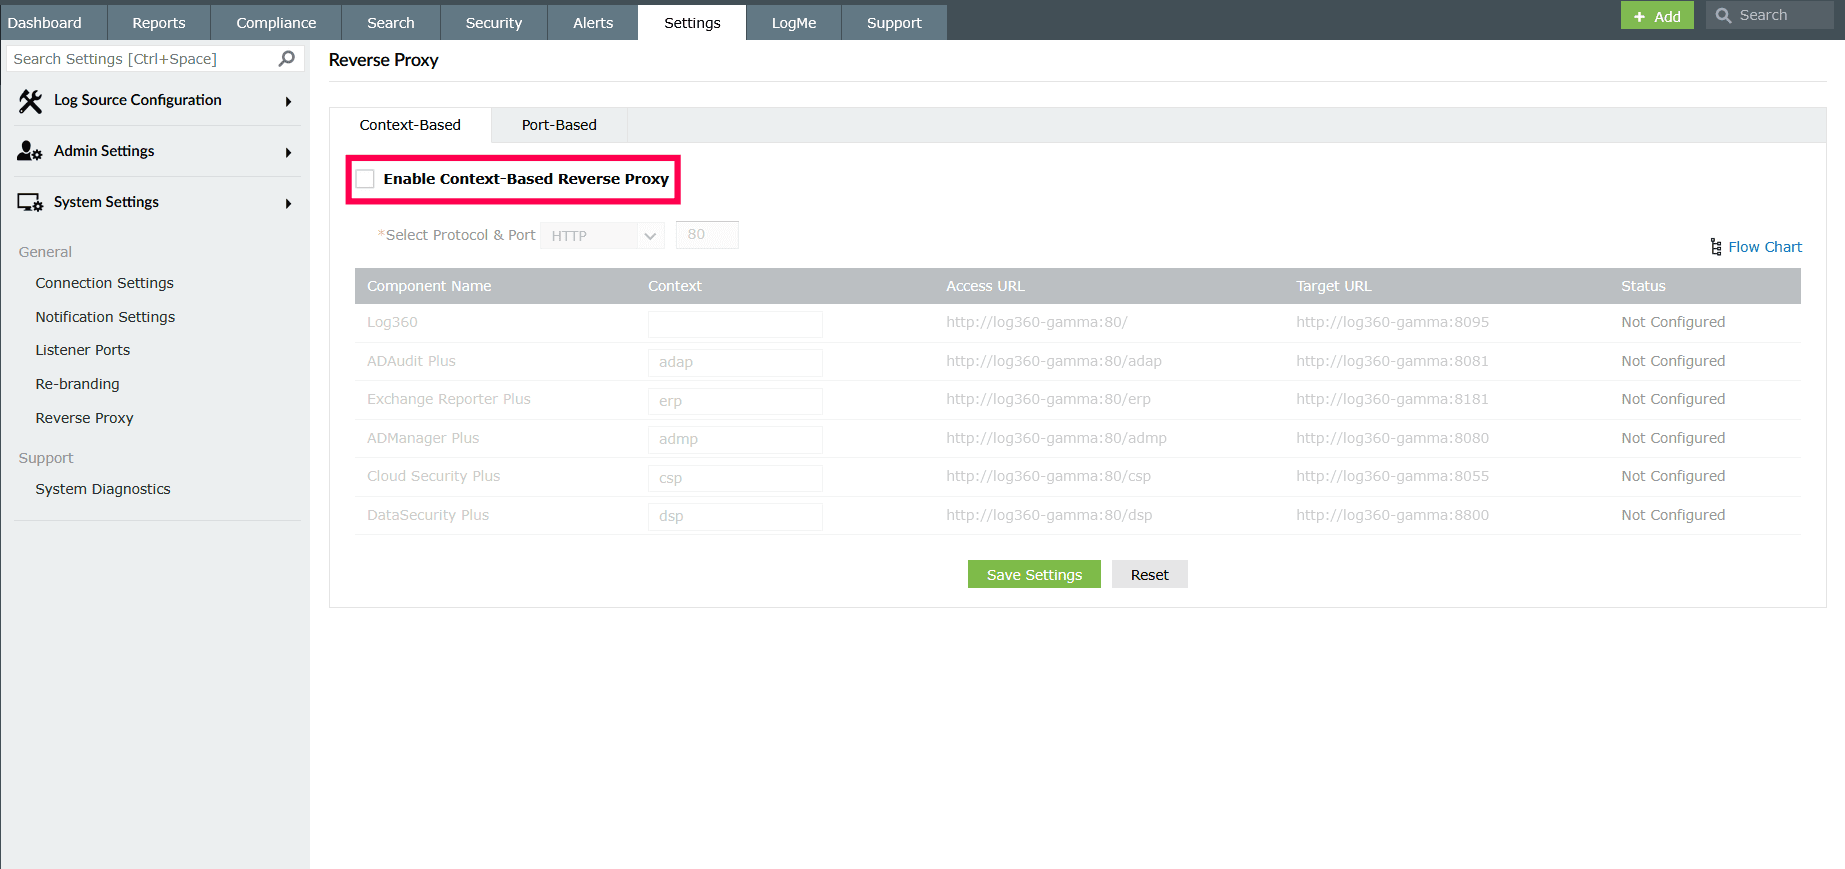
Figure 2: Enabling context-based reverse proxy - From the Protocol dropdown, choose the required protocol (HTTP or HTTPS).
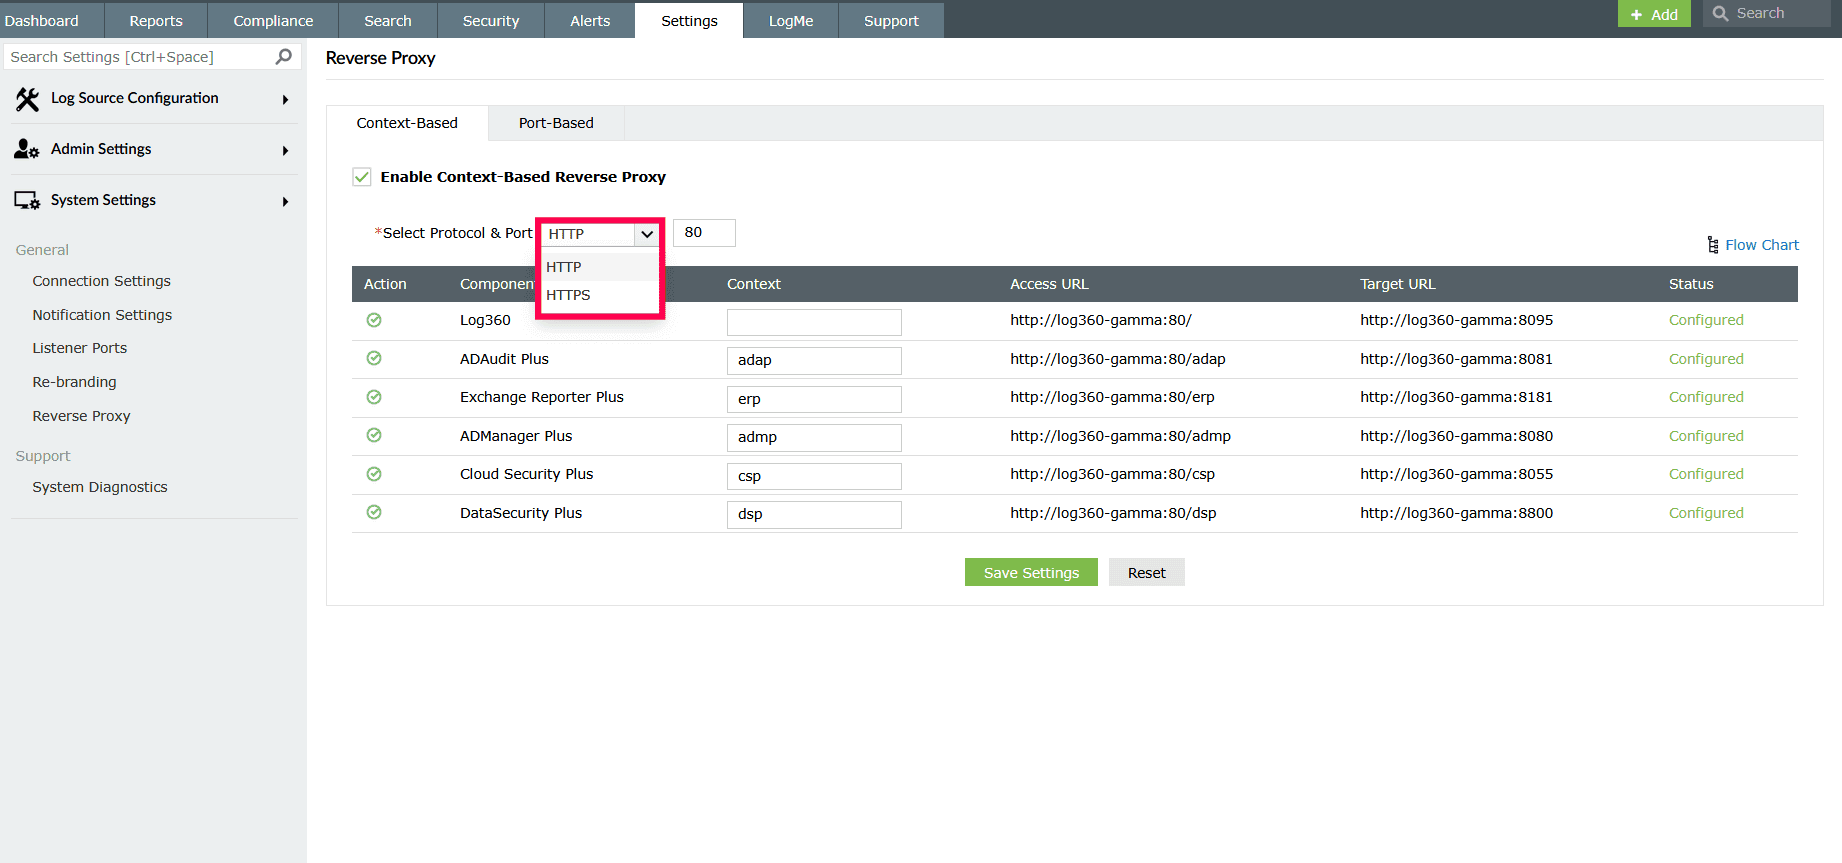
Figure 3: Selecting protocol for context-based reverse proxy - In the Port field, enter a port number that is not used by other applications.
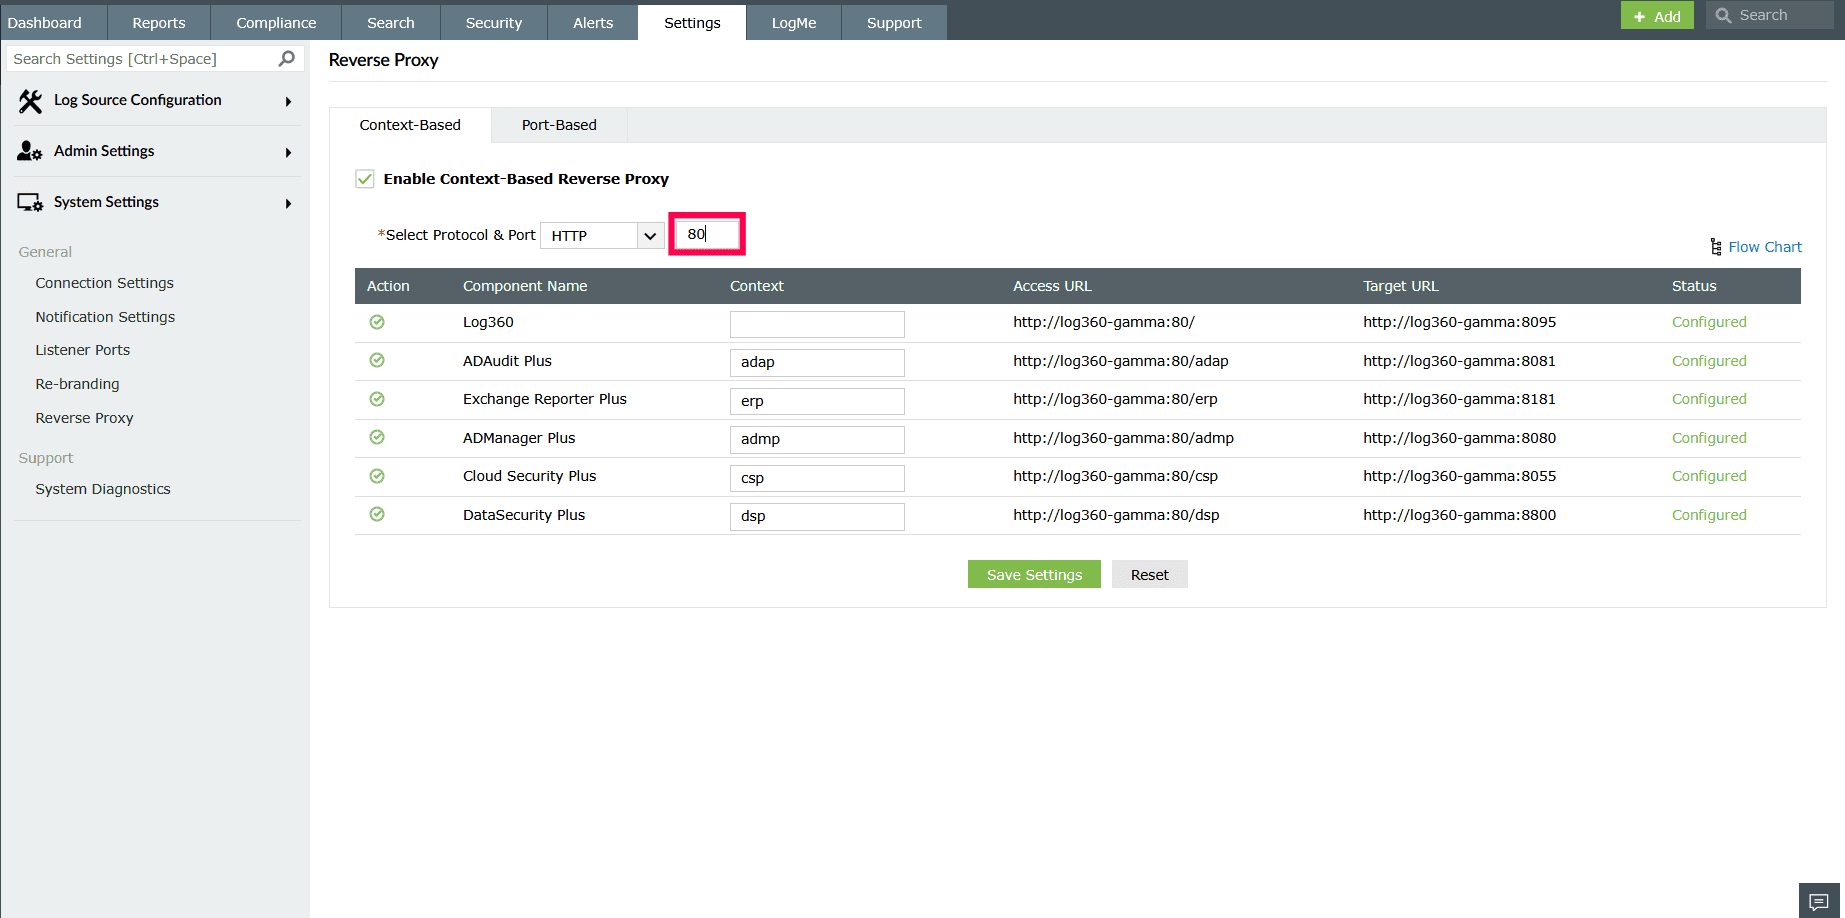
Figure 4: Configuring port number - Under the Context column, provide a unique context path for the product and each integrated component.
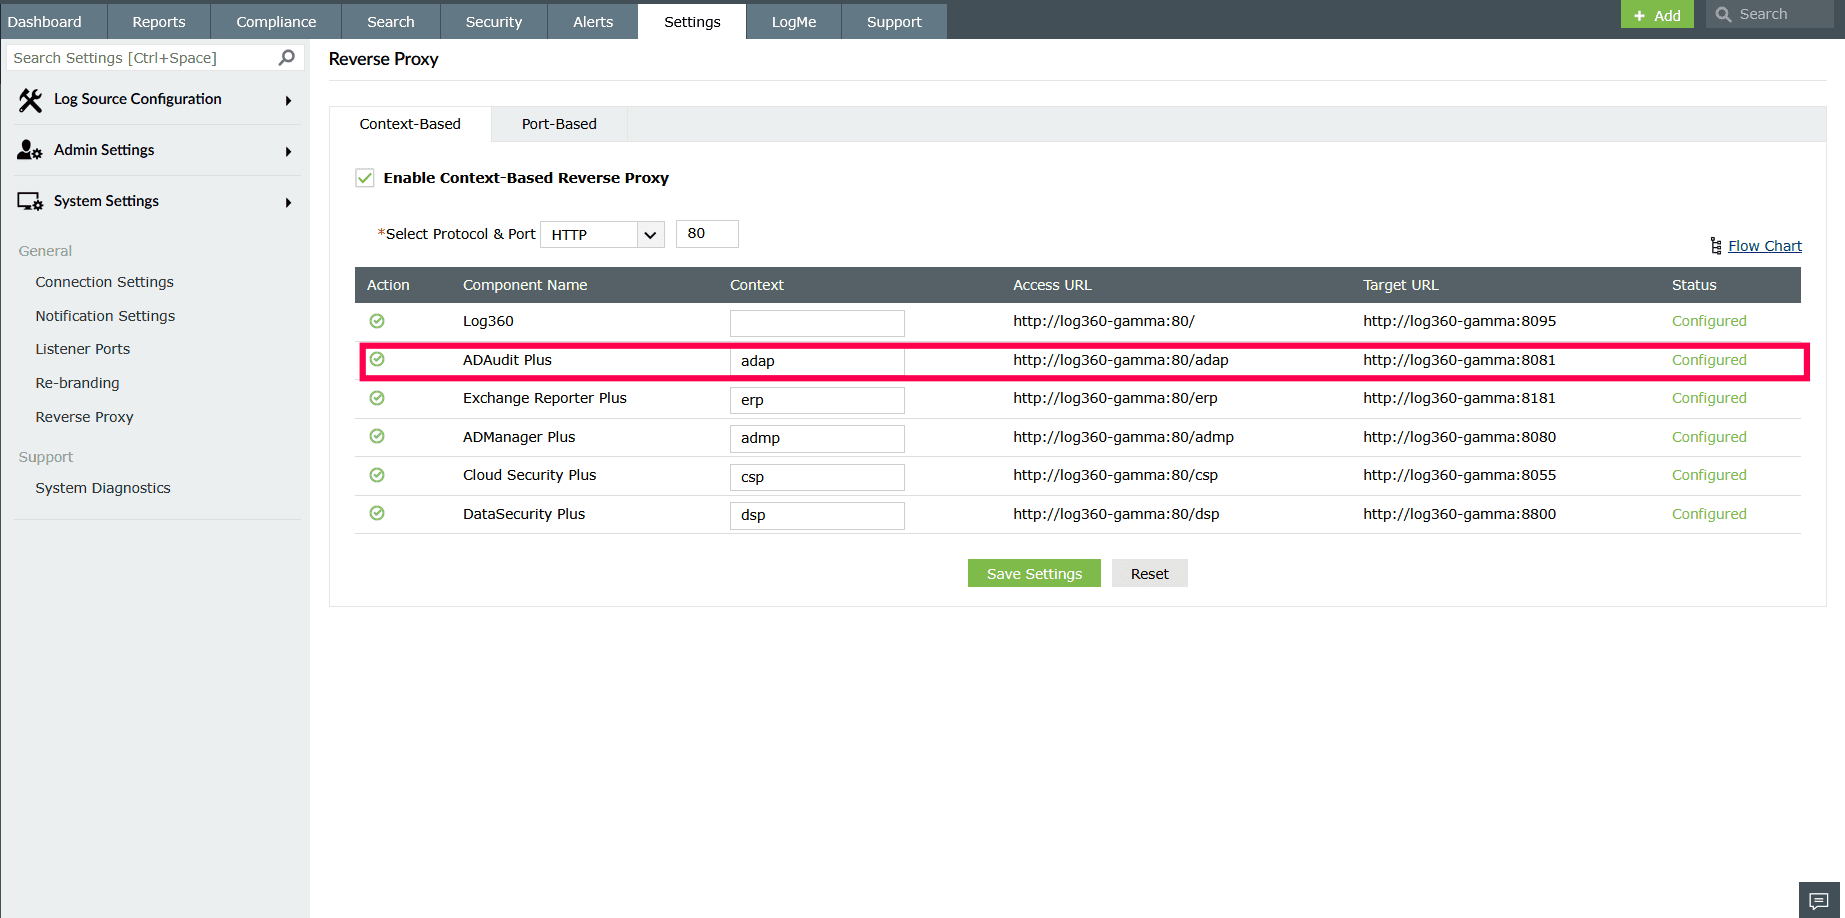
Figure 5: Configuring context path - Note down the Access URLs displayed for each component. These URLs will be used by external users.
- Click Save Settings to apply the configuration.
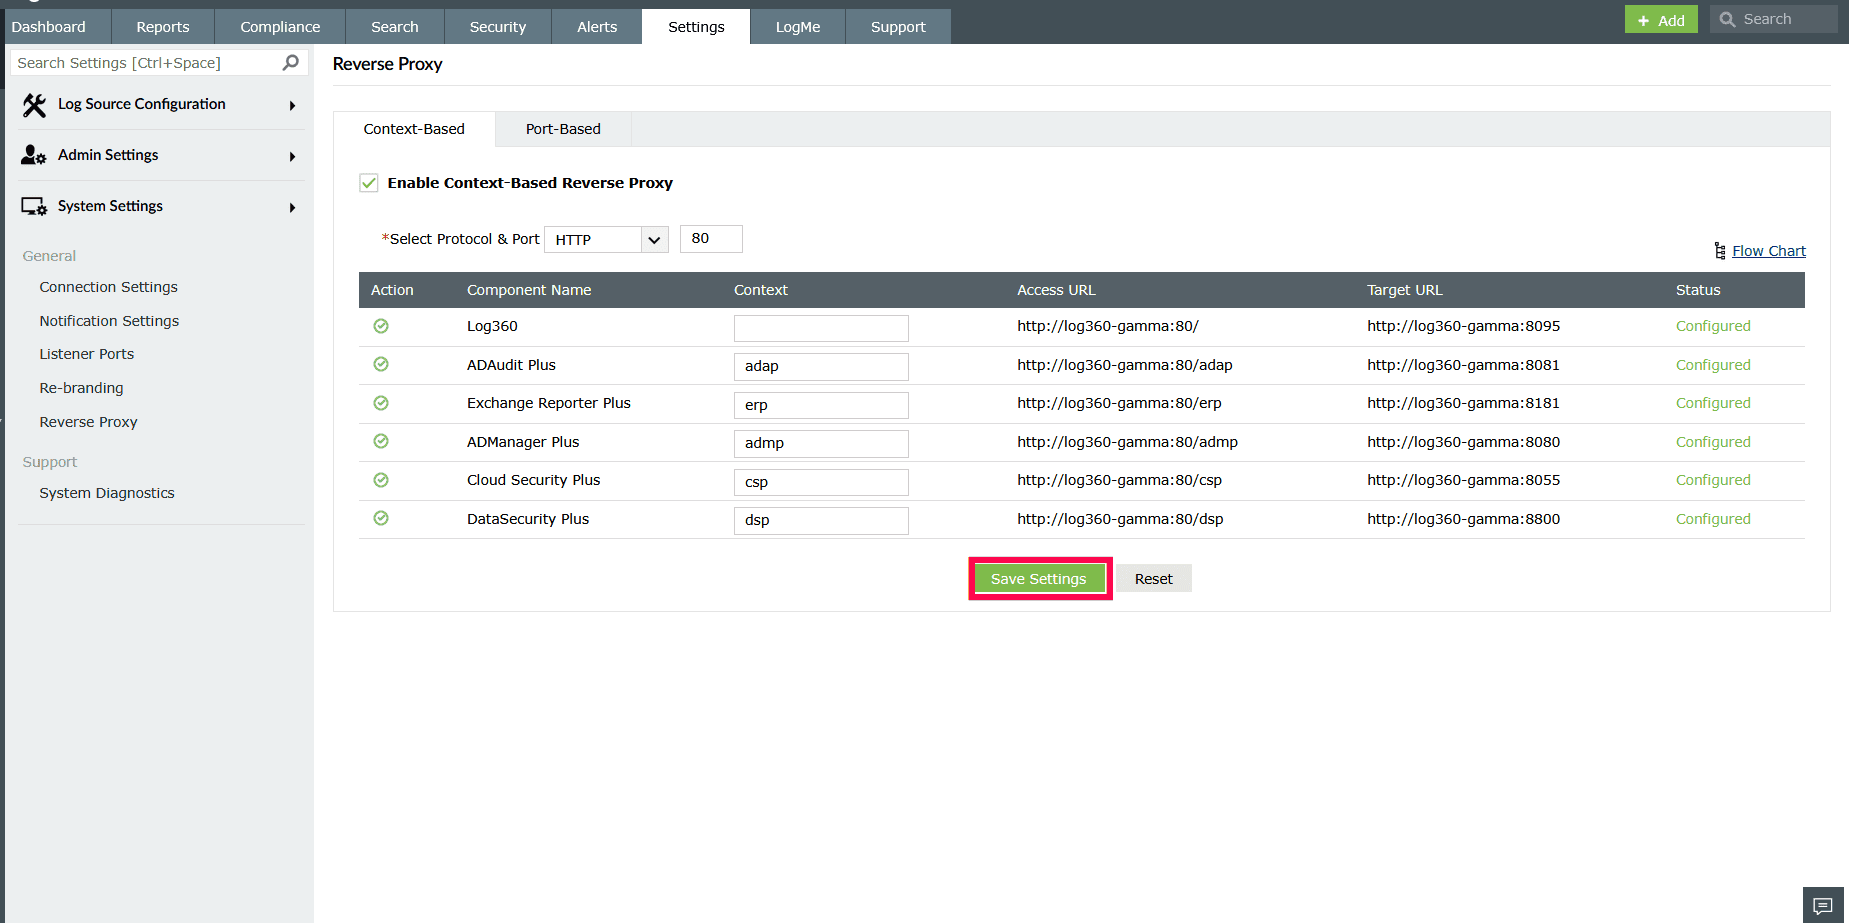
Figure 6: Enabling context-based reverse proxy
Enabling port-based reverse proxy
- Log into the product console as an administrator.
- Navigate to the Settings tab.
- Under System Settings, click Reverse Proxy.
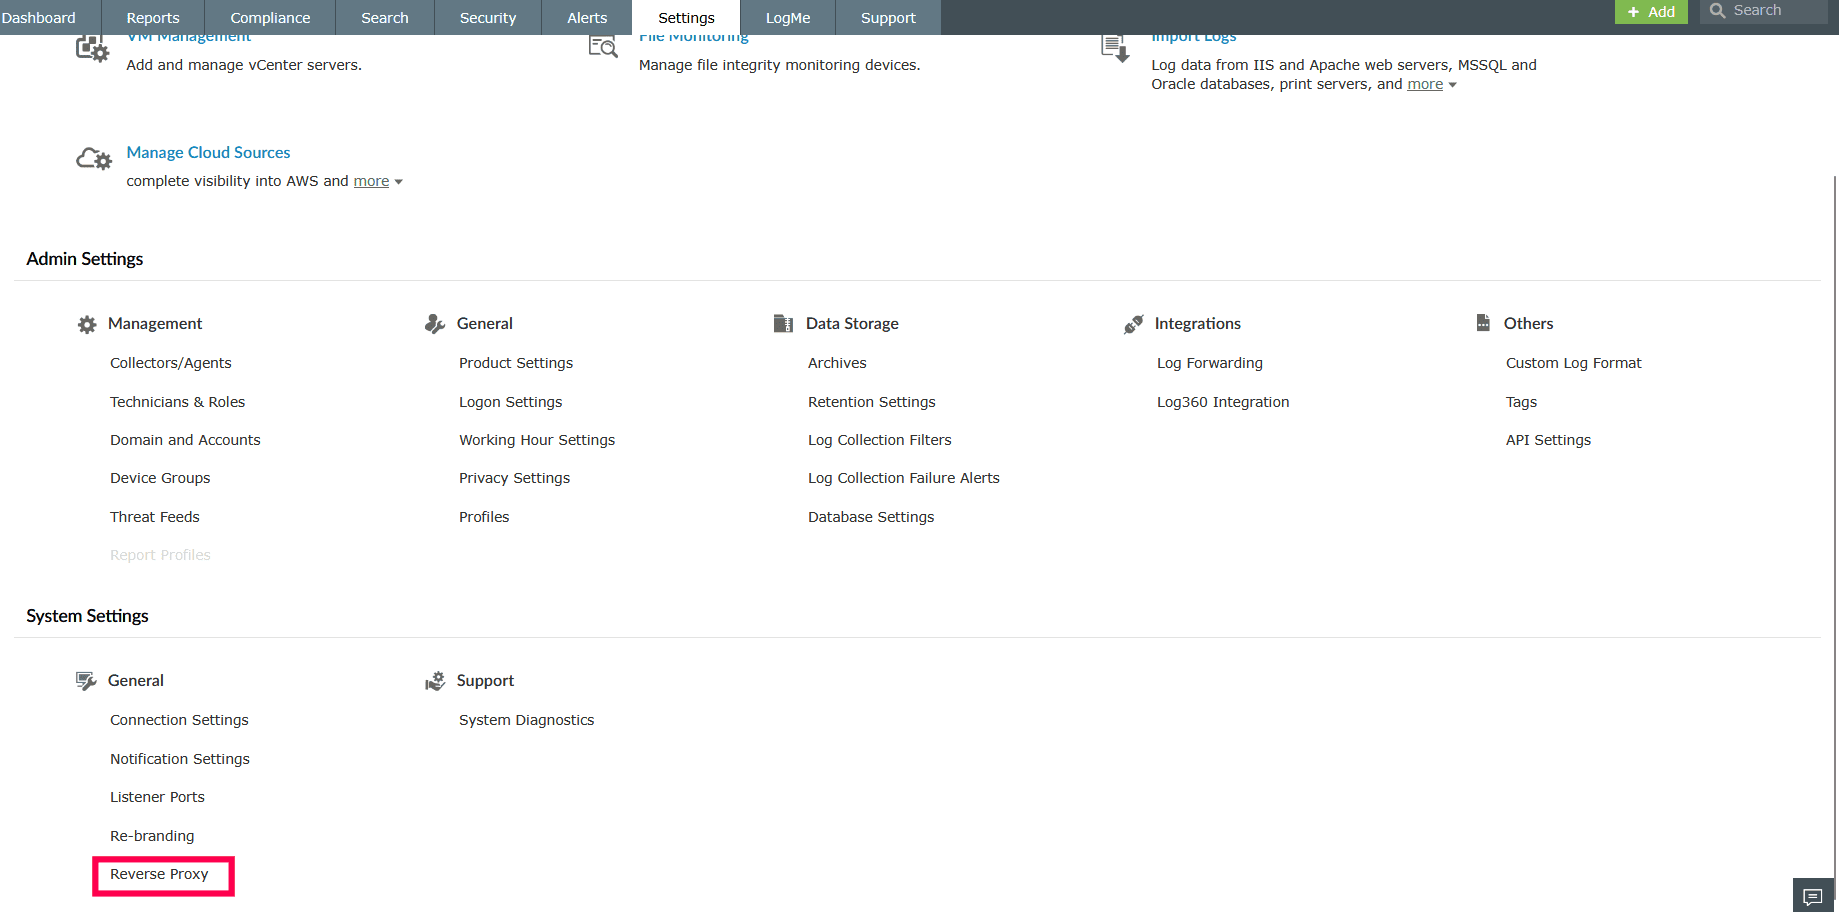
Figure 7: Enabling reverse proxy - In the Port-Based tab, select the checkbox Enable Port-Based Reverse Proxy.
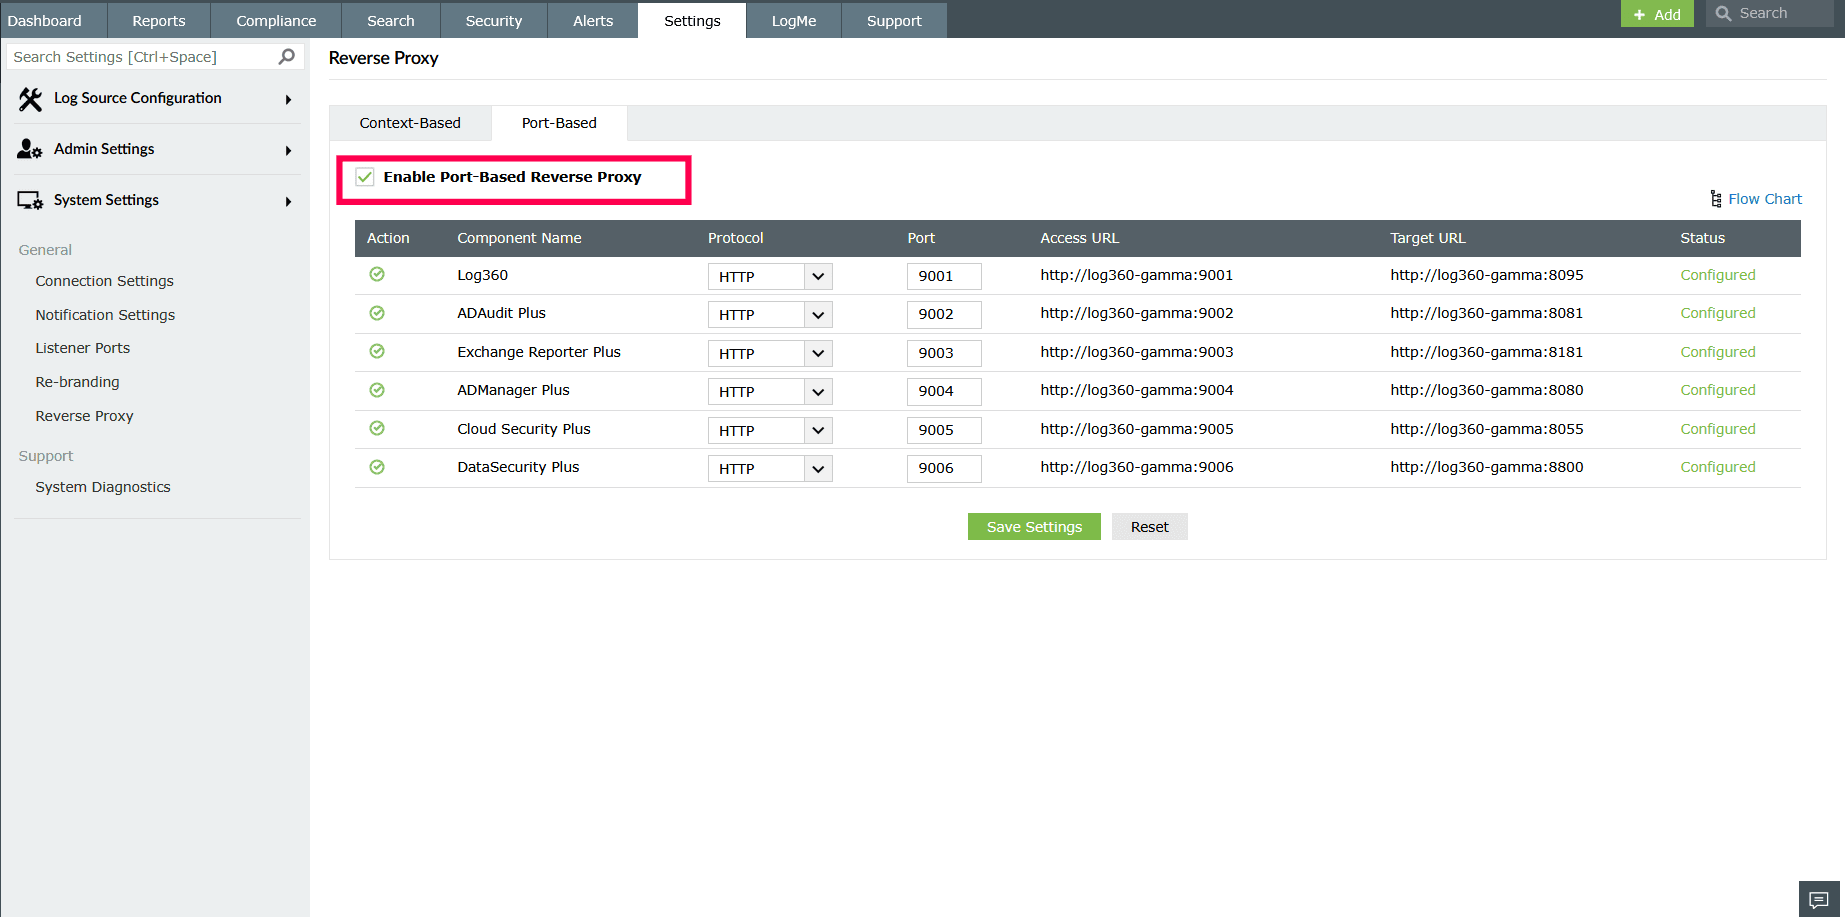
Figure 8: Enabling port-based reverse proxy - In the Protocol column, select the required protocol (HTTP or HTTPS) for each component.
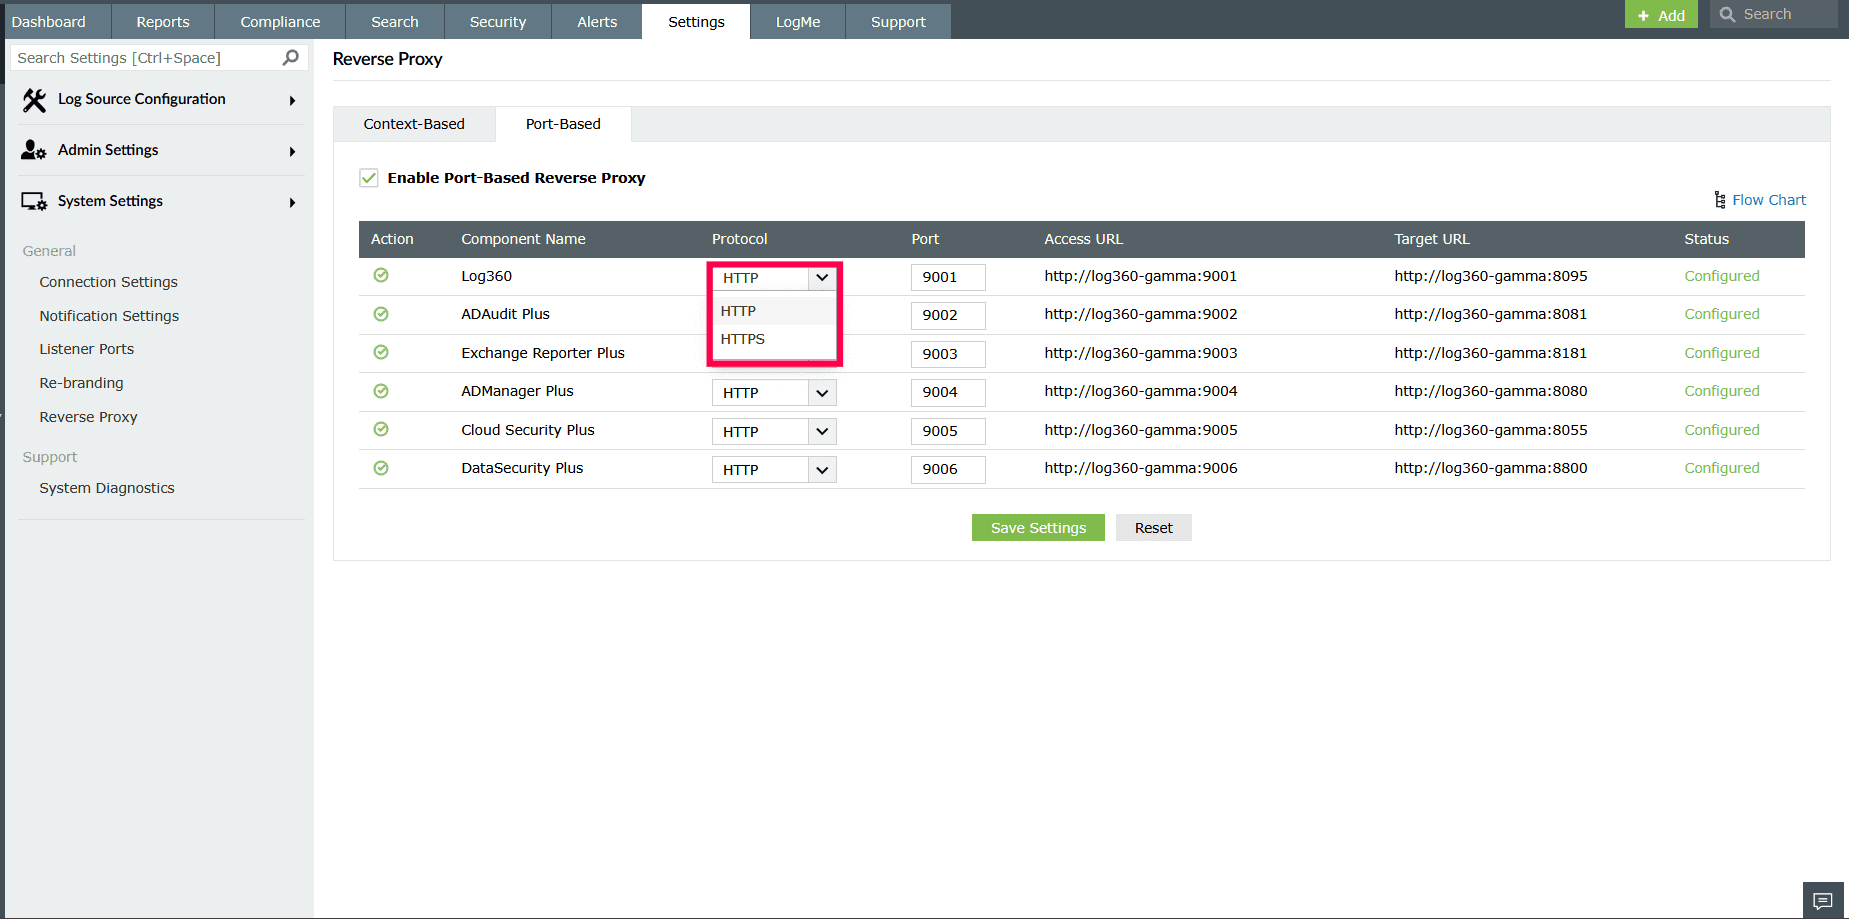
Figure 9: Selecting protocol for port-based reverse proxy - In the Port column, enter a unique port number for the product and its integrated components. Ensure the port numbers are not used by other applications.
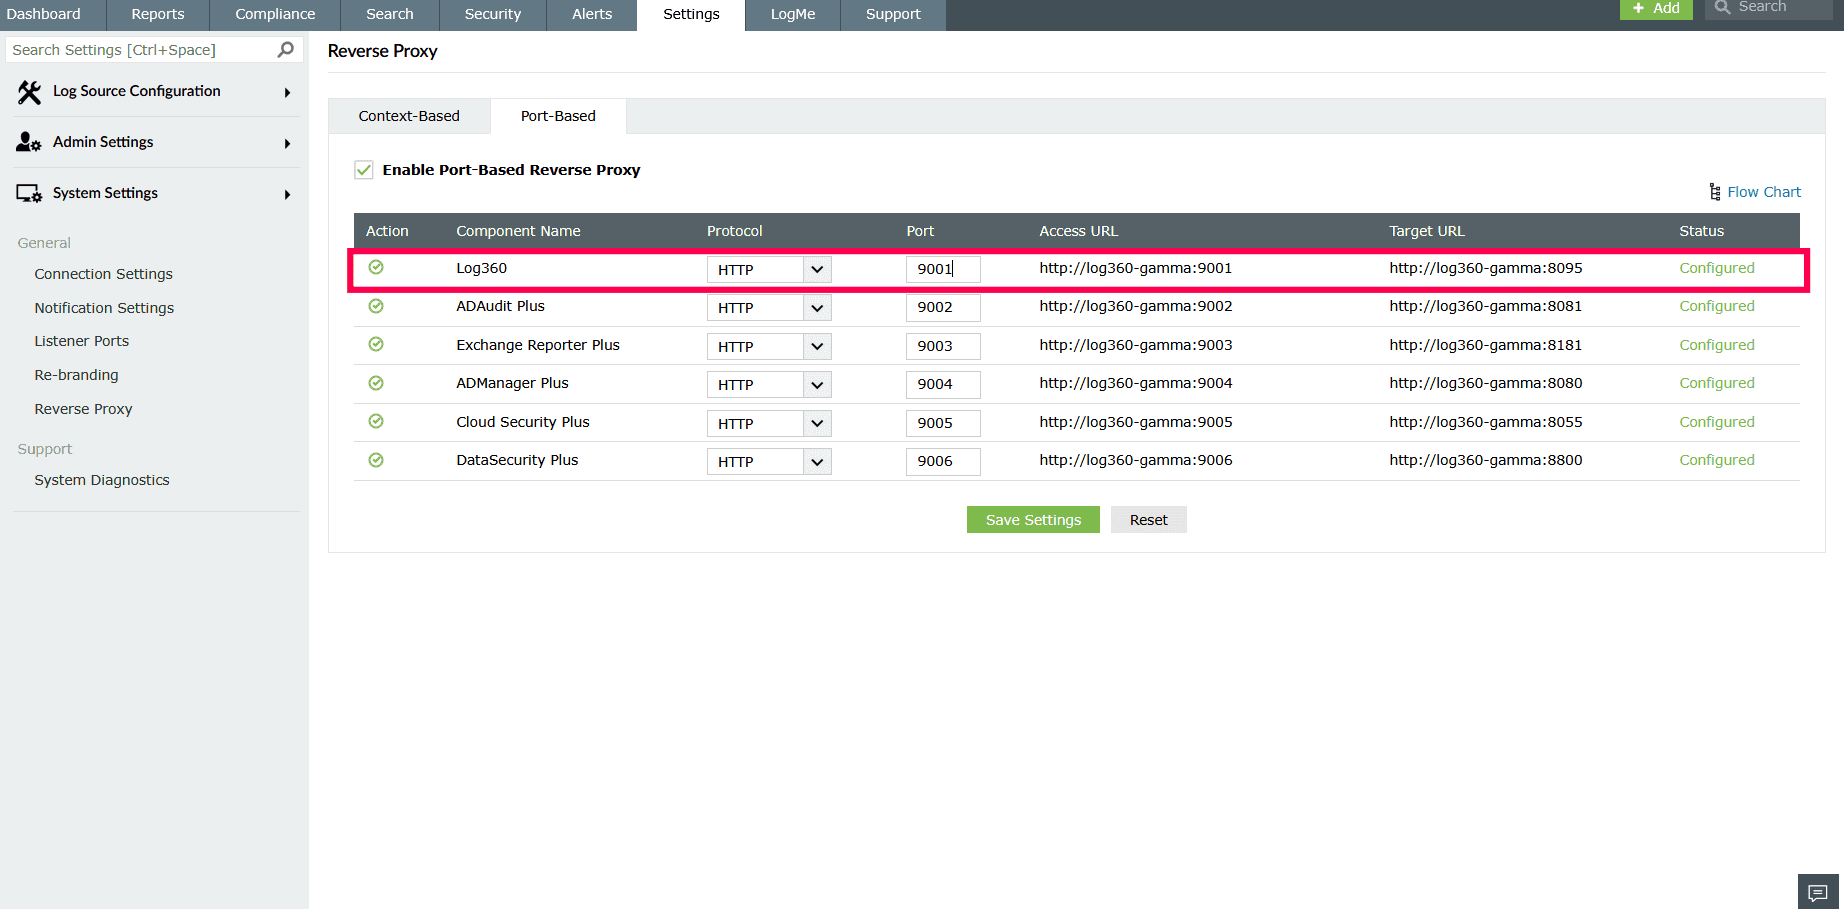
Figure 10: Configuring port number - Note down the Access URLs displayed for each component. These URLs will be used by external users.
- Click Save Settings to apply the configuration.
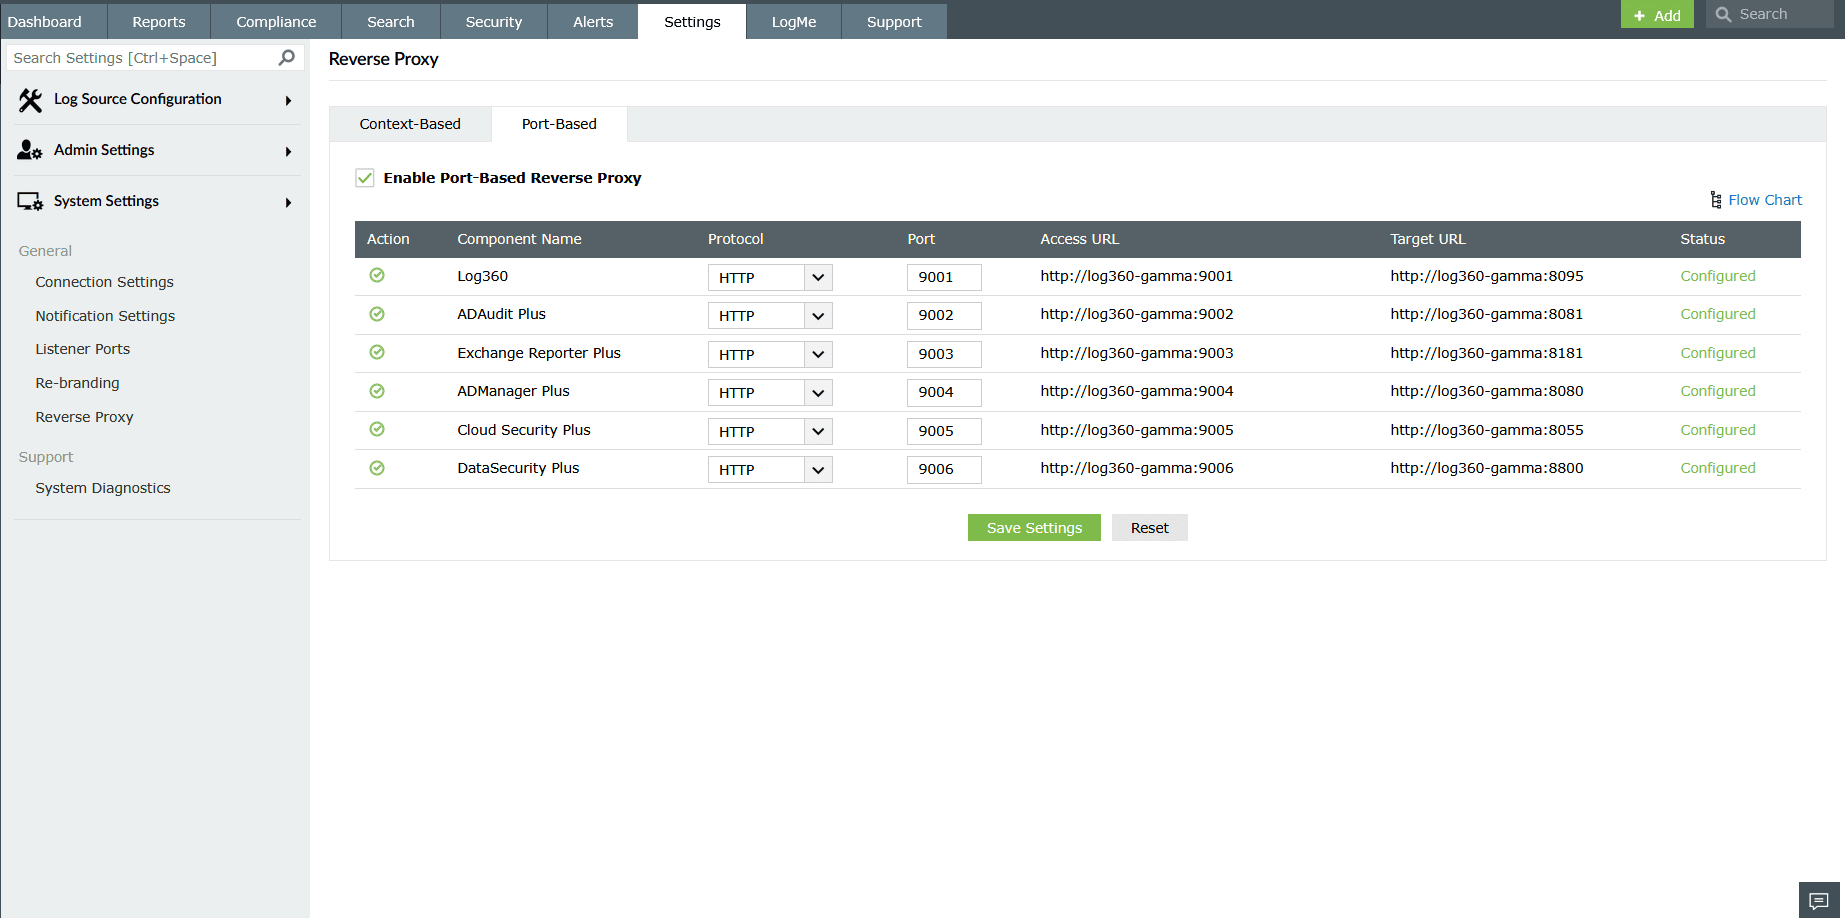
Figure 11: Enabling port-based reverse proxy
Disabling reverse proxy
- In the Reverse Proxy page, locate the component you want to disable.
- Under the Actions column, click the
 icon to disable the reverse proxy.
 - The component’s Status will change to Not Configured.
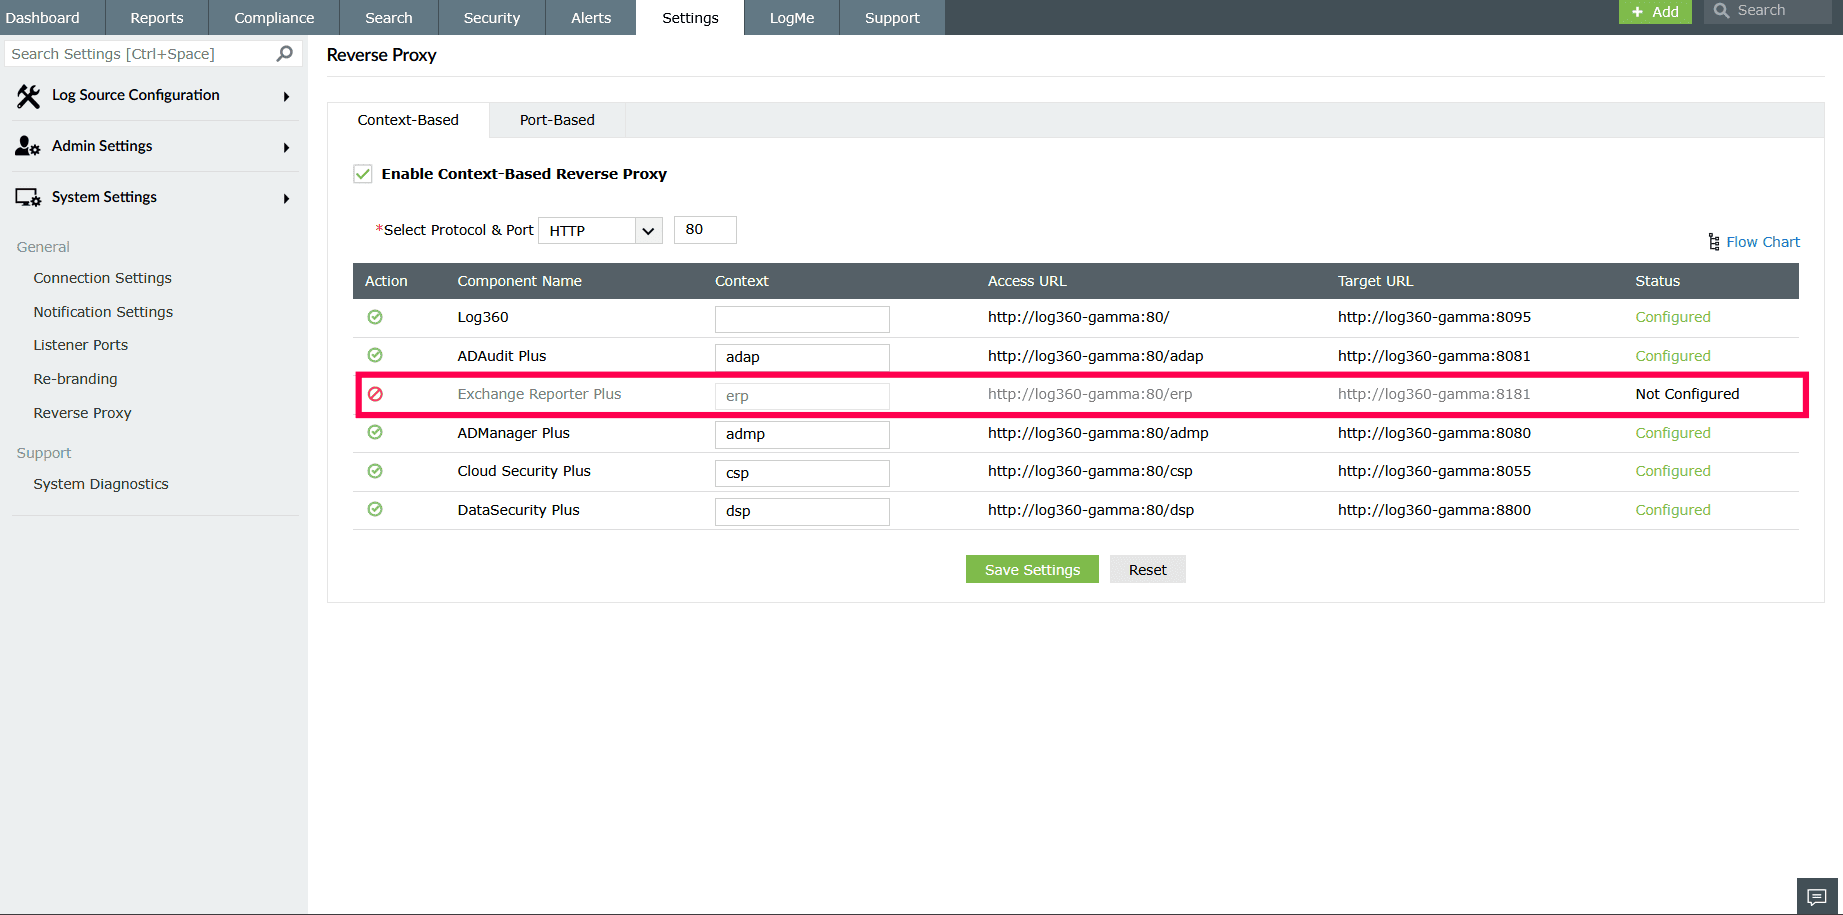
Figure 12: Disabling a reverse proxy - Click Save Settings to apply the changes.
Read also
This document explained how to manage the reverse proxy in Log360. To learn how Log360 uses a reverse proxy to secure communication.