Configuring Microsoft Exchange Online as the Mail Server
Organizations using Microsoft Exchange Online can configure it as the mail server in PAM360 to send onboarding messages, notifications, alerts, and other product-generated emails. PAM360 supports both SMTP and Microsoft Graph API for mail delivery, with OAuth 2.0-based authentication and authorization.
The following topics are covered in this help document:
- Registering PAM360 as an Application on the Microsoft Azure Portal
- Delegating API Permissions to the PAM360 Application
- Generating Client Secret on the Microsoft Azure Portal
- Configuring Microsoft Exchange Online as Mail Server in PAM360
1. Registering PAM360 as an Application on the Microsoft Azure Portal
To integrate PAM360 with Microsoft Azure, you should register PAM360 as an application in the Microsoft Azure portal. The registration process involves specifying essential details about PAM360 and setting up the necessary configurations. Follow these steps to add PAM360 as a new application in the Azure portal.
- Log in to the Microsoft Azure portal
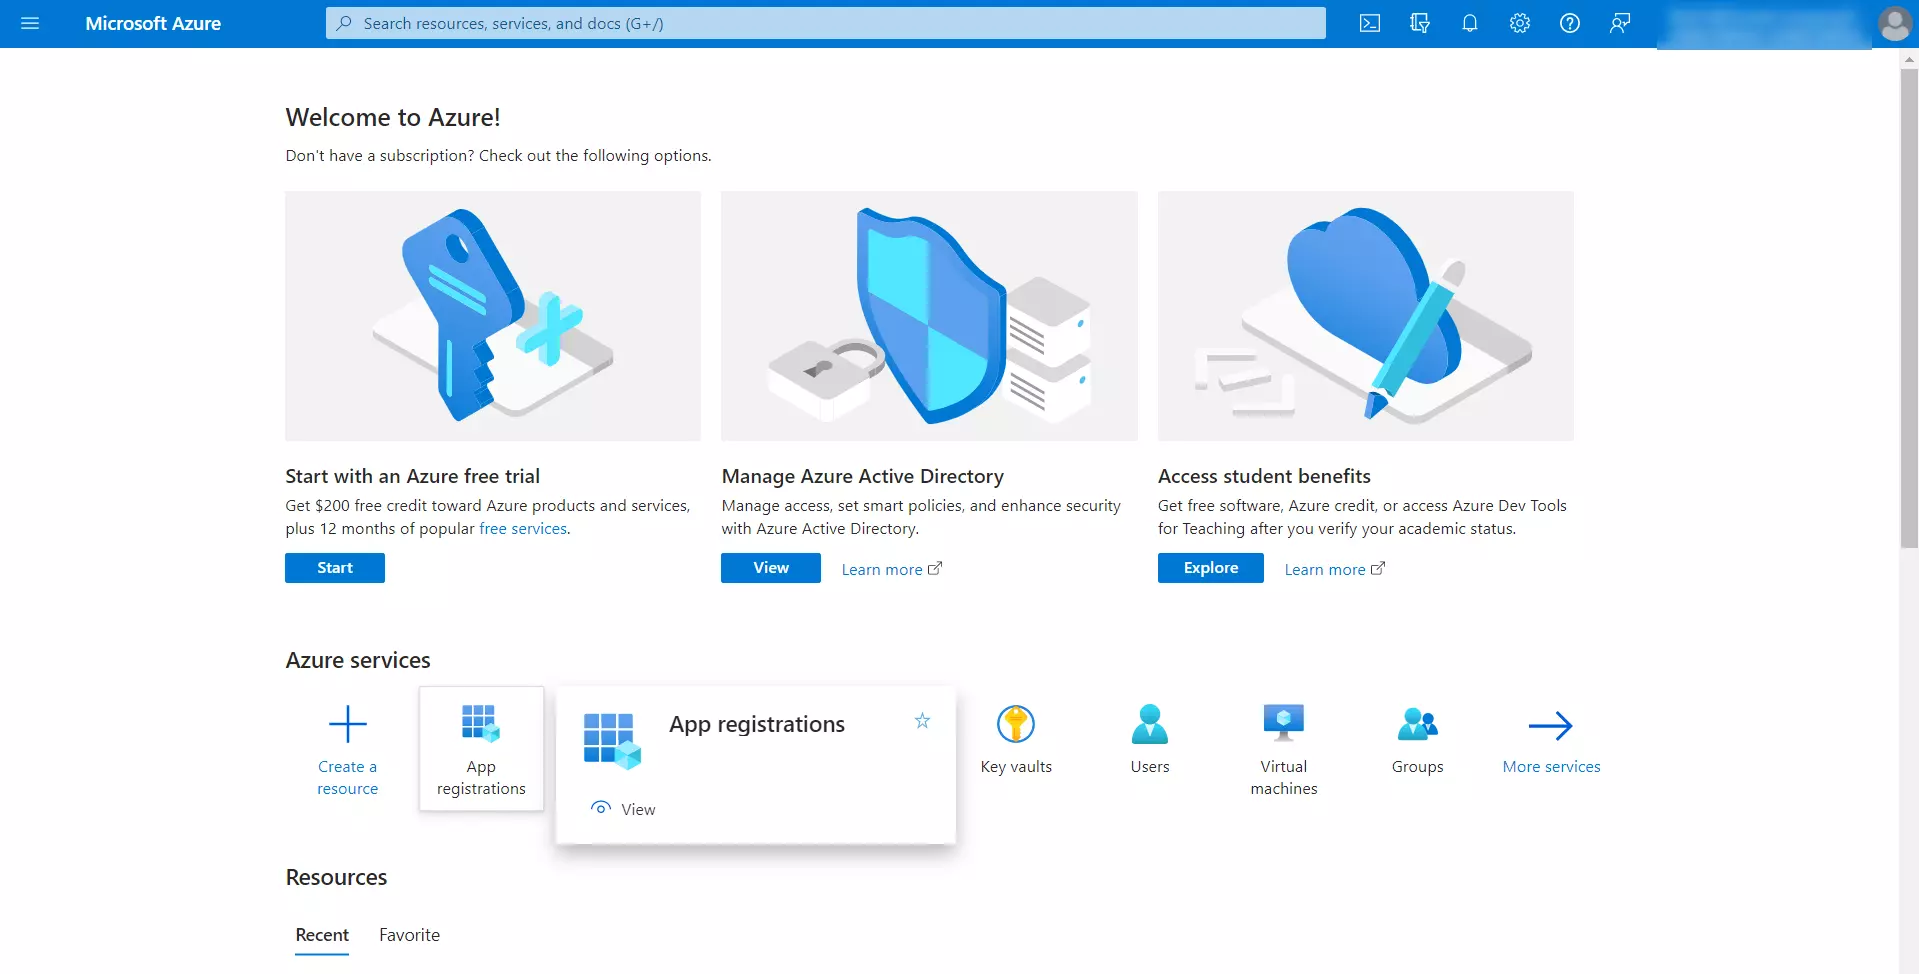
- Select the App registrations option under the Azure services section on the Microsoft Azure home page.
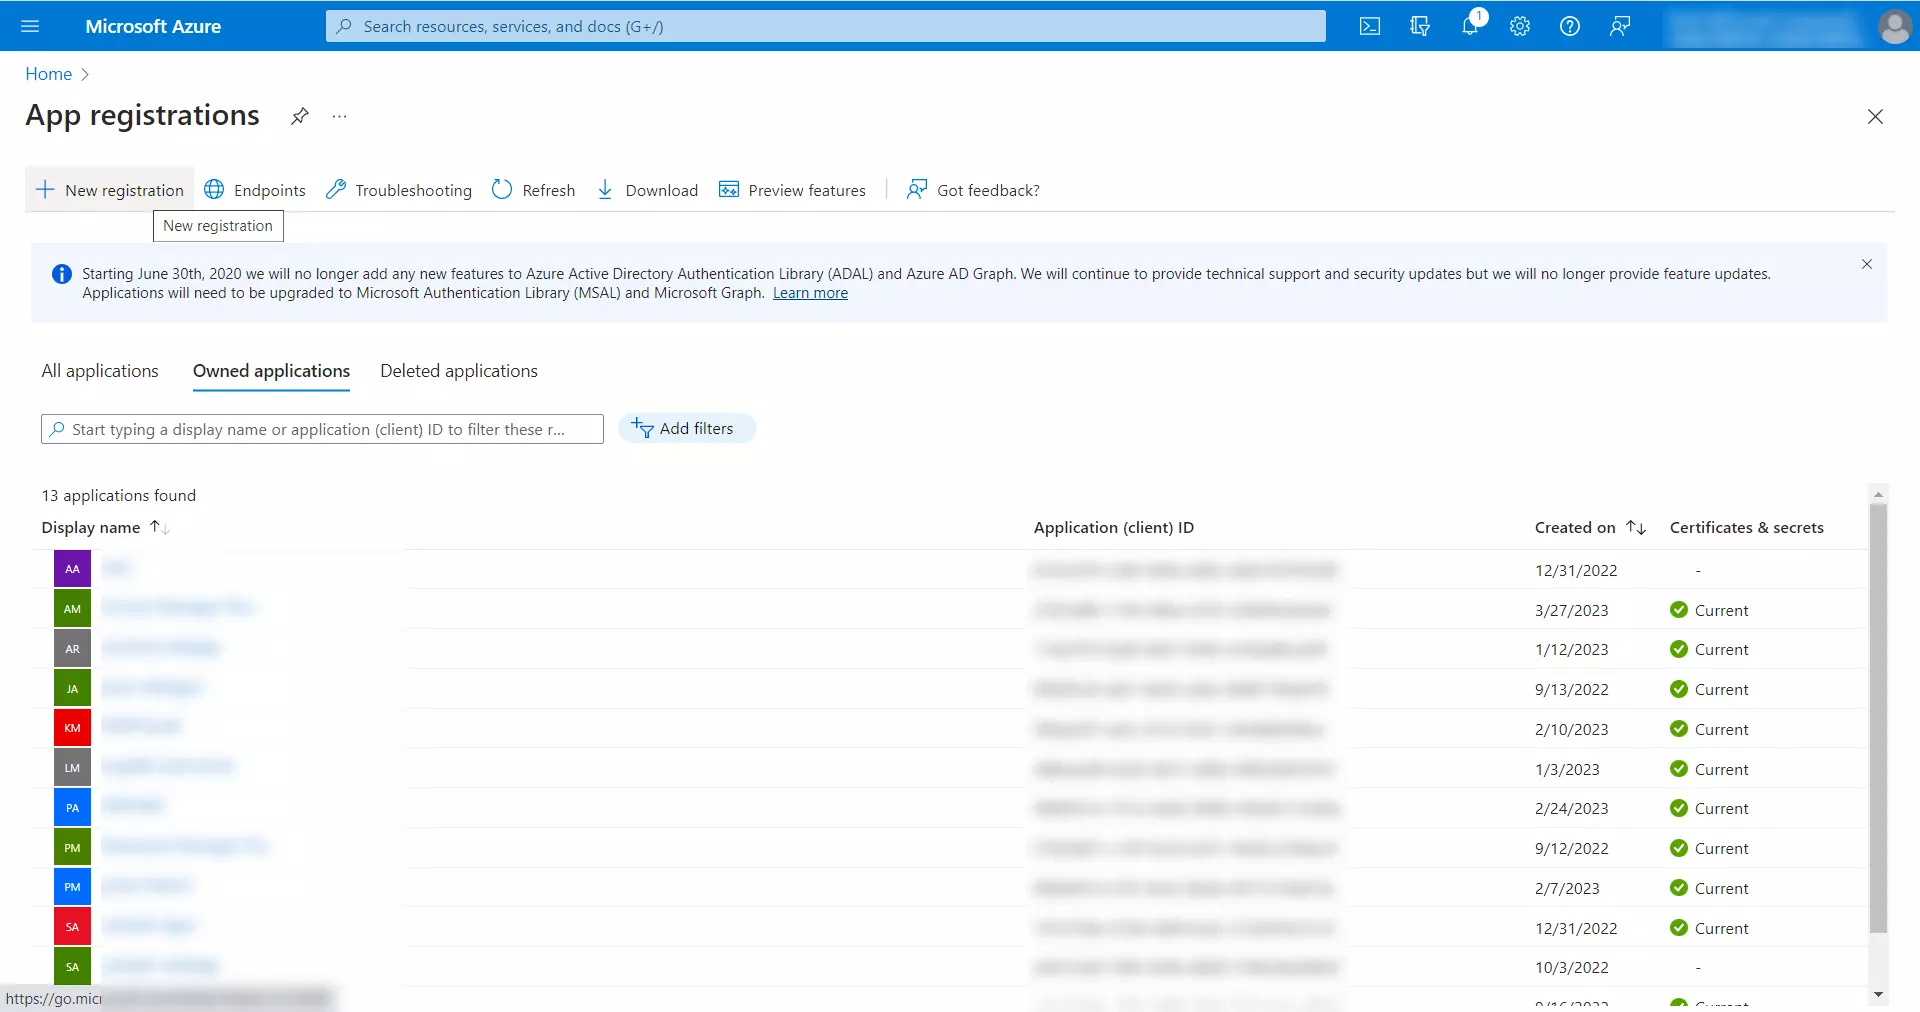
- On the App registrations page, click the + New registration button on the top-left corner of the screen.
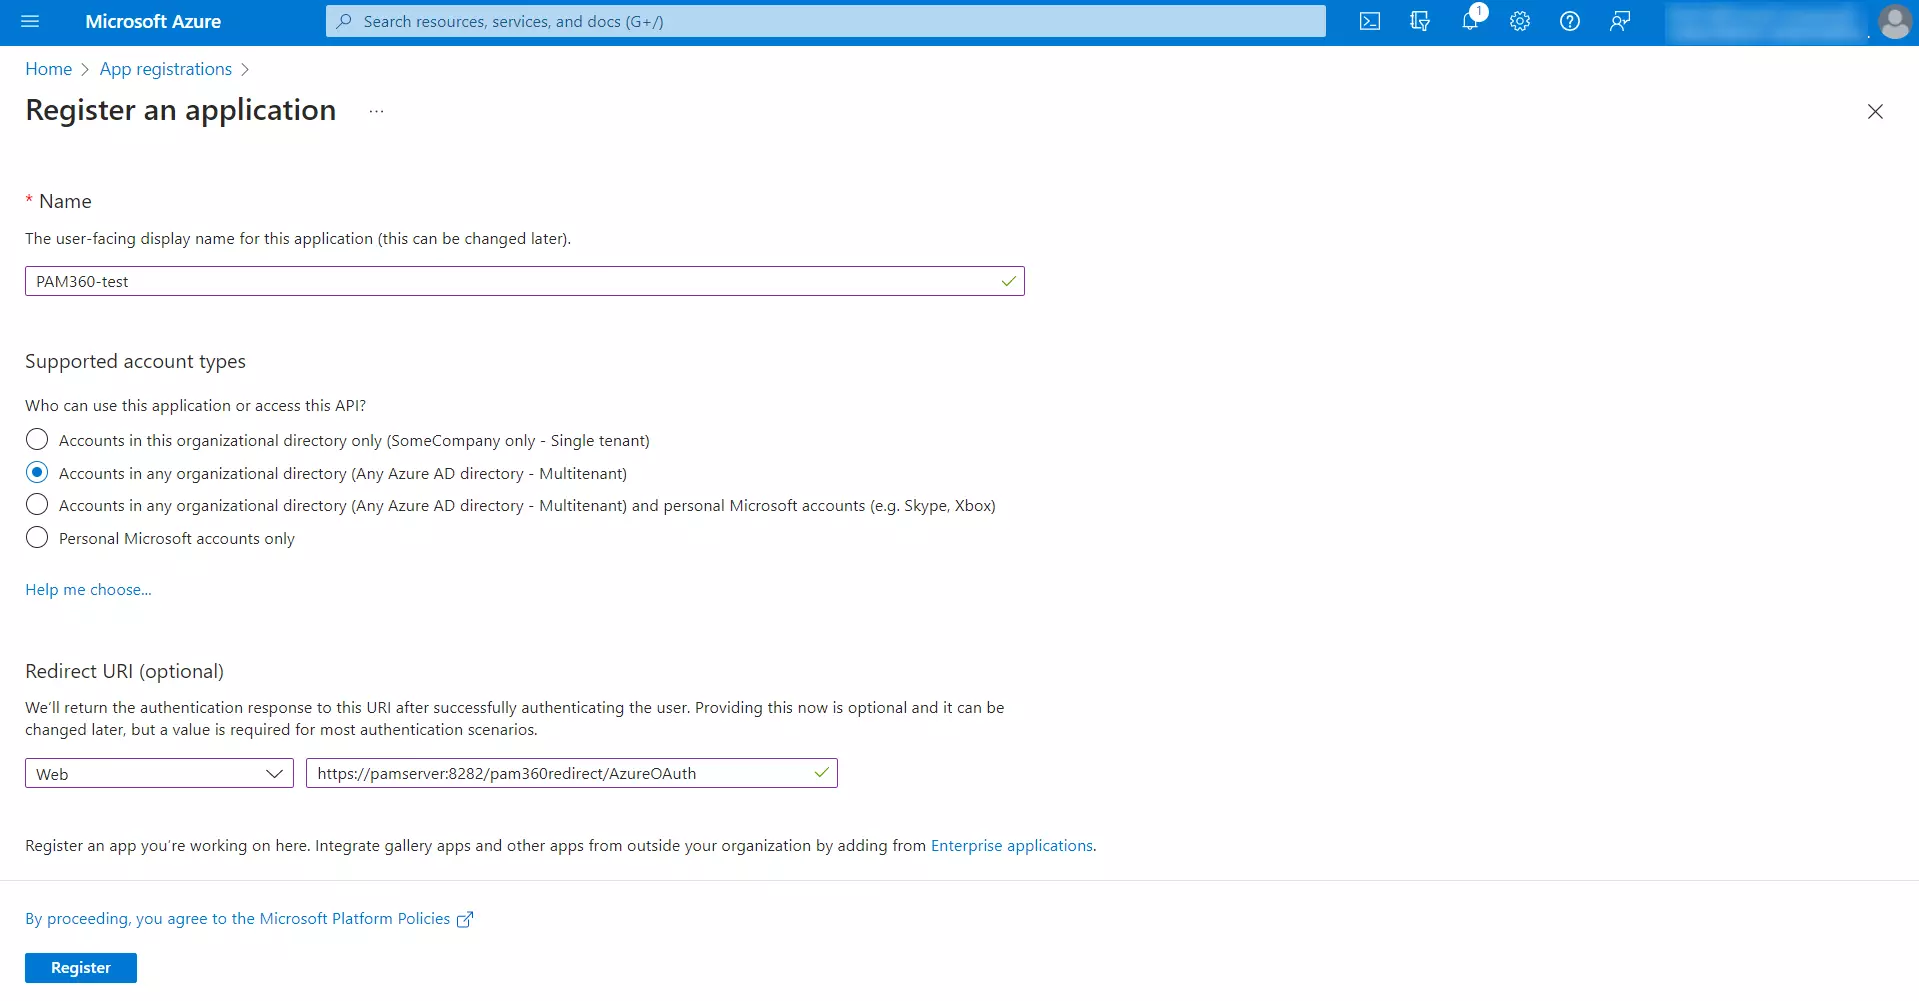
- Specify the following details on the Register an application page:
- Name - Enter a display name of your choice for the application (e.g., PAM360)
- Supported account types - Select the Accounts in any organizational directory (Any Microsoft Entra ID tenant - Multitenant) option.
- Redirect URI - Choose Web from the drop-down menu and enter the URI of the PAM360 application in the format: <access URL>/pam360redirect/AzureOAuth. For example, if the access URL is https://pamserver:8282 then the Redirect URI you enter here should be https://pamserver:8282/pam360redirect/AzureOAuth.
- Click Register to add PAM360 as an application in the Microsoft Azure portal. You will be redirected to the App registrations page, where you can view the details of the newly registered application.
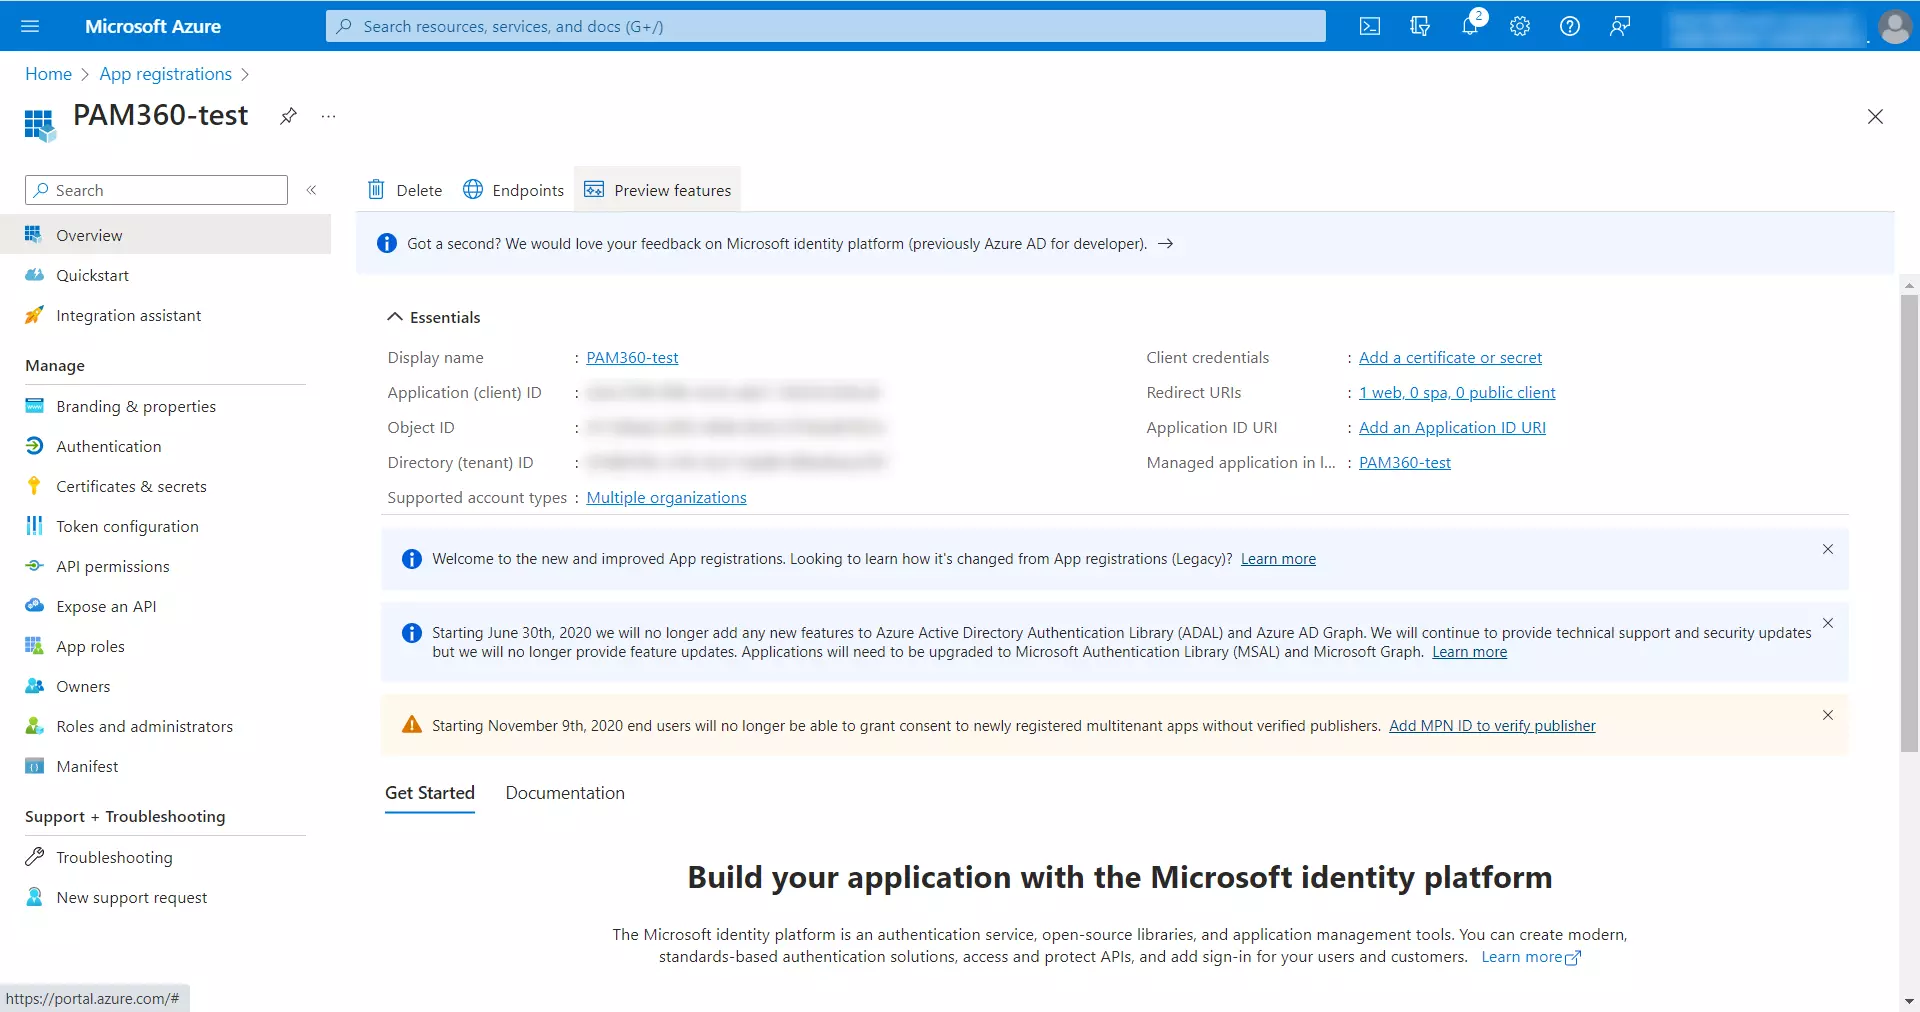
- You can view the details of your newly added app registration by clicking on the application name from the list of registered applications on the App registrations page.
Caution
Ensure the PAM360 application URI (access URL) you enter in the Redirect URI field is the same as the one users can use to access the PAM360 application from other machines. Provide the same link in the Access URL field in section 4.
2. Delegating API Permissions to the PAM360 Application
To enable PAM360 to send emails through Microsoft Exchange Online, you should delegate the necessary permissions to the PAM360 application in the Microsoft Azure portal. Follow the steps below to delegate the required permissions for PAM360 to send emails securely through Microsoft Exchange Online.
- Go to the App registrations page and select PAM360 (The display name entered during app registration) from the list of registered applications.
- On the left pane, select Manage >> API permissions.
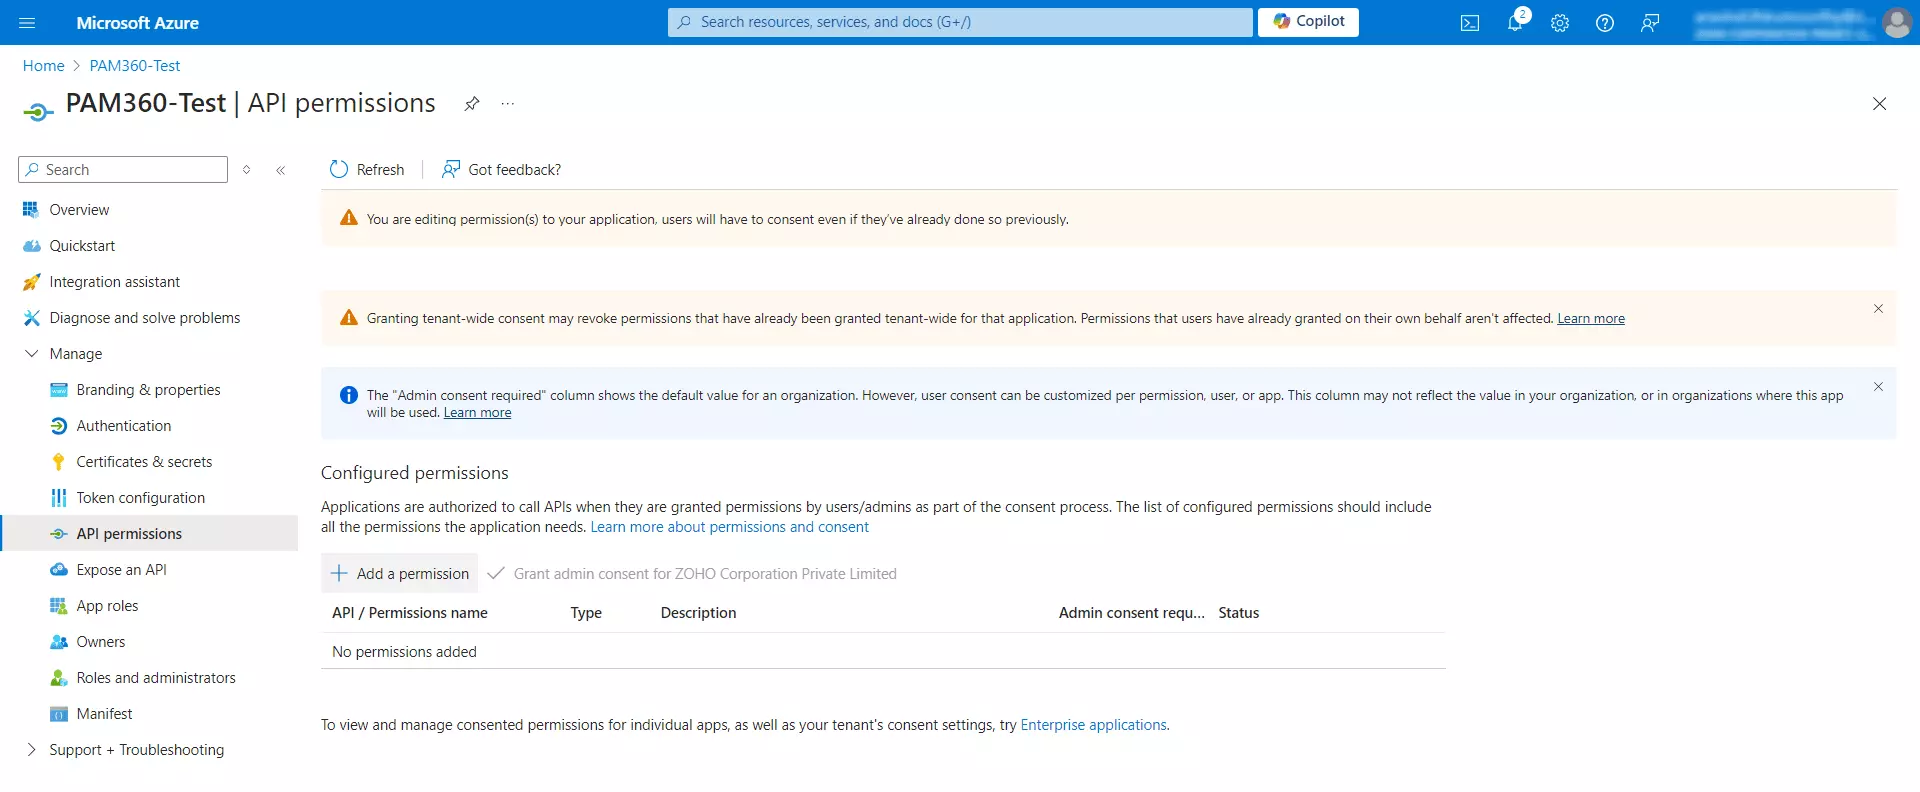
- On the API permissions page, click the +Add a permission button under the Configured permissions section to open the Request API permissions window.
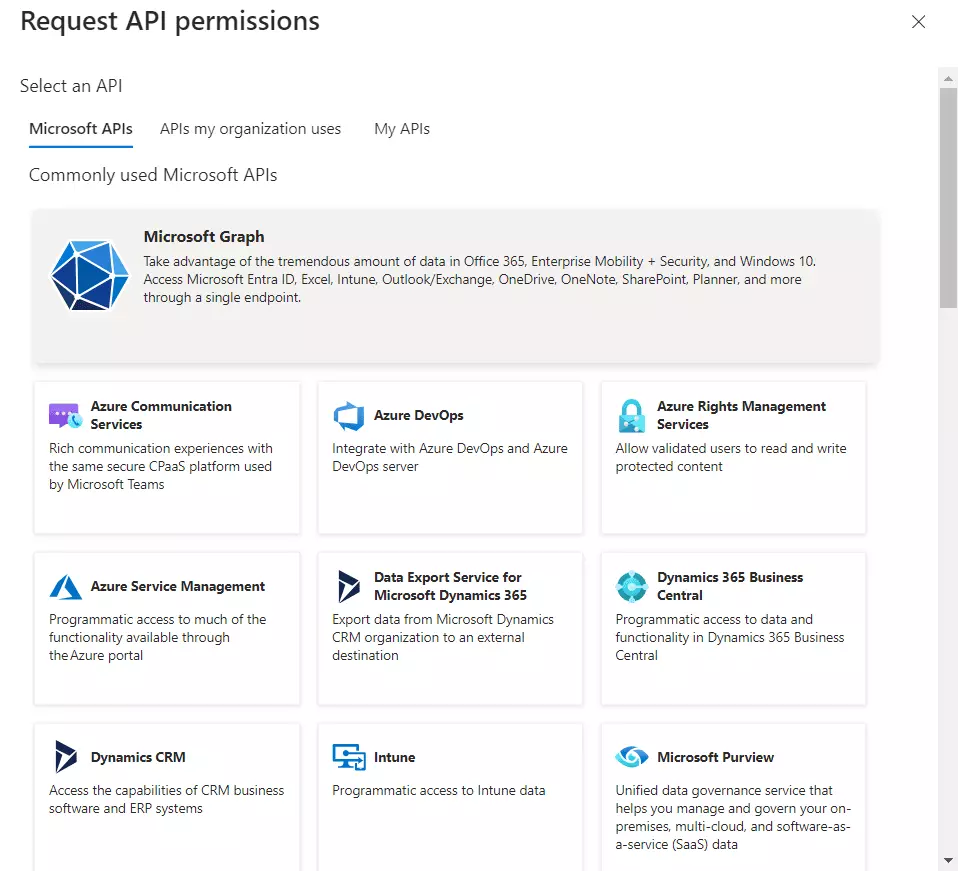
- In the Request API Permissions window, select Microsoft Graph from the available list of Microsoft APIs.
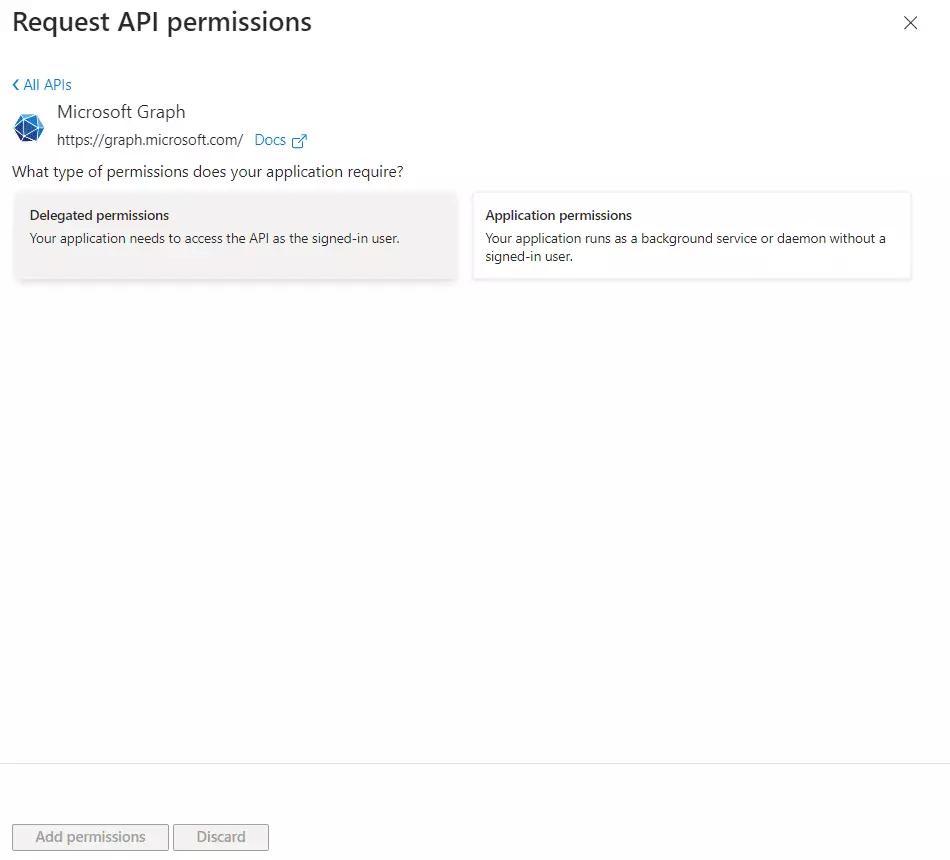
- In the window that opens, select Delegated permissions or Application permissions.
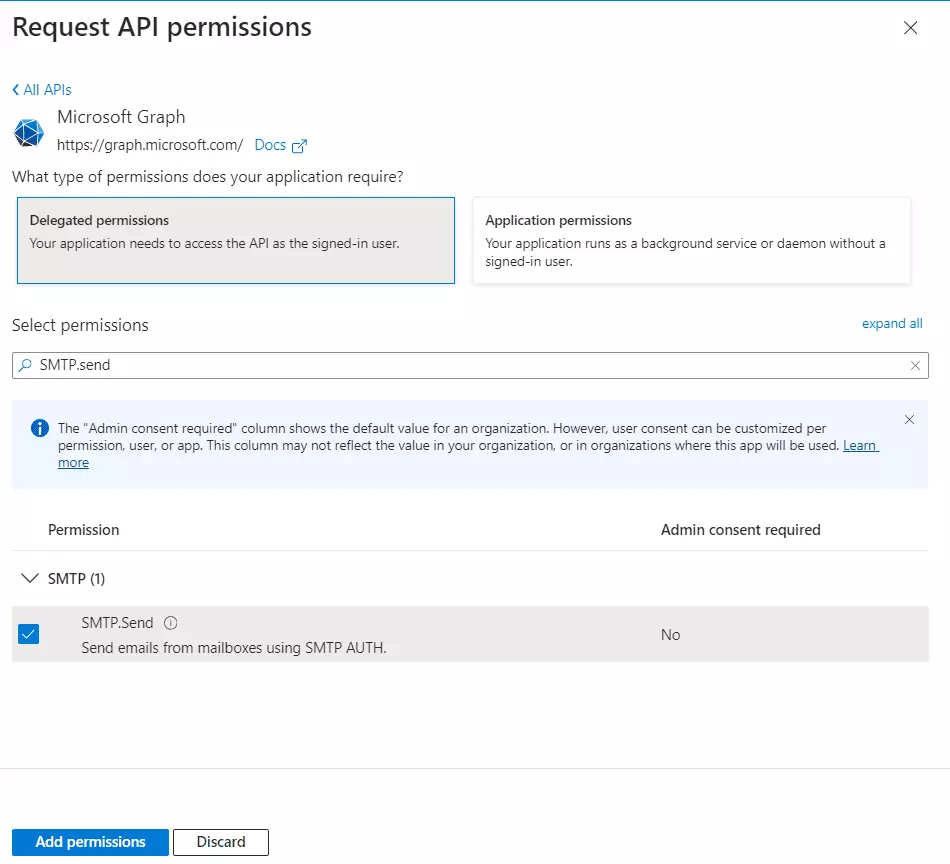
- In the Request API Permissions window, locate the following API permissions based on the mail delivery method and permission type you want to configure using the search bar and click the Add Permissions button.
- SMTP, Delegated - SMTP.Send, offline_access
- API, Delegated - Mail.Send (del), offline_access
- API, Application - Mail.Send (app), offline_access
- After adding the required permissions, click the Grant admin consent button beside the + Add a permission button.
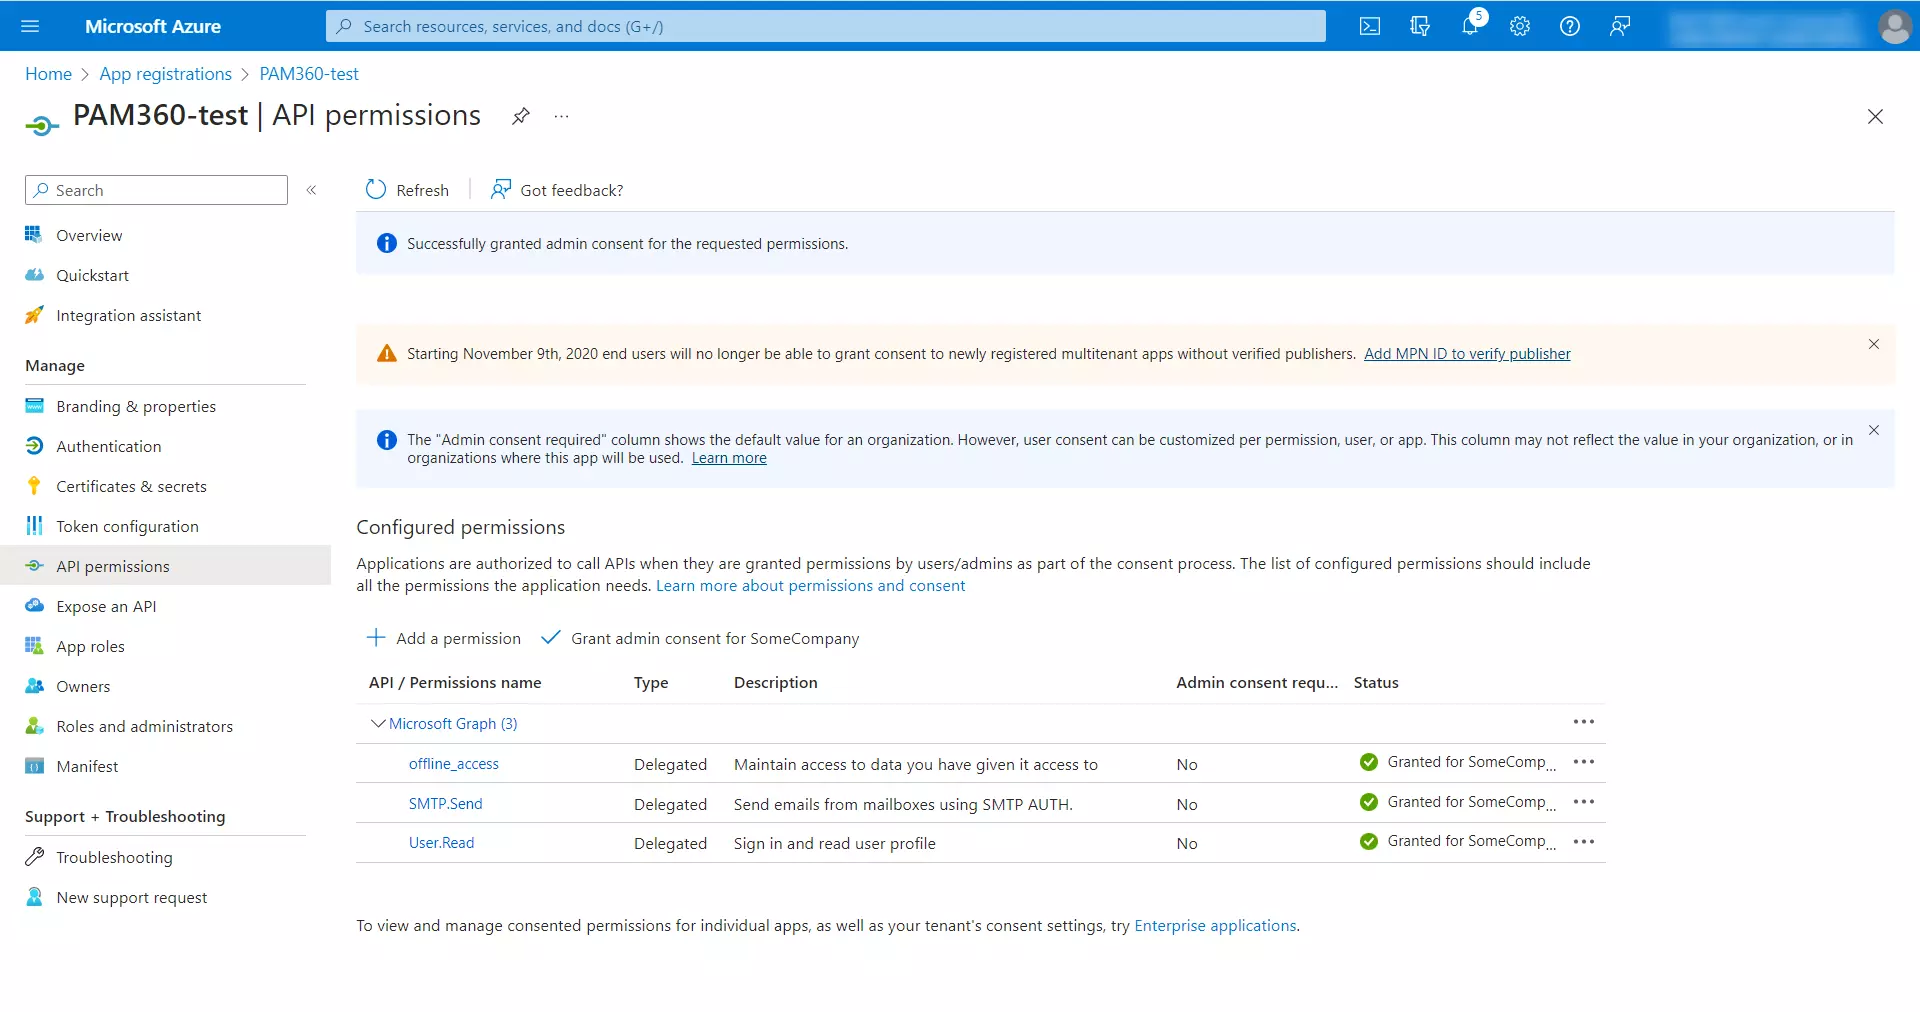
- In the pop-up window that opens, click Yes to grant consent for the selected permissions.
3. Generating Client Secret on the Microsoft Azure Portal
To complete the setup on the Microsoft Azure portal for using Microsoft Exchange Online as the mail server, you need to generate a client secret. PAM360 will use this client secret to authenticate with Microsoft Exchange Online. Follow these steps to generate the client secret on the Microsoft Azure portal.
- Go to the App registrations page and select PAM360 (the display name entered during app registration) from the list of registered applications.
- Navigate to Manage >> Certificates & secrets from the left pane.
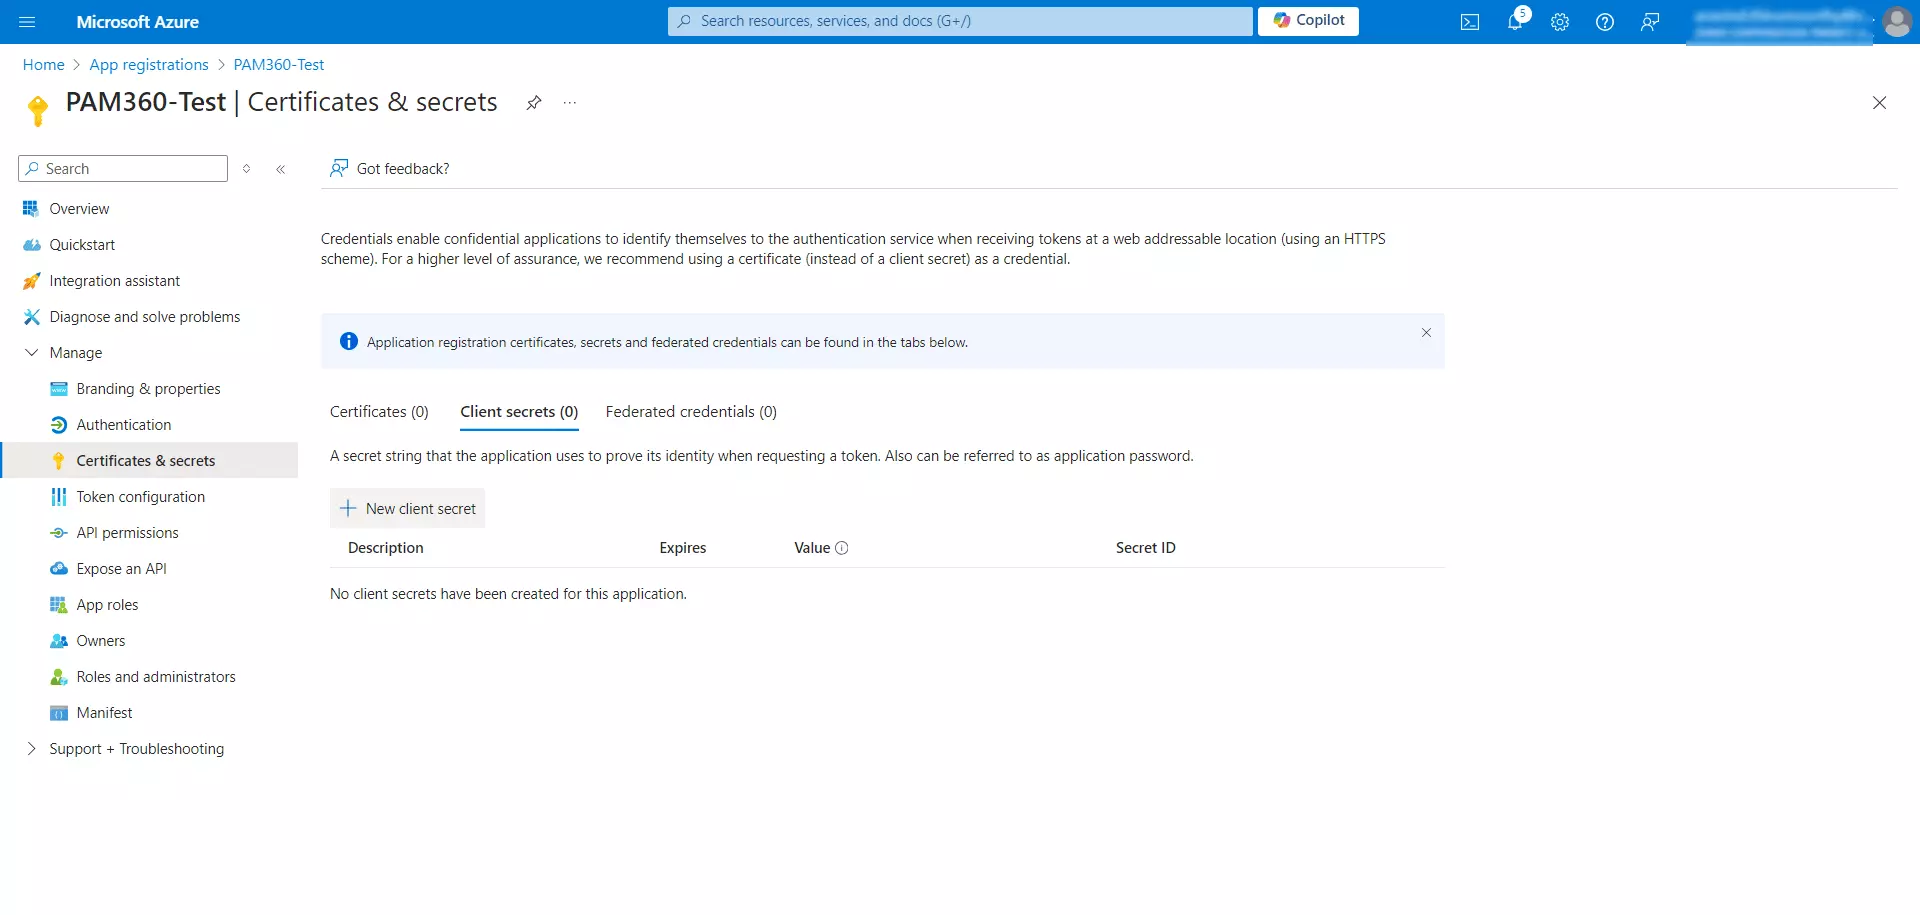
- Switch to the Client secrets tab and click + New client secret.
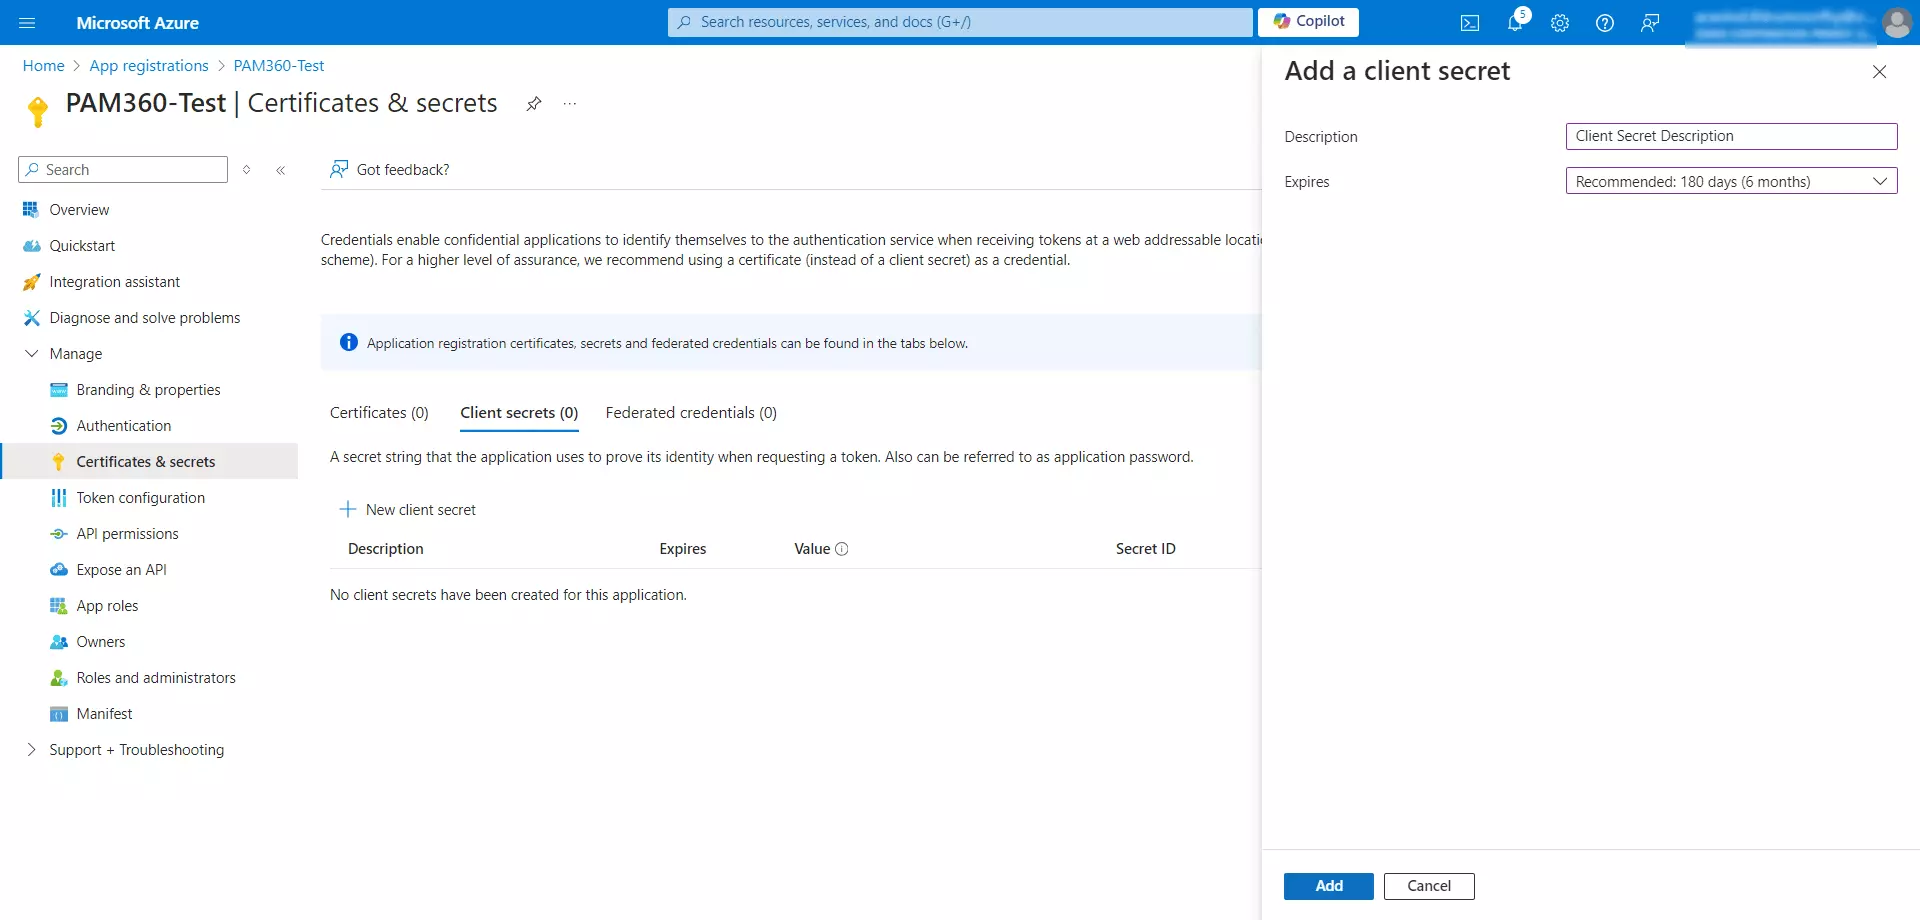
- In the Add a client secret window, enter a description for the client secret, choose an expiry period from the drop-down menu, and click Add.
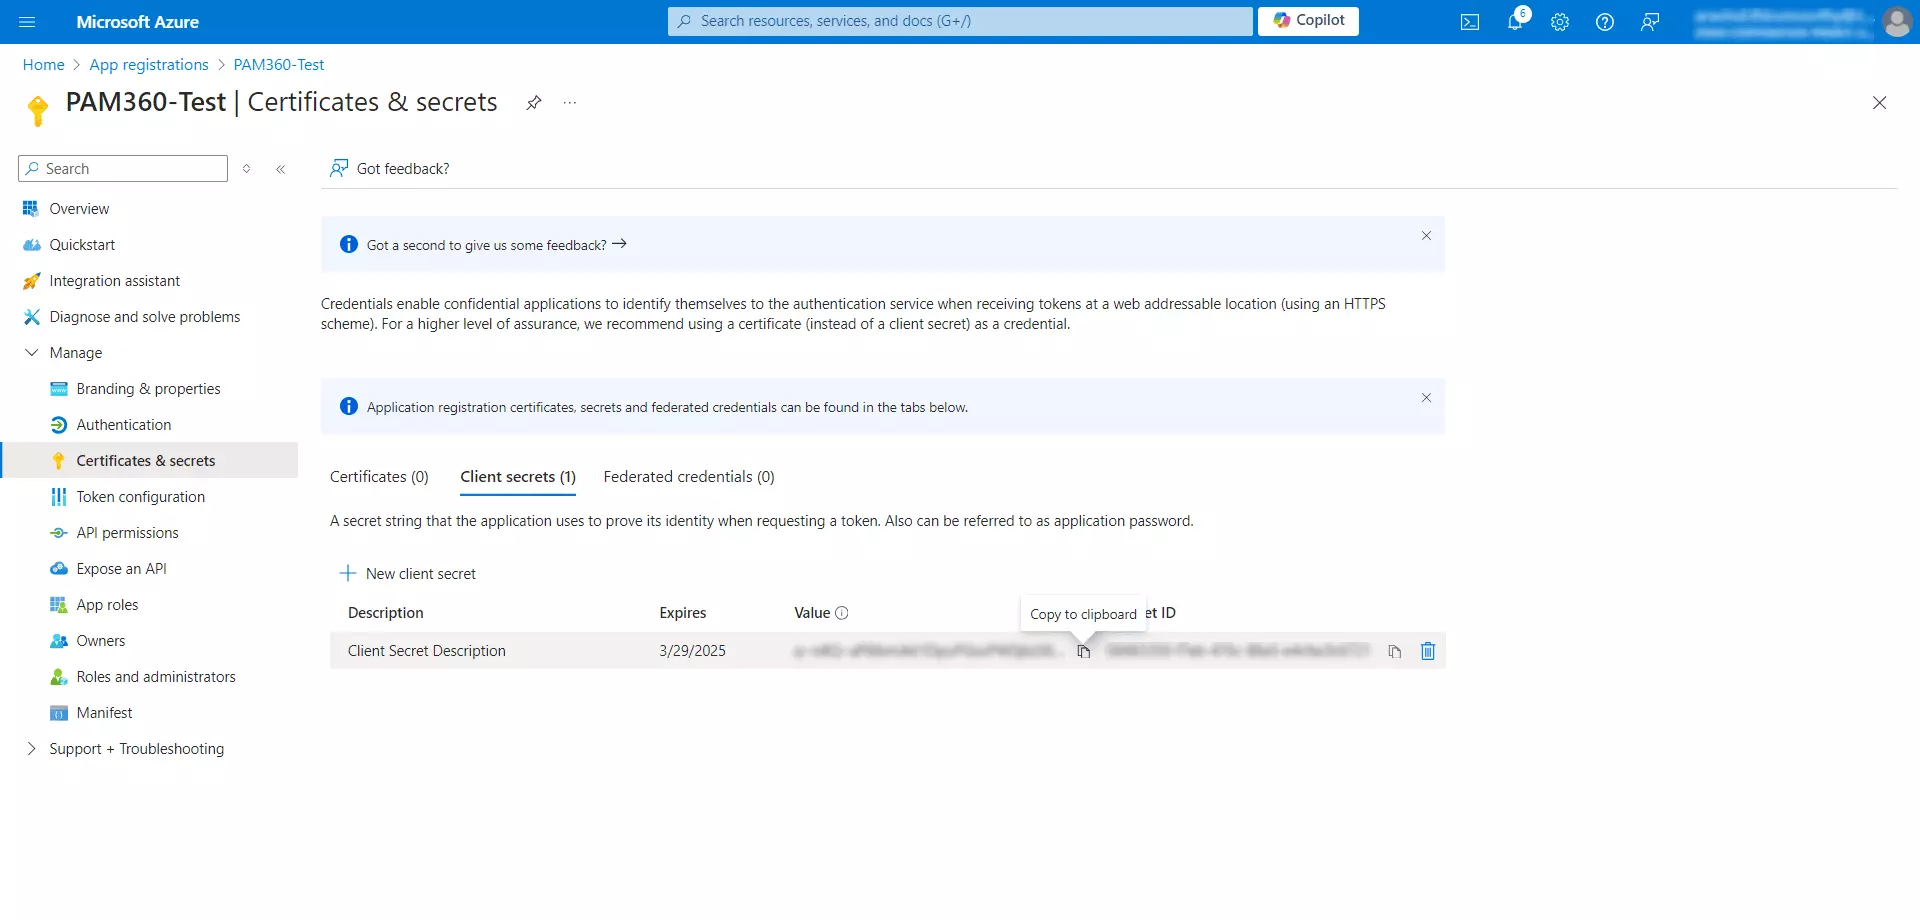
- The client secret value will be displayed under the Value column on the Certificates& secrets page. Copy and save this value securely, as it will be shown only once. This client secret is required to configure Microsoft Exchange Online as the mail server in PAM360.
- Once the application is registered with the required permissions, go to the PAM360 web interface and configure the mail server settings using the obtained client secret value.
4. Configuring Microsoft Exchange Online as Mail Server in PAM360
To configure Microsoft Exchange Online as the mail server in PAM360, specify the required mail delivery, connection, authentication, and access settings in the PAM360 interface. Follow these steps to configure Microsoft Exchange Online as the mail server in PAM360:
- Navigate to Admin >> Server Settings >> Mail Server Settings.
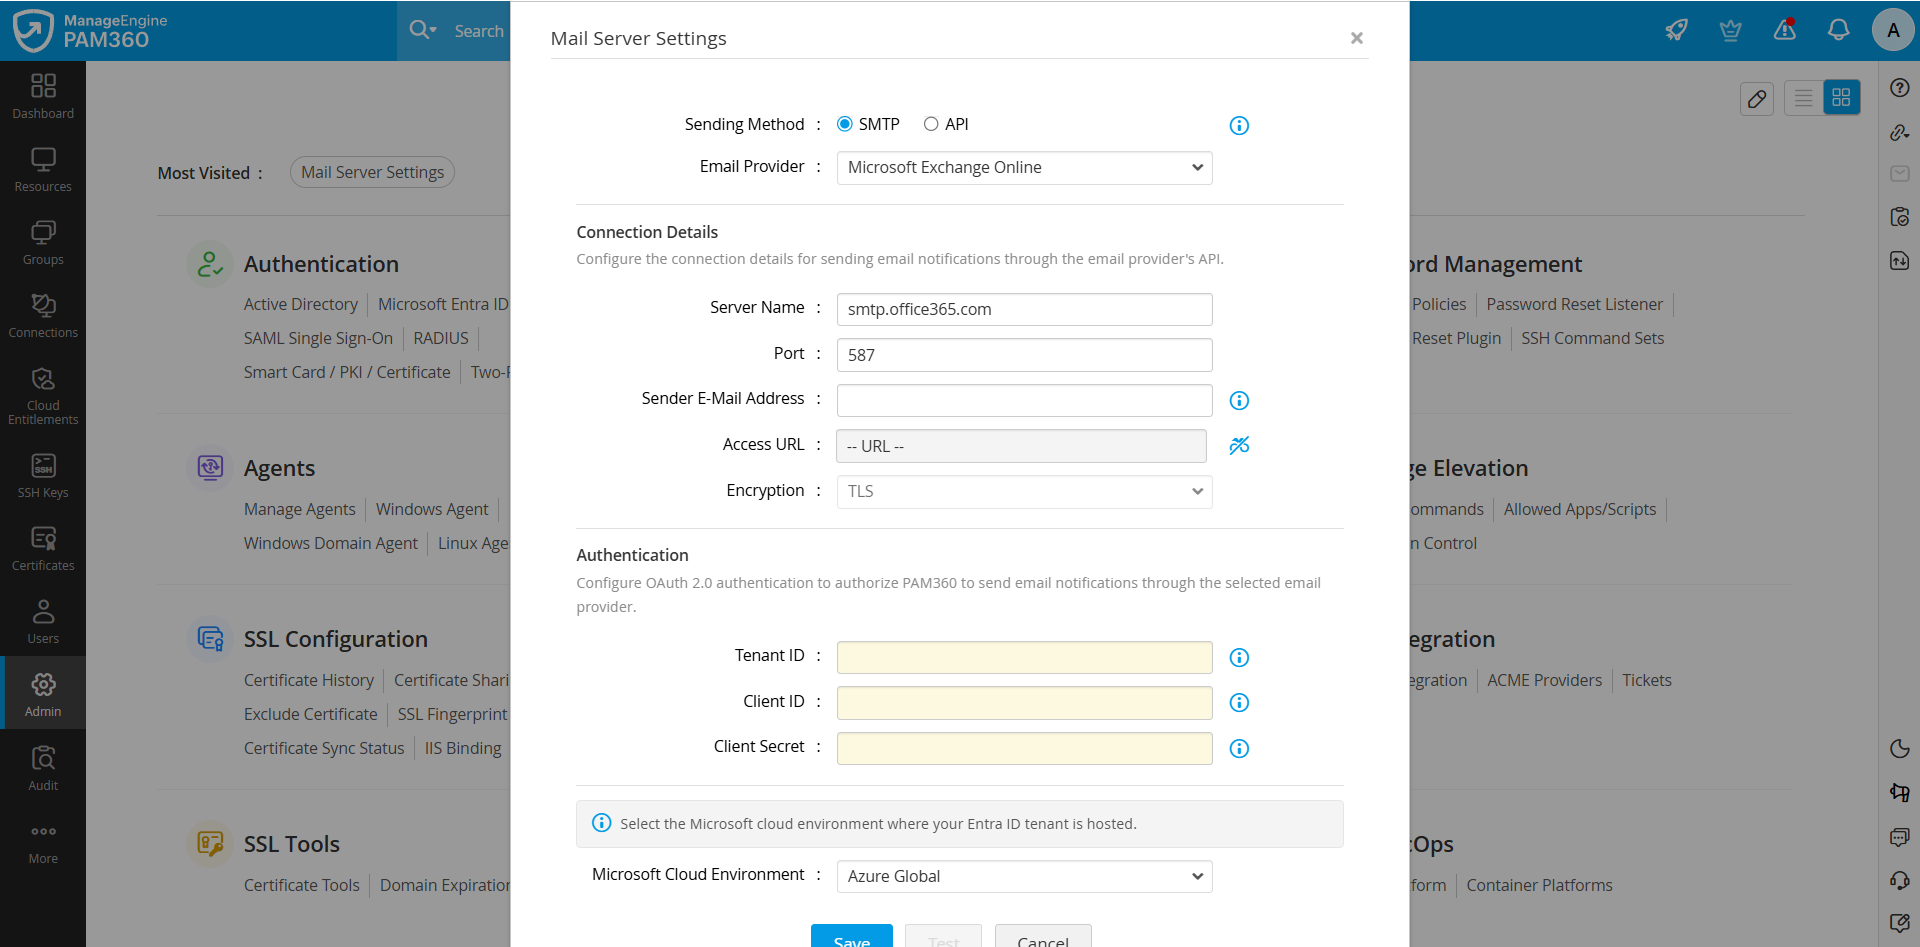
- In the Mail Server Settings window, select the email sending method and the email provider.
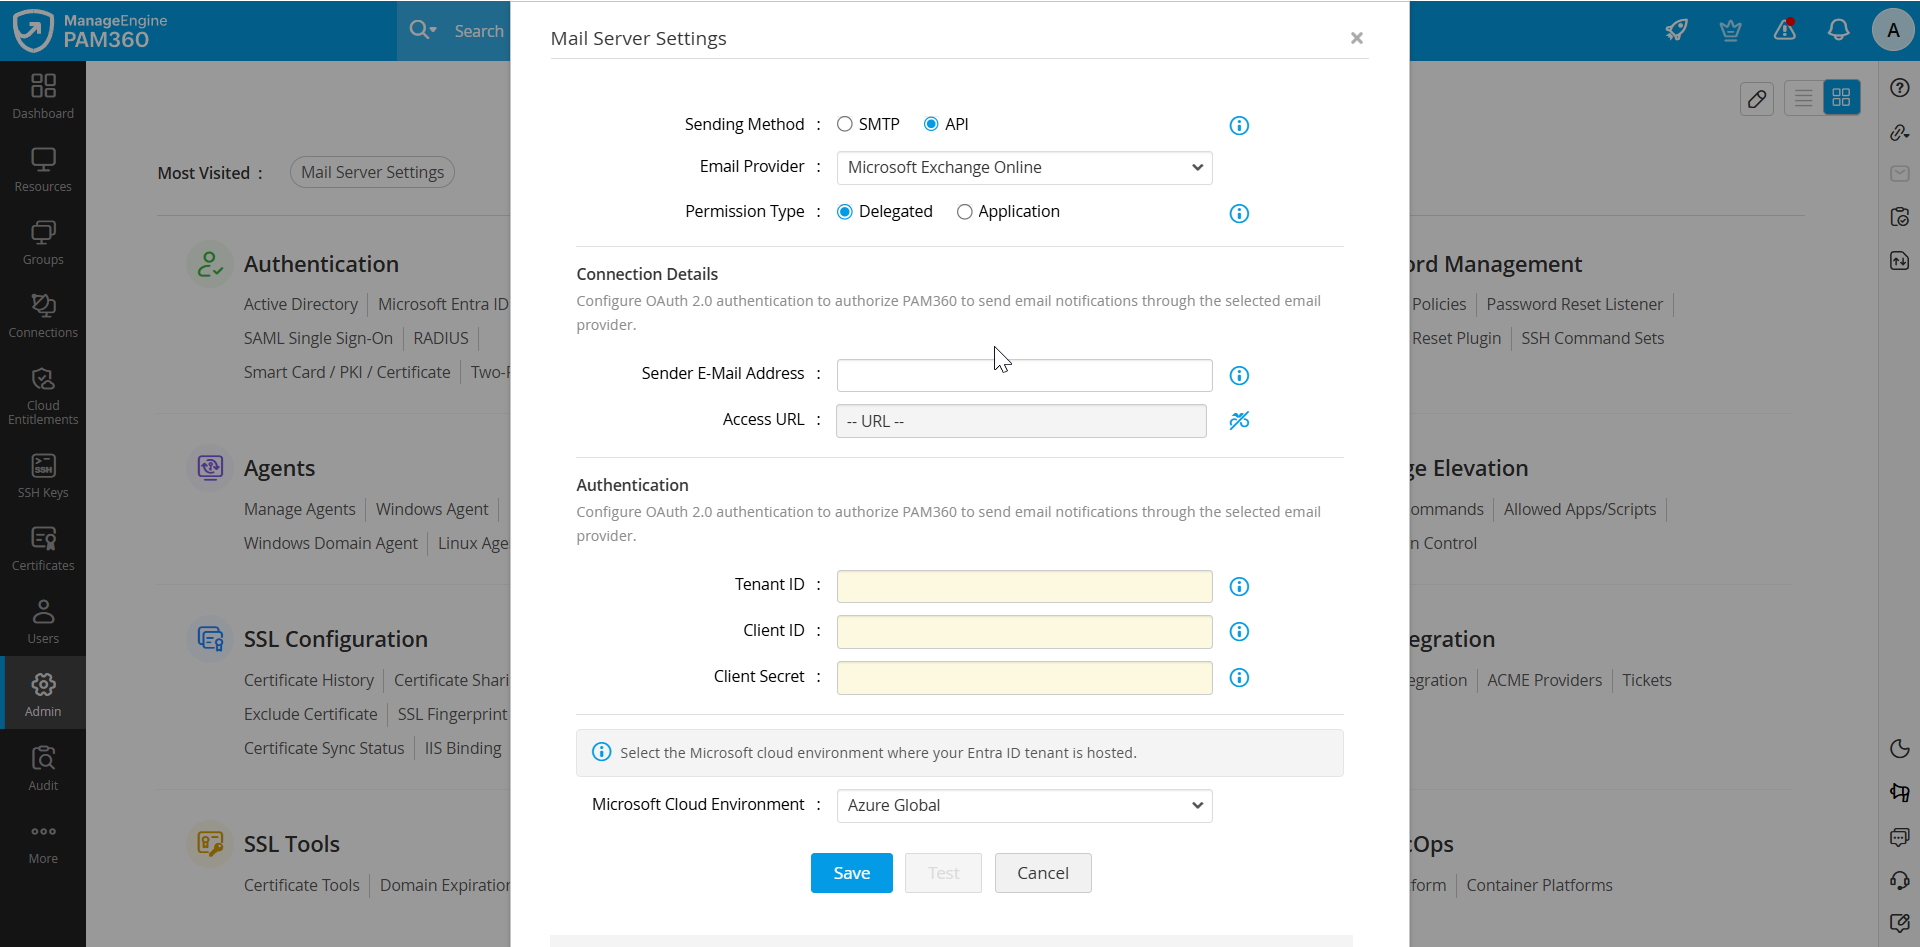
- Sending Method - Choose between SMTP or API as the desired email delivery method. If you choose API as the email delivery method, then select the permission type.
- Delegated - Sends email on behalf of an authorized user using OAuth 2.0 authorization.
- Application - Sends email without a signed-in user using the OAuth 2.0 client credentials flow.
- Email Provider - Select Microsoft Exchange Online as the service provider from the drop-down.
- Sending Method - Choose between SMTP or API as the desired email delivery method. If you choose API as the email delivery method, then select the permission type.
- Under the Connection Details section, enter the following details which are required depending on the sending method you selected:
- Server name - Enter the actual name of the SMTP server, such as smtp.office365.com.
- Port - Specify the port number for TLS (587) or SSL (465), depending on your setup.
- Sender E-mail Address - Provide a valid email address for sending onboarding messages, notification alerts, and license expiry reminders. Enter the email address PAM360 should use to send email notifications. For SMTP or API with Delegated permission, specify the mailbox account used to authorize PAM360. For API with Application permission, specify a licensed mailbox that the application is permitted to use for sending email.
- Access URL - Enter the PAM360 access URL to be included in the mail intimations sent to the users. This URL should match the access URL specified in the Redirect URI field in section 1. For example, if the mentioned Redirect URI is https://pamserver:8282/pam360redirect/AzureOAuth, then the Access URL given here should be https://pamserver:8282.
- Under the Authentication section, enter your Azure environment credentials:
- Tenant ID - Enter the directory ID of the Azure application.
- Client ID - Enter the application ID of the Azure application.
- Client Secret - Enter the client secret generated on the Microsoft Azure portal.
- Azure Environment - Choose the appropriate Azure environment from the drop-down menu.
- After entering the required details, click Save to save the configuration.
- If you selected SMTP, or API with Delegated permission as the sending method, you will be redirected to the Microsoft sign-in page. Log in using the email address specified in the Sender E-mail Address field in PAM360 and complete the authorization. This is a one-time operation. This steps does not apply when API is selected as the sending method with Application permission.
- After saving the mail server configuration and completing the OAuth authorization, click Test. Specify the recipient email address to send a test email and verify the mail server configuration.
Additional Detail
For OAuth-based mail server configurations, the Test option is enabled only after the mail server settings are saved and the OAuth configuration is completed successfully.
Microsoft Exchange Online is now configured as the mail server in PAM360 using the selected mail delivery method and permission type.