Creating a new downtime schedule
The Downtime Schedules table displays:
- The Schedule Name
- Status of the schedule
- Occurrence Periods
- Next schedule time i.e the start time, end time and the corresponding time zone.
Edit  and delete options are available in the table to modify the schedule or delete it.
Creating a new schedule
The Downtime Scheduler provides you with the option to schedule a time period for which monitoring can be paused. You can choose between time periods of recurrence - Daily, Weekly or Once. You can add a new Schedule and view it from the Settings tab. Follow the given steps to add a schedule:
- Click Add New. It takes you to 'New Schedule' page.
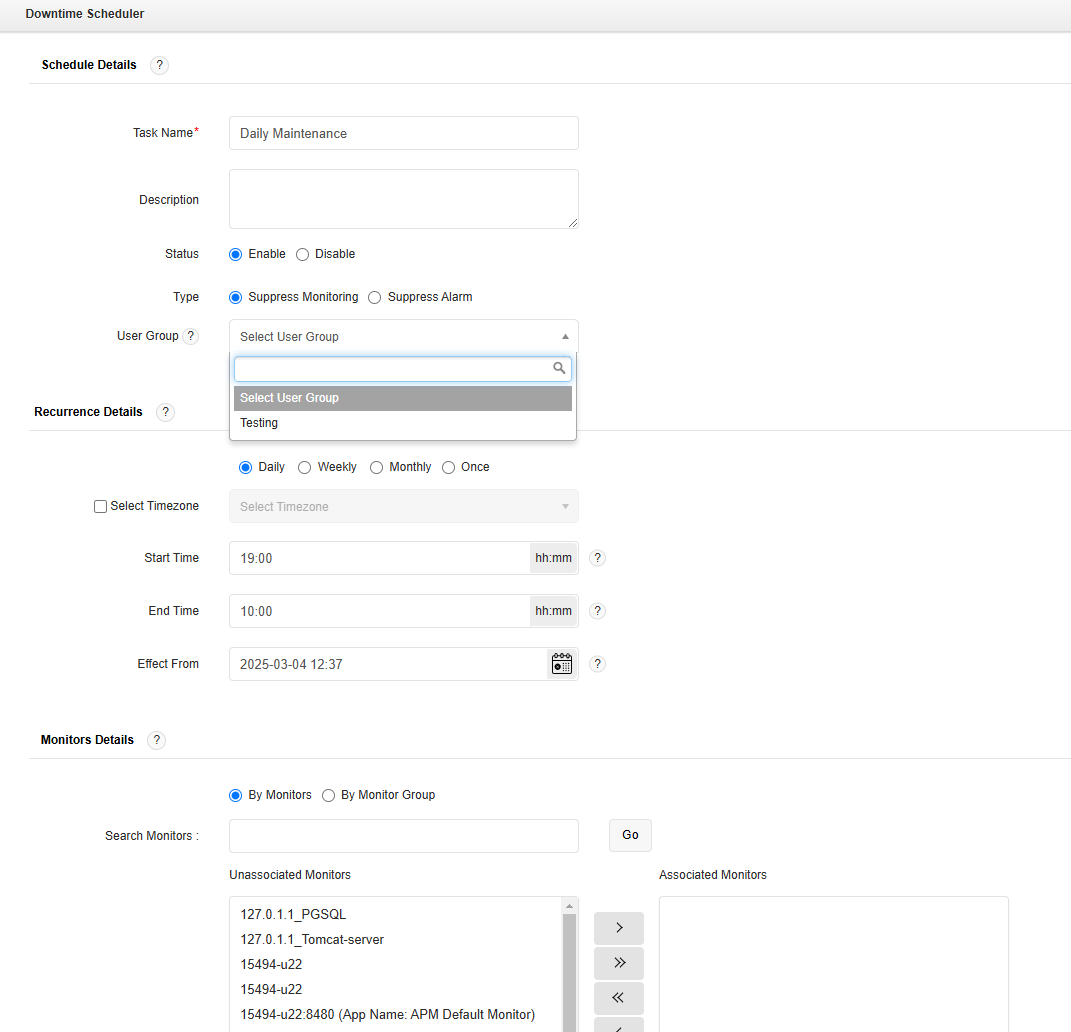
- Enter the Task Name.
- Enter the Description of the Task.
- By default, the Status would be 'Enable'.
- Using the option Type, you can enable or disable data collection during maintenance. There are two options available in Type as, Suppress Monitoring and Suppress Alarm.
- Suppress Monitoring: Enabling Suppress Monitoring option will make sure that data collection do not take place during downtime.
- Suppress Alarm: Enabling Suppress Alarm option will allow data collection and restrict alarm generation during maintenance.
- Select a User Group from the dropdown to allow users within the same user group to edit the Downtime schedule. This option is applicable only if the Associate User Group with Downtime Schedulers option is enabled.Note: The Downtime Schedule owner retains control over the schedule, regardless of user group changes, such as:
- Being removed from the associated group
- Modifications or removal of the selected group
- Under Recurrence Details, choose the time period for which monitoring is not needed. The schedule can be Daily, Weekly, Monthly or Once. (You can use the Edit option to modify the time period later).
- If you select Daily, specify the Start Time and Completion Time of the schedule. You can also choose the starting date for the schedule.
- If you choose Weekly, you can specify upto 7 schedules for the week. Specify the Start Time and Completion Time of the schedule and press More to create another schedule.
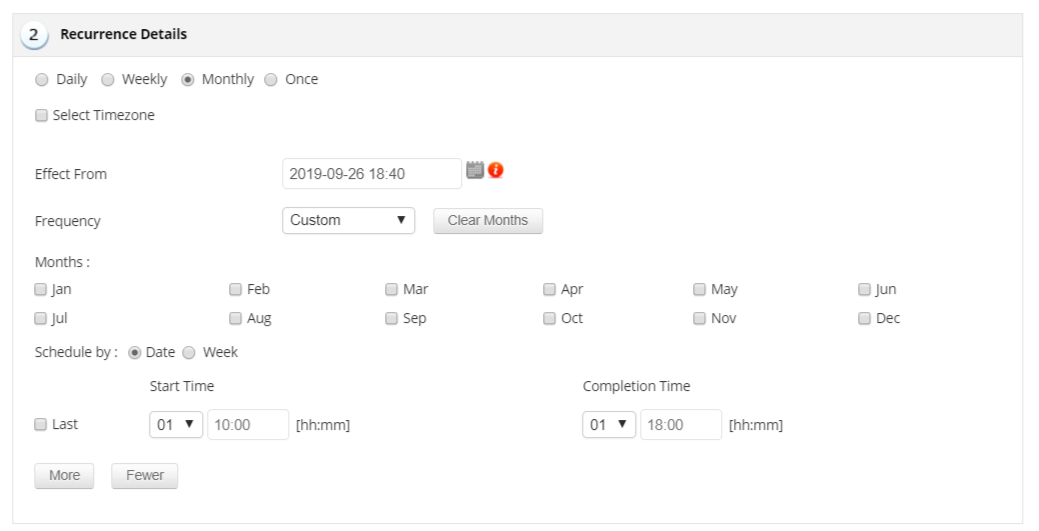
- If you choose Monthly, specify the frequency of the schedules — all months, alternate even/odd months, quaterly, triannual, custom and biannual. If Custom is selected, you'll have to choose the Months and choose whether you want to specify the schedule by date or week depending upon which, you'll have to provide the Start Time and Completion Time.
- If date is chosen, select the date and enter the time for start time. To choose the day of the month in reverse order, check the Last option. You can choose upto the 7th day from end of the month.
- If week is chosen, select the week number and the day of the week, and enter the time for start time.
- Enter the span in number of days and the time of the day for Completion time. You can add upto 5 schedules in monthly.
- If you choose Once, provide the Start Time, End Time along with the date of the schedule. Click on More to create another schedule. You can add upto 5 schedules in once.
- By enabling the Select Timezone checkbox you can select the required timezone from the drop-down list.
- In the Monitors Details table, you can associate a downtime scheduler task with monitors or process monitors for which monitoring is not required. You can either associate the task with the existing list of monitors or with the available monitor groups. Select the monitors that do not require monitoring. Once saved, the selected monitors will have their maintenance tasks scheduled.
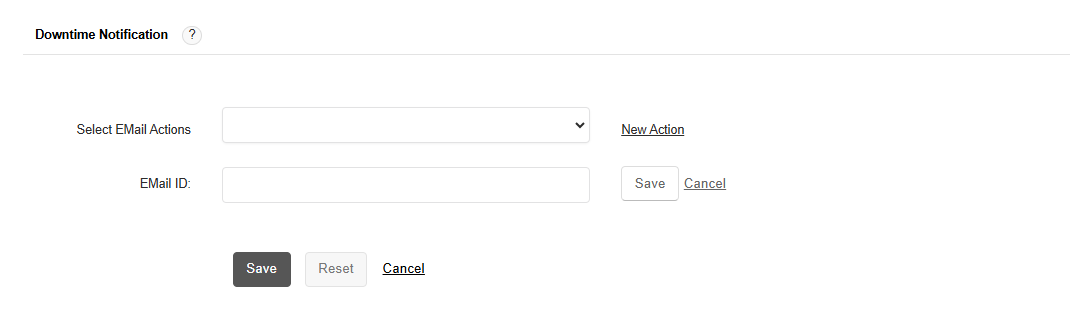
- Under the Downtime Notification section, use the Select Email Actions drop-down to choose an existing email action or create a new one by clicking New Action.
- In the EMail ID field, enter the recipient email address that should receive downtime notifications.
- Click on Save to complete the schedule.
Note:
- After creating a new downtime schedule, it takes about 10 to 15 minutes to sync the data from the Central server to the Probe servers.
- If you want to add downtime schedules for processes and/or Windows services, you should select the Enable downtime scheduling for processes/Windows Services option under the Downtime Scheduler Settings tab.