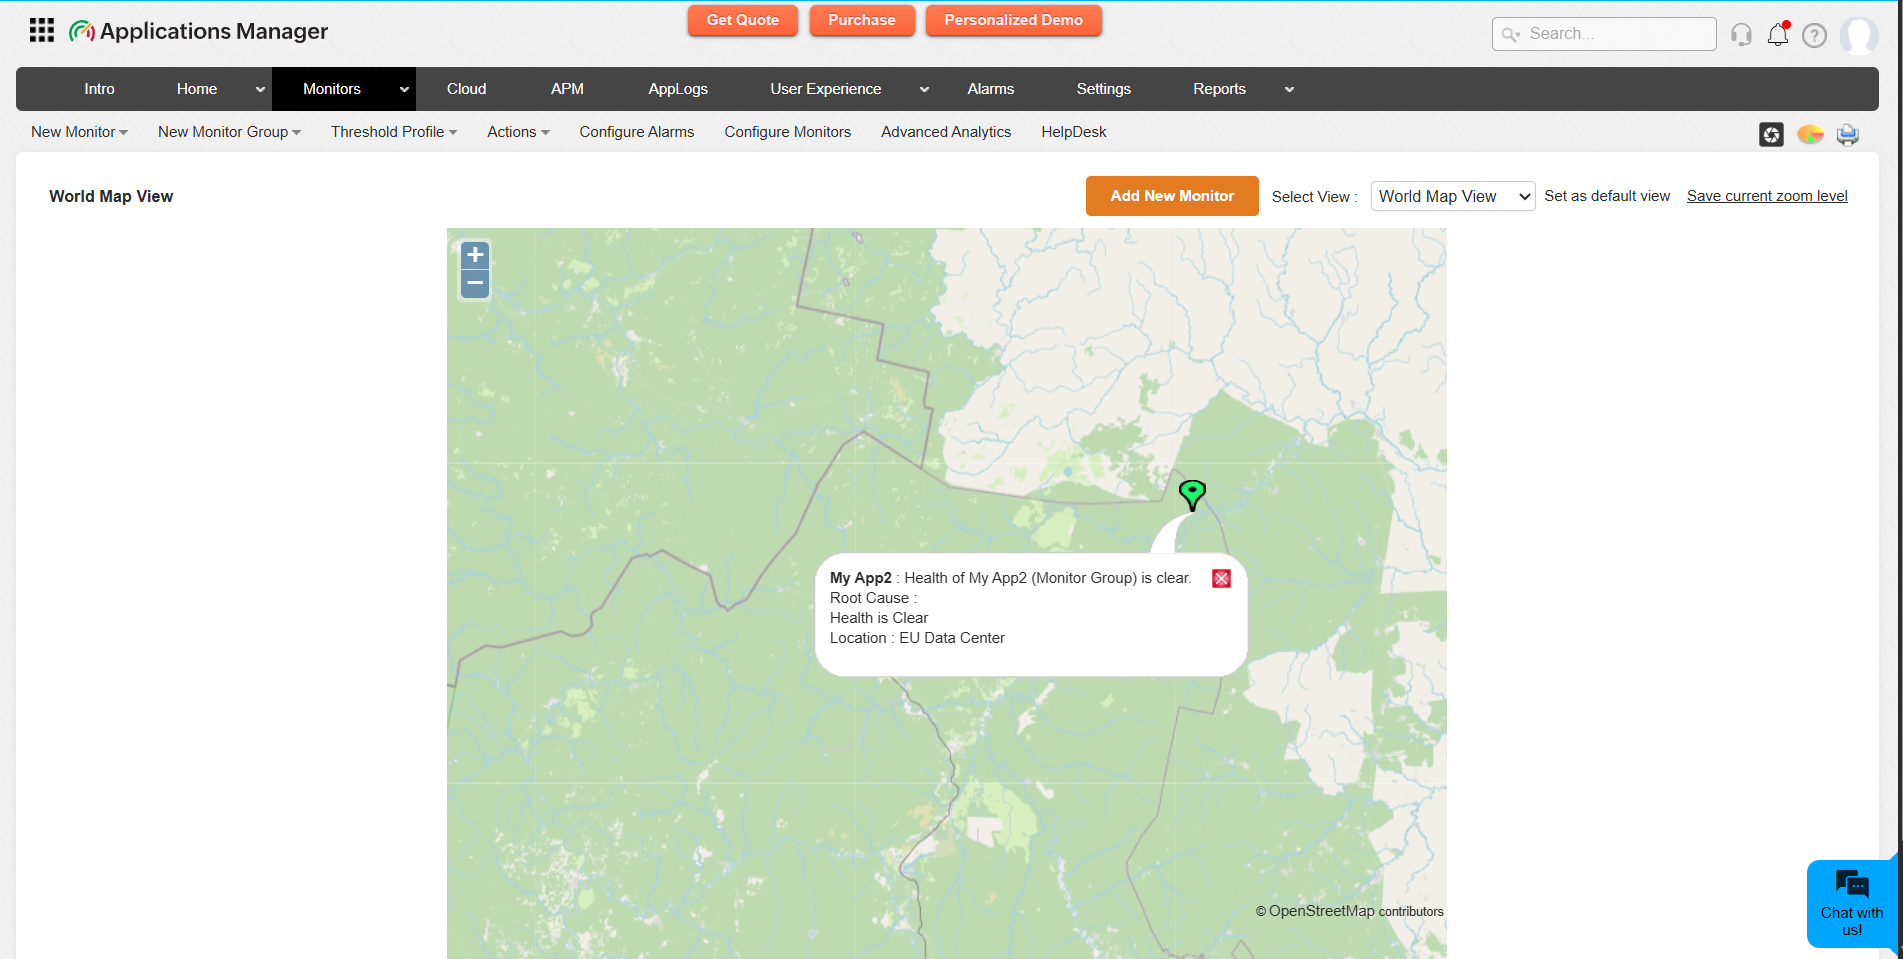
World Map View
The World Map View in ManageEngine Applications Manager enables administrators to gain a comprehensive understanding of how their infrastructure is distributed across different geographic locations.
You can associate locations with monitor groups so they are displayed on the World Map view. Monitor groups are logical collections of one or more monitors that provide a consolidated and holistic view of your business environment. This provides a consolidated and holistic view of your business environment and allows you to visually track the status of distributed resources as well as provides root cause analysis (RCA) data to help identify and troubleshoot issues efficiently.
Associating locations on World Map View while creating Monitor Groups
Applications Manager helps you instantly associate a location on World Map View while you are creating a new Monitor Group. Follow the steps given below to associate a location:
- While creating a new Monitor Group, select the appropriate location from the available list shown in the dropdown.
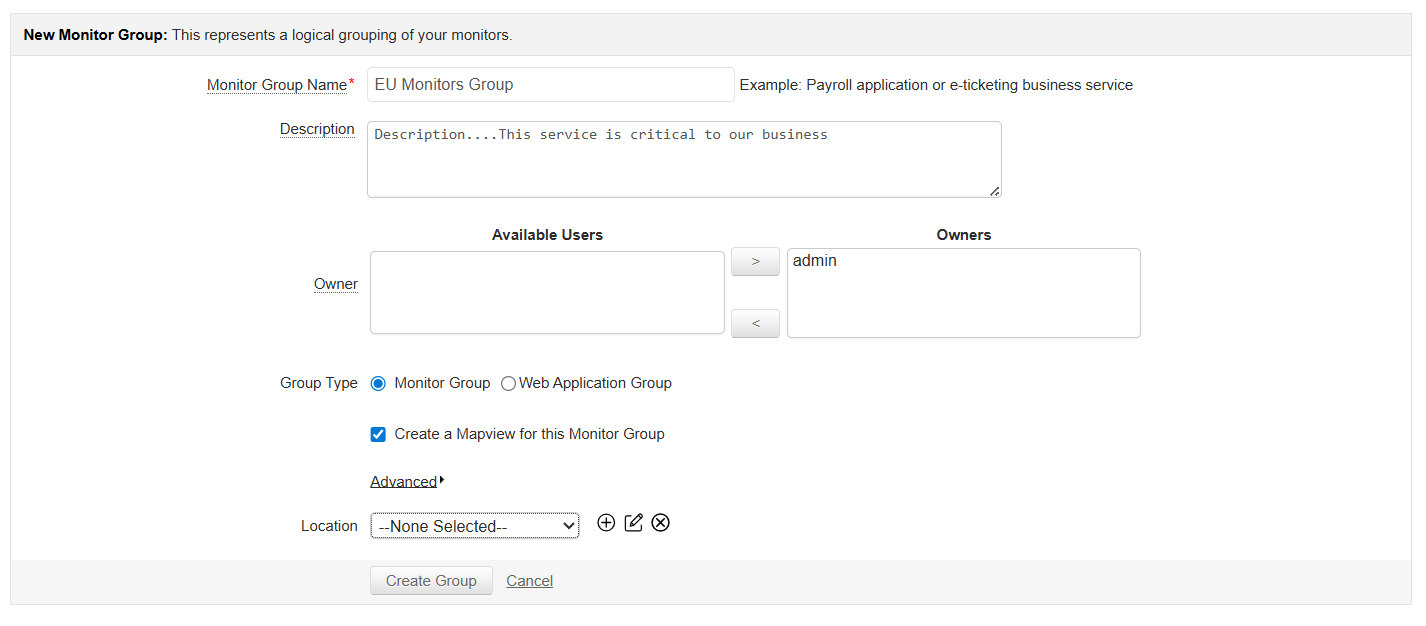
- Alternatively, click Advanced → Add Location to open the World Map, where you can select and add custom locations directly to the map.
- The selected location will be reflected on the World Map, allowing you to visualize its status geographically. You can modify or remove assigned locations, if required. However, these actions are restricted only to users with Administrator role.
- Additionally, you can save the current zoom level as per your preference by clicking the Save current zoom level option located at the top-right corner of the World Map View page.
World Map Settings
You can configure World Map View Settings such as managing the locations or adjusting the Height and Width of the map by navigating to Settings → Integration with Portals → World Map. Following are the options available in World Map Settings page:
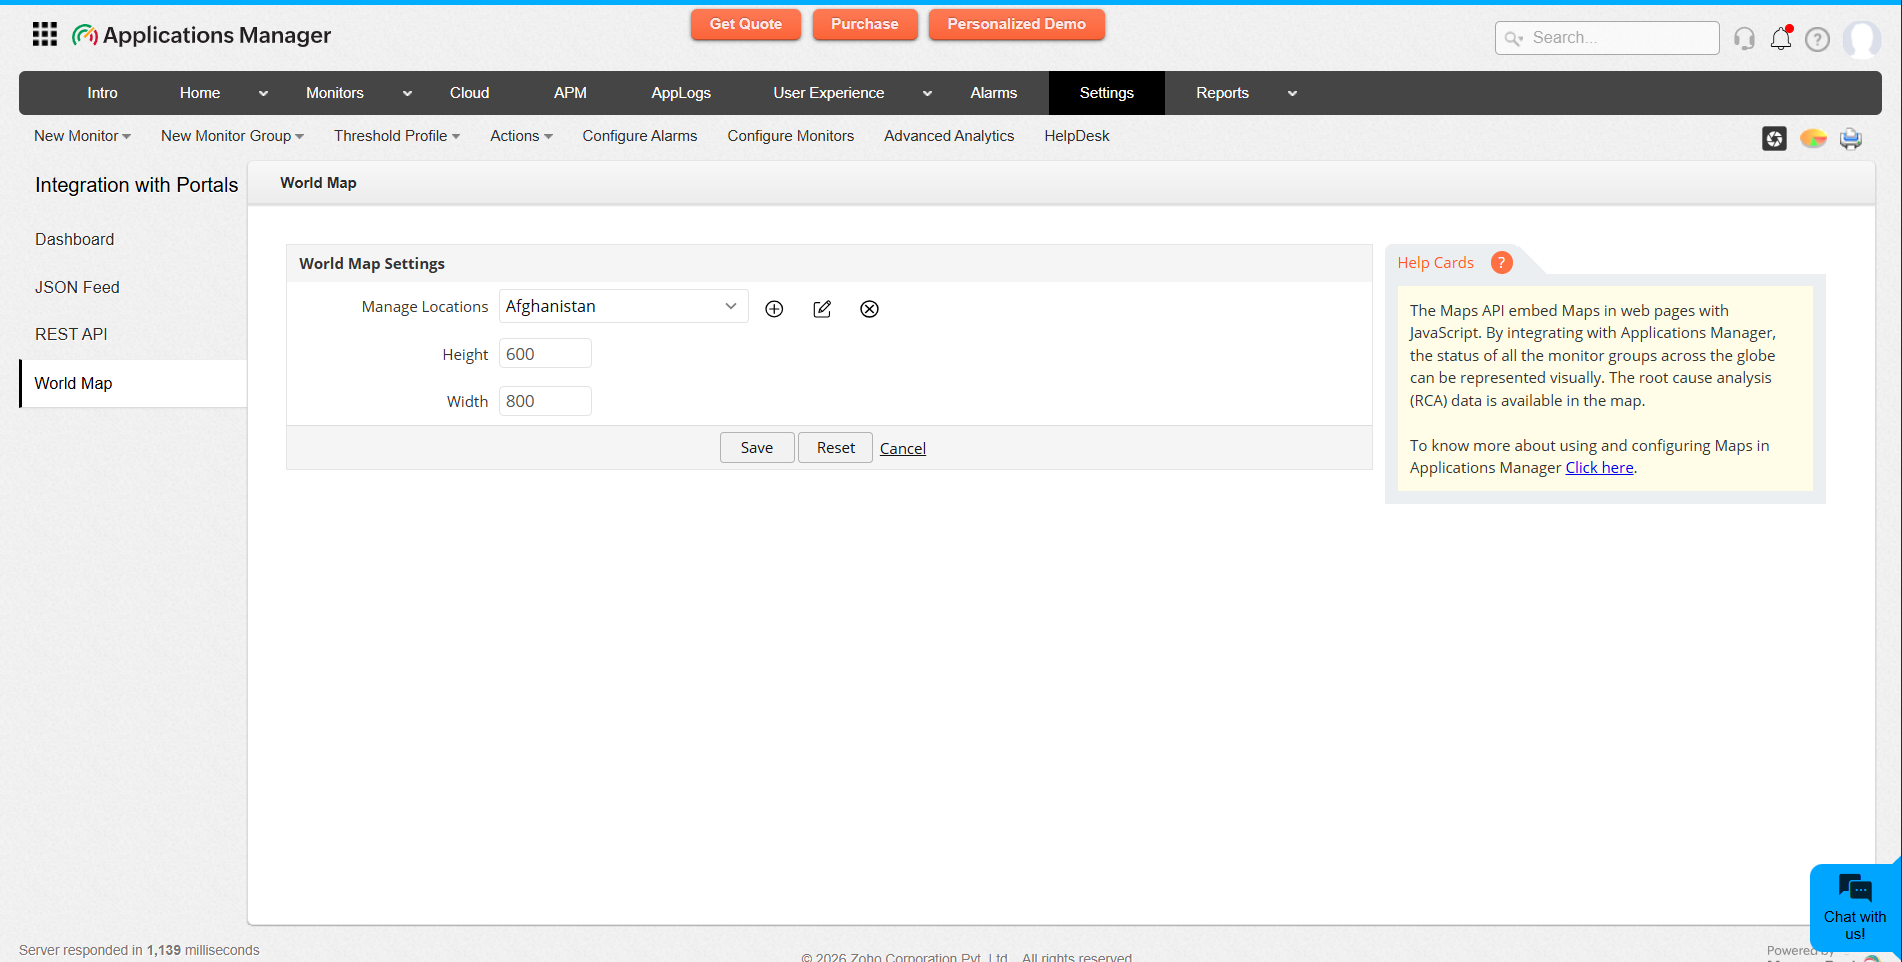
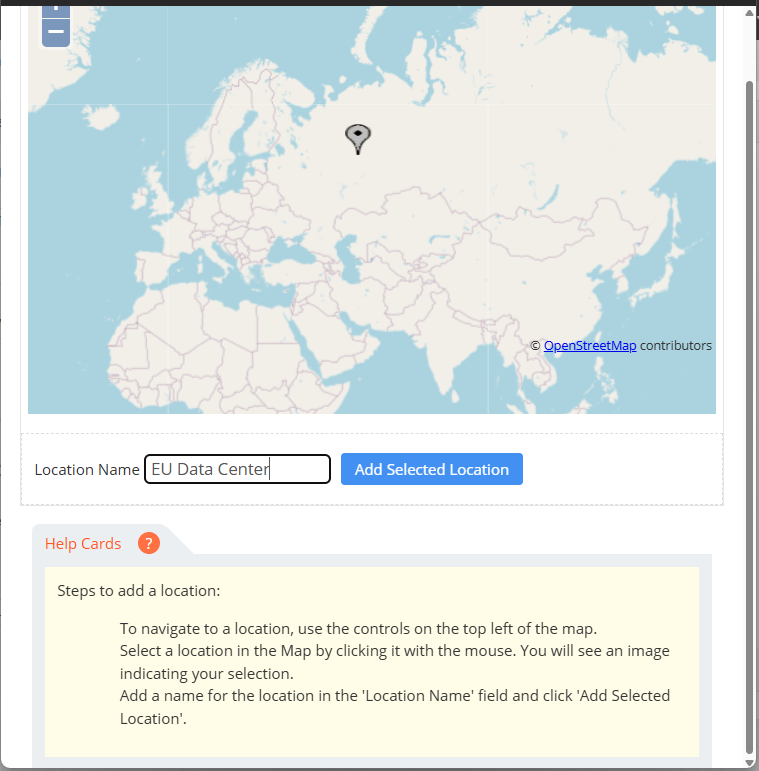
- Manage Locations: Allows you to select from a predefined list of locations as well as add, modify, or delete locations on the World Map. To add a location on World Map, follow the steps given below:
- Go to Manage Locations and click on Add Location to open the World Map. This will open the World Map in a separate window.
- Use the navigation controls at the top-left of the map to move and zoom to the desired area.
- Click on the map to select a location. A marker will appear indicating your selection.
- Once the location is marked on the map, specify a name for the location in the Location Name field and click Add Selected Location to save it.
- You can edit or delete existing locations by selecting the appropriate options shown on the page.
- Height & Width: Allows you to customize and adjust the display by specifying the height and width of the World Map as needed.