Integrating/Adding Entra ID to Endpoint Central
Before integrating Entra ID with Endpoint Central, ensure the following requirements are met:
- Entra ID Subscription:
Ensure you have an active Entra ID subscription (e.g., Entra ID Free, Premium P1, or Premium P2).
- Endpoint Central Access:
You must have access to the Endpoint Central platform with at least SoM Full Control and All Computers Scope / Administrator permissions to configure the Entra ID integration.
- SSL Certificate: (Optional)
An SSL certificate can be installed on the server hosting Endpoint Central to ensure secure communication during synchronization.
- Configure NAT Settings:
Configure NAT settings to allow communication between Endpoint Central and Entra ID.
Follow the steps below to add an Entra ID domain to Endpoint Central.
- Navigate to Domain Settings in Endpoint Central:
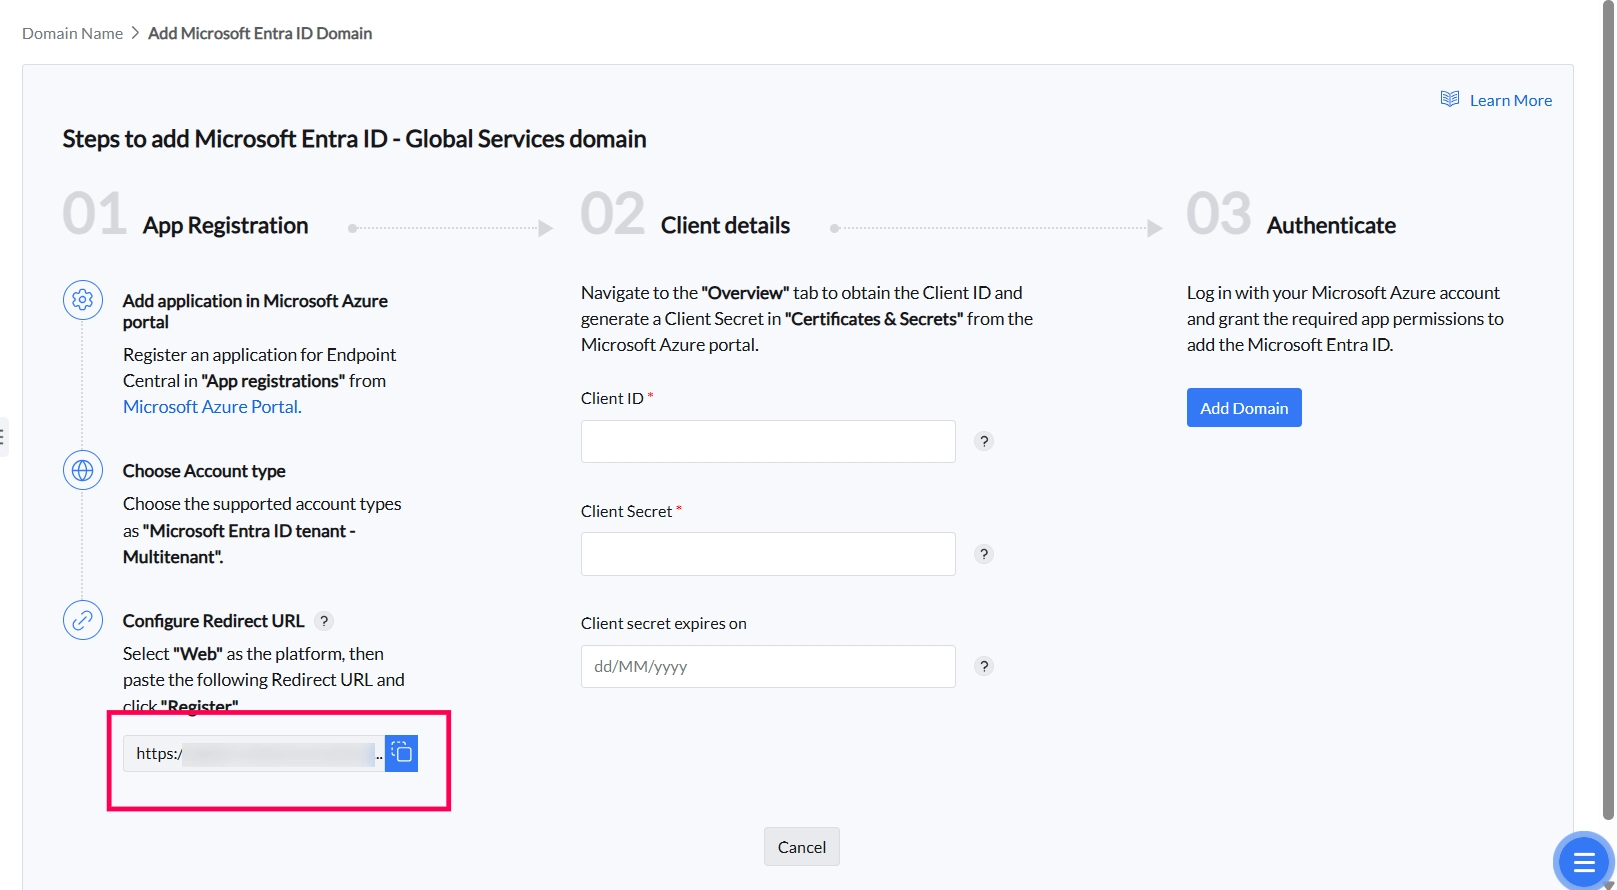
Go to the Agent tab. Select Domain and then click on Add Domain.
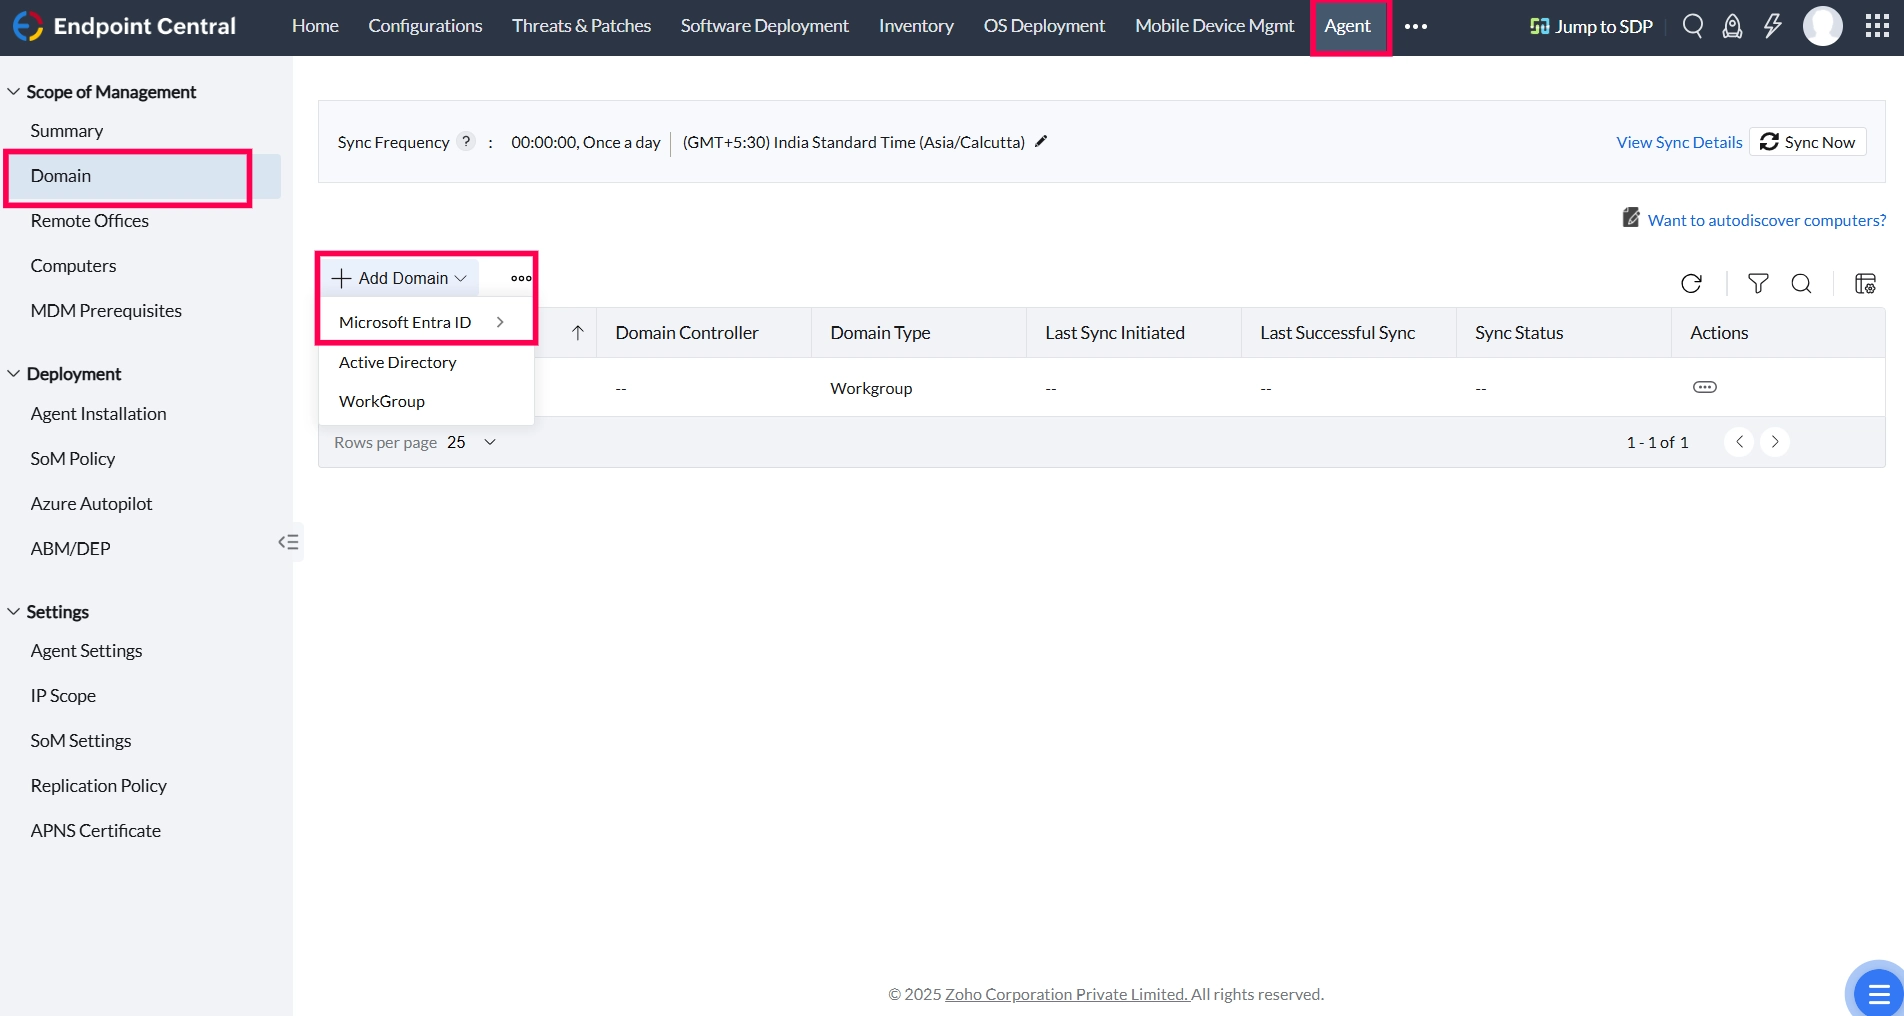
- Select Entra ID as Domain Type:
Click on Add Domain and select Entra ID from the available domain types. Select the specific Entra ID services you wish to integrate (e.g., Global, DoD, etc.).
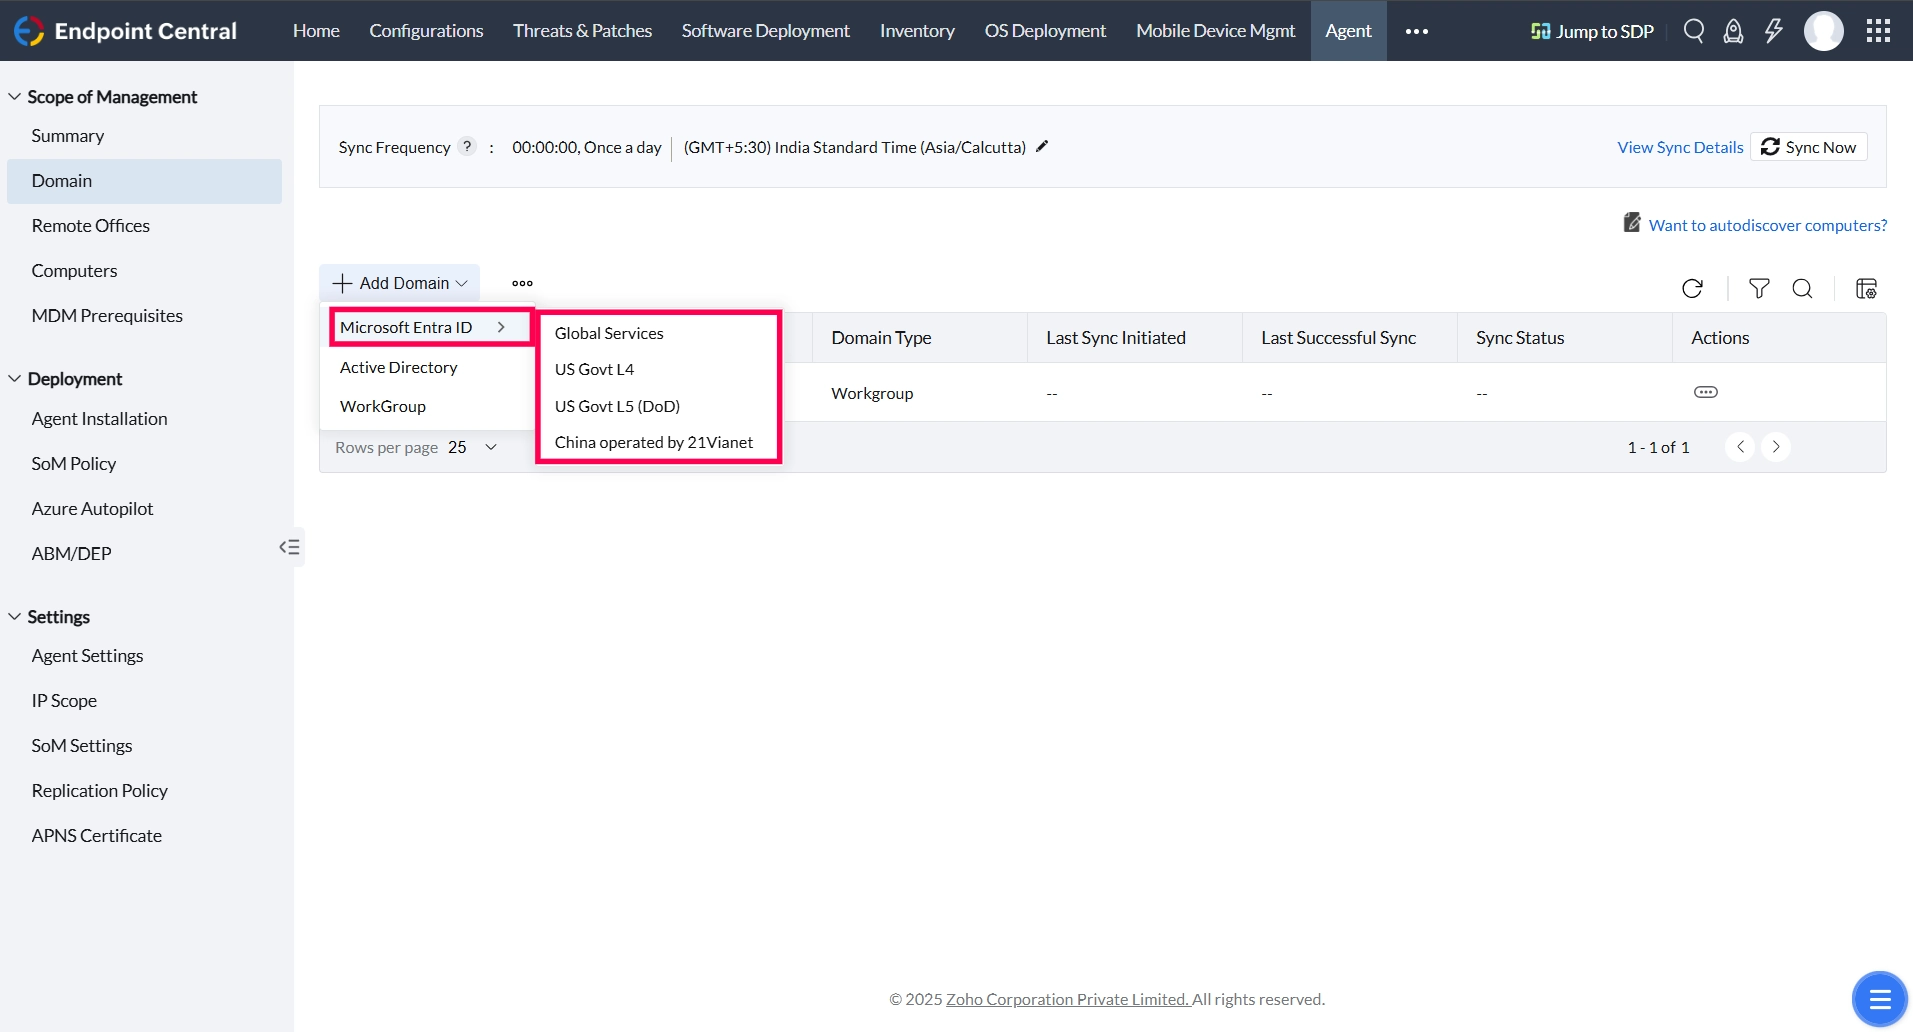 NoteEndpoint Central supports integration with various Entra ID services, including Global, US Govt L4, L5 (DoD) and China operated by 21Via Net.
 - Register the Endpoint Central Application with Entra ID:
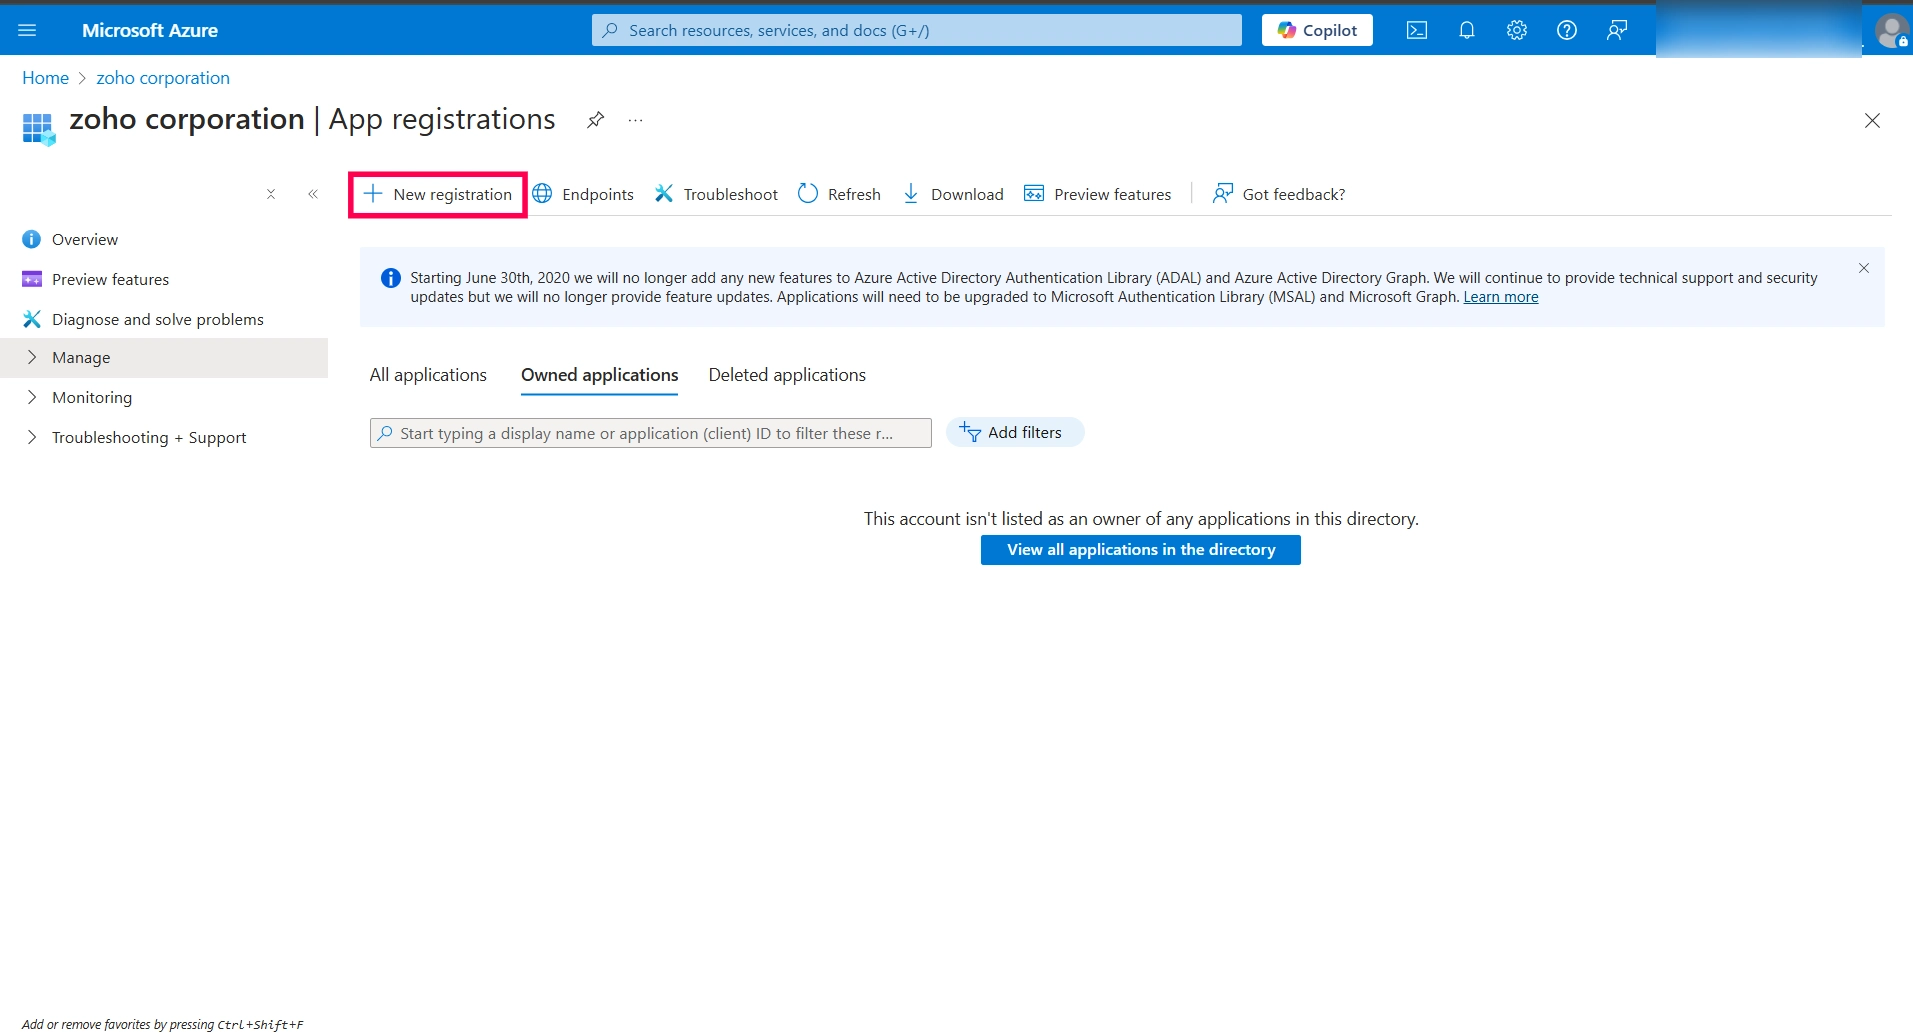
- Log in to the Azure Portal.
- Navigate to App registrations and click on New registration.
- Provide a name for the Azure OAuth app (e.g., UEMS).
- Under Supported account types, select Multitenant.
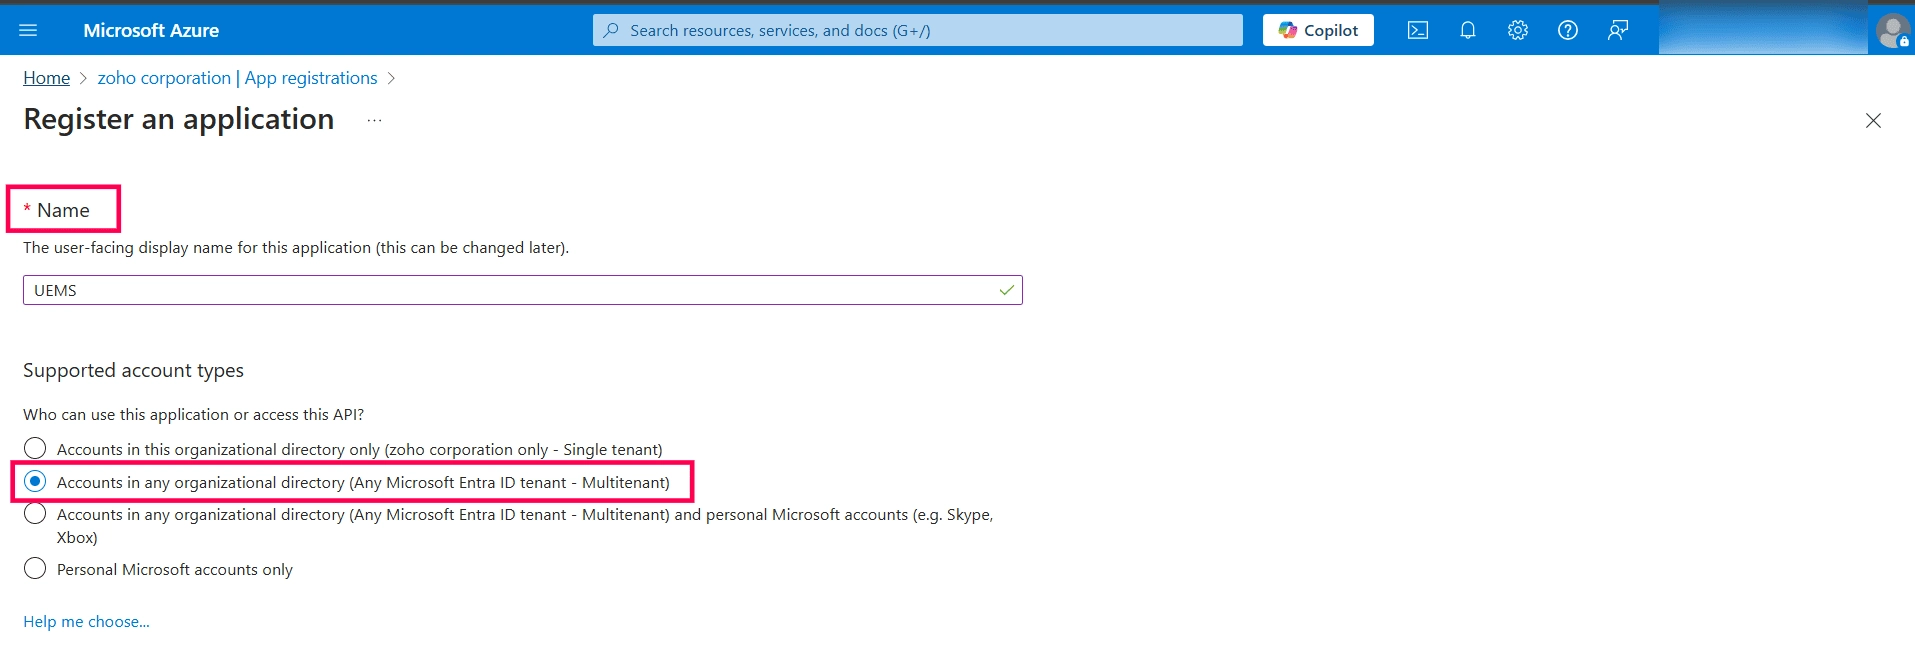
Info: The same app registration can be used for all tenants within your organization.
- Select Web as the Redirect URI, and copy the Redirect URI from the MDM console to enter it here.
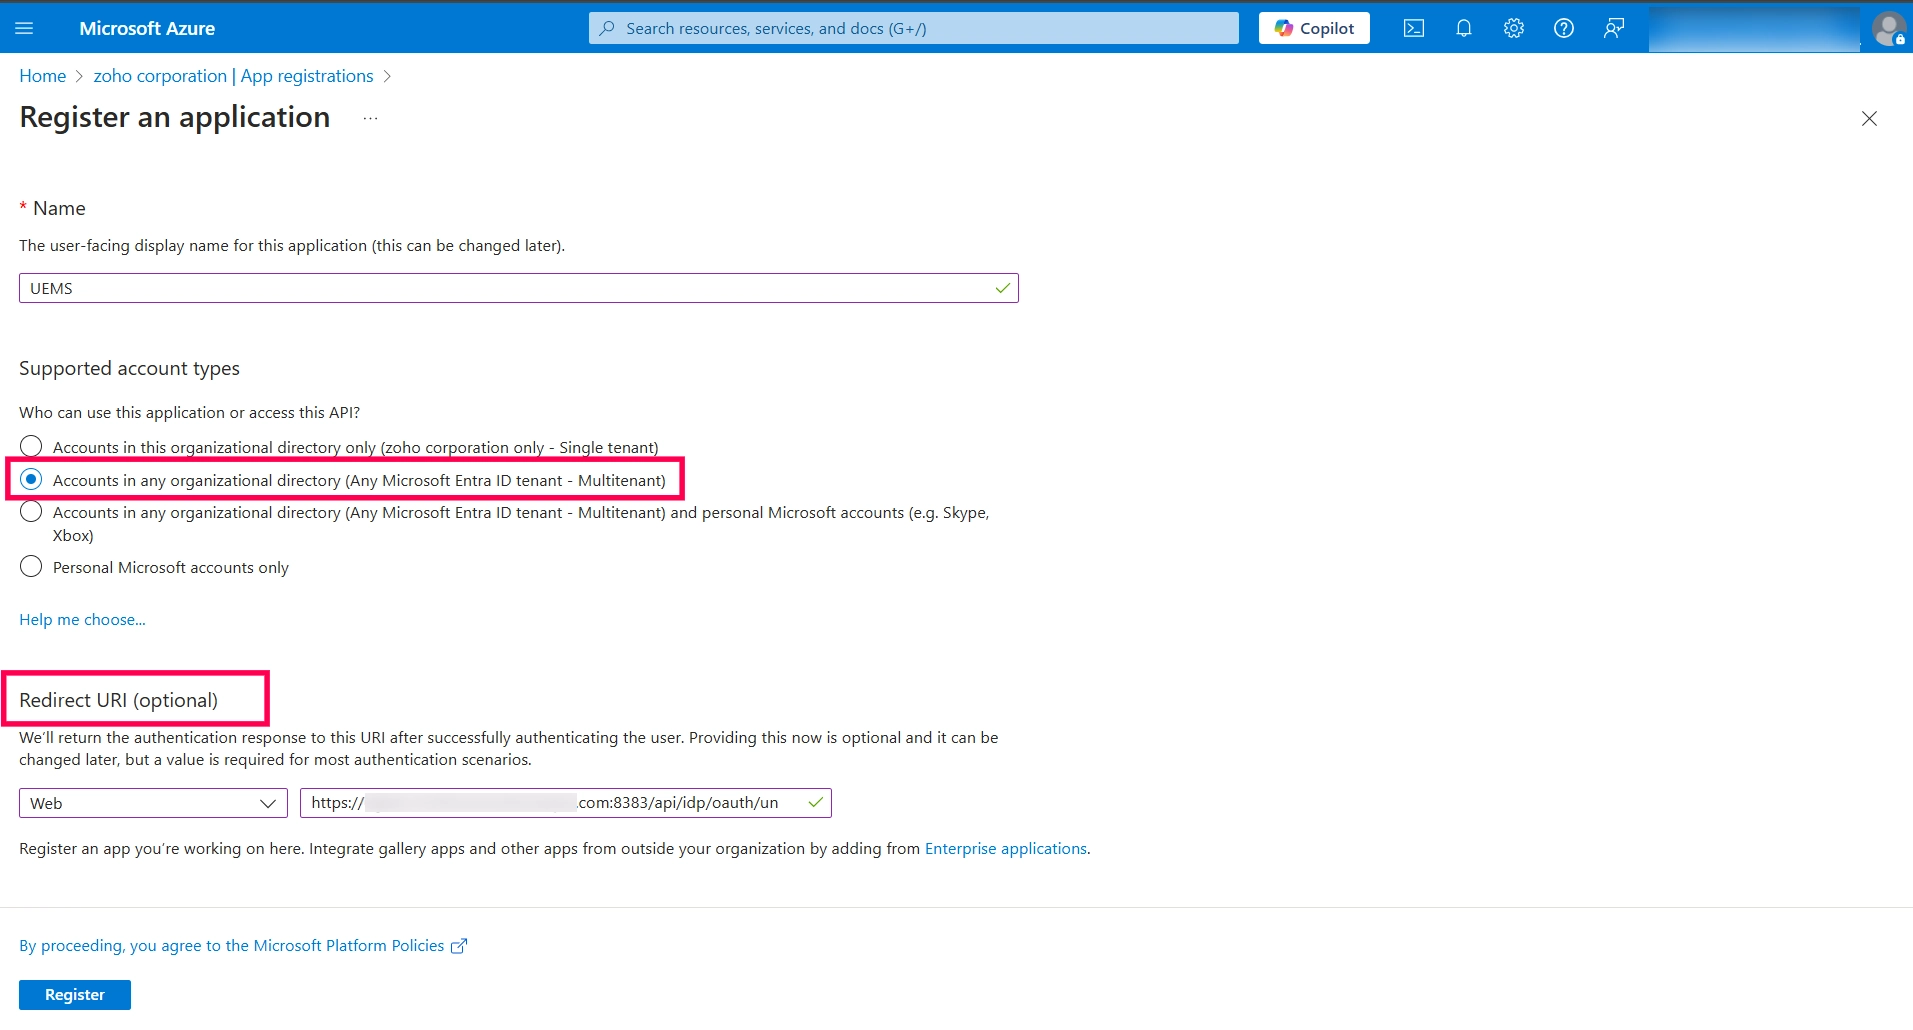
- Click on Register.
- Obtain Client ID and Client Secret:
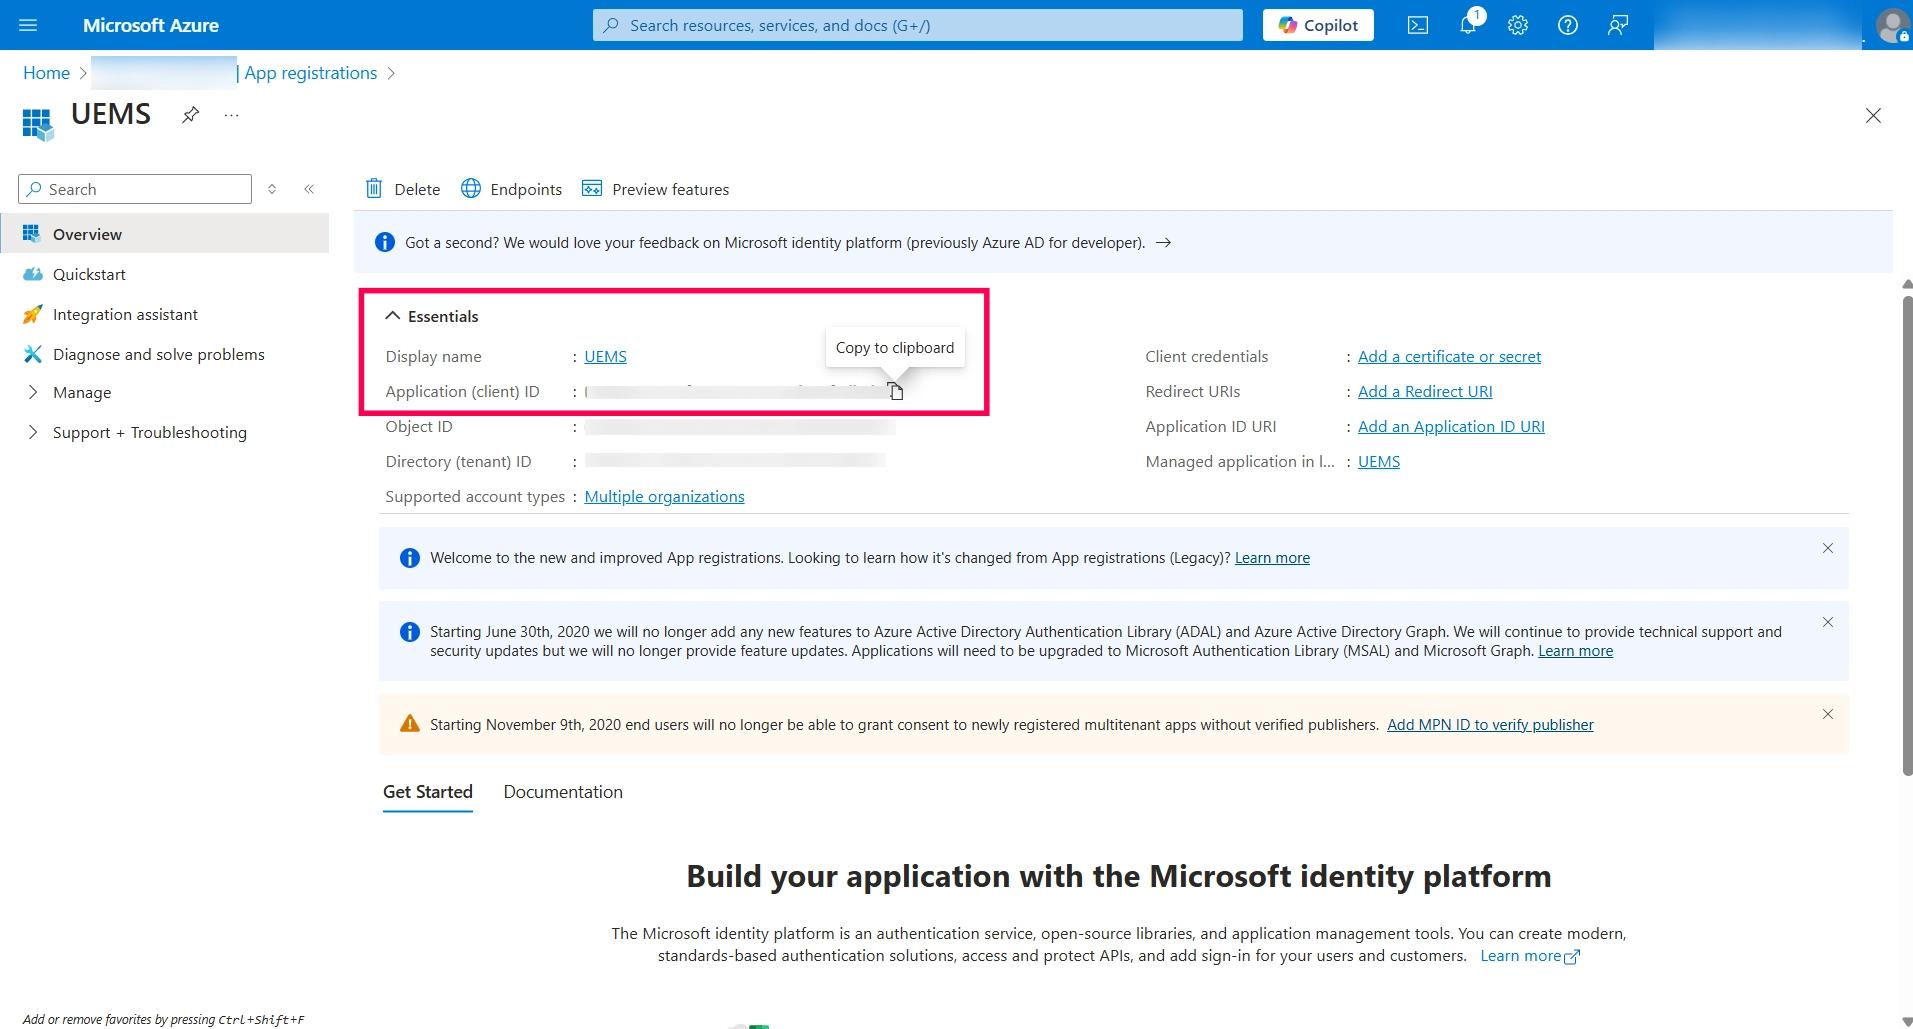
- Once the Azure OAuth app is registered, go to the Overview page of the registered app and copy the Client ID.
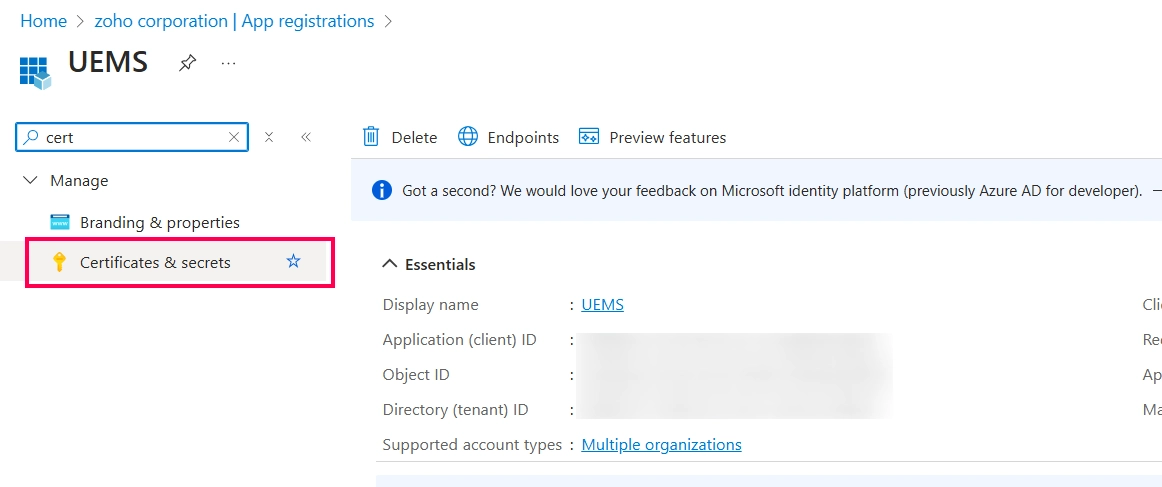
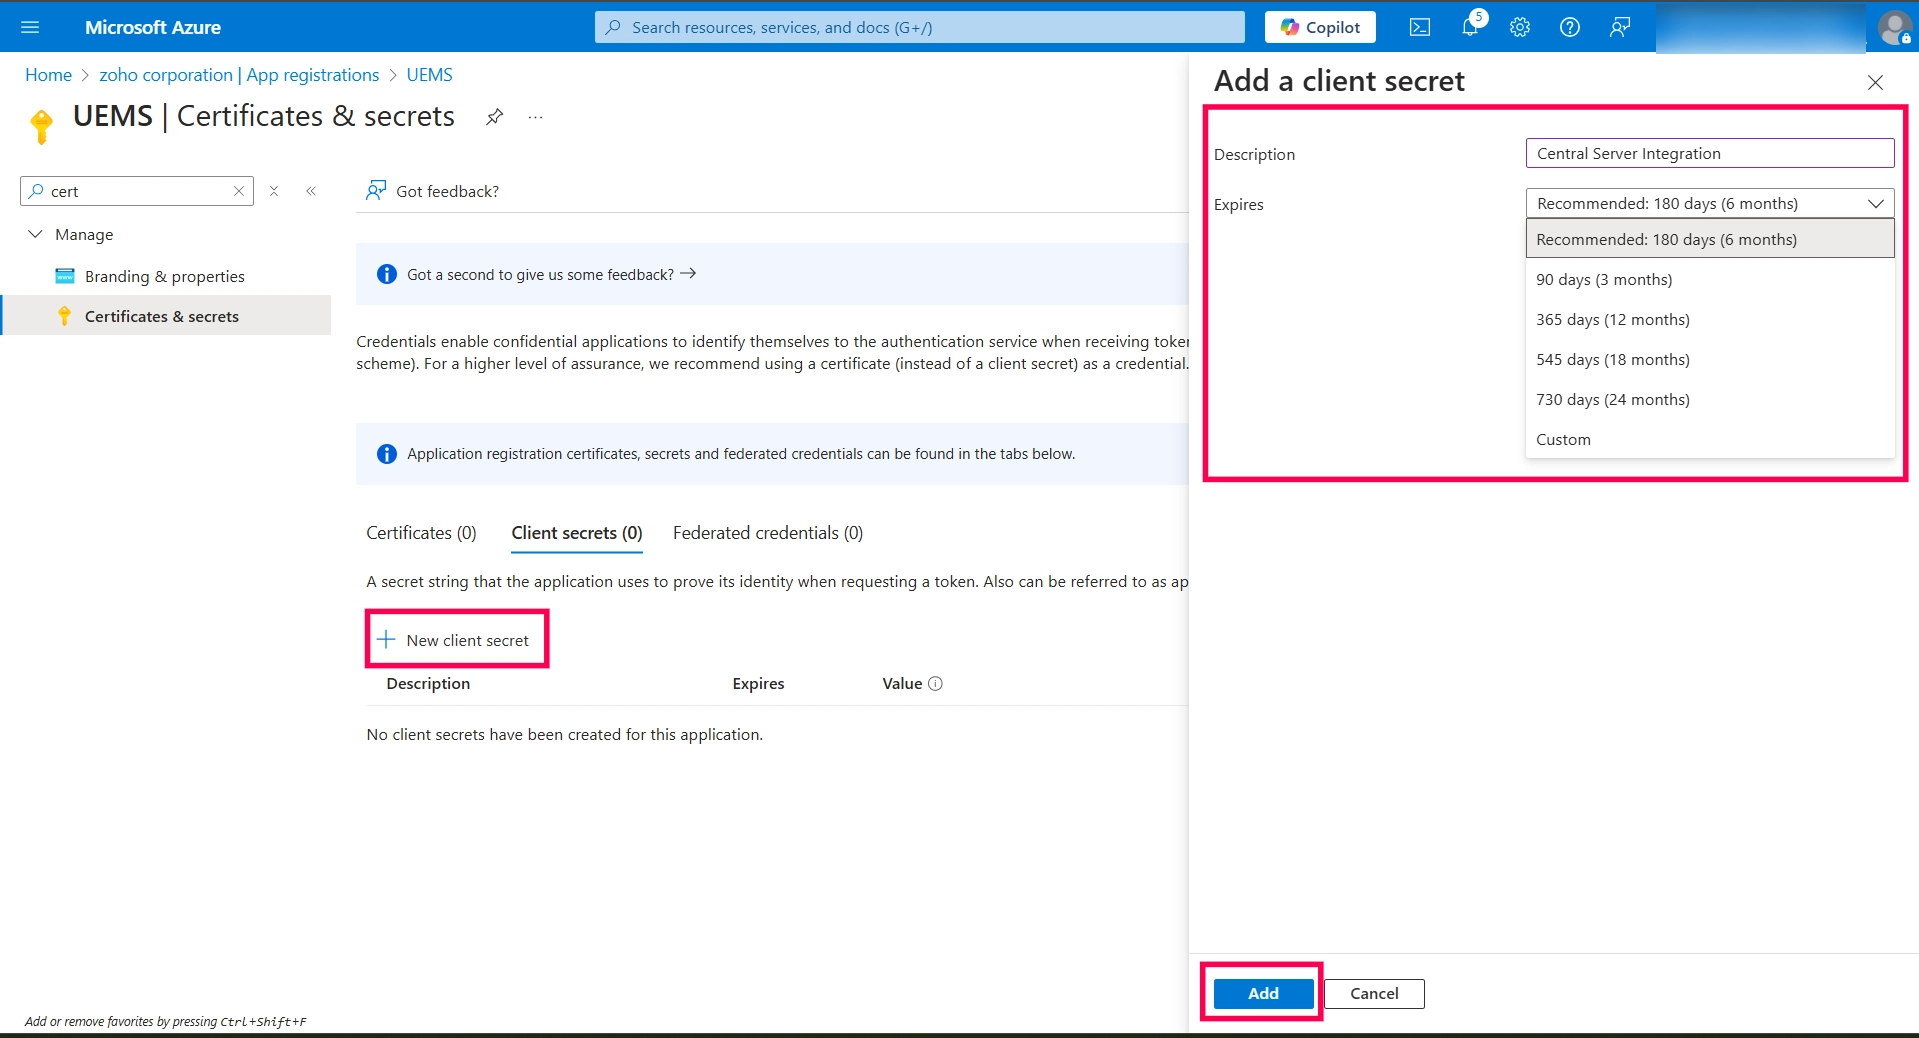
- To generate the Client Secret, navigate to the Certificate & Secrets section in the left panel, then go to Client secrets and click New client secret.
- Provide a description and set the expiry days, or you can choose a custom date. Click Add.
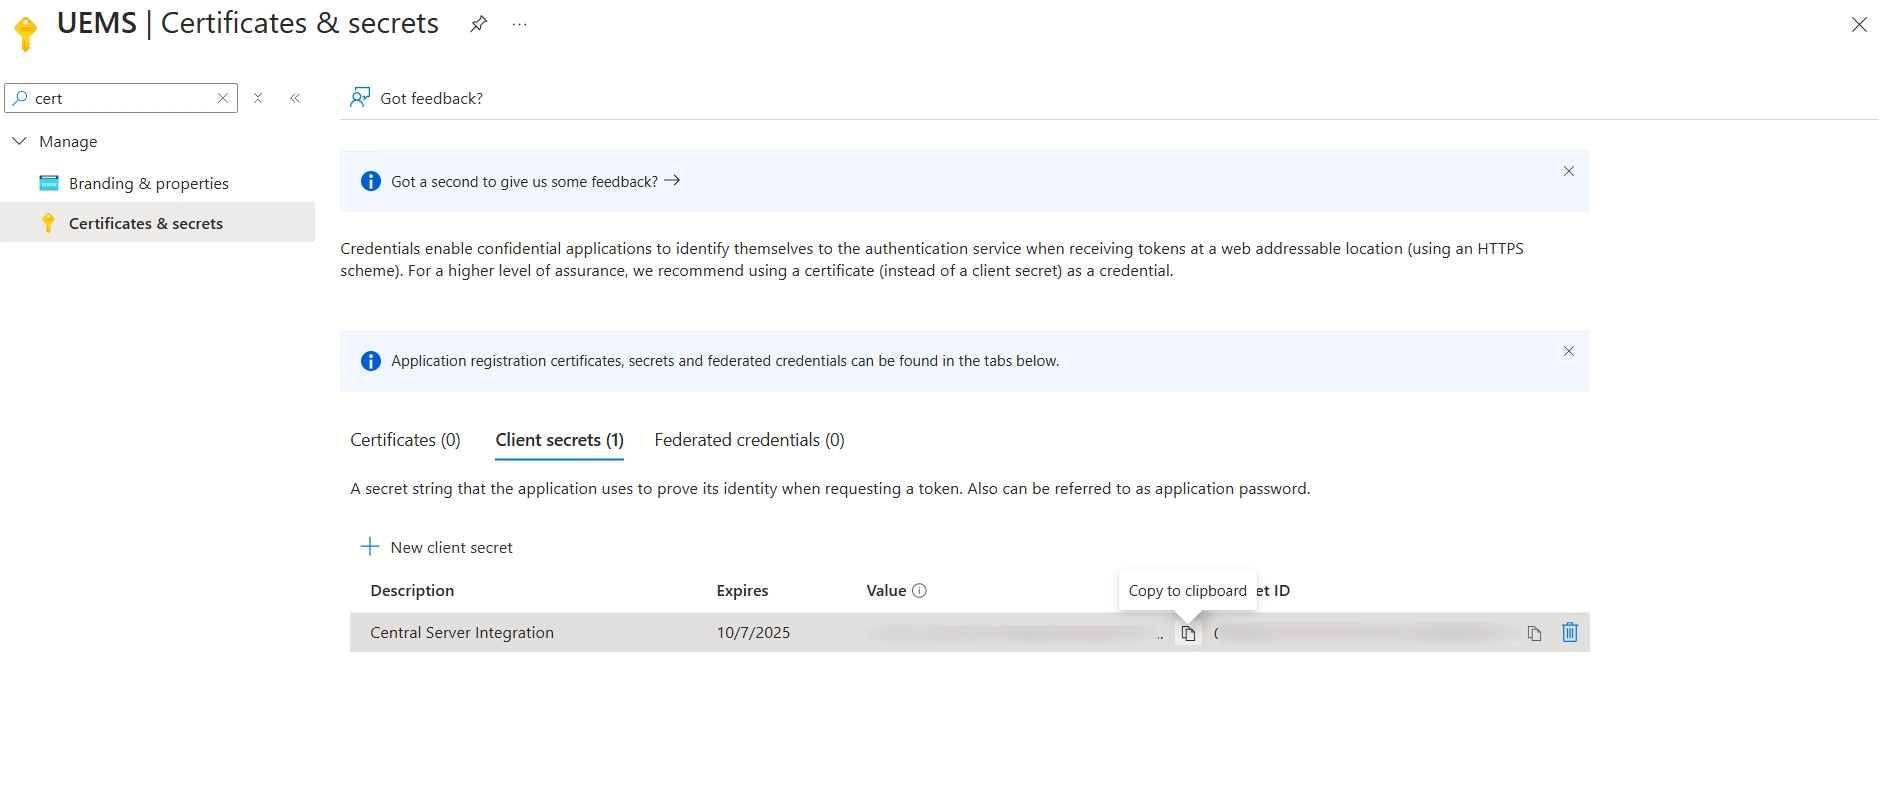
- Copy the Client Secret provided in the Value column.
- Once the Azure OAuth app is registered, go to the Overview page of the registered app and copy the Client ID.
- Provide Client ID and Client Secret in Endpoint Central:
- Go to the Endpoint Central Entra ID Domain Addition page and provide the Client ID, Client Secret, and Client Secret Expiry Date, Click Add domain.
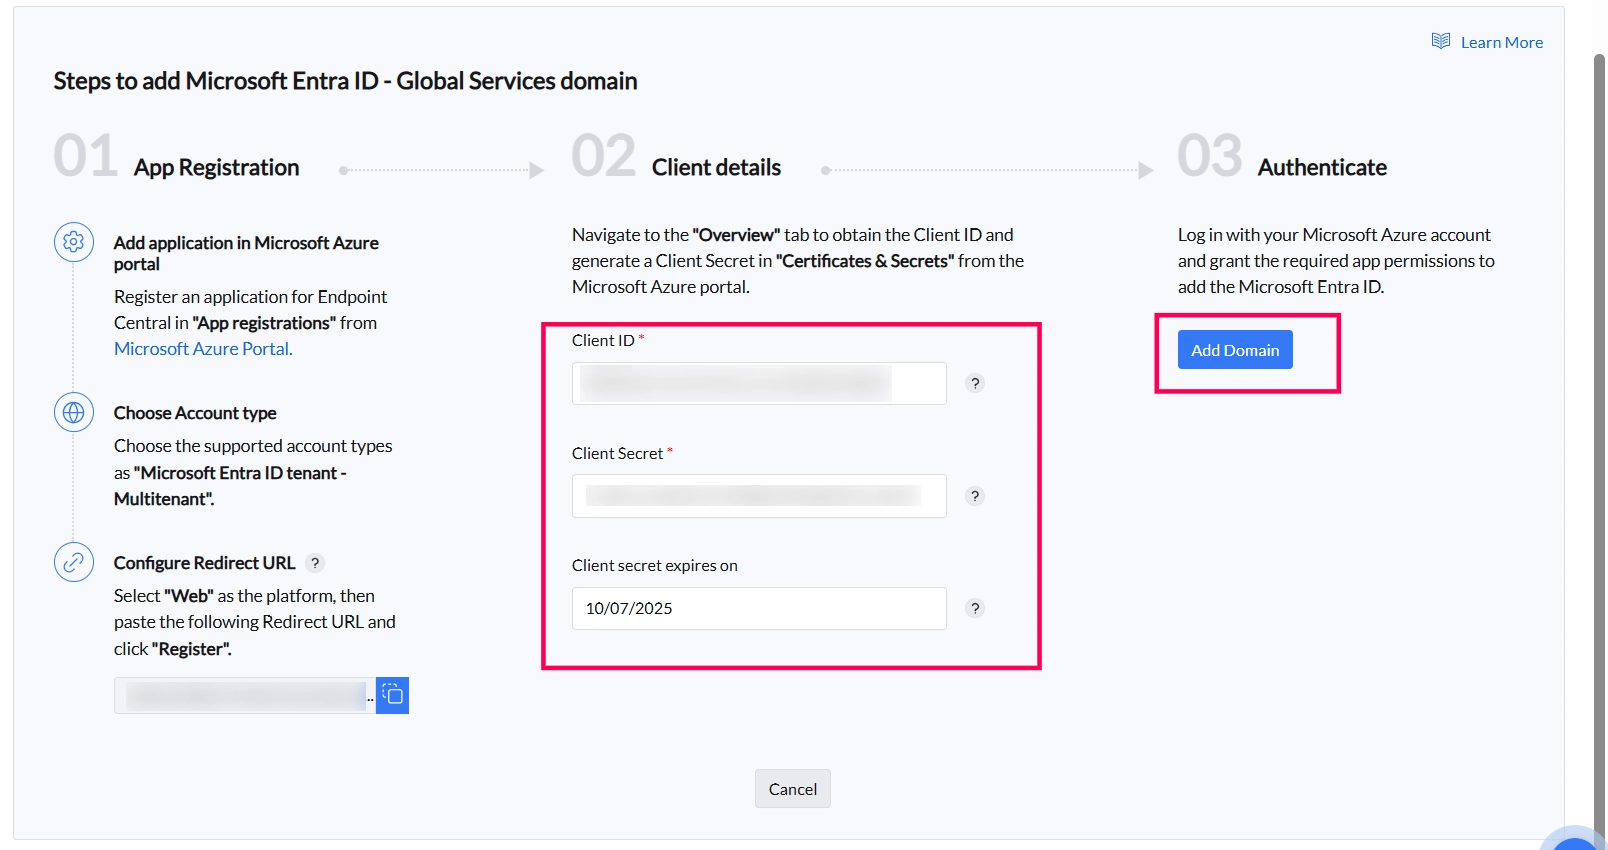
Info: If you have already registered the application, you will be prompted to Authenticate.
- Click Authenticate.
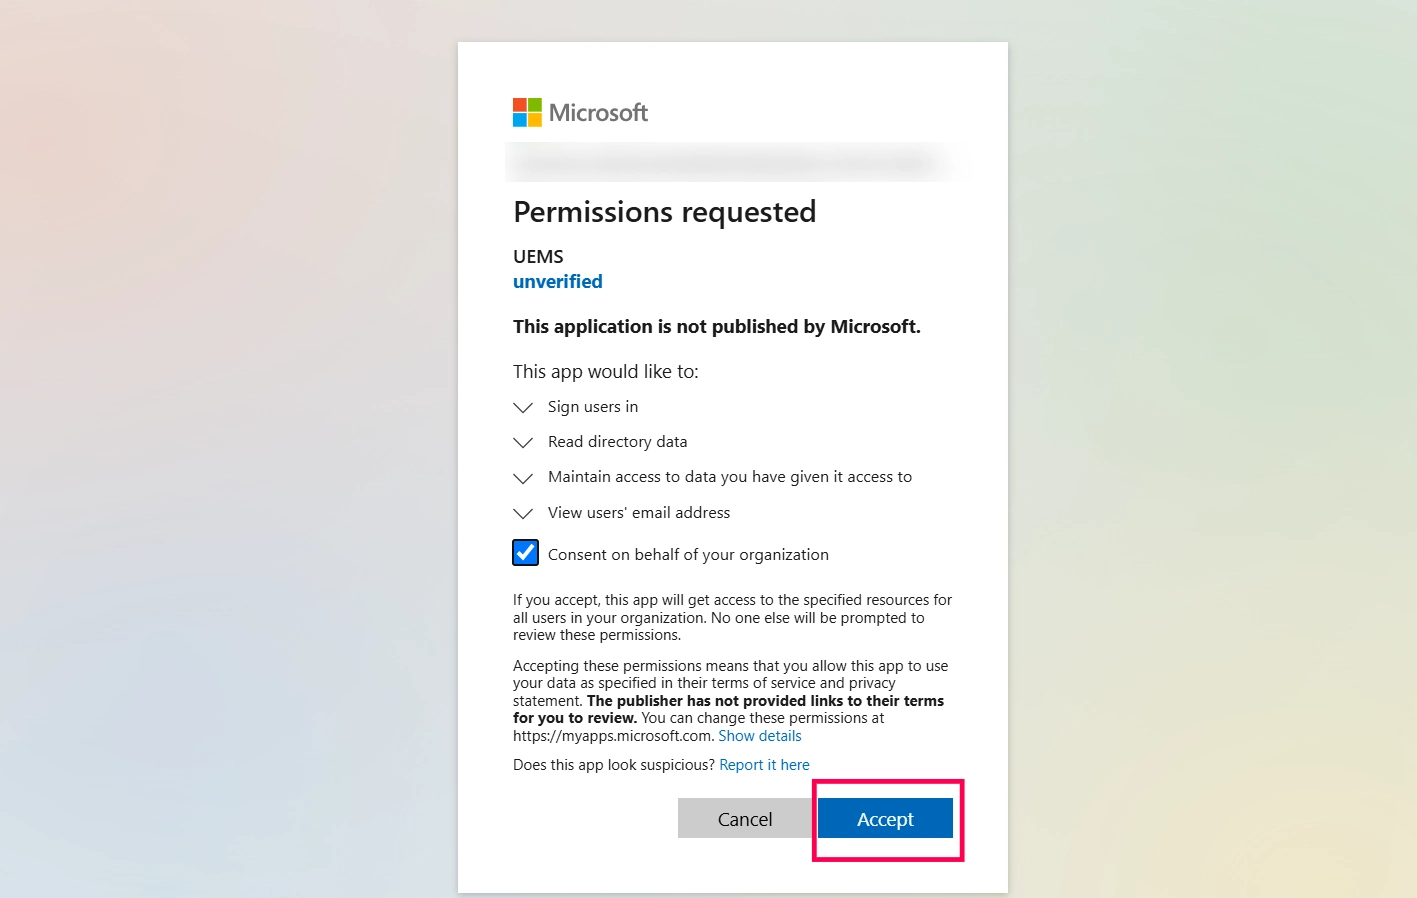
- You will be redirected to the Microsoft Azure Login page. After logging in, a consent screen will be displayed for integration consent.
- Click Accept.
- Go to the Endpoint Central Entra ID Domain Addition page and provide the Client ID, Client Secret, and Client Secret Expiry Date, Click Add domain.
- Configure Sync Frequency:
After authentication and accepting the consent from Azure Portal, return to Endpoint Central and configure the sync frequency for the Entra ID domain. Choose from the following frequency options:
- Every 6 hours
- Twice a day
- Once a day
- Select the Timezone based on your Entra ID timezone.

- You can also initiate an On-demand Sync by using the Sync action available in the action button.
Once the Entra ID domain is added, you can manage it through the Actions menu.
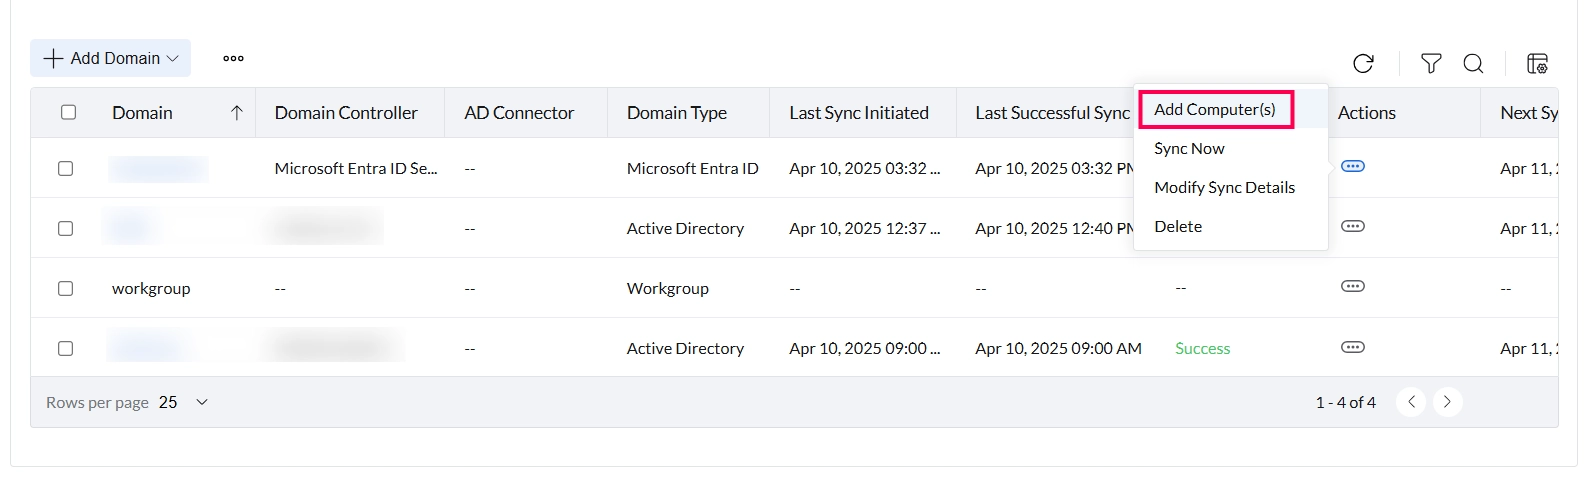
- Add Computers:
To add Entra ID computers, select the domain, navigate to Actions, and click Add Computers.
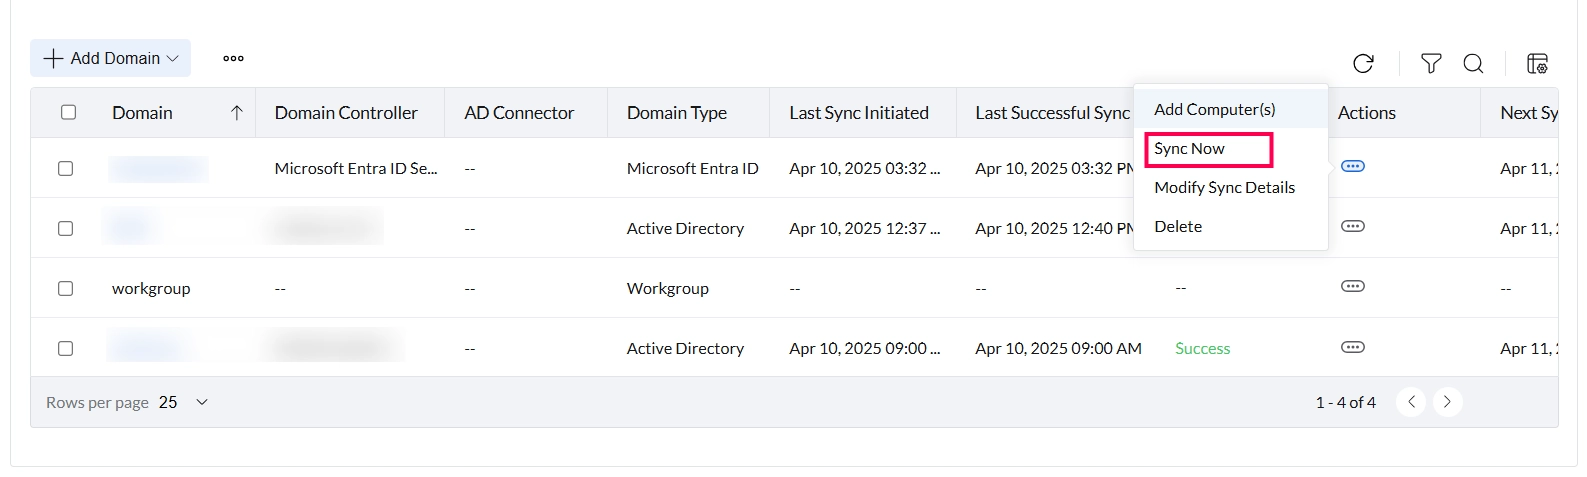
- Sync Now:
To initiate a sync immediately, navigate to the Actions menu for the corresponding domain and click Sync Now.
NoteYou can only initiate a manual sync 4 times per day. - Modify Domain:
To edit domain details, navigate to the Actions menu of the corresponding domain and click Modify Domain.
 Notethis Option only to applicable to Windows Server Active Directory
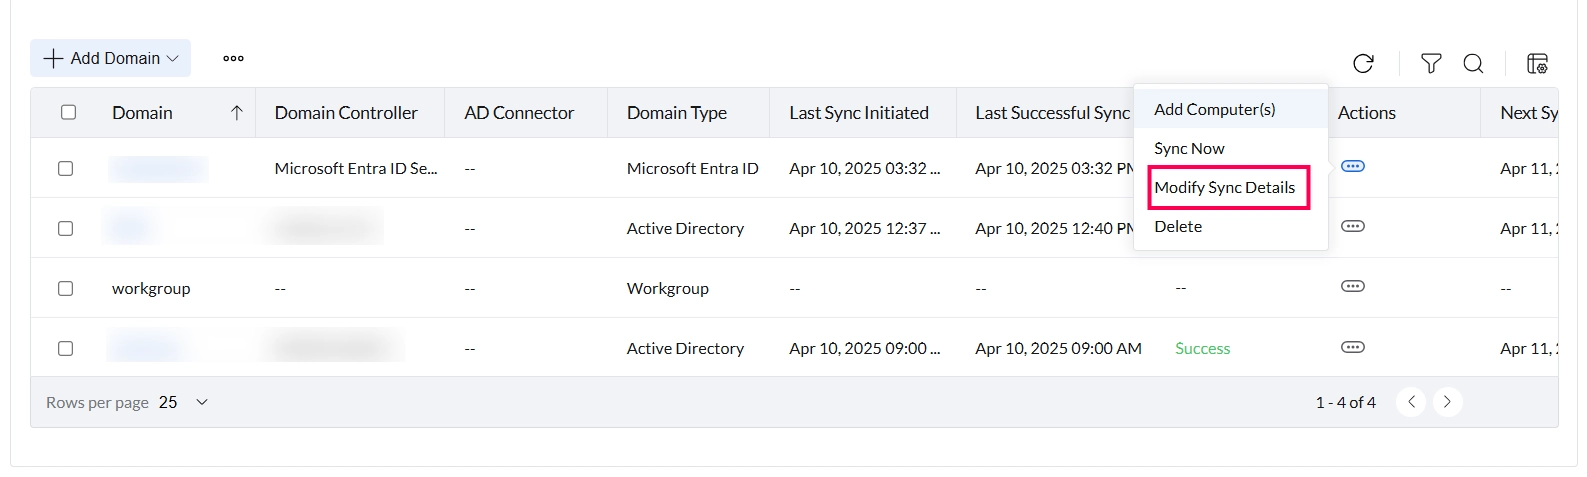
 - Modify Sync Details:
To update the sync frequency or start time, navigate to the Actions menu of the corresponding domain and click Modify Sync Details.
- Delete Domain:
To delete a domain, navigate to the Actions menu of the corresponding domain and click Delete.
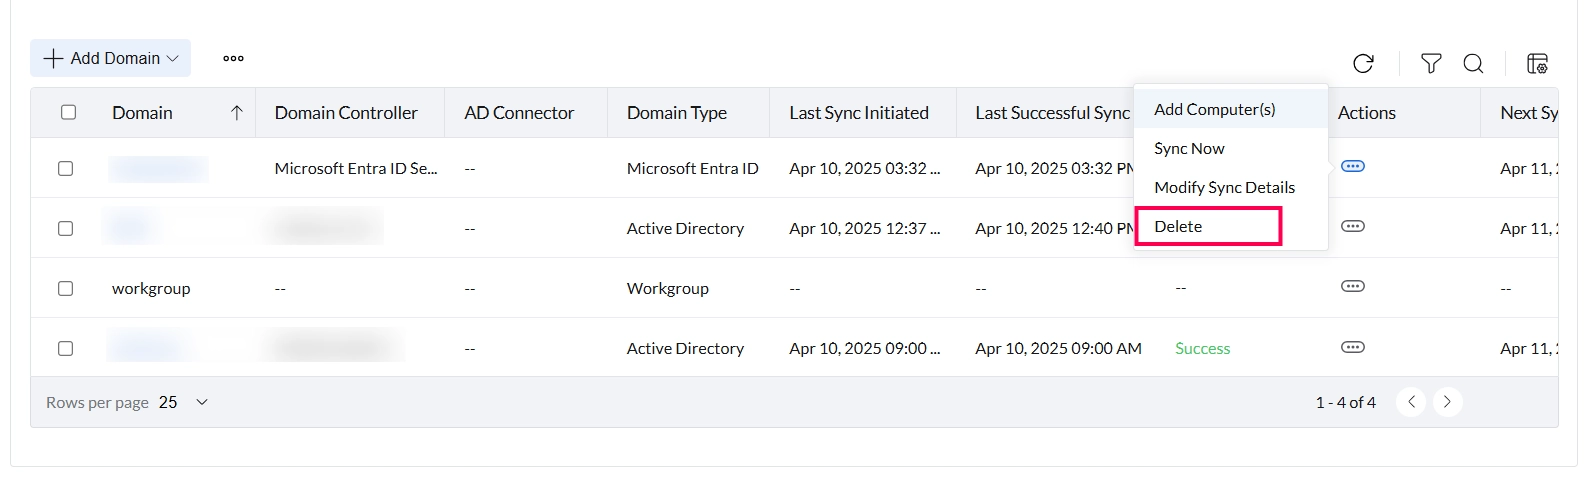
Important: Deleting a domain will erase all associated data for that domain. A domain cannot be deleted unless all the managed computers are removed from the Scope of Management.
- Change to Workgroup:
To convert a domain-based device to a workgroup, select the domain, click the corresponding action, and choose Change to Workgroup.
 Notethis Option only to applicable to Windows Server Active Directory
Troubleshooting Entra ID Configuration
If you encounter issues during the Entra ID configuration or syncing process, consider the following steps:
- Check Network Connectivity:
Ensure that the server running Endpoint Central has proper network connectivity to Entra ID.
- Verify API Permissions:
Ensure that the app registered in Entra ID has sufficient API permissions to access directory data.
- Check SSL Certificate: (Optional)
Verify that your SSL certificate is correctly installed and valid for secure communication between Endpoint Central and Entra ID.
- Review Sync Frequency:
Ensure that the sync frequency is configured correctly based on your organization's requirements.
- Check for Valid Client ID/Secret:
Ensure that the provided Client ID/ Secret is valid or have not reached the expiry date. If not, get the Client ID and Secret value from the Azure Portal, update in the OAuth details available in OAuth tab, and reauthenticate Domains.