How to Set Up Azure Automation for Agent Installation
Overview
This document outlines the steps to set up Azure Automation for agent installation in virtual machine. It provides detailed instructions for downloading agent files, creating storage and automation accounts, and managing roles and runbooks in Azure. By following these steps, you will be able to automate the installation of agents in your Azure environment efficiently.
Prerequisites
- Azure Subscription: Ensure you have an active Azure subscription.
- Automation Account: Create an Automation account to manage runbooks and authenticate to Azure resources.
- Storage Account: Create a storage account to store agent binaries and scripts.
Step 1: Download the Agent Installation Files
- Access Endpoint Central
- Log in to the Endpoint Central web console.
- Navigate to Agent > Computers.
- Select the remote office and click on Download Agent.
Step 2: Create a Storage Account
- Login to the Azure Portal
- Create a Storage Account
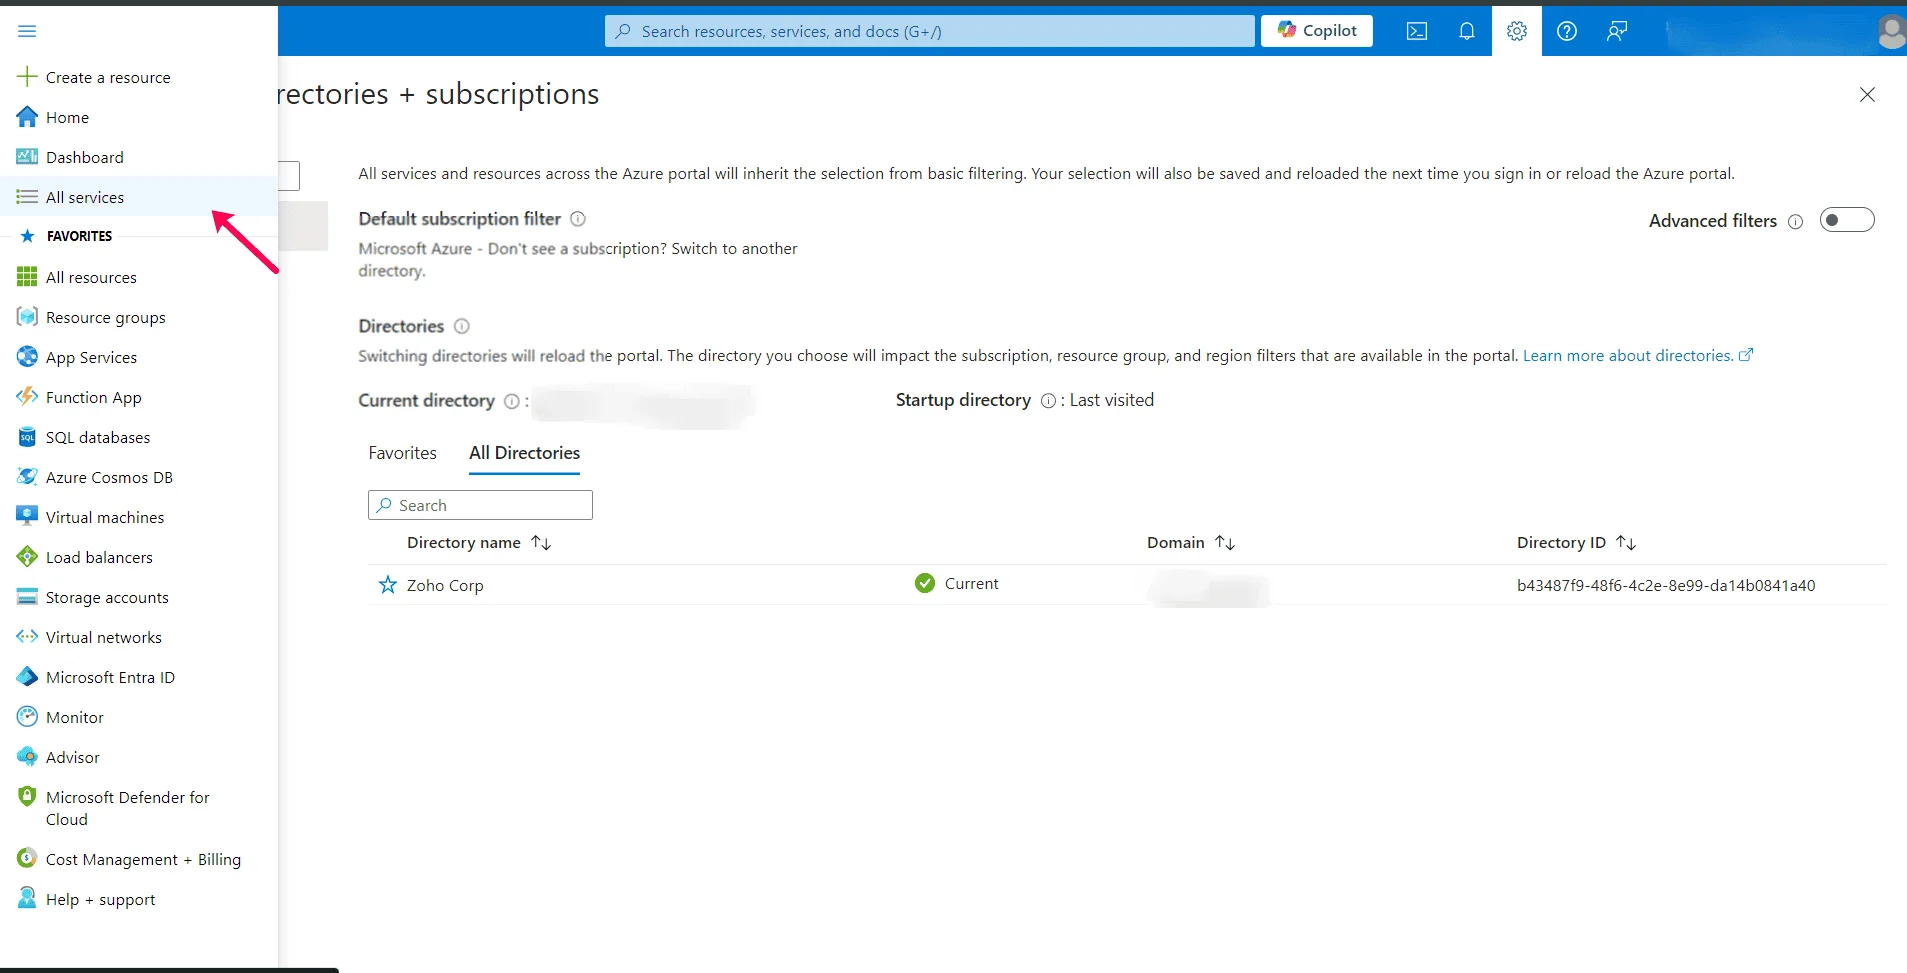
- Go to All services and select Storage Accounts.
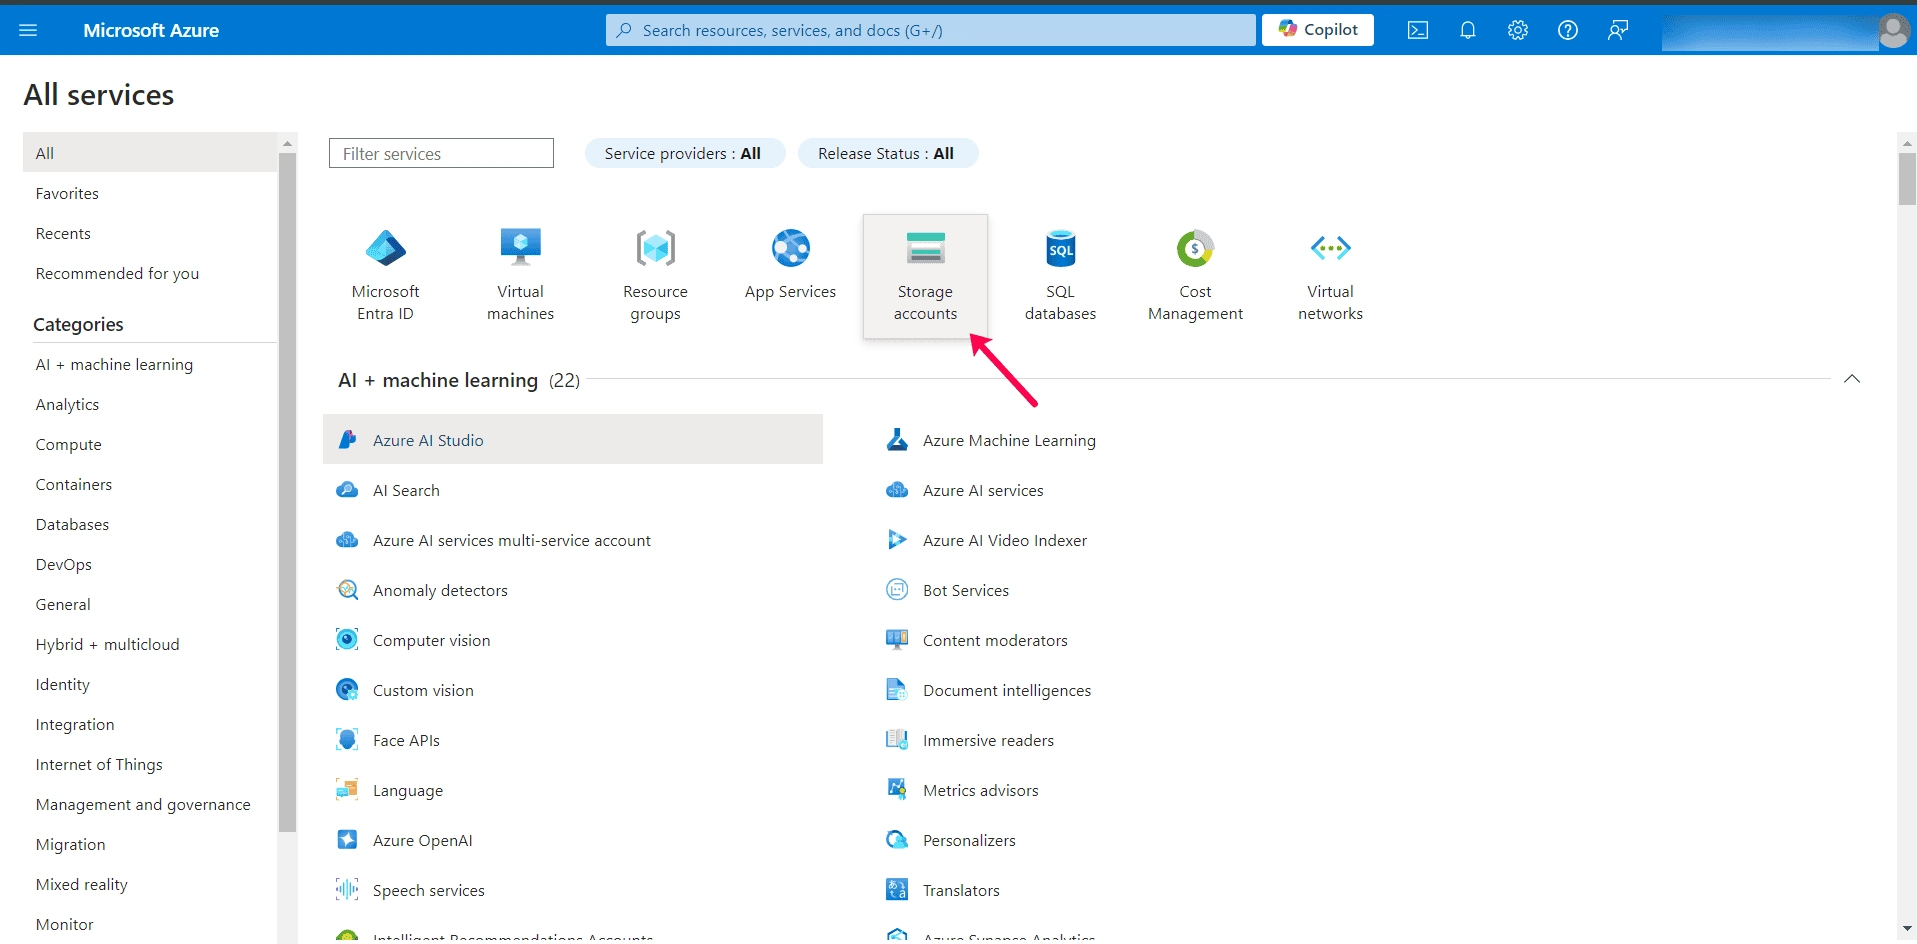
- Click on the Create Storage Account
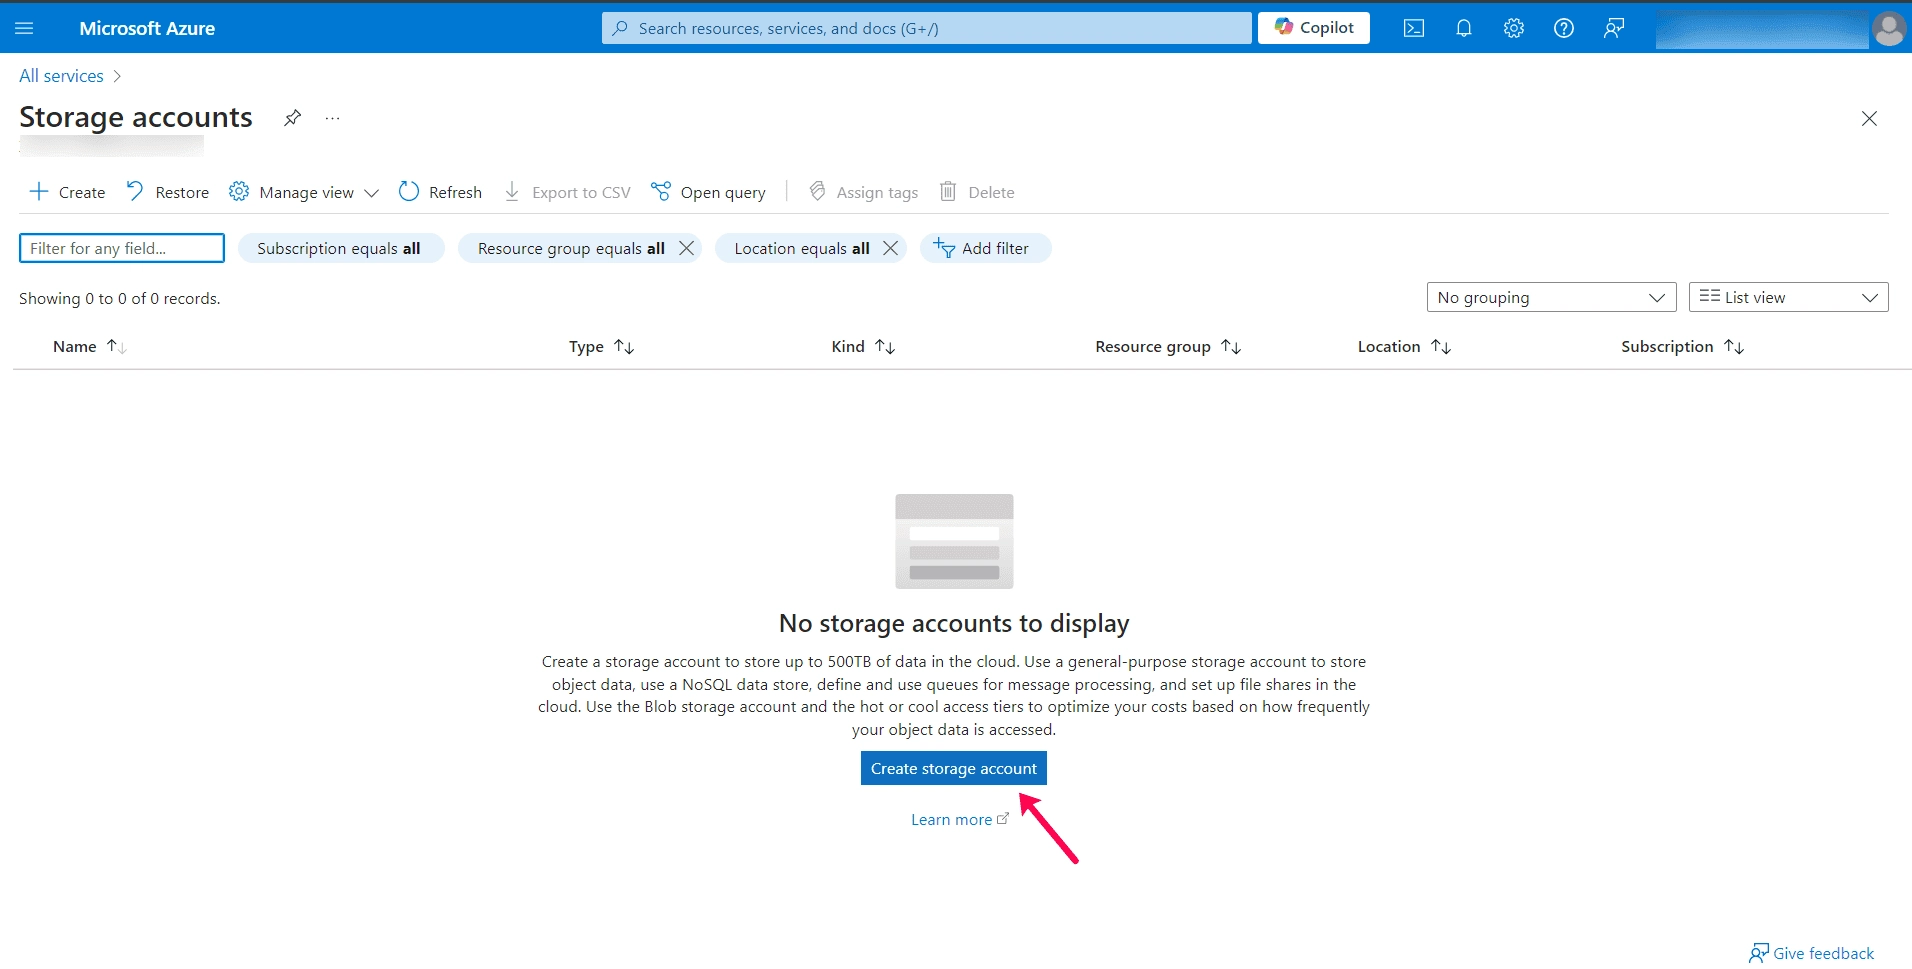
- Enter the storage account name: ecagentbinary.
 NoteIf you use a different name, update the Automation runbook script accordingly.
 - Modify default settings as needed and click Create.
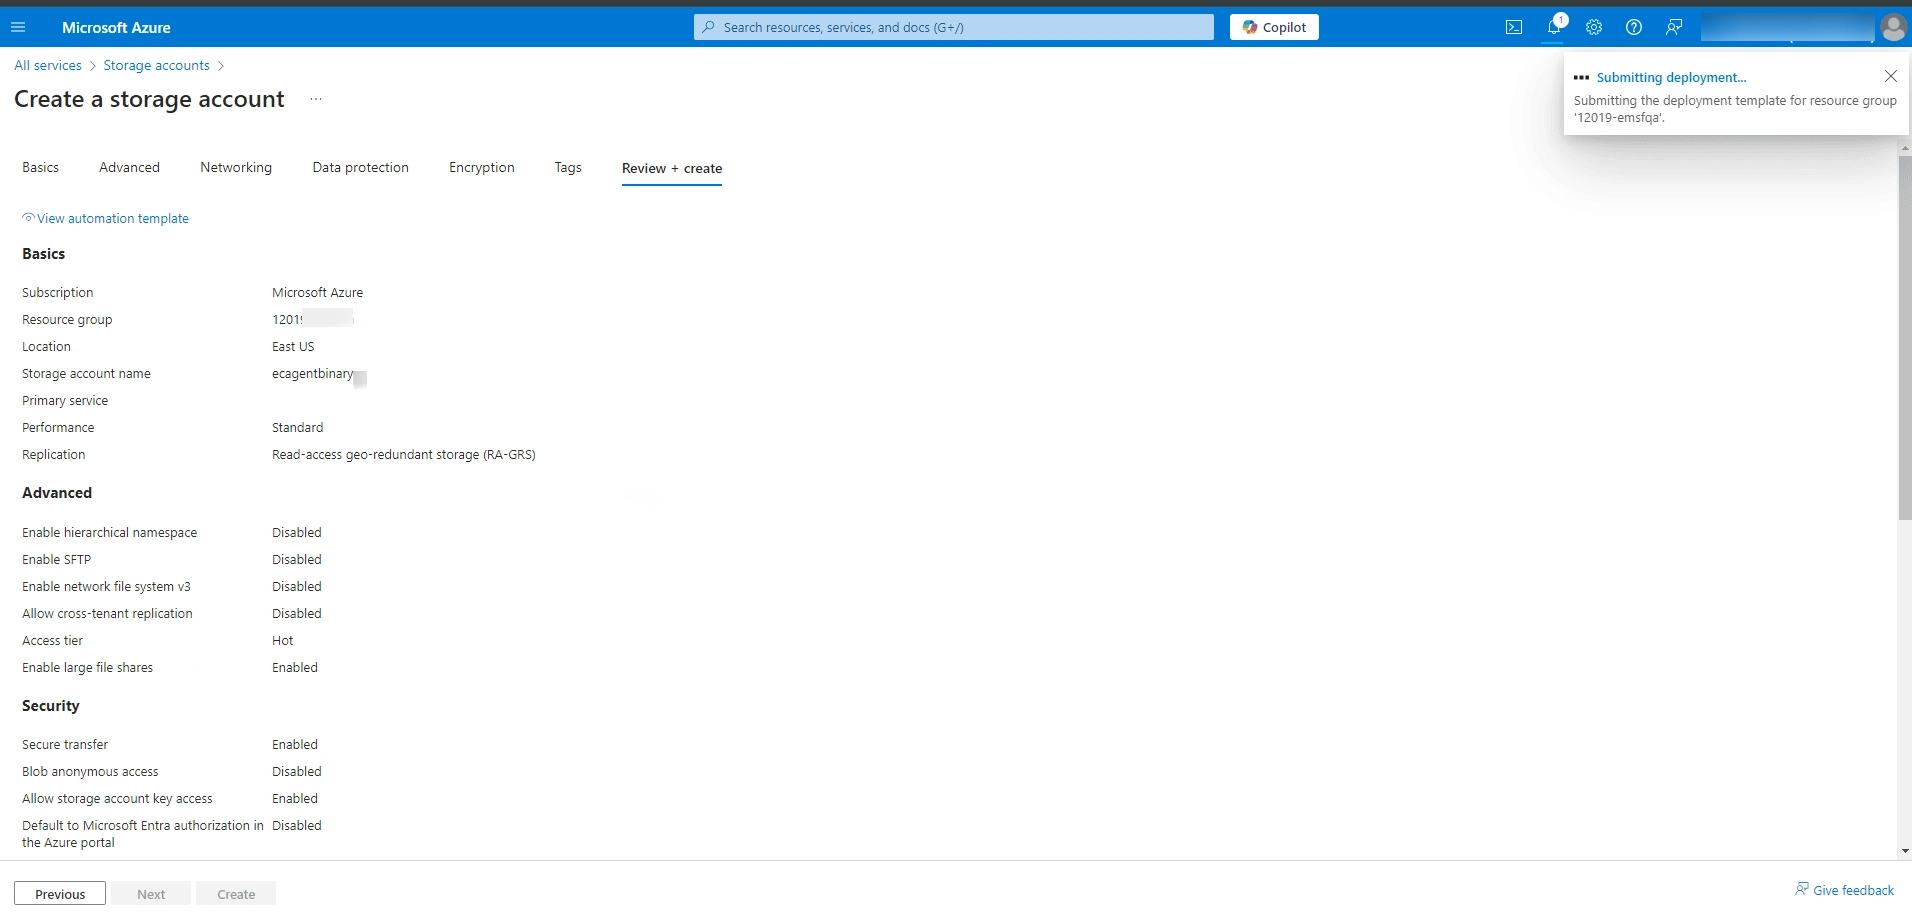
- Wait for the deployment to finish, then click Go to resource.
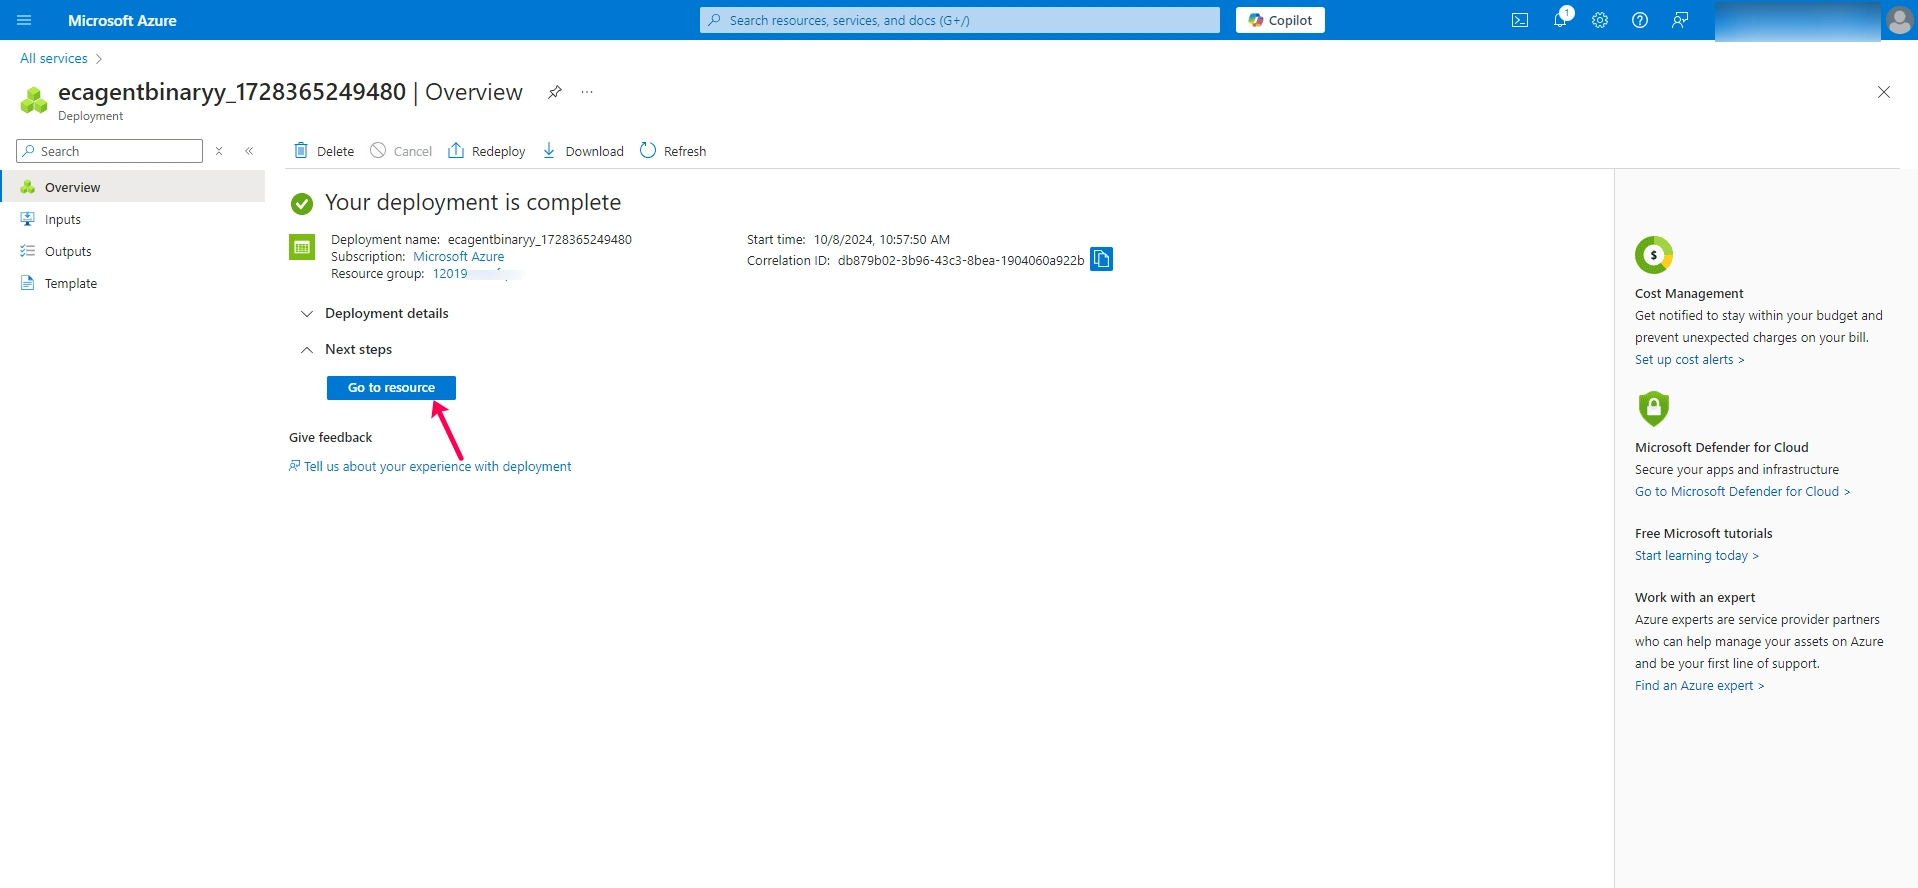
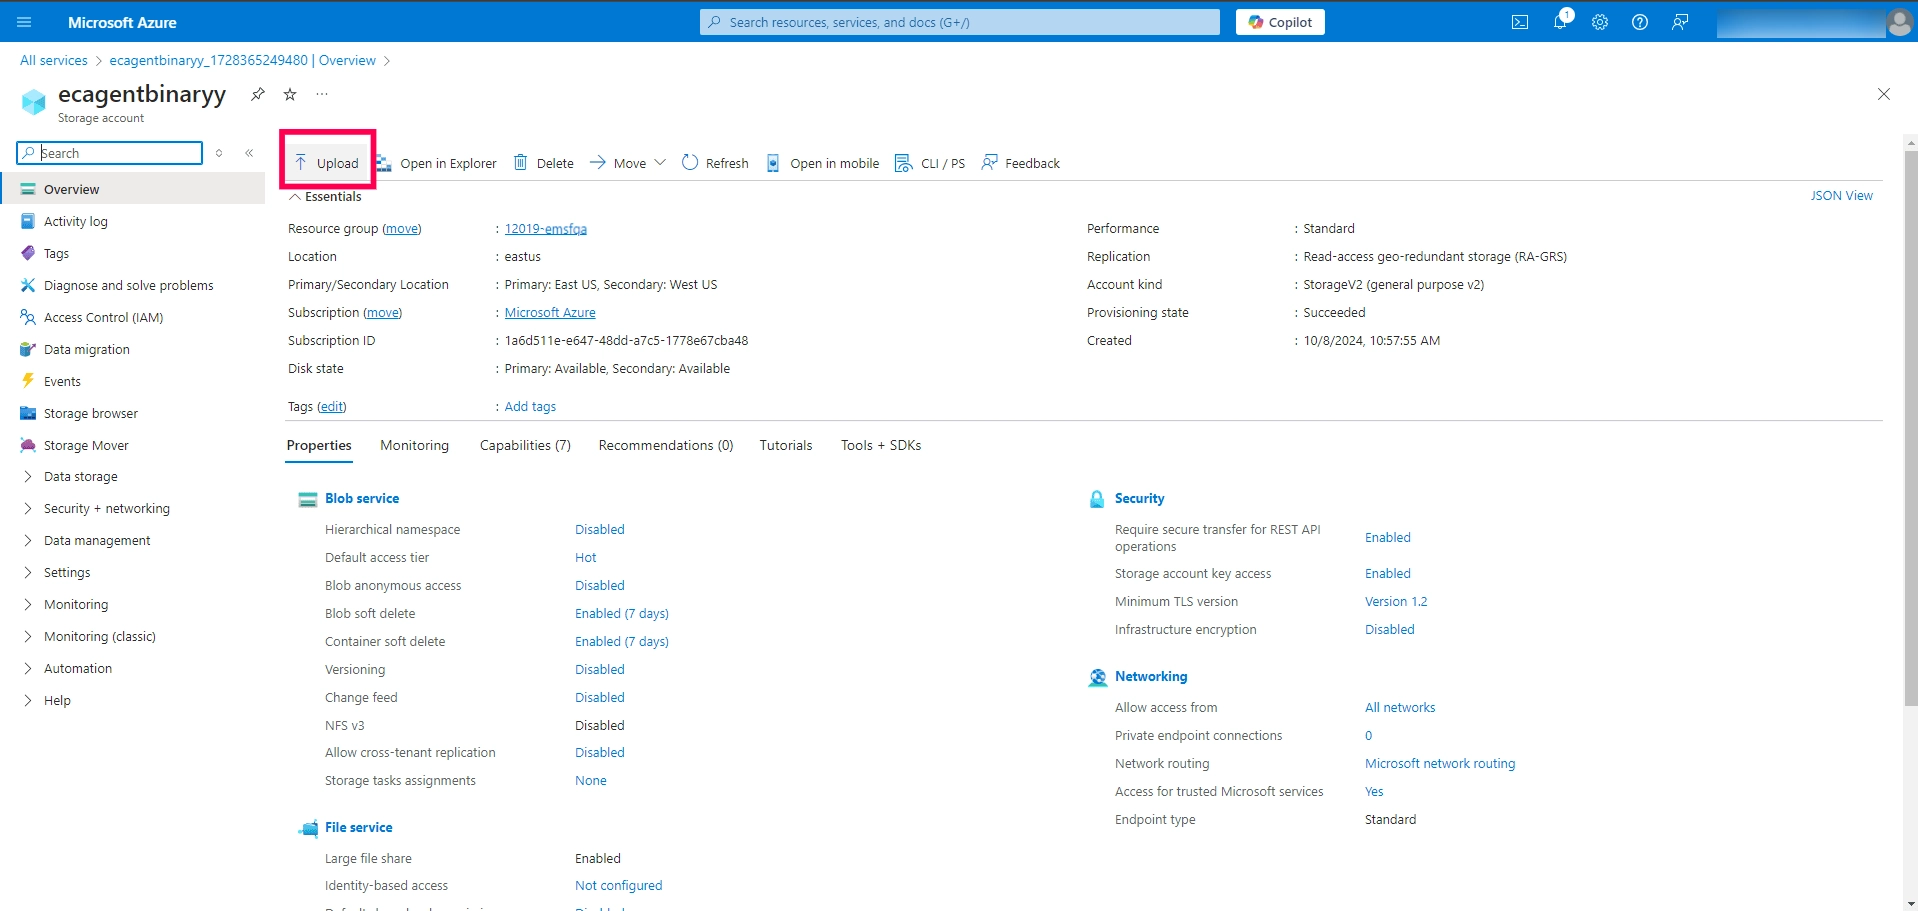
- Upload the Agent File:
- In the storage account, navigate to Overview and click Upload.
- Upload the file: Downloaded Agent File.
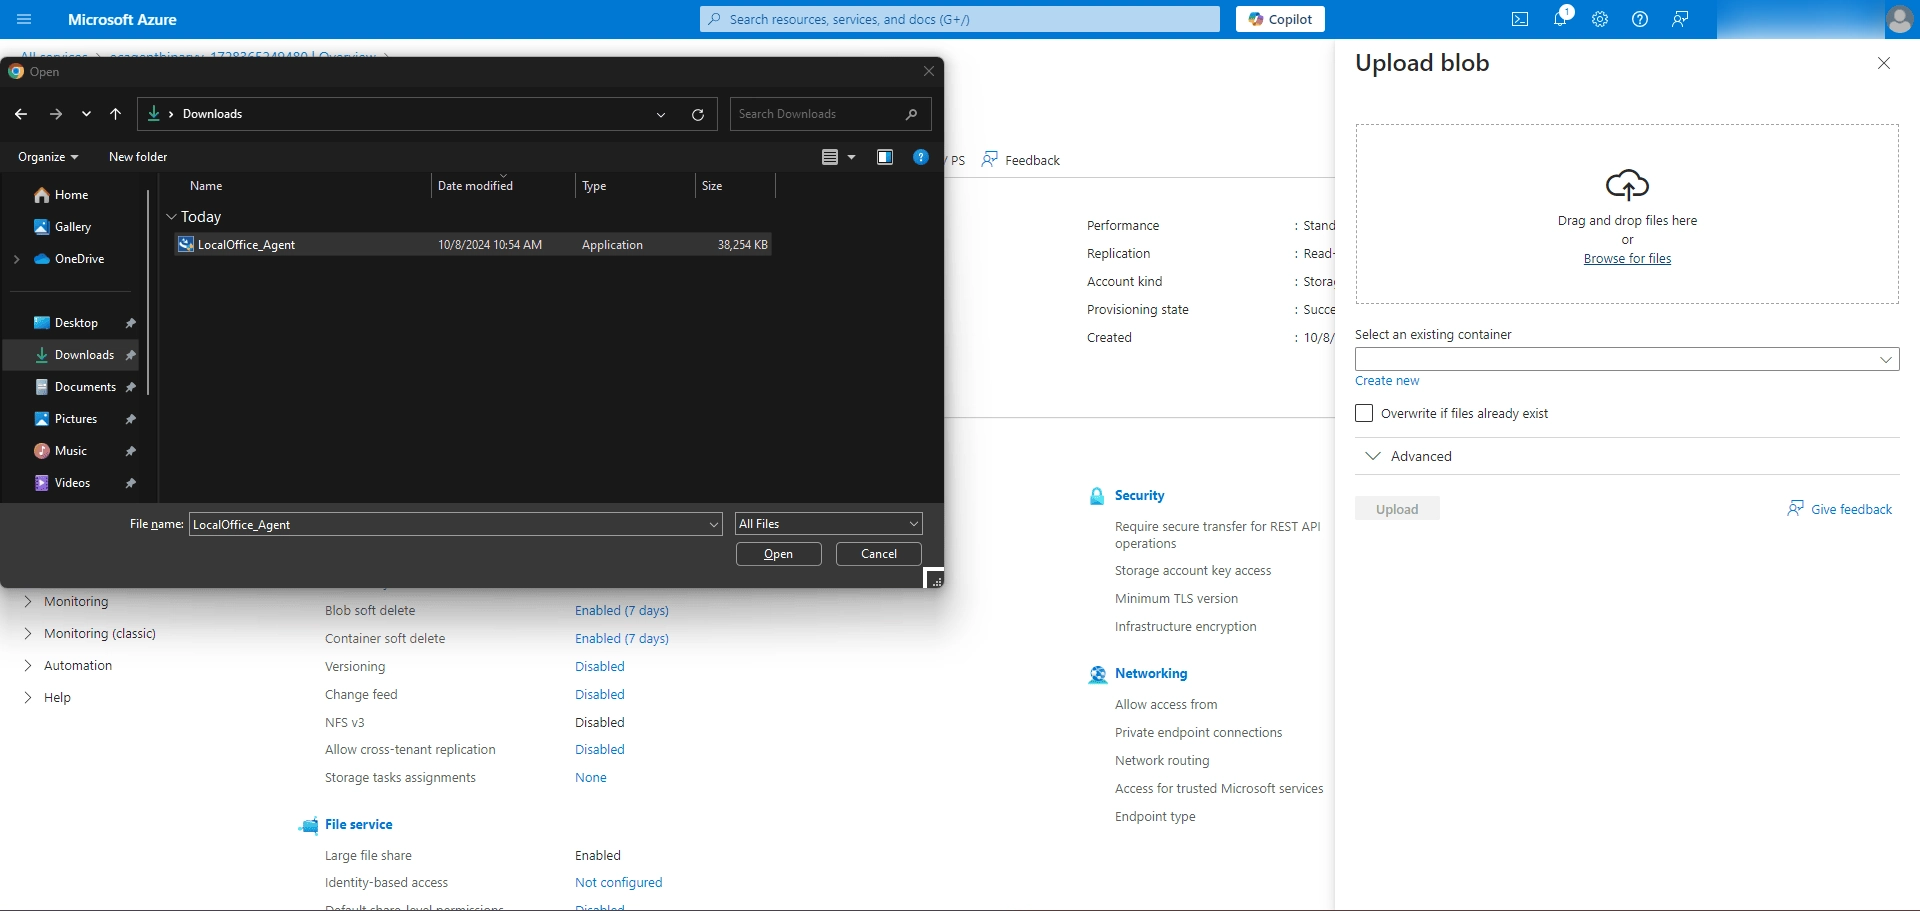
- Set the container name as scriptcontainer.
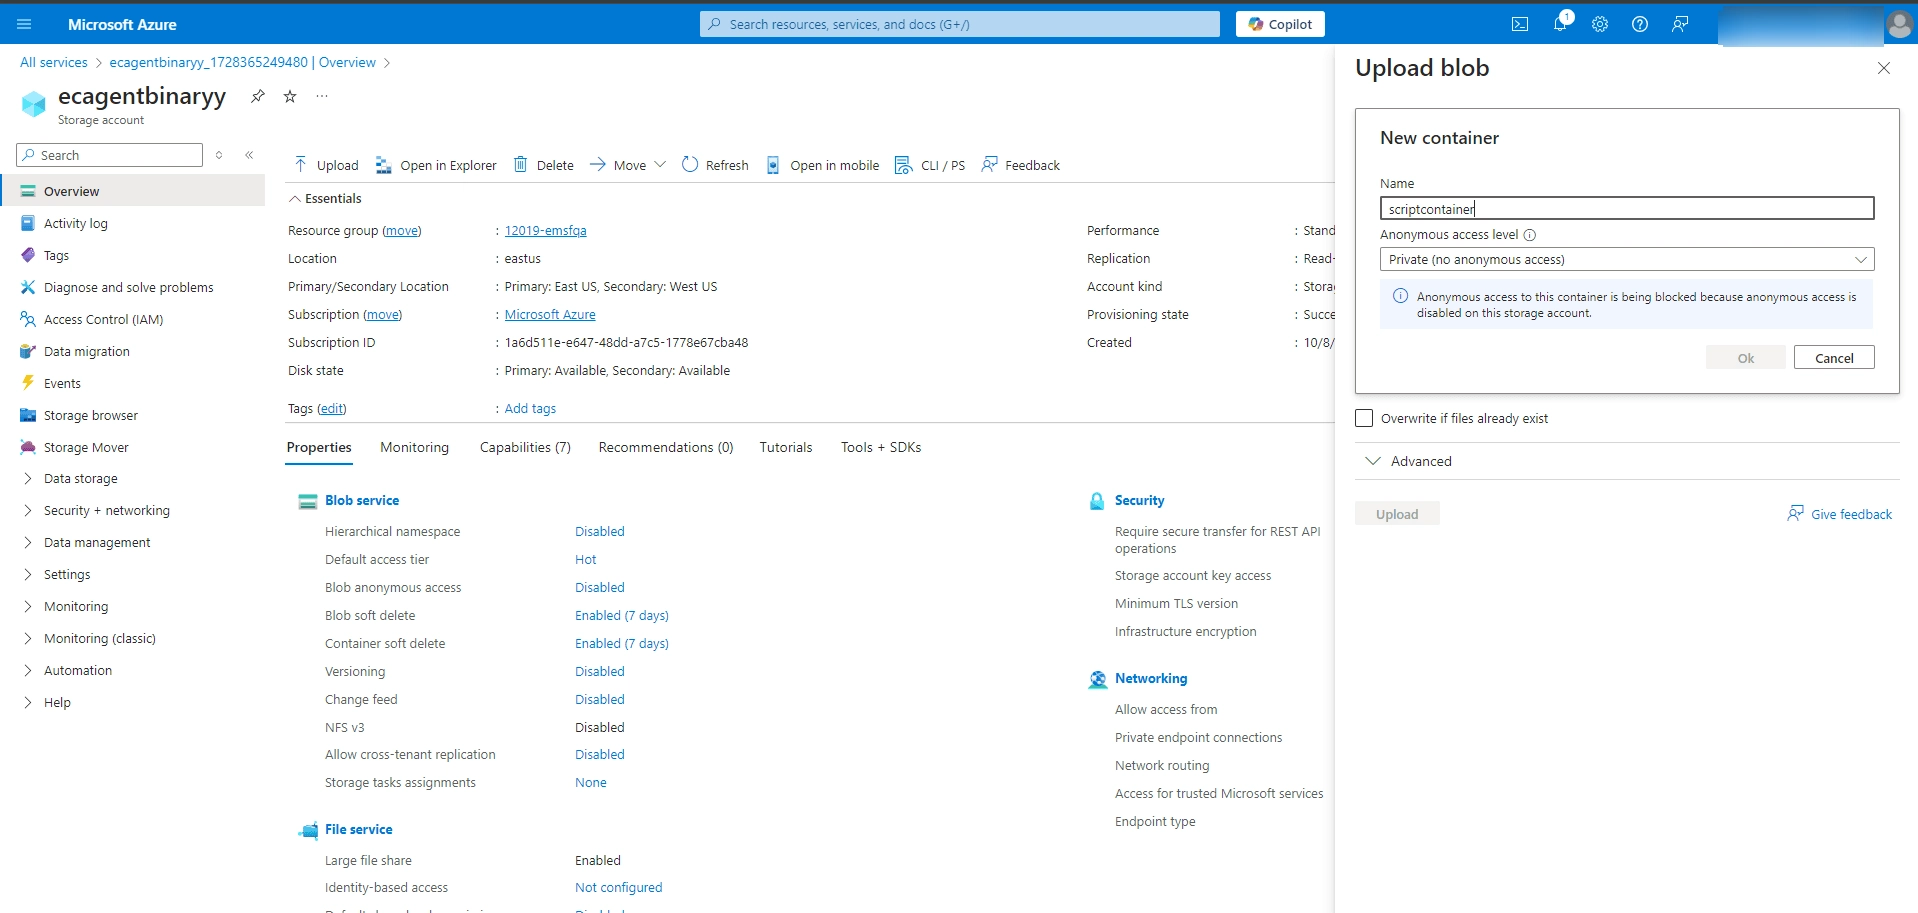 NoteIf you use a different name, update the Automation runbook script accordingly.
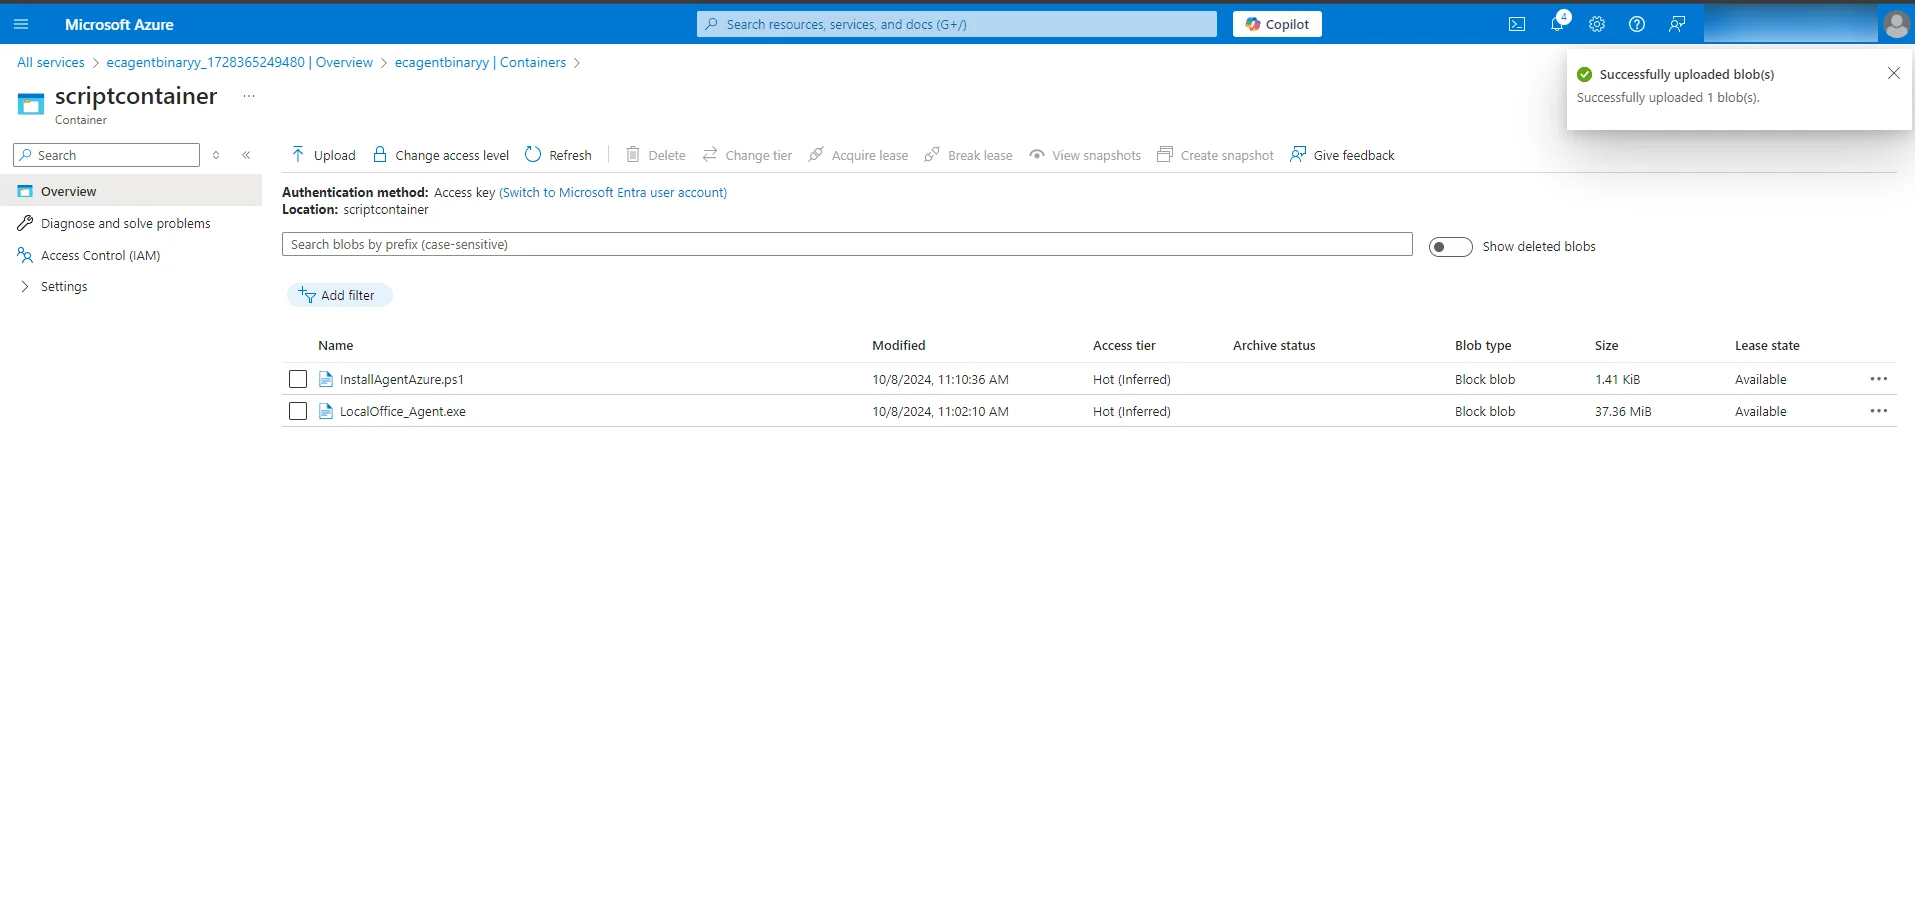
 - After the upload completes, go to the Containers tab and open scriptcontainer.
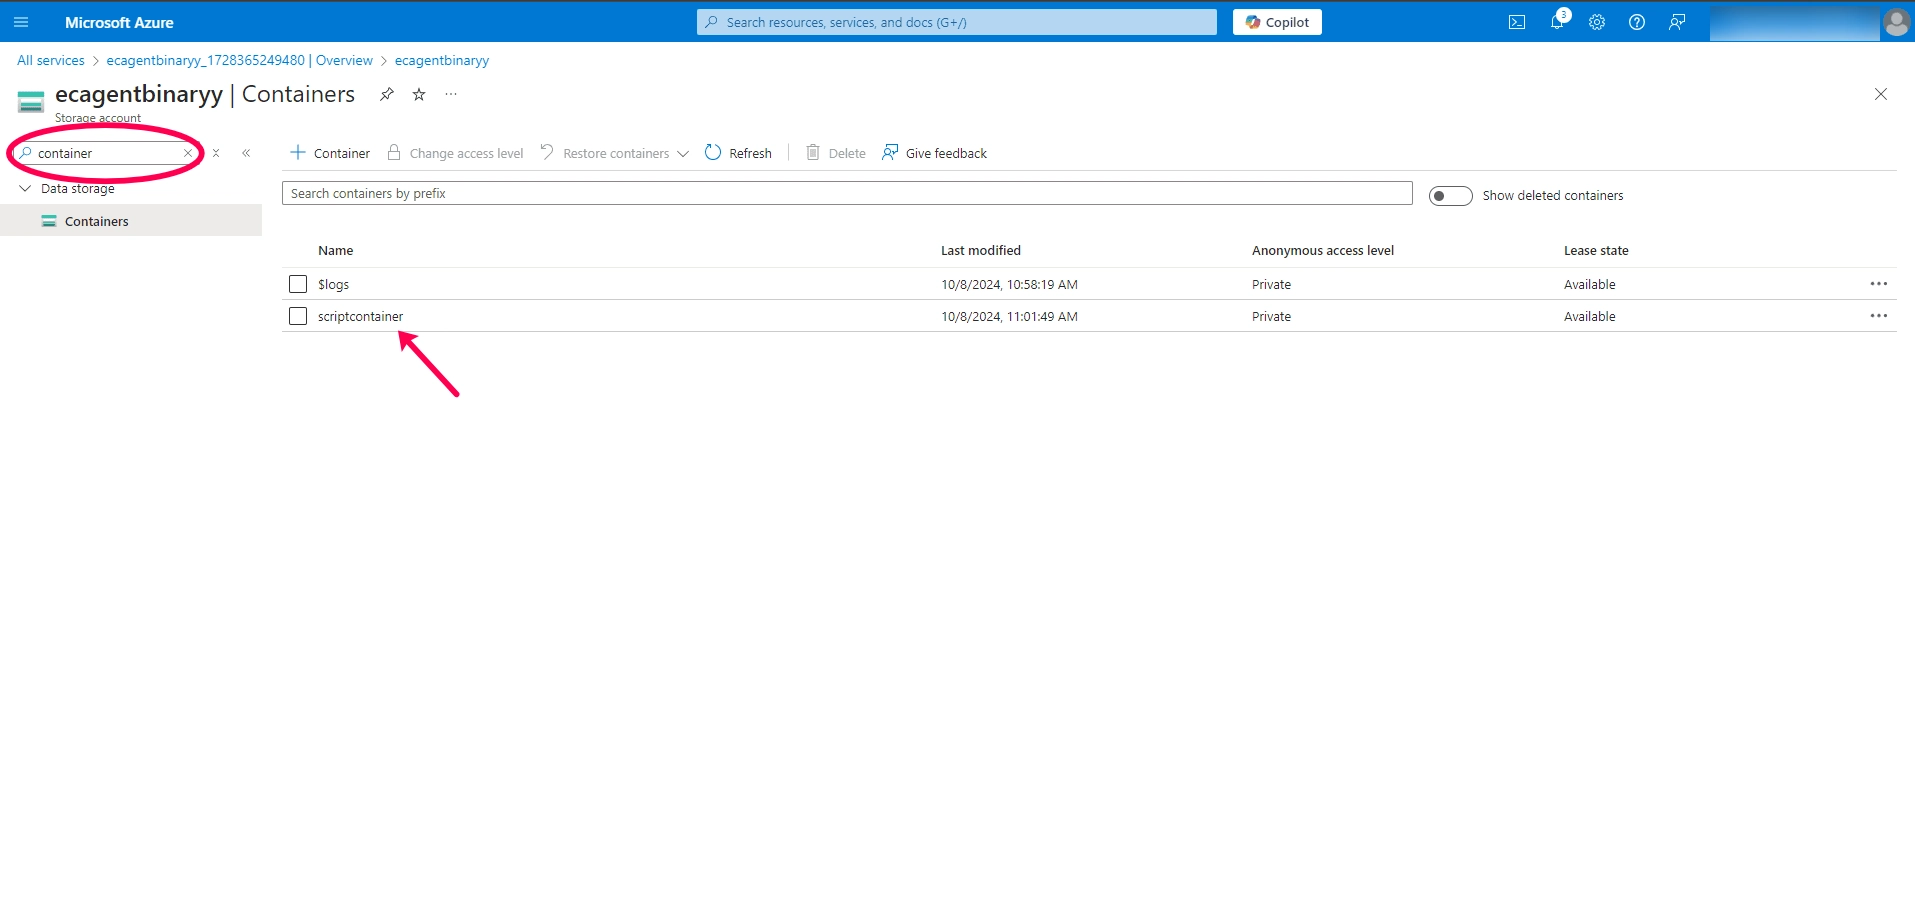
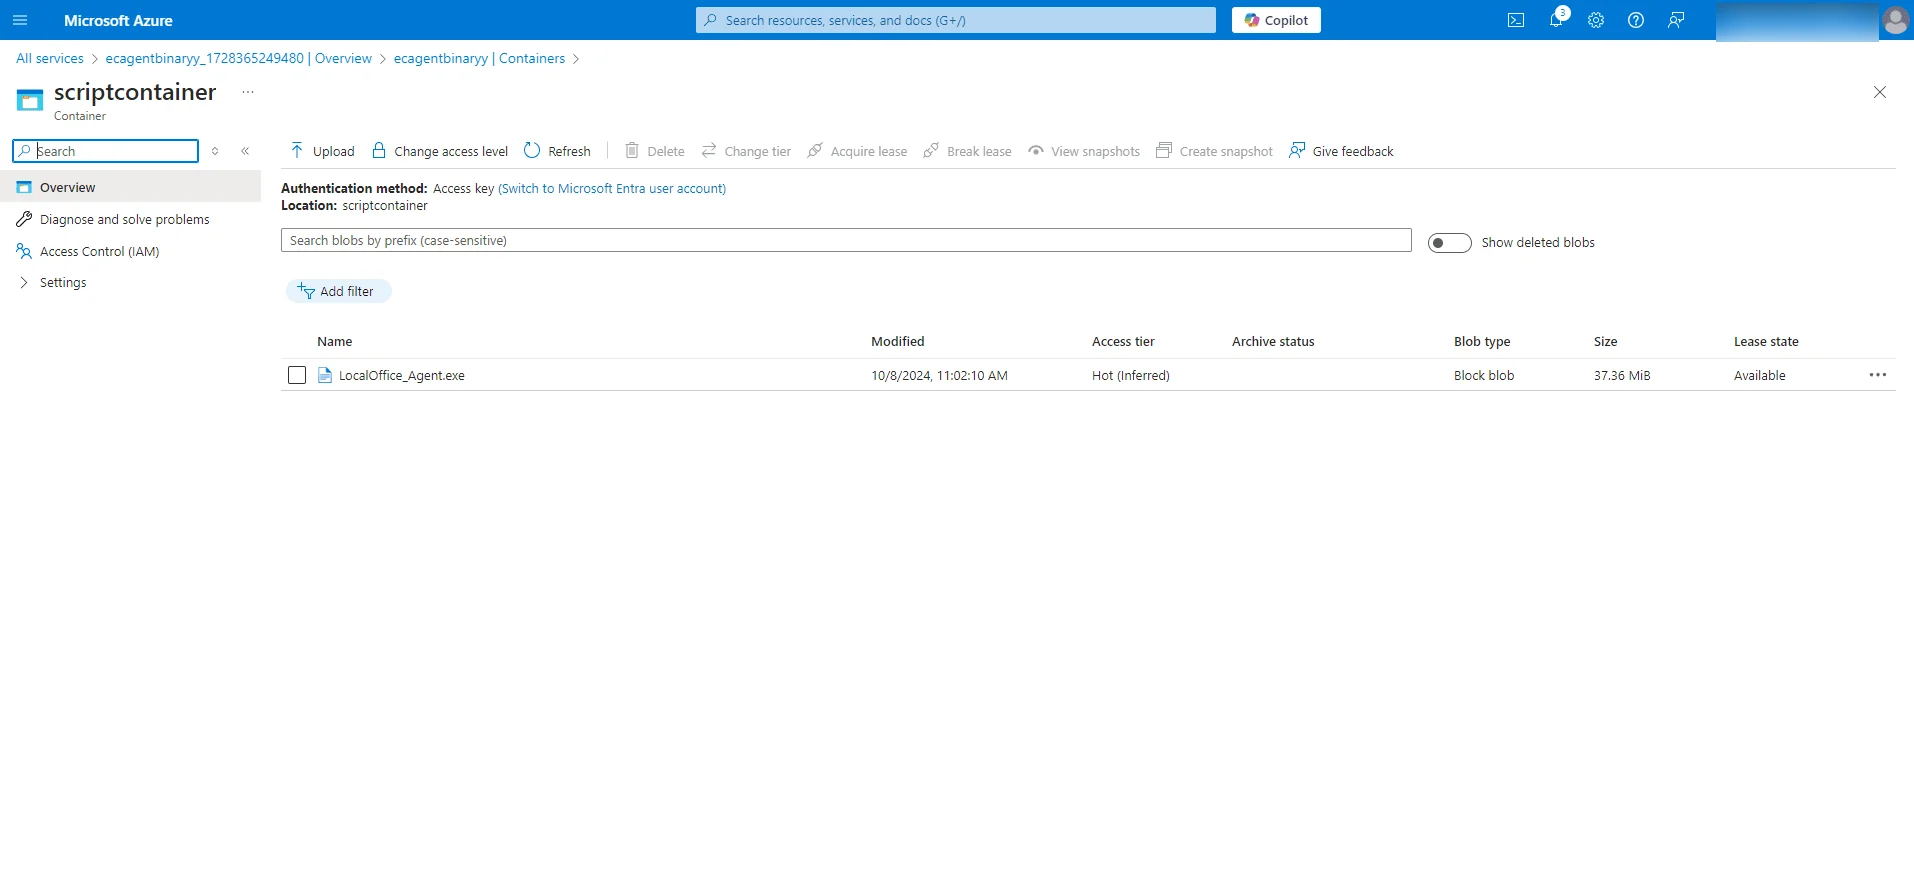
- Generate a SAS Token:
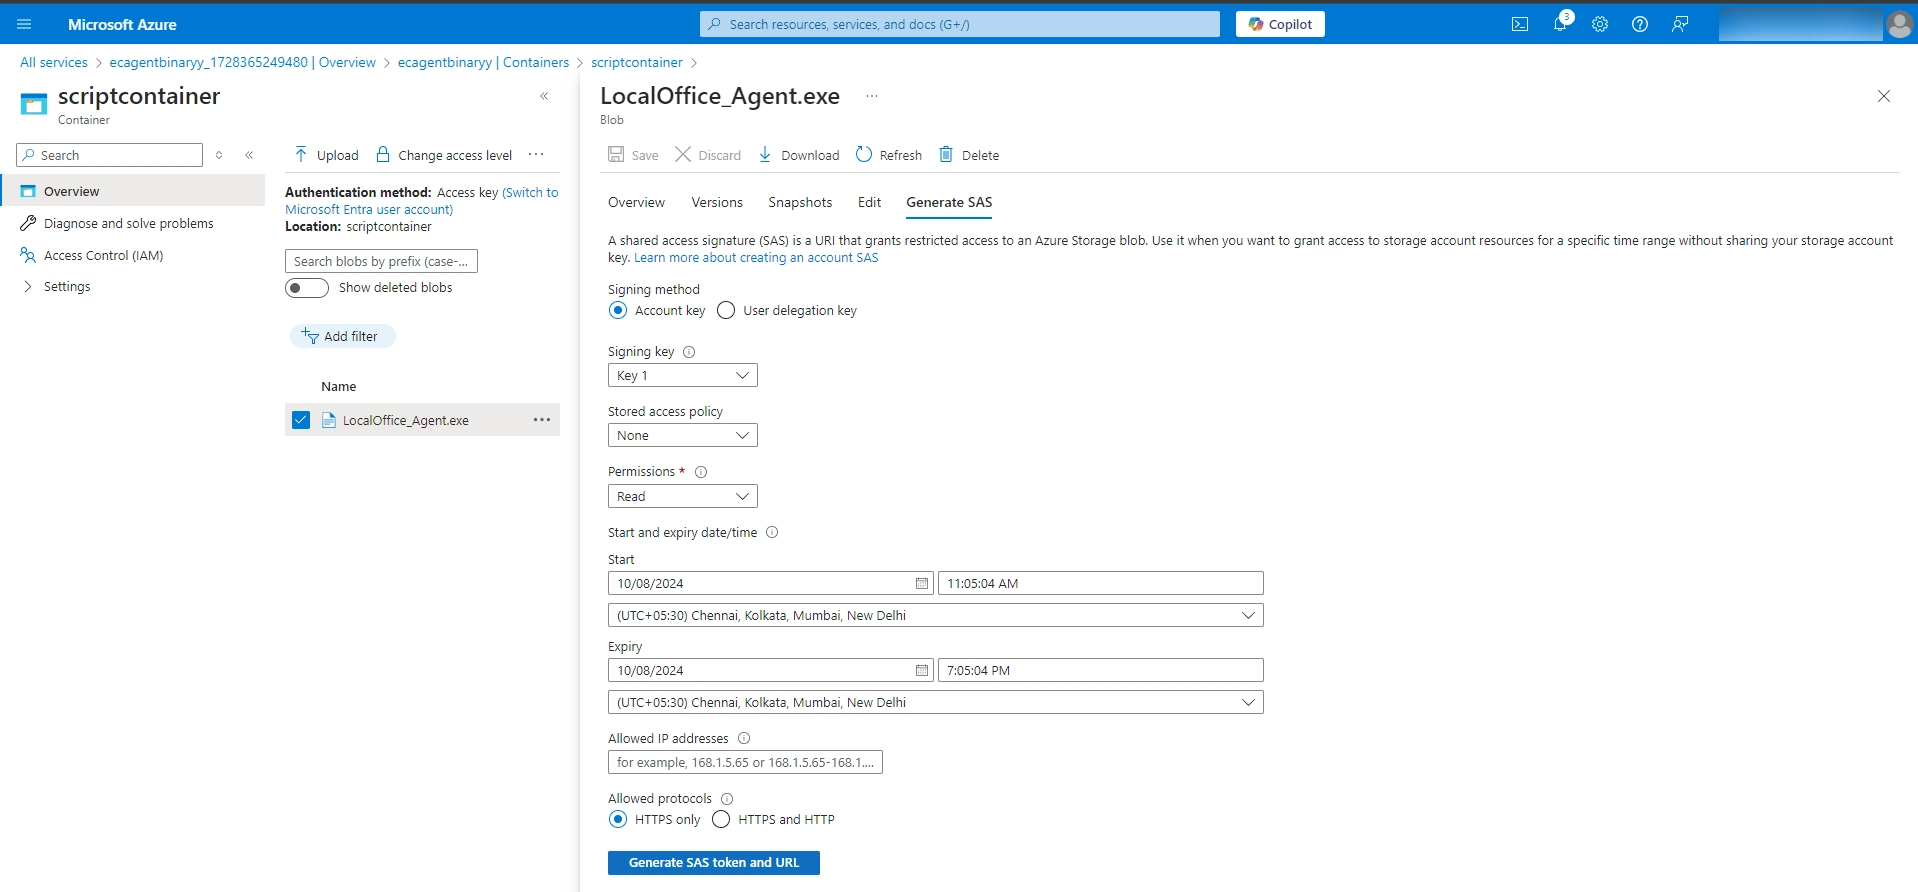
- Right-click on LocalOffice_Agent.exe and select Generate SAS.
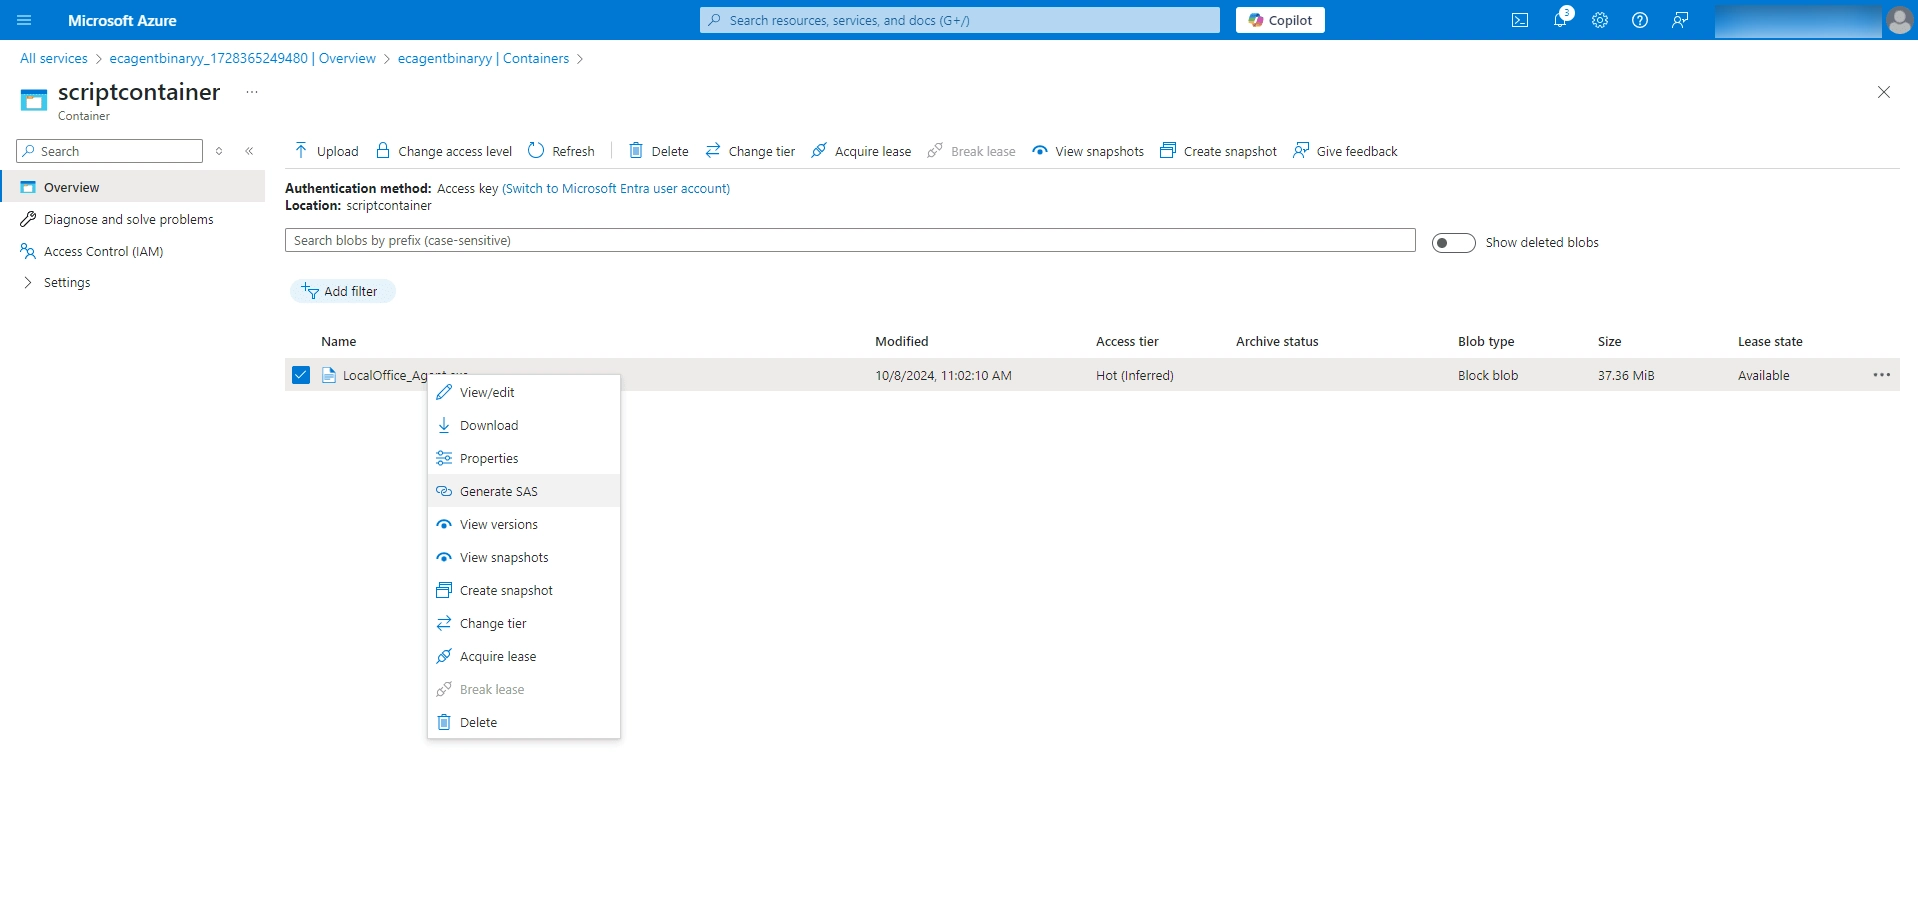
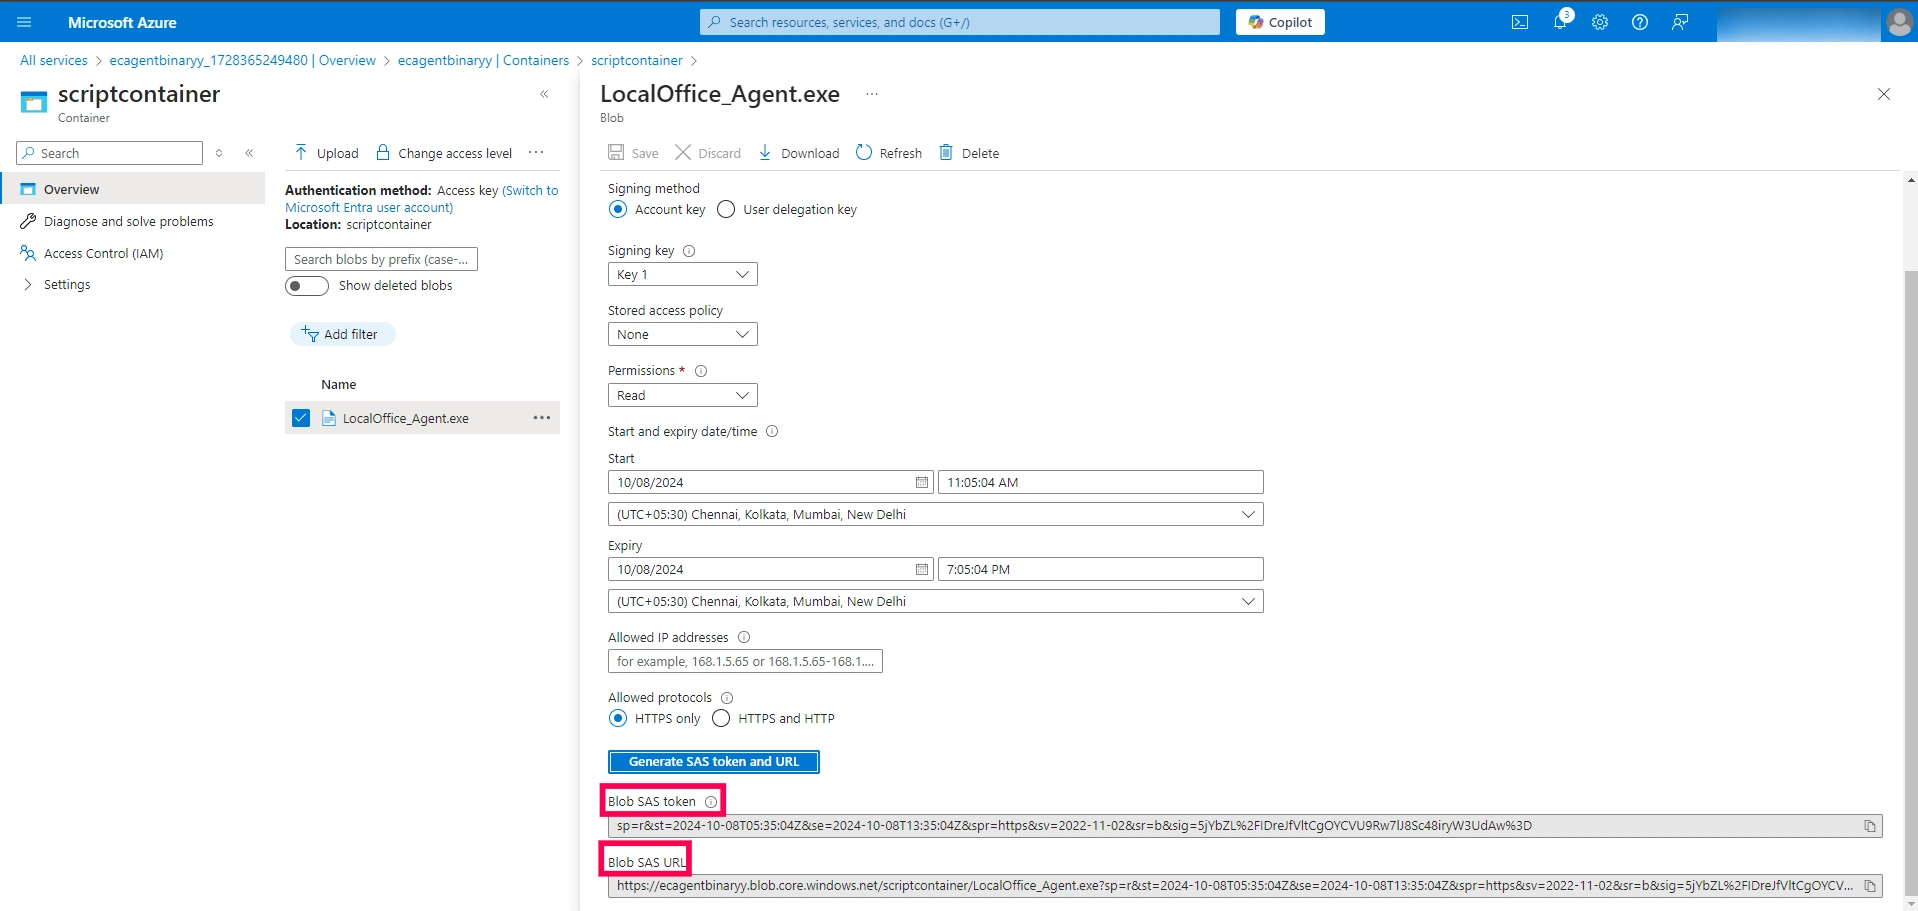
- Set the expiration date and allowed protocol, then click Generate SAS token and URL.
- Copy the Blob SAS URL.
- Prepare the Installation Script:
- Download the attached script and open it in a text editor.
- Replace the placeholder
LocalOffice_Agent.exe Agent_MSI_URLwith the Blob SAS URL.
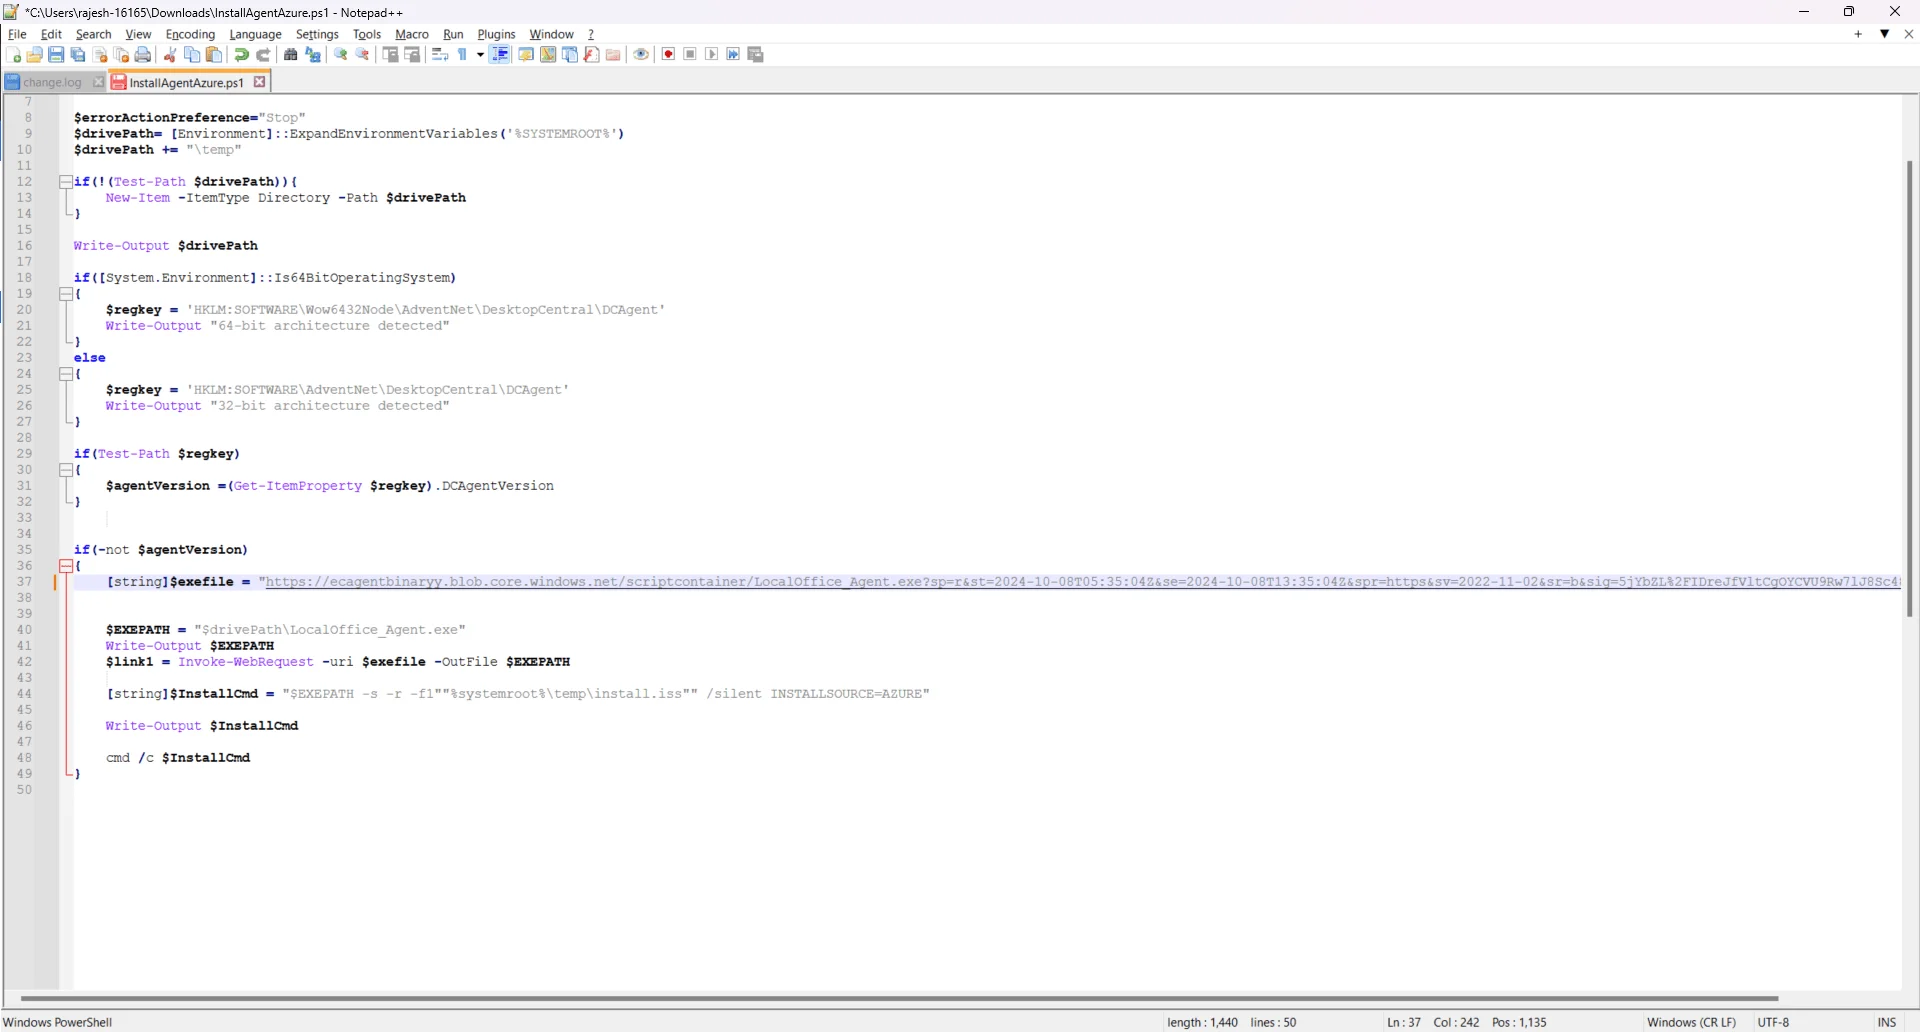
- Save the file as InstallAgentAzure.ps1.
- Upload InstallAgentAzure.ps1 to the same scriptcontainer.
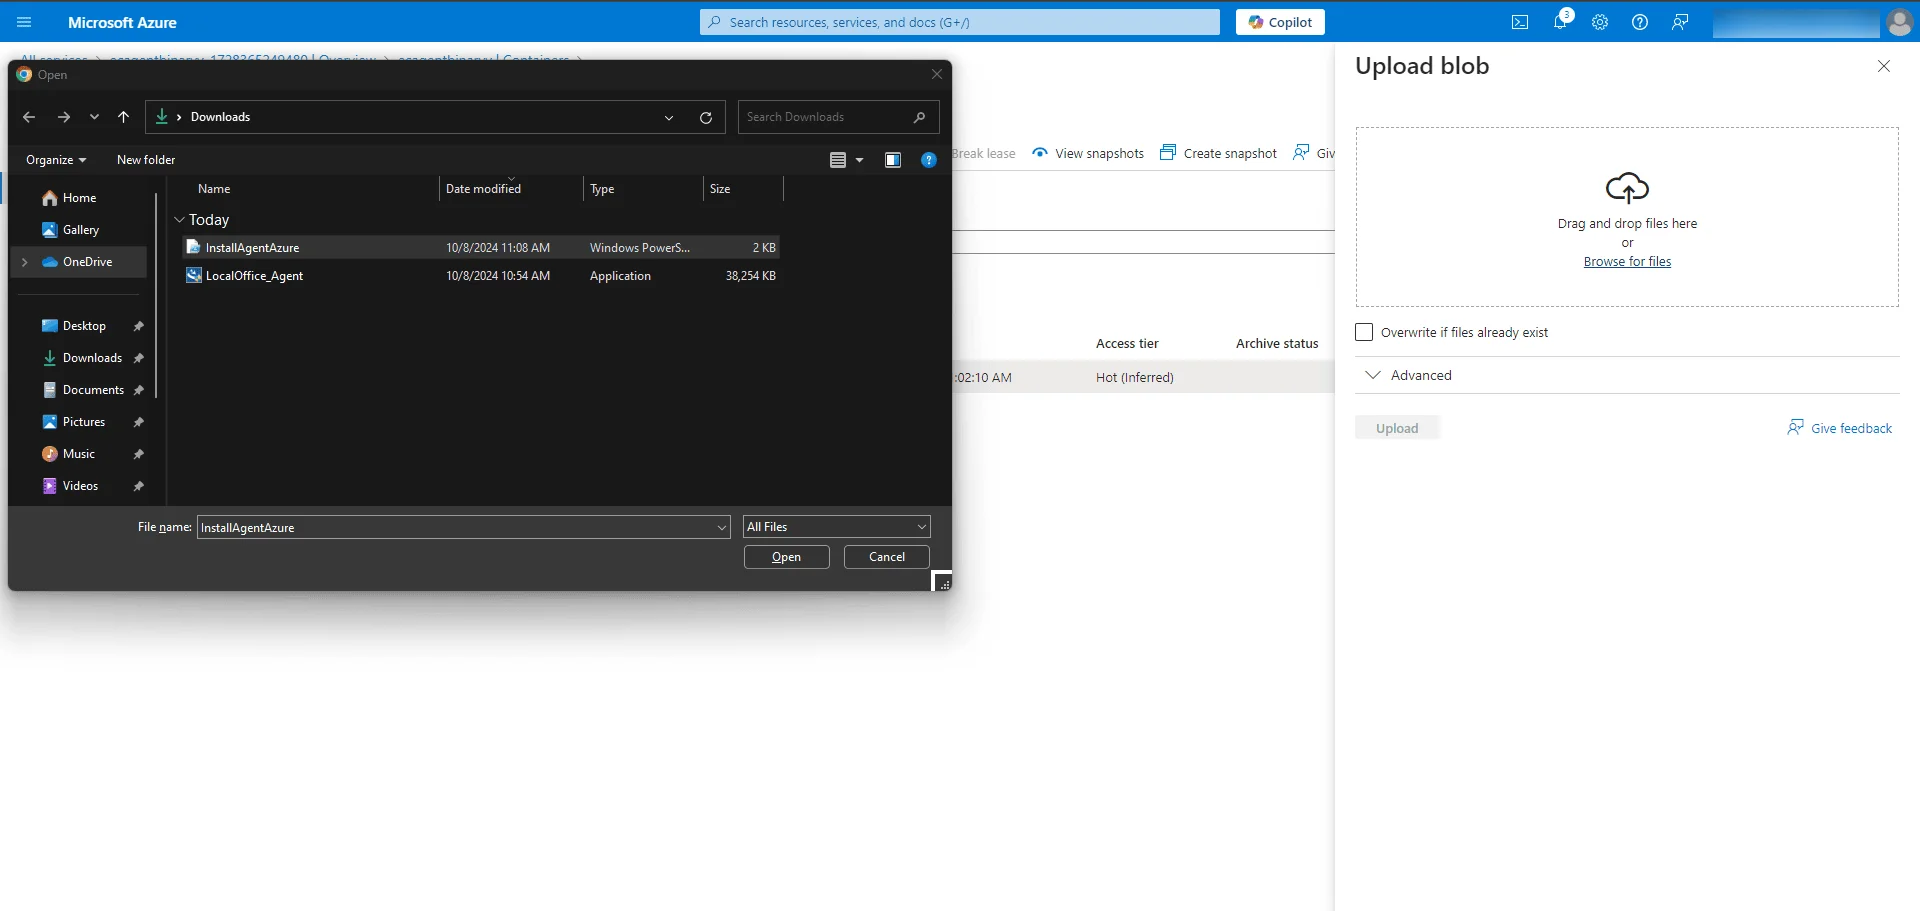
Finalize Storage Container Contents
Your scriptcontainer should now contain:
- LocalOffice_Agent.exe
- InstallAgentAzure.ps1
Step 3: Create an Azure Automation Account
- Login to the Azure Portal.
- Create an Automation Account:
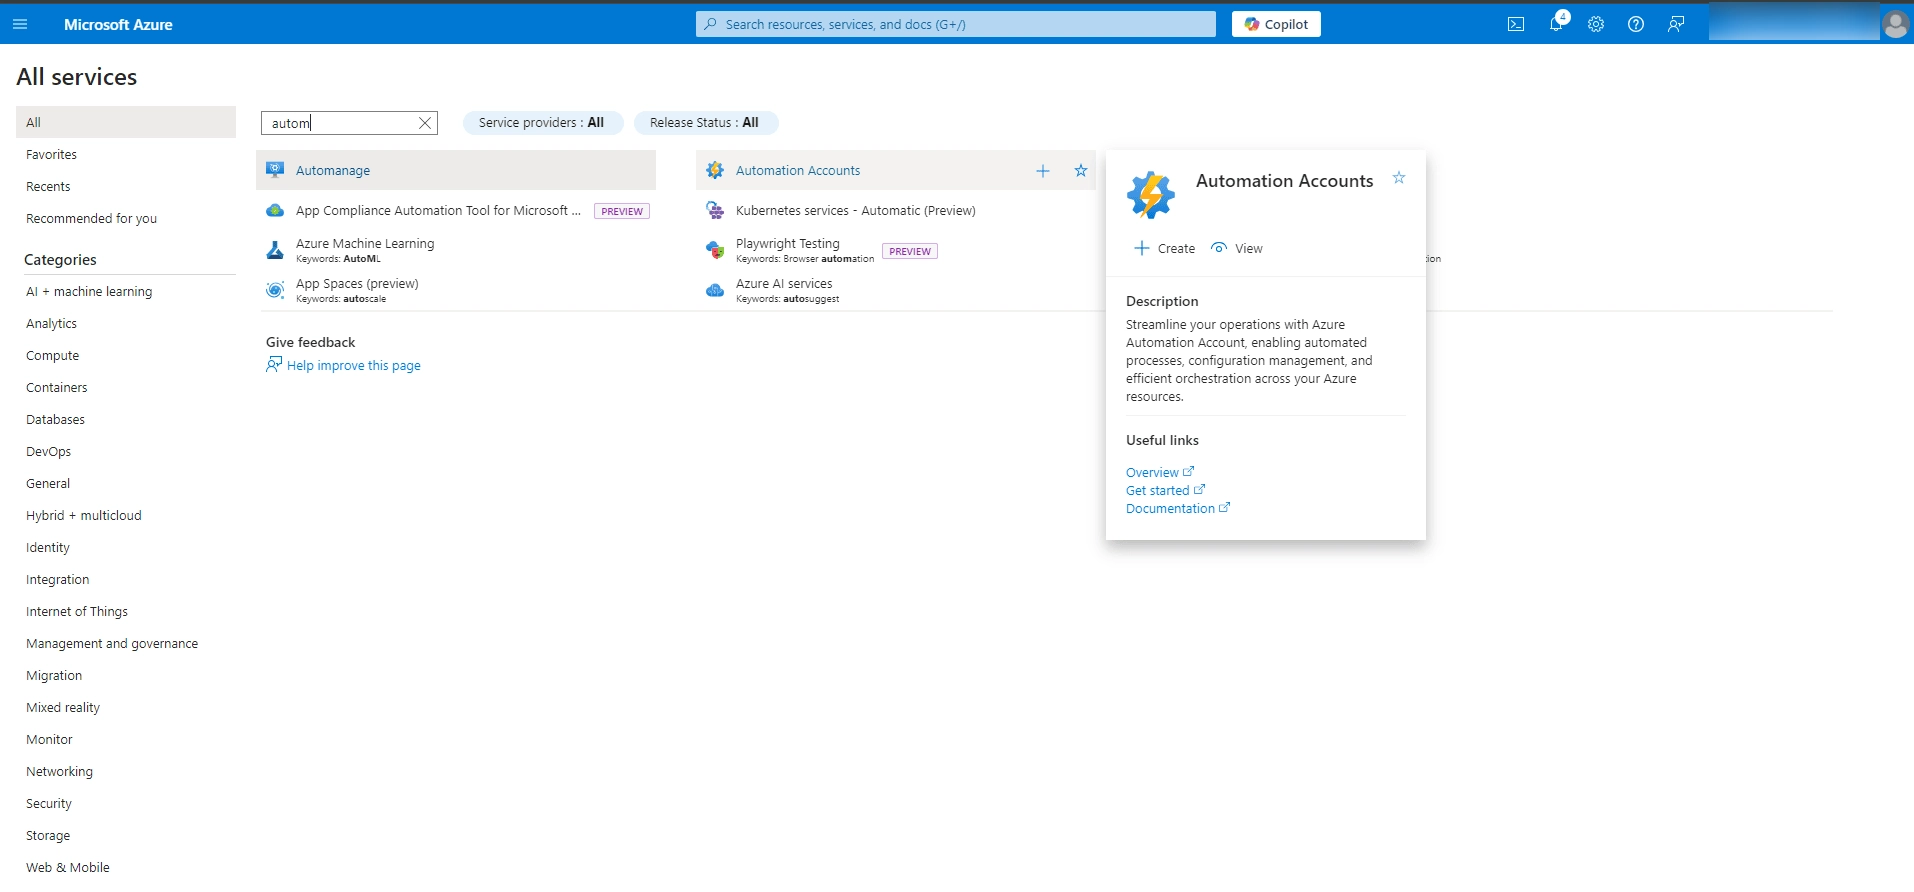
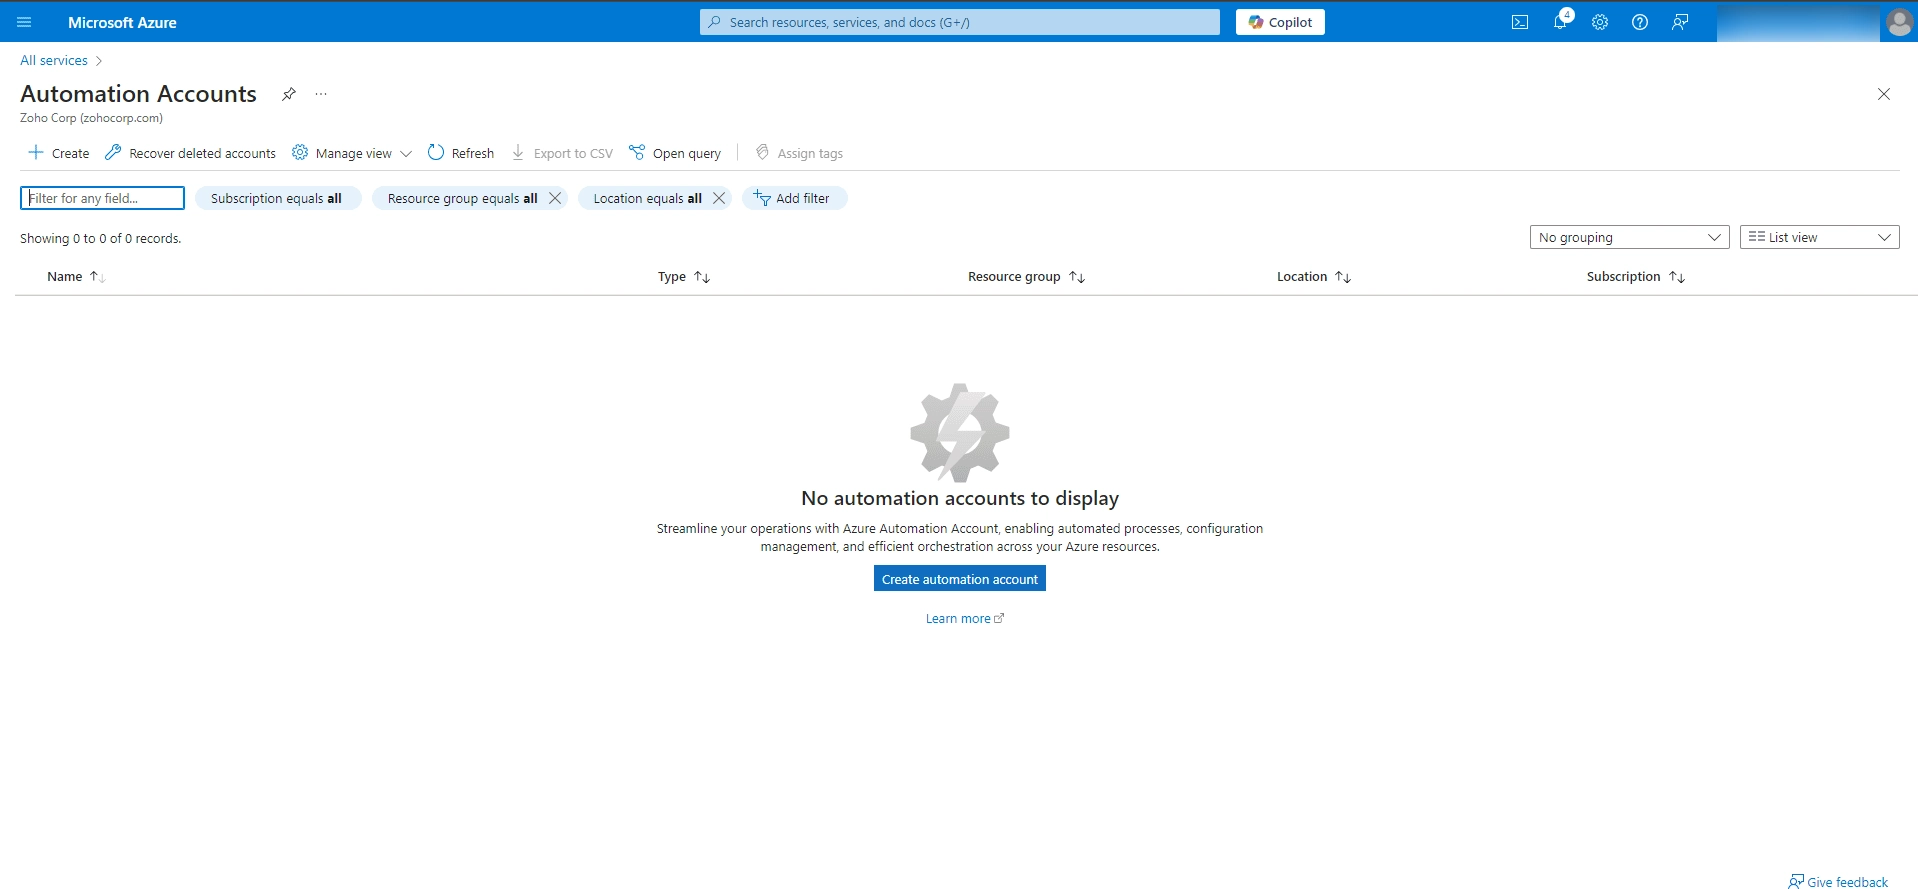
- Navigate to Automation Accounts and click Add.
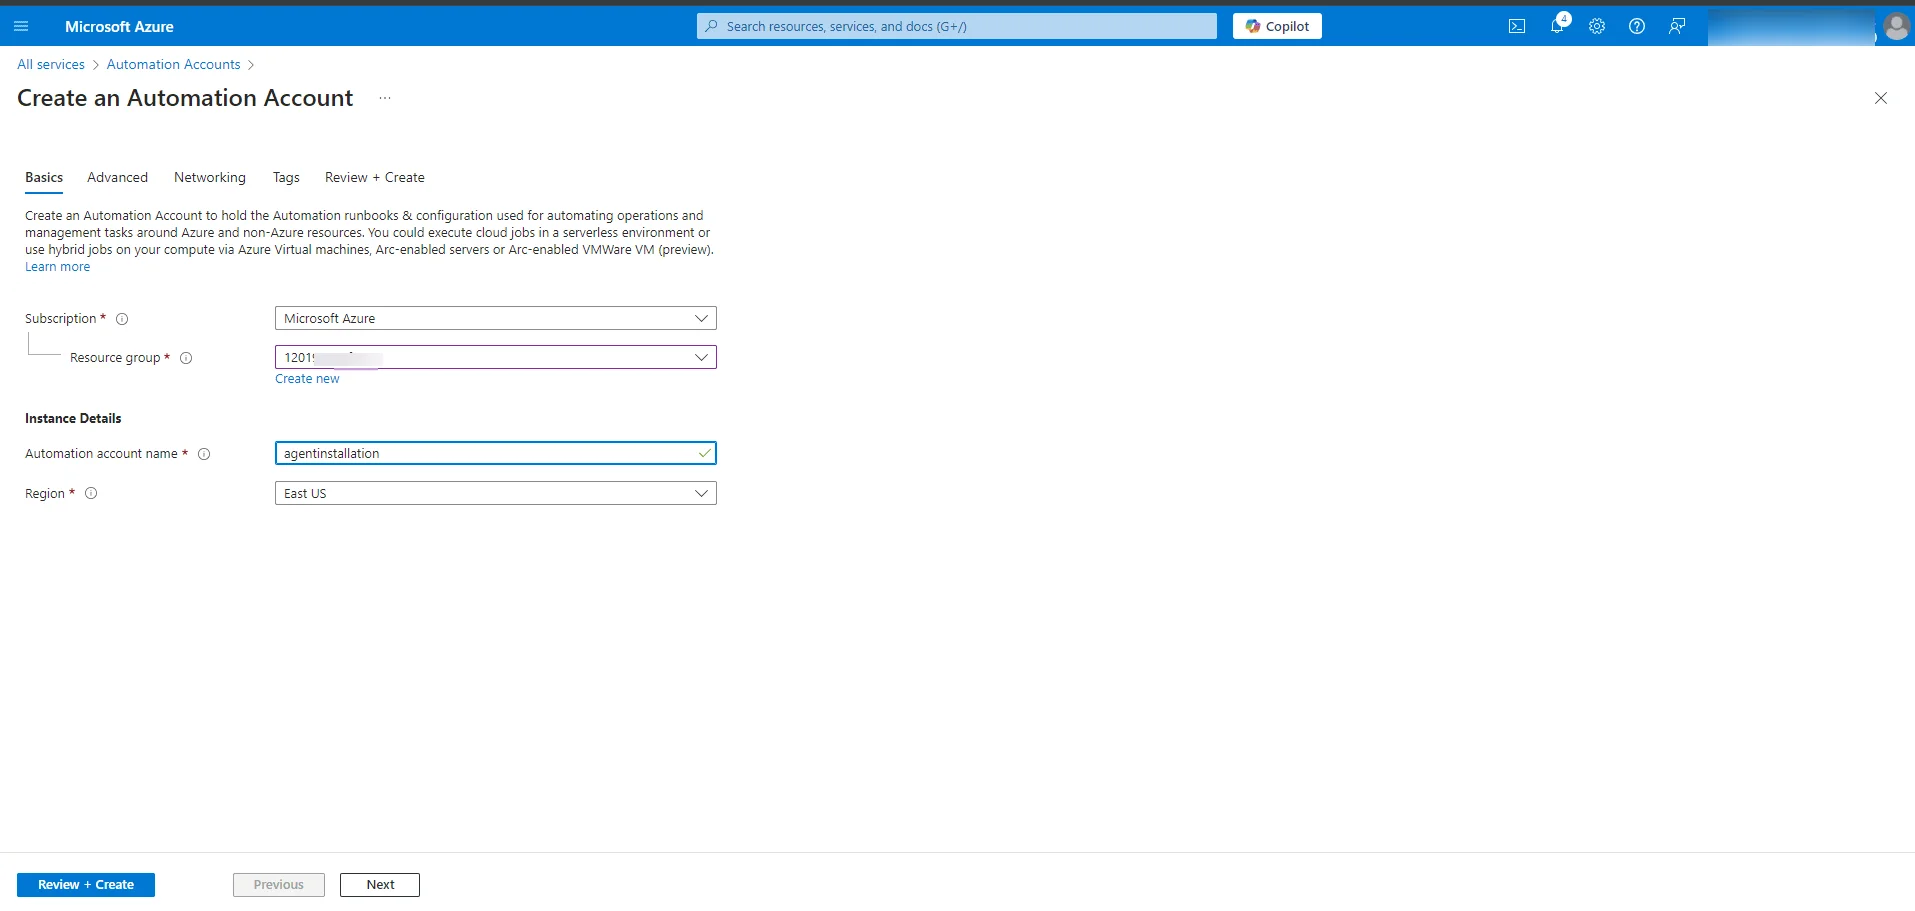
- Choose your resource group.
- Name the Automation account: agentinstallation.
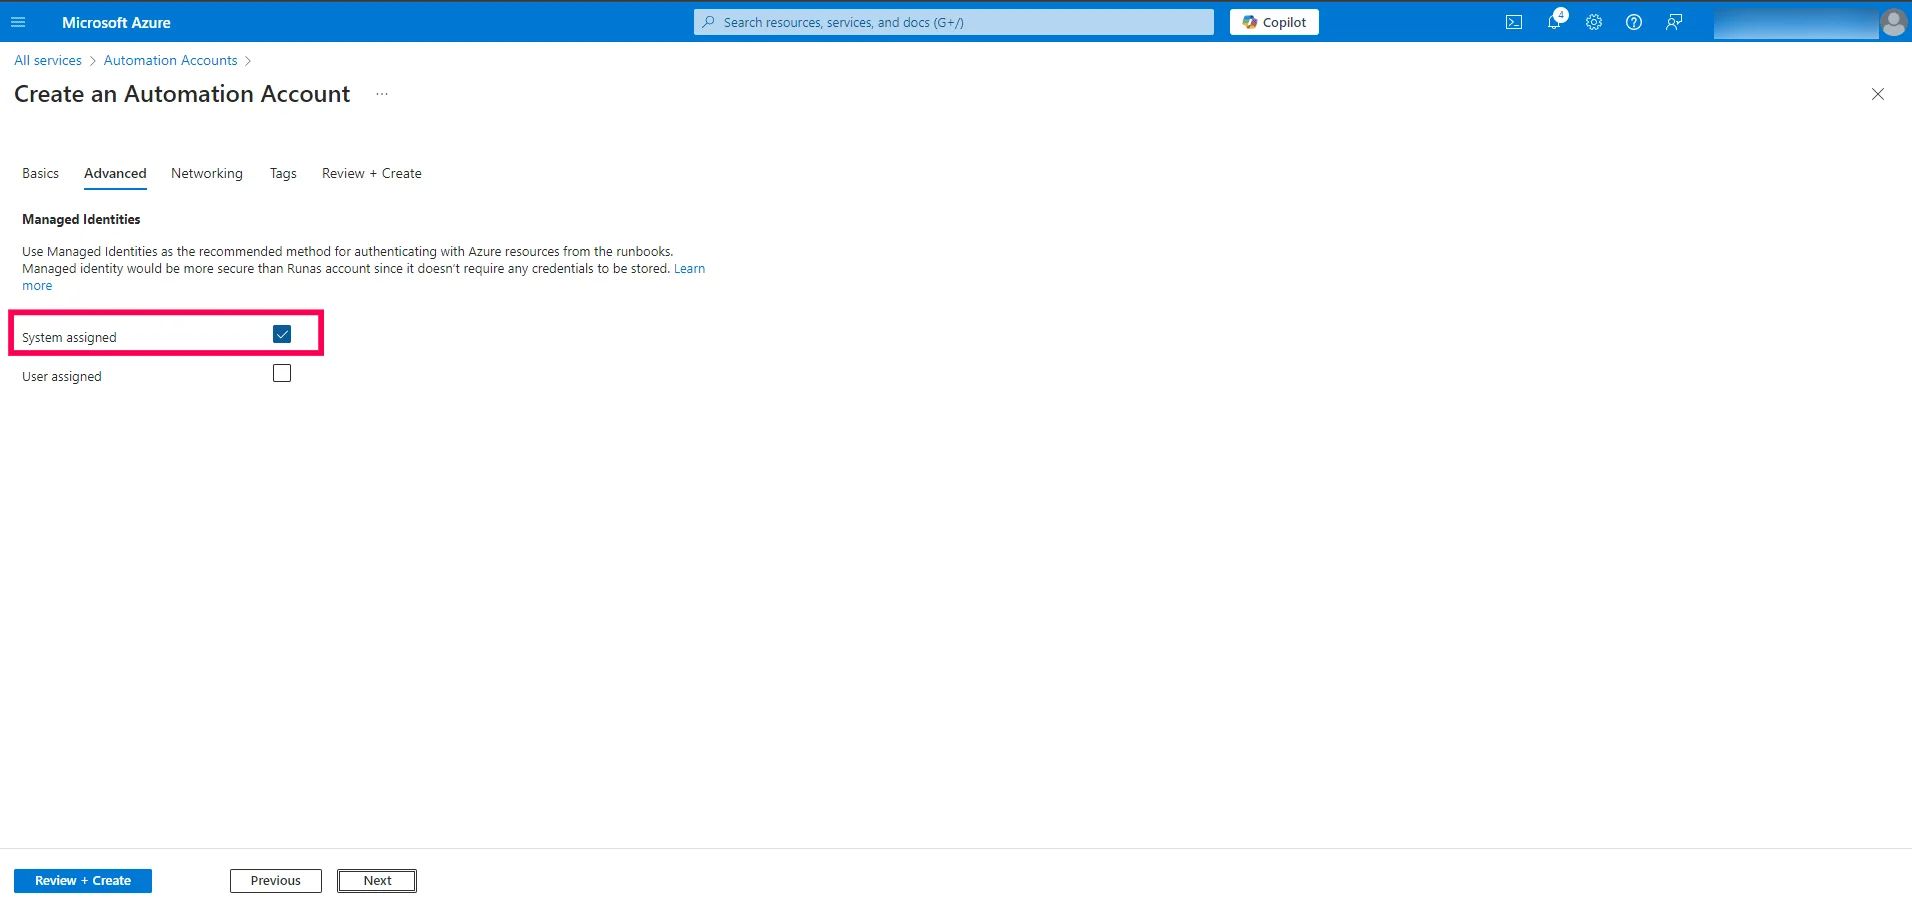
- In the Advanced tab Select System Managed Identity.
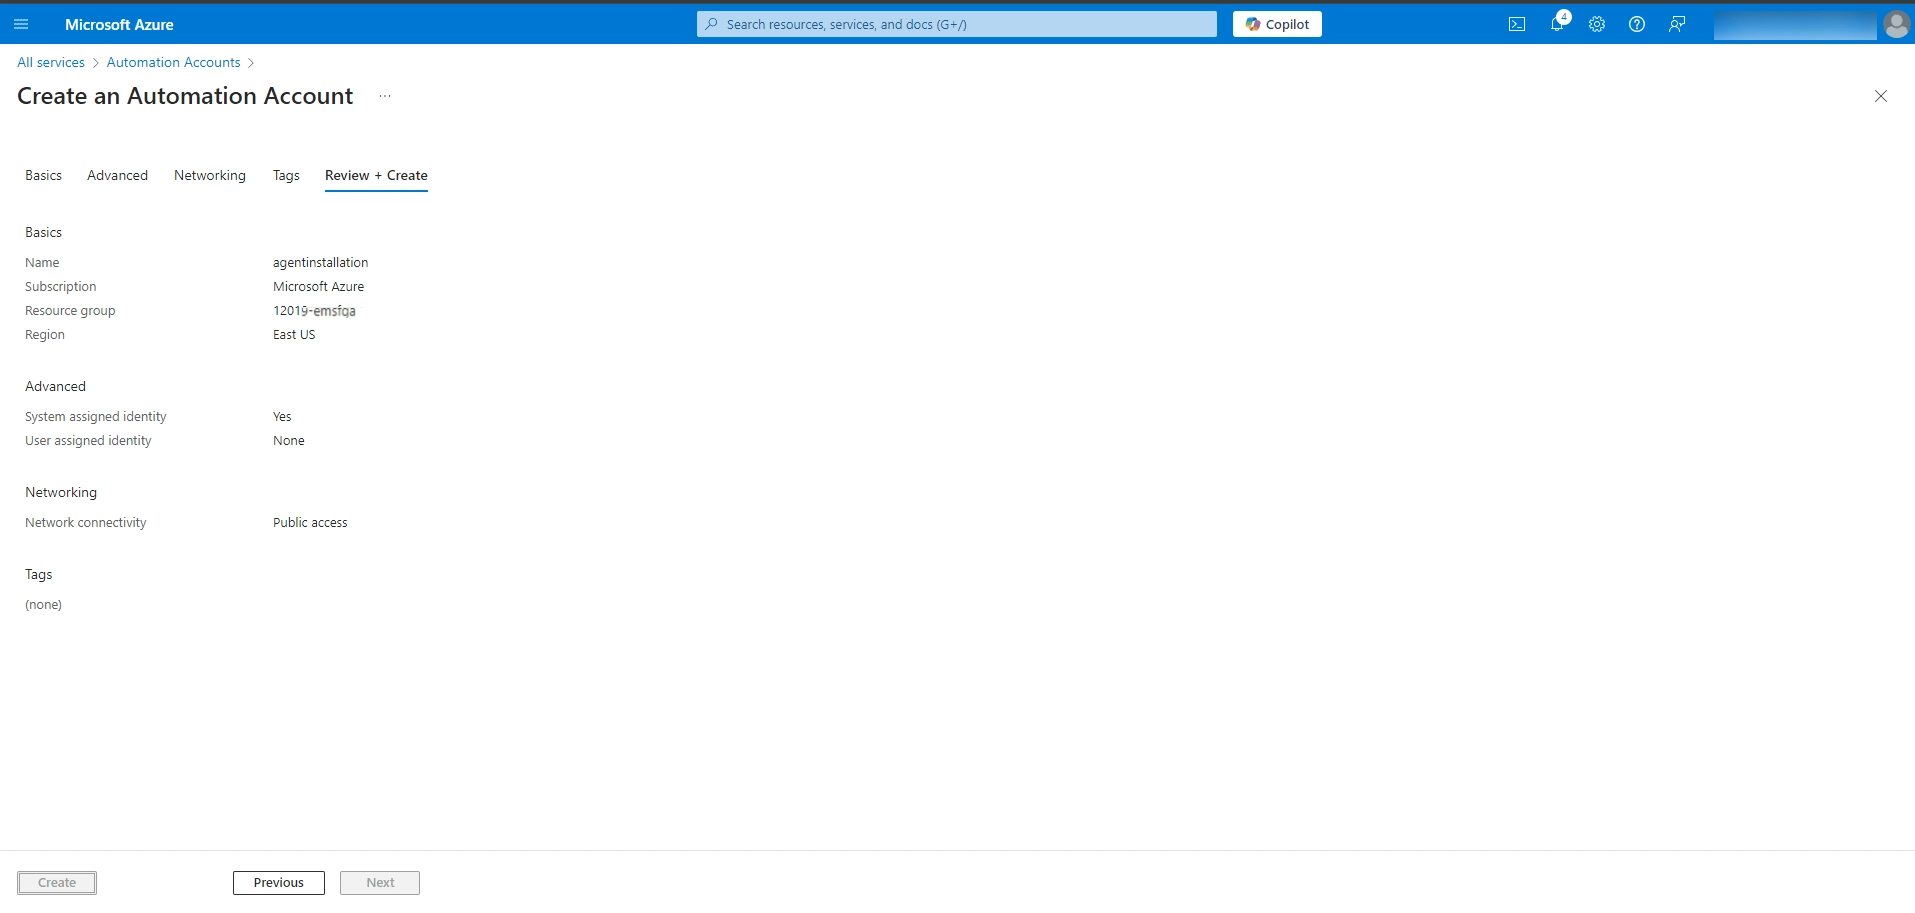
- Review your settings and click Create.
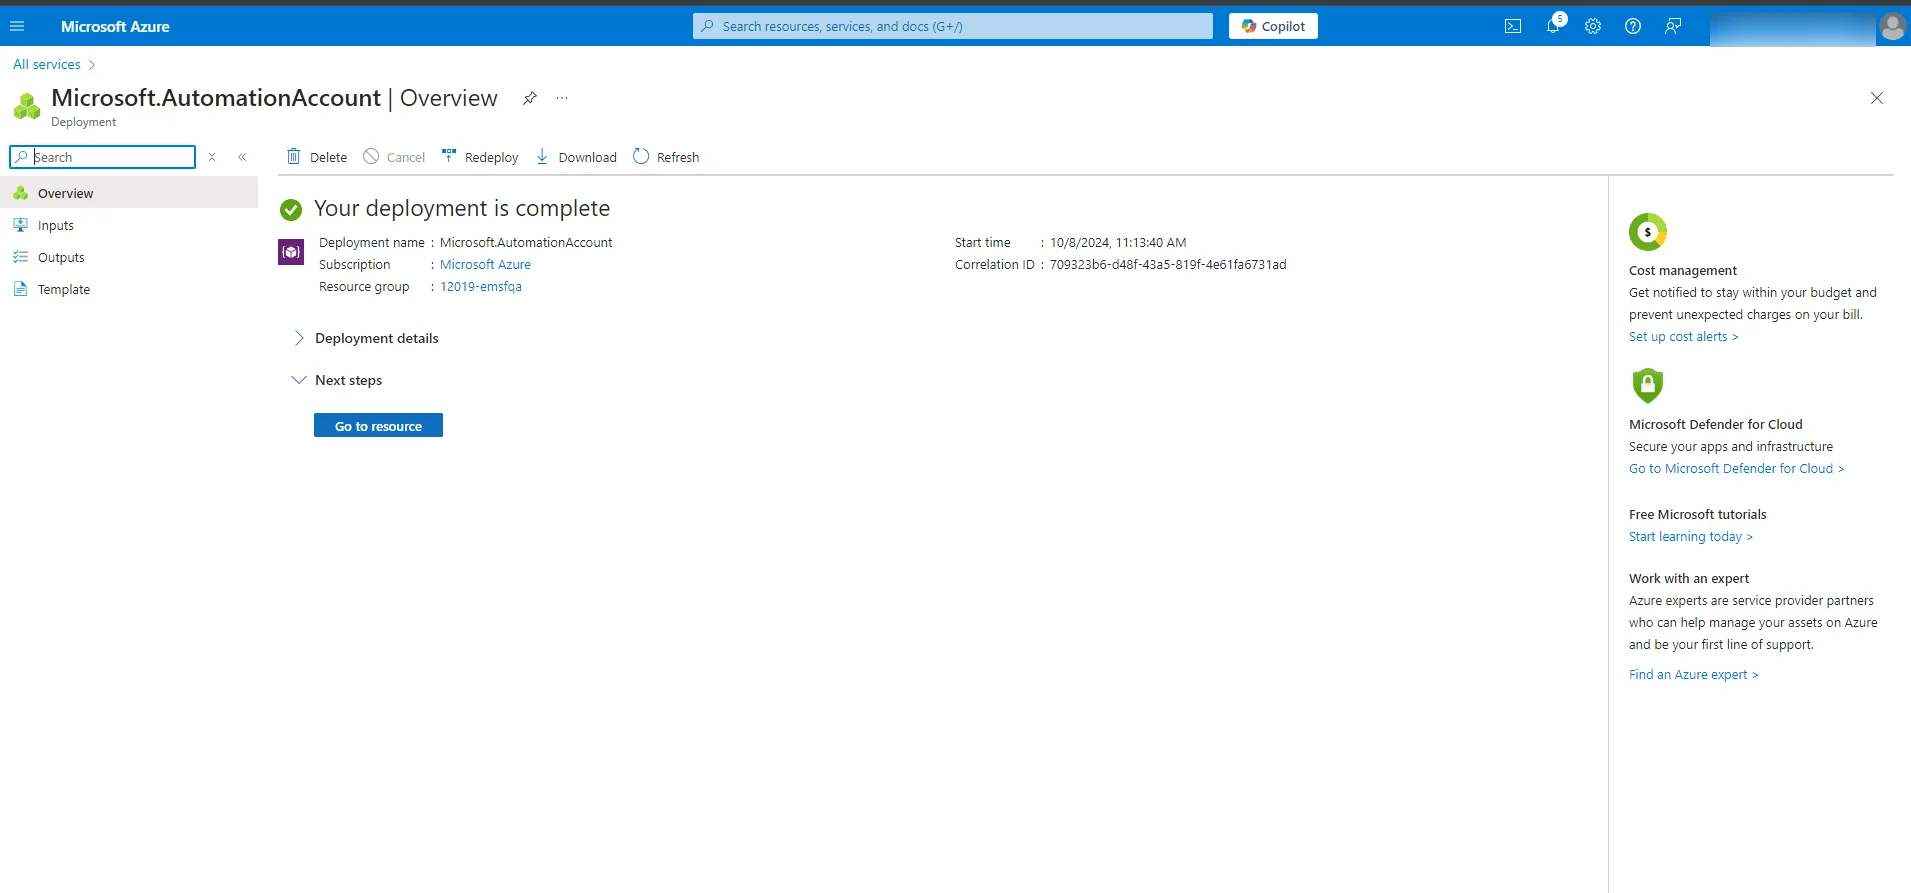
- Enable System Managed Identity:
- Once the deployment completes, click Go to resource.
- Search for Identity and toggle System Managed Identity to On.
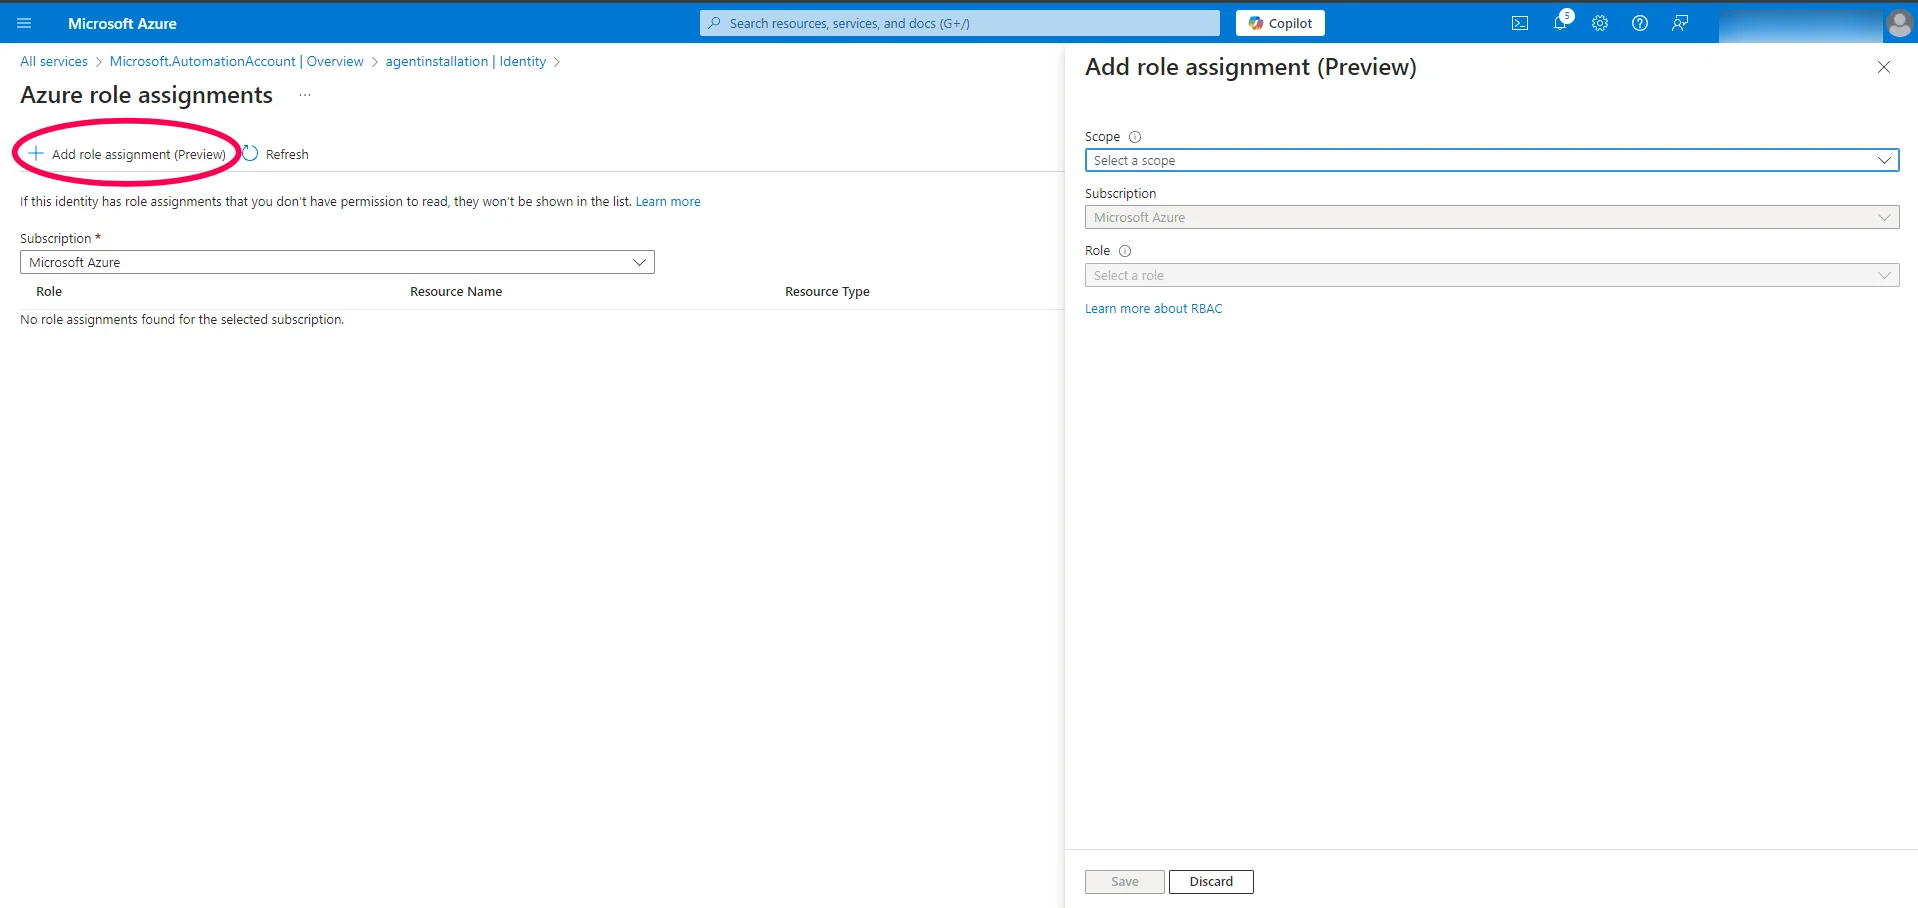
- Assign Roles:
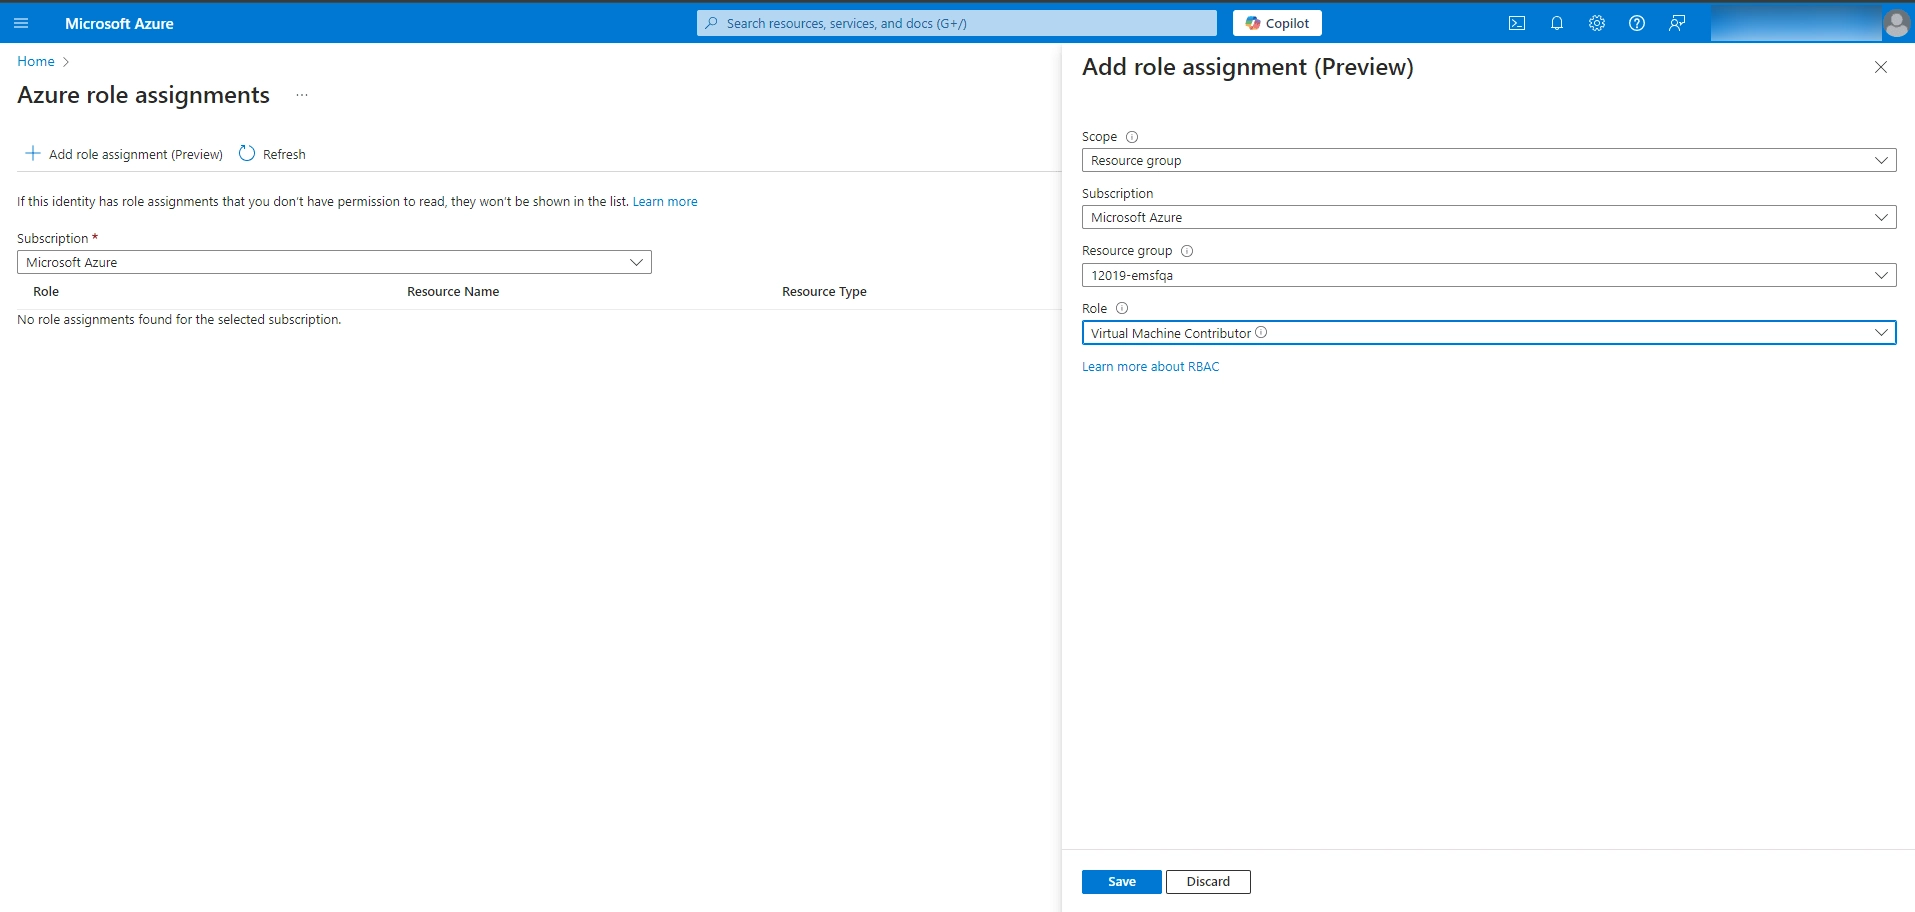
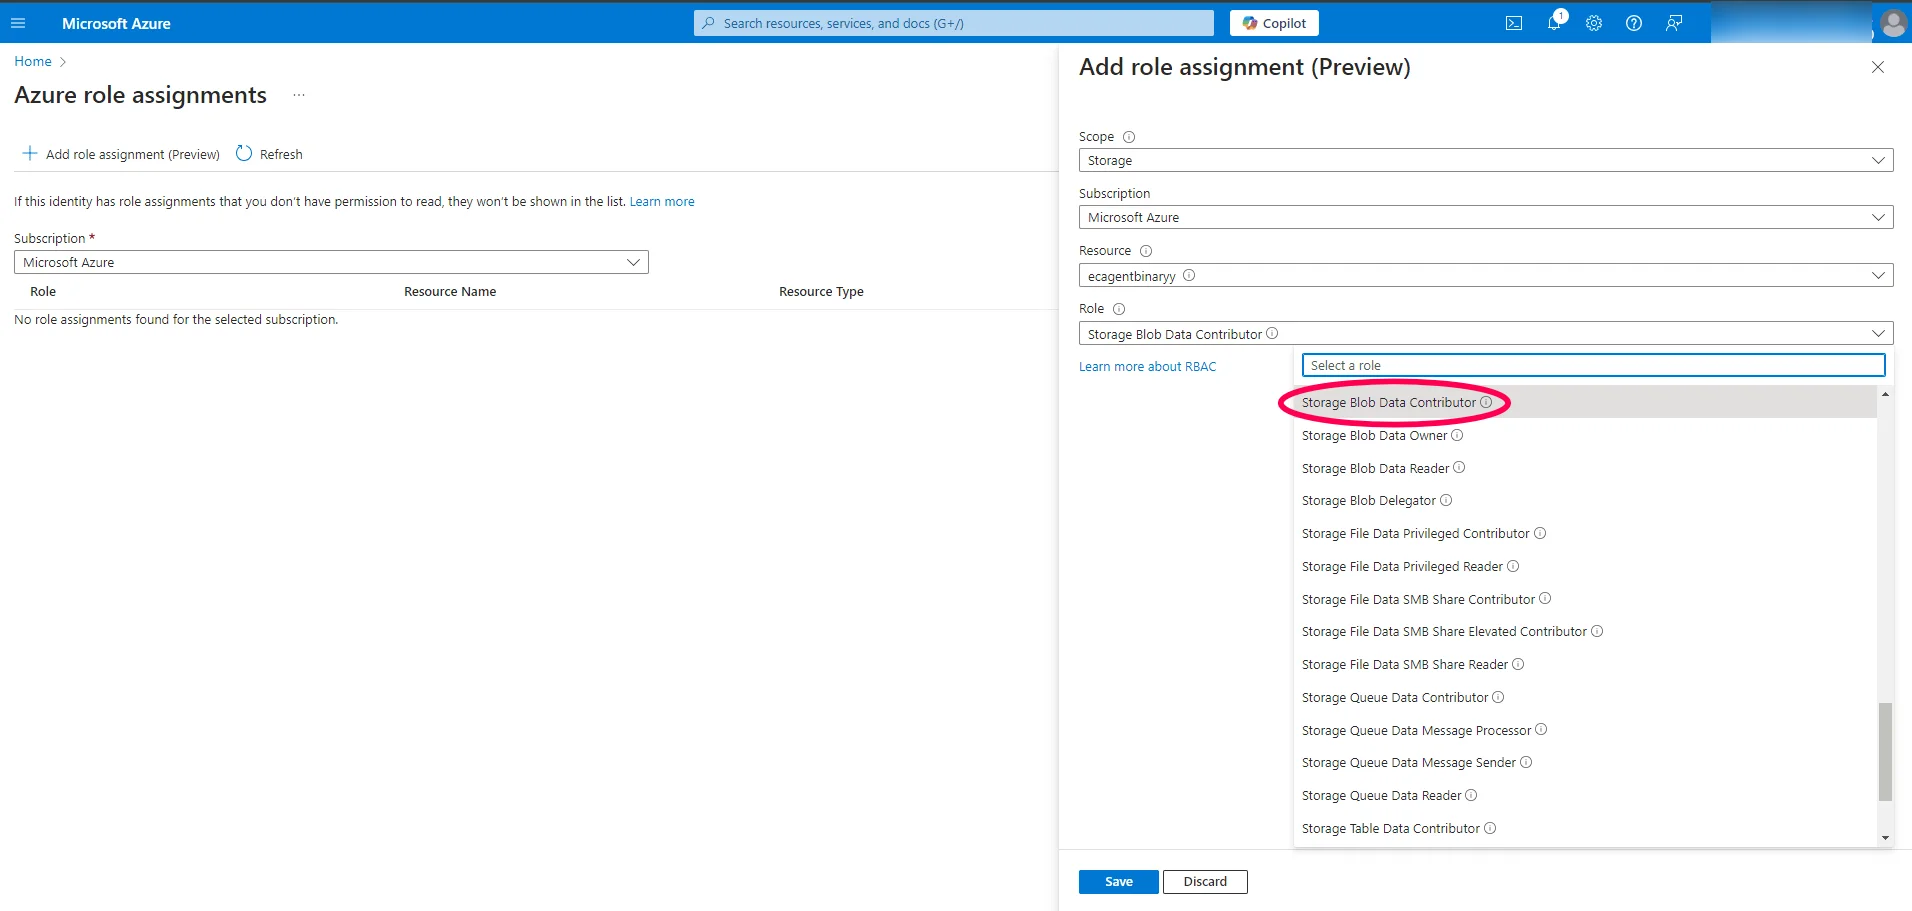
- Click Azure role assignments and use Add role assignmentto assign the following roles:
- Role 1:
- Scope: Resource group
- Subscription: Your target subscription
- Role: Virtual Machine Contributor
- Role 2:
- Scope: Storage
- Subscription: Your target subscription
- Resource: ecagentbinary
- Role: Storage Blob Data Contributor
- Role 1:
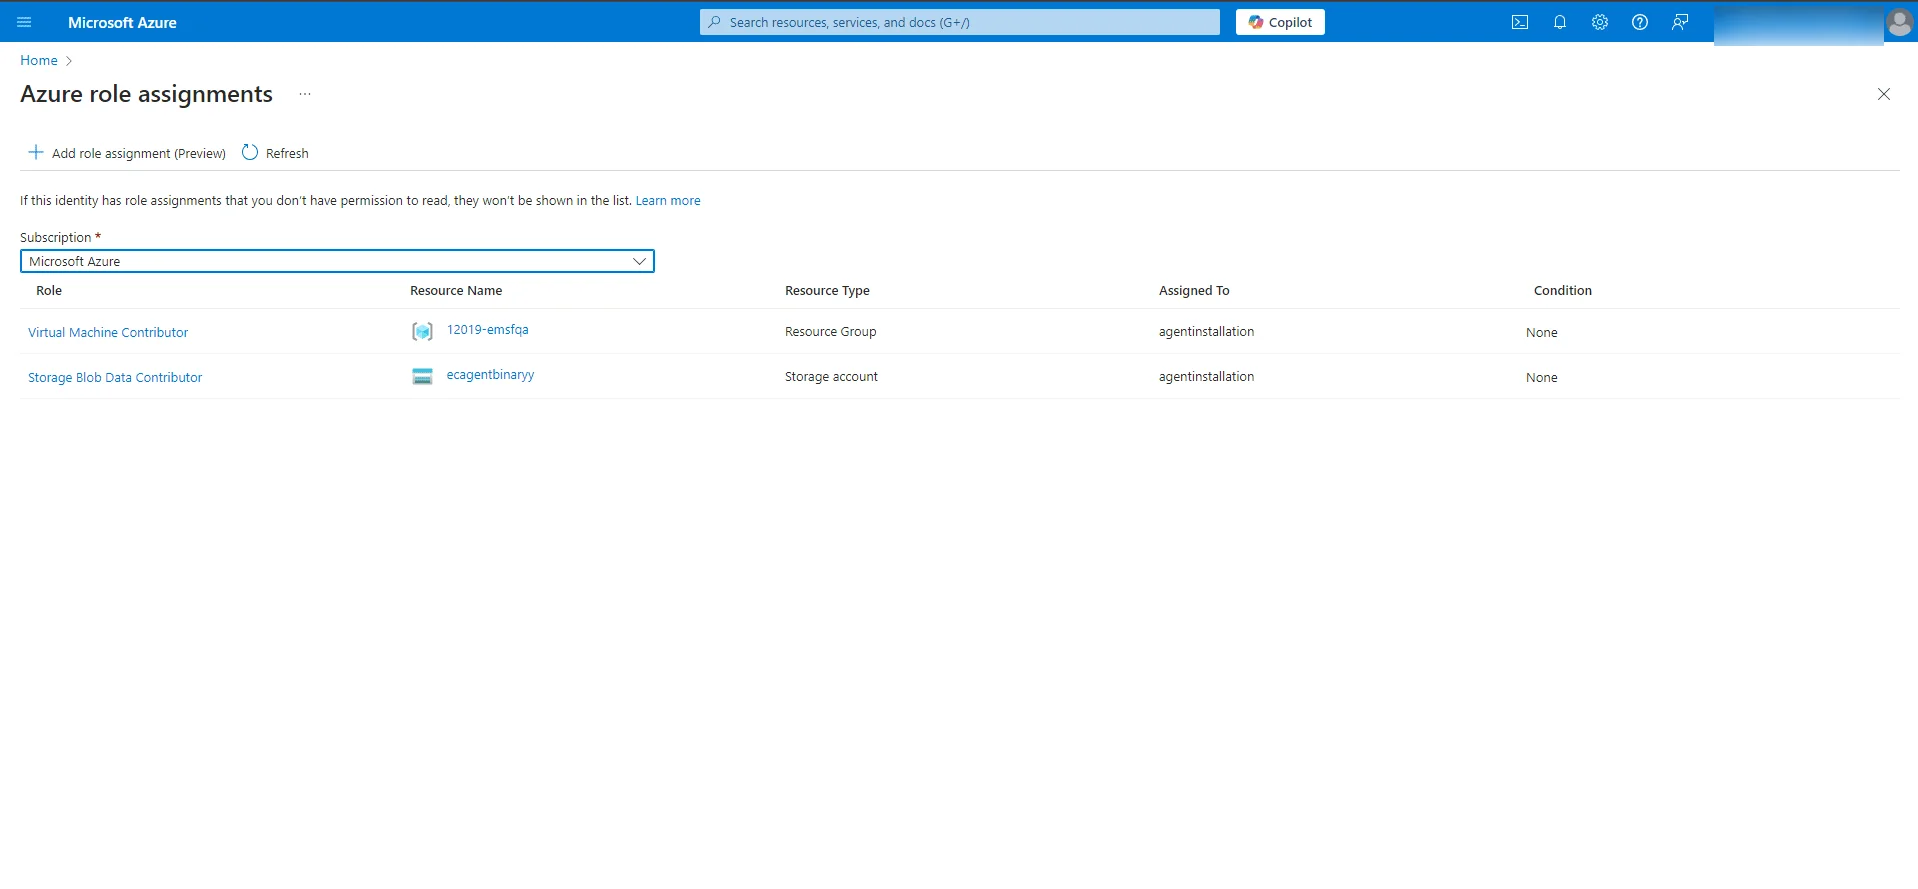
- Wait a few minutes to verify that the roles are assigned.
- Click Azure role assignments and use Add role assignmentto assign the following roles:
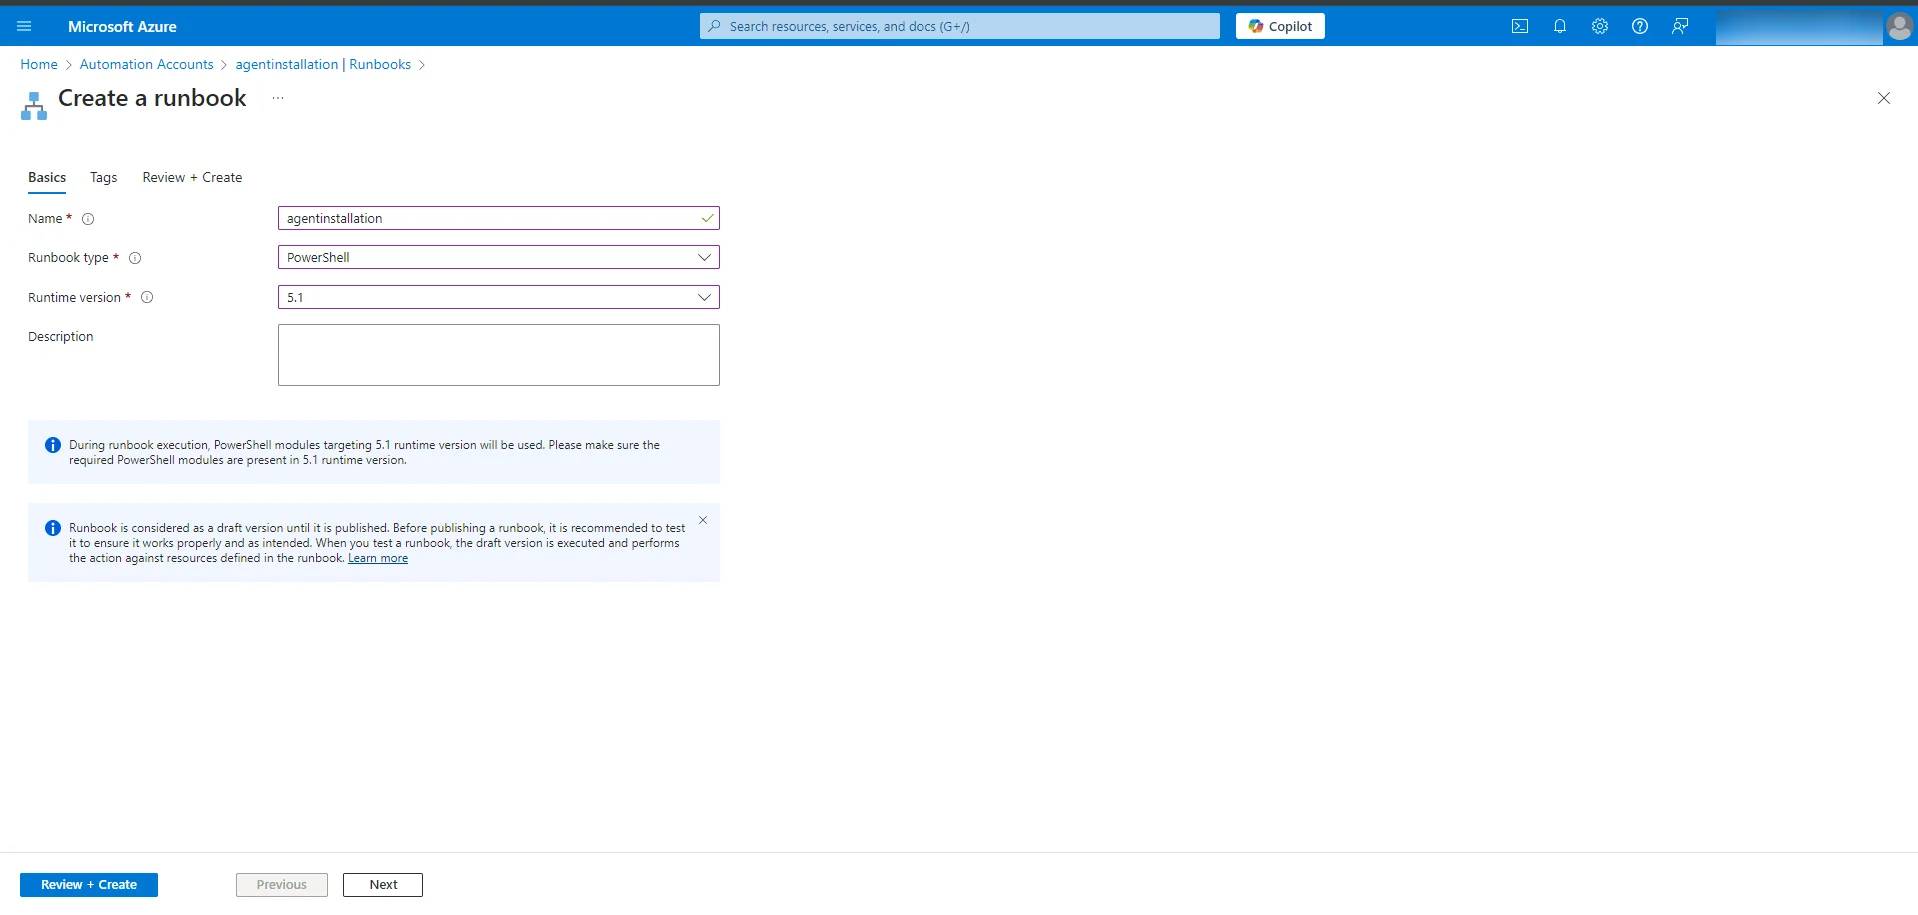
Step 4: Create a New Runbook
- Go to the Automation Account and select Runbooks.
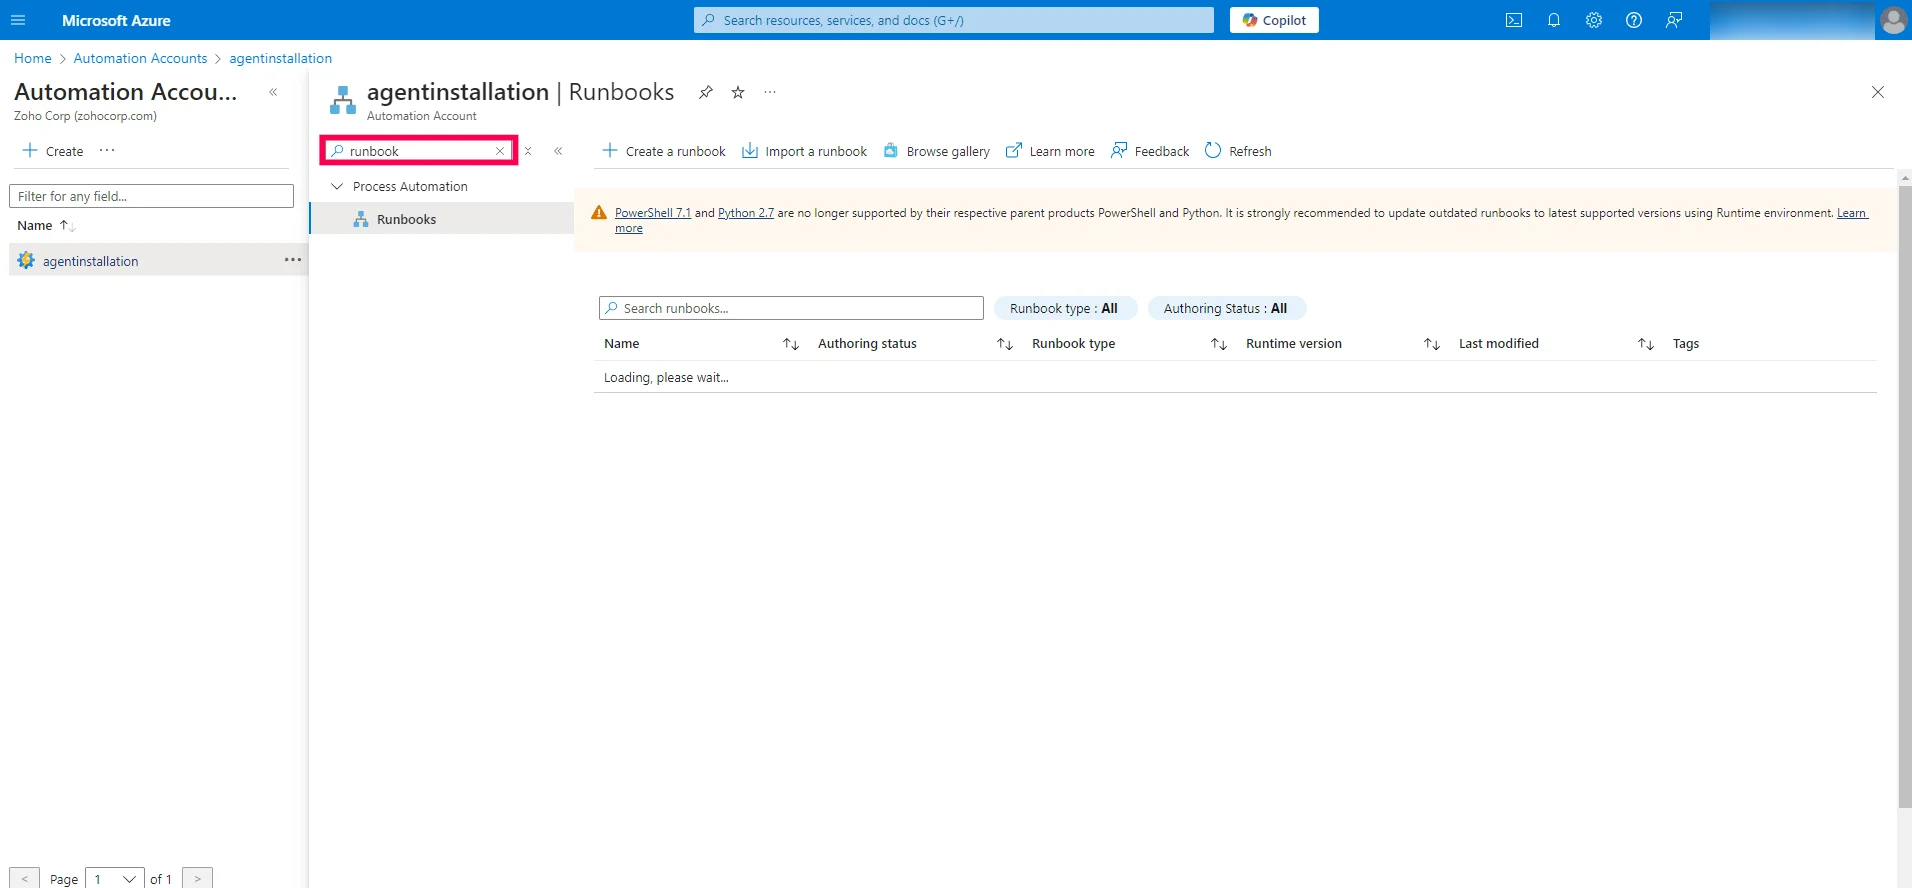
- Click Create a runbookand fill in the details:
- Name: agentinstallation
- Runbook type: PowerShell
- Runtime version: 5.1
- Click Review + Create.
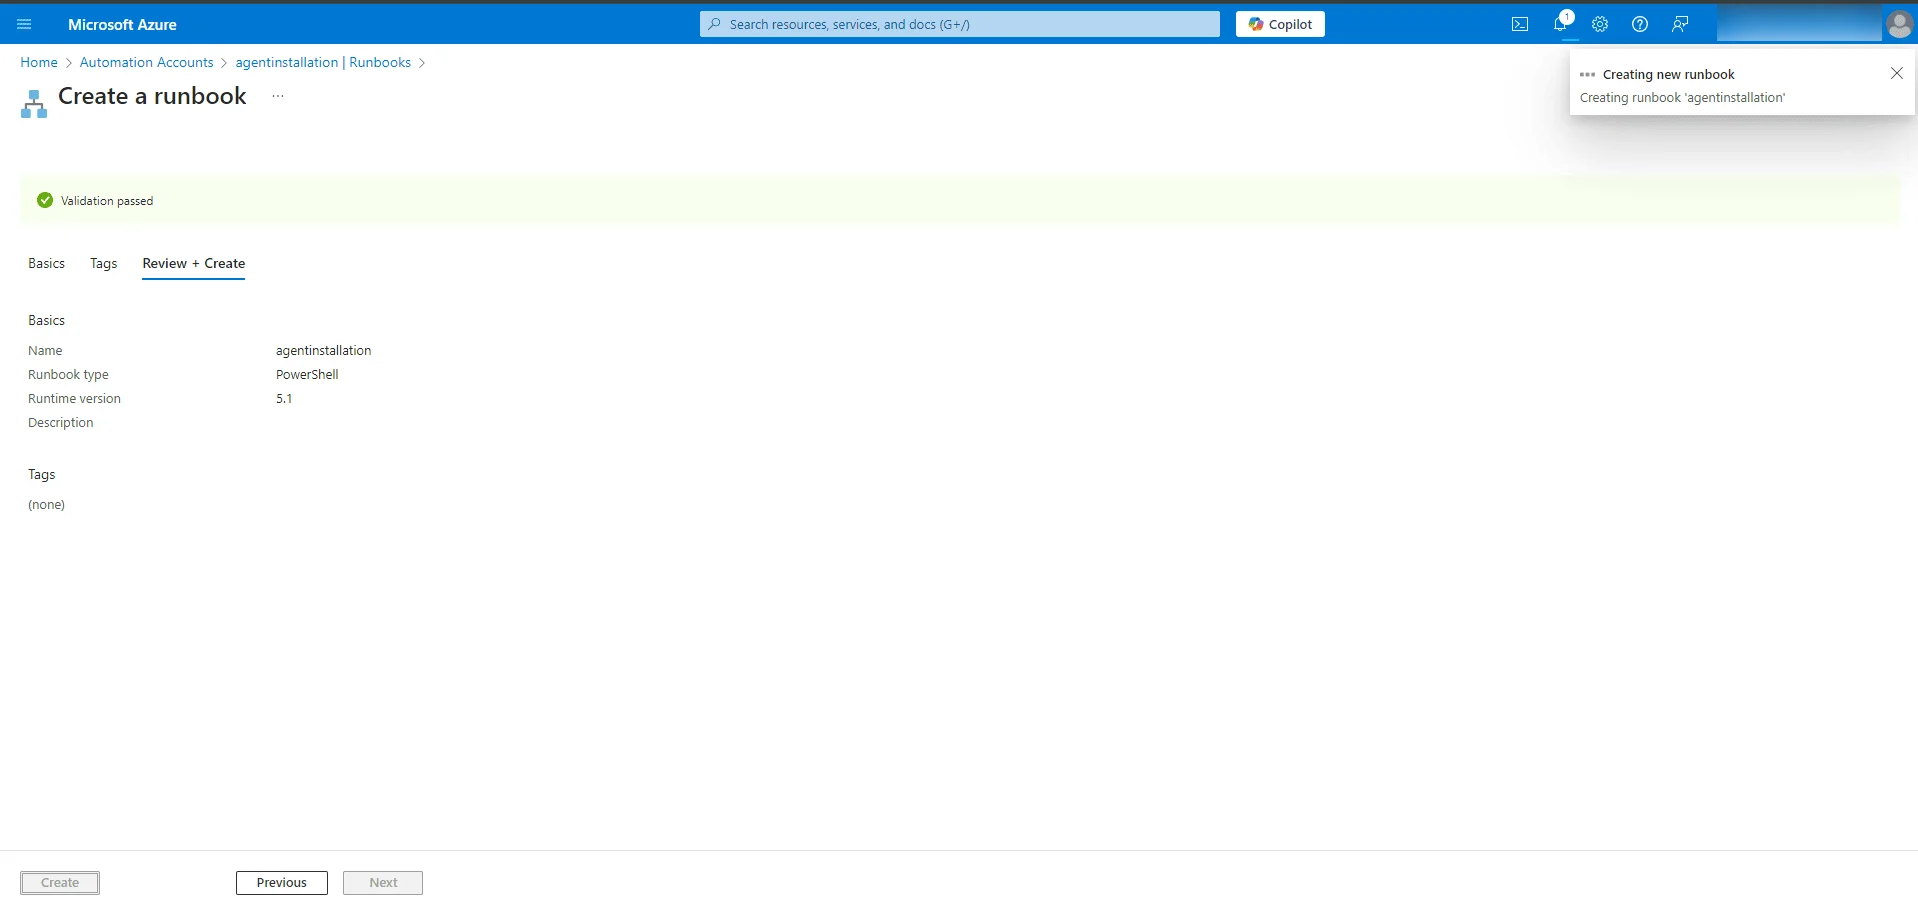
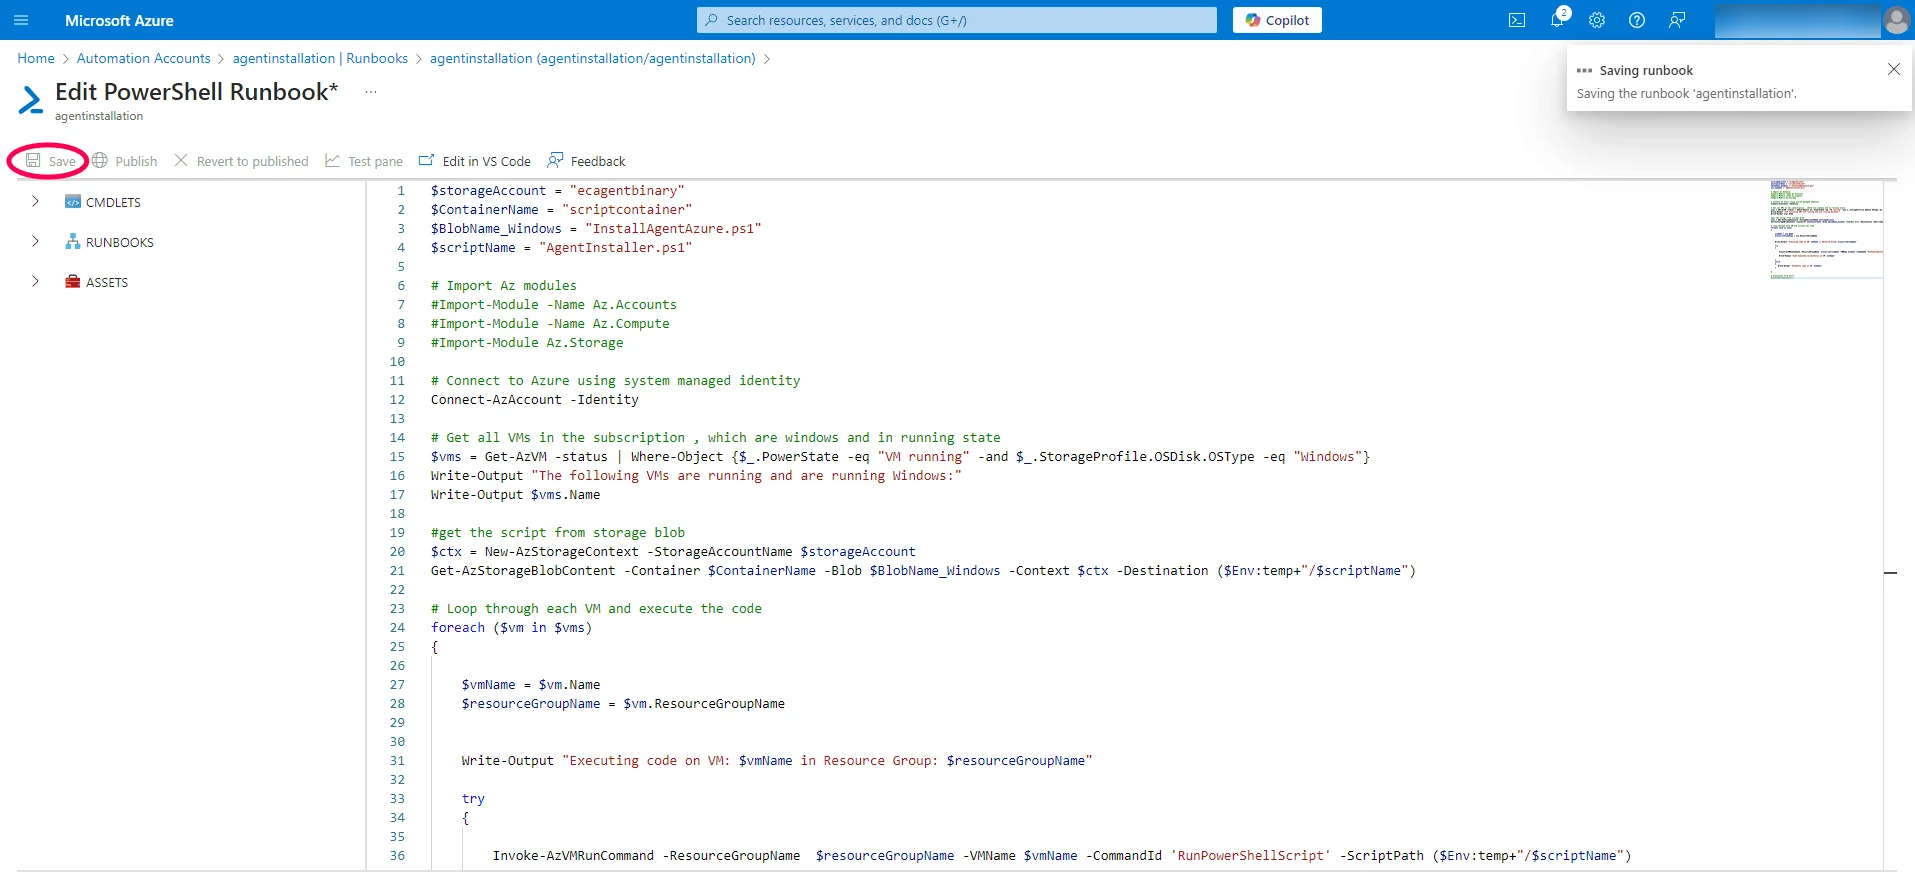
- Edit the Runbook:
- Download the scriptbelow and copy the link and paste it into the editor
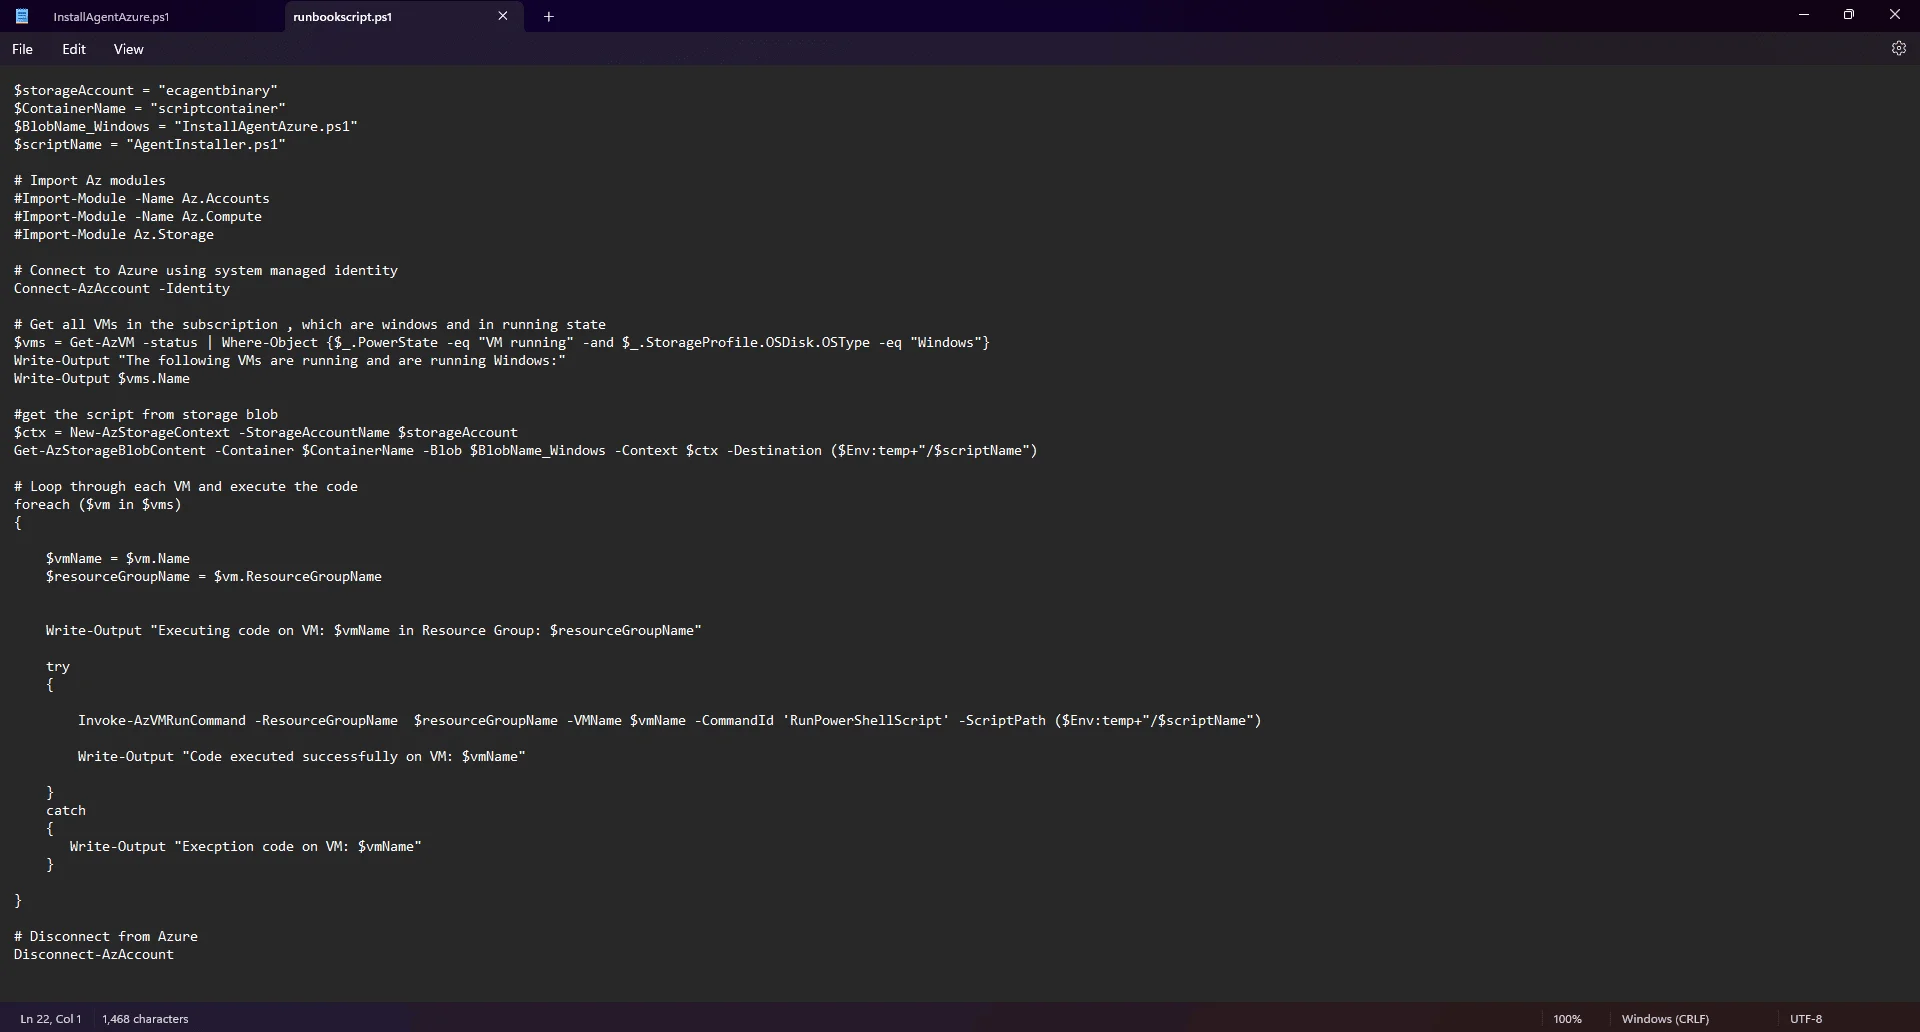
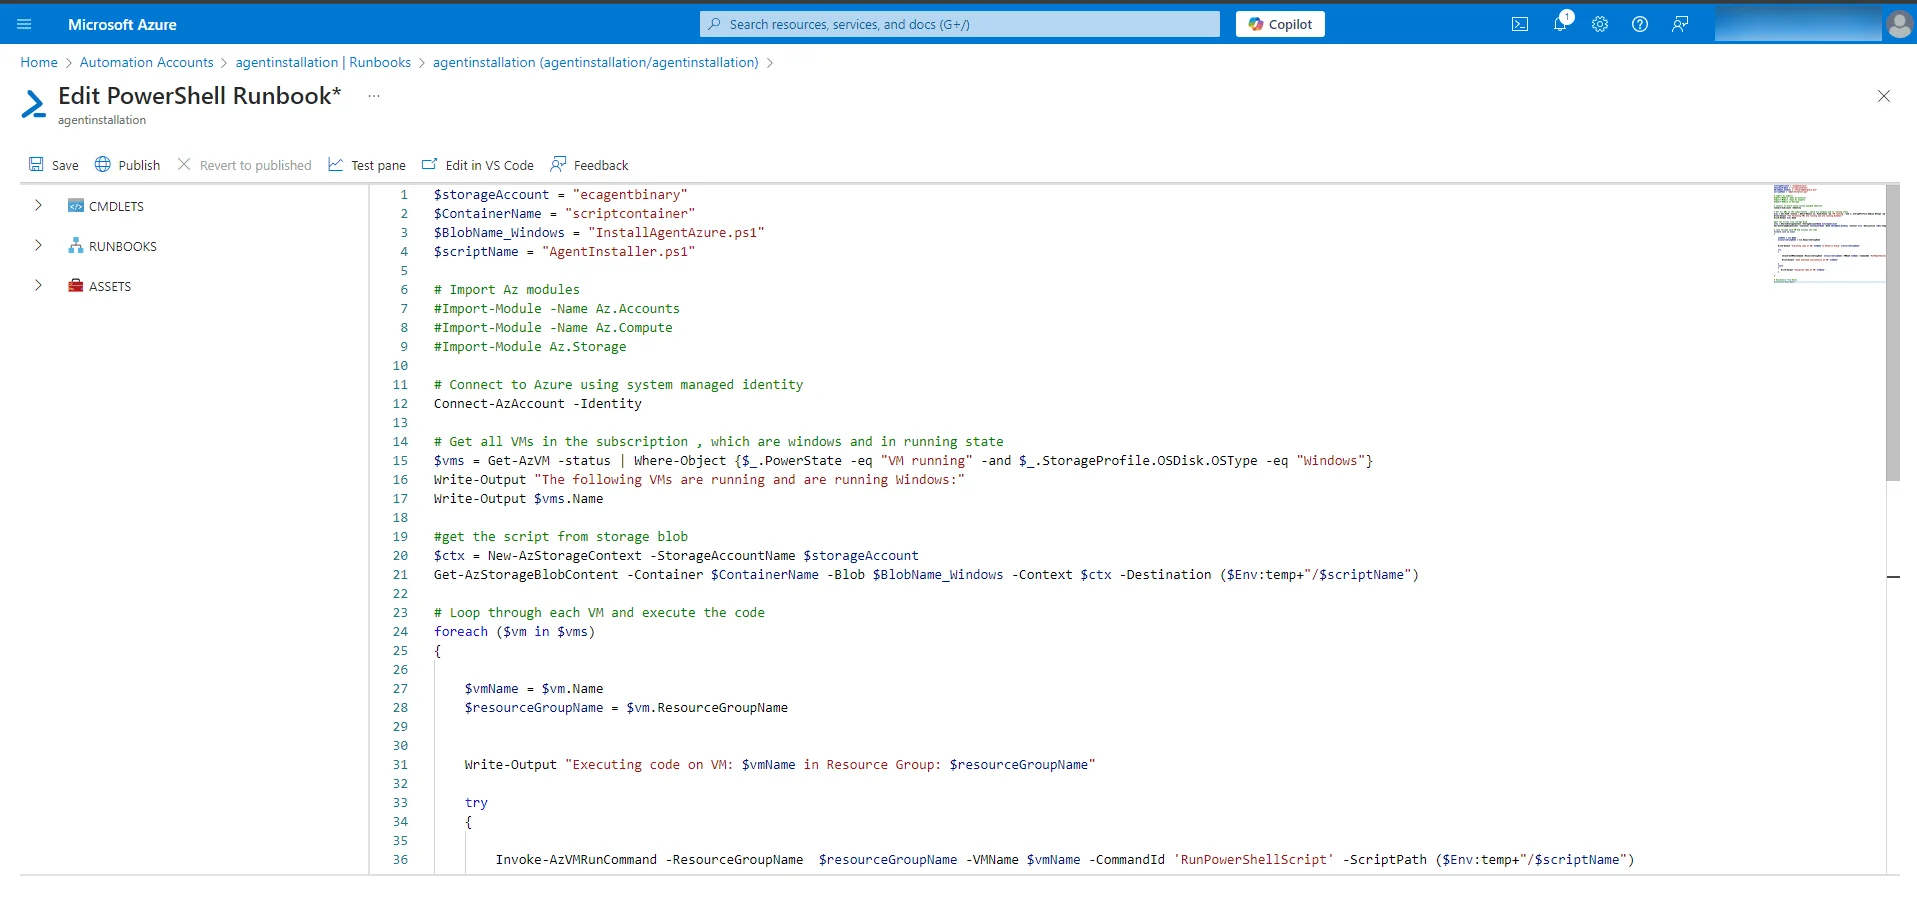
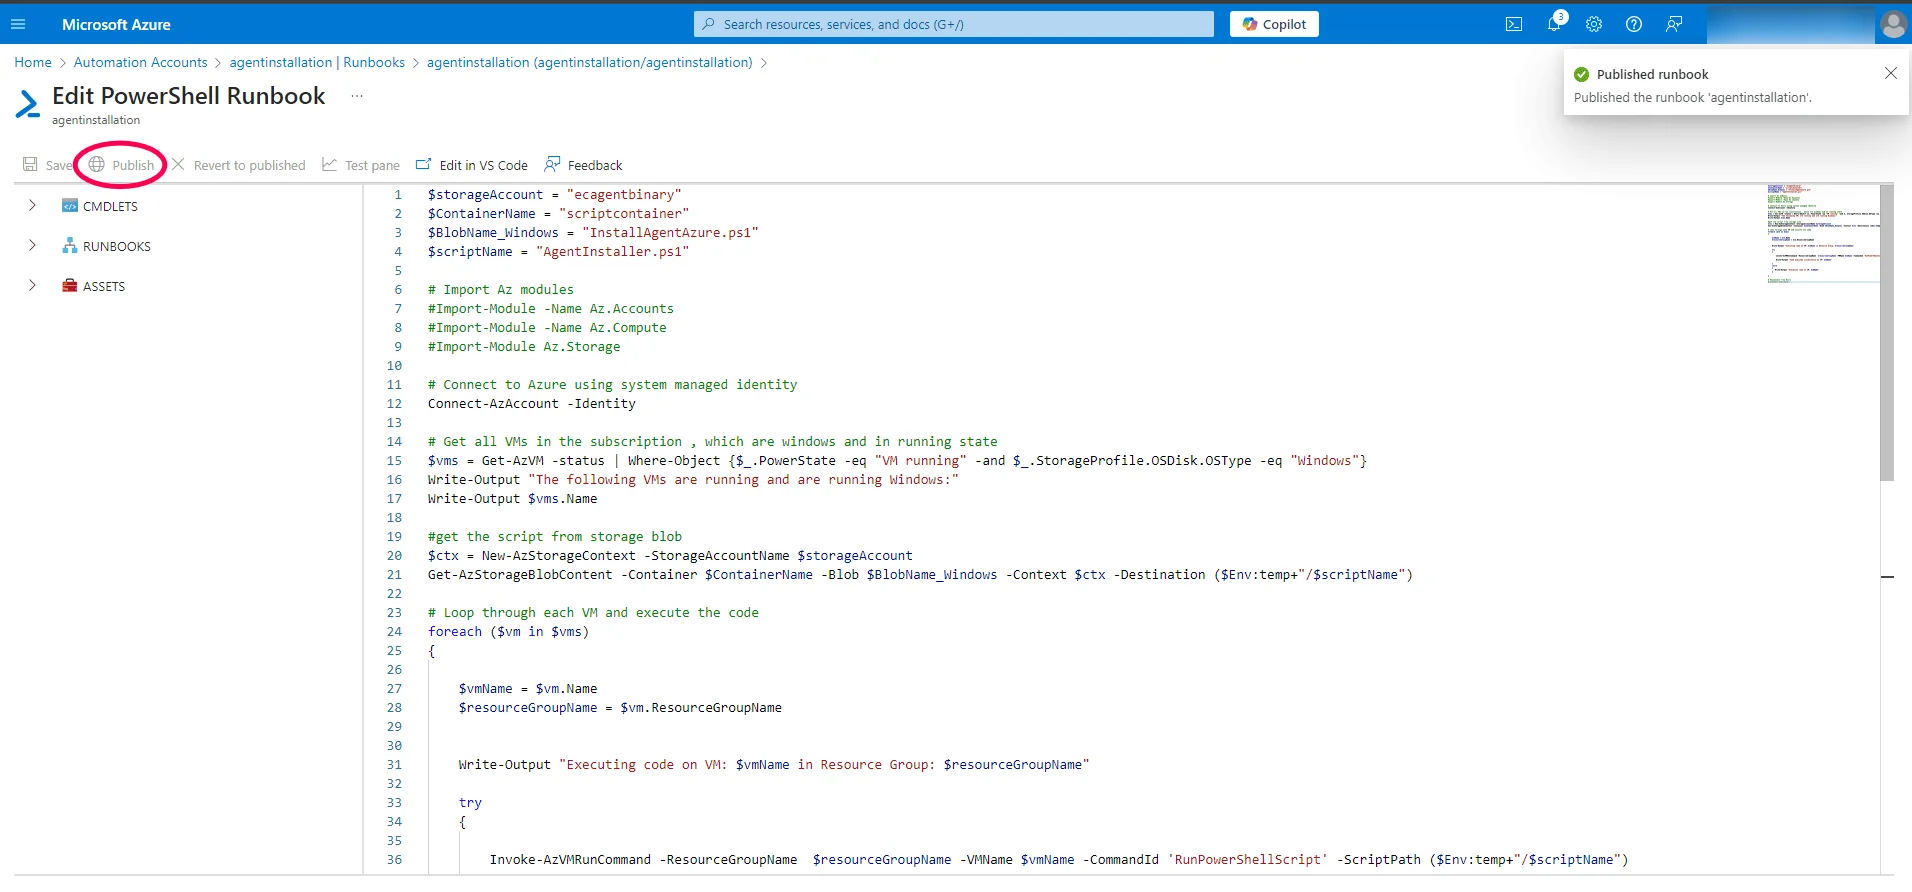
- Save and publish the runbook.
- Start the Runbook:
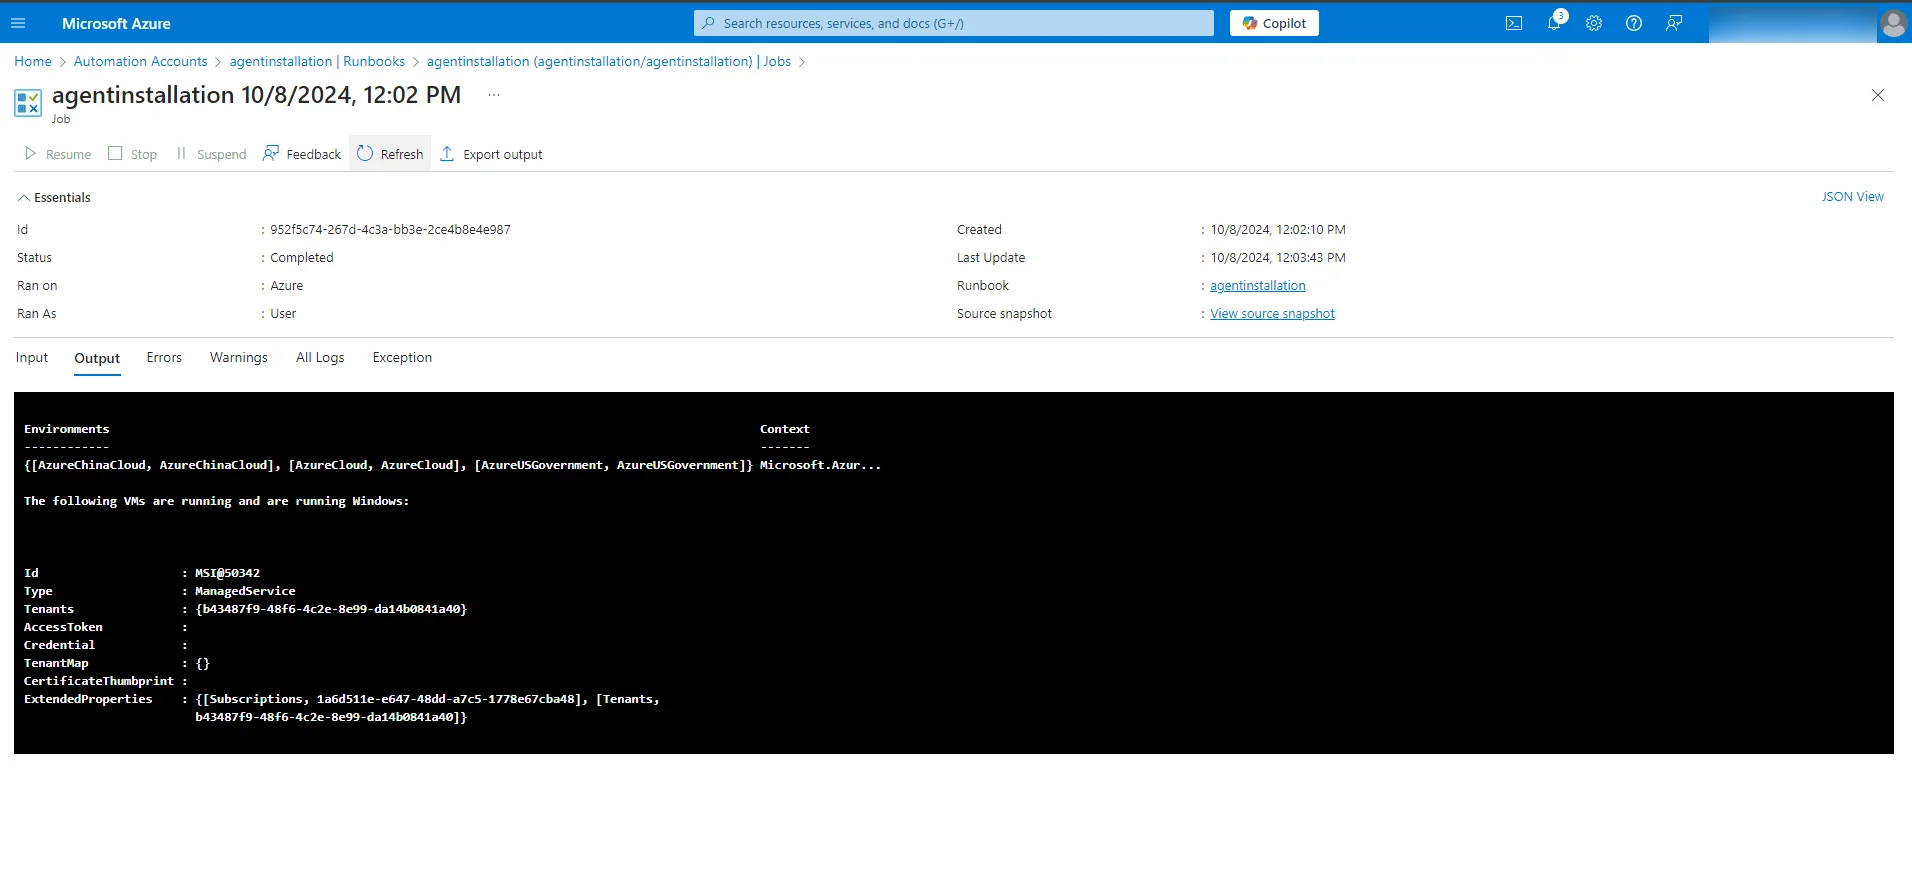
- Wait for the deployment to finish, then click Start once available.
- Open the Jobs tab to monitor the status and check the output tab for execution results.
Troubleshooting
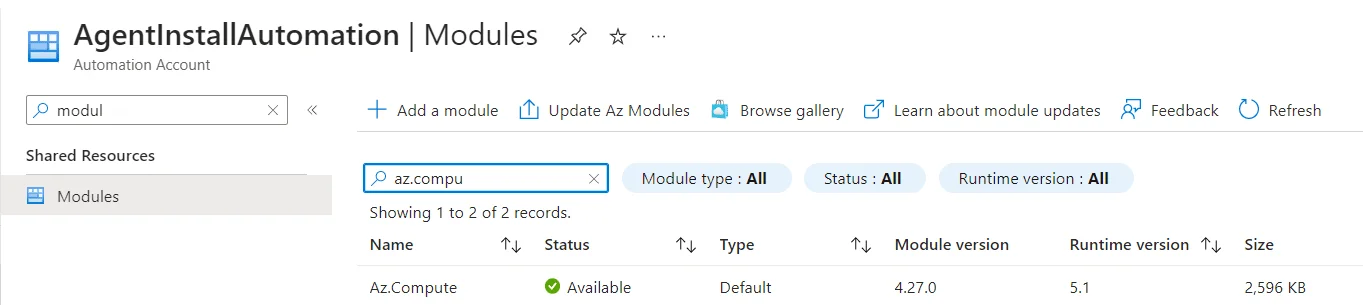
In case of errors during script execution, ensure that the following two modules are imported in the Modules tab of the Automation account:
Run time 5.1
- az.accounts
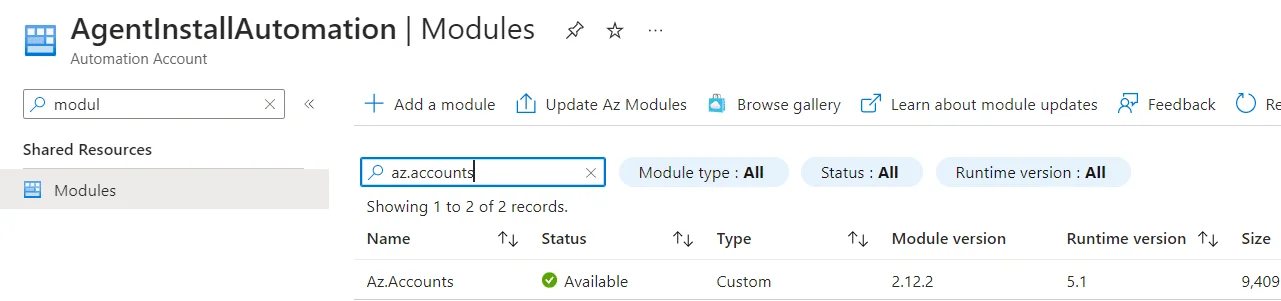
- az.compute
Conclusion
By following this guide, you have successfully set up Azure Automation for agent installation. This setup streamlines the process of deploying agents across your Azure environment, allowing for greater efficiency and easier management. If you encounter any issues or have questions, don't hesitate to seek further assistance.