Remote Office Movement
Managing the devices of the sales and marketing teams is a challenging task for an IT administrator. This is because people in these teams tend to be traveling around the country and even the globe to other branch offices or to an event. Tracking their devices and maintaining compliance in situations like this can be a tricky process. However, using Remote Office movement capabilities supported in Endpoint Central, those computers can be tracked and managed efficiently under the appropriate Remote Offices.
Moving Endpoints Between Remote Offices
There are two ways to move a device (endpoint) from one remote office to another:
Manual Movement
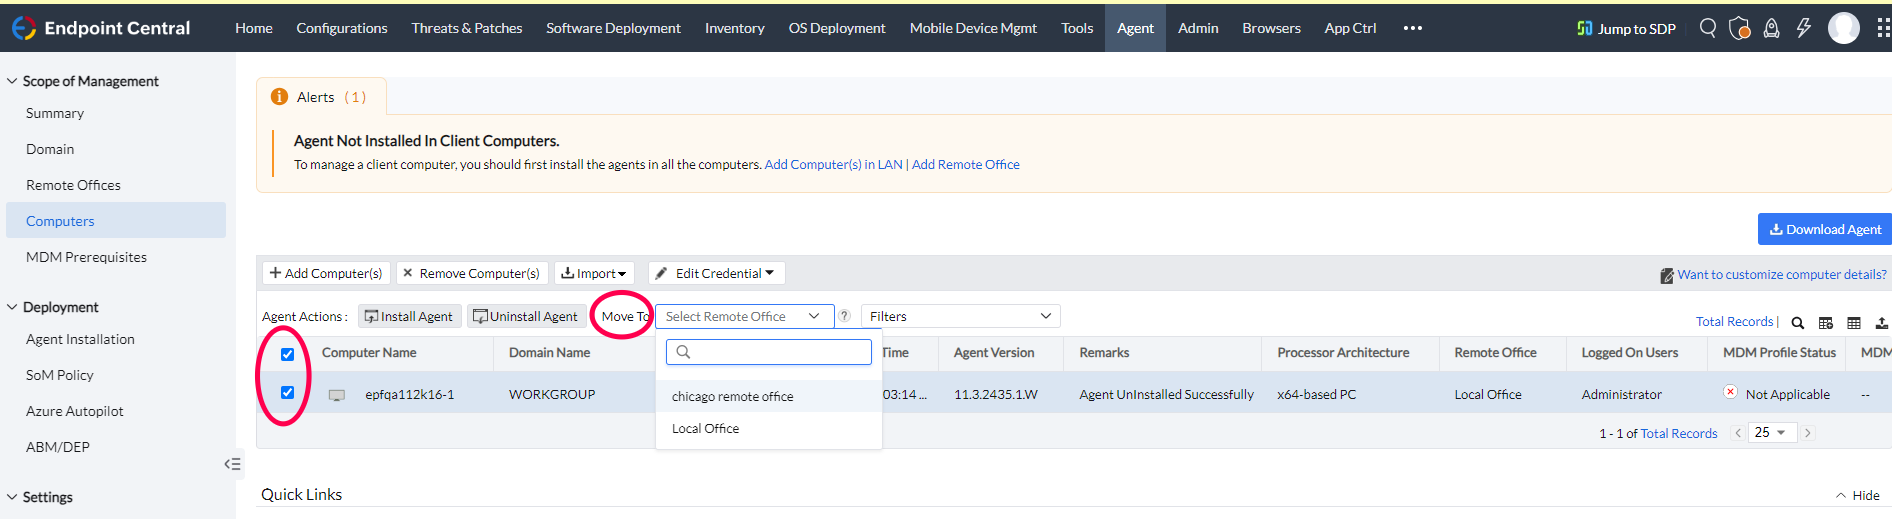
- Navigate to Agent → Computers.
- Select the computer(s) you want to move.
- Click Move to and choose the desired remote office from the drop-down menu.
- The selected computer(s) will now be moved to the specified remote office.
Users who move between remote offices
Different IP scopes for various remote offices can be defined. This way, whenever a device is moving from a local office to a remote location, a new IP address is automatically assigned to it by the DHCP server in the remote office network. On the next refresh policy, the agent determines whether the newly assigned IP address is within the IP range of the new remote office. When a change is detected, the respective device will be automatically associated with corresponding remote office based on the new IP. Follow the below steps to add an IP scope:
Pre-requisites:
Each Remote Office should have a unique range and not overlap with another RO/IP Scope.
- Navigate to the Agent tab → Settings → IP Scope.
- Click Add Scope.
- In the Select Remote Office list, select the required remote office name.
- Select either of the following types of IP Scope:
- IP Address Range: Enter the start and end IP addresses.
- Subnet: Enter the subnet mask and subnet IP address.
- Click Save.
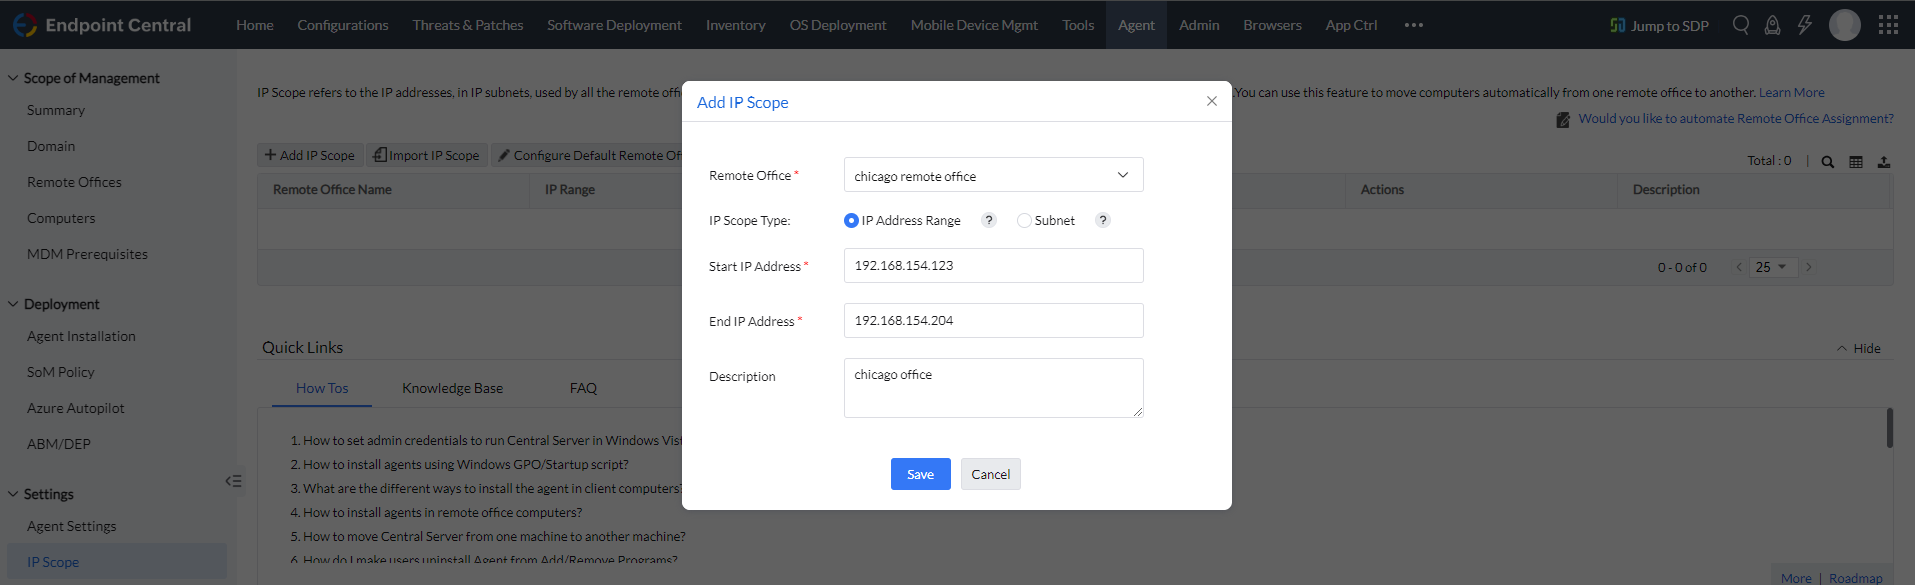
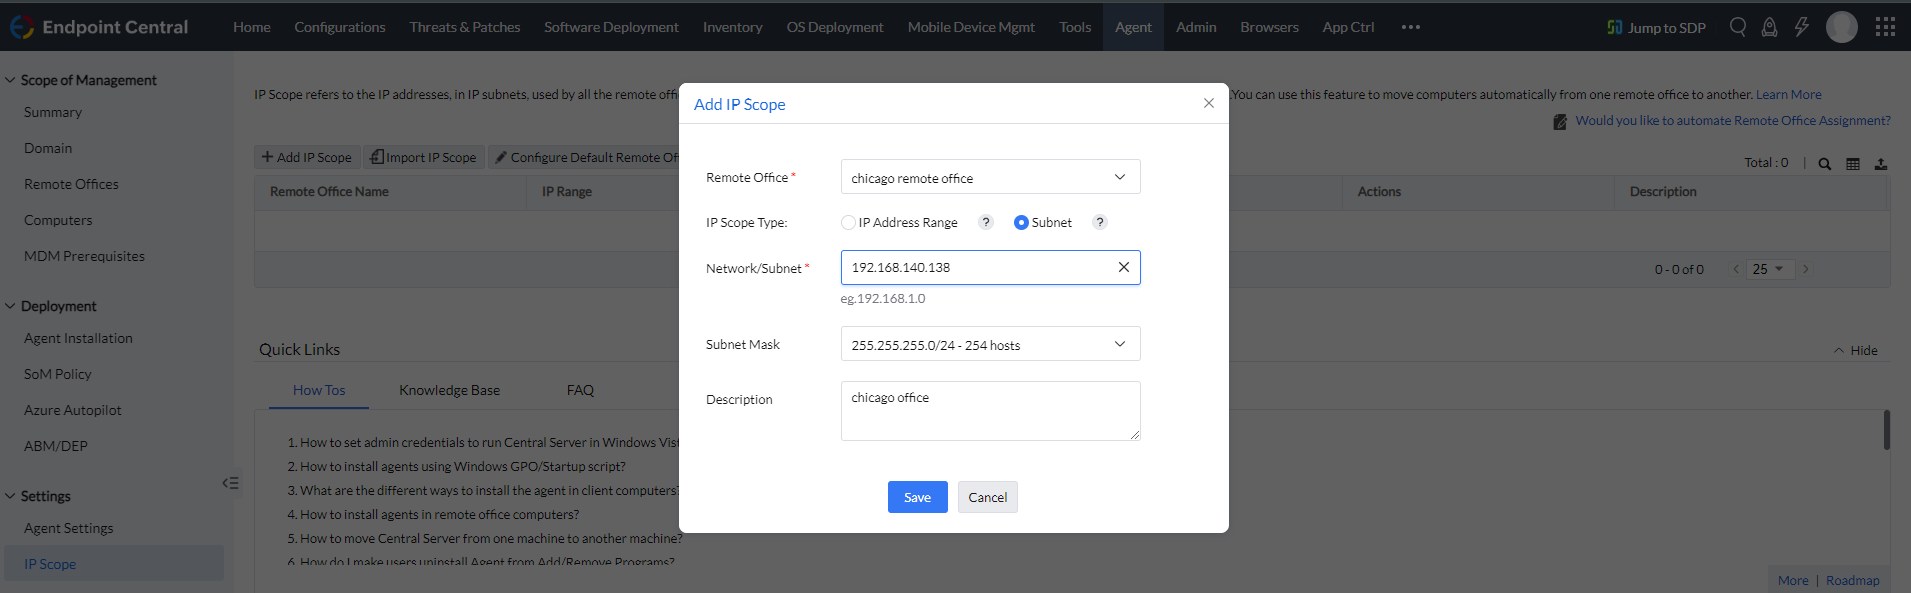
You have successfully configured IP scope.
Users who access Endpoint Central server via internet
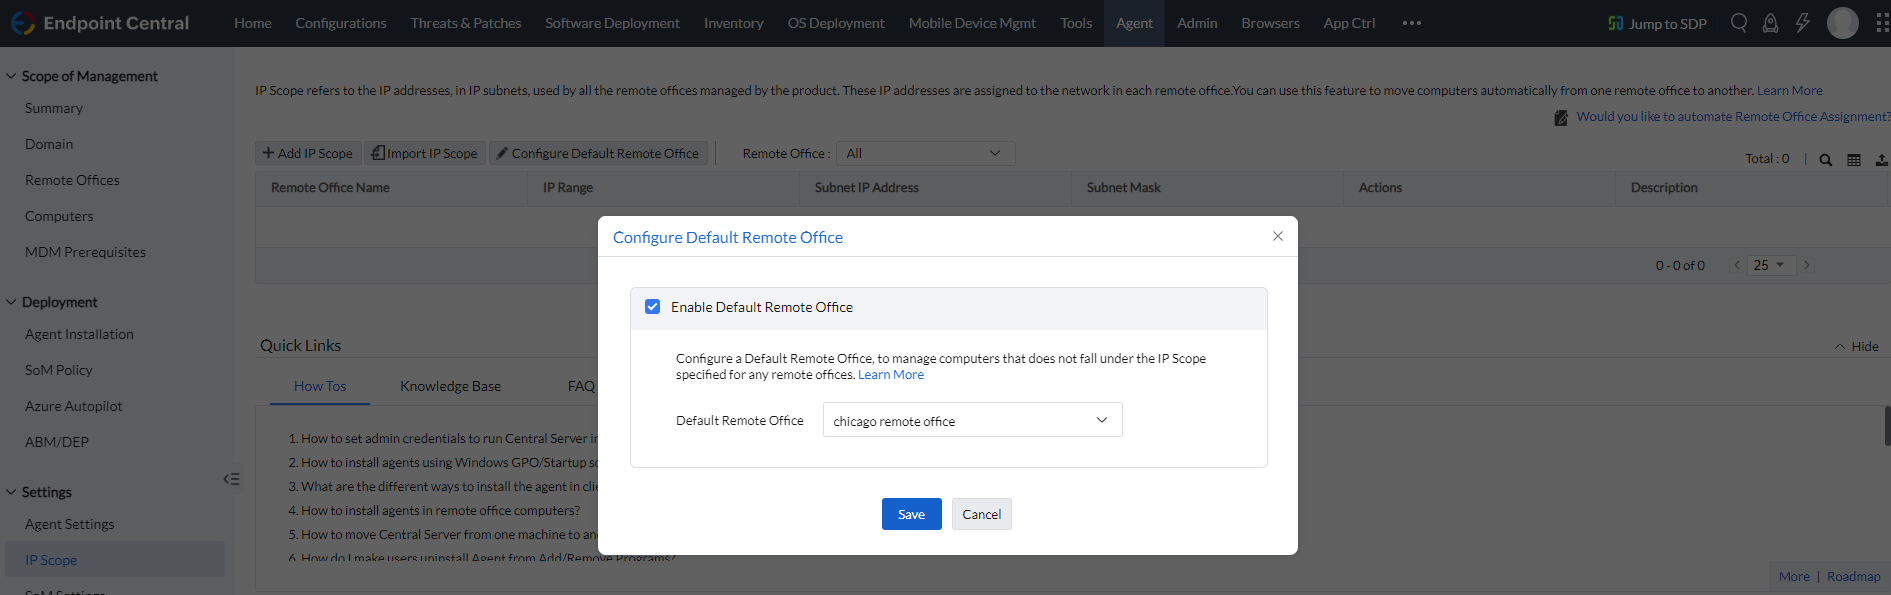
In situations where users move away from the local office but not to a remote office, the product is accessed via the internet. For cases like this, a default remote office can be configured, so that whenever a user does not fall under the IP scope of any remote office, they will be automatically assigned to this default remote office. The default remote office works only if IP Scope is configured for other local offices or remote offices. Follow the below steps to configure Default Remote Office:
- Navigate to the Agent tab → Settings → IP Scope.
- Click Configure Default Remote Office.
- Enable the checkbox to Enable Default Remote Office.
- From the drop-down, select the remote office/local office which needs to be set as default.
- Click Save to save changes.
Conclusion
This guide covers how to move devices between remote offices either manually or automatically. Automating the process with IP scopes simplifies network management by ensuring that the correct WAN agent is deployed when devices move between locations.