User Identity Configuration
User identity plays a crucial role in determining who can access internal applications. Configuring the Identity Provider ensures that authentication flows are secure, seamless, and compliant with your organization’s access policies. Once integrated, the IdP becomes the authoritative source for verifying user credentials and passing identity attributes to the Endpoint Central.
Private Access supports Active Directory and Microsoft Entra ID for identity management.
Steps to Add a Active Directory Domain
- Navigate to the Agent > Domain > Add Domain.
- Choose Active Directory from the drop down.
- Enter the details collected from the Command Prompt (from the
set Landset Ucommands) in the appropriate fields.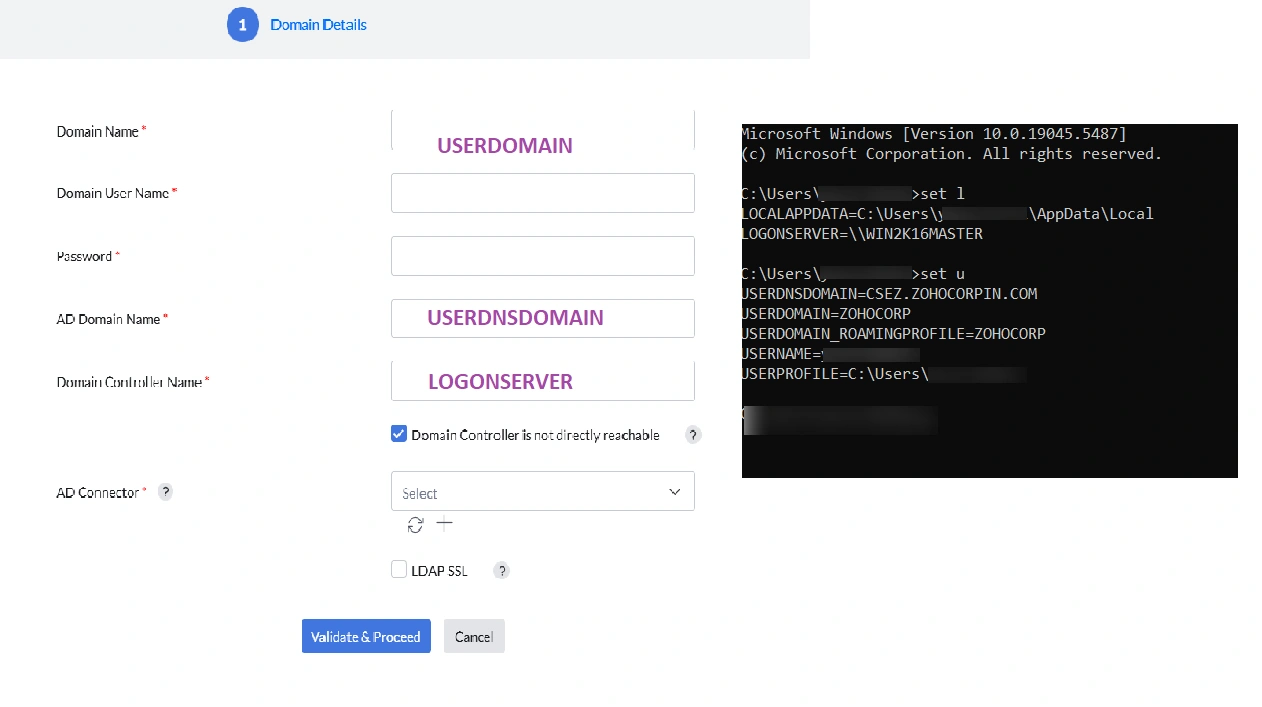 Note1.If the Central Server cannot directly reach the Domain Controller, enable the Domain controller is not directly reachable option. Then, choose a Distribution Server—located close to the Active Directory Domain Controller—as the Active Directory connector. The Active Directory connector should have reachability to both Central Server and Active Directory Domain Controller.
2. Distribution server must be configured for the remote office where the domain controller is located to configure Active Directory connector. - Select the Active Directory connector from the drop down. Active Directory Connector acts as a communicator between Central Server and Domain Controller to fetch the Active Directory objects. Distribution Server configured for the location where Domain Controller present can be used as an Active Directory Connector. You can also refresh or add a new Active Directory Connector
- Enable LDAP SSL to encrypt communication between and Active Directory. This requires uploading an SSL certificate to the Active Directory. By default, LDAP SSL uses port 636, which can be modified based on your requirements.
- Click Validate and Proceed.
For further details, see Active Directory Integration for Endpoint Central.
Steps to Add an Entra ID Domain
Follow the steps below to add an Entra ID domain to Endpoint Central.
Navigate to Domain Settings in Endpoint Central:
Go to the Agent tab. Select Domain and then click on Add Domain.
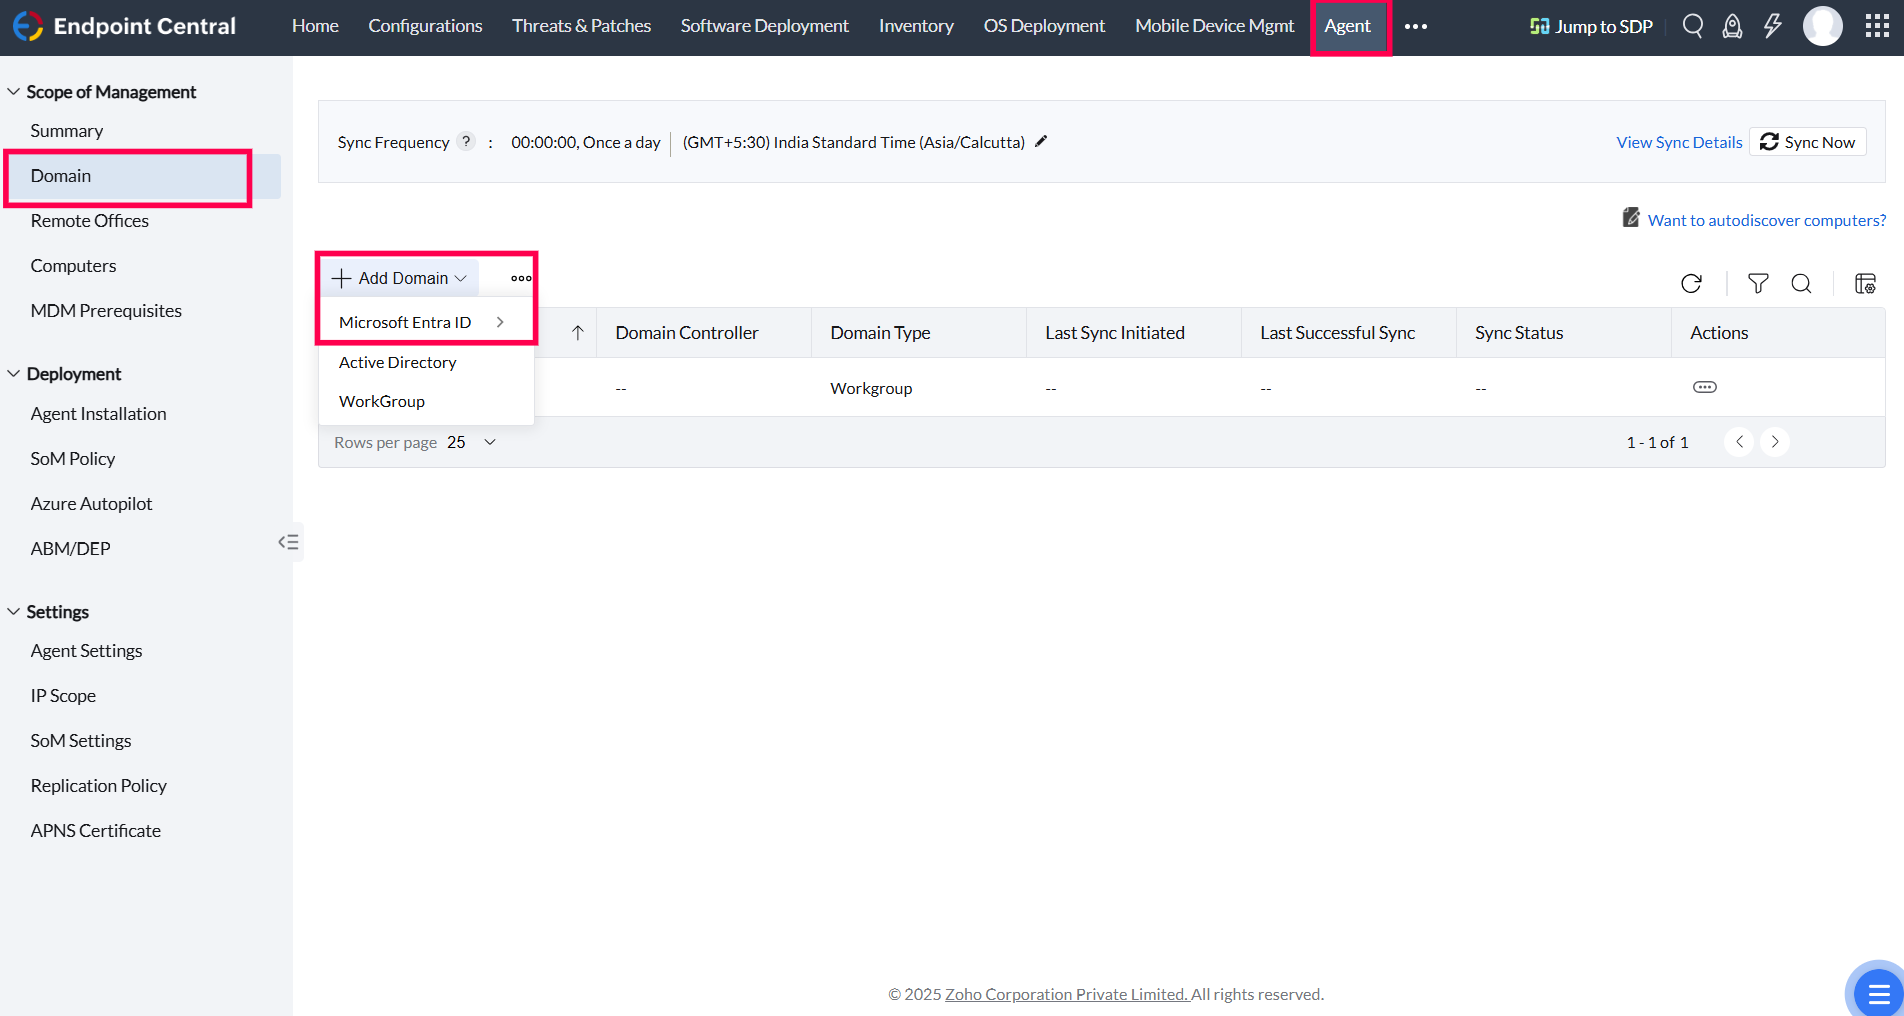
Select Entra ID as Domain Type:
Click on Add Domain and select Entra ID from the available domain types. Select the specific Entra ID services you wish to integrate (e.g., Global, DoD, etc.).
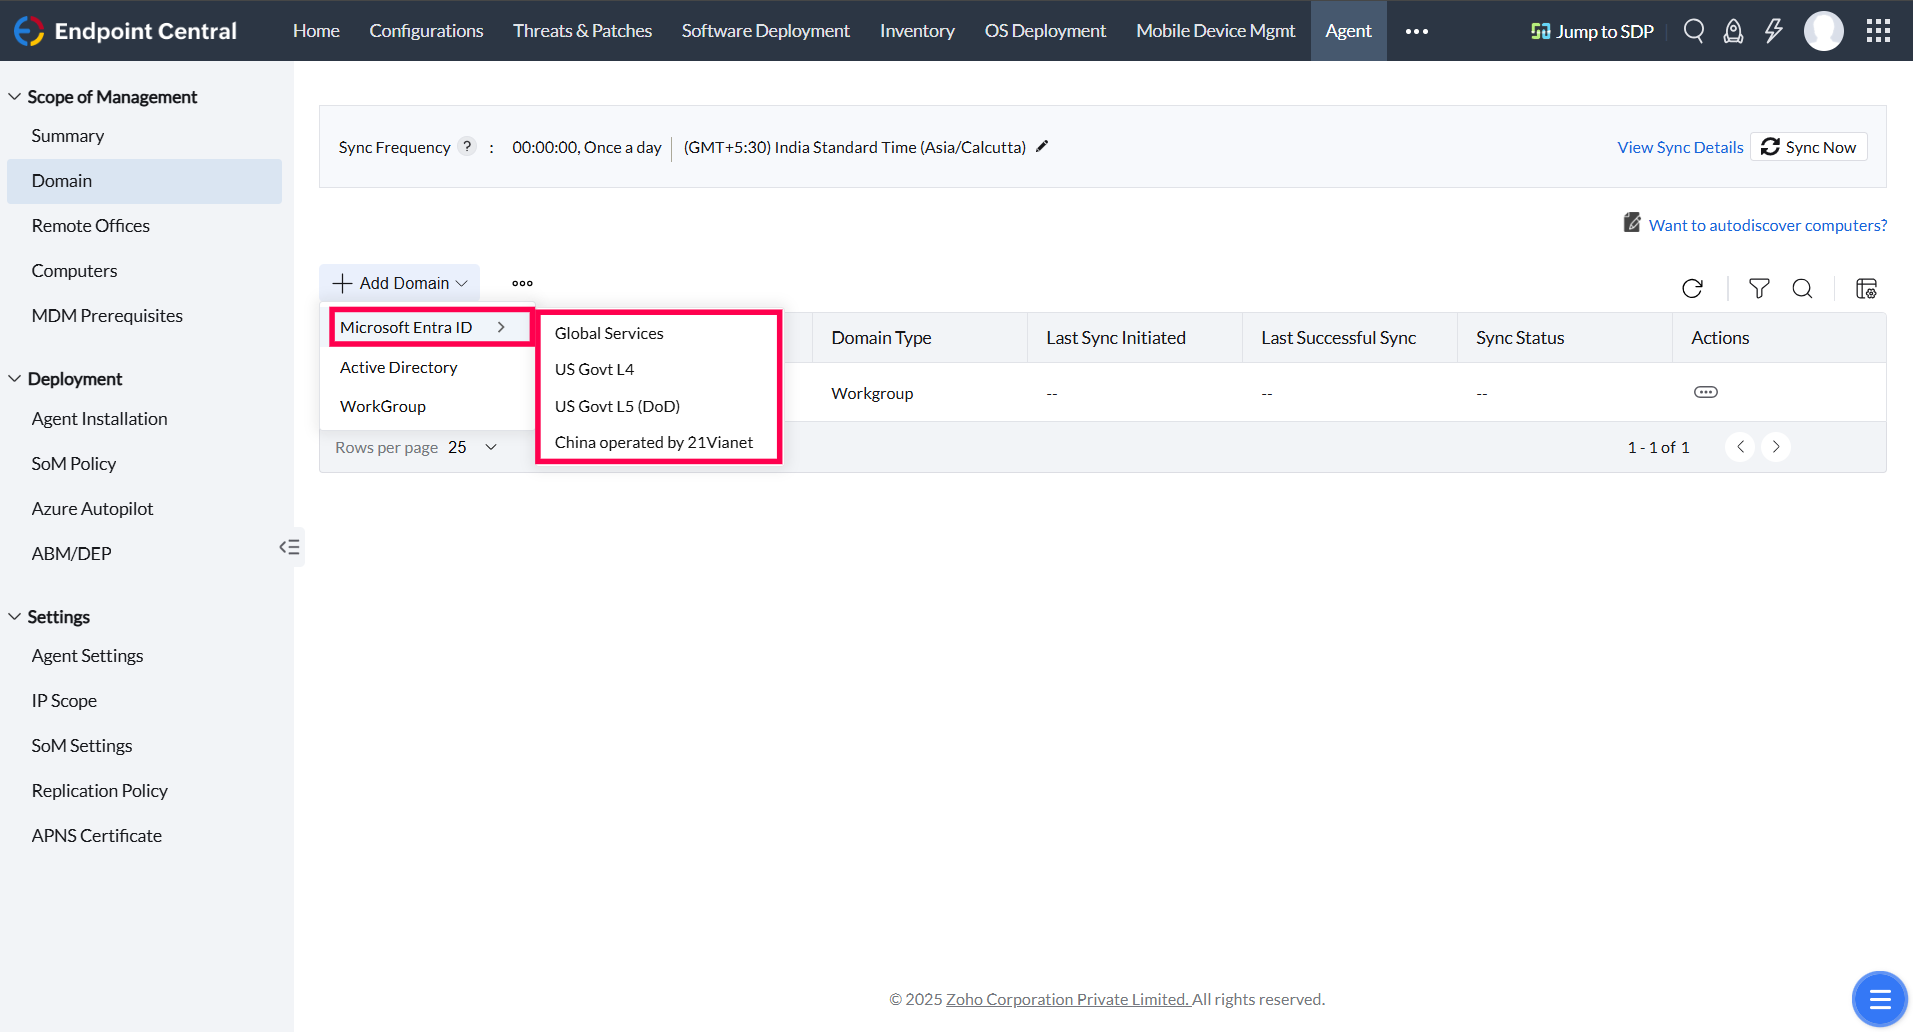 NoteEndpoint Central supports integration with various Entra ID services, including Global, US Govt L4, L5 (DoD) and China operated by 21Via Net.
Register the Endpoint Central Application with Entra ID:
- Log in to the Azure Portal.
- Navigate to App registrations and click on New registration.
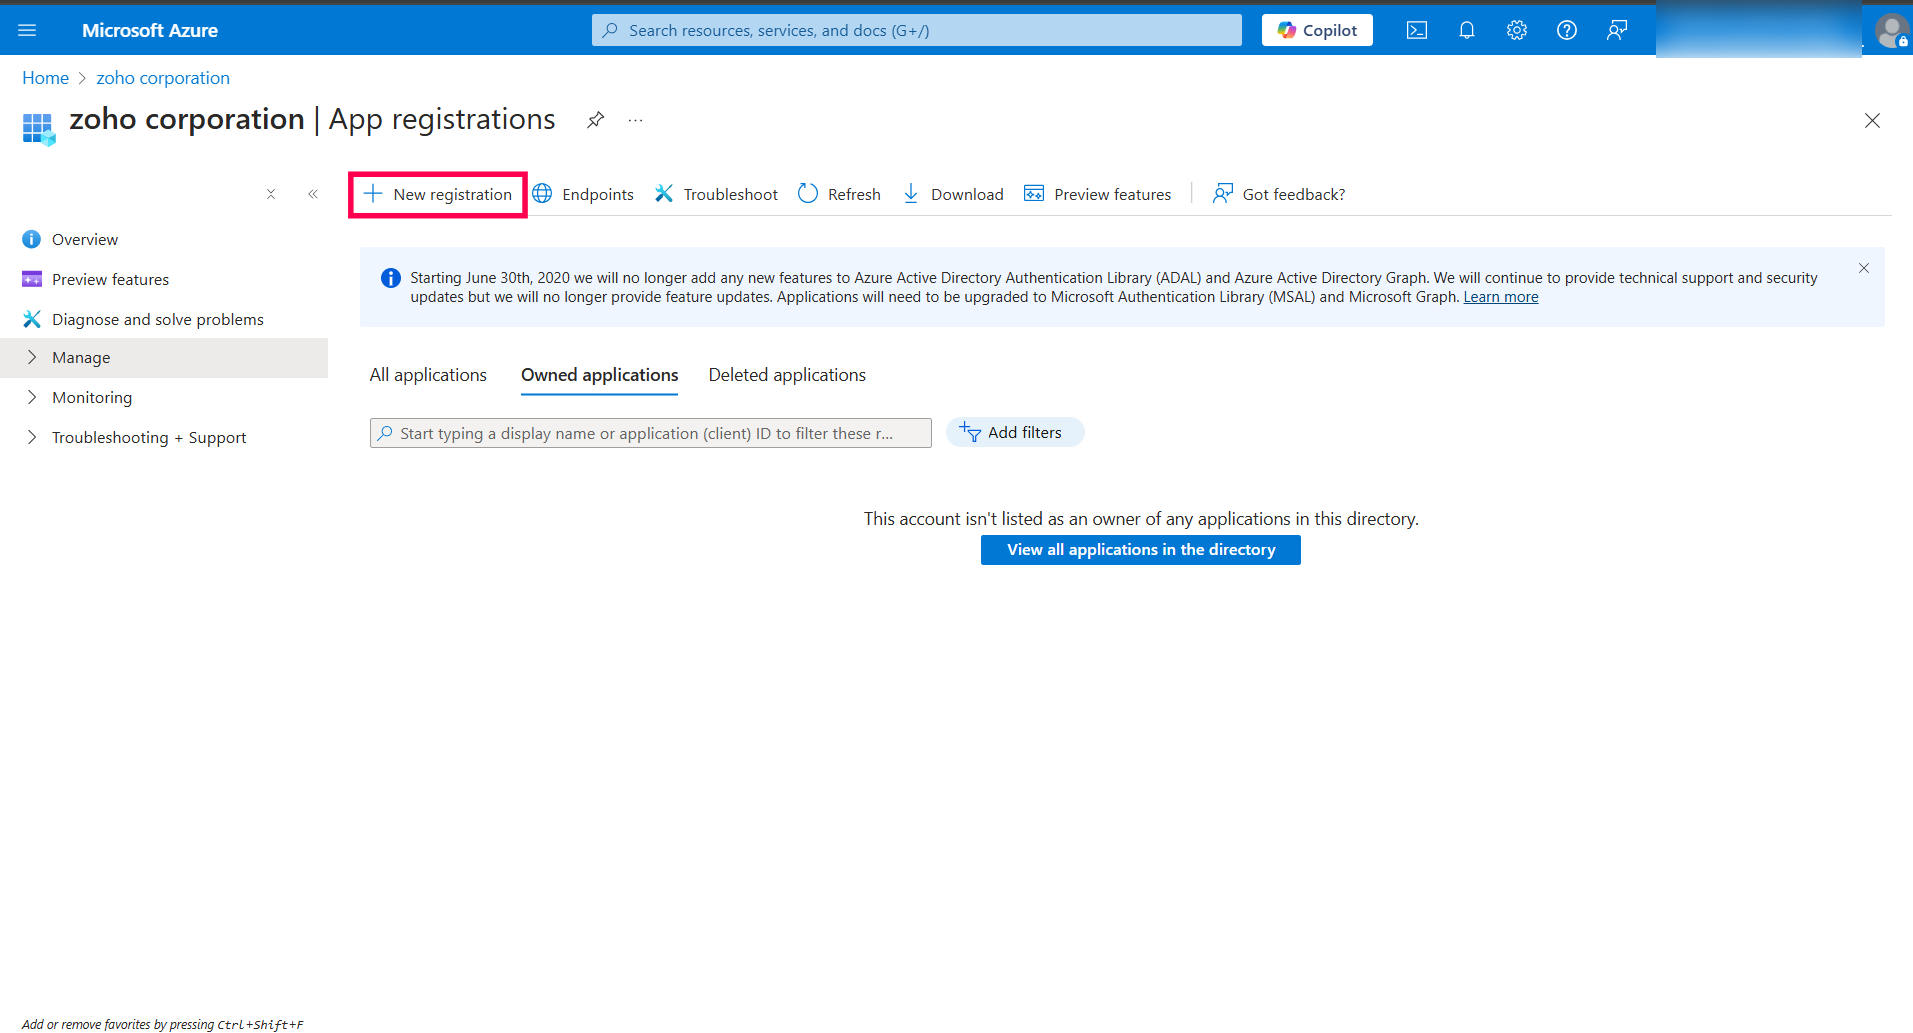
- Provide a name for the Azure OAuth app (e.g., UEMS).
- Under Supported account types, select Multitenant.
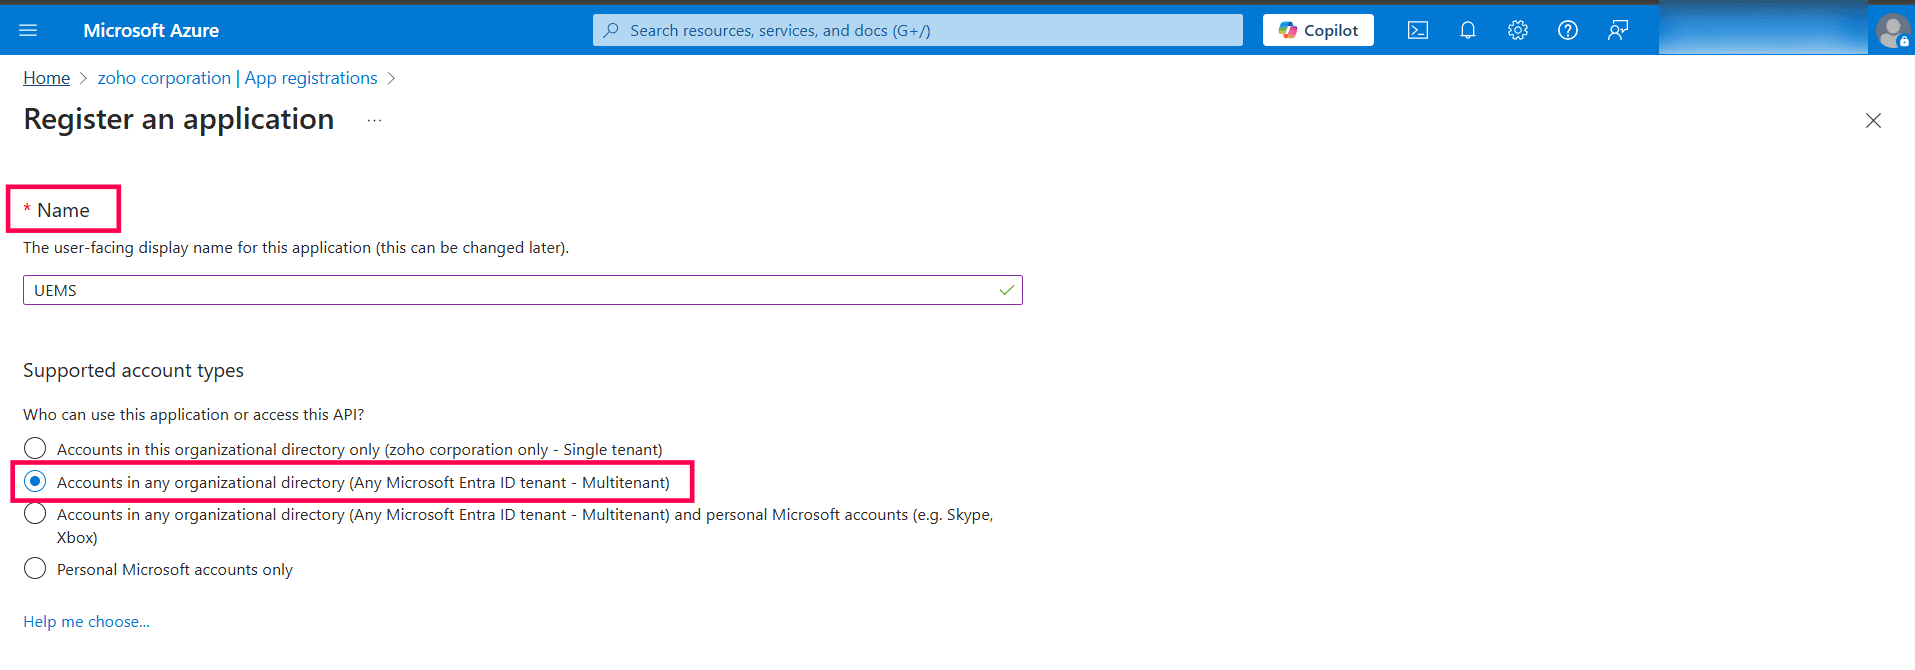
InfoThe same app registration can be used for all tenants within your organization.- Select Web as the Redirect URI, and copy the Redirect URI from the MDM console to enter it here.
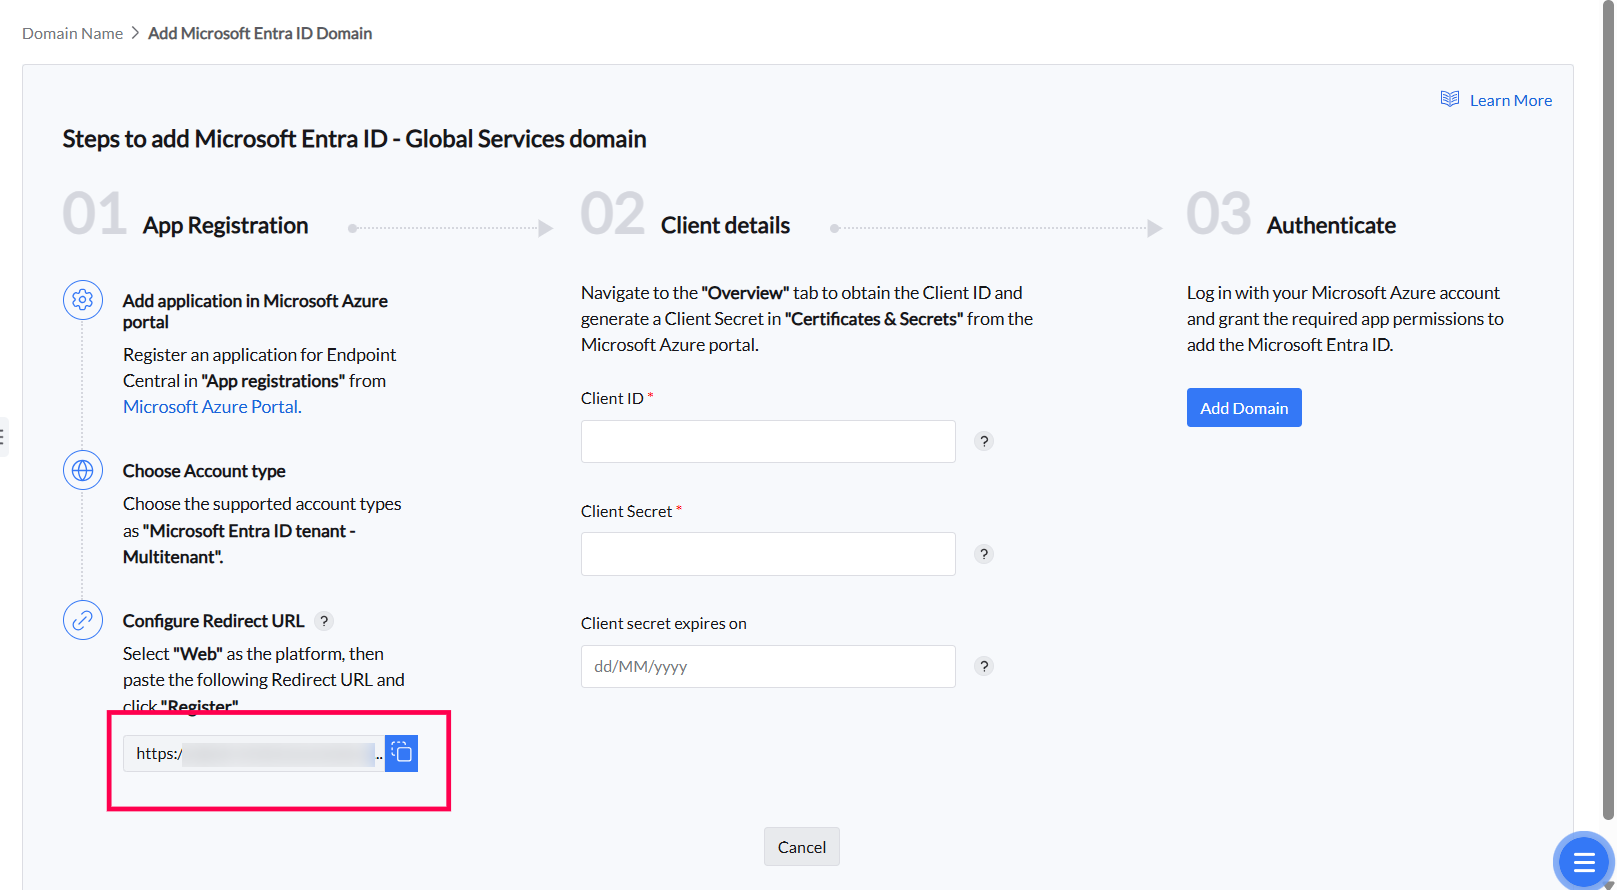
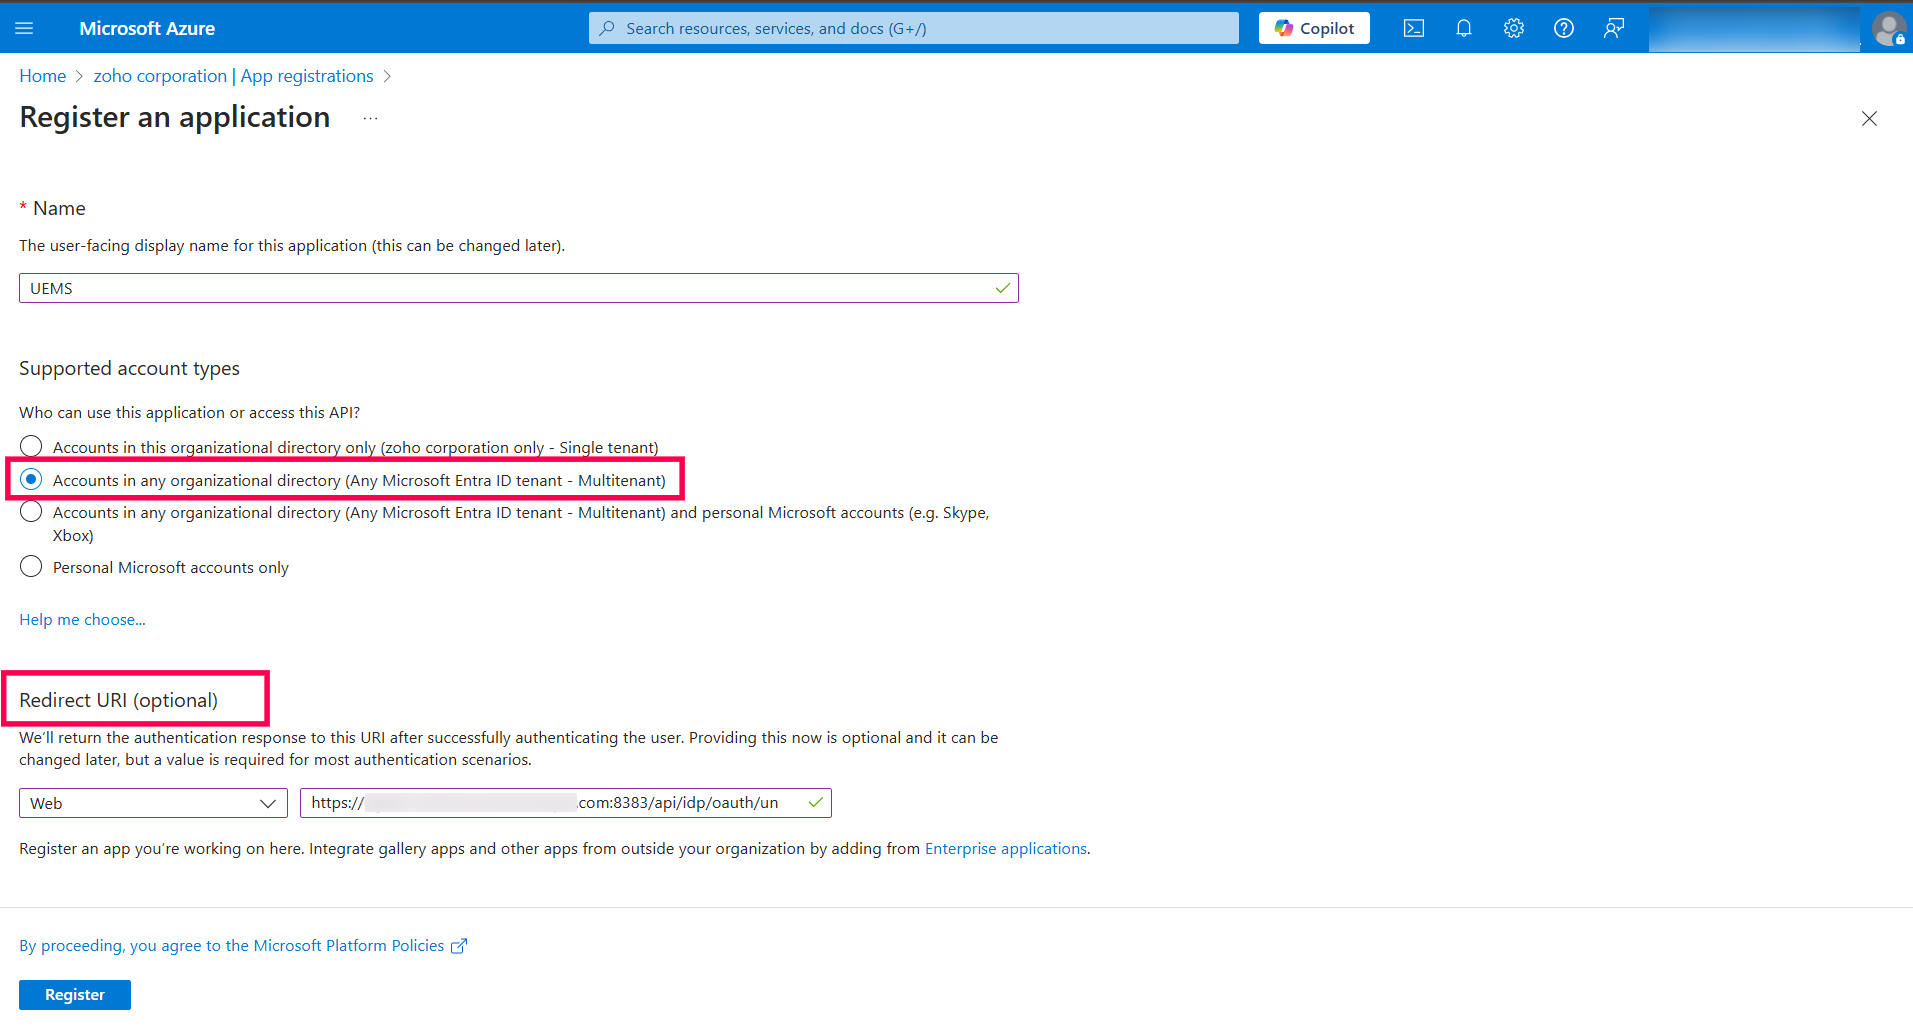
- Click on Register.
- Obtain Client ID and Client Secret:
- Once the Azure OAuth app is registered, go to the Overview page of the registered app and copy the Client ID.
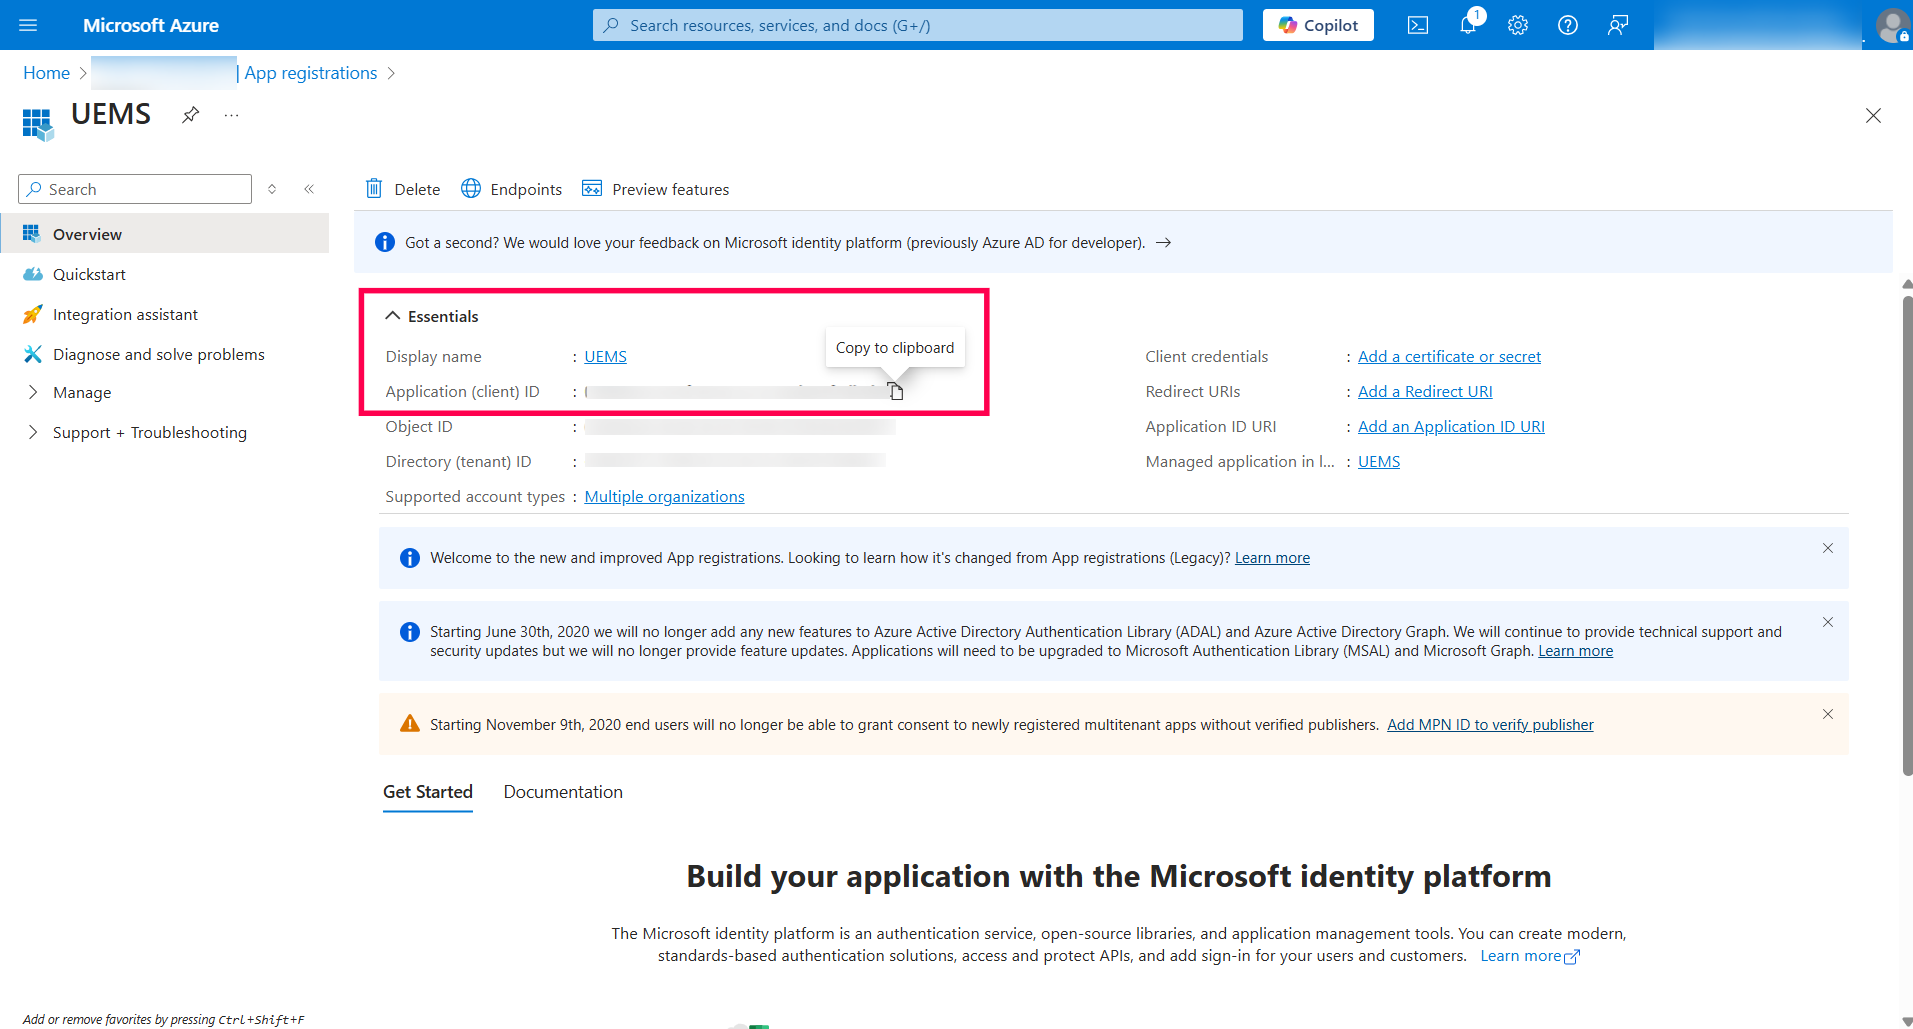
- To generate the Client Secret, navigate to the Certificate & Secrets section in the left panel, then go to Client secrets and click New client secret.
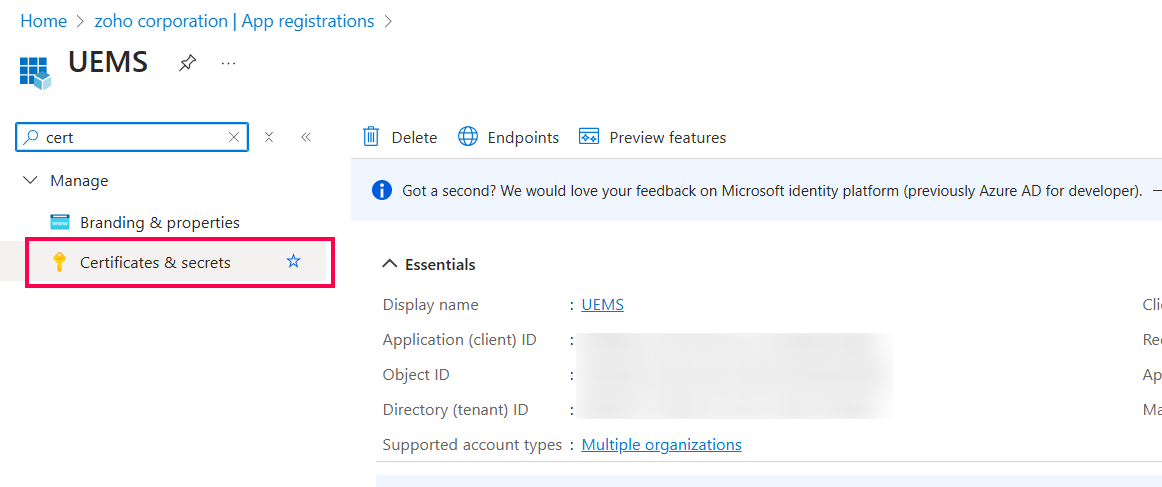
- Provide a description and set the expiry days, or you can choose a custom date. Click Add.
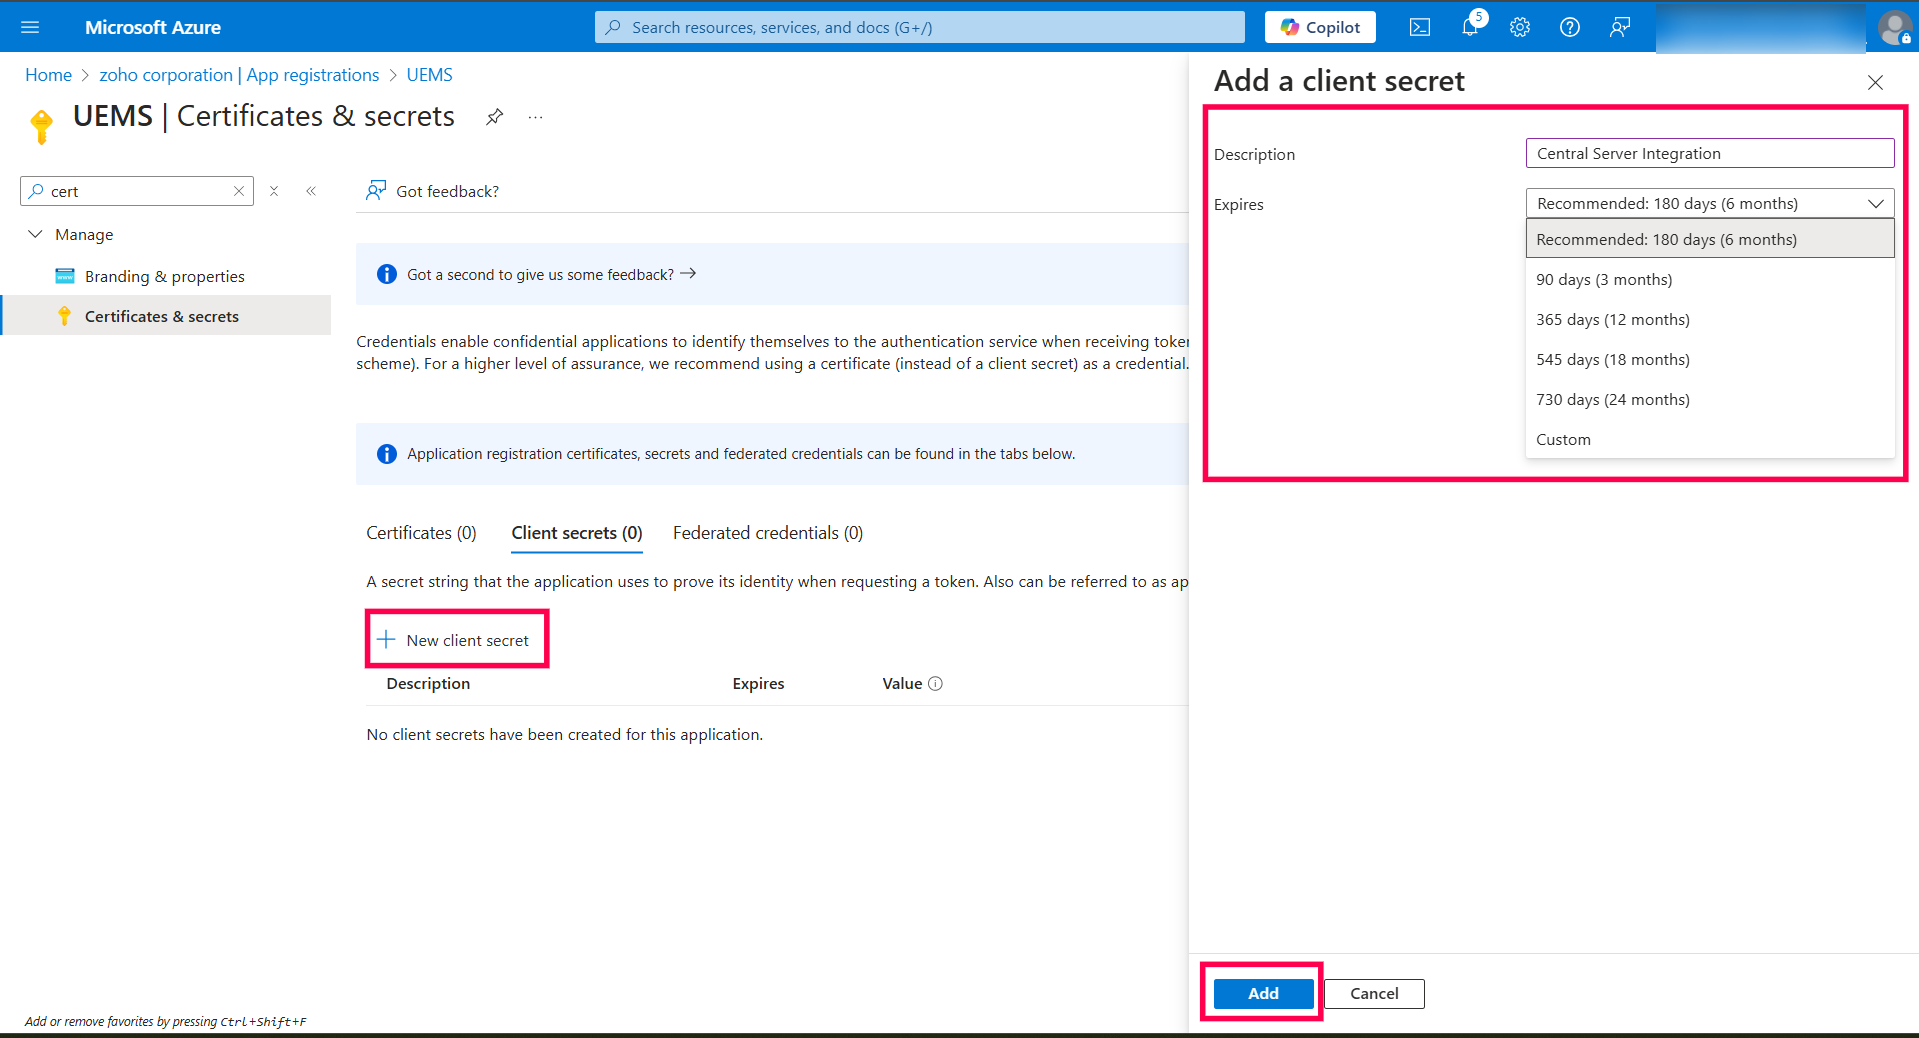
- Copy the Client Secret provided in the Value column.
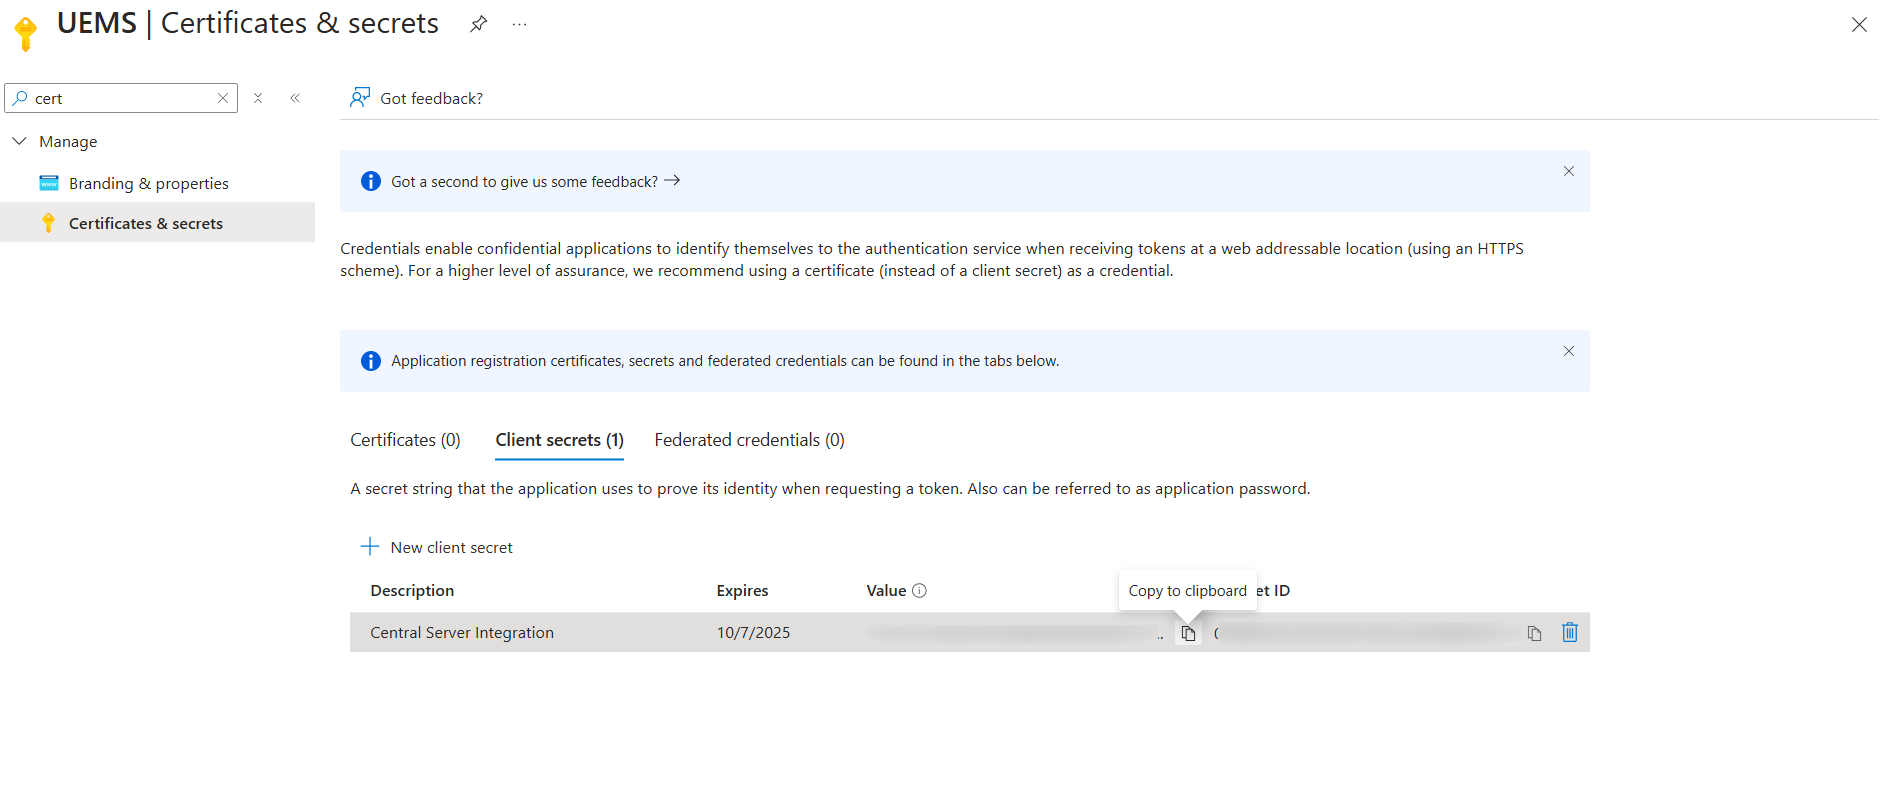
- Once the Azure OAuth app is registered, go to the Overview page of the registered app and copy the Client ID.
- Provide Client ID and Client Secret in Endpoint Central:
Go to the Endpoint Central Entra ID Domain Addition page and provide the Client ID, Client Secret, and Client Secret Expiry Date, Click Add domain.
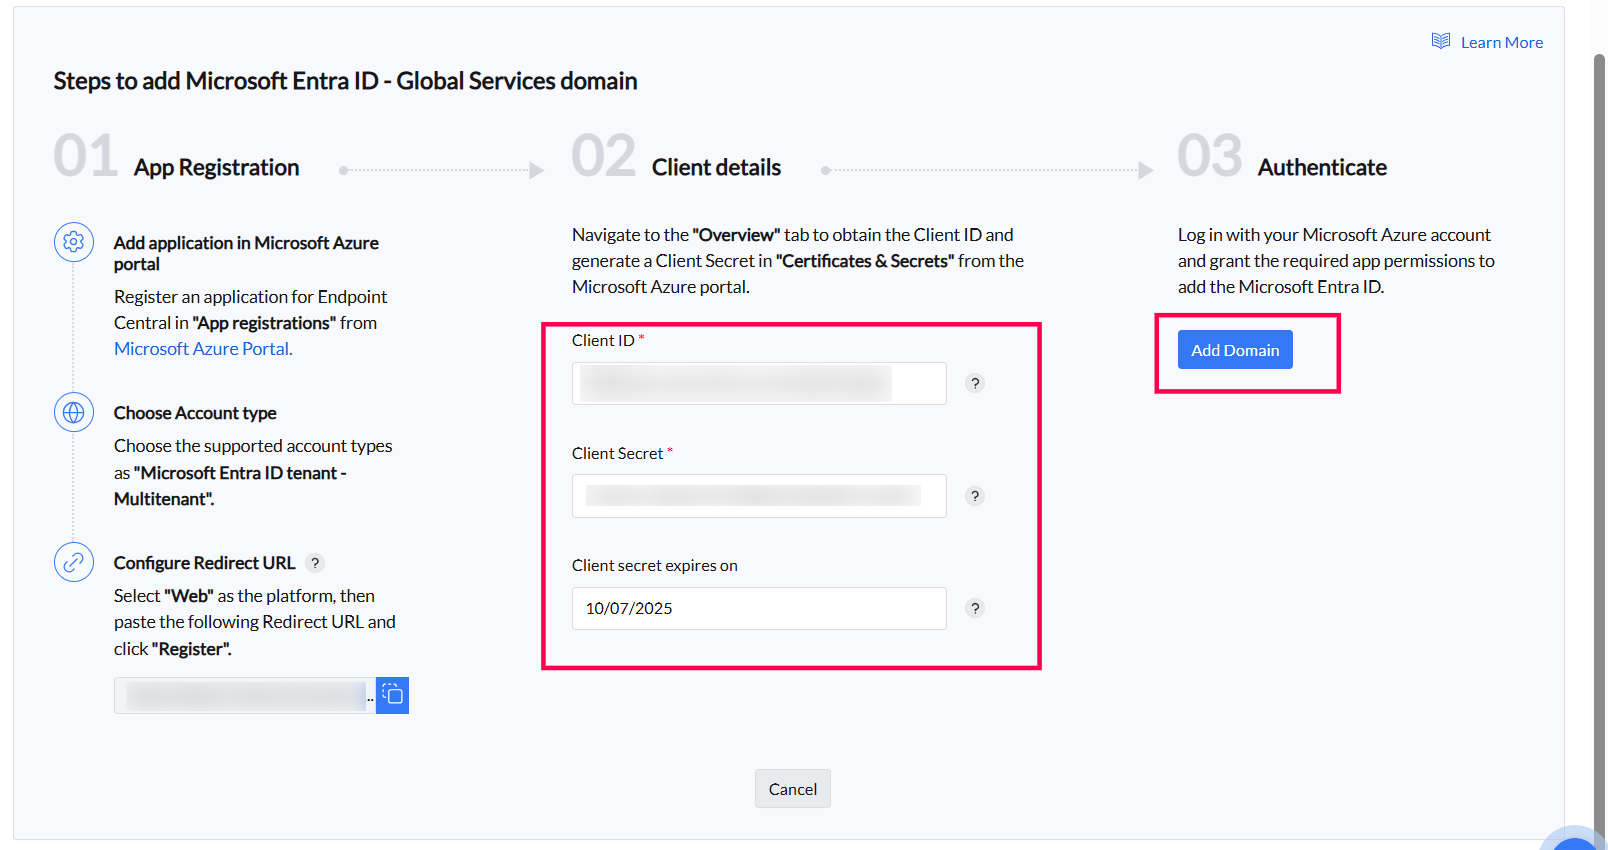 InfoIf you have already registered the application, you will be prompted to Authenticate.
- Click Authenticate.
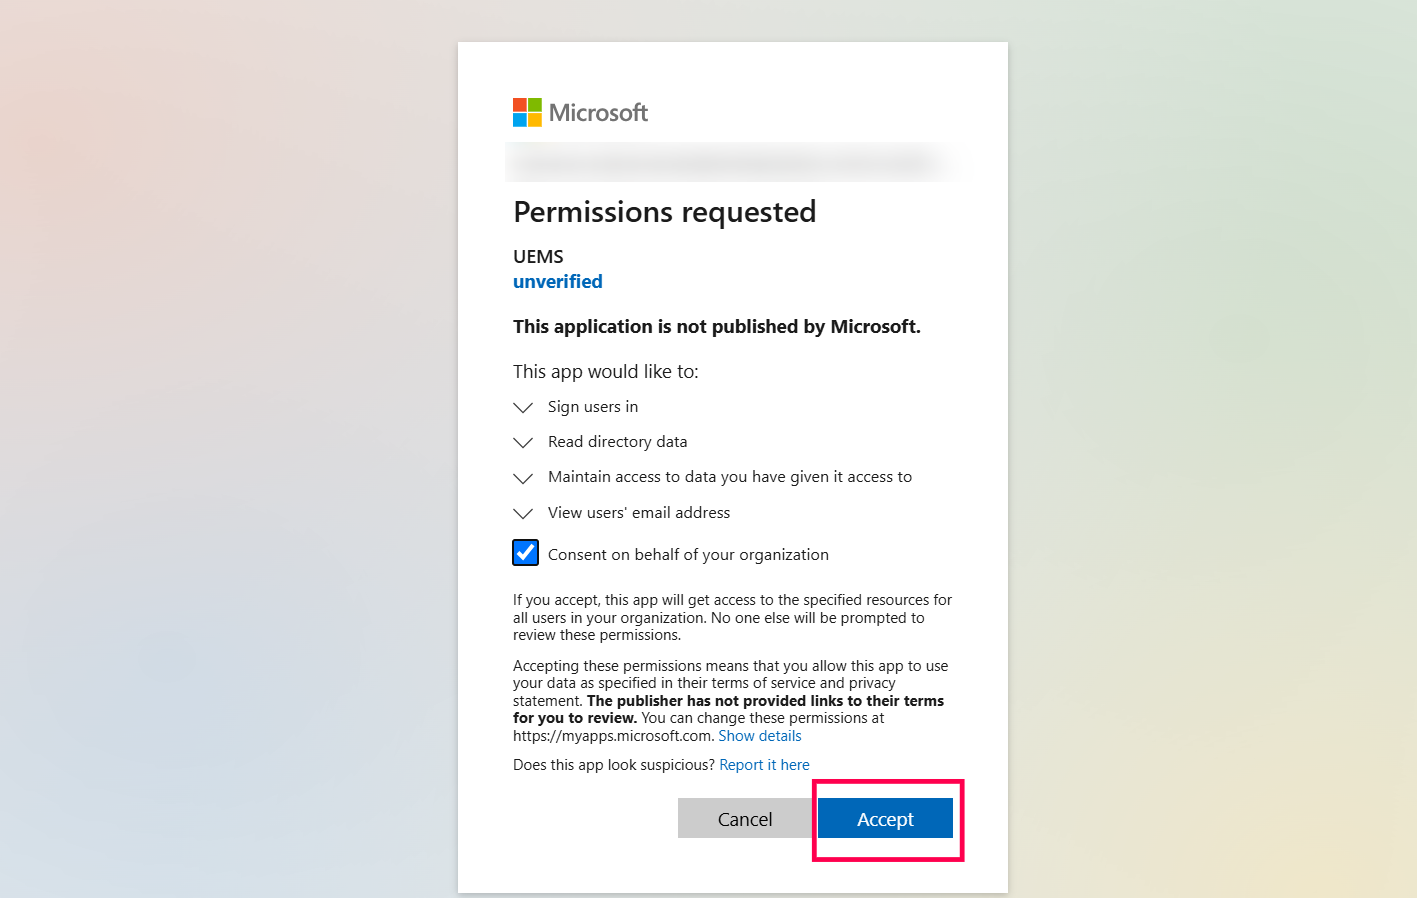
- You will be redirected to the Microsoft Azure Login page. After logging in, a consent screen will be displayed for integration consent.
- Click Accept.
Configure Sync Frequency:
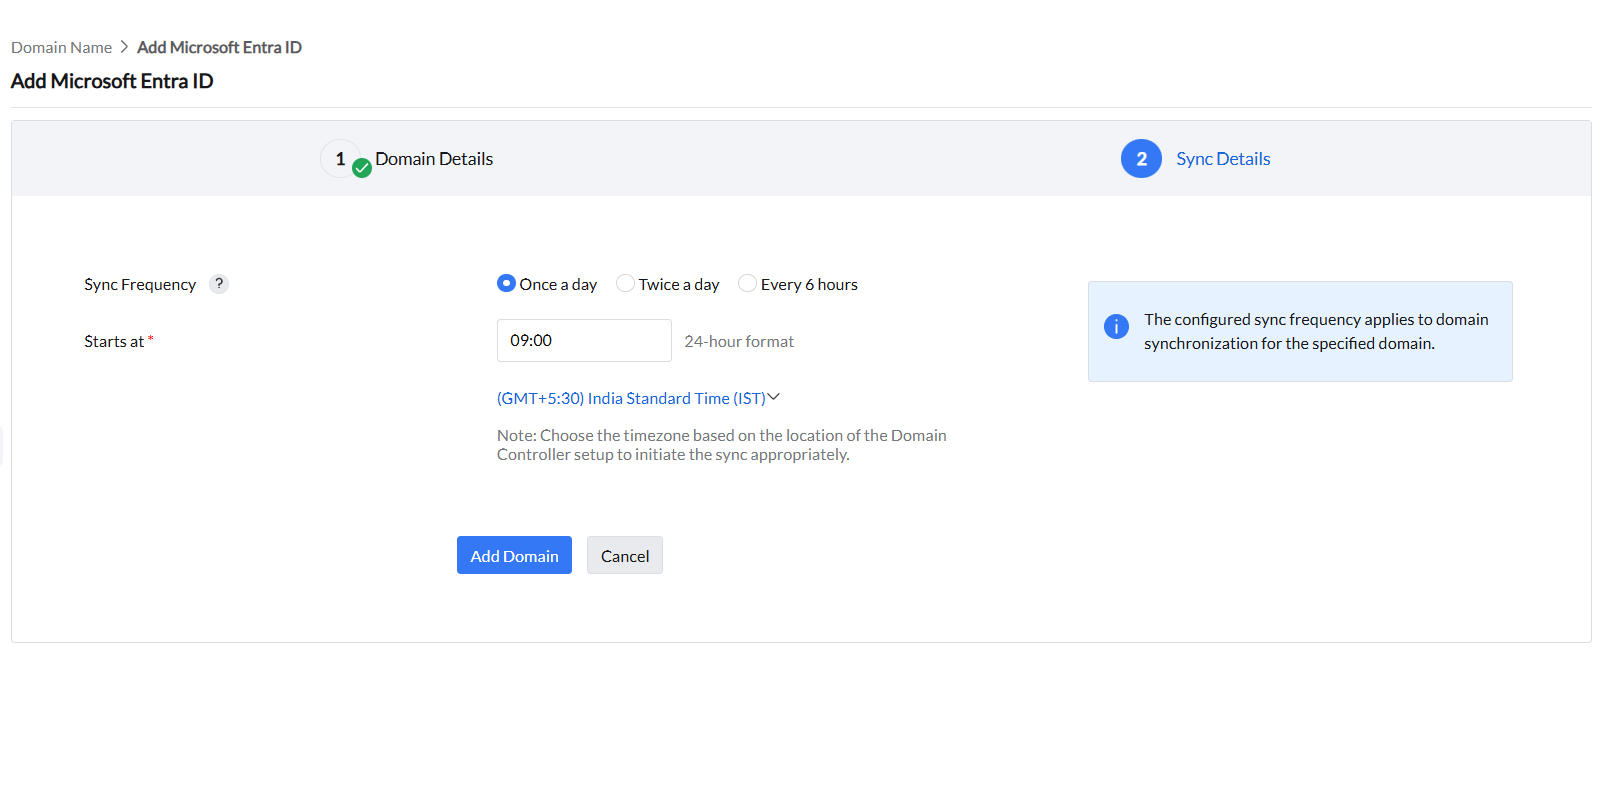
After authentication and accepting the consent from Azure Portal, return to Endpoint Central and configure the sync frequency for the Entra ID domain. Choose from the following frequency options:
- Every 6 hours
- Twice a day
- Once a day
- Select the Timezone based on your Entra ID timezone.
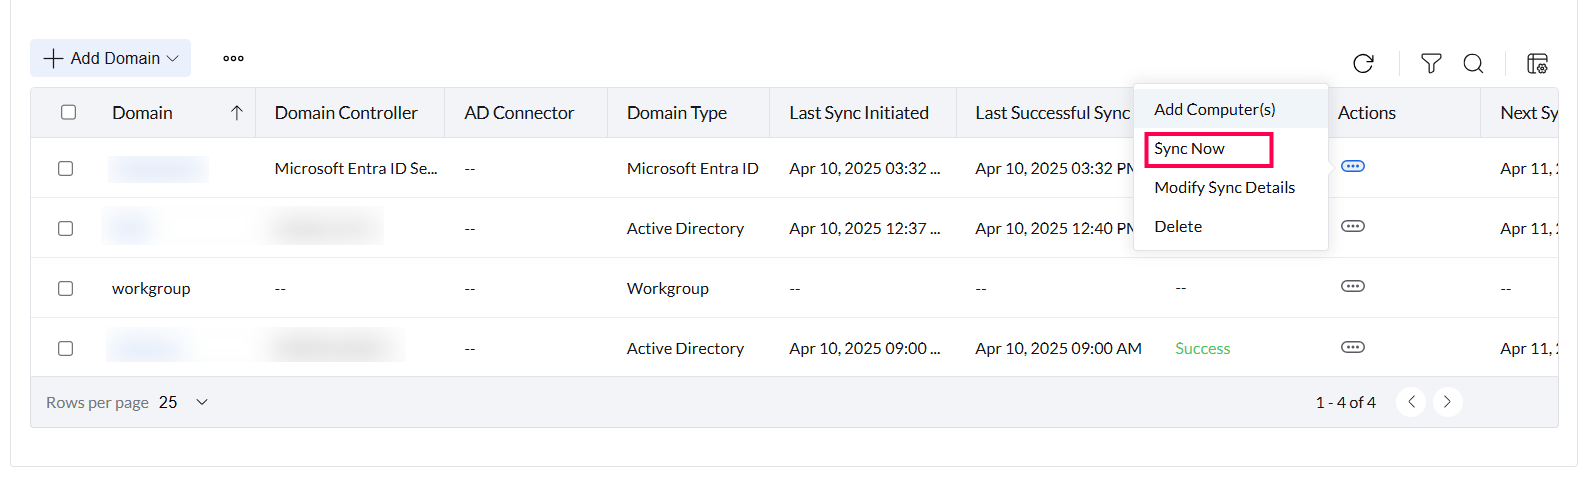
- You can also initiate an On-demand Sync by using the Sync action available in the action button.
For further details, see Integrating/Adding Entra ID to Endpoint Central.