How to deploy MSIX Files via Powershell script?
If the user wants to deploy MSIX files, then it can be achieved with the help of the following steps.
Table of contents
Create the MSIX package
- Add the below command and save it as .ps1 file. This Powershell script will install the MSIX file.
Add-AppxPackage -Path <MSIX_file_name_with_extension>Example: Add-AppxPackage -Path MSTeams-x86.msix
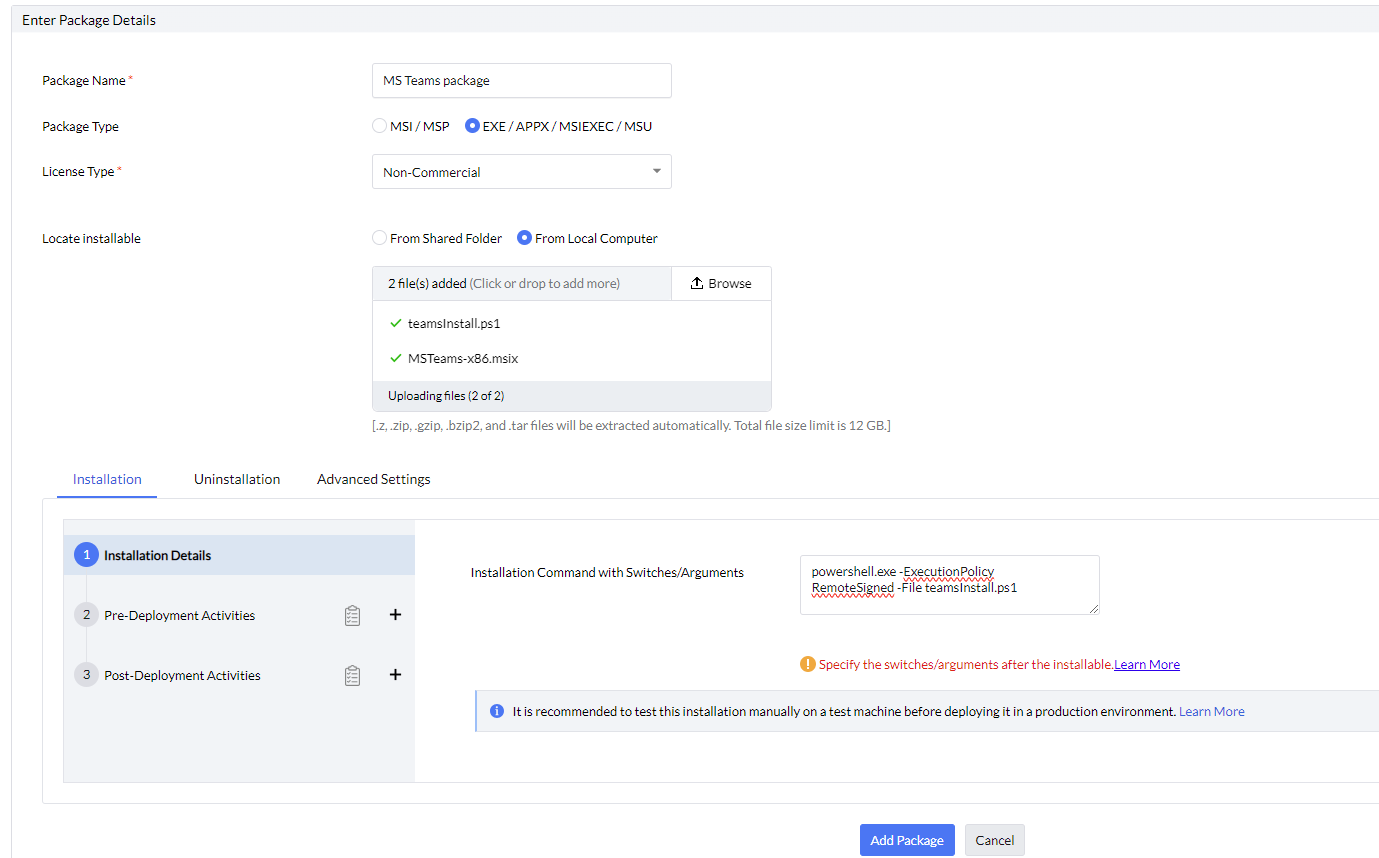
- Navigate to Software Deployment → Packages → Add package → Windows
- Enter the package name and choose the package type as EXE/APPX/MSIEXEC/MSU
- Select the license type as Non-Commercial from the drop down menu
- Locate the installableFrom local computer
- Upload the PowerShell script file and MSIX file in the package.
- Provide the below installation command. This command will trigger the PowerShell script.
powershell.exe -ExecutionPolicy RemoteSigned -File <powershell_script_name_with_extension>Example: powershell.exe -ExecutionPolicy RemoteSigned -File testFile.ps1
- If necessary, configure predeployment and postdeployment activities
- Click the Add Package button.
Note: The MSIX package is a user-based package so when deploying via Software Deployment, deploy it as a user-based Software Deployment configuration. When publishing to Self Service Portal, publish to the user group.
Deploy to target
- Under Packages, select the package created and click on Install/Uninstall Software > Windows > User Configuration
- Enter a name and description for your configuration.
- Configure Install/Uninstall options, as per your requirement.
- Configure the Deployment Settings, as per your requirement.
- Define the Target users to which you are deploying.
- Configure Execution Settings, as per your requirement.
- Select Enable notifications and Scheduler settings, as per your requirements.
- Click Deploy/Deploy Immediately to deploy the Configuration.