☰
The Product Settings tab of Exchange Reporter Plus allows you to configure various settings of the product pertaining to the connection, the security hardening measures, and the URL settings of the product.
The various settings tab that are available under the Product Settings include:
Using this option, you can set the HTTPS connection between the Exchange Reporter Plus server and the web browser, configure the general settings as well as to set the internal mail domains within your Exchange Organization.
To access Connection Settings, navigate to Admin > General Settings > Product Settings > Connection.
Under the connection tab, the various changes that you can perform include:
Note: Changes in the port settings will reflect only after you restart the Exchange Reporter Plus server.
Note: Changes in the port settings will reflect only after you restart the Exchange Reporter Plus server.
Note: Exchange Reporter Plus is configured with a default certificate, which is not valid for an SSL connection. You have to add a valid CA-signed certificate or self-signed certificate for this purpose.
General Settings can be used for setting the logging levels, enabling usage statistics gathering, enforcing GDPR compliance, implementing automatic license management, and editing the language and logo settings.
Note: By enabling this feature in Exchange Reporter Plus, the product will be set to make necessary changes like not displaying complete log paths in the UI in order to comply with all GDPR guidelines.
This option enables you to configure and manage all product security settings in one place. A dashboard on the right side displays the percentage of security hardening and it gets updated dynamically based on the security settings configured.
Security hardening alerts will be shown in the License tab located on the top-right corner, and will also be emailed to the users along with product downtime and start-up mailers. It will also be displayed in the Notification Center (the ![]() icon on the top-right corner) until the Product Security Hardening dashboard reaches 100%. For licensed customers, the alert will also be displayed after every successful login until all mandatory security configurations are completed.
icon on the top-right corner) until the Product Security Hardening dashboard reaches 100%. For licensed customers, the alert will also be displayed after every successful login until all mandatory security configurations are completed.

To manage security settings individually, click the Configure > Change or Enable option corresponding to the required security setting and make the changes. Once configured, status corresponding to a setting will change to Configured or Changed as shown in the image above.
The security configurations available in Exchange Reporter Plus are
Note: You can configure this only with a primary and secondary email address, and a telephone number, that have not been previously shared with ManageEngine. This ensures that these contact details are unique and can serve as a fallback if the previously provided information becomes inaccessible.
Note: The Enforce HTTPs, Change Default Admin's Password, Enforce Two-factor Authentication settings must be configured in Exchange Reporter Plus. Until these settings are configured or the checkbox for alerts are not enabled, you will continue to receive alerts and notifications.
To keep your Exchange Reporter Plus instance secure, the ManageEngine security team will use the registered contact details to notify you of important security updates. By registering the contact information of your operations or security team, you can ensure timely delivery of these updates.
Previously, security updates were sent only to licensed email addresses. Going forward, they will also be delivered to registered email addresses. These updates cover both internal and external vulnerabilities and will be sent to both the primary and secondary registered email addresses.
When vulnerabilities are identified, they are resolved within defined timelines. Critical vulnerabilities are fixed within 24 hours, while high-risk vulnerabilities are typically resolved within 10 days. Administrators will be notified once each issue has been addressed. In certain cases, proactive measures taken to safeguard against potential public vulnerabilities will also be communicated to registered email addresses.
The registration process ensures that only verified contacts receive updates. For this registration, a verification link will be sent to the provided email address. This link must be confirmed within 7 days; otherwise, security updates will not be delivered. To ensure uninterrupted delivery, registered email addresses must be re-verified every 365 days. The information provided will be used exclusively for sending security updates.
With this enhancement, security updates are no longer limited to licensed email addresses but are also delivered to registered contacts. This ensures that the right teams receive timely notifications, allowing administrators to respond quickly to vulnerabilities and maintain a stronger security posture.
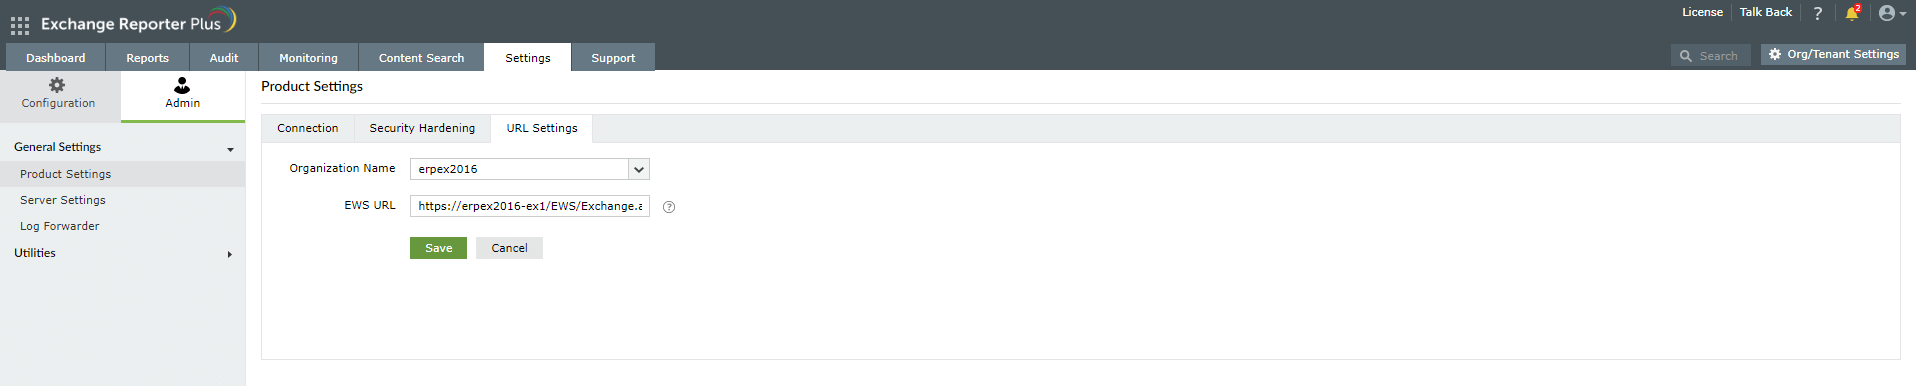
This option enables you to enter the EWS URL that defines the EWS connection endpoint of your Exchange Server organization. If this field is left empty, then the default EWS URL will be used.
To set the EWS URL:
Copyright © 2024, ZOHO Corp. All Rights Reserved.
 ADManager Plus
 ADAudit Plus
 ADSelfService Plus
 M365 Manager Plus