Password Synchronization with Microsoft 365/Azure
ADSelfService Plus’ real-time password synchronizer ensures that users maintain a single password across different applications, reducing password-related issues. Each time a user resets or changes their Active Directory password, the new password is automatically synced with their Microsoft 365/Azure account.
Microsoft 365/Azure can be configured with ADSelfService Plus for password synchronization by using either the Azure admin's credentials to authorize password synchronization for Azure user accounts (Password Authentication) or by creating an application in Azure and permitting password synchronization using OAuth (OAuth Client Credentials).
Steps to configure Microsoft 365/Azure accounts with ADSelfService Plus
Prerequisites
If you are using OAuth Client Credentials
You will need to register a new Azure application for ADSelfService Plus by following these steps:
- Log into portal.azure.com with your Azure administrator credentials.
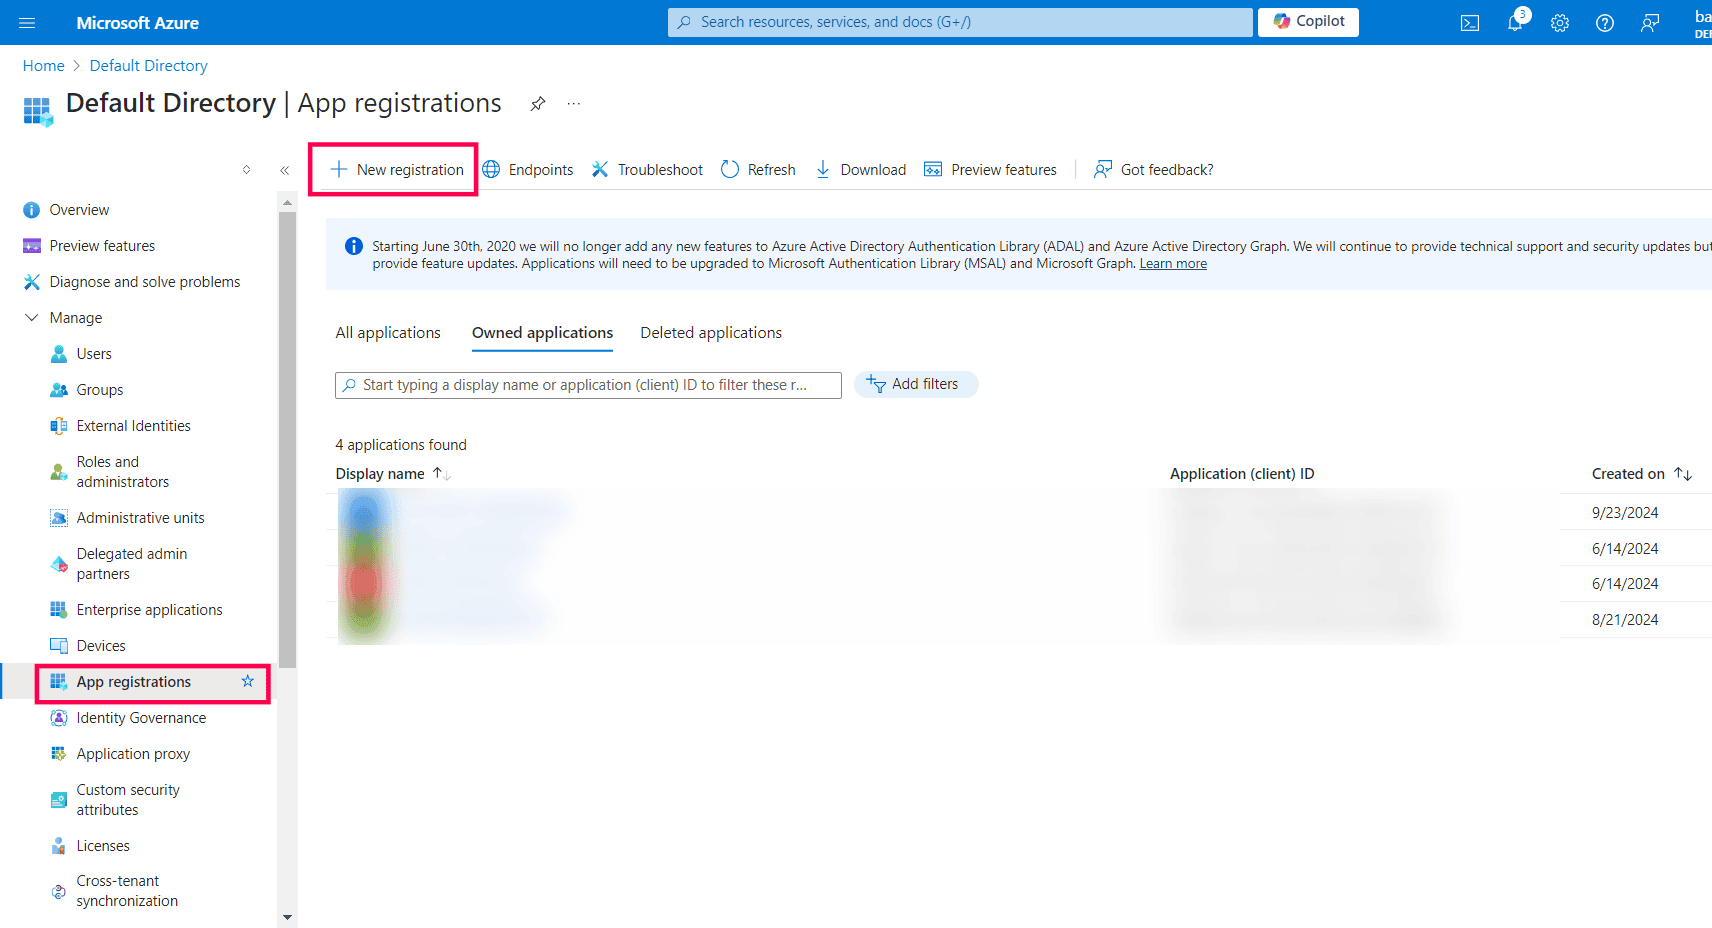
- Under Azure services, click Microsoft Entra ID. In the left pane, navigate to Manage > App registrations > New registration.
- Provide a Name of your choice and select Accounts in this organizational directory only as the Supported Account Types.
- If auto-linking has been disabled, select Web as the platform and paste the appropriate Redirect URI according to the protocol used by ADSelfService Plus:
- If HTTP is enabled in ADSelfService Plus: https://identitymanager.manageengine.com/api/public/v1/oauth/redirect
- If HTTPS is enabled in ADSelfService Plus: https://<productAccessUrl>/LinkAccountCallback
- Click Register.
- In the Overview page that appears, you will find the application details. Copy the Client ID and Tenant ID which will be used during configuration in ADSelfService Plus.
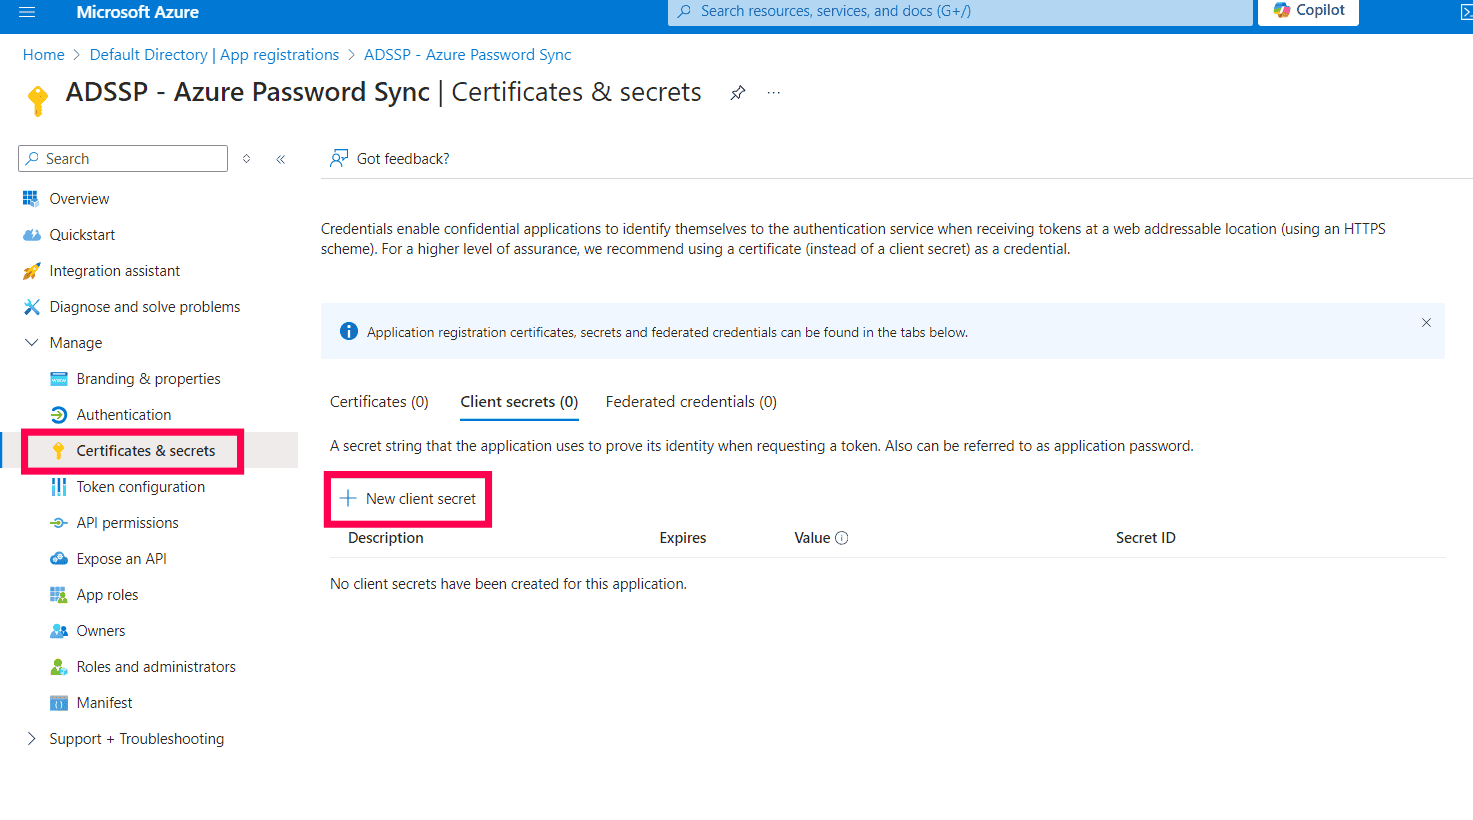
- From the left pane of the registered application page, navigate to Certificates & secrets and click New client secret.
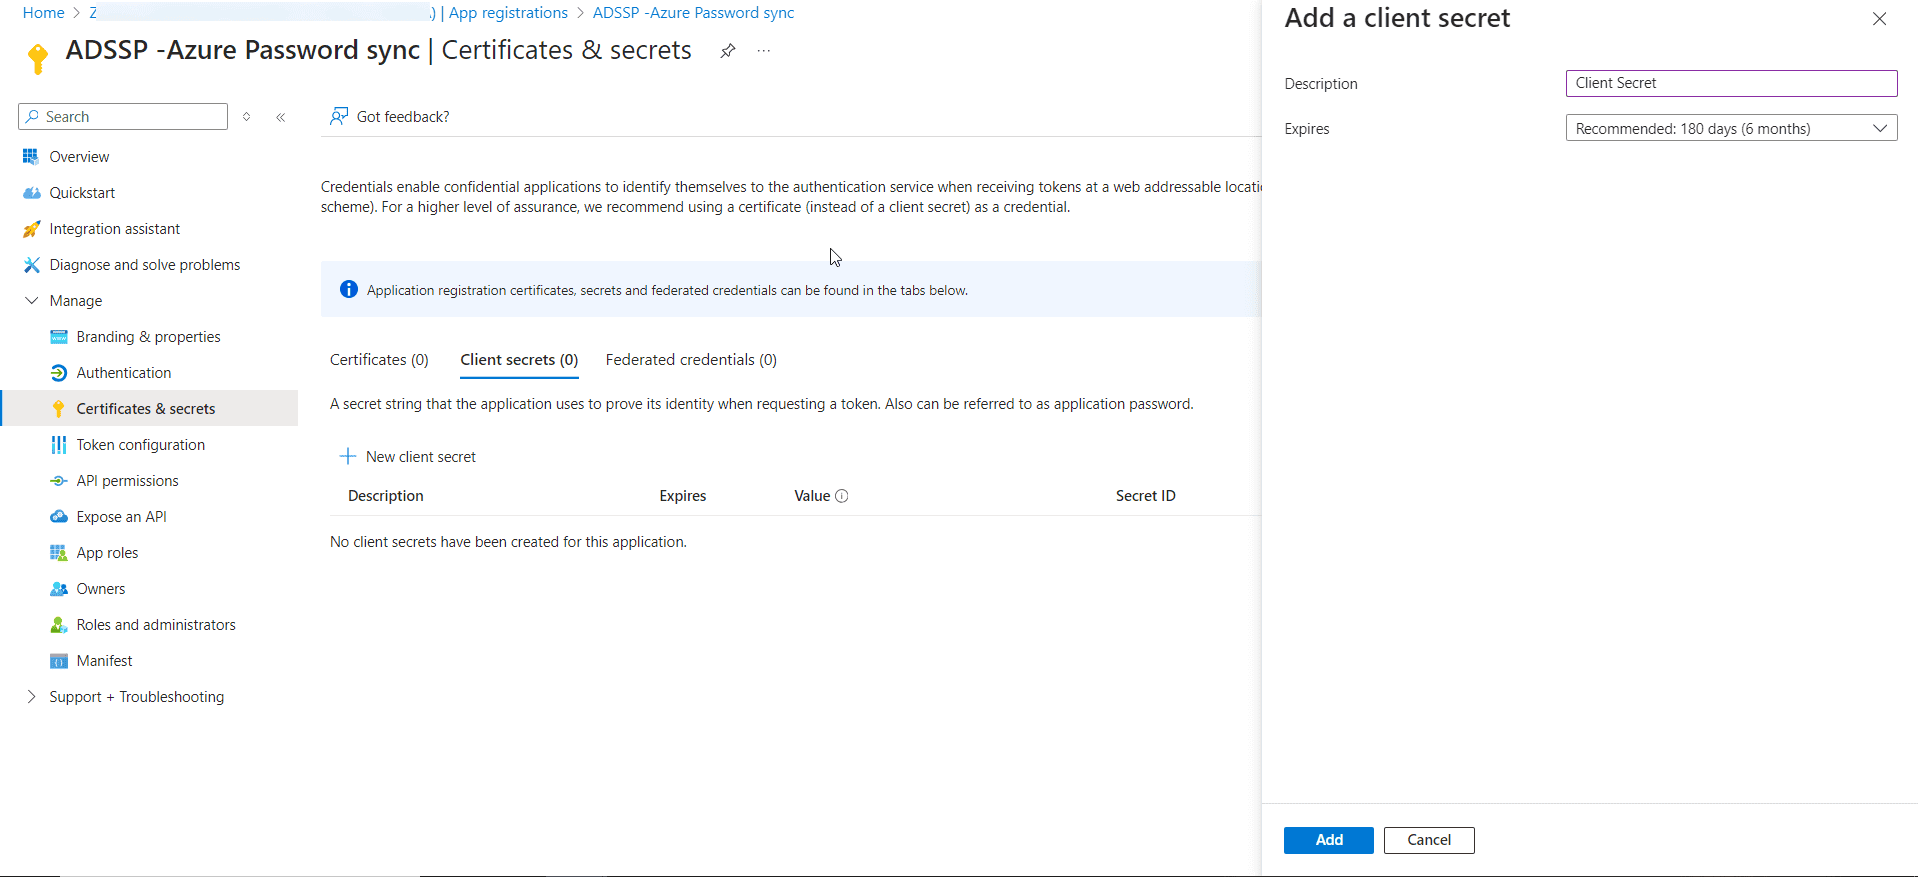
- Provide a Description for the client secret, and in the Expires field, specify the validity period for the client secret. Click Add.
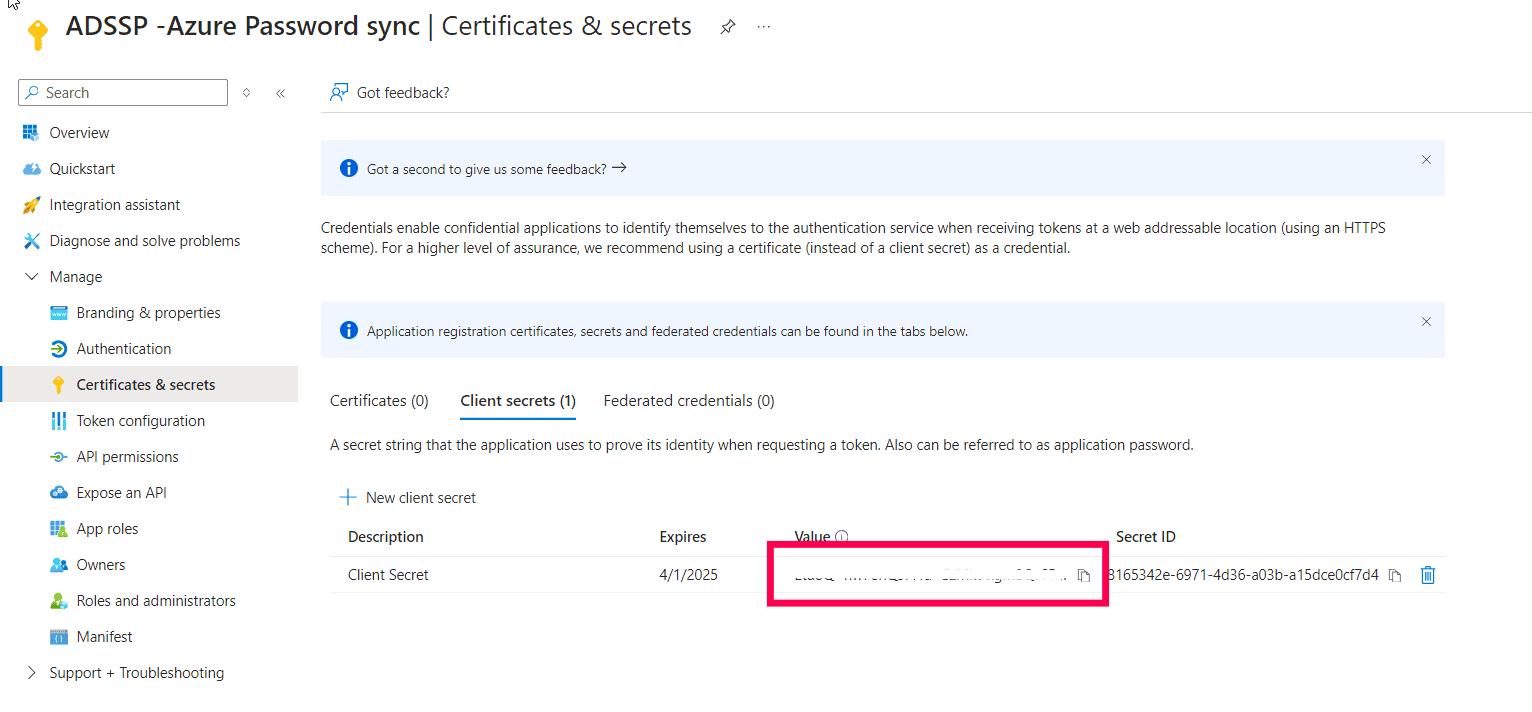
- The client secret will be generated. Copy the string displayed under Value which will be used later for configuration in ADSelfService Plus.
- You will also need to set the following roles for your app based on your requirements:
- If you need to synchronize passwords reset by all users including admins, ensure that the application is assigned the Global Administrator role.
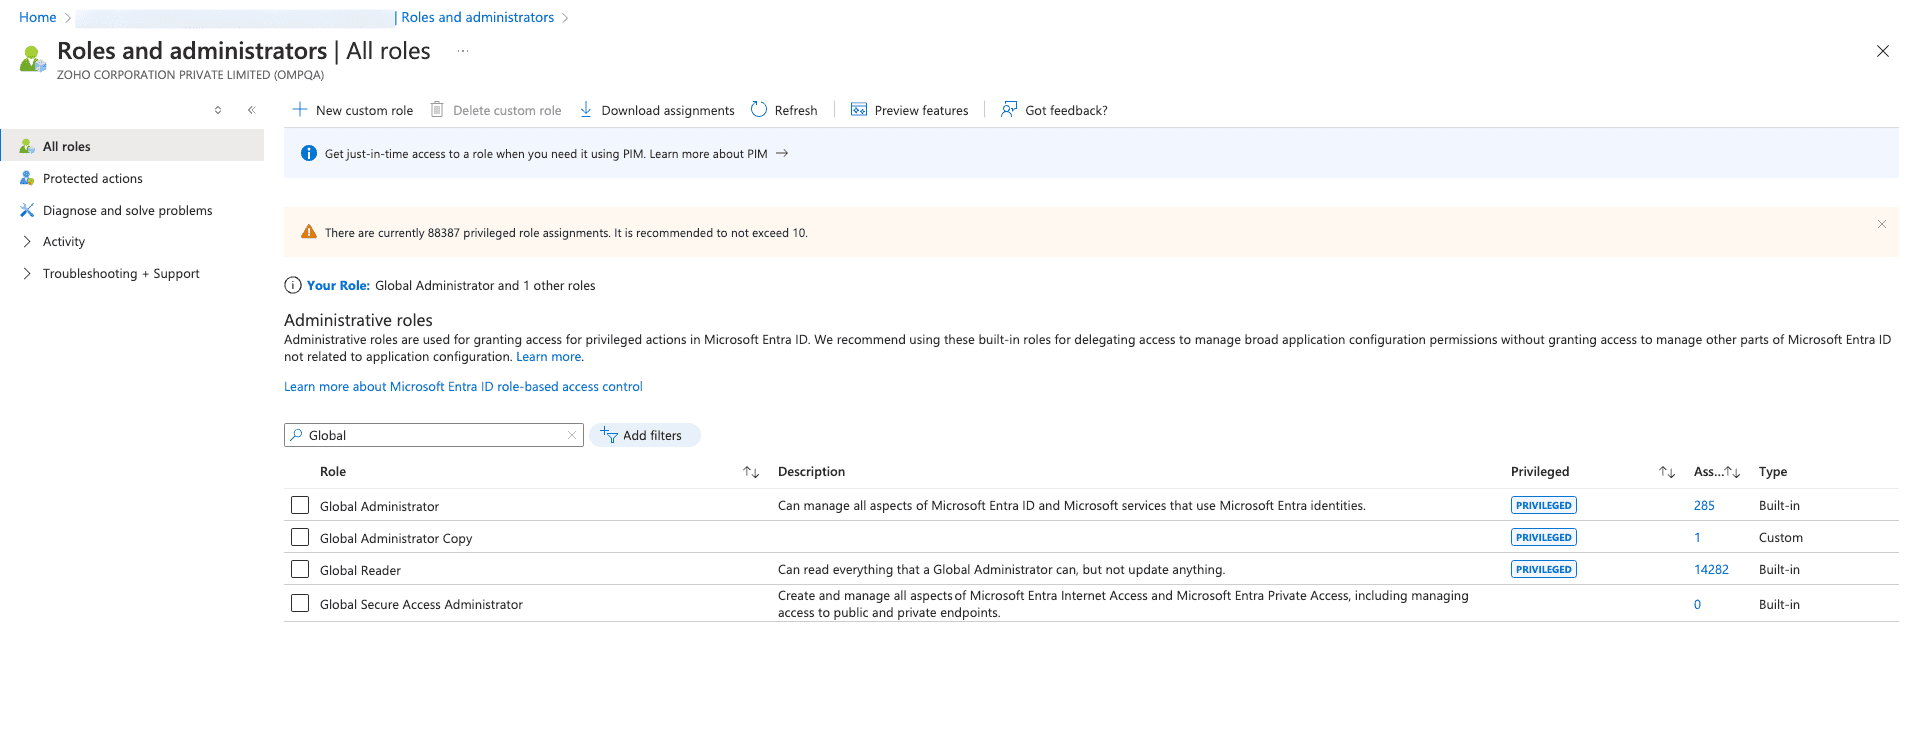
- To do this, navigate to Microsoft Entra ID > Manage > Roles and administrators, and select the Global Administrator role.
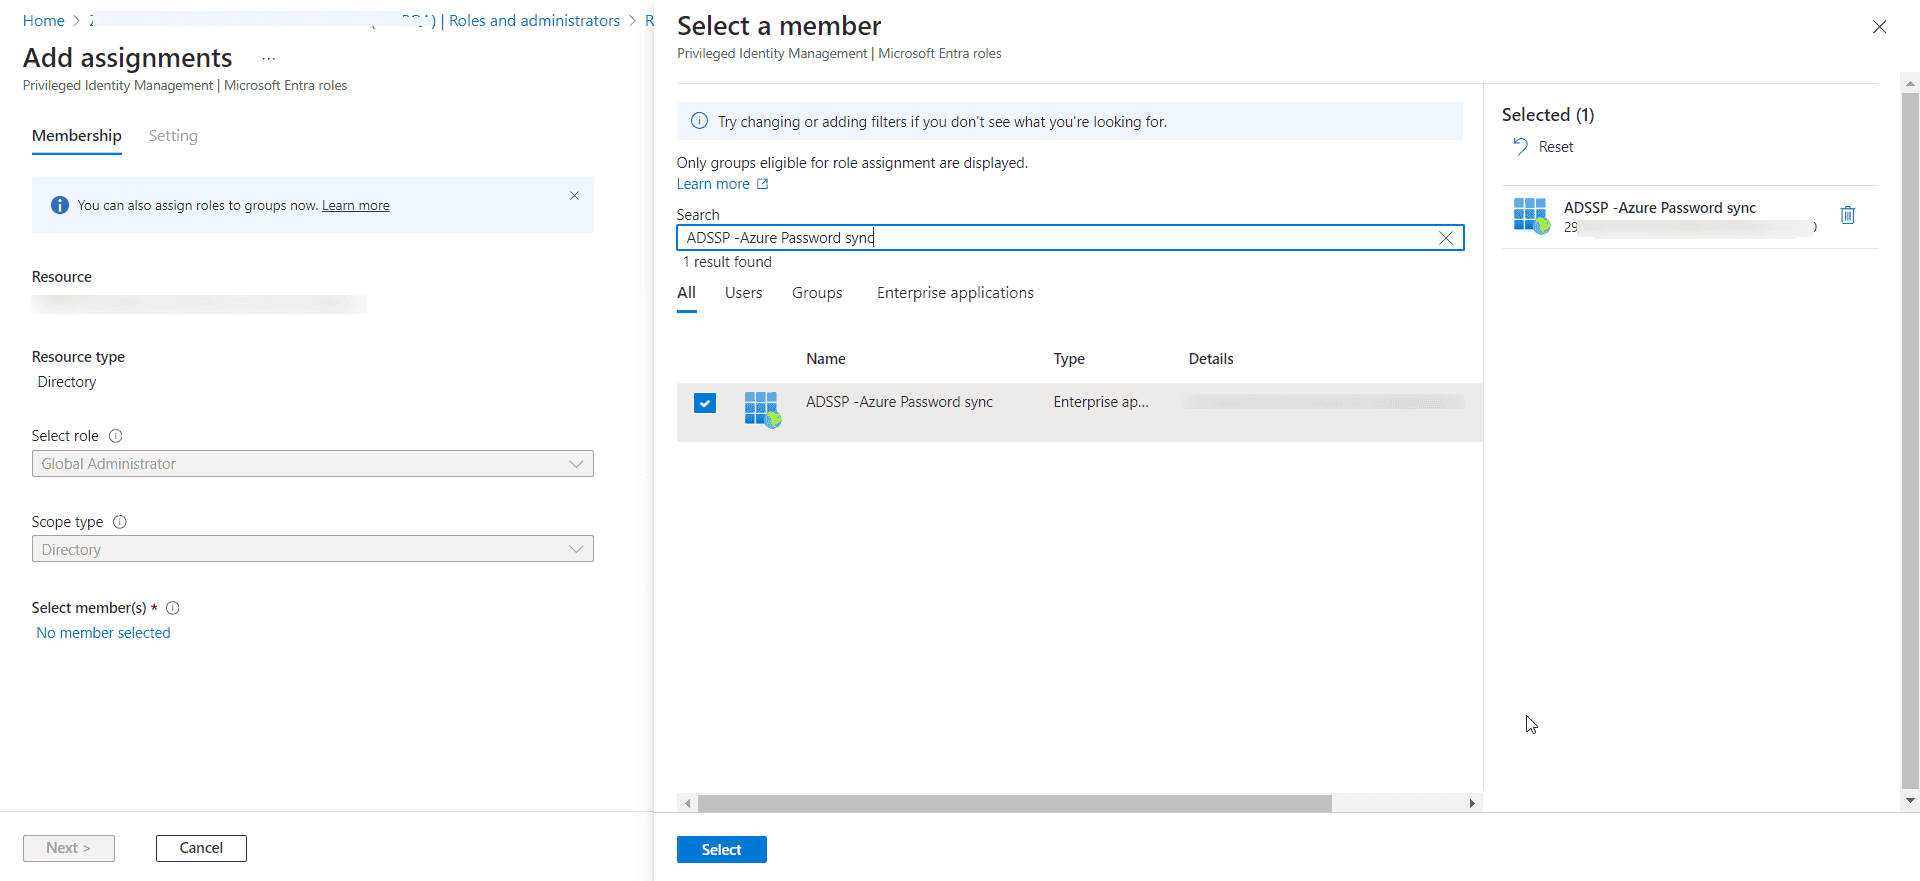
- Click Add assignments. In the Select Member(s) field choose the ADSelfService Plus OAuth password sync application you created, and click Select.
- Click Next.
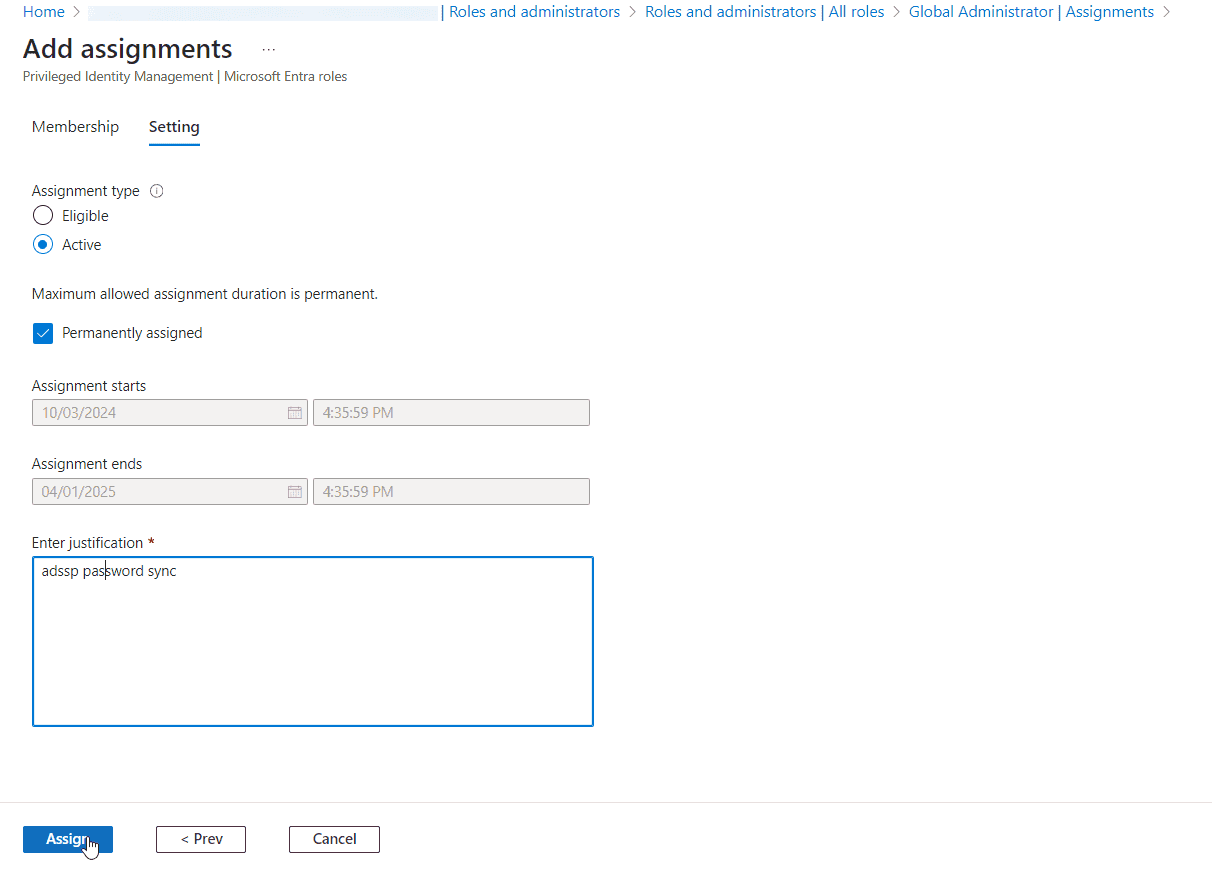
- Navigate to the Setting page, retain the default settings for all fields, fill in the Enter justification field, and click Assign.
- If you only need to synchronize passwords reset by non-admin users, ensure that the application is assigned both the User Administrator and Password Administrator roles, following the same steps outlined above.
- If you need to synchronize passwords reset by all users including admins, ensure that the application is assigned the Global Administrator role.


If you are using Password Authentication
Ensure that you have installed the Windows Azure AD Module for Windows PowerShell for your operating system, on your ADSelfService Plus server.
To install it, open an elevated PowerShell prompt and execute the following commands:
- Install-module msonline
- Install-module AzureAd
Configuration steps
- Log into ADSelfService Plus with admin credentials.
- Navigate to Configuration > Self-Service > Password Sync/Single Sign On.
- Select the Microsoft 365/Azure application.
- Enter the Application Name and Description.
- Enter the Domain name of your Microsoft 365/Azure account.
- In the Assign Policies field, select the policies for which password sync needs to be enabled.
- Under Password Sync, select Enable Password Sync.
- You can choose to enable password synchronization using either Password Authentication or OAuth Client Credentials.
A. Password Authentication
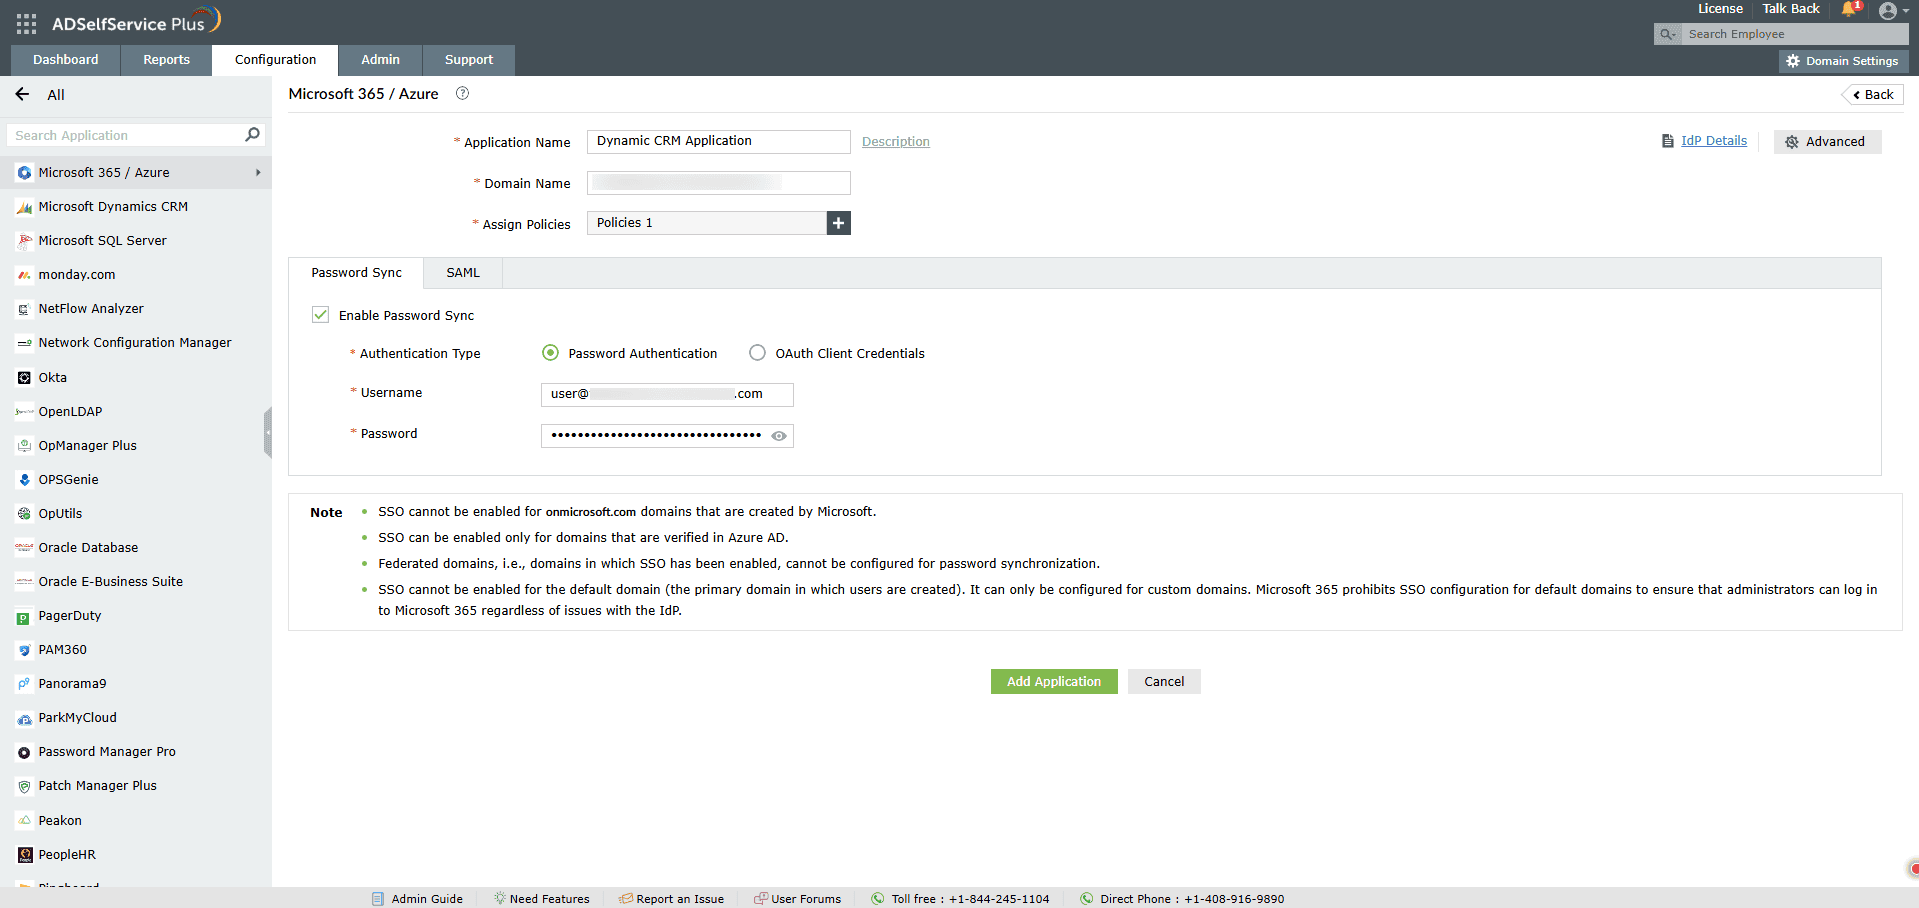
- If you choose Password Authentication, enter the Username and Password of your Microsoft 365/Azure administrator account.
- Click Add Application.
B. OAuth Client Credentials
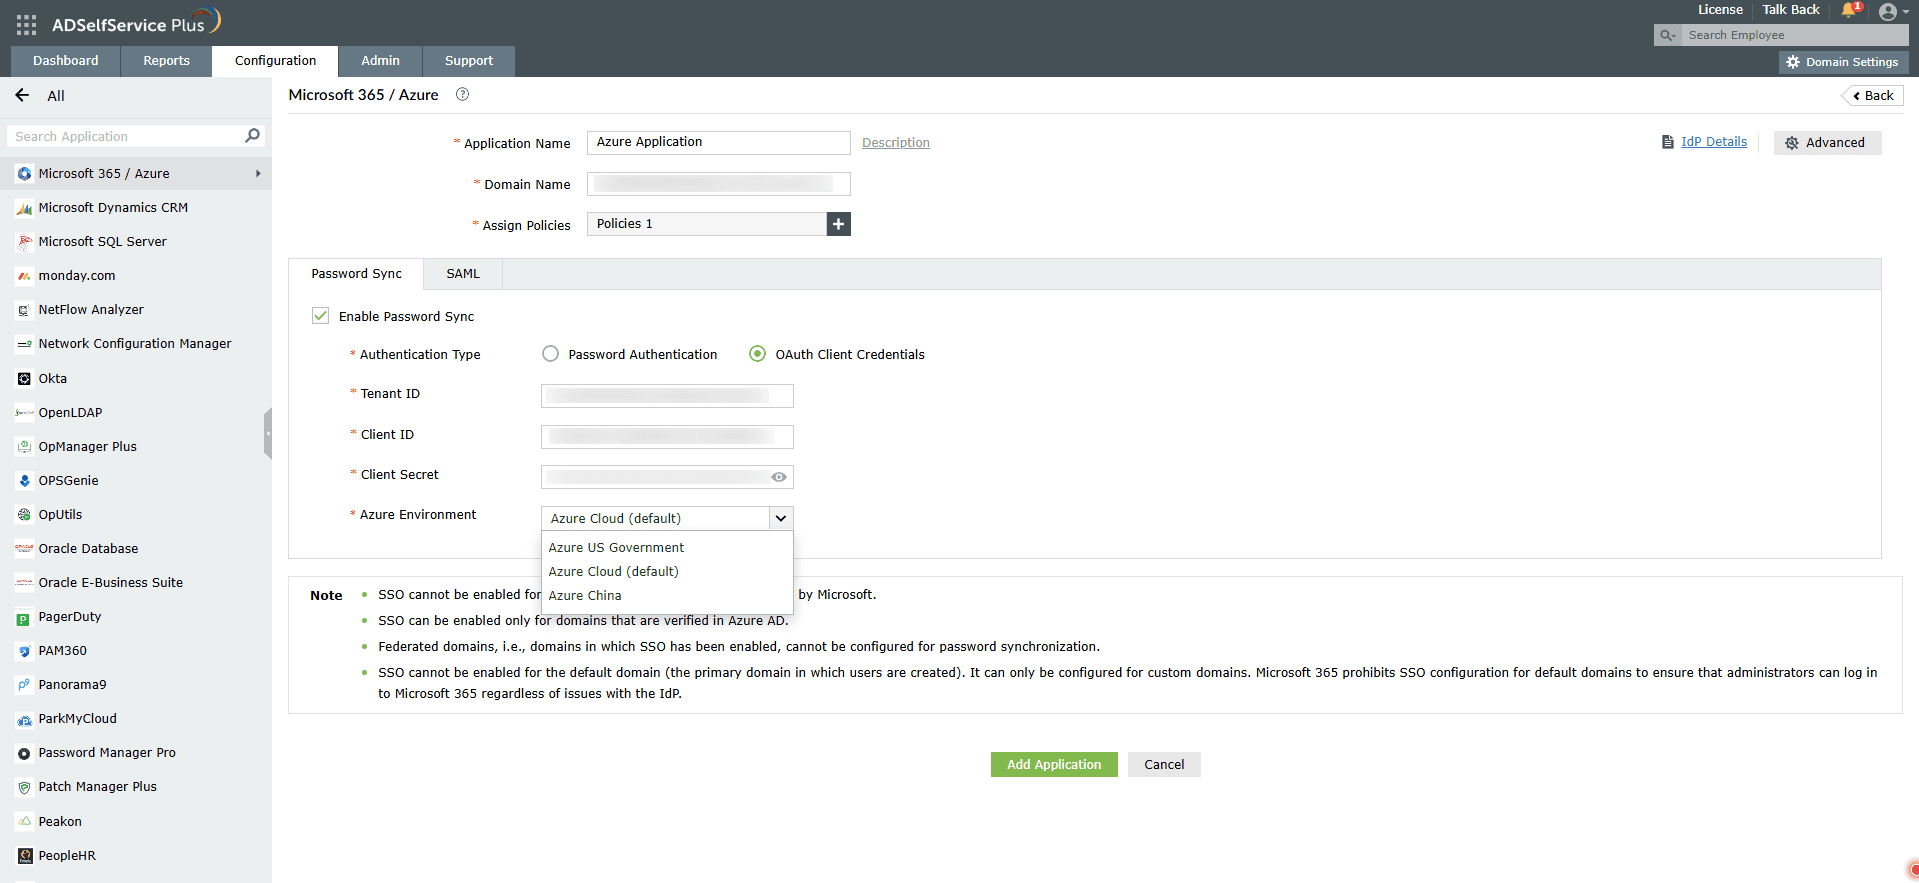
- If you choose OAuth Client Credentials, paste the Tenant ID, Client ID, and Client Secret of the Azure application, copied as instructed in the Prerequisites steps, in the respective fields.
- From the Azure Environment drop-down, select the environment based on where your tenant resides.
- Click Add Application.
Note: You can also find Microsoft 365/Azure application that you need from the search bar located in the left pane or the alphabet wise navigation option in the right pane.
Note: ADSelfService Plus allows you to create OU and group-based policies for your AD domains. To create a policy, go to Configuration > Self-Service > Policy Configuration > Add New Policy.