How to Configure MS SQL Server Database for the Central Server
Prerequisites for the migration process
In the Microsoft SQL Server used for migration, make sure that the following conditions are satisfied:
- Hardware Requirements for the MSSQL Server
Hardware Requirements for SQL server
The hardware requirements for SQL server include the following:
No. of endpoints to be Managed Processor Details RAM Size Hard Disk Space 1 to 250 Intel Core i3 (2 core/4 thread) 2.0 Ghz 3 MB cache 4 GB 5 GB* 251 to 500 Intel Core i3 (2 core/4 thread) 2.4 Ghz 3 MB cache 4 GB 10 GB* 501 to 1000 Intel Core i3 (2 core/4 thread) 2.9 Ghz 3 MB cache 4 GB 20 GB* 1001 to 3000 Intel Core i5 (4 core/8 thread) 2.3 GHz 8 GB 30 GB* 3001 to 5000 Intel Core i7 (6 core/12 thread) 3.2 GHz. 12 MB cache 8 GB 200 GB* 5001 to 10000 Intel Xeon E5 (8 core/16 thread) 2.6 GHz. 20 MB cache 16 GB 250 GB* 10001 to 15000 Intel Xeon E5 (12 core/24 thread) 2.7 GHz. 30 MB cache 32 GB 500 GB* 15001 to 20000 Intel Xeon E5 (14 core/28 thread) 2.7 GHz. 30 MB cache 64 GB 500 GB* 20001 to 25000 Intel Xeon (14 core/28 thread) 2.7 GHz. 30 MB cache 64 GB 1 TB* 25001 to 30000 Intel Xeon (20 core/40 thread) 3.6 GHz. 50 MB cache 128 GB 1 TB* * May increase dynamically according to the frequency of scanning.
- The SQL Server browser must be up and running
Configuring the MSSQL Server
If you already have a working MS SQL Server instance, this step is not required. Follow these steps to configure a newly installed MS SQL Server instance:
- Open Services:
- Click Start → Run and type
services.msc. - If the SQL Server Browser service is not running, start it to make the port number visible in the instance list.
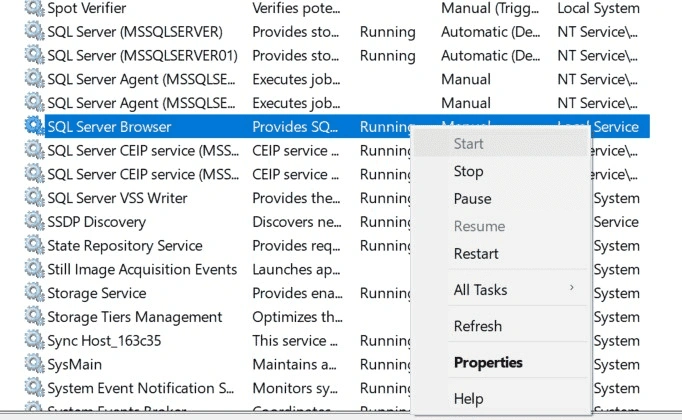
- Click Start → Run and type
- Configure TCP/IP:
- Open SQL Server Configuration Manager.
- Go to SQL Server Network Configuration → Protocols for [Instance Name].
- Ensure that TCP/IP is enabled. Right-click and enable it if not.
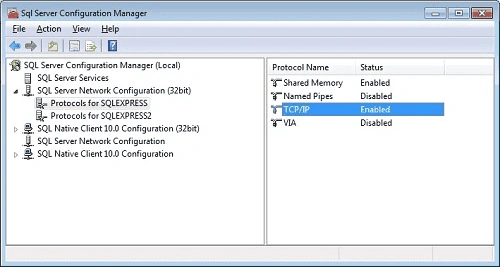
- Restart SQL Services:
- After enabling TCP/IP, go to SQL Server Services, right-click the instance, and select Restart.
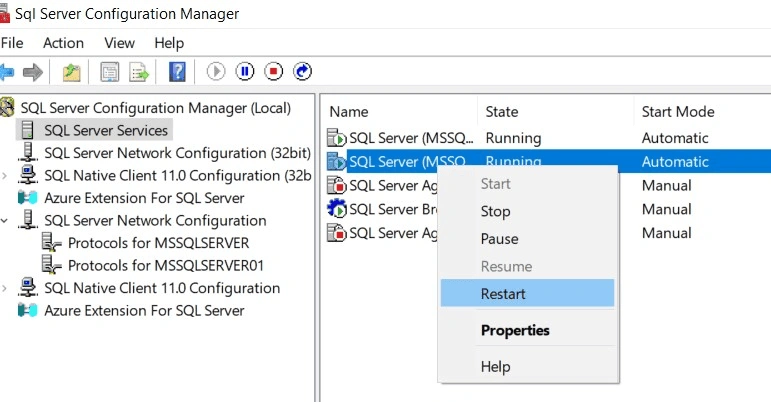
NoteEnsure that Windows Firewall is configured to allow SQL Server access. Refer to this document for more details. - Open Services:
- Microsoft SQL Server access must be delegated to a user with db_creator and db_owner permissions at the database level
Providing Permissions to the Microsoft SQL Instance
Follow these steps to grant db_owner privileges to the user:
Before Migration:
- Right-click the user and select Properties.
- Go to User Mapping.
- Select db_owner (master db) and click OK.
- Go to Securables and enable Create any database.
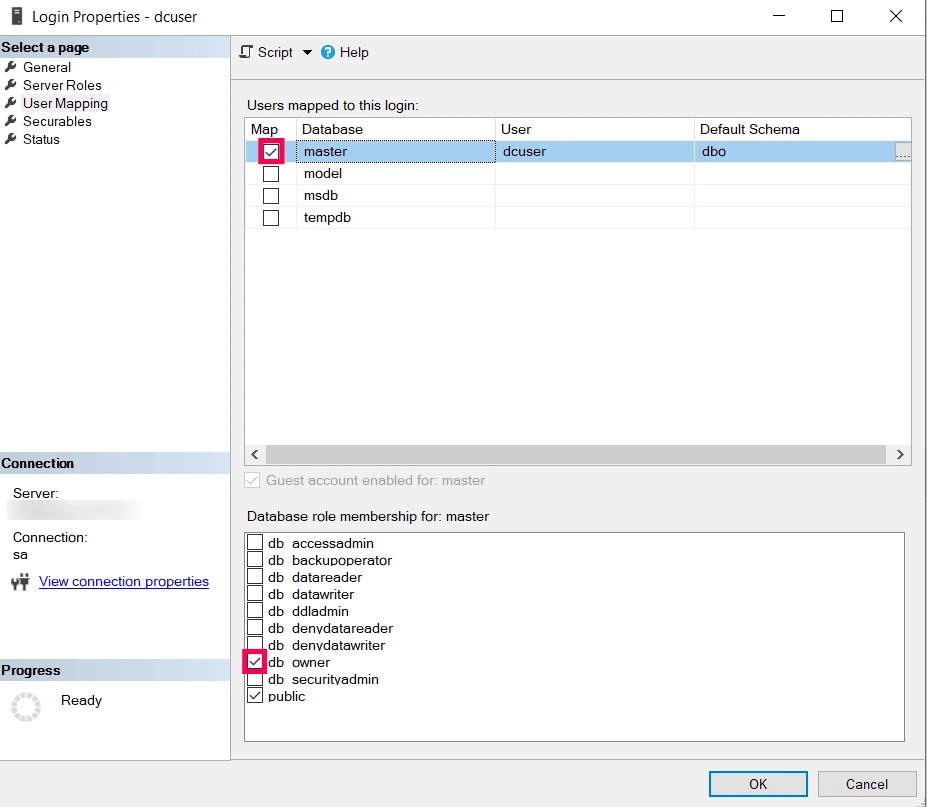
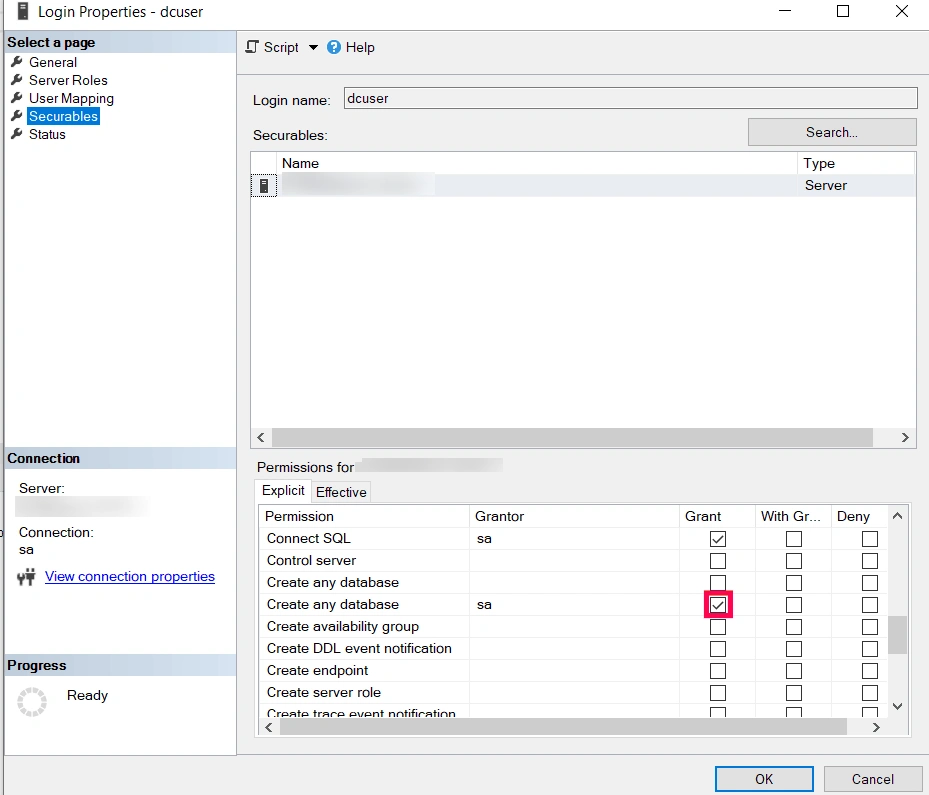
After Migration:
- Right-click the user and select Properties.
- Go to User Mapping.
- Select db_owner (Device Control Plus db) and click OK.
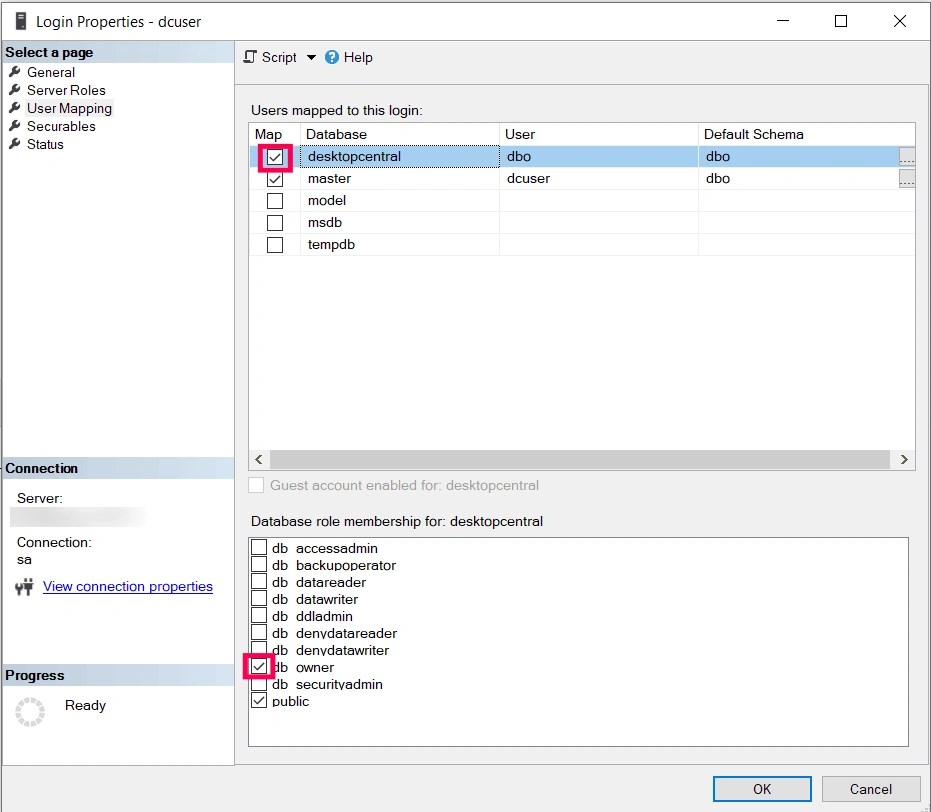
- For databases using the Full or Bulk-Logged recovery model, back up the transaction logs regularly to avoid data loss and prevent the transaction log from filling up. Learn more.
- The supported SQL version of Central Server is mentioned in the system requirements.
- If you are using a High Availability Server (formerly known as Failover Server) , additional steps are required.
Change SQL Server Machine Name/IP in the Central Server (Without Migration)
To update the machine name or IP address in the Central Server without migrating the database:
- Stop the Central Server.
- Open the
database_params.conffile located at<OSDeployer_Server>/conf. - Replace the old SQL Server IP/hostname with the new one:
url=jdbc:sqlserver://Old_Server_Name:SQLPort;DatabaseName=desktopcentralurl=jdbc:sqlserver://New_Server_Name:SQLPort;DatabaseName=desktopcentral
- Save the file and start the Central Server.
Migrate the Central Server Database from PGSQL to MSSQL
This section explains how to migrate the Central Server database from PostgreSQL (PGSQL) to Microsoft SQL Server (MSSQL). Follow these steps carefully to ensure a smooth migration:
- Stop the Central Server: Shut down the Central Server service.
- Run the Migration Script:
- UEMS_CentralServer
- Navigate to
<OSDeployer_Server>/binand run thechangeDBServer.batscript. This launches the Database Setup Wizard.
- Navigate to
- Select SQL Server:
- Choose SQL Server as the database type.
- Enter the hostname where SQL Server is installed.
- Select the appropriate instance from the list.
- Authentication:
- Select either Windows Authentication or SQL Server Authentication and provide the necessary credentials.

Windows Authentication

SQL Server Authentication
- Enable Data Migration:
- Ensure the "Migrate Data from Existing Database" checkbox is selected to migrate data from your current database to the new MSSQL database.
- Test Connection:
- Click the Test button to verify the connection. A pop-up message will confirm the connection is established.

- Complete Configuration:
- Click Save to complete the SQL Server configuration.
- A confirmation message will indicate successful SQL Server setup and data migration.

- Note: Migration duration depends on the amount of data and machine performance. Please wait until completion.
- Additional Steps for High Availability (formerly known as Failover Server) :
- Stop both the Primary and Secondary Servers.
- Copy the
database_params.confandServer.starttimefiles from theconffolder. - Move them to the corresponding location on the Secondary (failover) server.
- Start the Primary Server first, followed by the Secondary Server.
Once migration is complete, you can begin using the Central Server with the new configuration.
To configure SQL Server Always On functionality, refer to: SQL Server Always On