Switch Stage
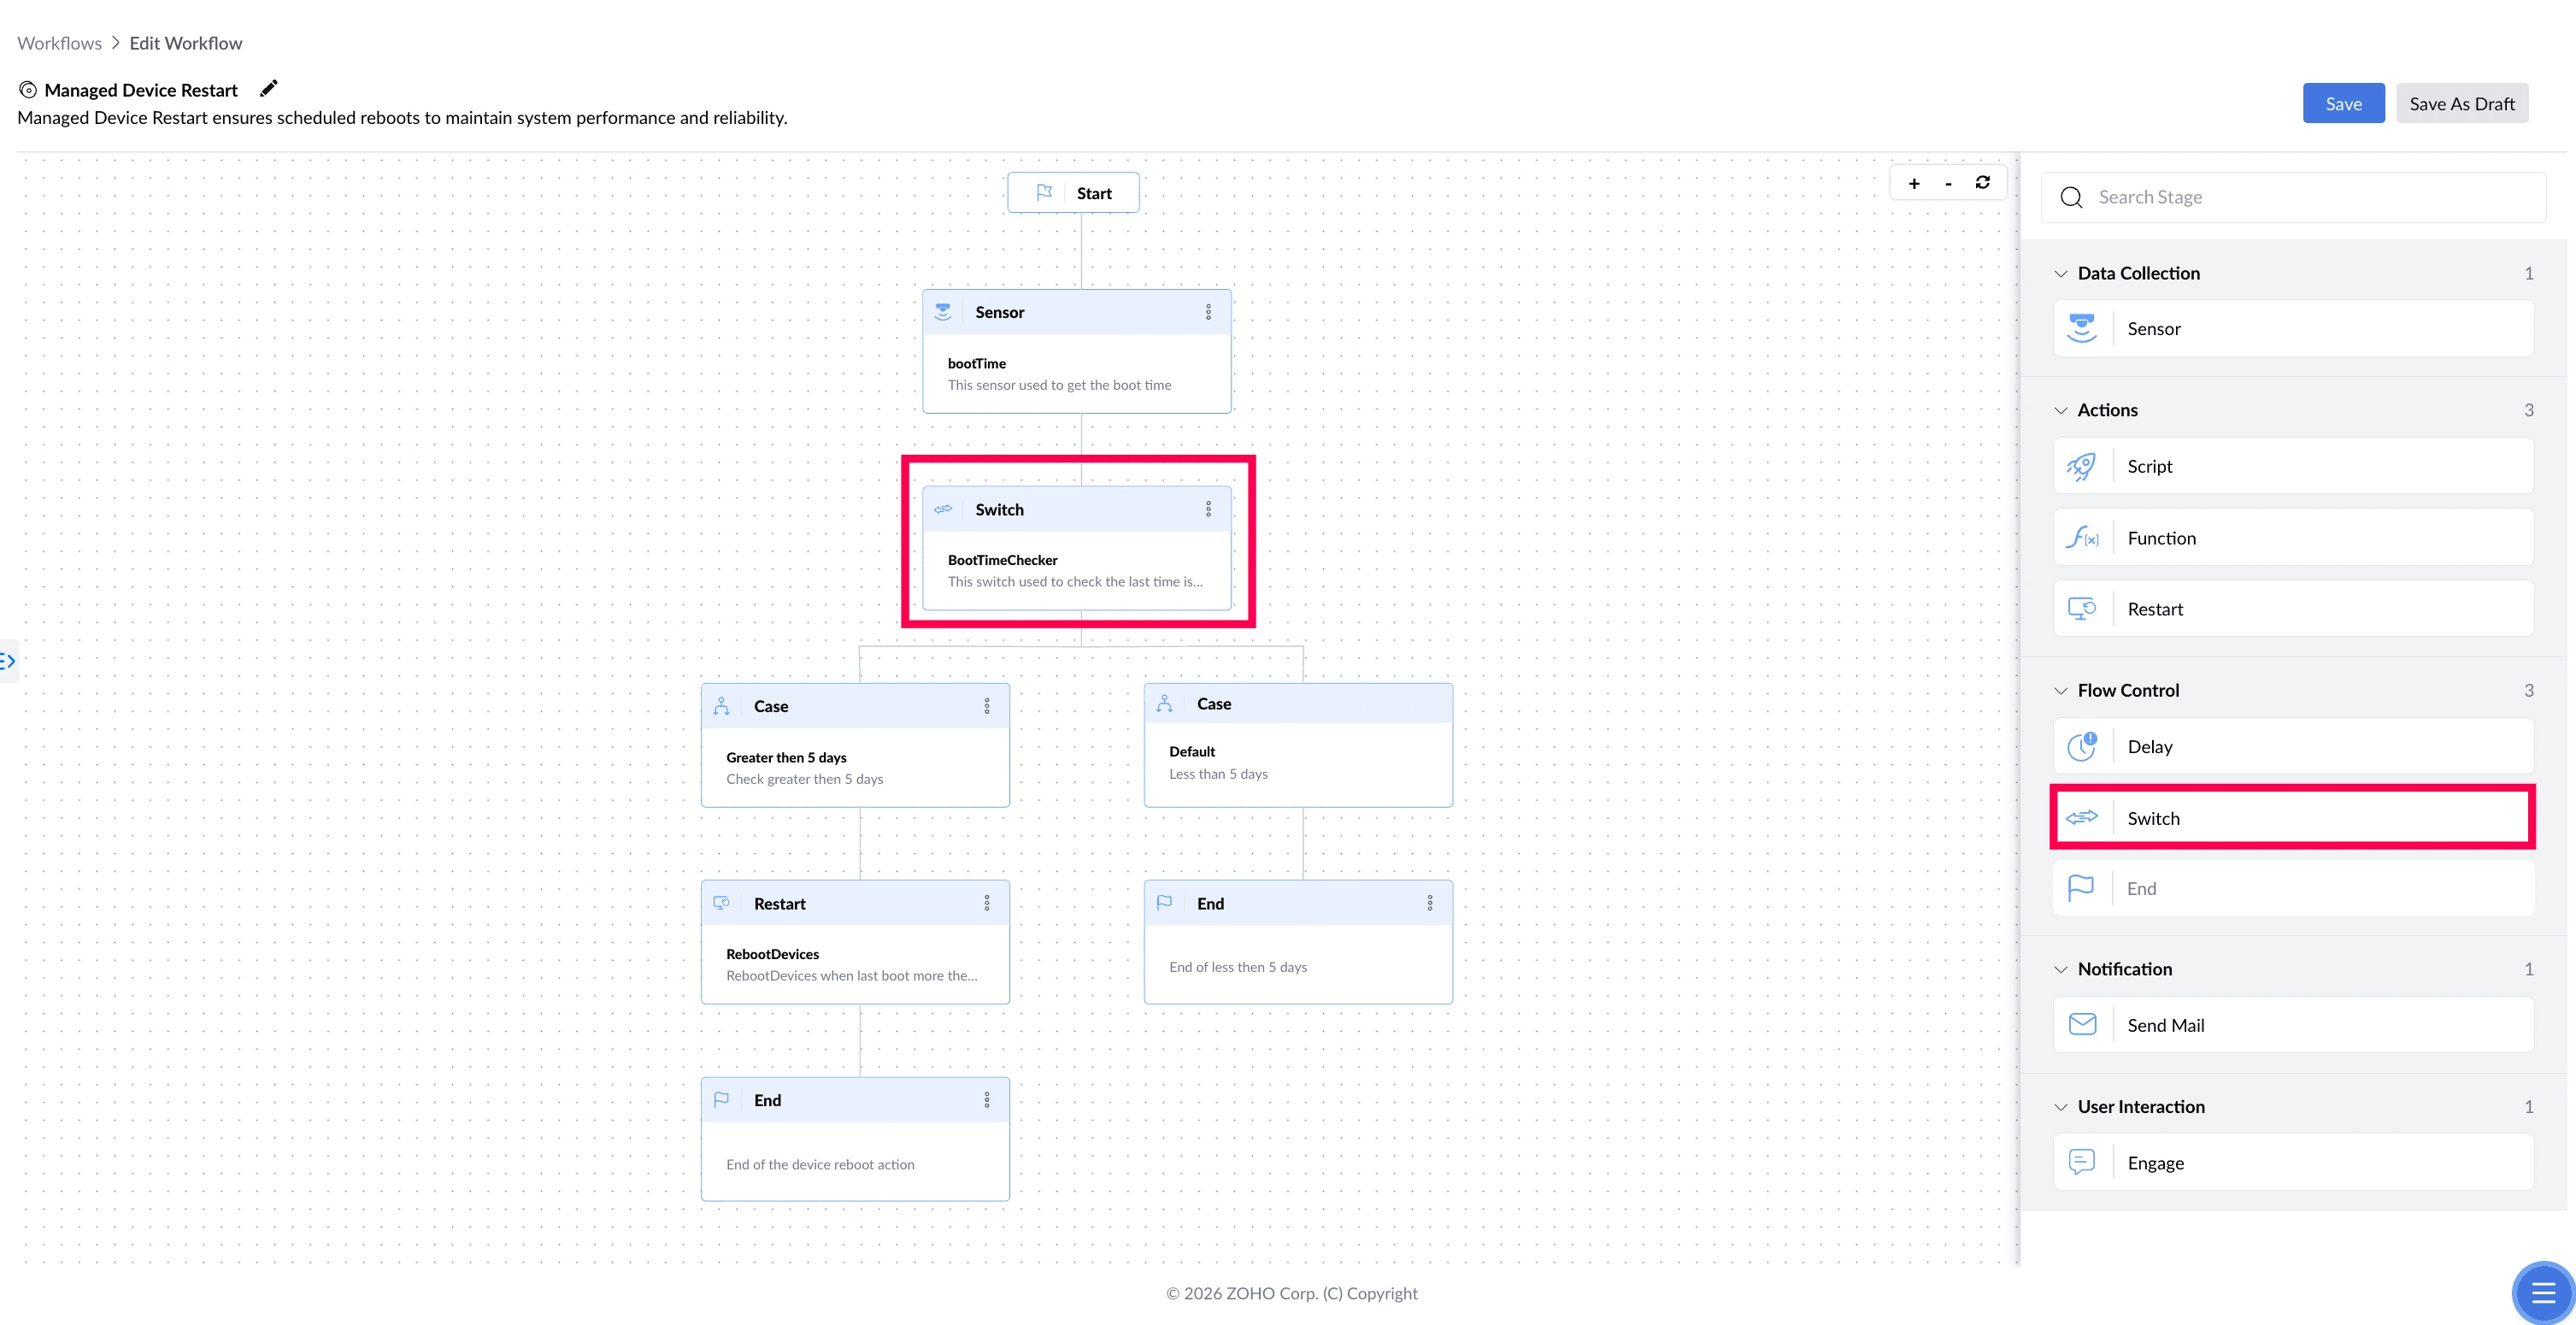
The Switch stage is where a workflow makes a decision. It compares a value — free disk space, the last restart date, a user's answer — against conditions you set, and the workflow continues along whichever path matches.
Each decision is set up as a case: one condition to check, plus the path the workflow takes when that condition is true.
What This Stage Solves
A workflow that does the same thing everywhere isn't much use. Most of the time the right action depends on what's actually happening on the device — how much space is left, how long since it restarted, or what the user just chose. Without a way to compare and branch, you'd need a separate workflow for every situation. The Switch stage makes that decision inside a single workflow.
| The problem | What Switch does about it |
|---|---|
| Cleanup would run on every device, including ones that don't need it | Checks free space first and only continues where it's low |
| A restart would be forced on devices that restarted yesterday | Compares the last restart date against your threshold |
| A user says no, but the workflow carries on anyway | Reads the user's answer and takes the matching path |
| Different device types need different handling | Branches on device properties such as network or OS |
Example
Managed Device Restart
This workflow uses two Switch stages. The first checks the last restart date collected from the device — those over 5 days carry on, and the rest end there. The second reads the user's answer to the restart prompt and routes accordingly: restart now, wait 10 minutes, or do nothing.
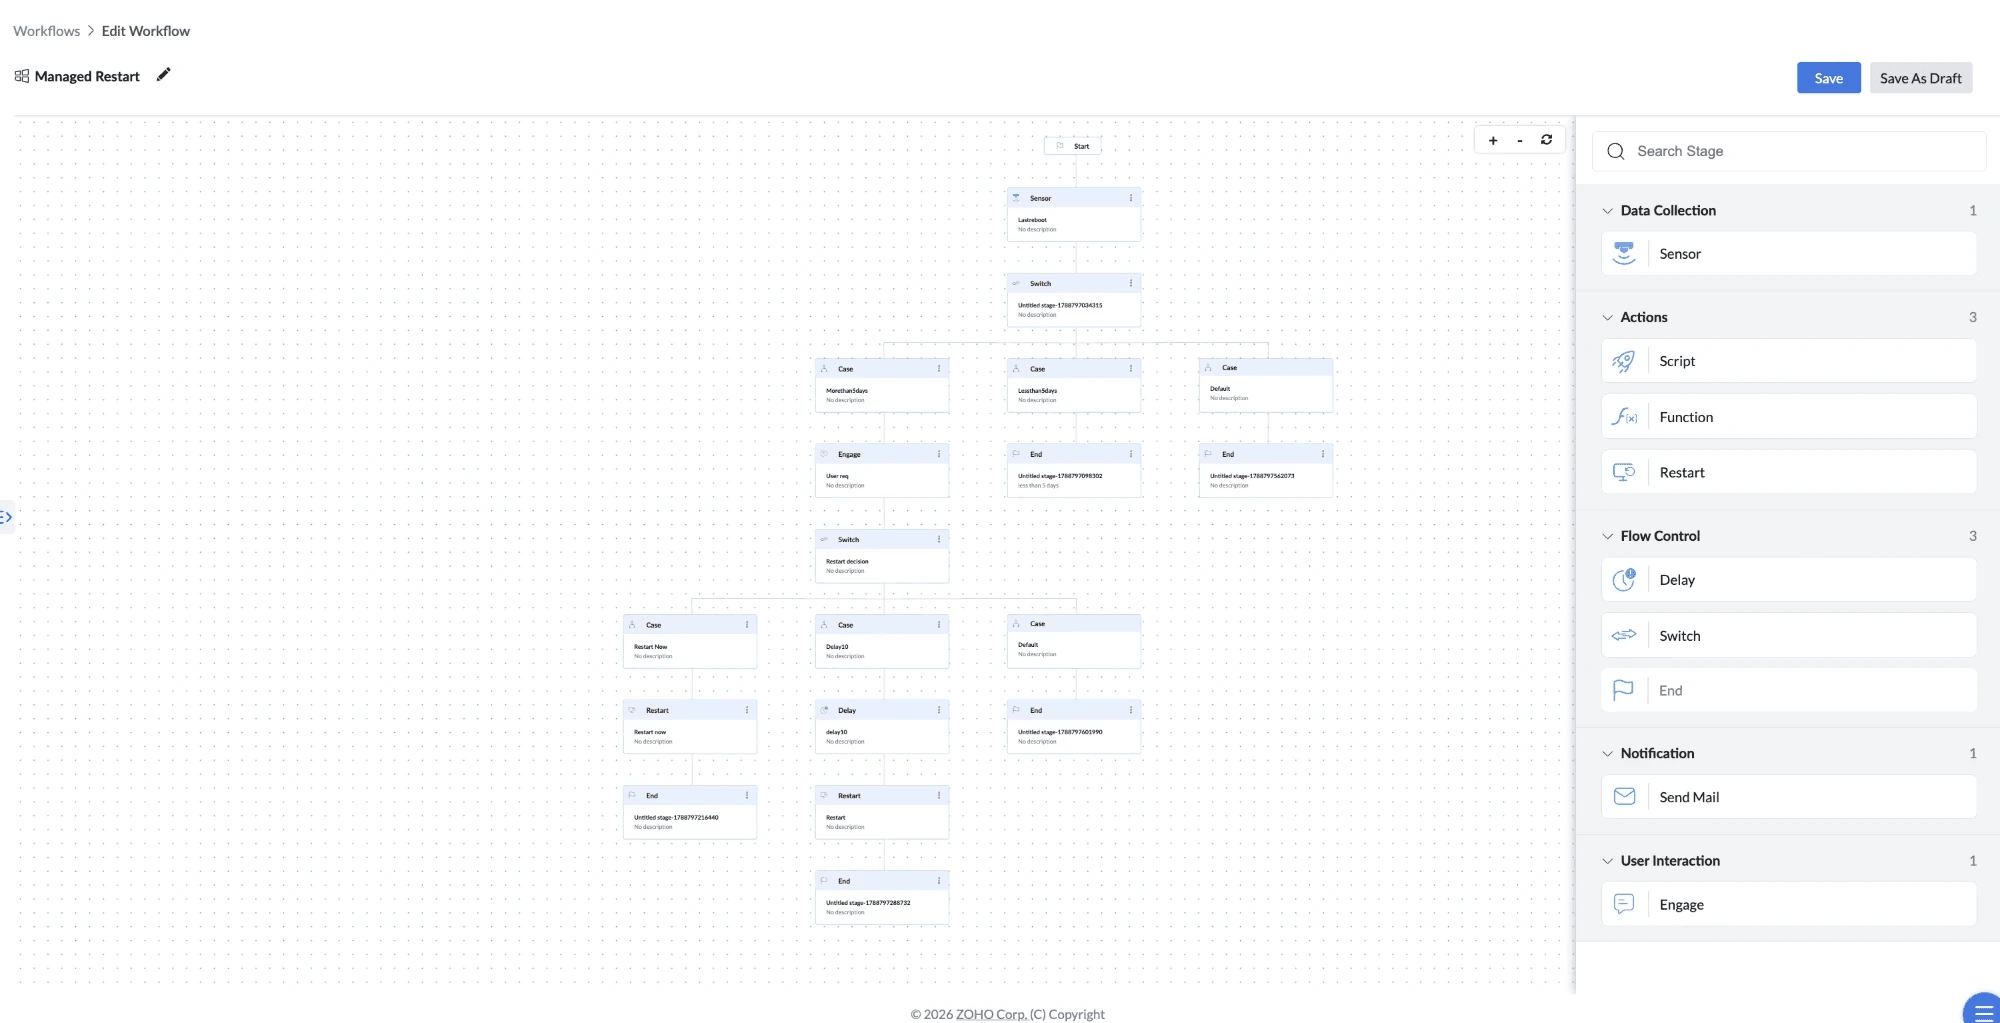
The first Switch branches on data collected from the device. The second branches on what a person chose — something only the Switch stage can do.
How to Configure
- Drag the Switch stage onto the canvas and connect it to the preceding stage.
- Enter a Name for the stage (required).
- Enter a Description (optional).
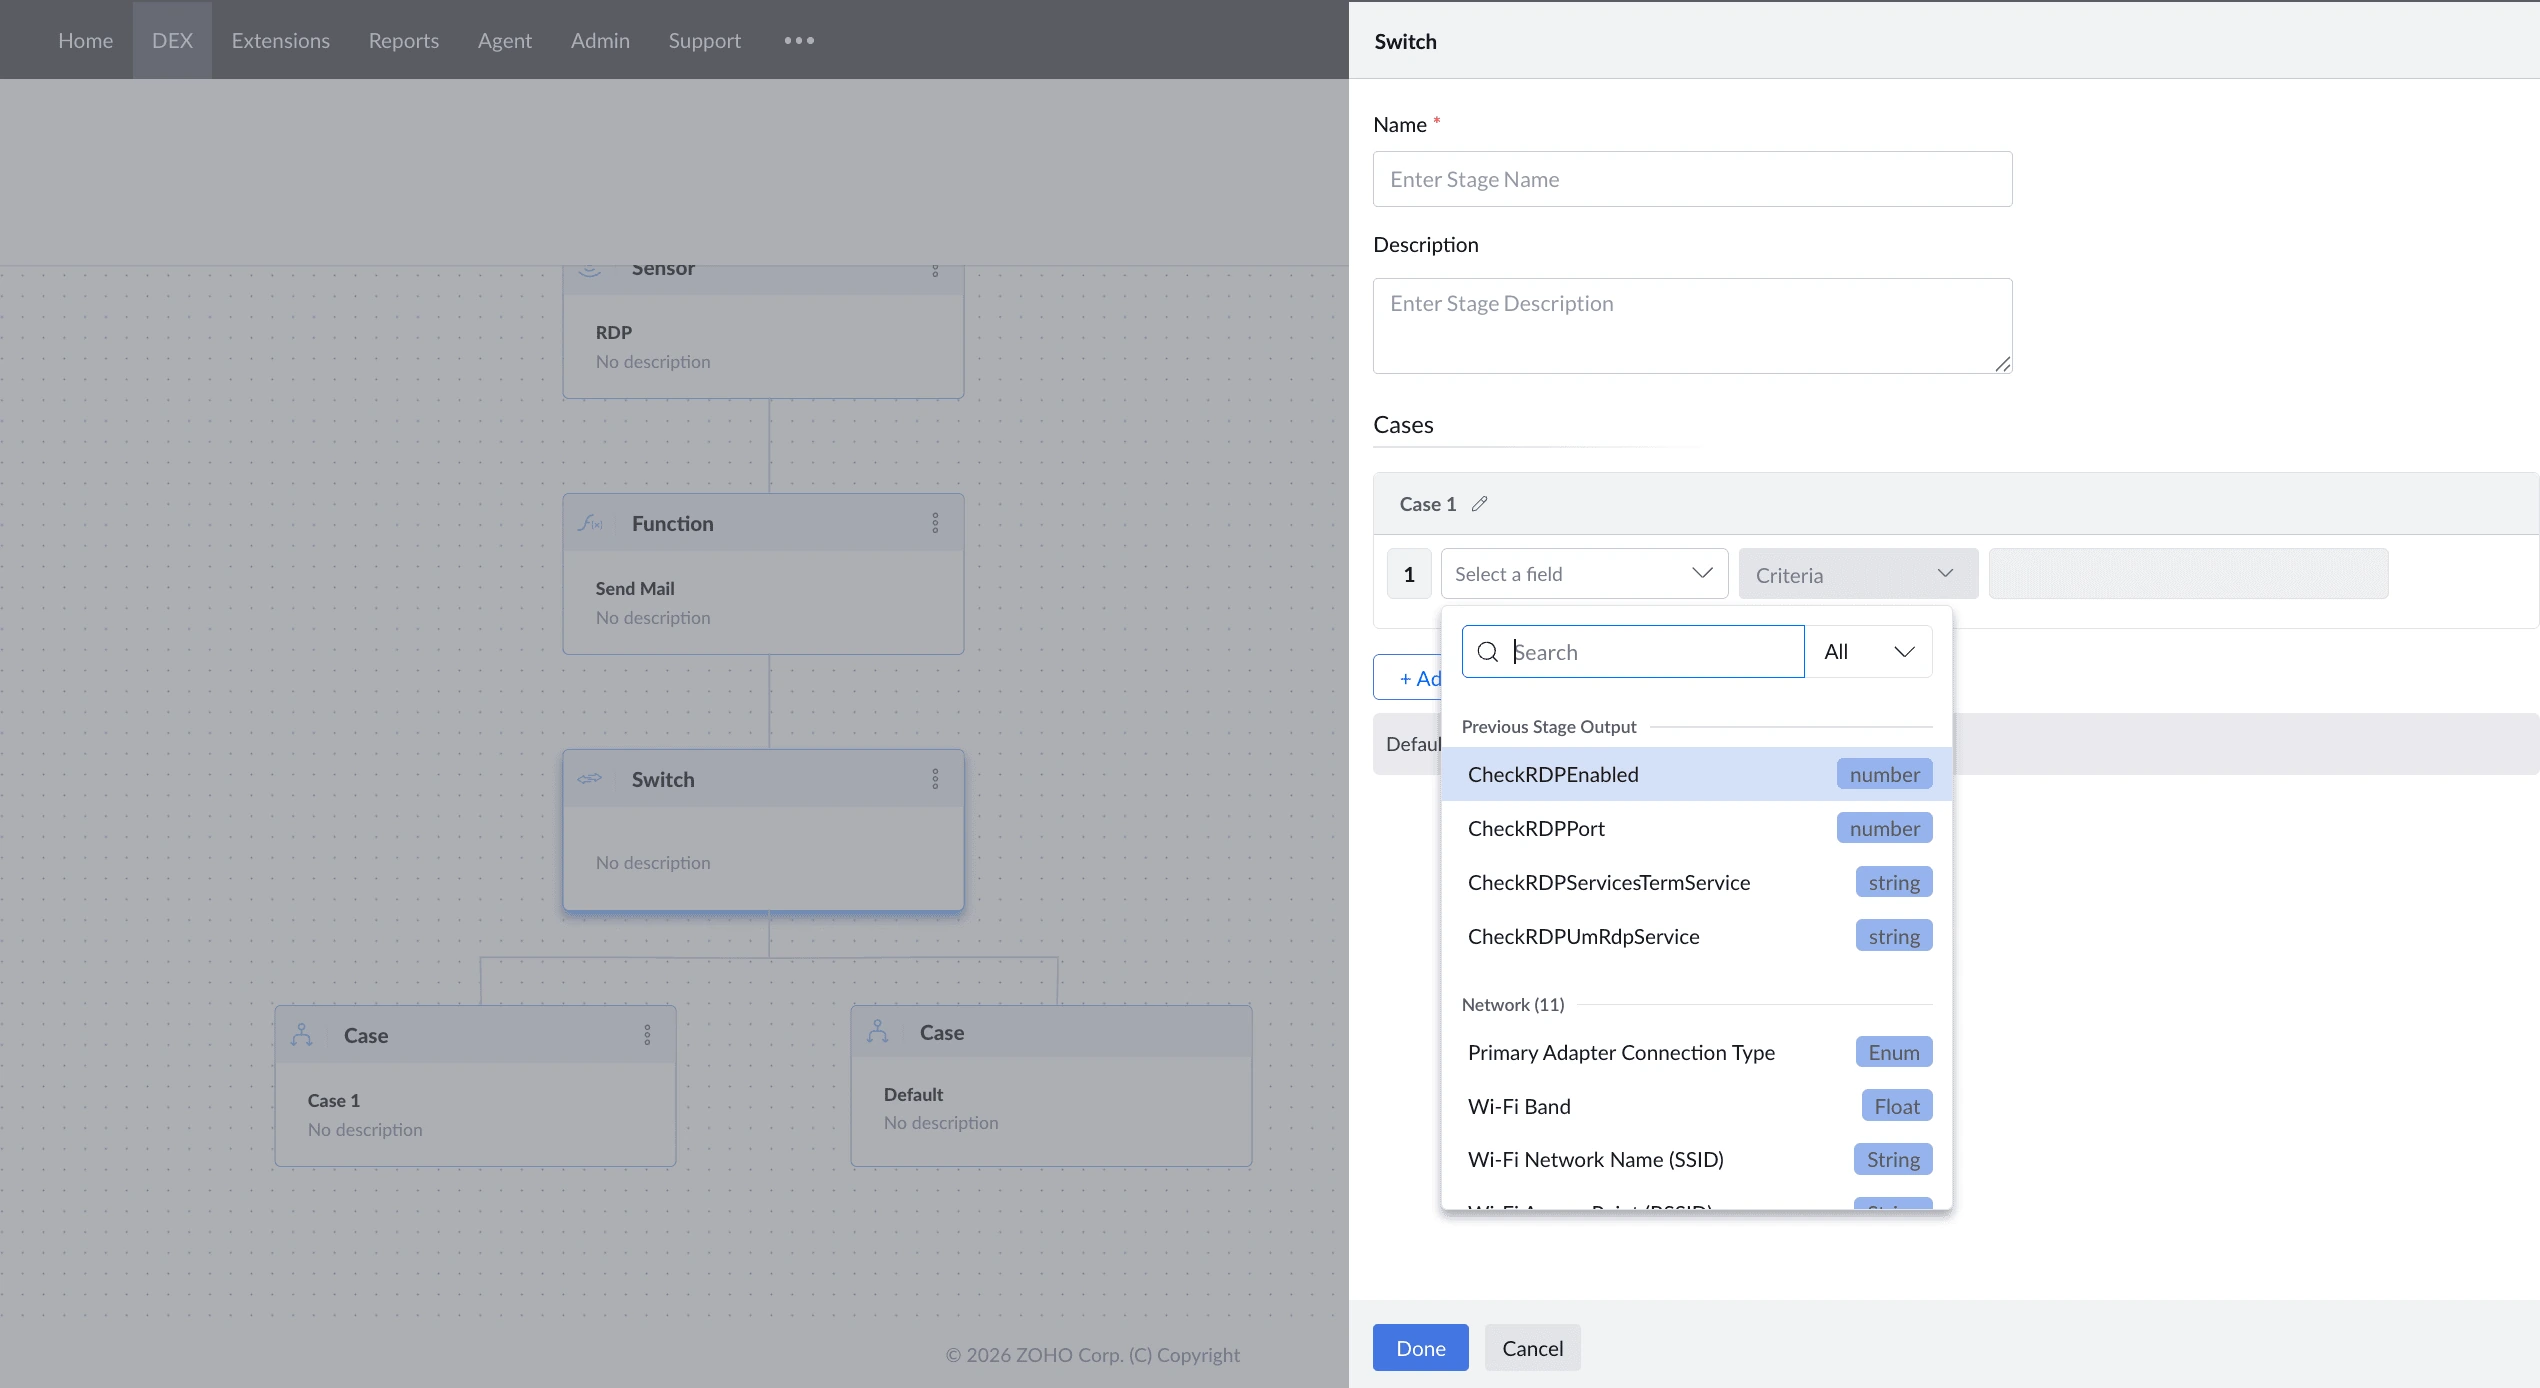
- Set up the first case:
- Click Select a field and choose the value to check.
- Choose a Criteria — e.g., equals, is greater than, contains.
- Enter the value to compare against.
- Click + Add Case for each additional condition you want to check.
- A Default case is added automatically and cannot be removed — this path is taken when no other case matches.
- Connect each case to the stage that should run when that condition is met.
What You Can Evaluate in a Case
Click Select a field to choose the value a case should check. The dropdown groups the available values by where they come from.
| Source | What it includes |
|---|---|
| Previous stage output | A value produced by an earlier stage in the workflow |
| Device properties | Details about the device, such as network information or OS version |
| Sensor fields | Fields from your existing sensors; selecting one runs that sensor during the workflow to fetch its value. |
| Engage response | The option the user selected in an Engage prompt |
An Engage response appears under the Previous Stage Output group in the dropdown. If an Engage stage is used anywhere before this Switch in the workflow, its response is available here.
Available Criteria
The criteria offered depend on the type of value you selected.
| Value type | Criteria |
|---|---|
| Numeric | is less than, is greater than, equals, does not equal, is less than or equal to, is greater than or equal to |
| Text | equals, does not equal, contains, does not contain |
The Criteria shown depend on the value type of the field you select.
Things to Know
- Switch is the only stage that can read a user's Engage response — any Switch placed after an Engage can evaluate what the user selected
- Every case, including Default, must lead to a path that ends at an End stage