DDI Central IPAM Tower - Supernet view
A supernet is a parent IP block that contains multiple smaller subnets within it. For example, a block like 10.20.0.0/16 can contain many subnets such as 10.20.1.0/24, 10.20.2.0/24, and so on. Rather than viewing your IP space as isolated subnet fragments, a supernet gives you the bigger address structure they all belong to, showing not just what exists, but how your IP space is organized and carved.
The Supernet View in DDI Central's IPAM Tower turns this CIDR hierarchy into a navigable structure. Instead of searching through subnet by subnet, administrators can start from a familiar parent block and drill down naturally into the exact subnet, pool, or IP they need, without losing architectural context along the way.
Benefits:
- Understand how your IP space is structured at a high level before drilling into specifics.
- Identify fragmentation, underutilized blocks, and capacity risks across your address space.
- Navigate to the right subnet faster by starting from the parent block rather than a flat list.
- Validate subnet placement and available growth space within any CIDR hierarchy.
- Bring unmapped subnets within a supernet under DDI Central cluster management directly from the view.
Supernet View supports three visualization modes - Table, Tree, and Cards, letting you compare address allocations across your infrastructure, trace the full hierarchy of a CIDR block, or quickly spot capacity risks depending on what you need at that moment.
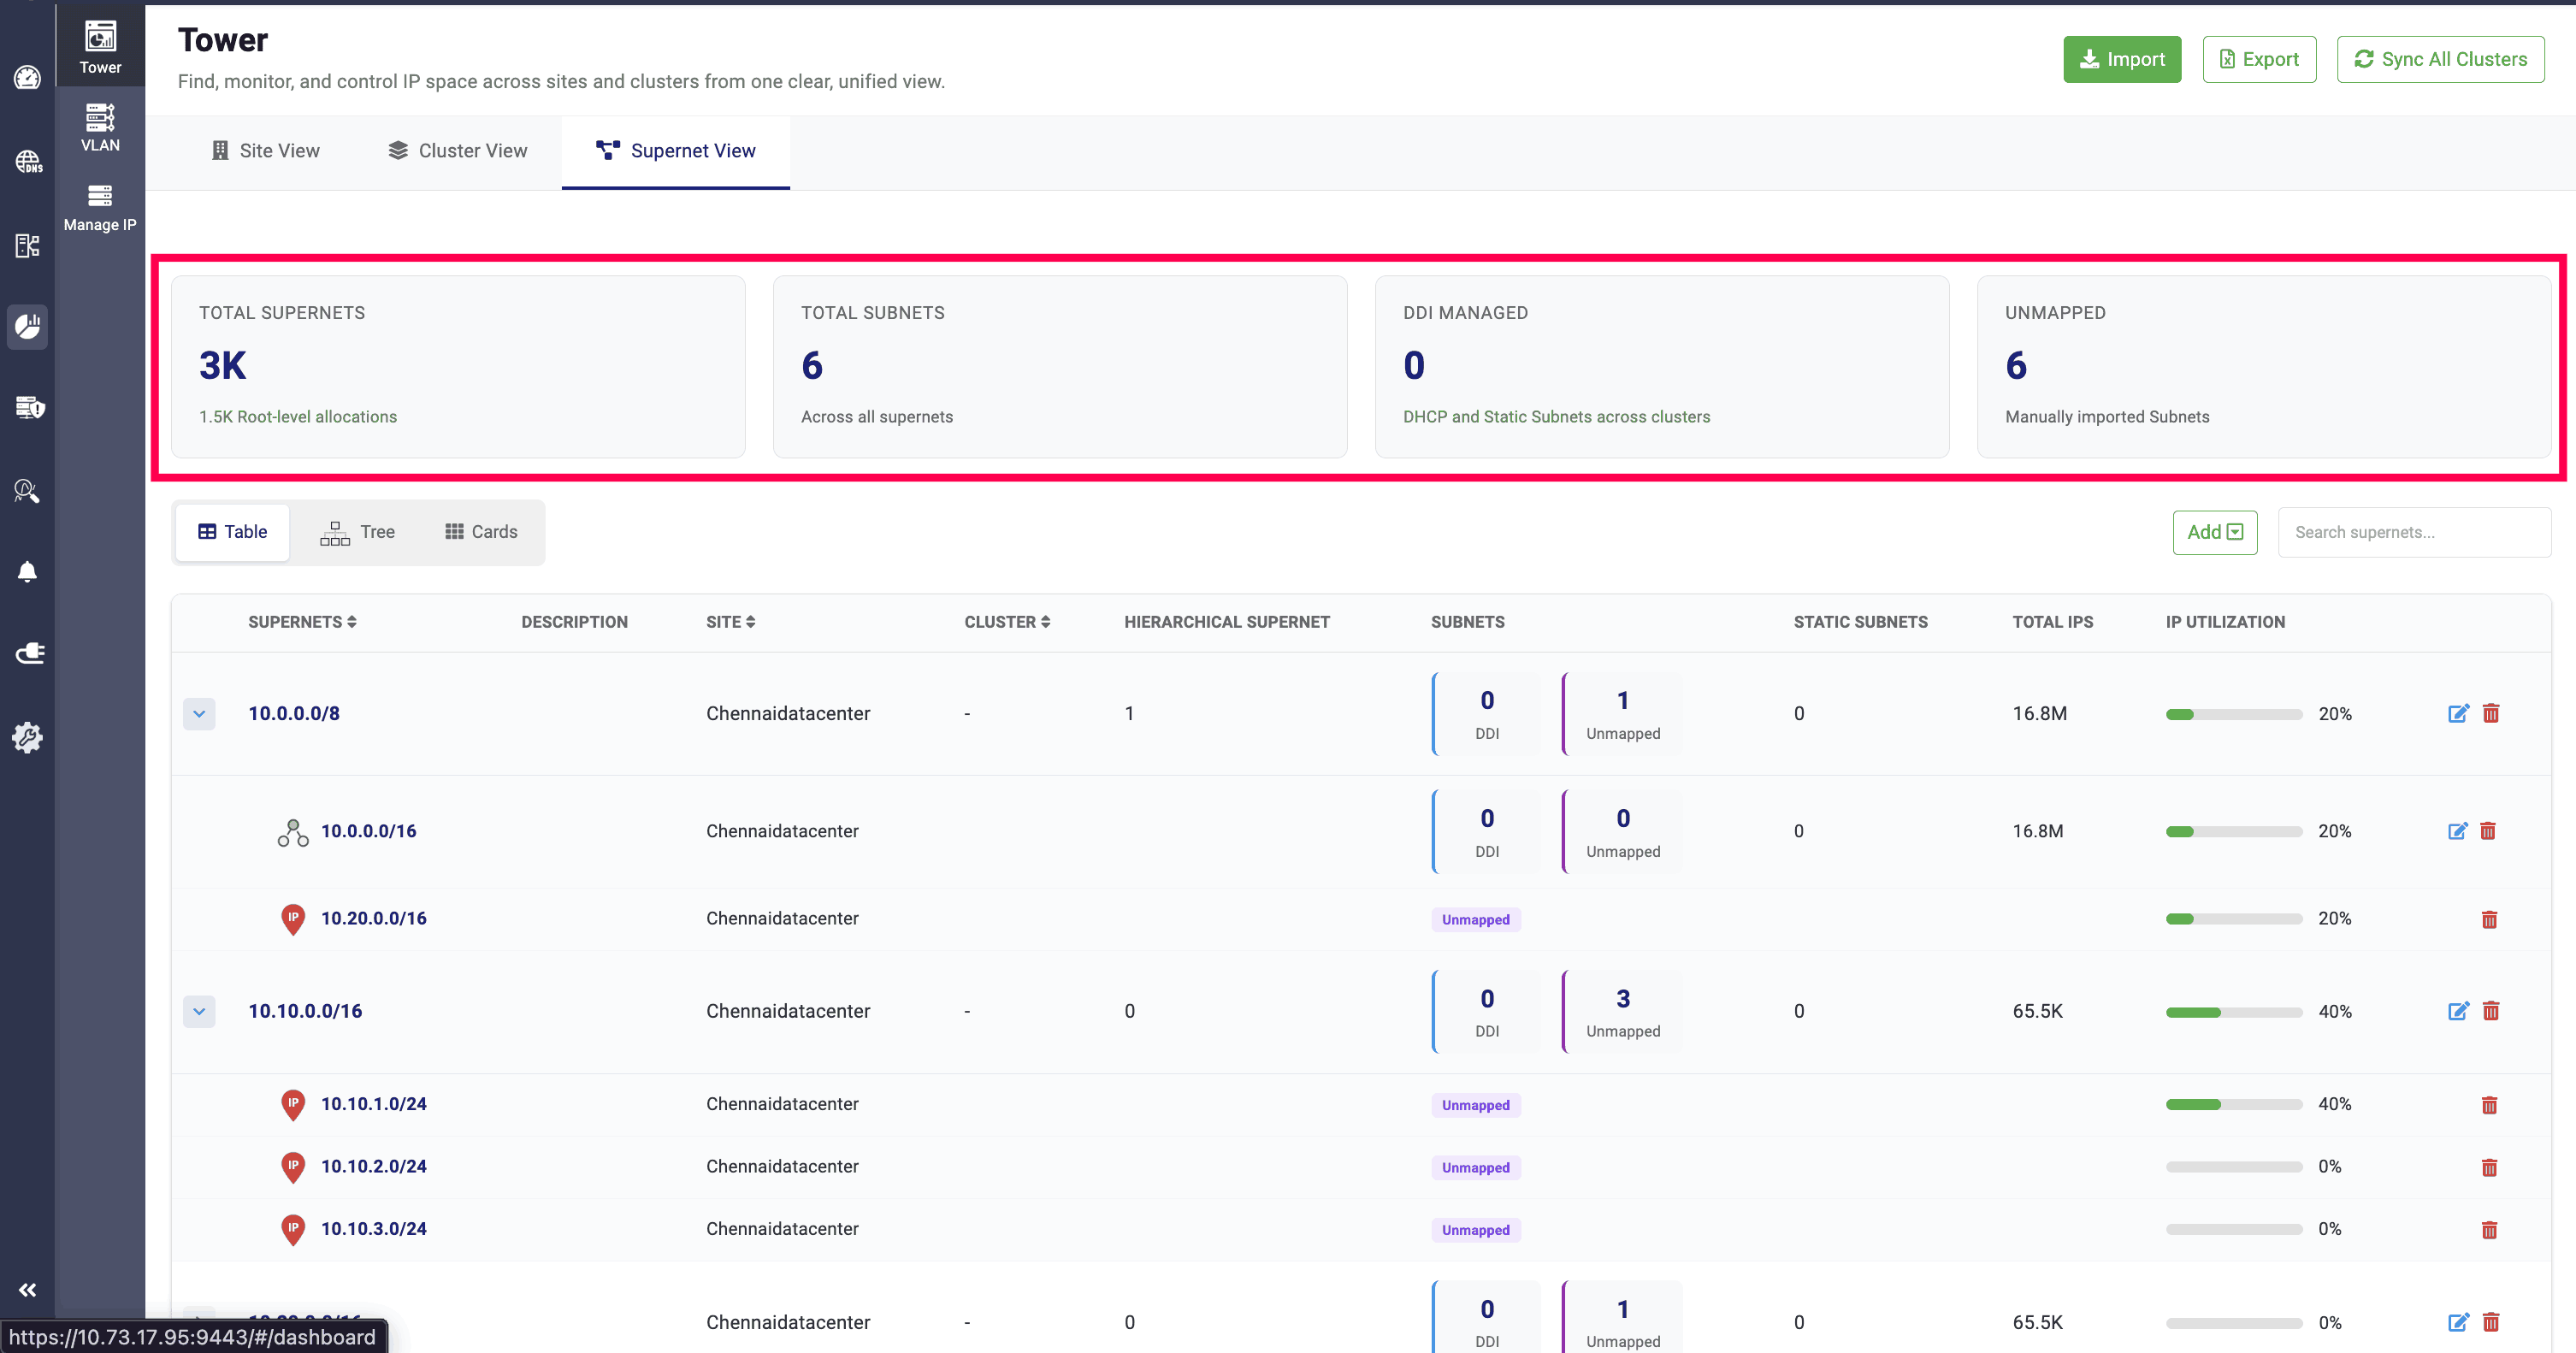
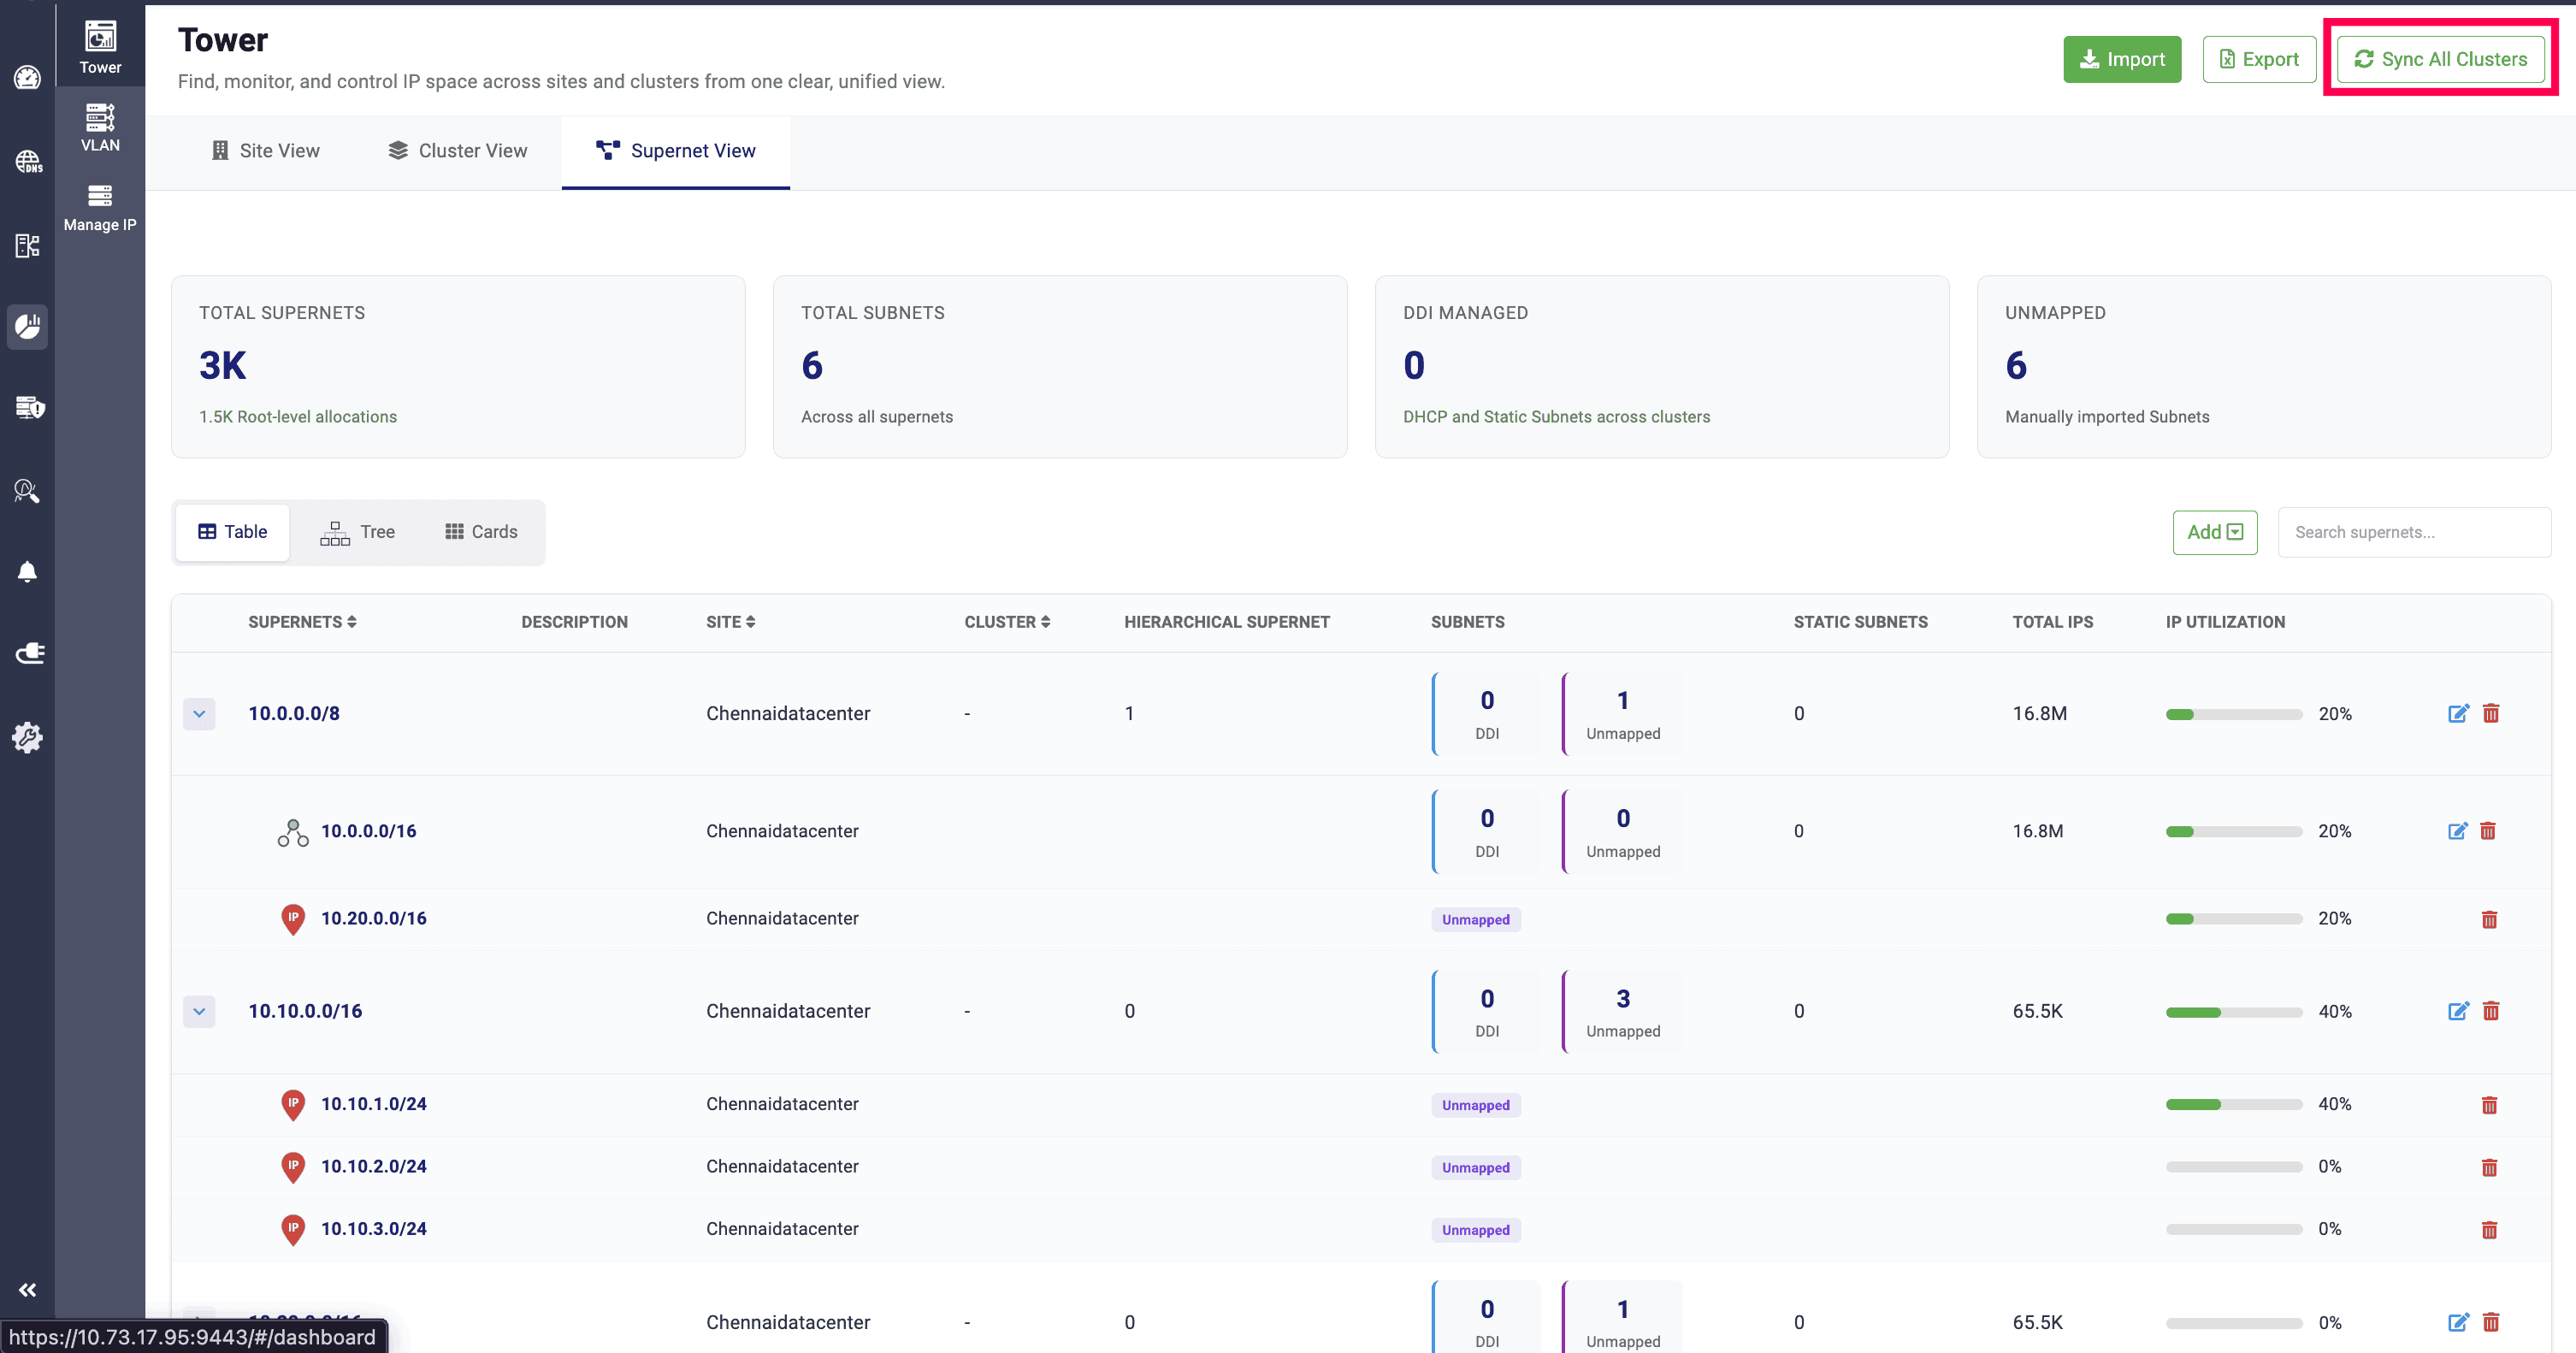
The Supernet View provides a detailed overview of the total number of supernets in the network. It displays root-level allocations under Total Supernets and the total number of subnets across all supernets under Total Subnets.
It also shows the number of subnets and static subnets managed by DDI Central under DDI Managed, and those that are imported under Unmapped.
Supernet table view
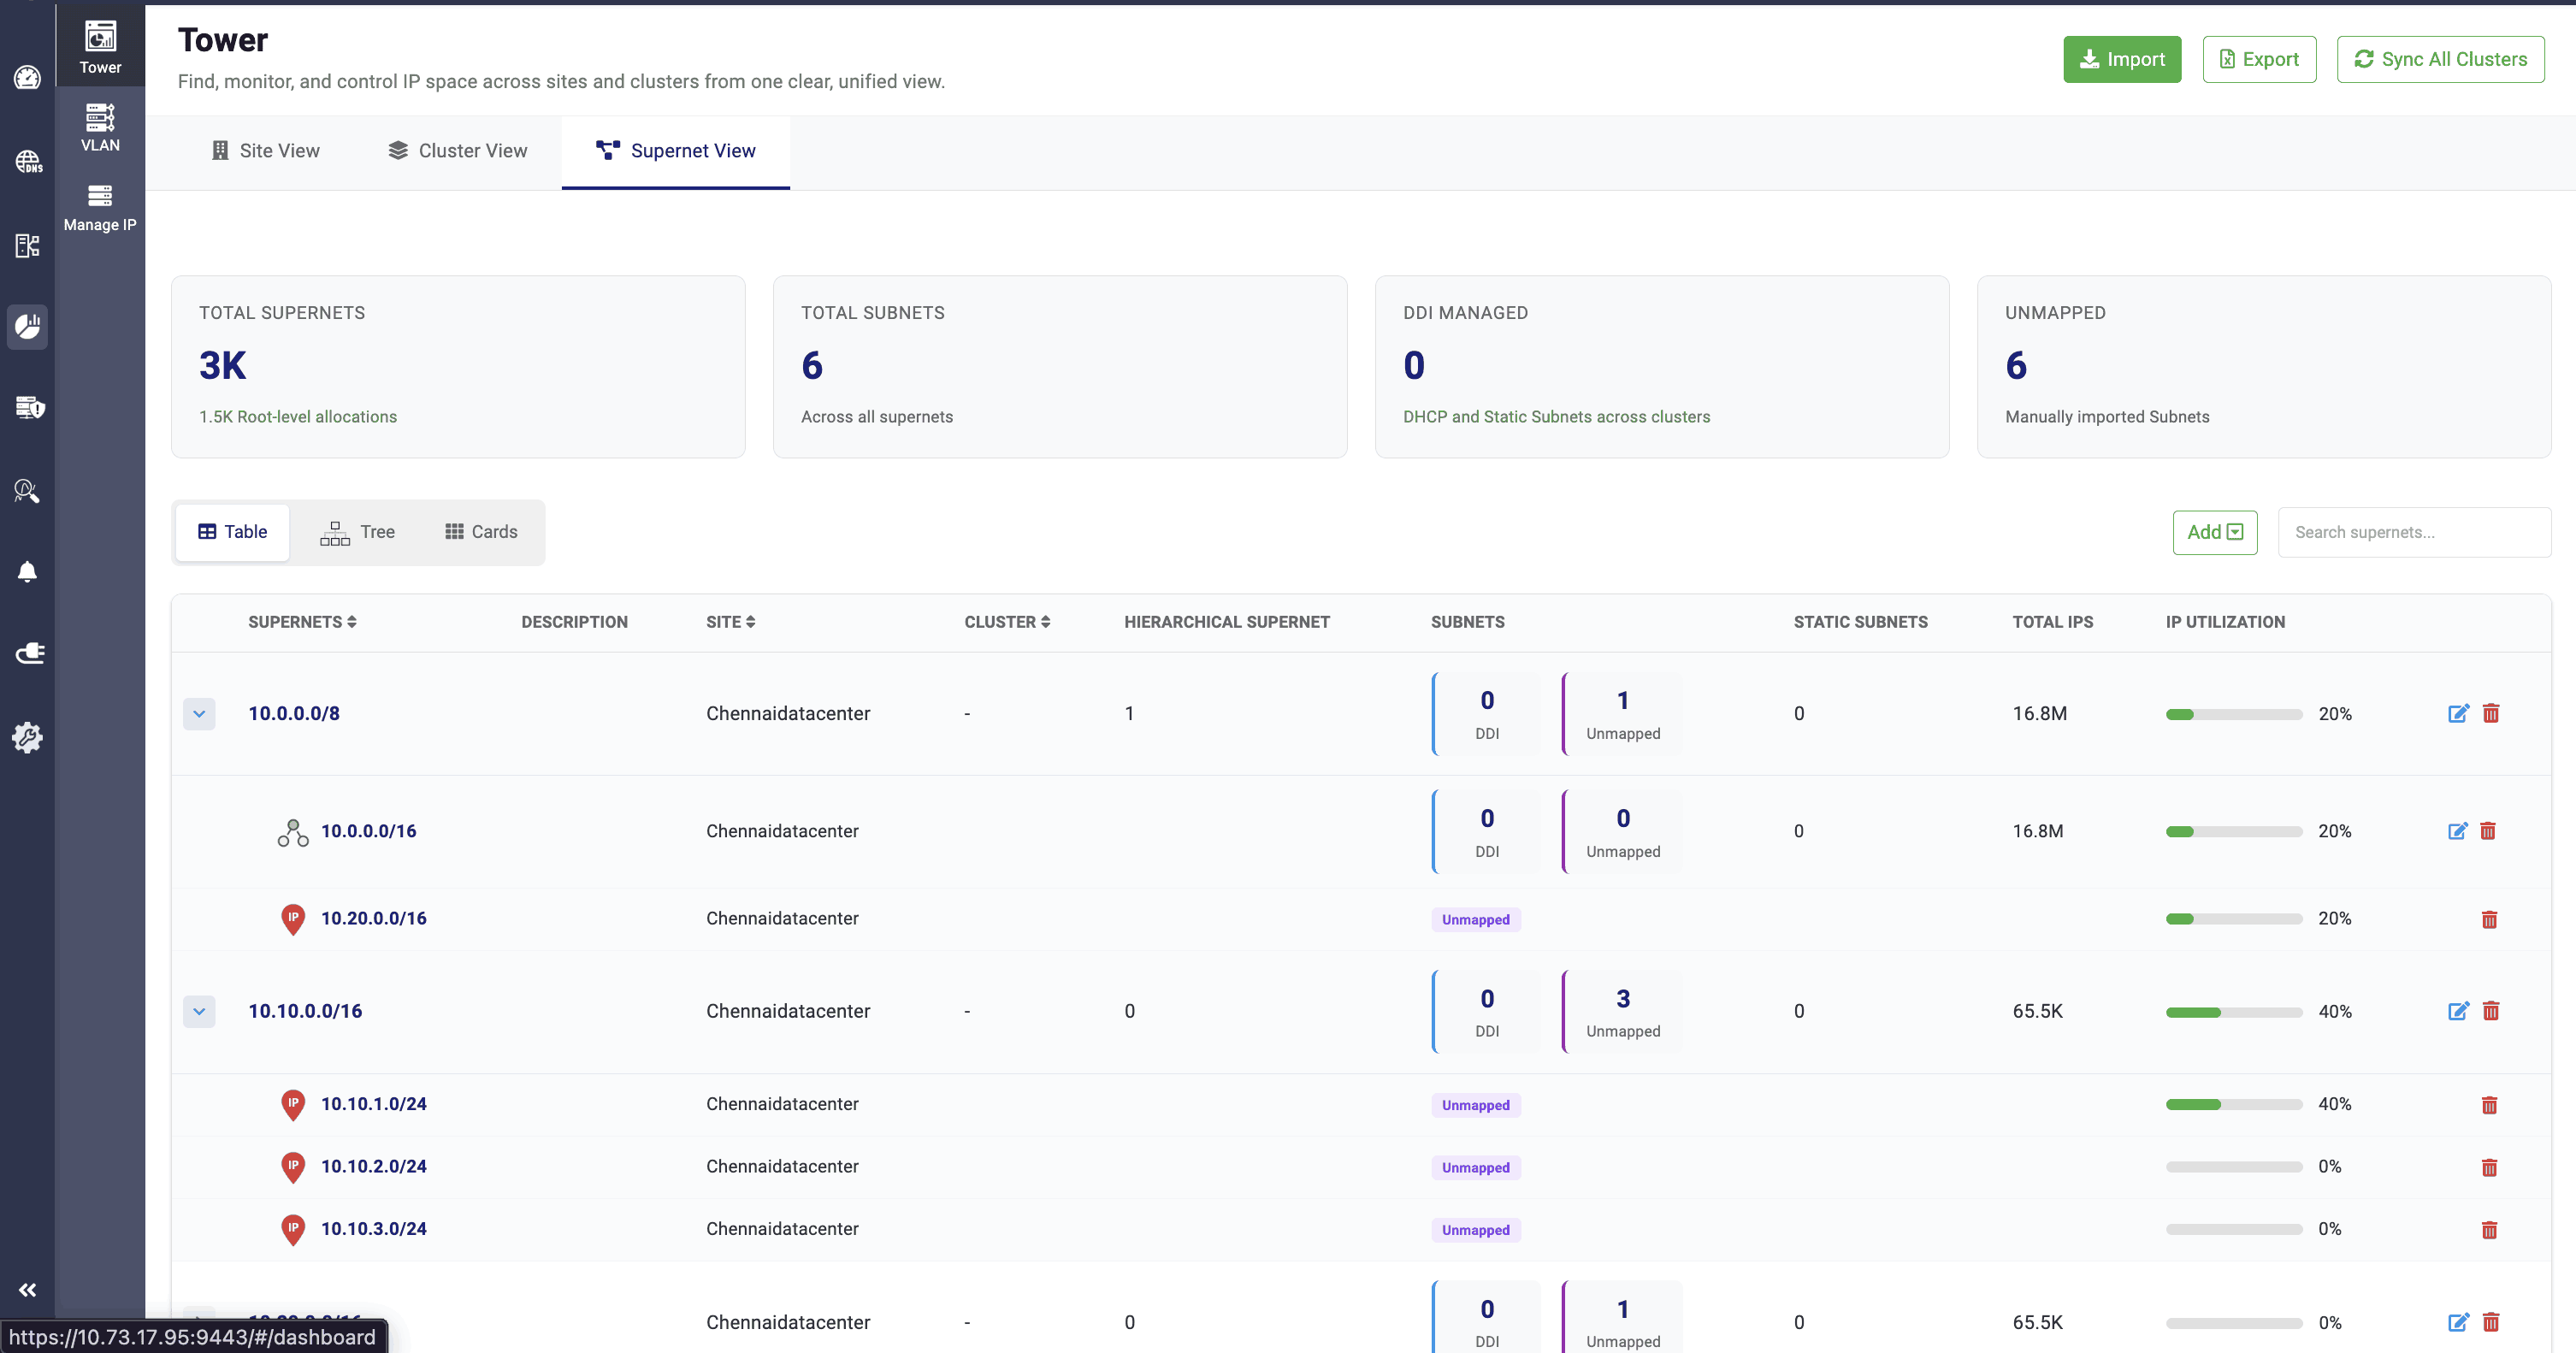
The Table View displays the total number of supernets along with their descriptions, the sites and clusters they are associated with, the number of hierarchical supernets under each supernet, the total number of subnets and static subnets, and the total number of IPs within each supernet.
It also shows the overall IP utilization percentage for each supernet.
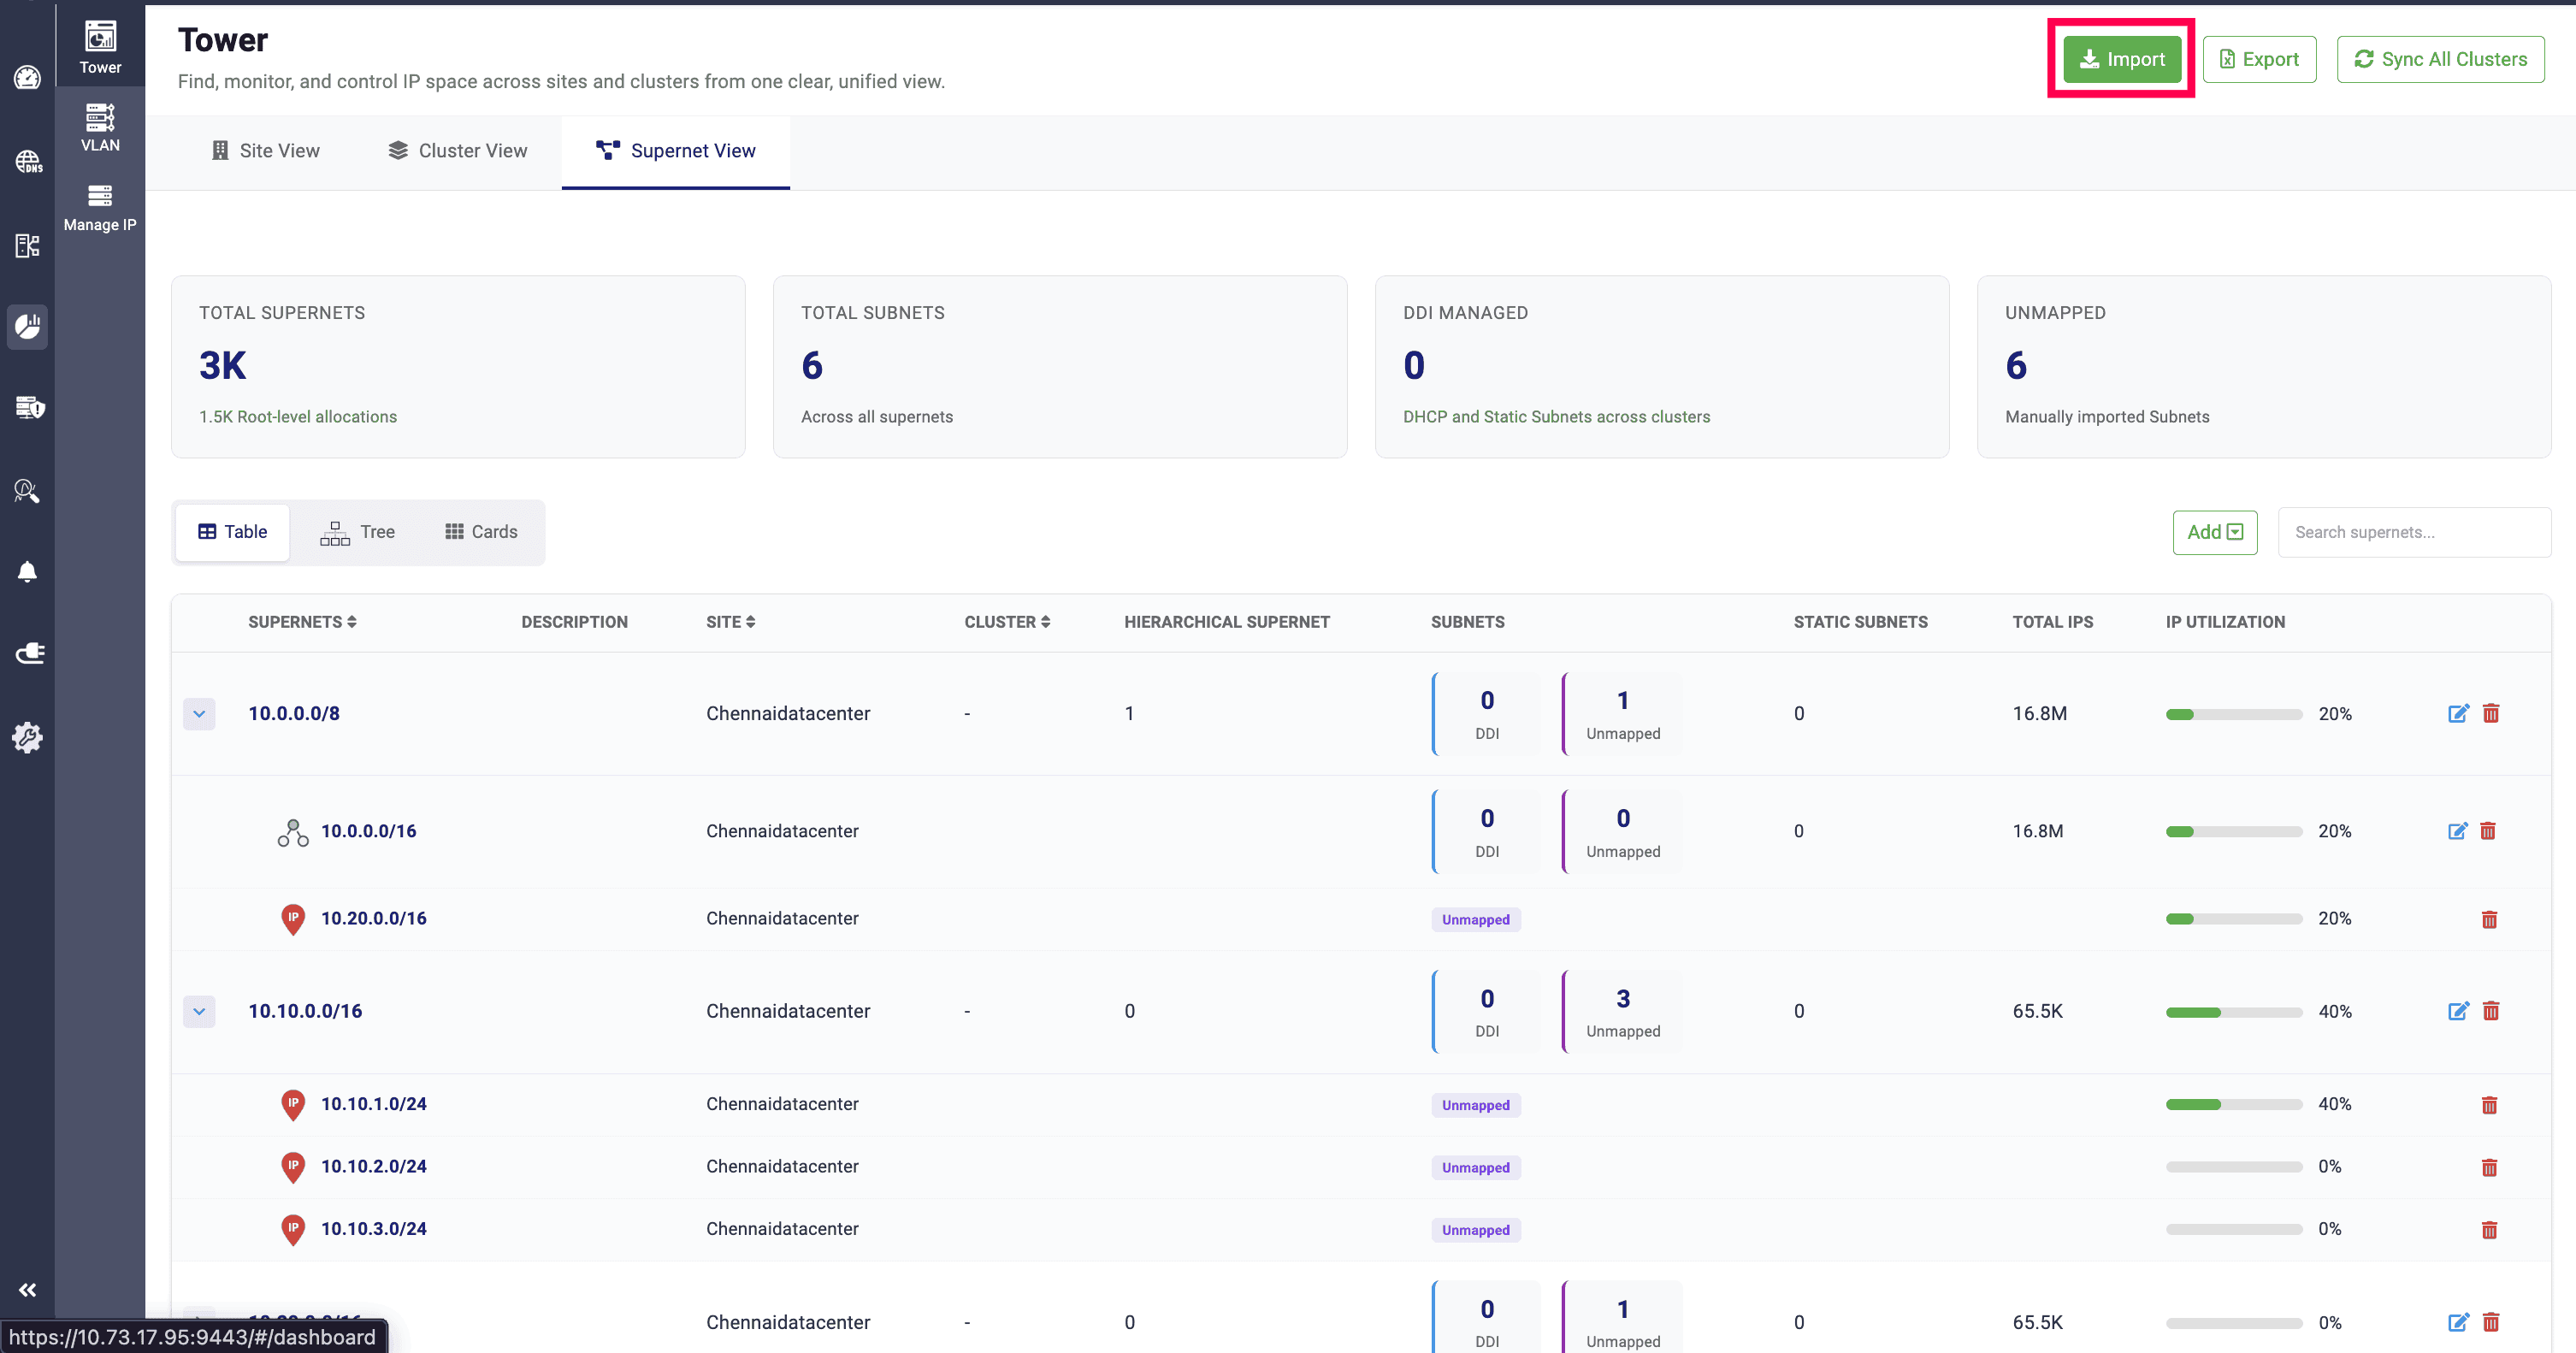
Supernets, sites, clusters, hierarchical supernets, subnets, and static subnets can be imported into the DDI Central application using CSV or XLSX file formats. Both unmapped.
DHCPv4 and DHCPv6 subnets can be imported through a CSV file. Providing static subnets in the import files is optional.
DDI Central supports XLSX file imports in two formats:
- Single-sheet import — All site, cluster, supernet, subnet, and static subnet details are provided in a single sheet.
- Multiple-sheet import — Separate sheets are created for individual sites, with the associated clusters, supernets, subnets, and static subnets organized in their respective sheets within a single file.
Here are the sample files for each type:
Import files (both CSV and XLSX formats) must include supernet and site data.
Import files should not contain special characters or duplicate entries. If present, they will be ignored during the import process.
The Sync All Clusters option allows admins to synchronize data and configuration changes across all created clusters.
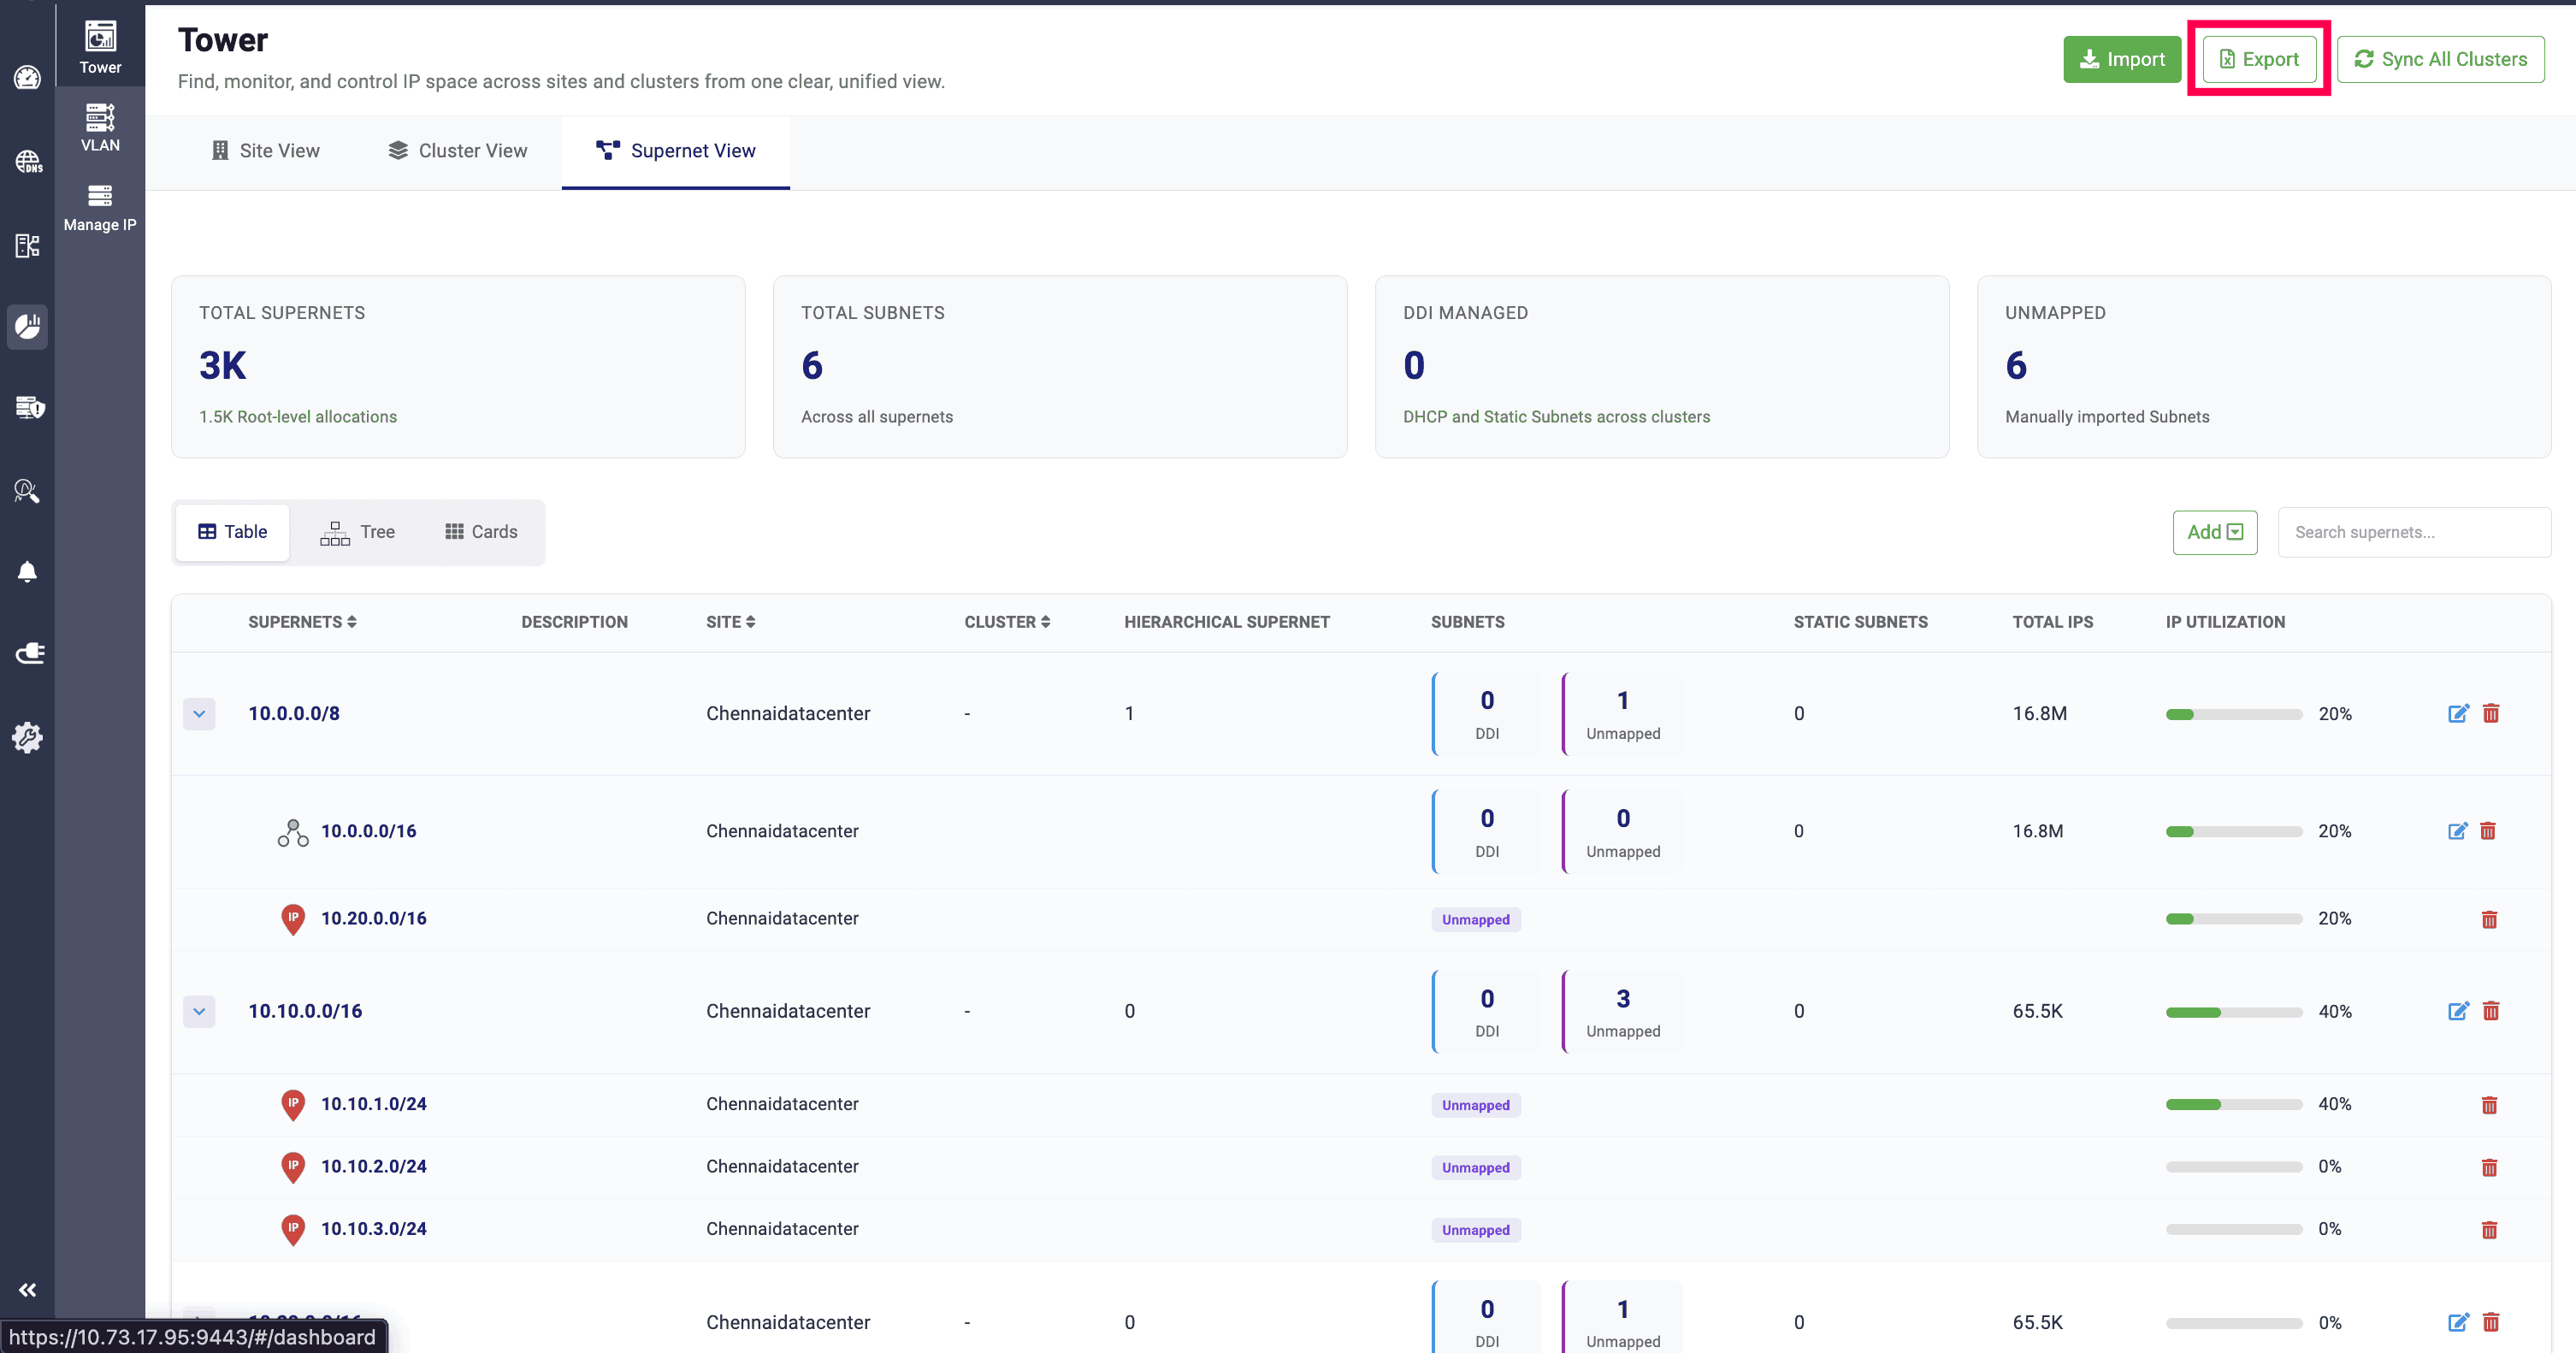
The data show in the site view can also be exported in CSV file format, by clicking on the Export option. The data will be exported in single sheet format.
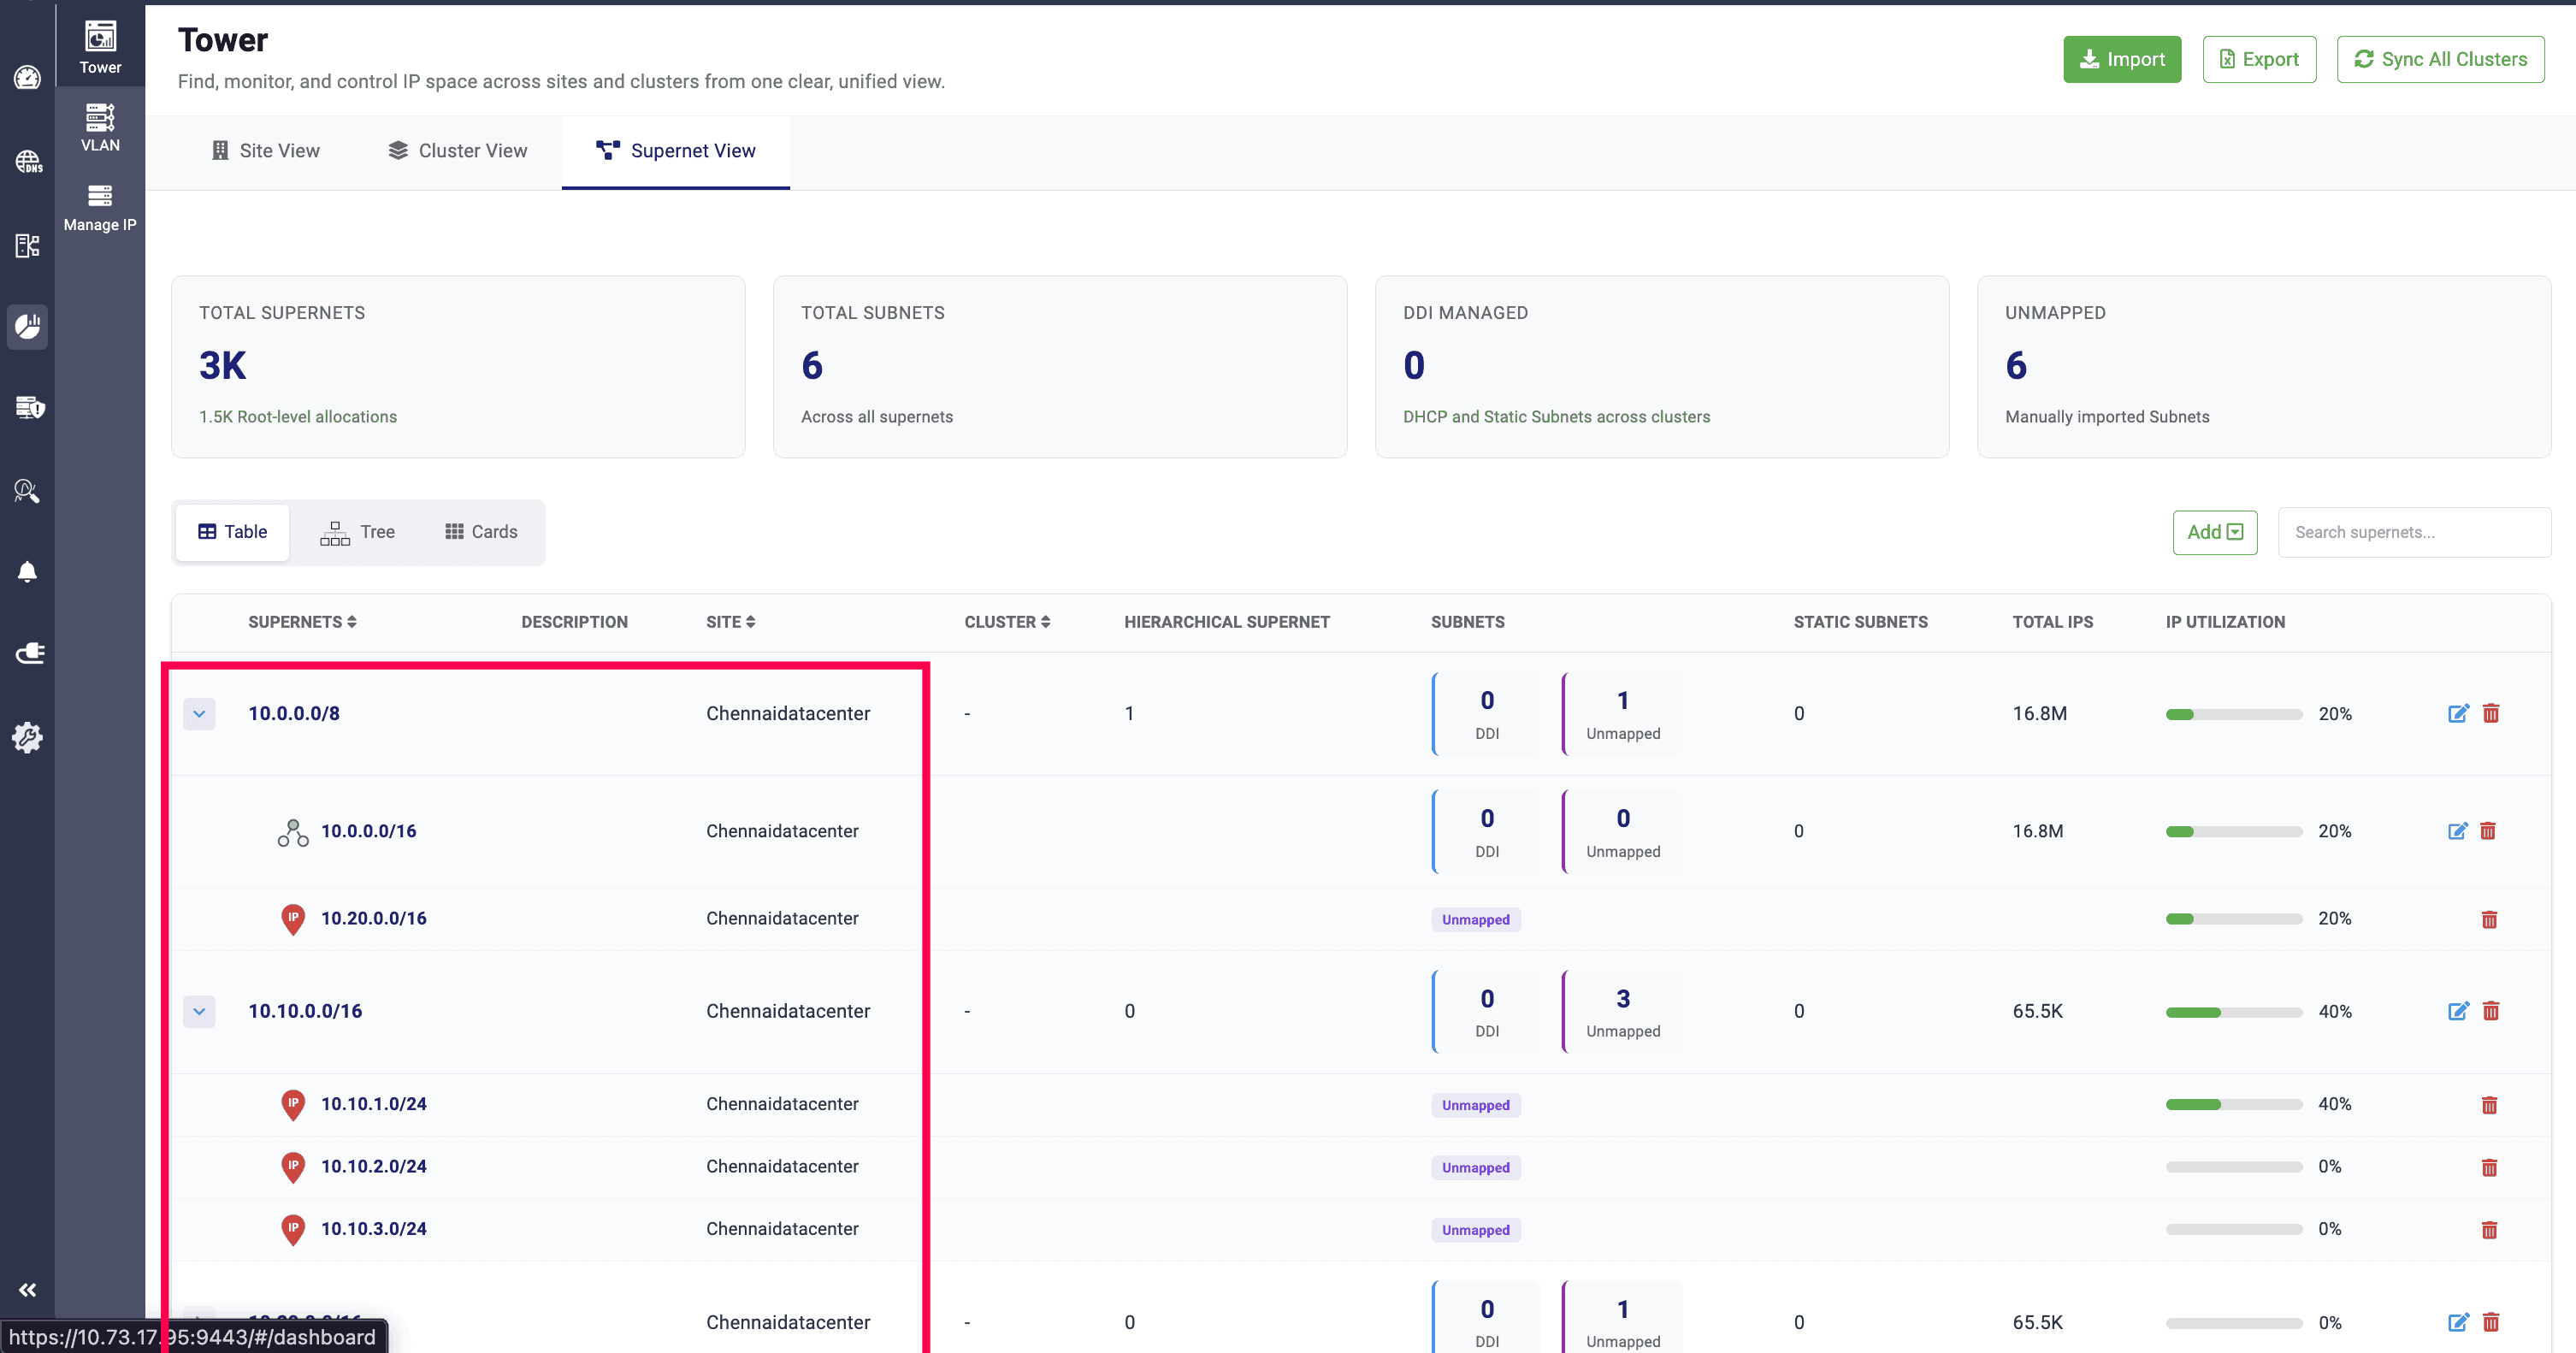
Clicking on each supernet will show the subnet under the supernet. If its a /8 supernet, it will then get break down into /16 and shown, along with the supernet. The Unmapped icon indicates that the subnet is not mapped and managed under any cluster.
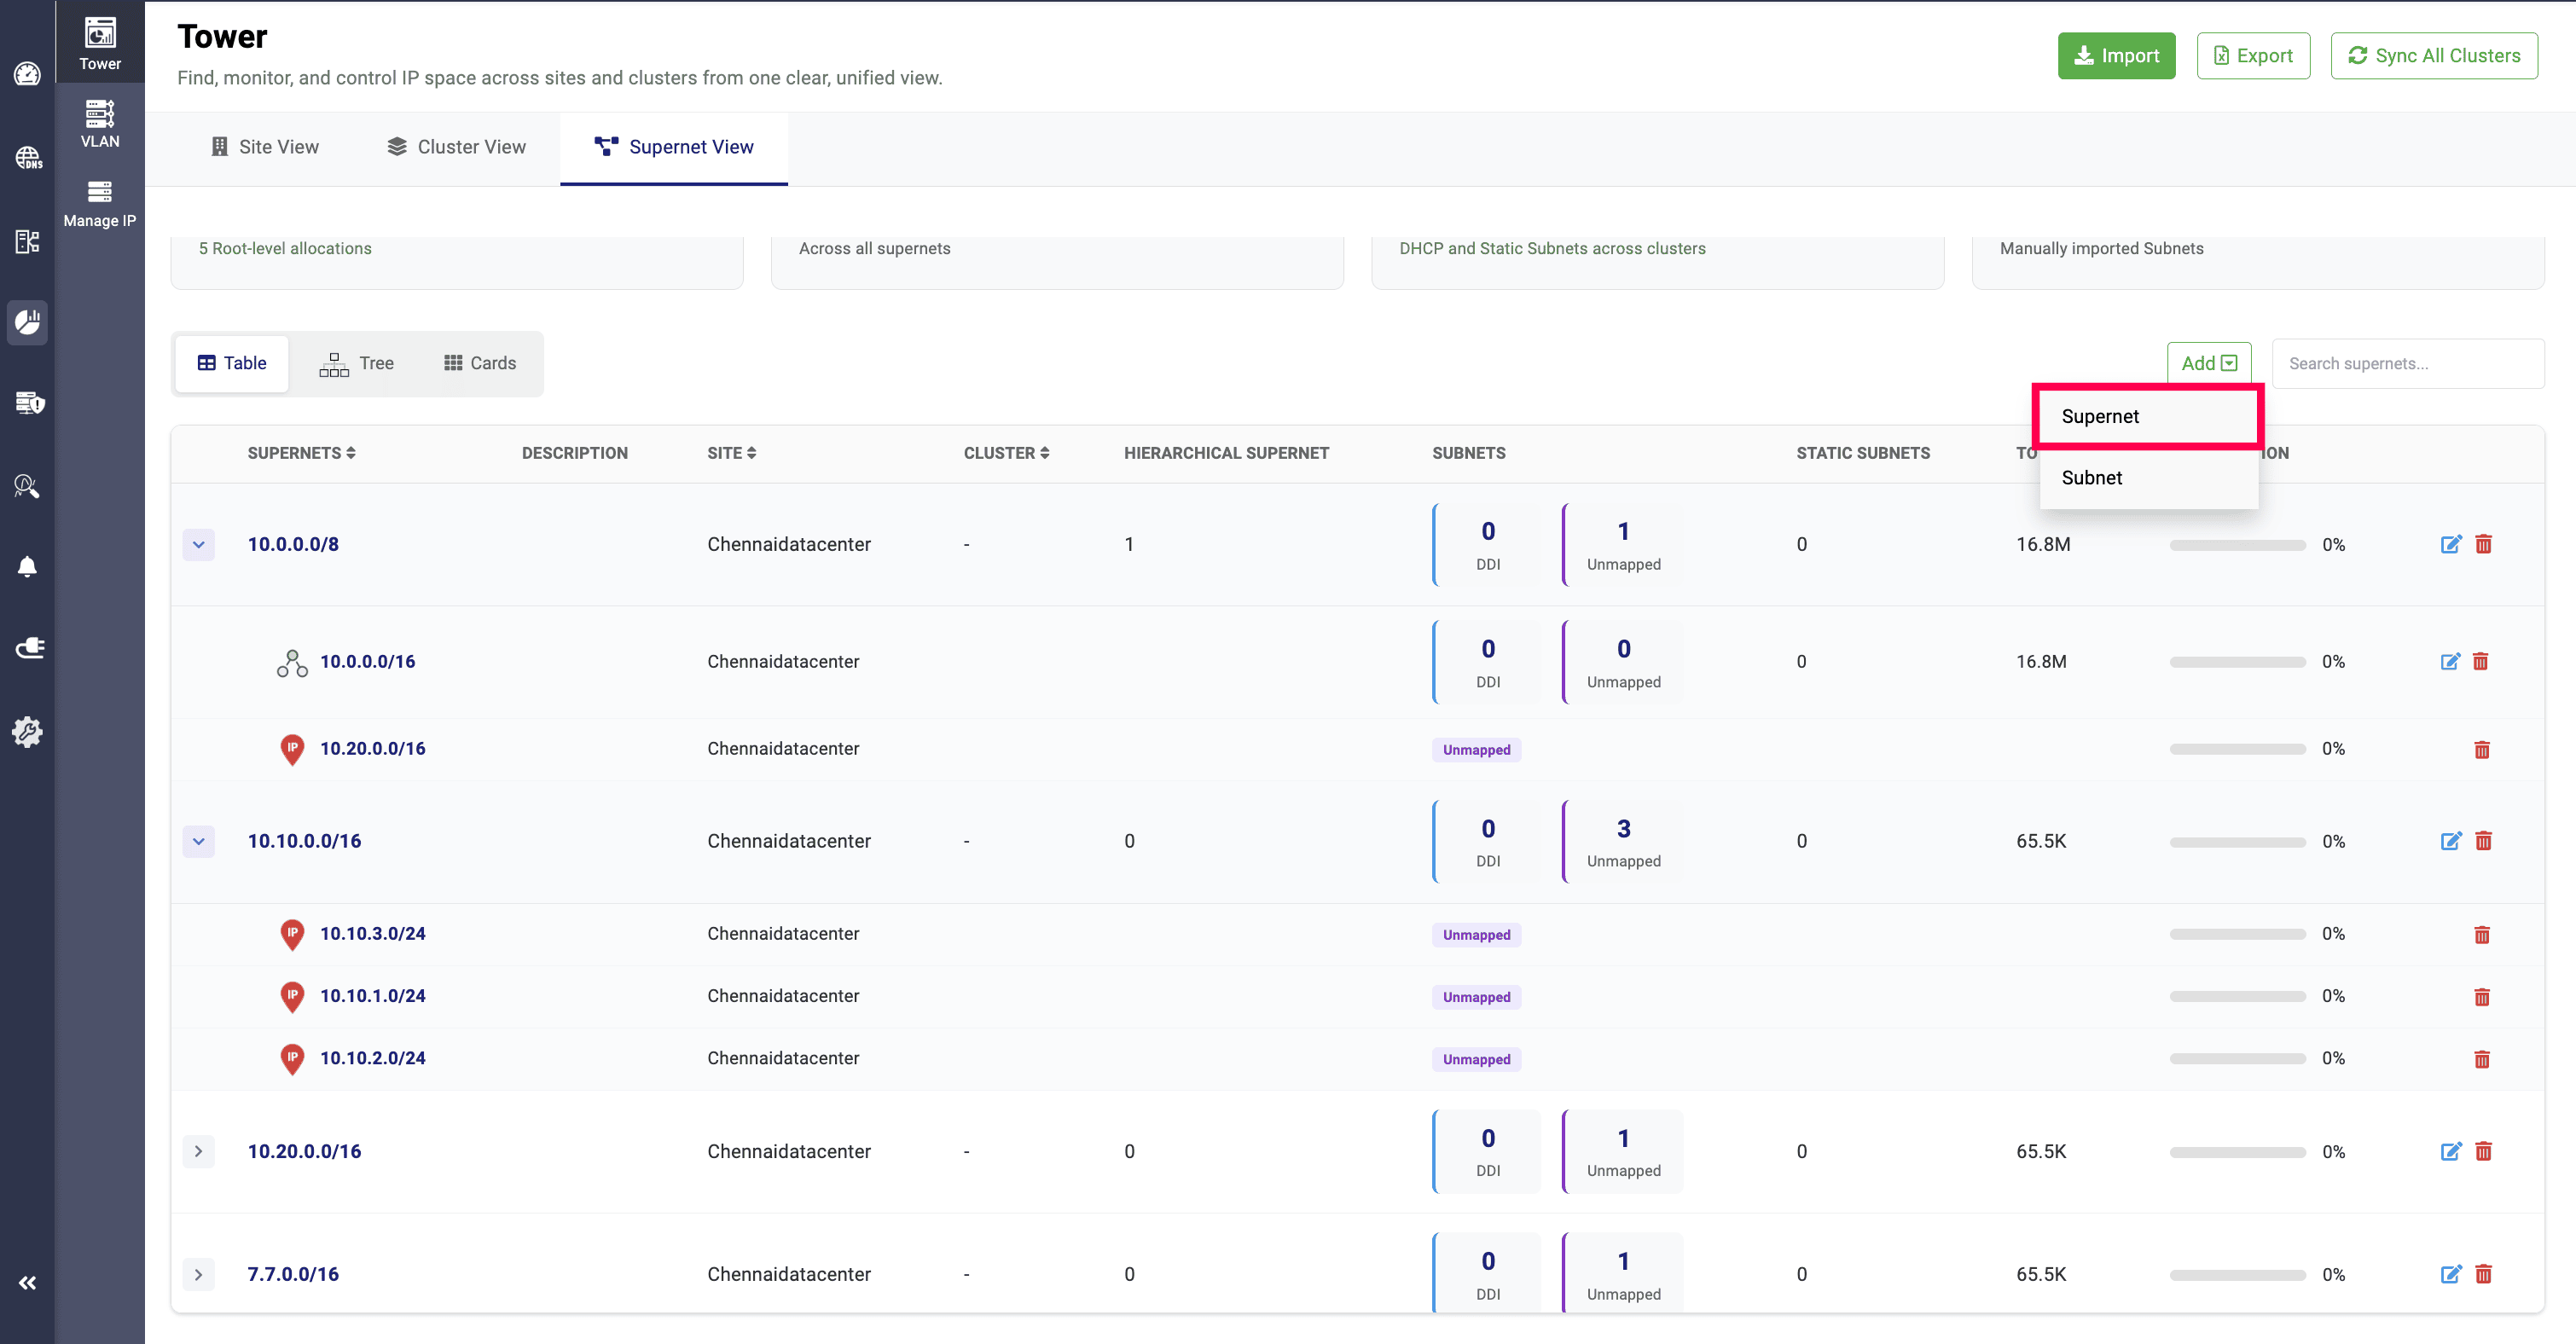
In the Add Supernet section, you must provide details such as the IP Address, its prefix length, a description, site you want to associate with, and the clusters and supernets to be linked.
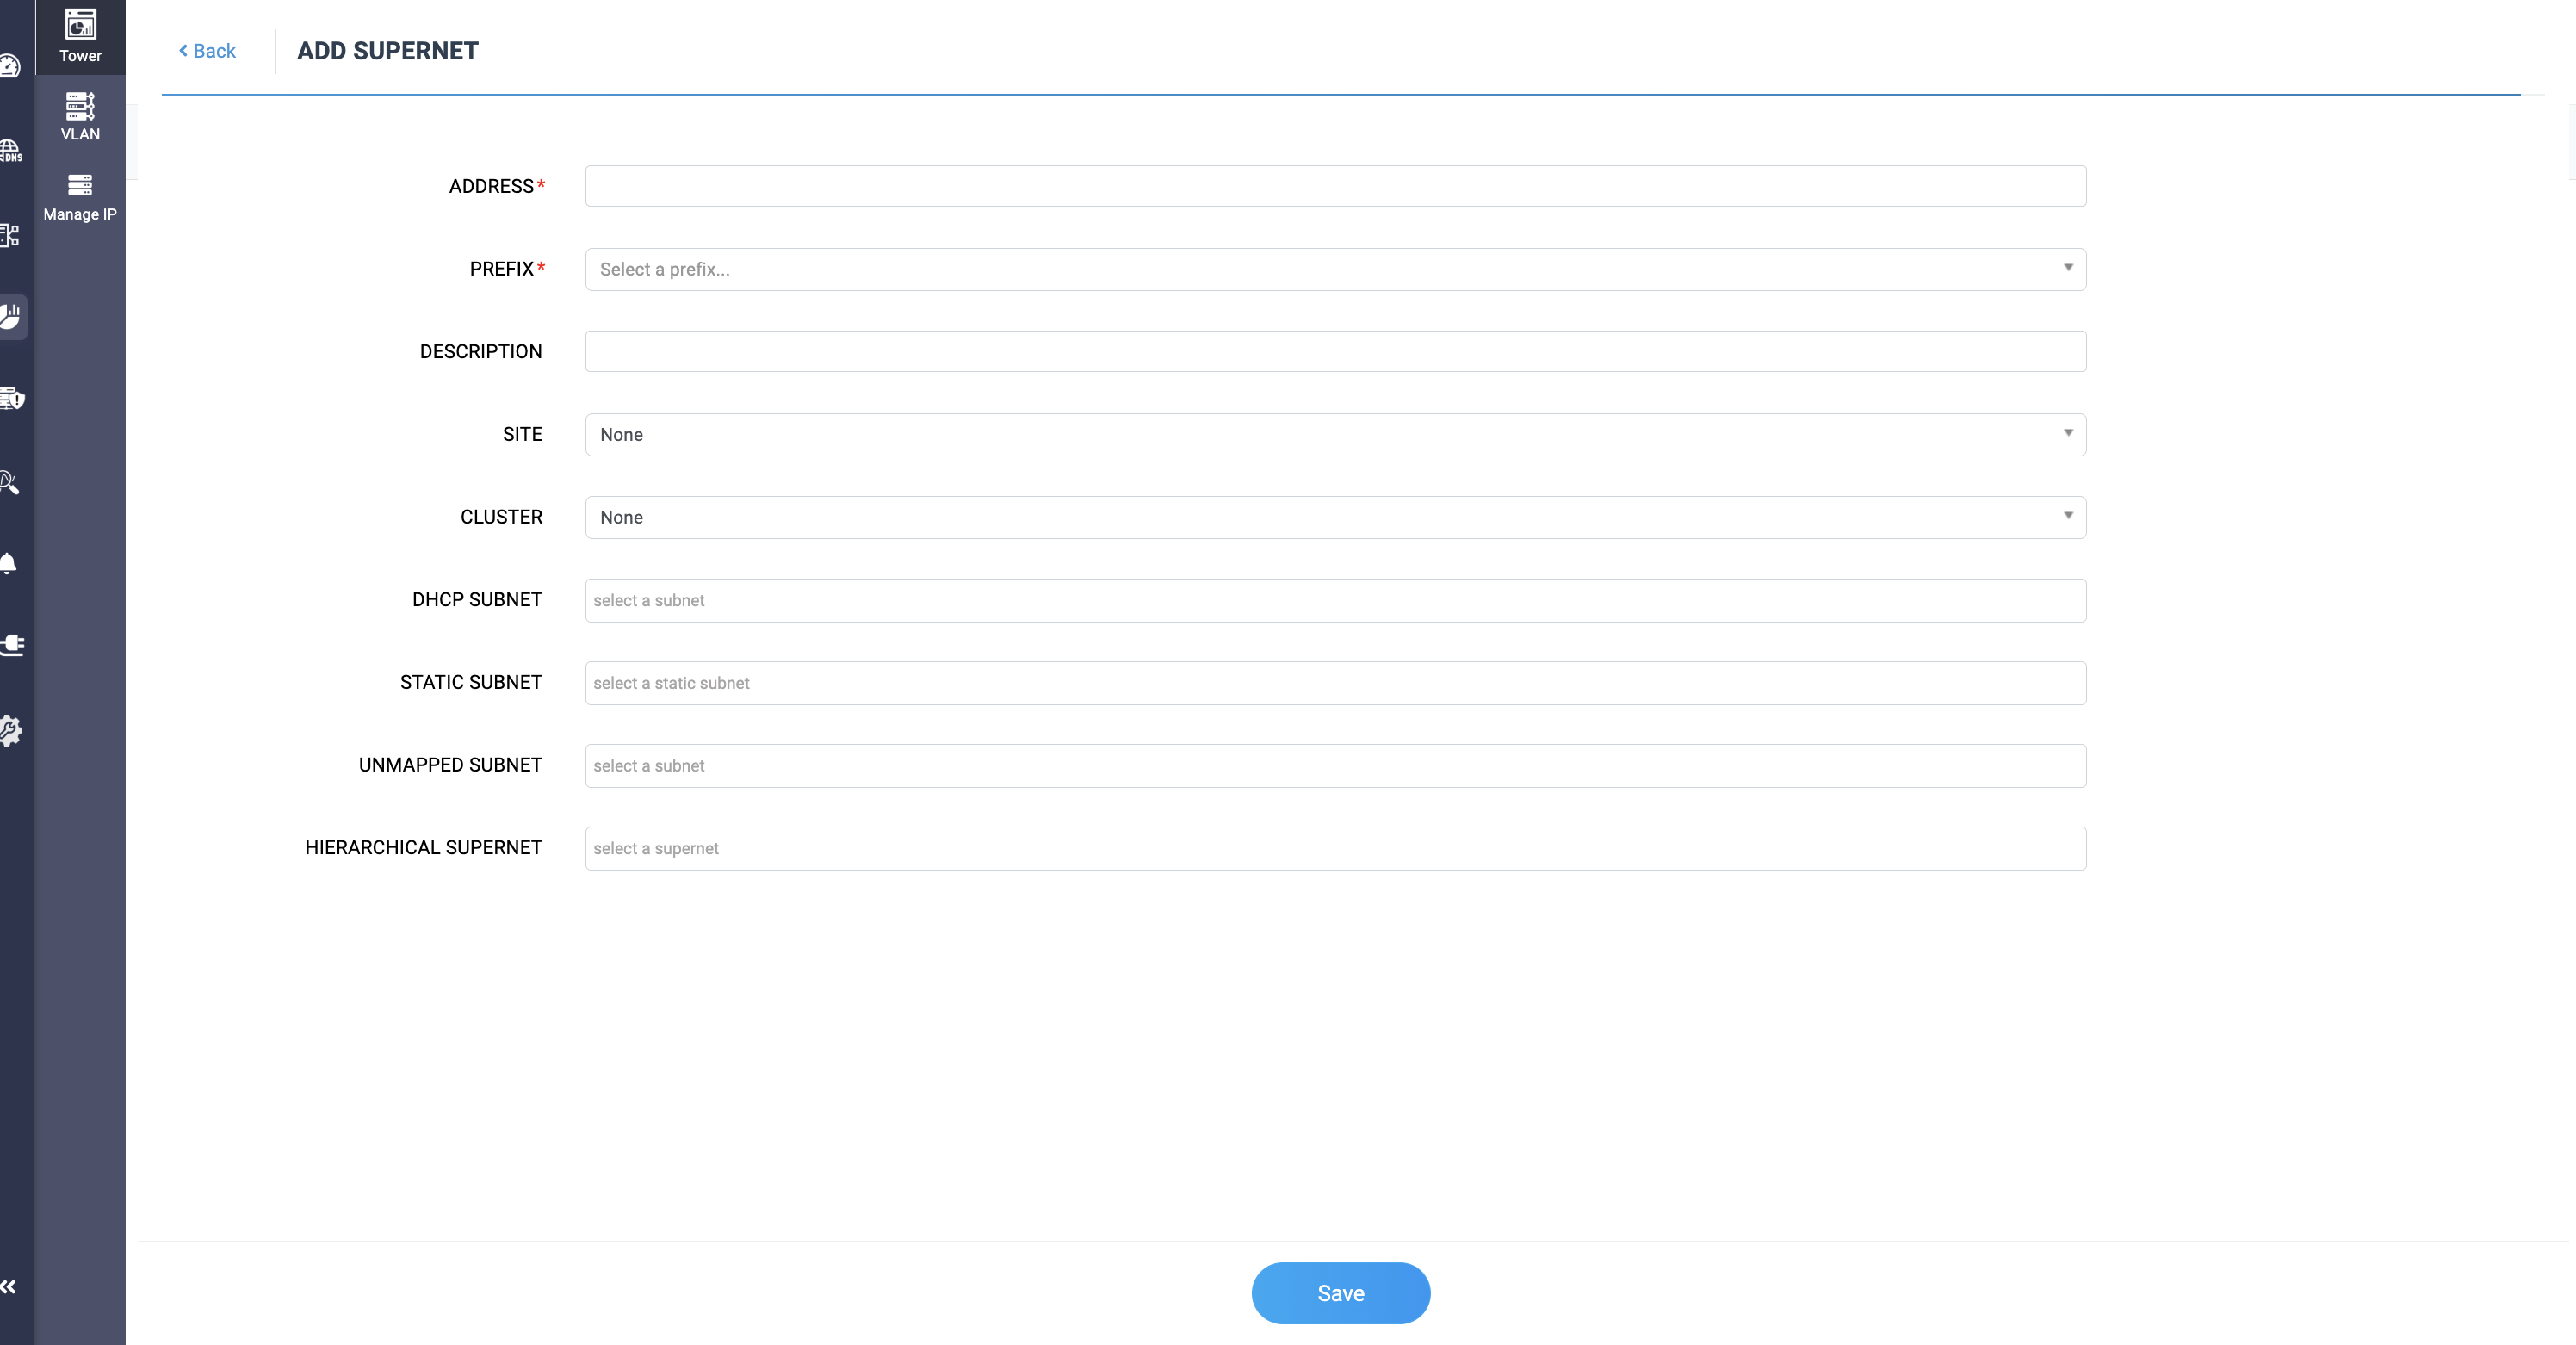
Multiple clusters can be selected under the CLUSTERS option.
You can select DHCP subnets, Static subnets, and Unmapped subnets to be under the supernet you are creating
Multiple subnets across different clusters can be associated with a site.
You can also select a supernet to be under hierarchy in this new one through the HIERARCHICAL SUPERNET field.
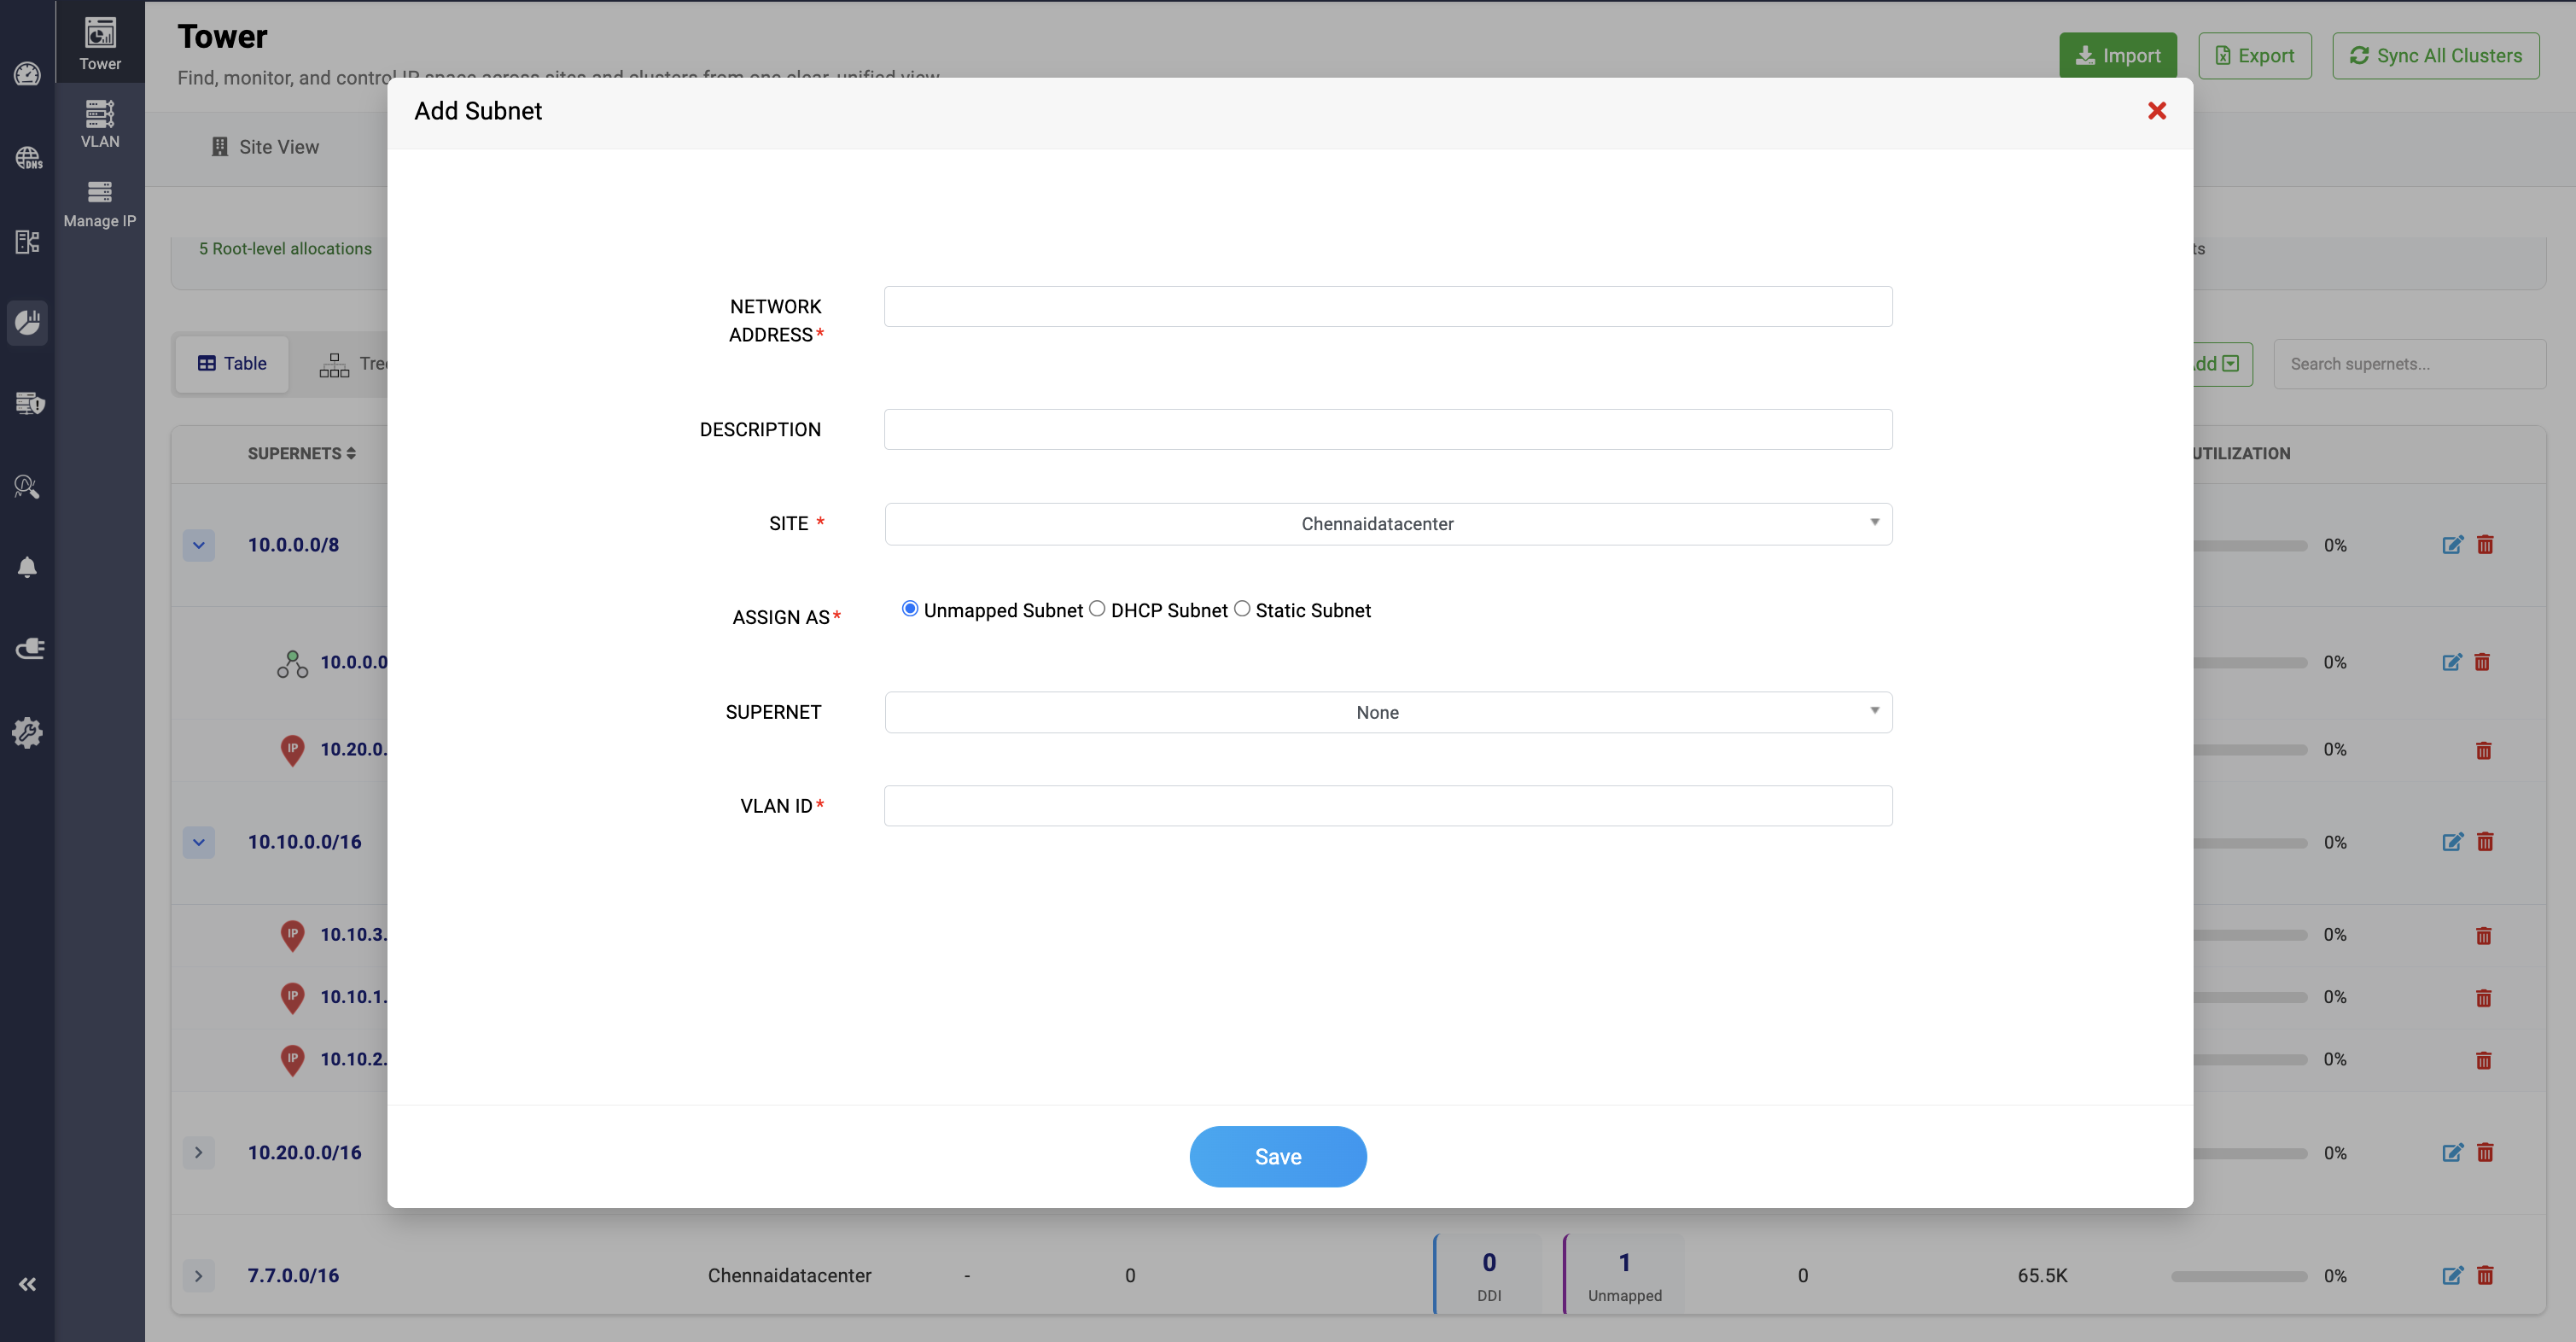
Clicking the Add Subnet option allows network administrators to add specific subnets under the clusters associated with the selected site.
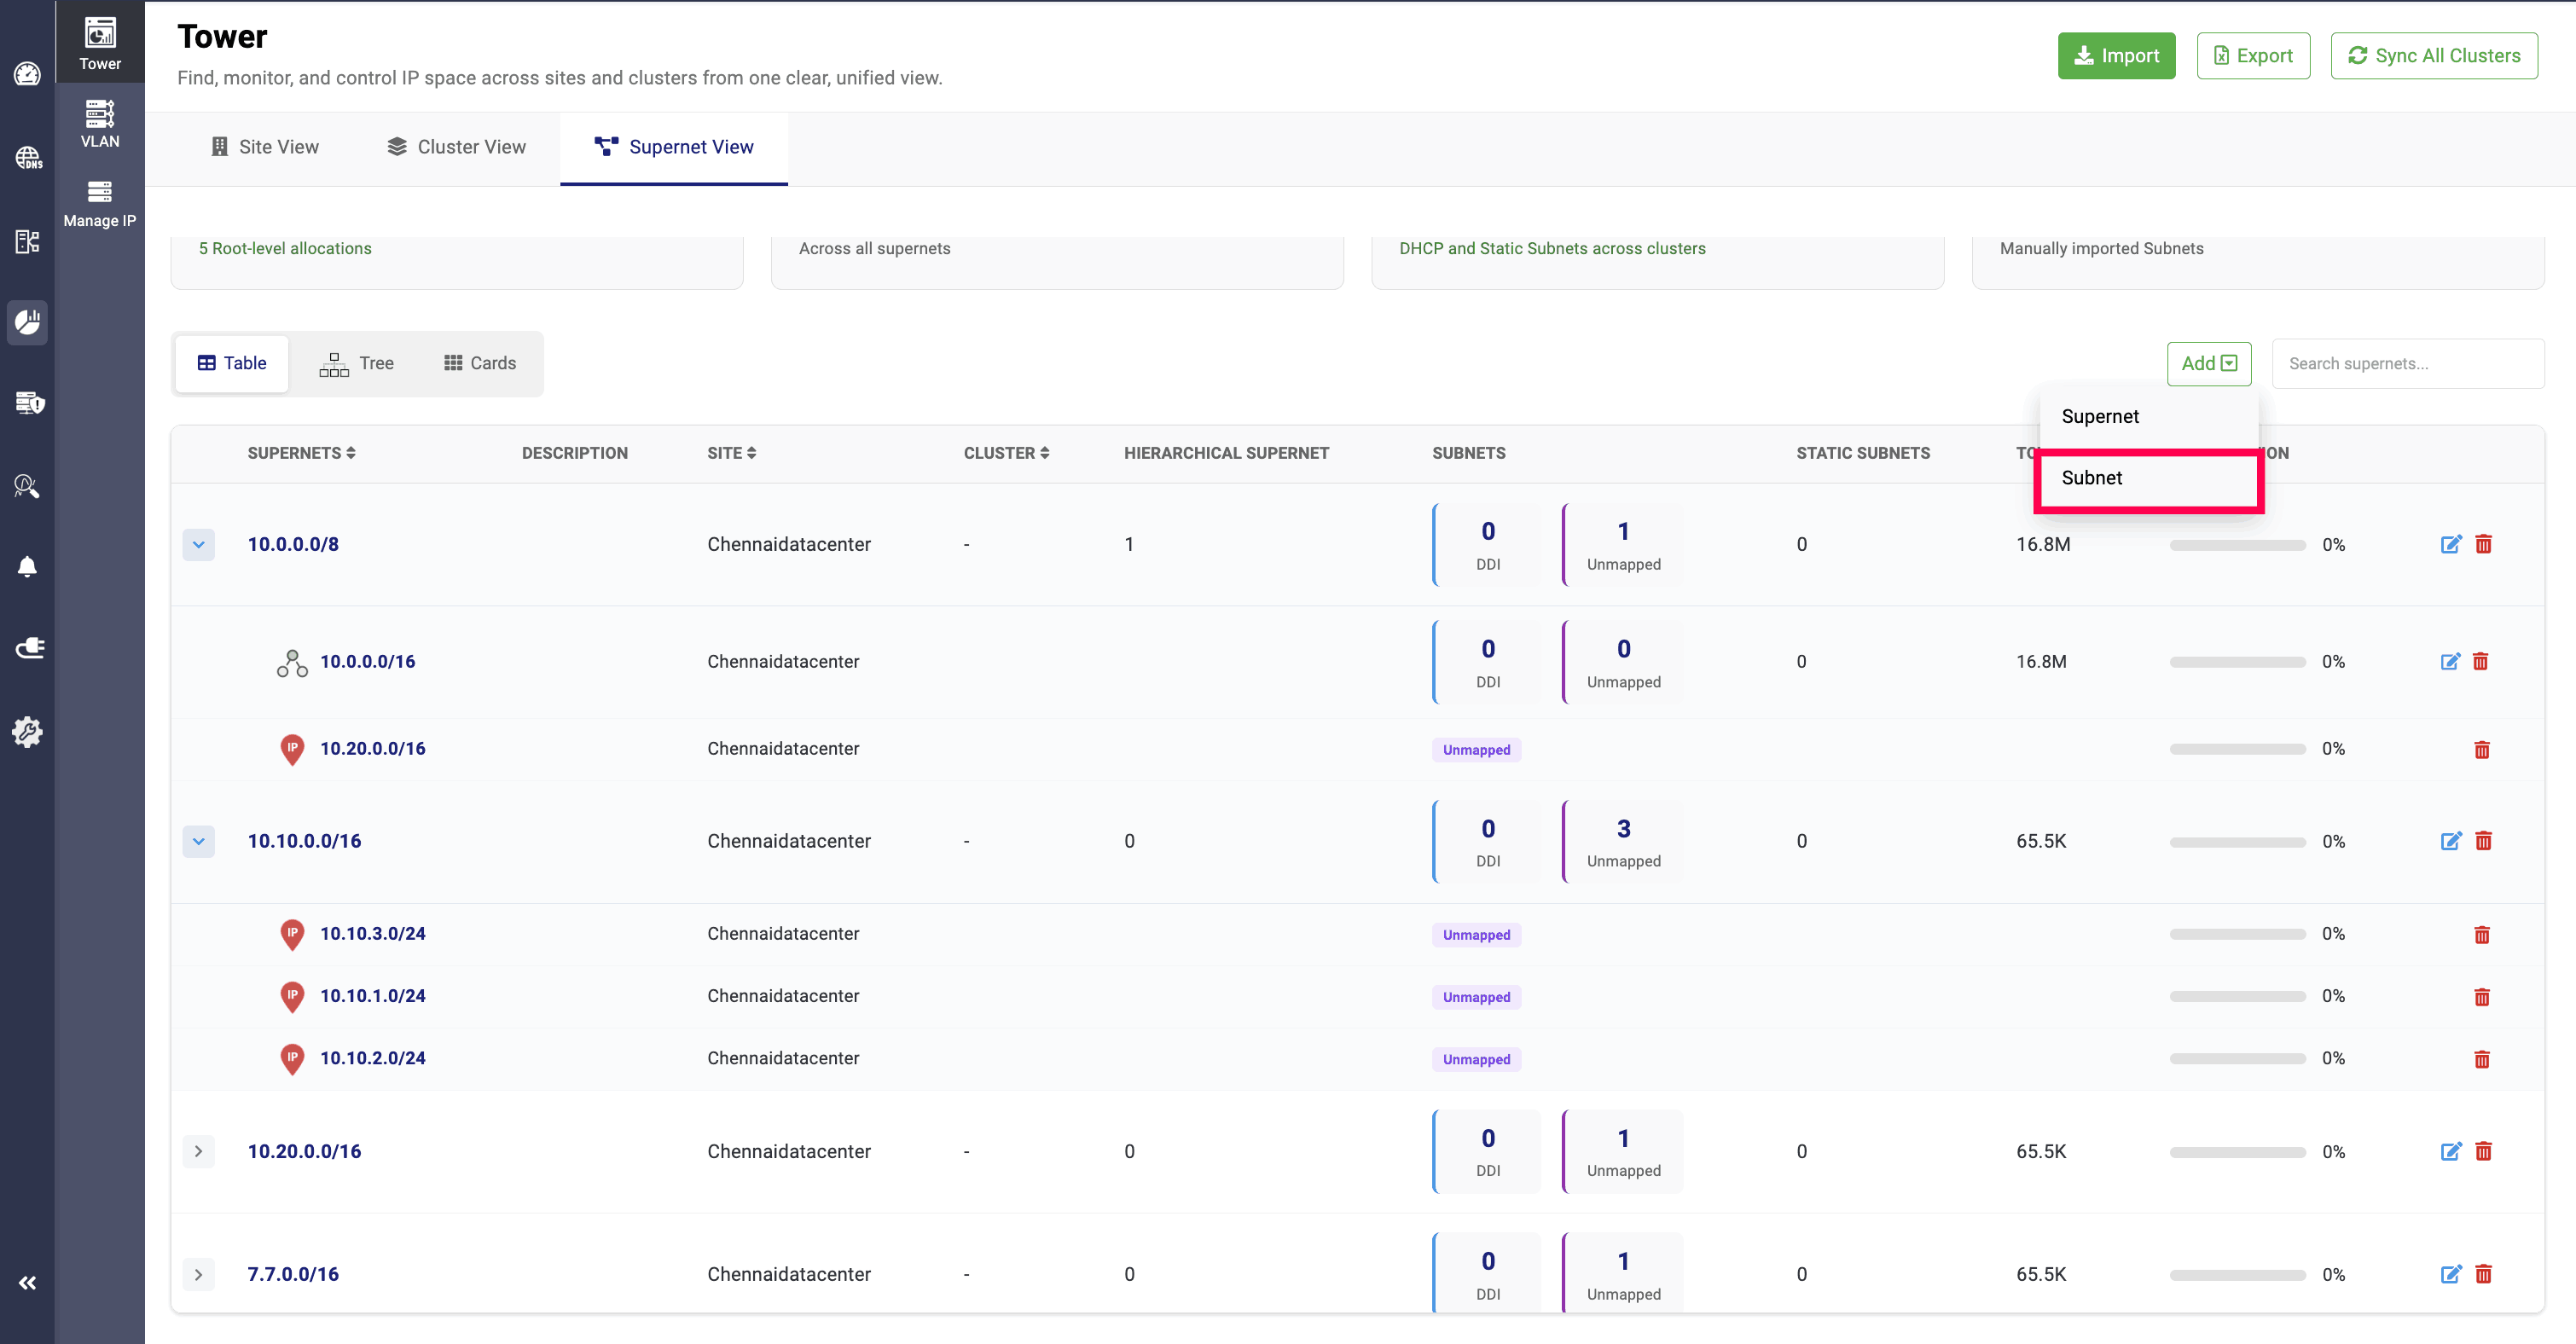
Here, you can provide the subnet’s network address and description, select the site you want to associate it with, assign it as an Unmapped subnet, DHCP-managed subnet, or Static subnet, allocate a Supernet for the subnet and assign a VLAN ID.
When a subnet is assigned to a site, it will be configured and added to both the site and the servers within the associated cluster.
Supernet tree view
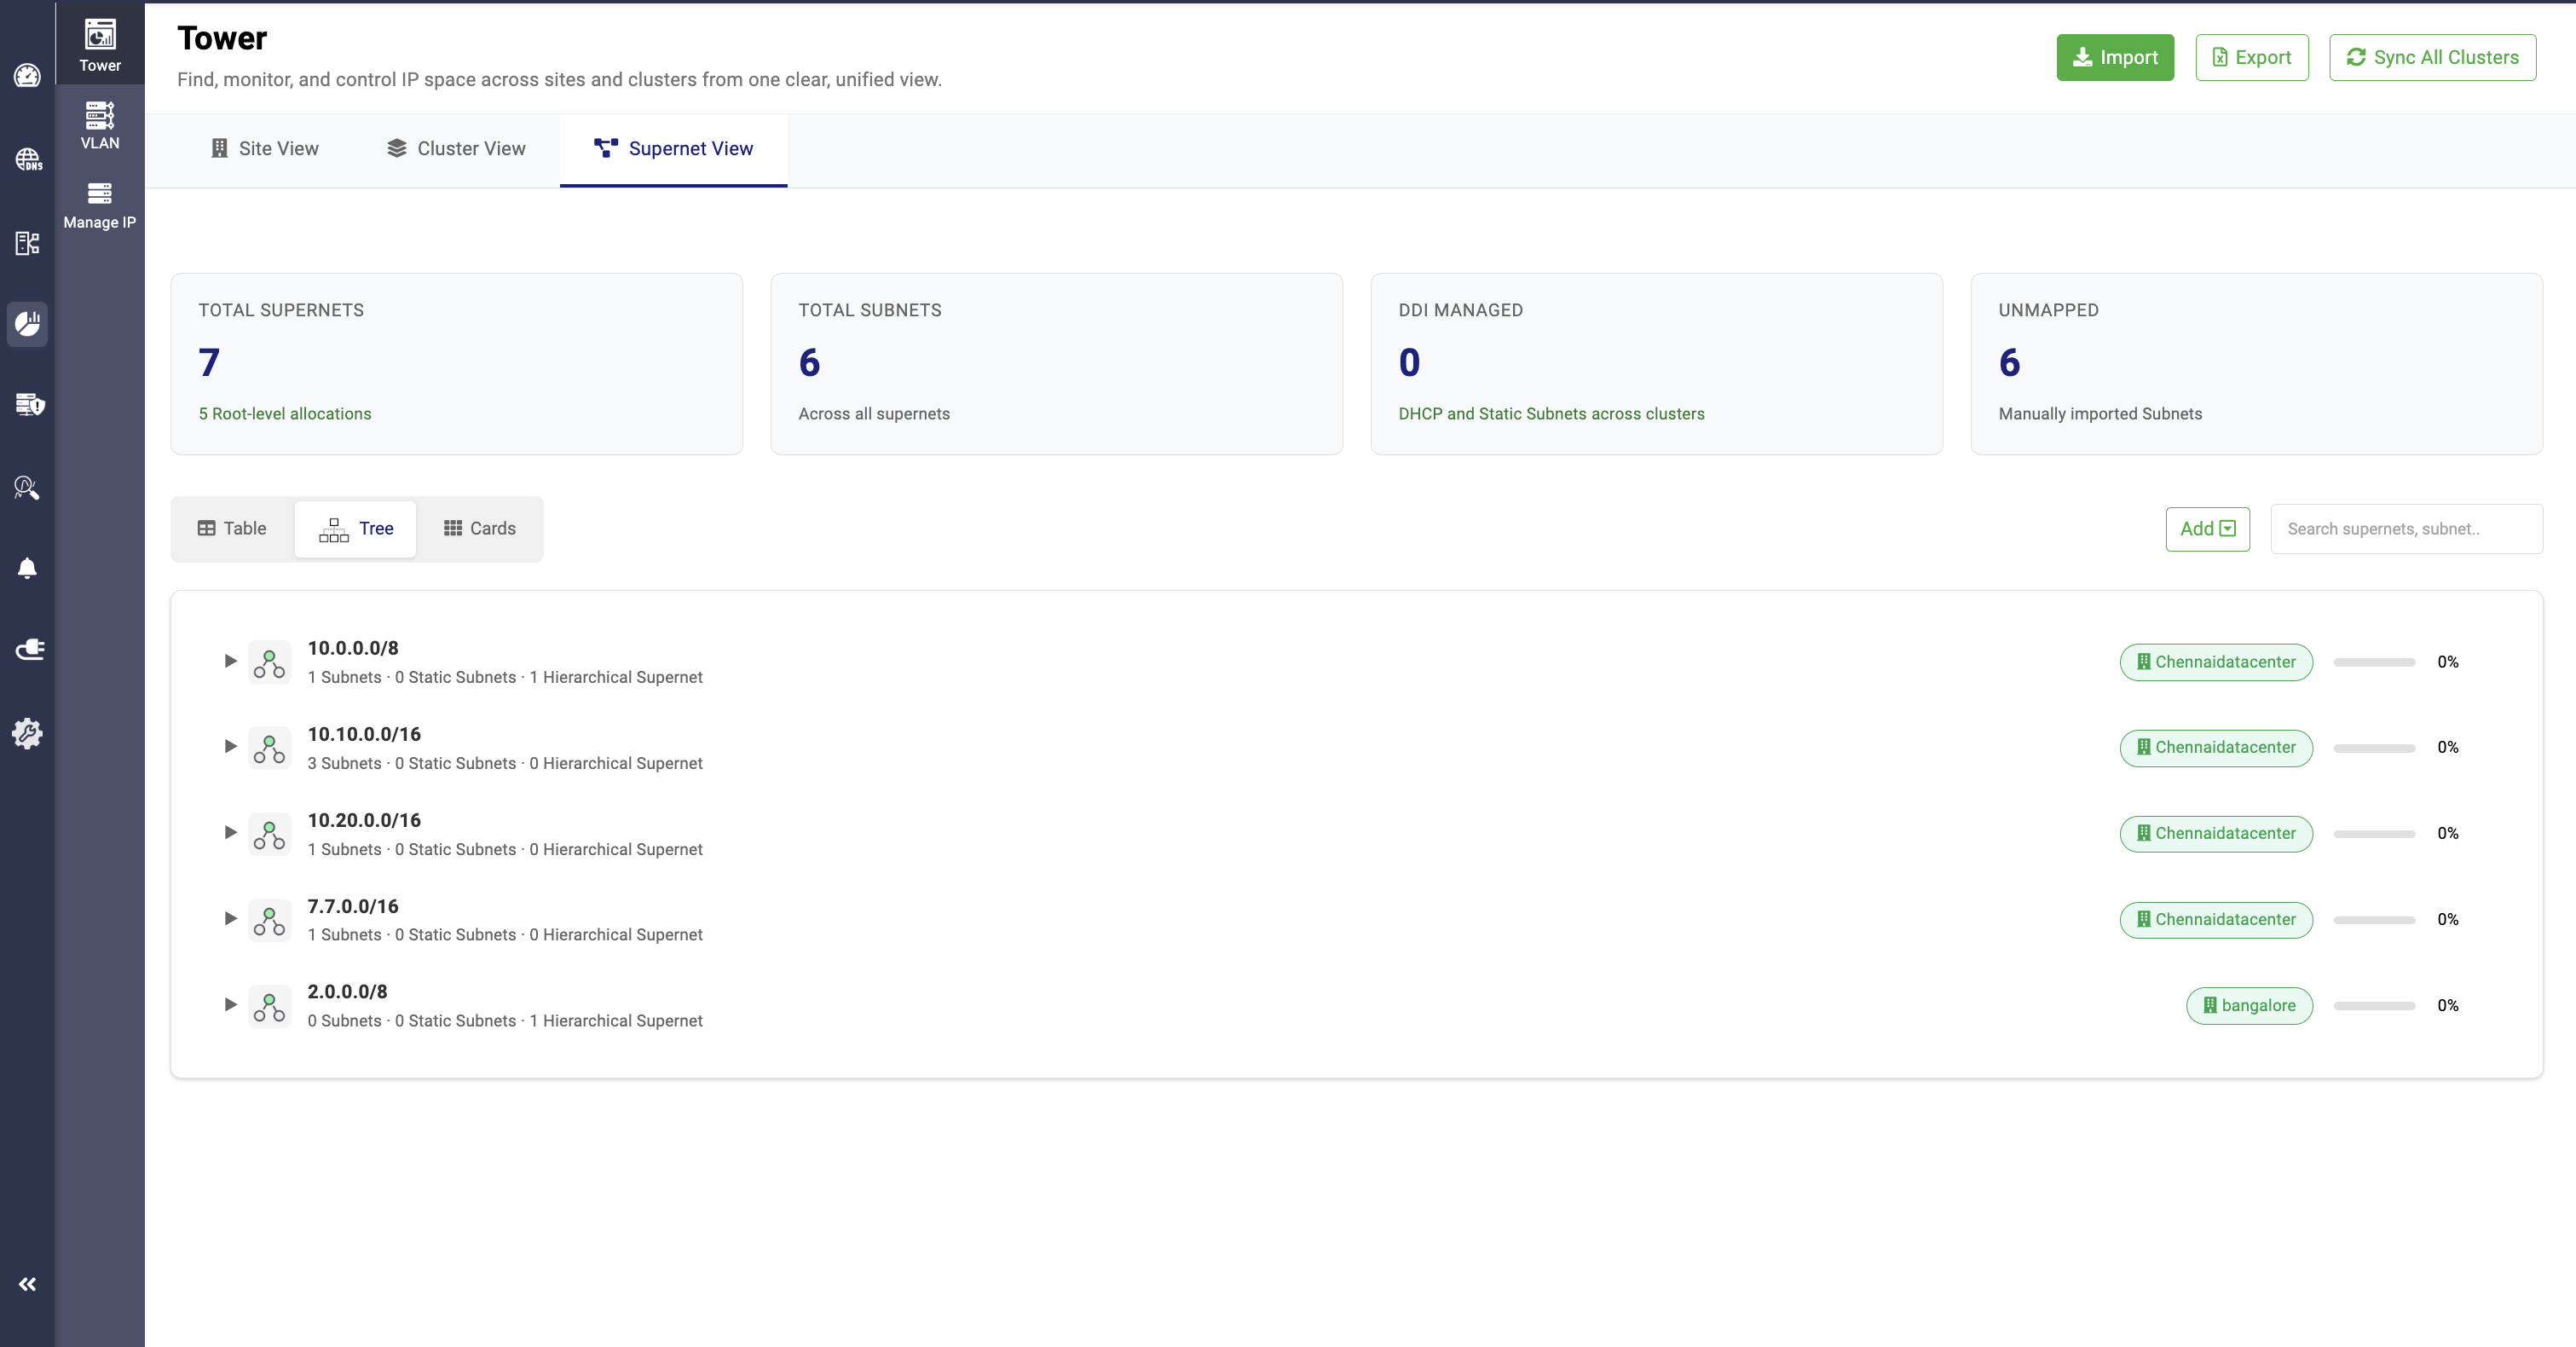
The Tree View provides a hierarchical arrangement of all supernets, along with the subnets and static subnets under each supernet.
It also displays the overall IP utilization percentage for each supernet.

Clicking on a supernet displays the subnets and hierarchical supernets within it, along with their respective values.
It also showcases the clusters, sites, and VLANs that are associated with the supernets.
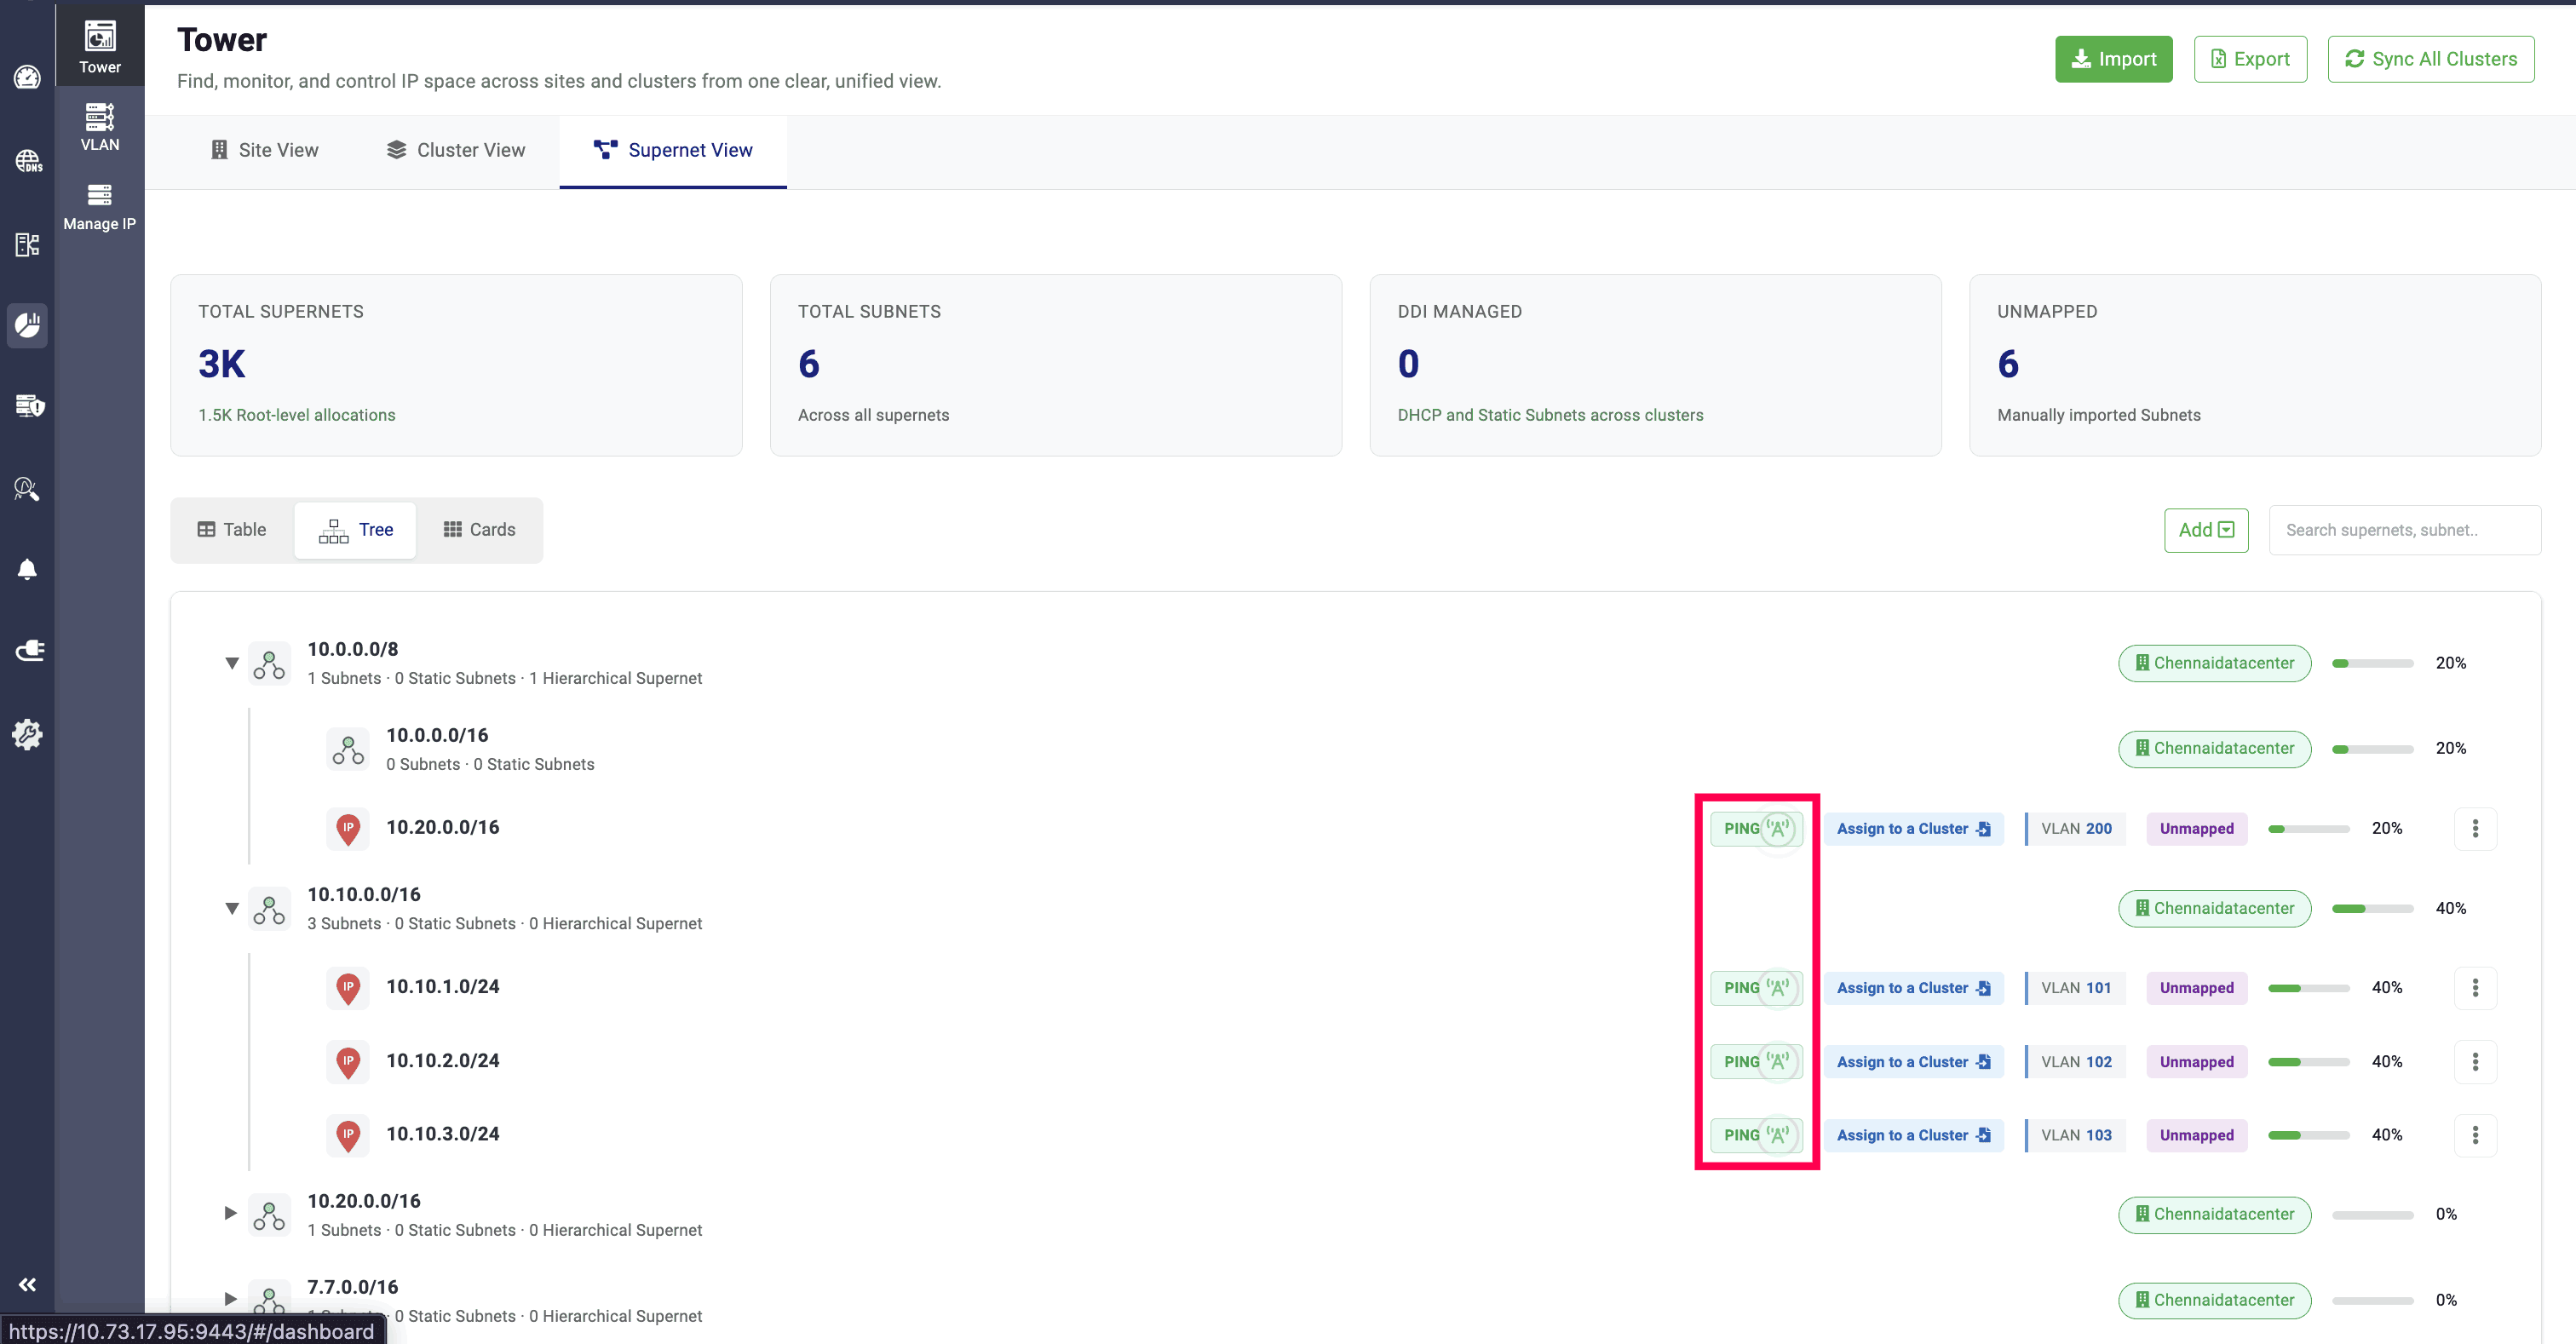
PING option gets enabled automatically for Unmapped subnets, and that can be clicked to deactivate the subnet and disable it to provide services on the network. Similarly, clicking it again will activate the subnet.
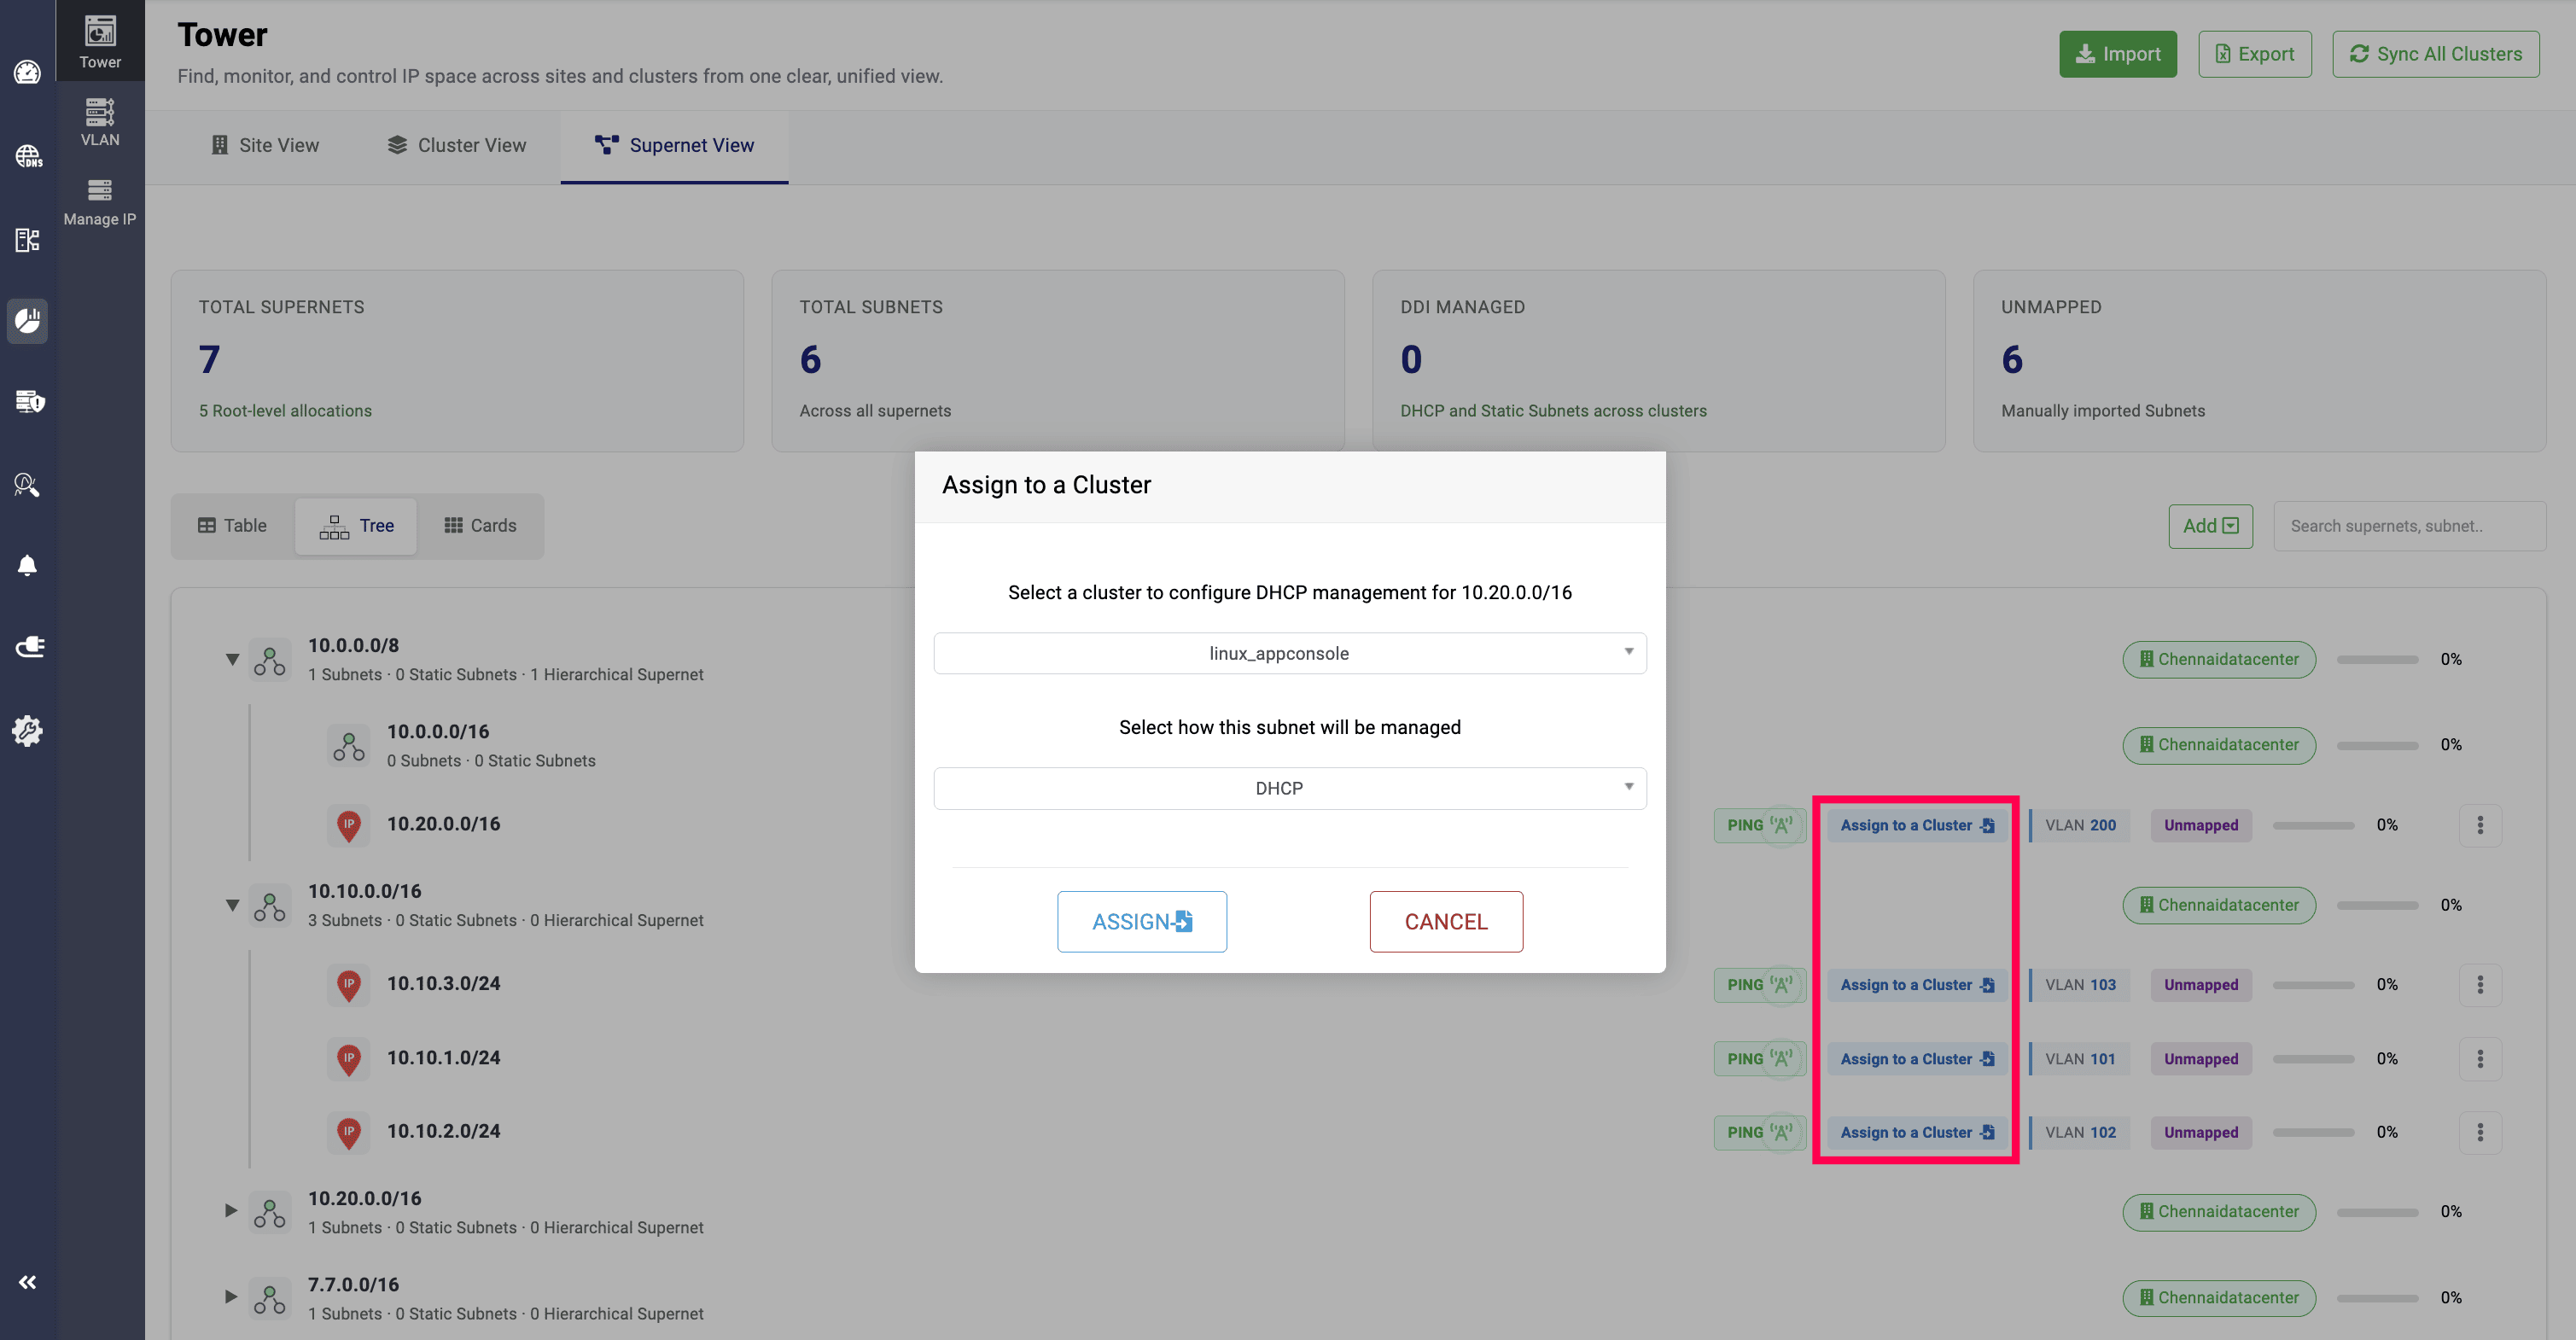
Clicking the Assign to a Cluster option allows you to select a cluster and choose whether the subnet should be managed as a DHCP or Static subnet from the dropdown field.
After selecting DHCP and clicking Assign, you will be redirected to the Create Subnet page. If you select Static, you will be redirected to the Create Static Subnet page.
Once assigned, the name of the cluster to which the subnet is assigned will be displayed in the Tree View.
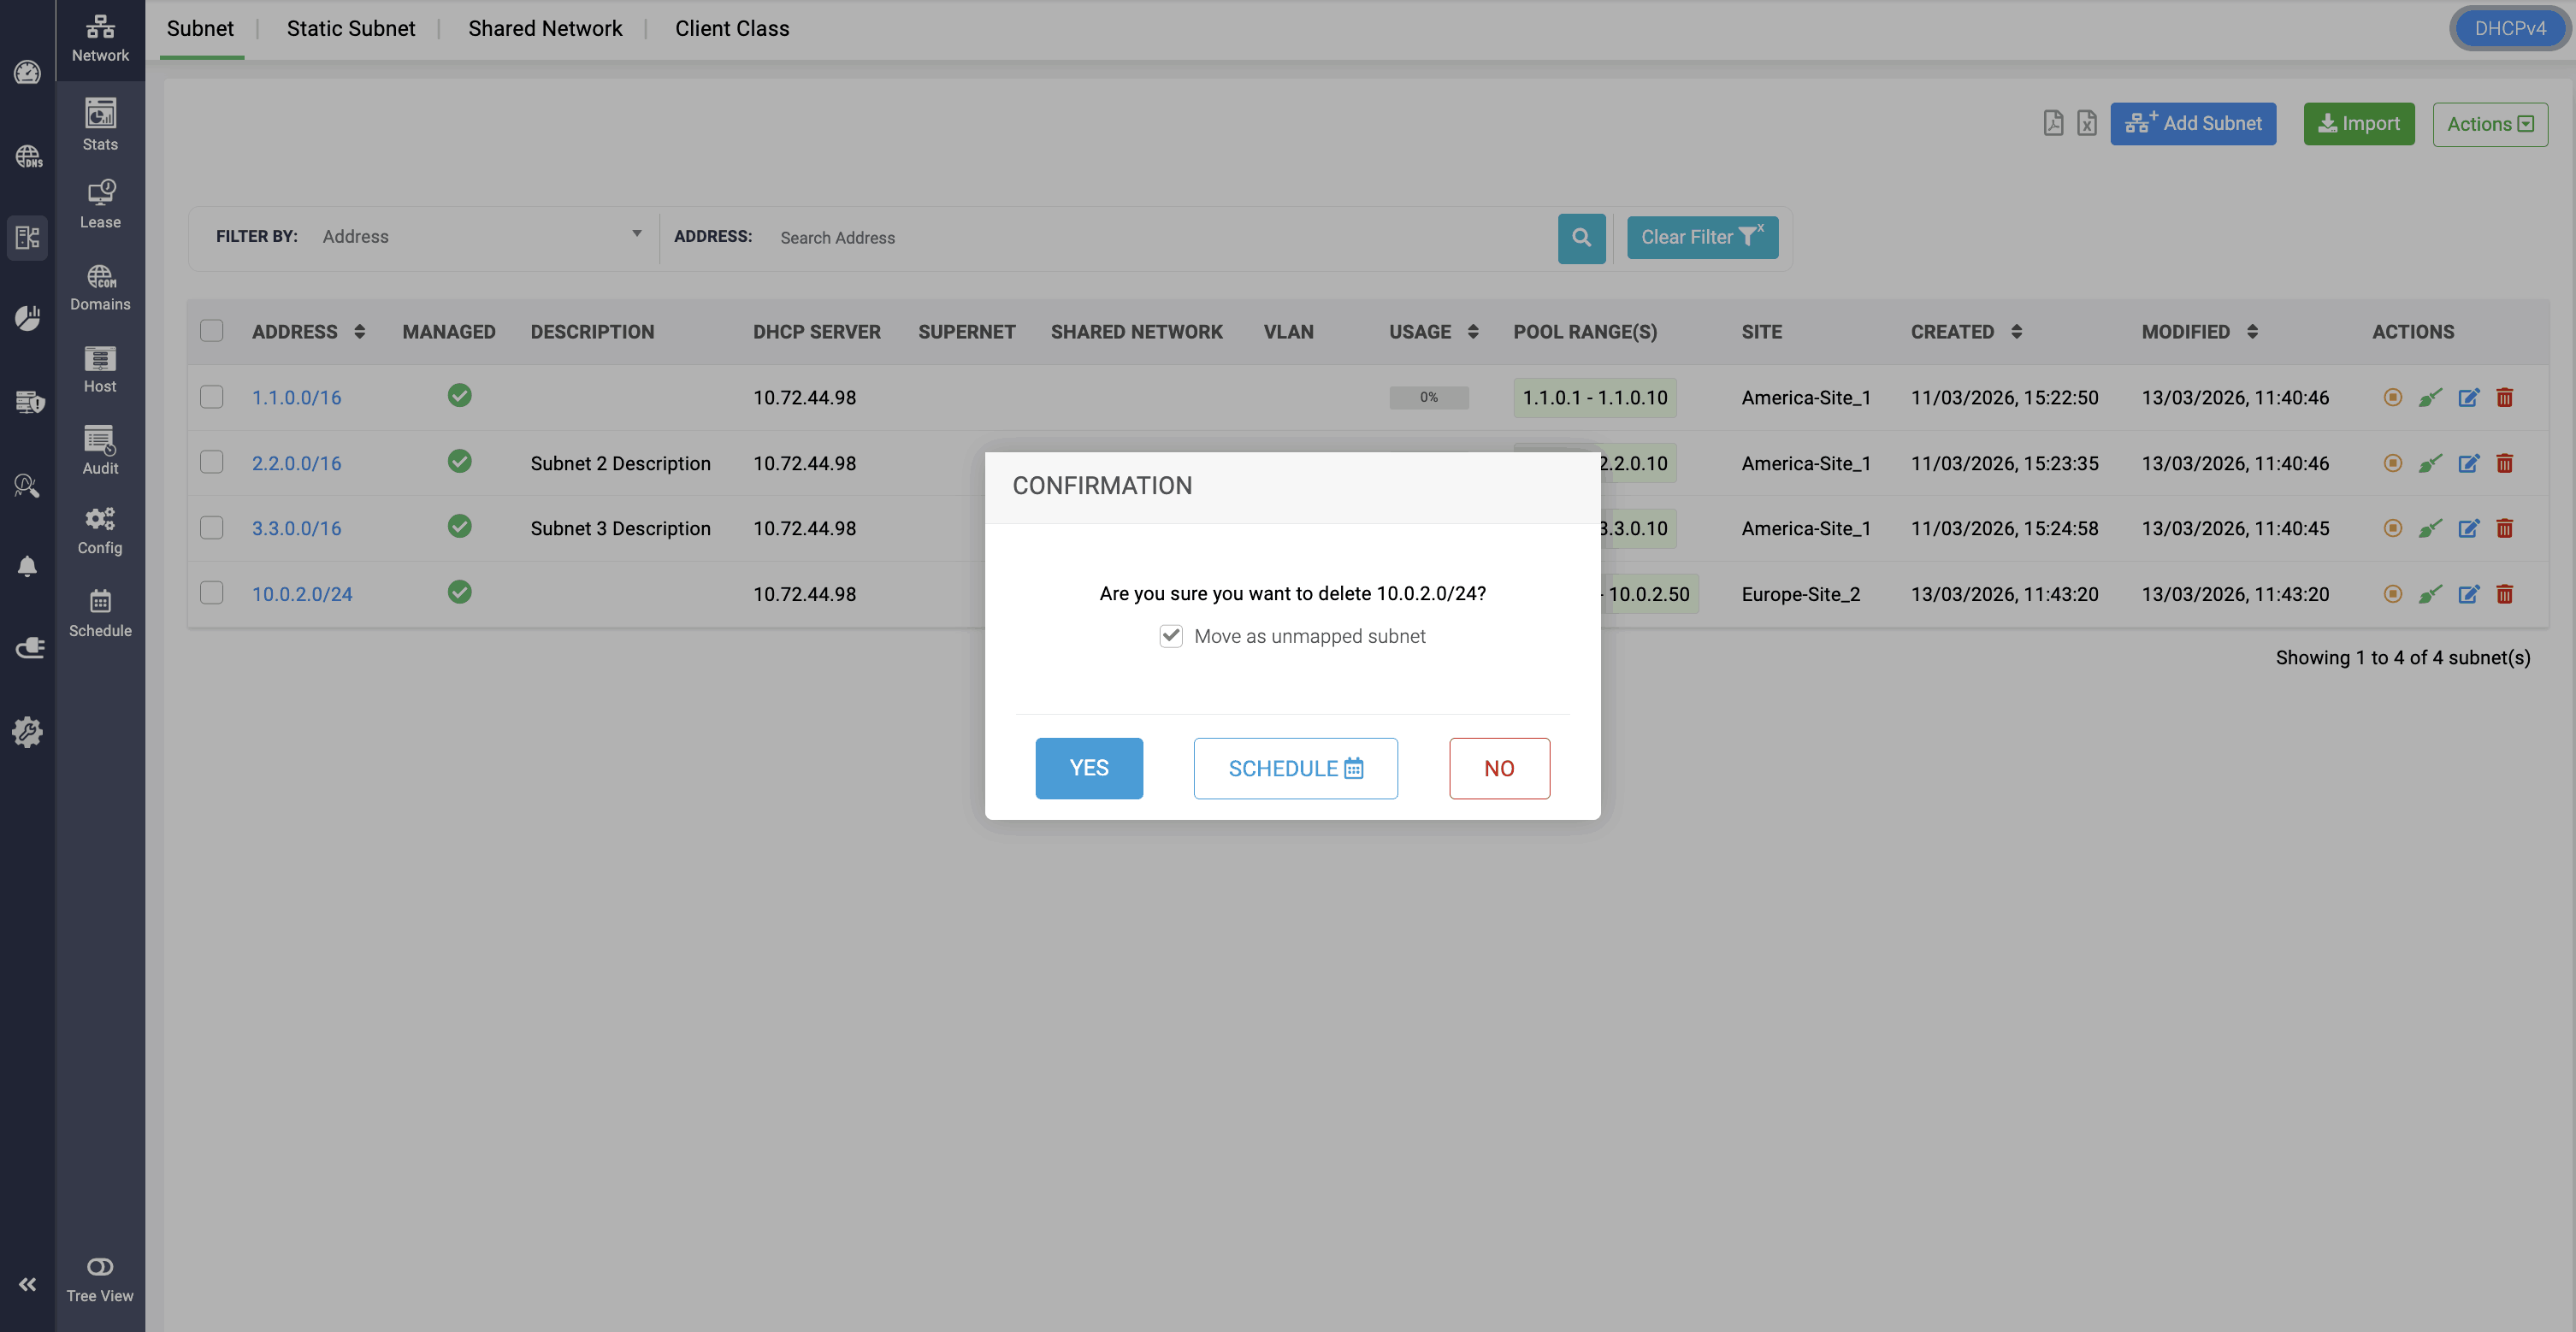
The same subnet can be unmapped from the assigned cluster by navigating to DHCP > Subnets, clicking the Delete icon, and selecting Move as Unmapped Subnet. Alternatively, you can delete the subnet from the network.
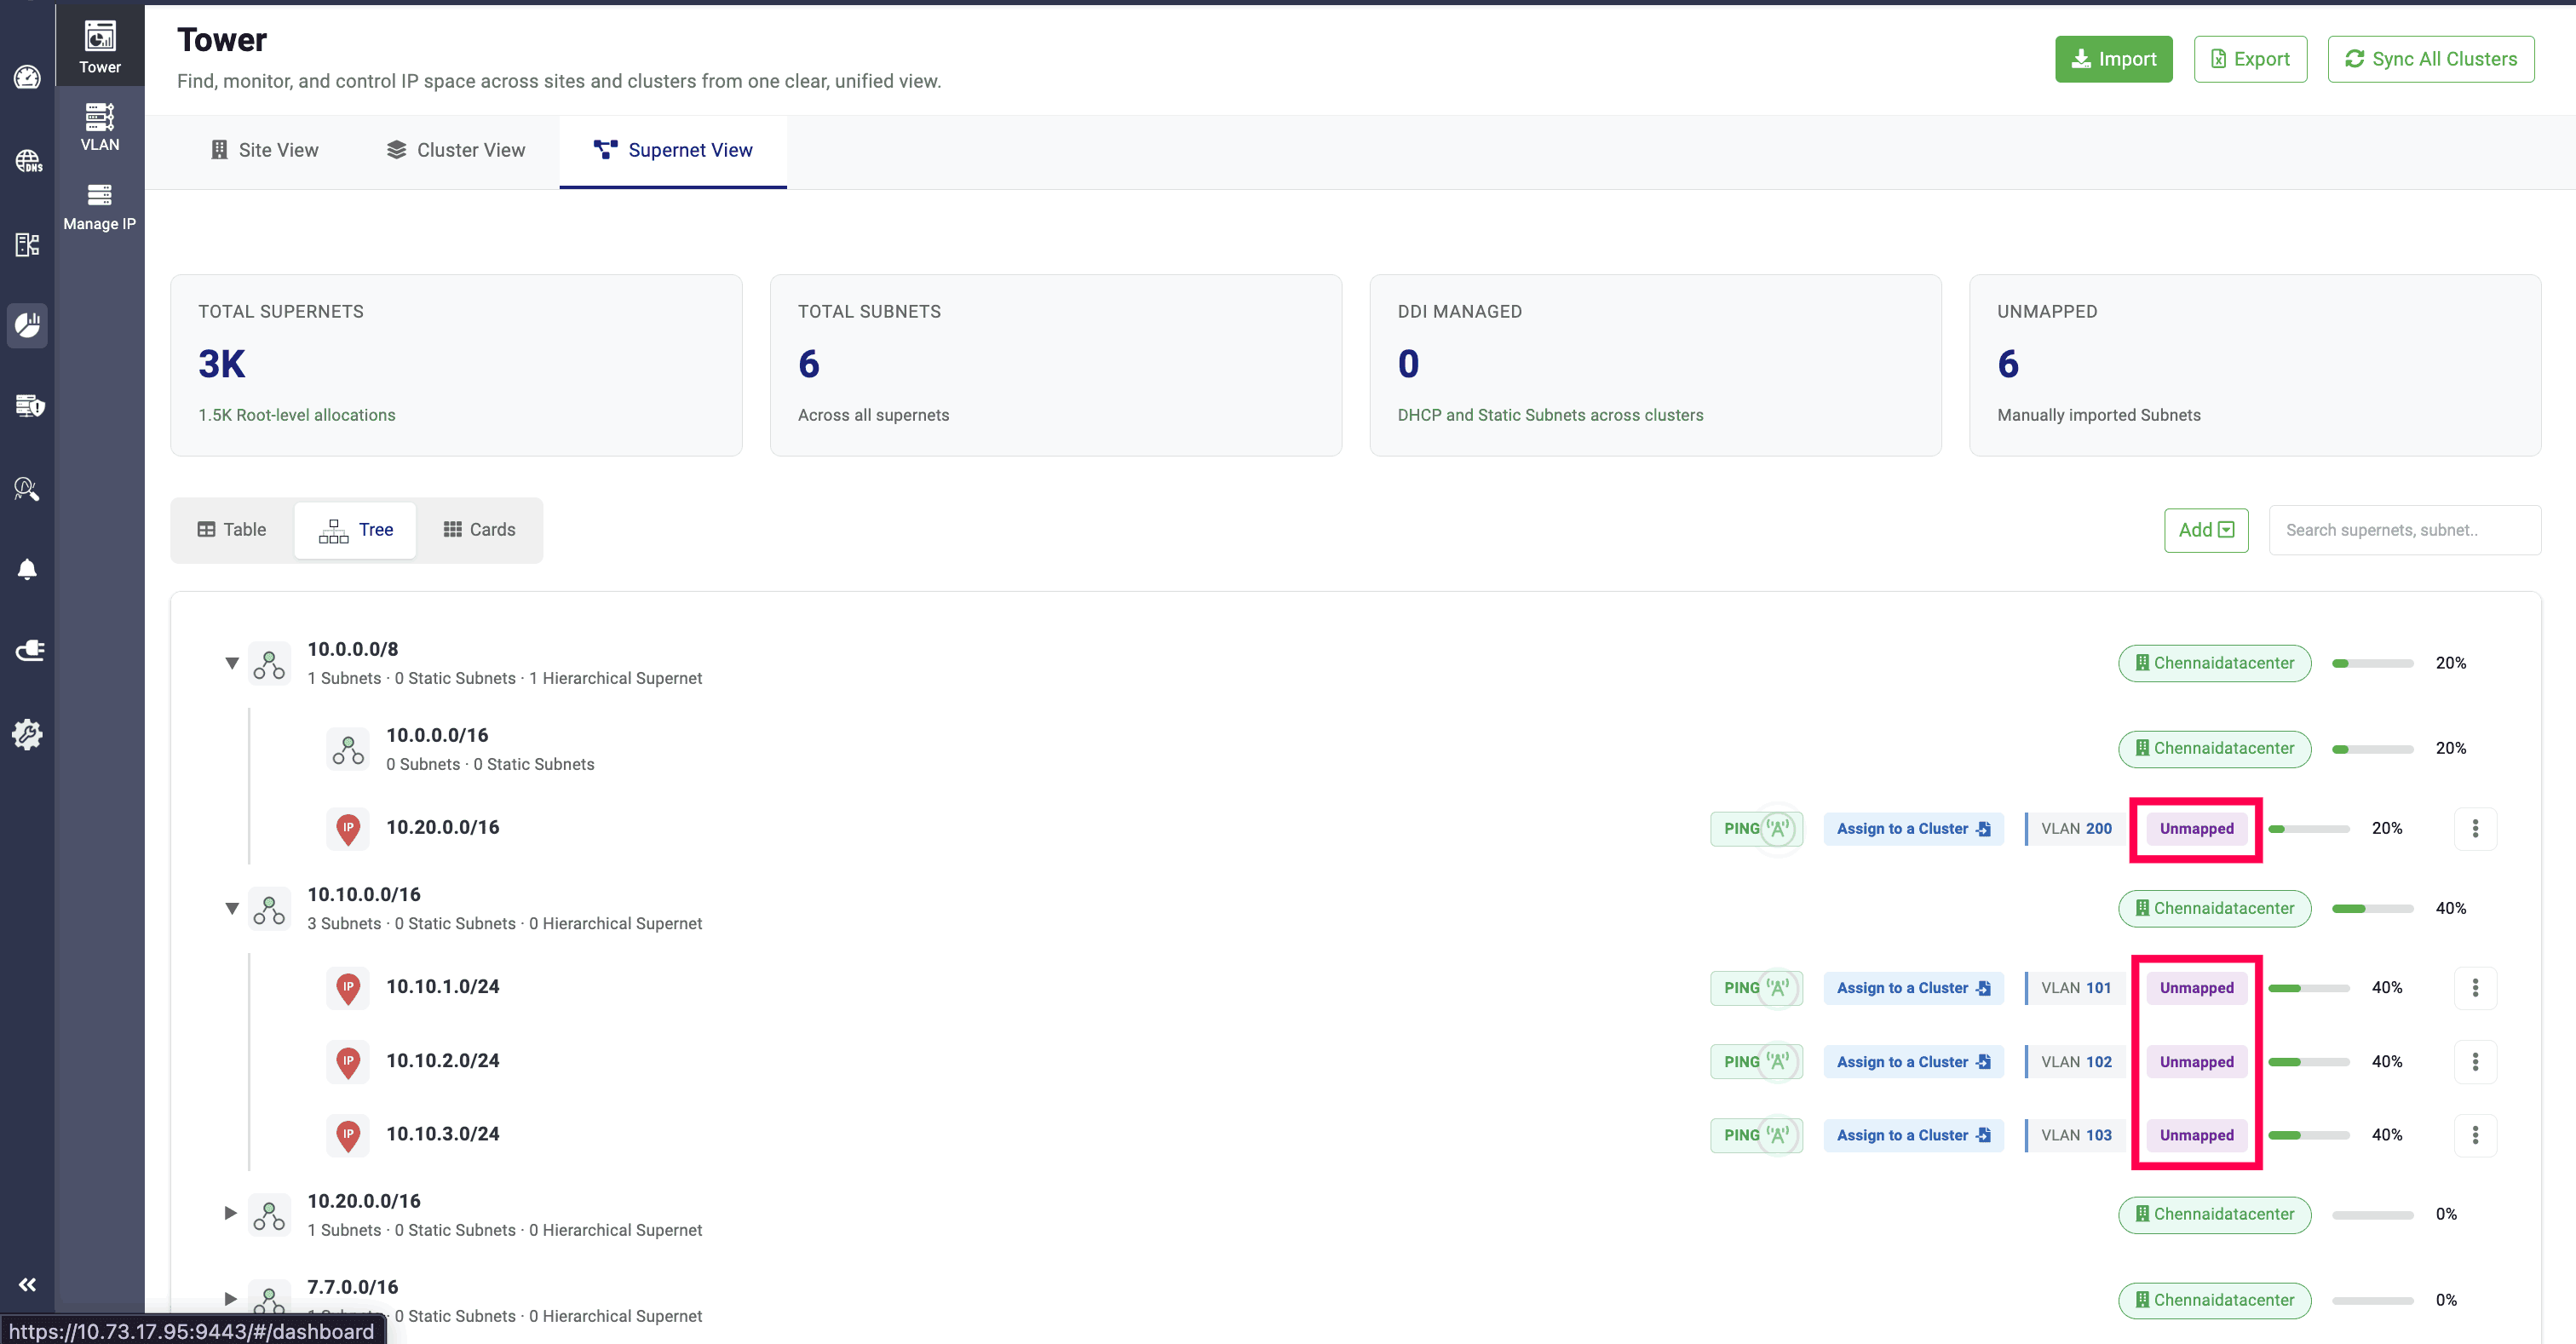
Imported subnets are marked as Unmapped, and the Tree View also displays the usage of each subnet.

For DDI Managed subnets, you can click on the View IPs option to view all the IP addresses in the subnet, and View Leases option to view the subnet's leases and lease history
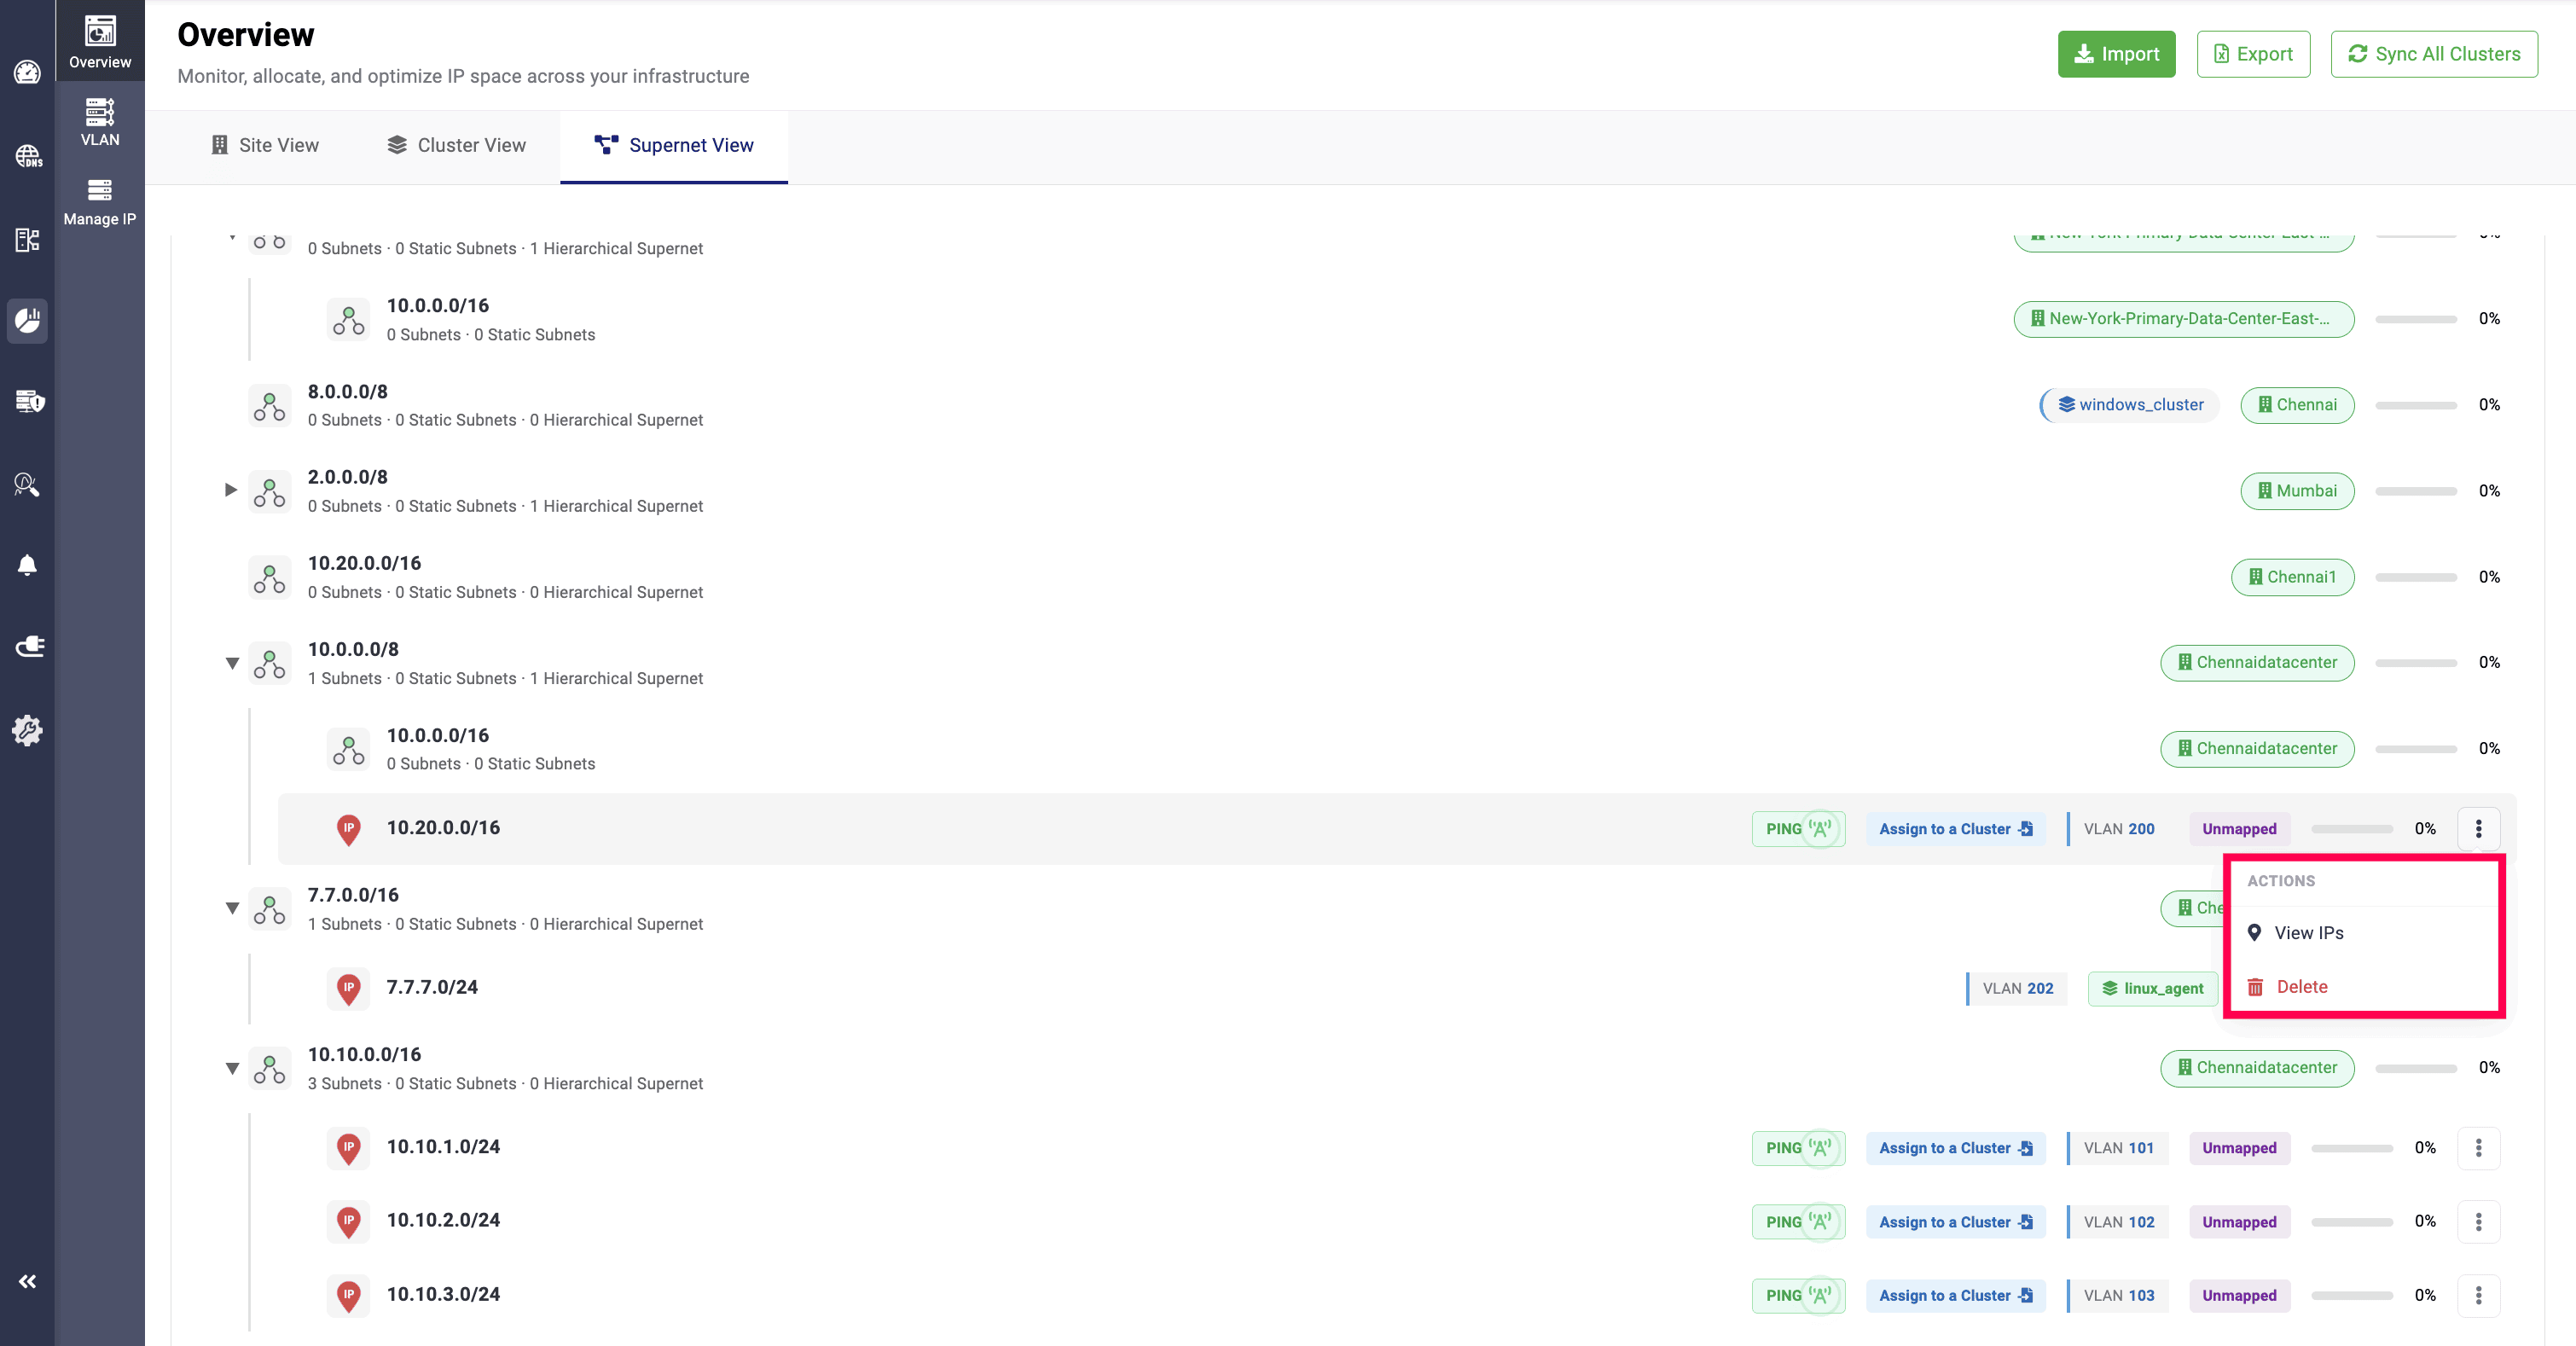
But, for Unmapped subnets, you can only view the IP addresses in the subnet through View IPs option, and you can only delete them through the Delete option.
Supernet cards view
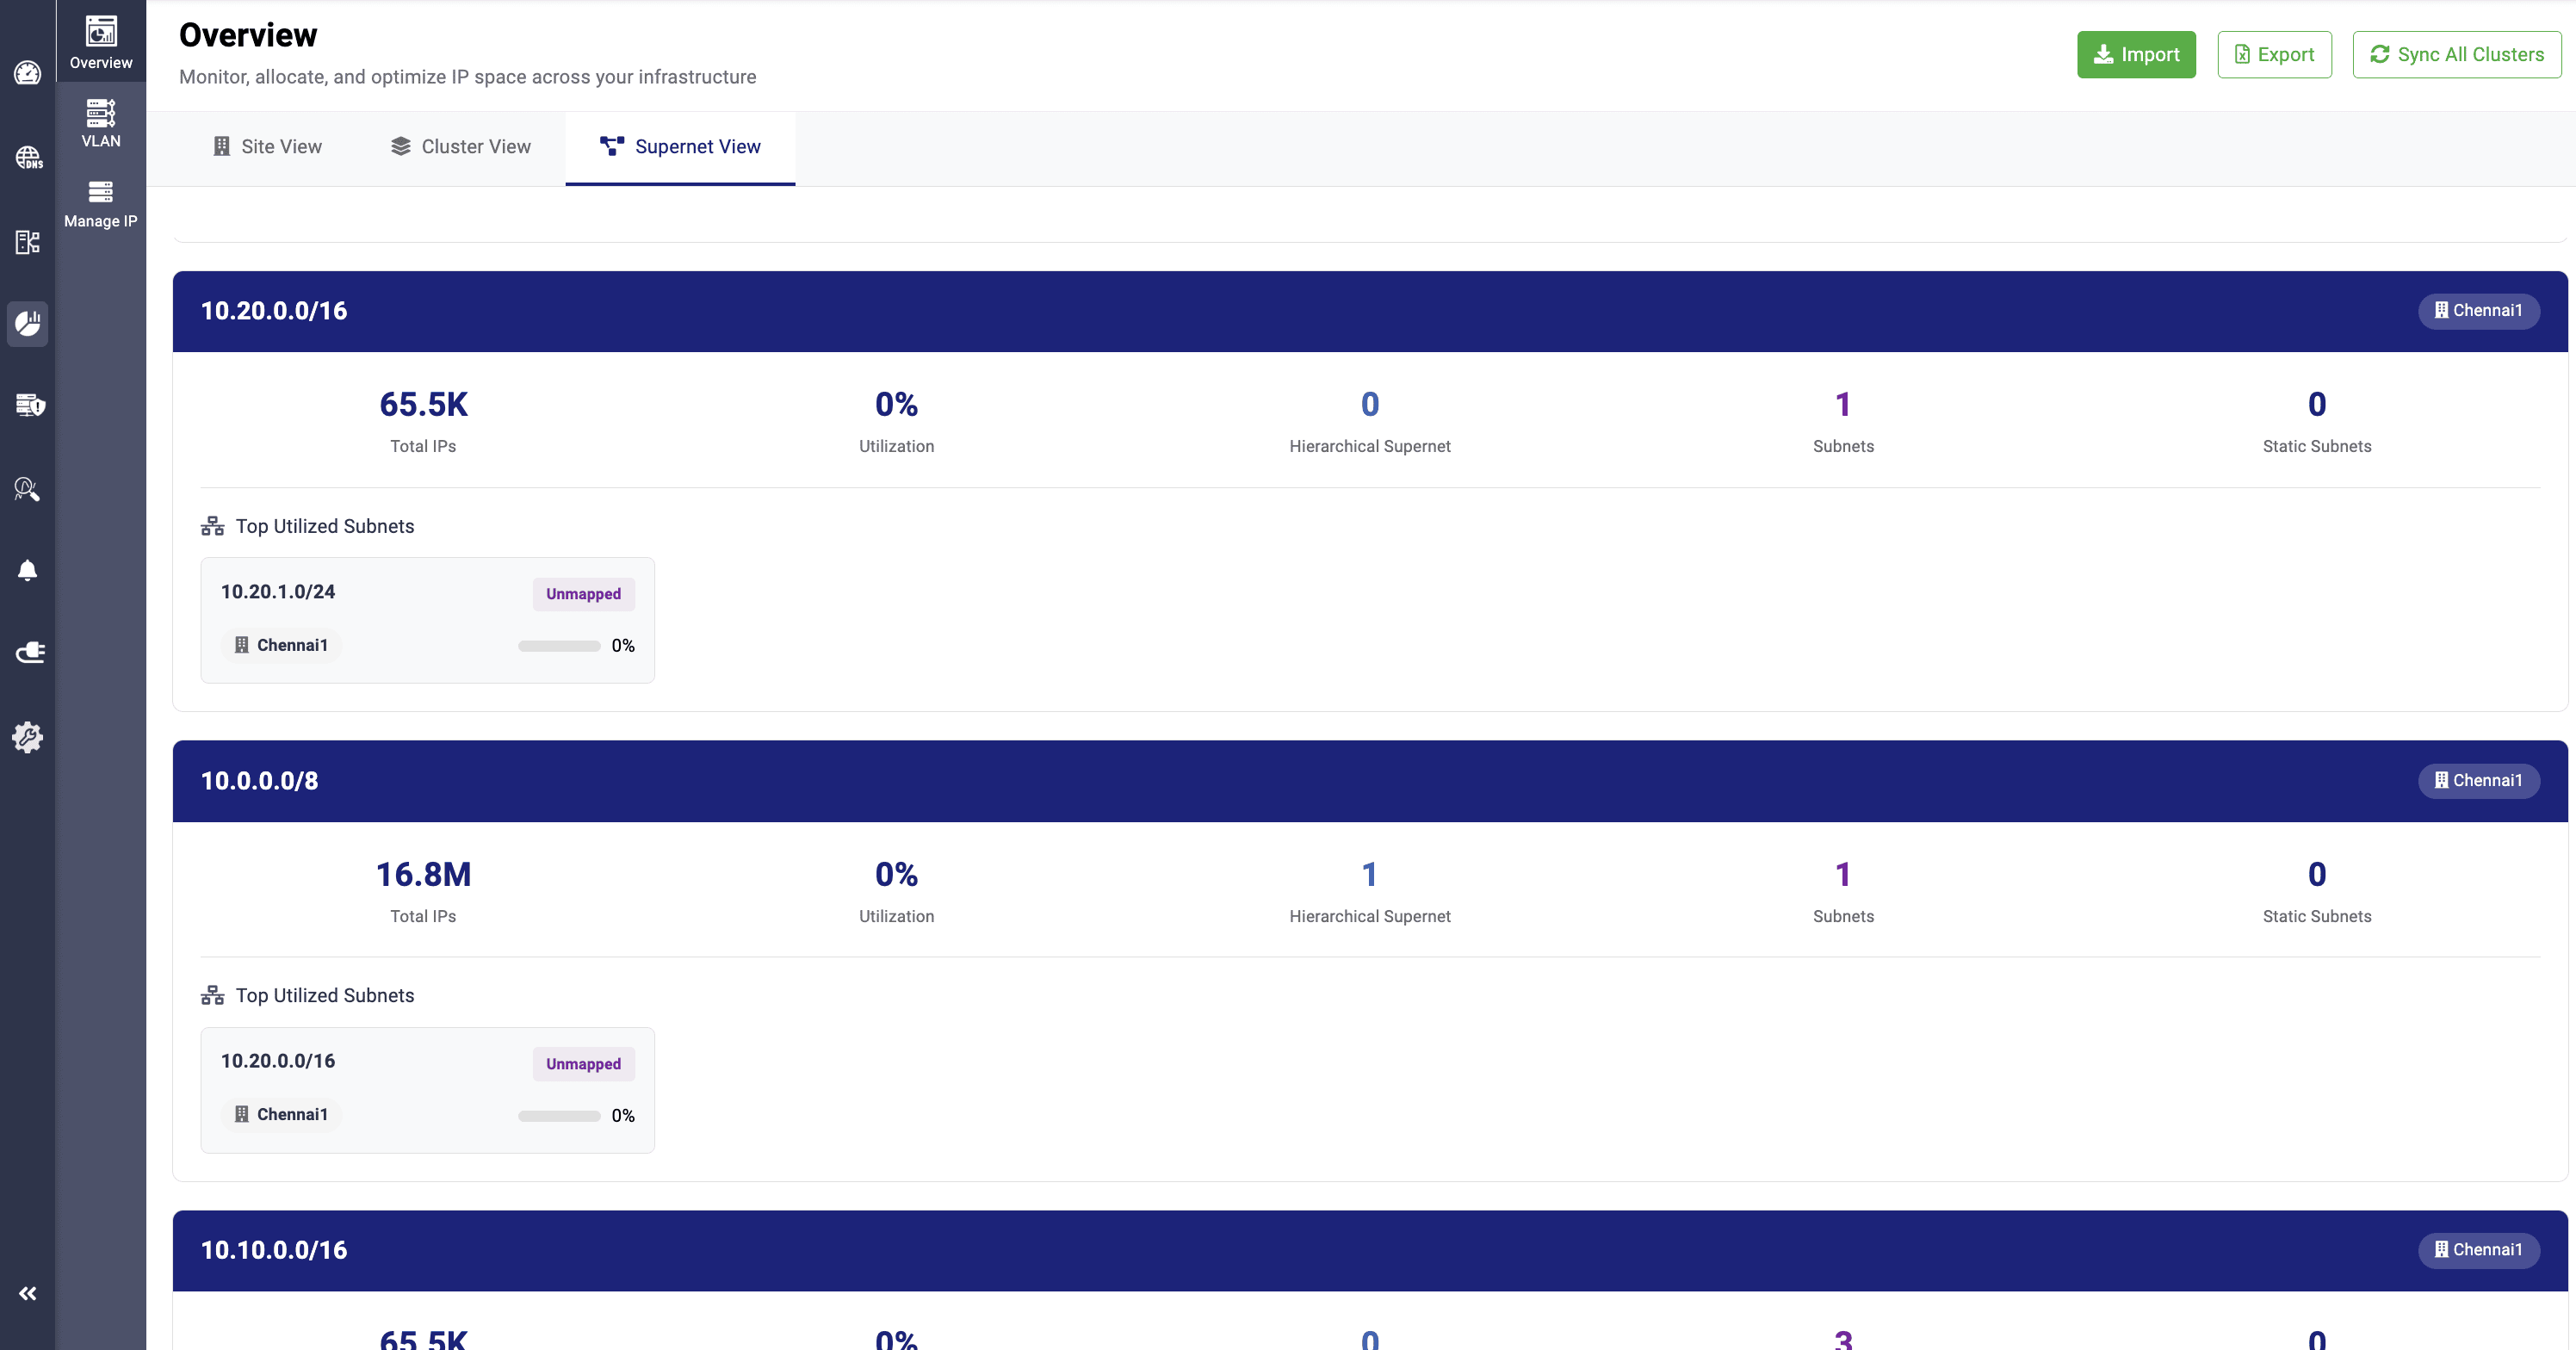
The Cards View provides segmented visibility of the total number of IPs within supernets, the IP utilization percentage, and the total number of supernets, subnets, and static subnets.
It also highlights the top utilized subnets within each supernet, along with the associated site and their usage values.
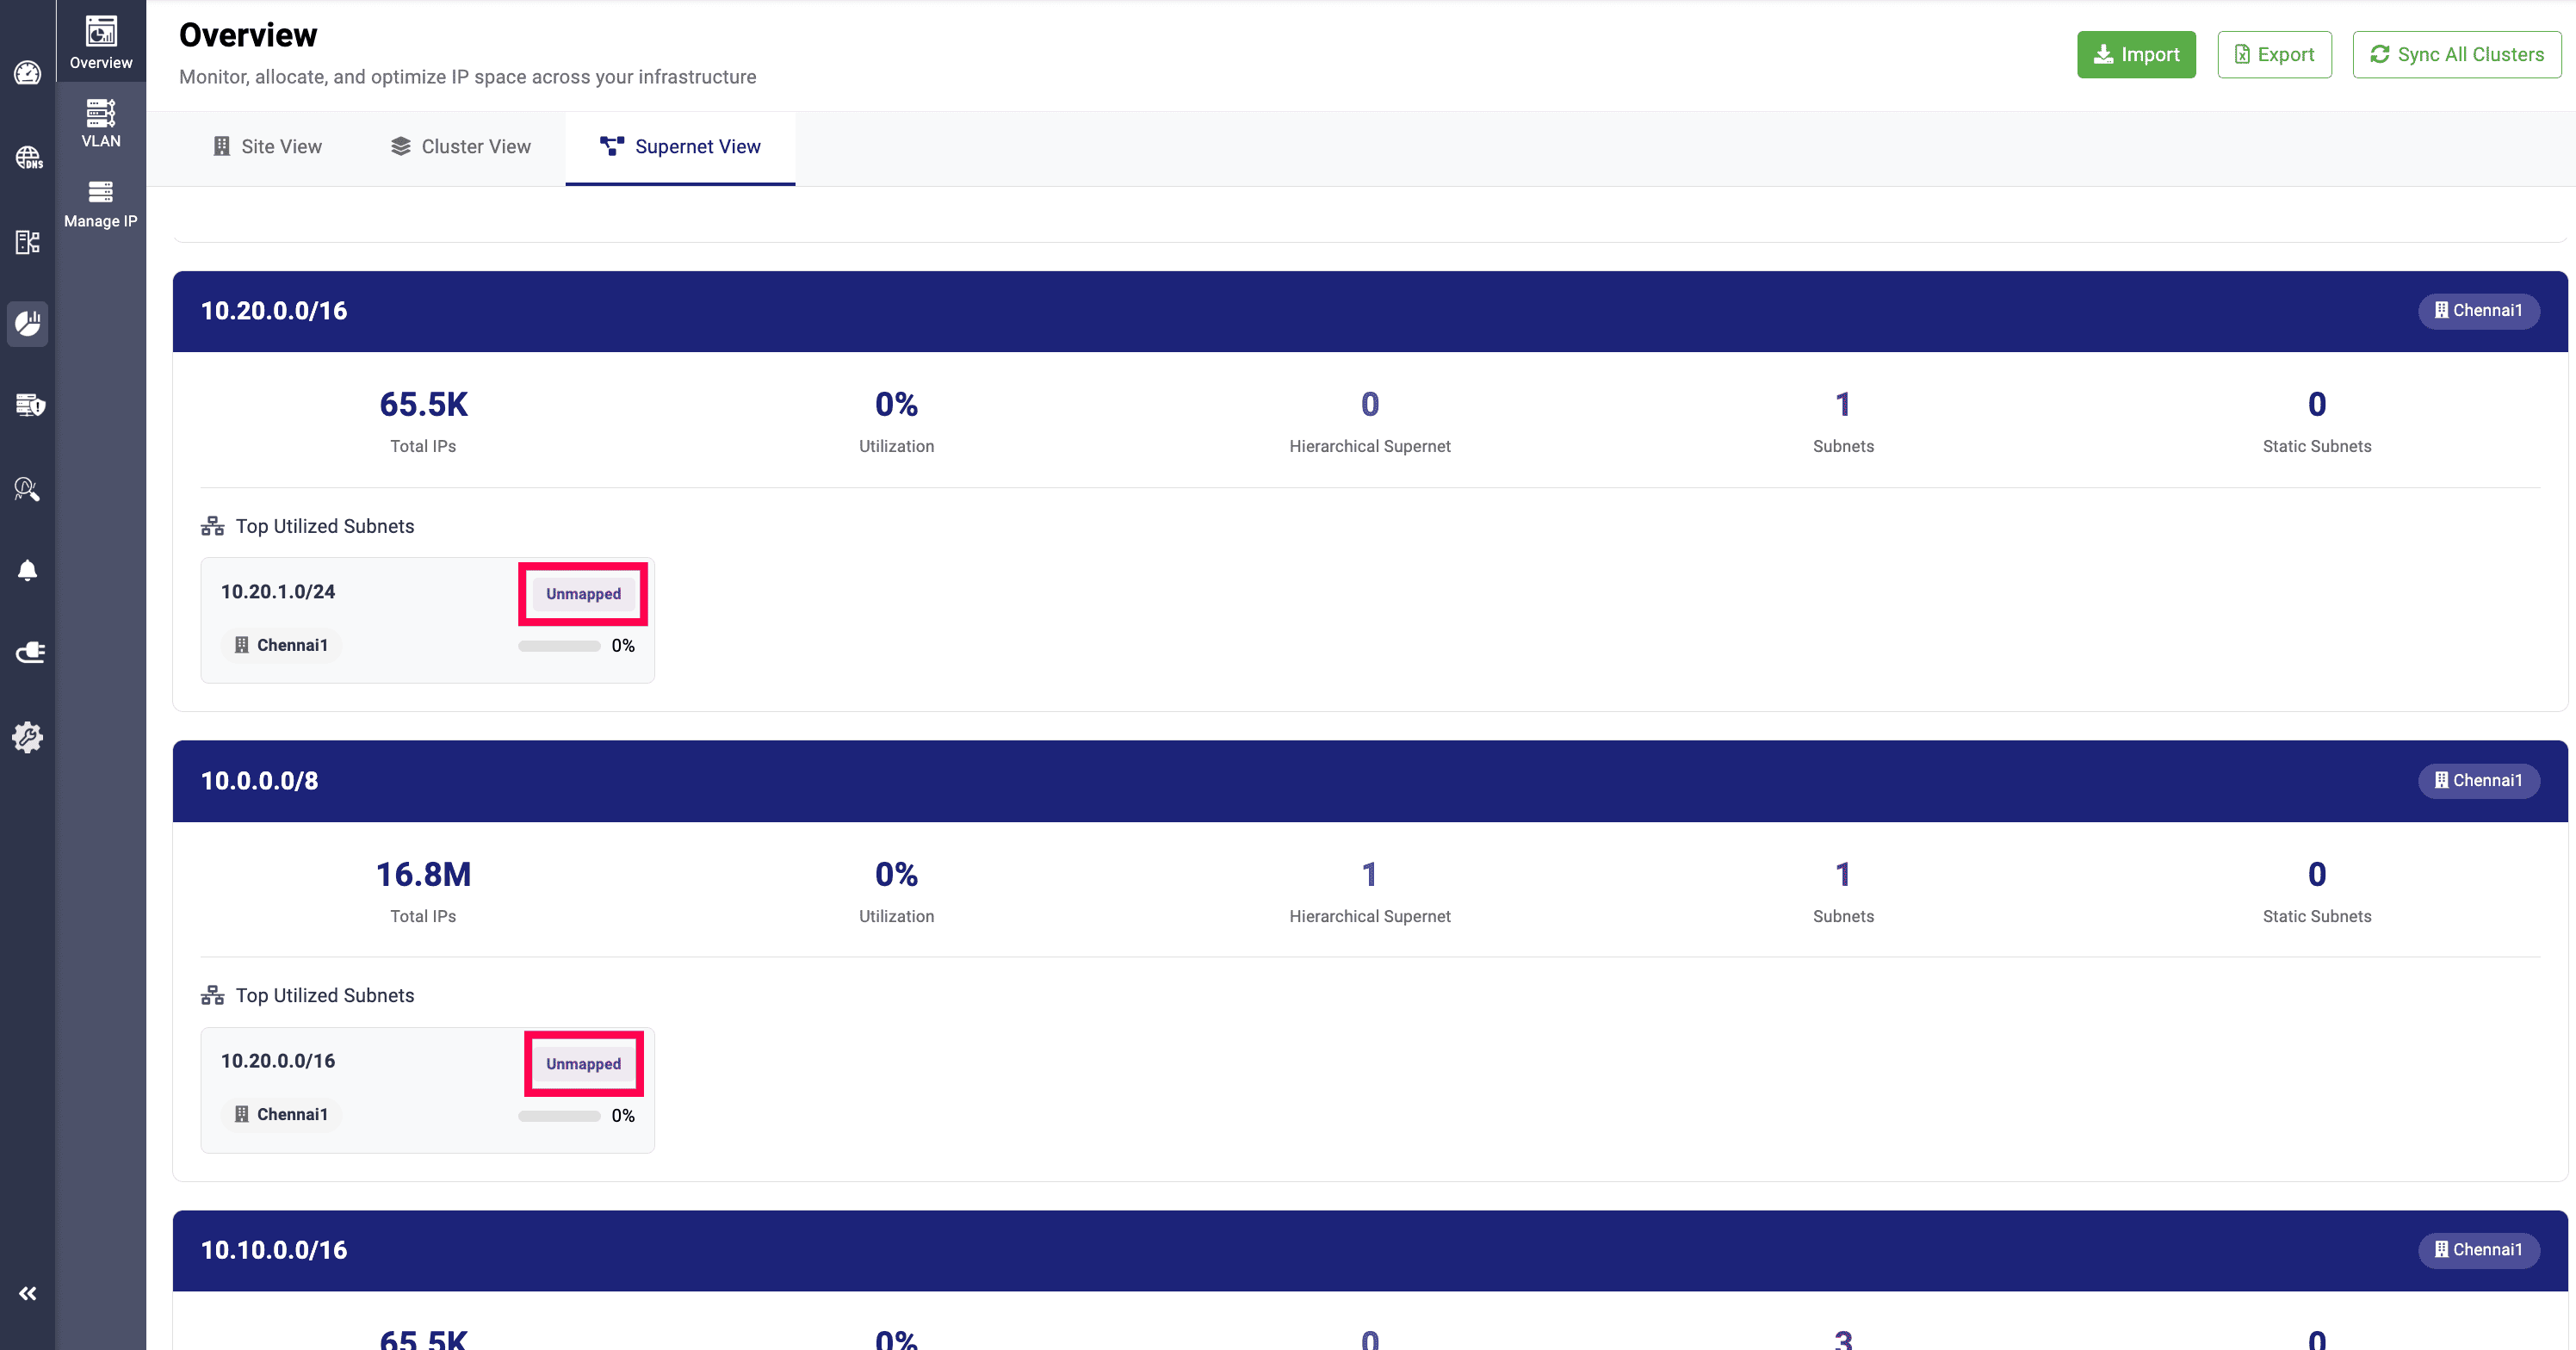
Imported subnets are marked as Unmapped when displayed under the Top Utilized Subnets section.
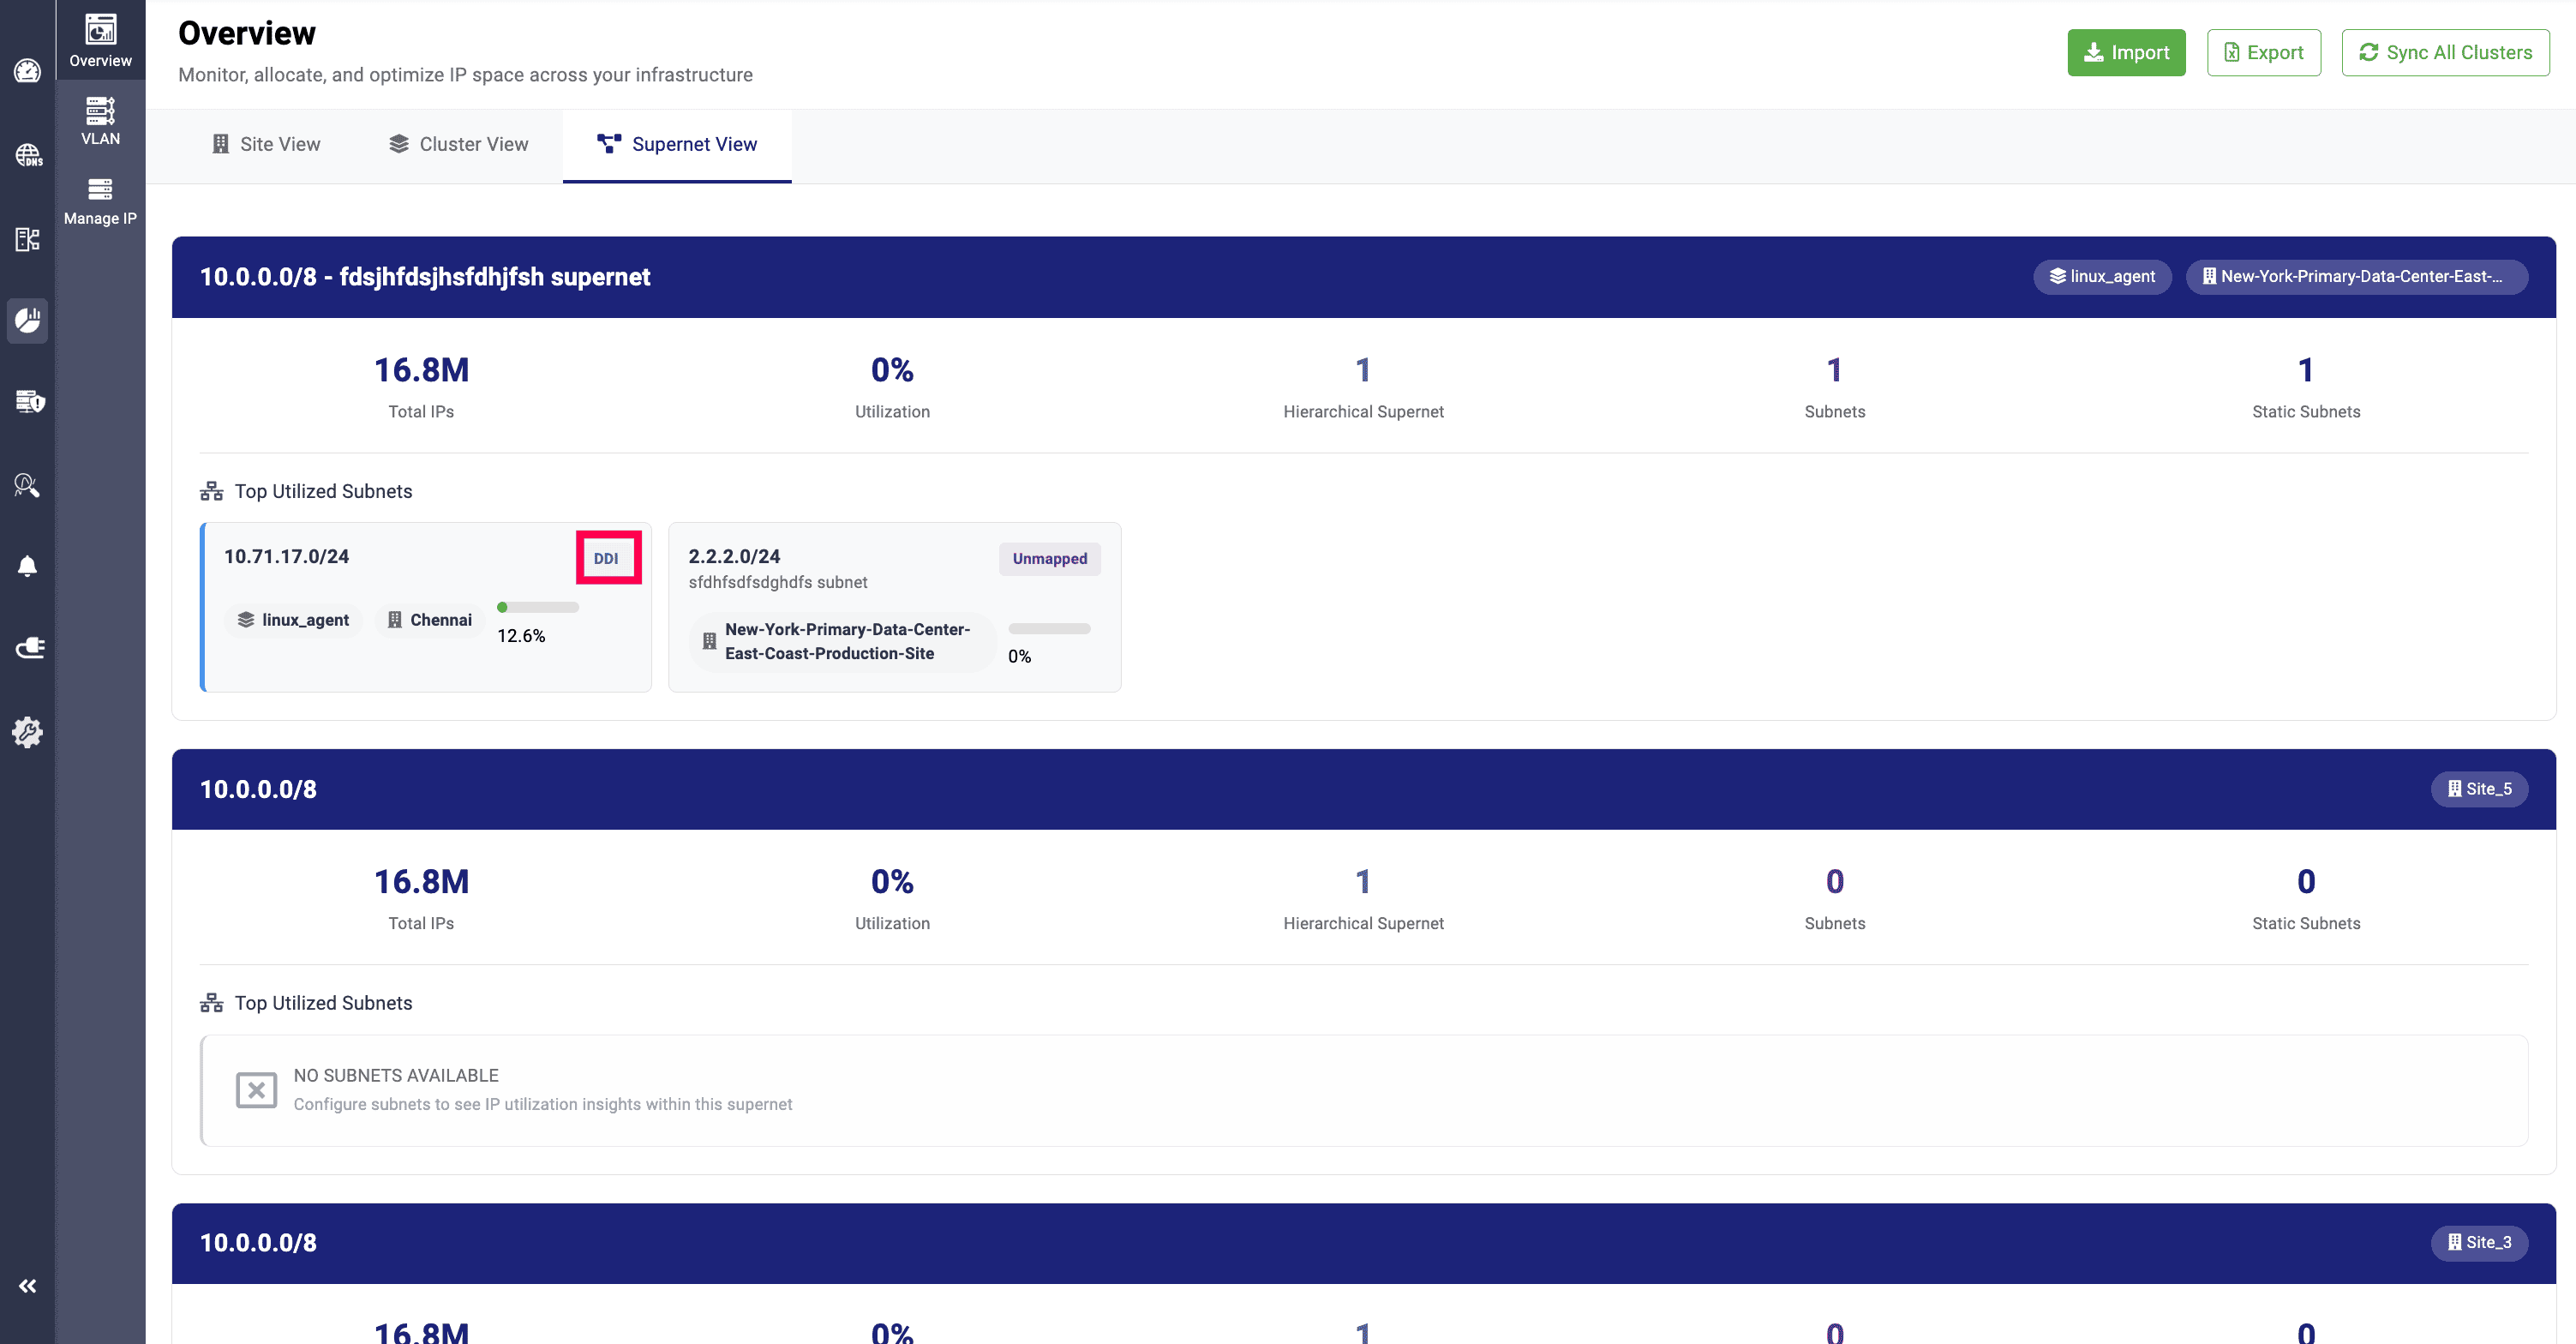
And, the supernets that are managed under DDI central are marked as DDI.
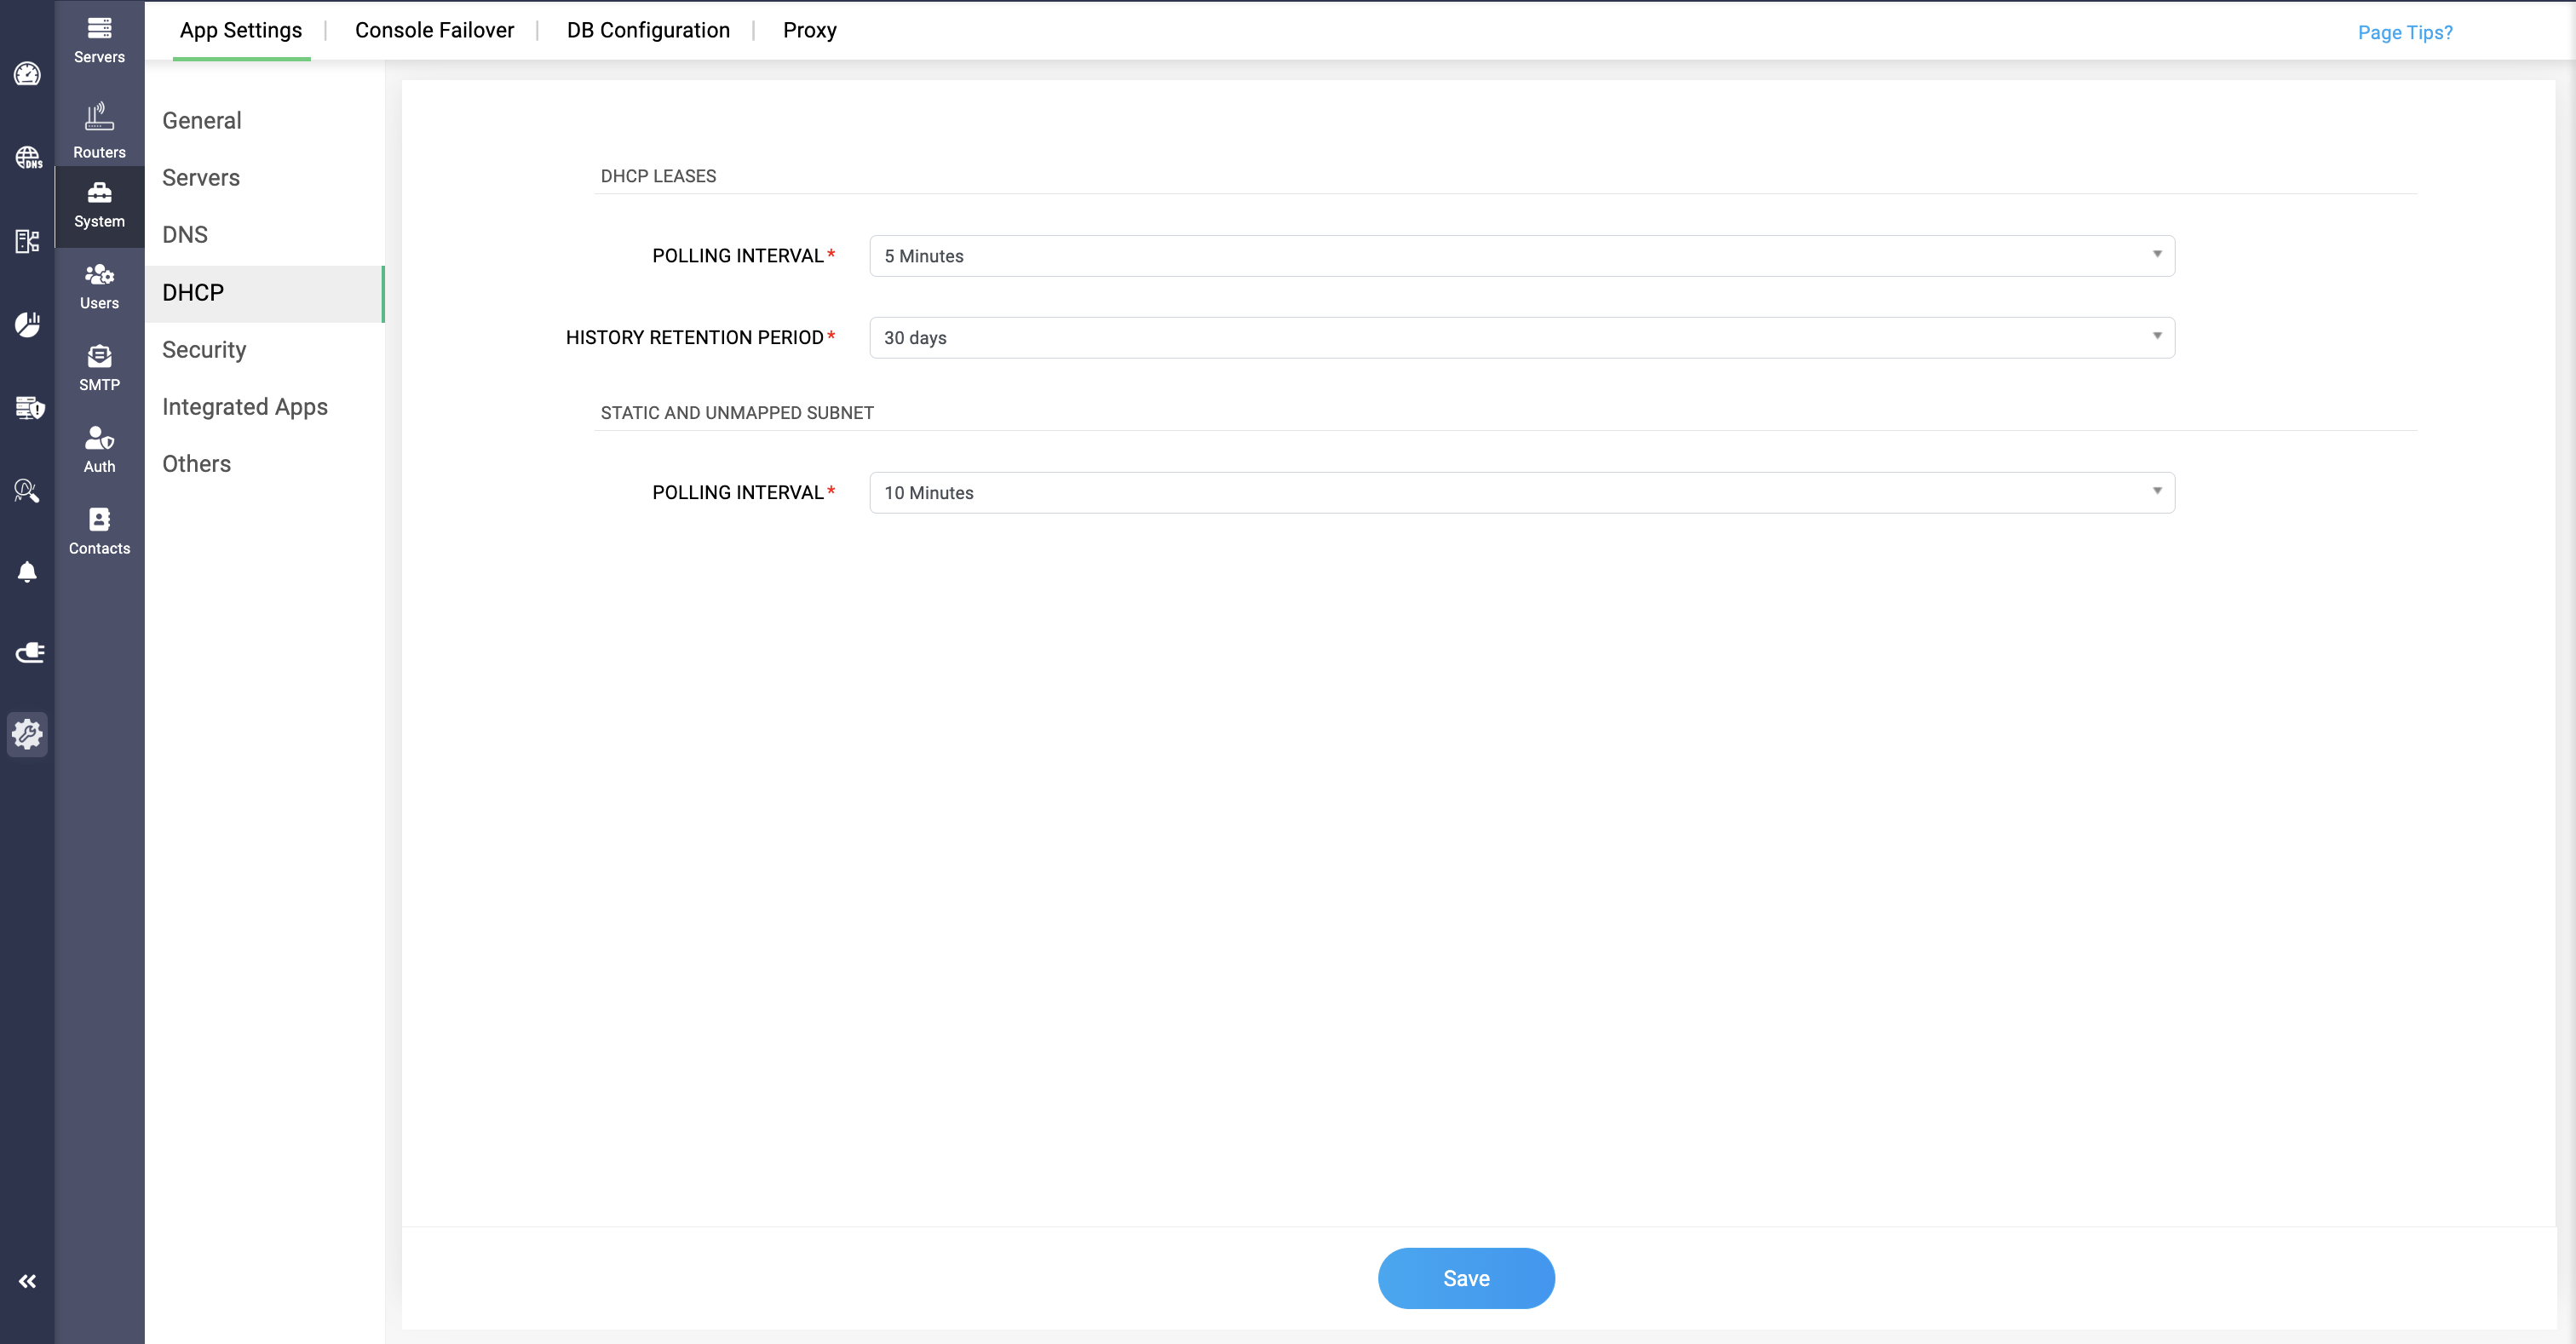
The polling interval for both Static and Unmapped subnet can be configured by going through Settings>System>App Settings>DHCP>STATIC AND UNMAPPED POLLING INTERVAL.