Managing DHCP scopes in the Linux ecosystem
DDI Central's DHCP Scope Manager provides a common interface for managing DHCP scopes across the Linux ecosystem. It supports both Legacy DHCP (ISC DHCPD) and Modern DHCP (Kea DHCP), allowing administrators to create and manage IPv4 and IPv6 subnets, host reservations, static subnets, and shared networks from a centralized workflow.
DHCP Scope Manager
A DHCP scope defines the address space and assignment policies that a DHCP server uses to allocate IP addresses and related network configuration to clients. DDI Central organizes these scopes as manageable network elements and presents a unified workflow across Legacy DHCP and Modern DHCP.
DHCP Subnets
DHCP Hosts
Network Organization
Subnets
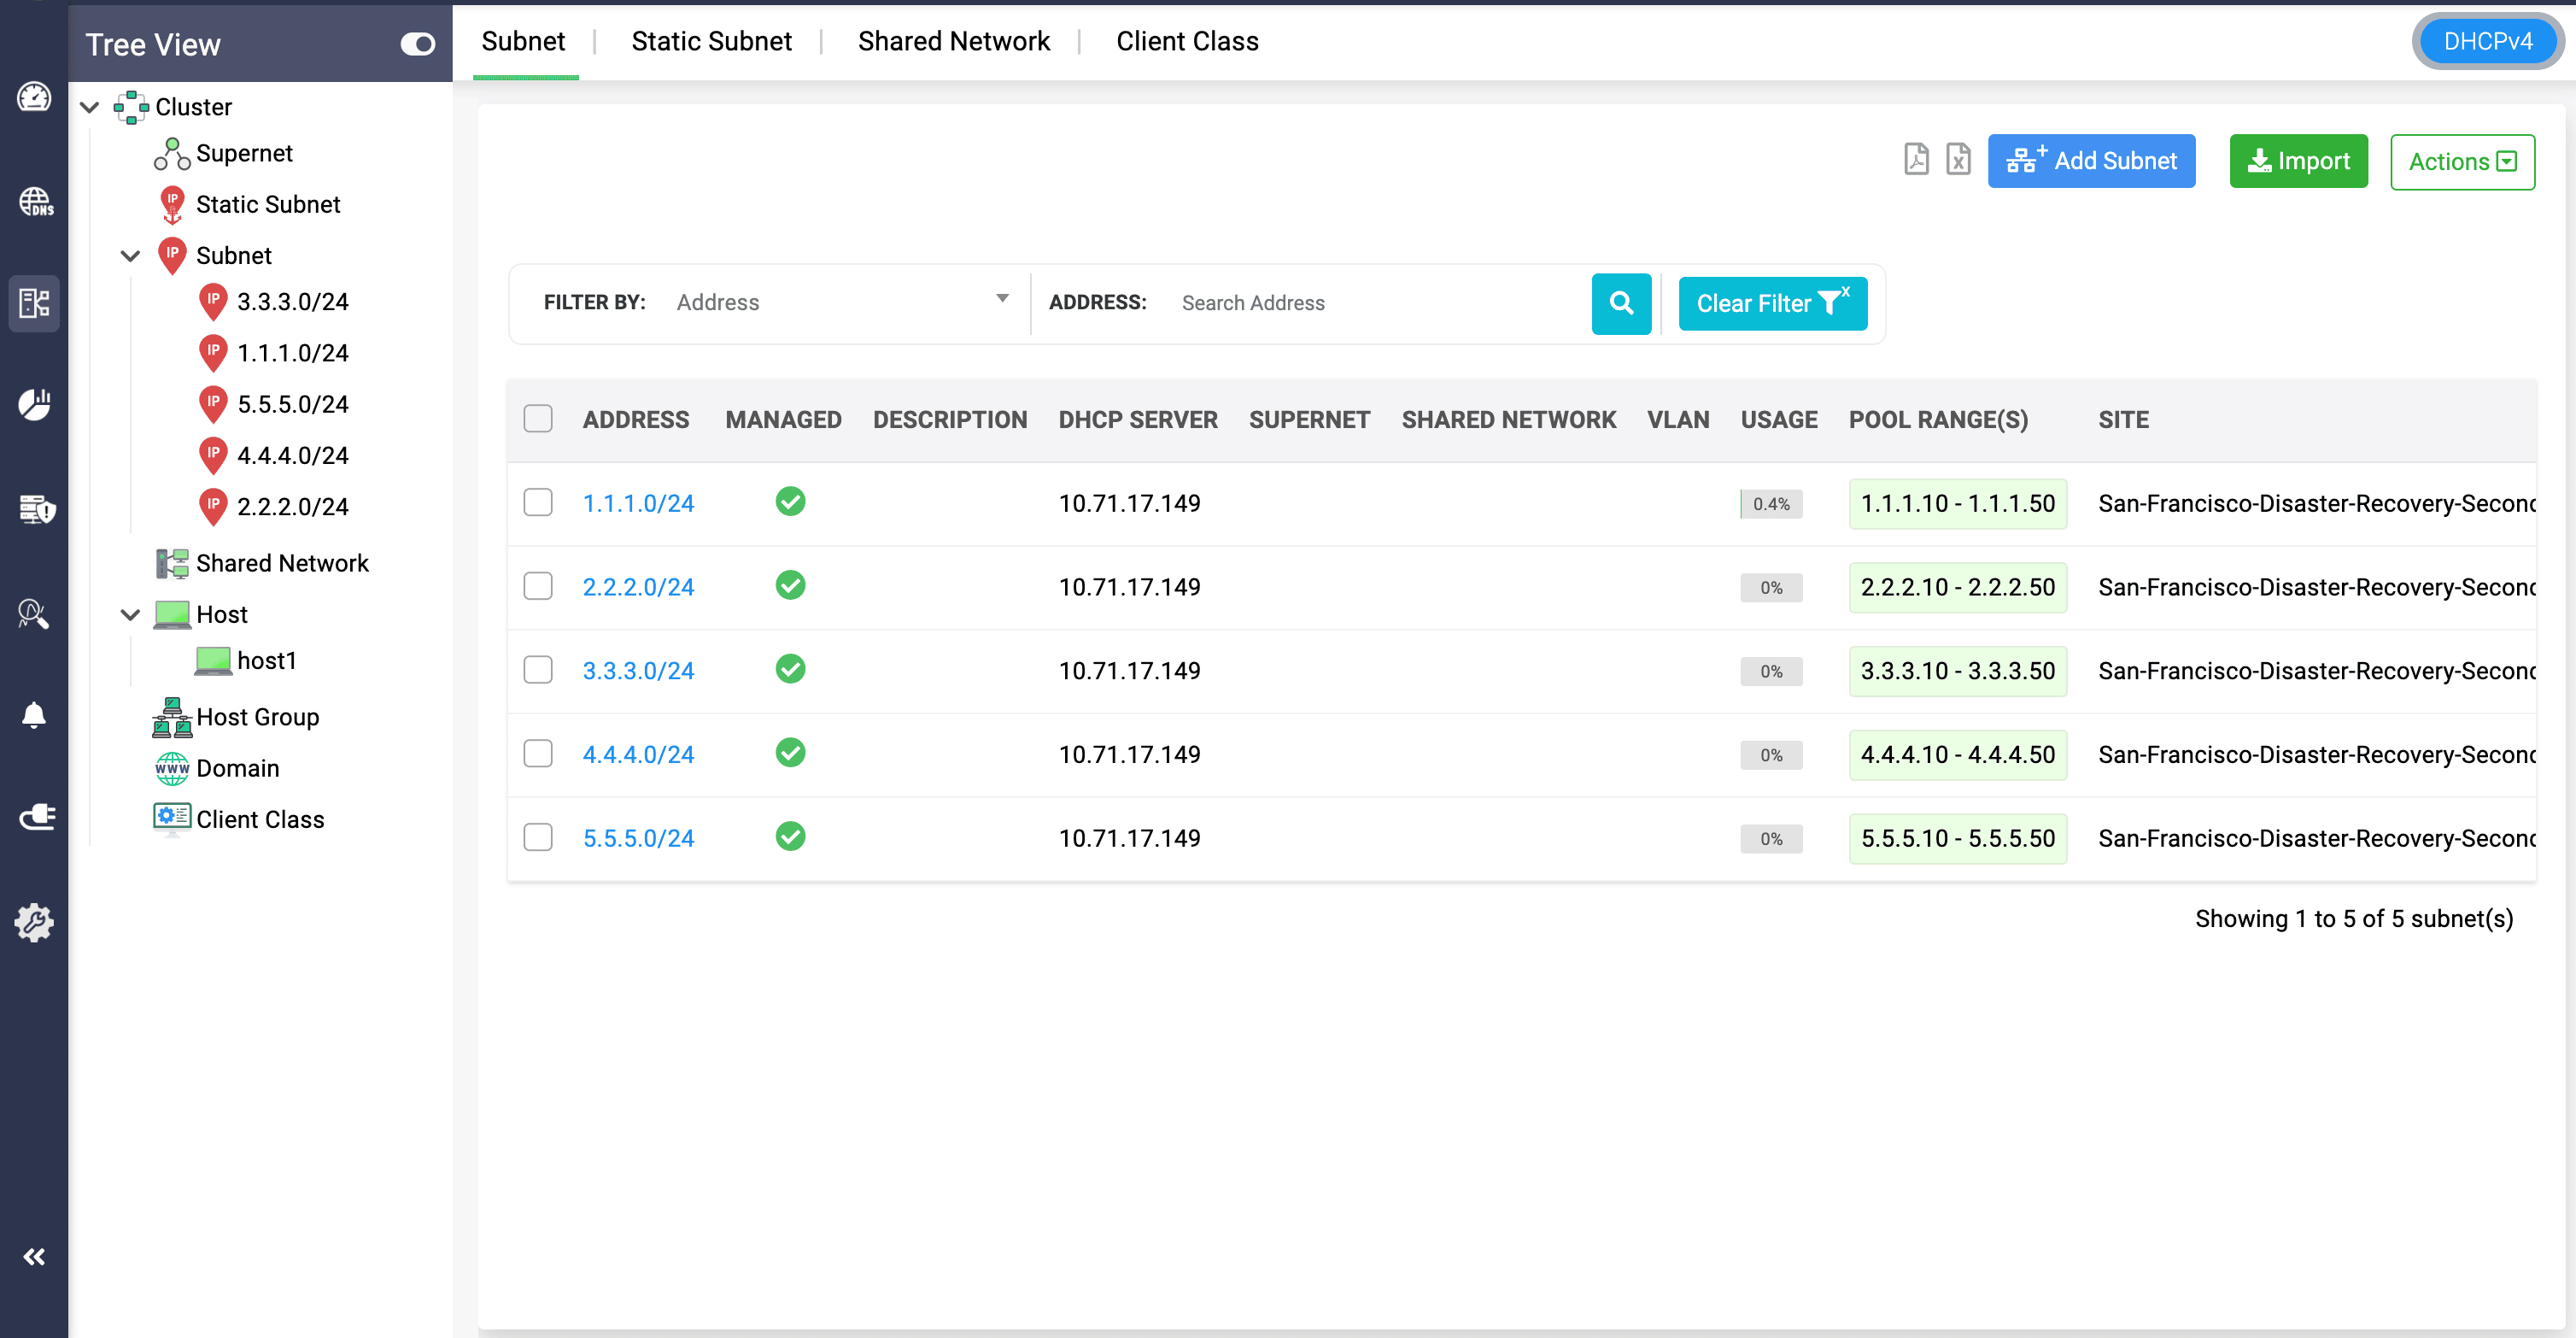
A subnet represents a basic segment of IP addresses (IPv4 or IPv6) within a network. Defining, a subnet in DDI Central is used to define a range of IP addresses that the DHCP server can assign to clients on a specific network segment.
Each subnet is defined by a range of IP addresses and a subnet mask, determining the network's address range.
DHCPv4 Subnet
A DHCPv4 subnet represents an IPv4 network segment from which the DHCP server can dynamically assign addresses to clients. DDI Central provides a common subnet-creation workflow for both Legacy DHCP and Modern DHCP.
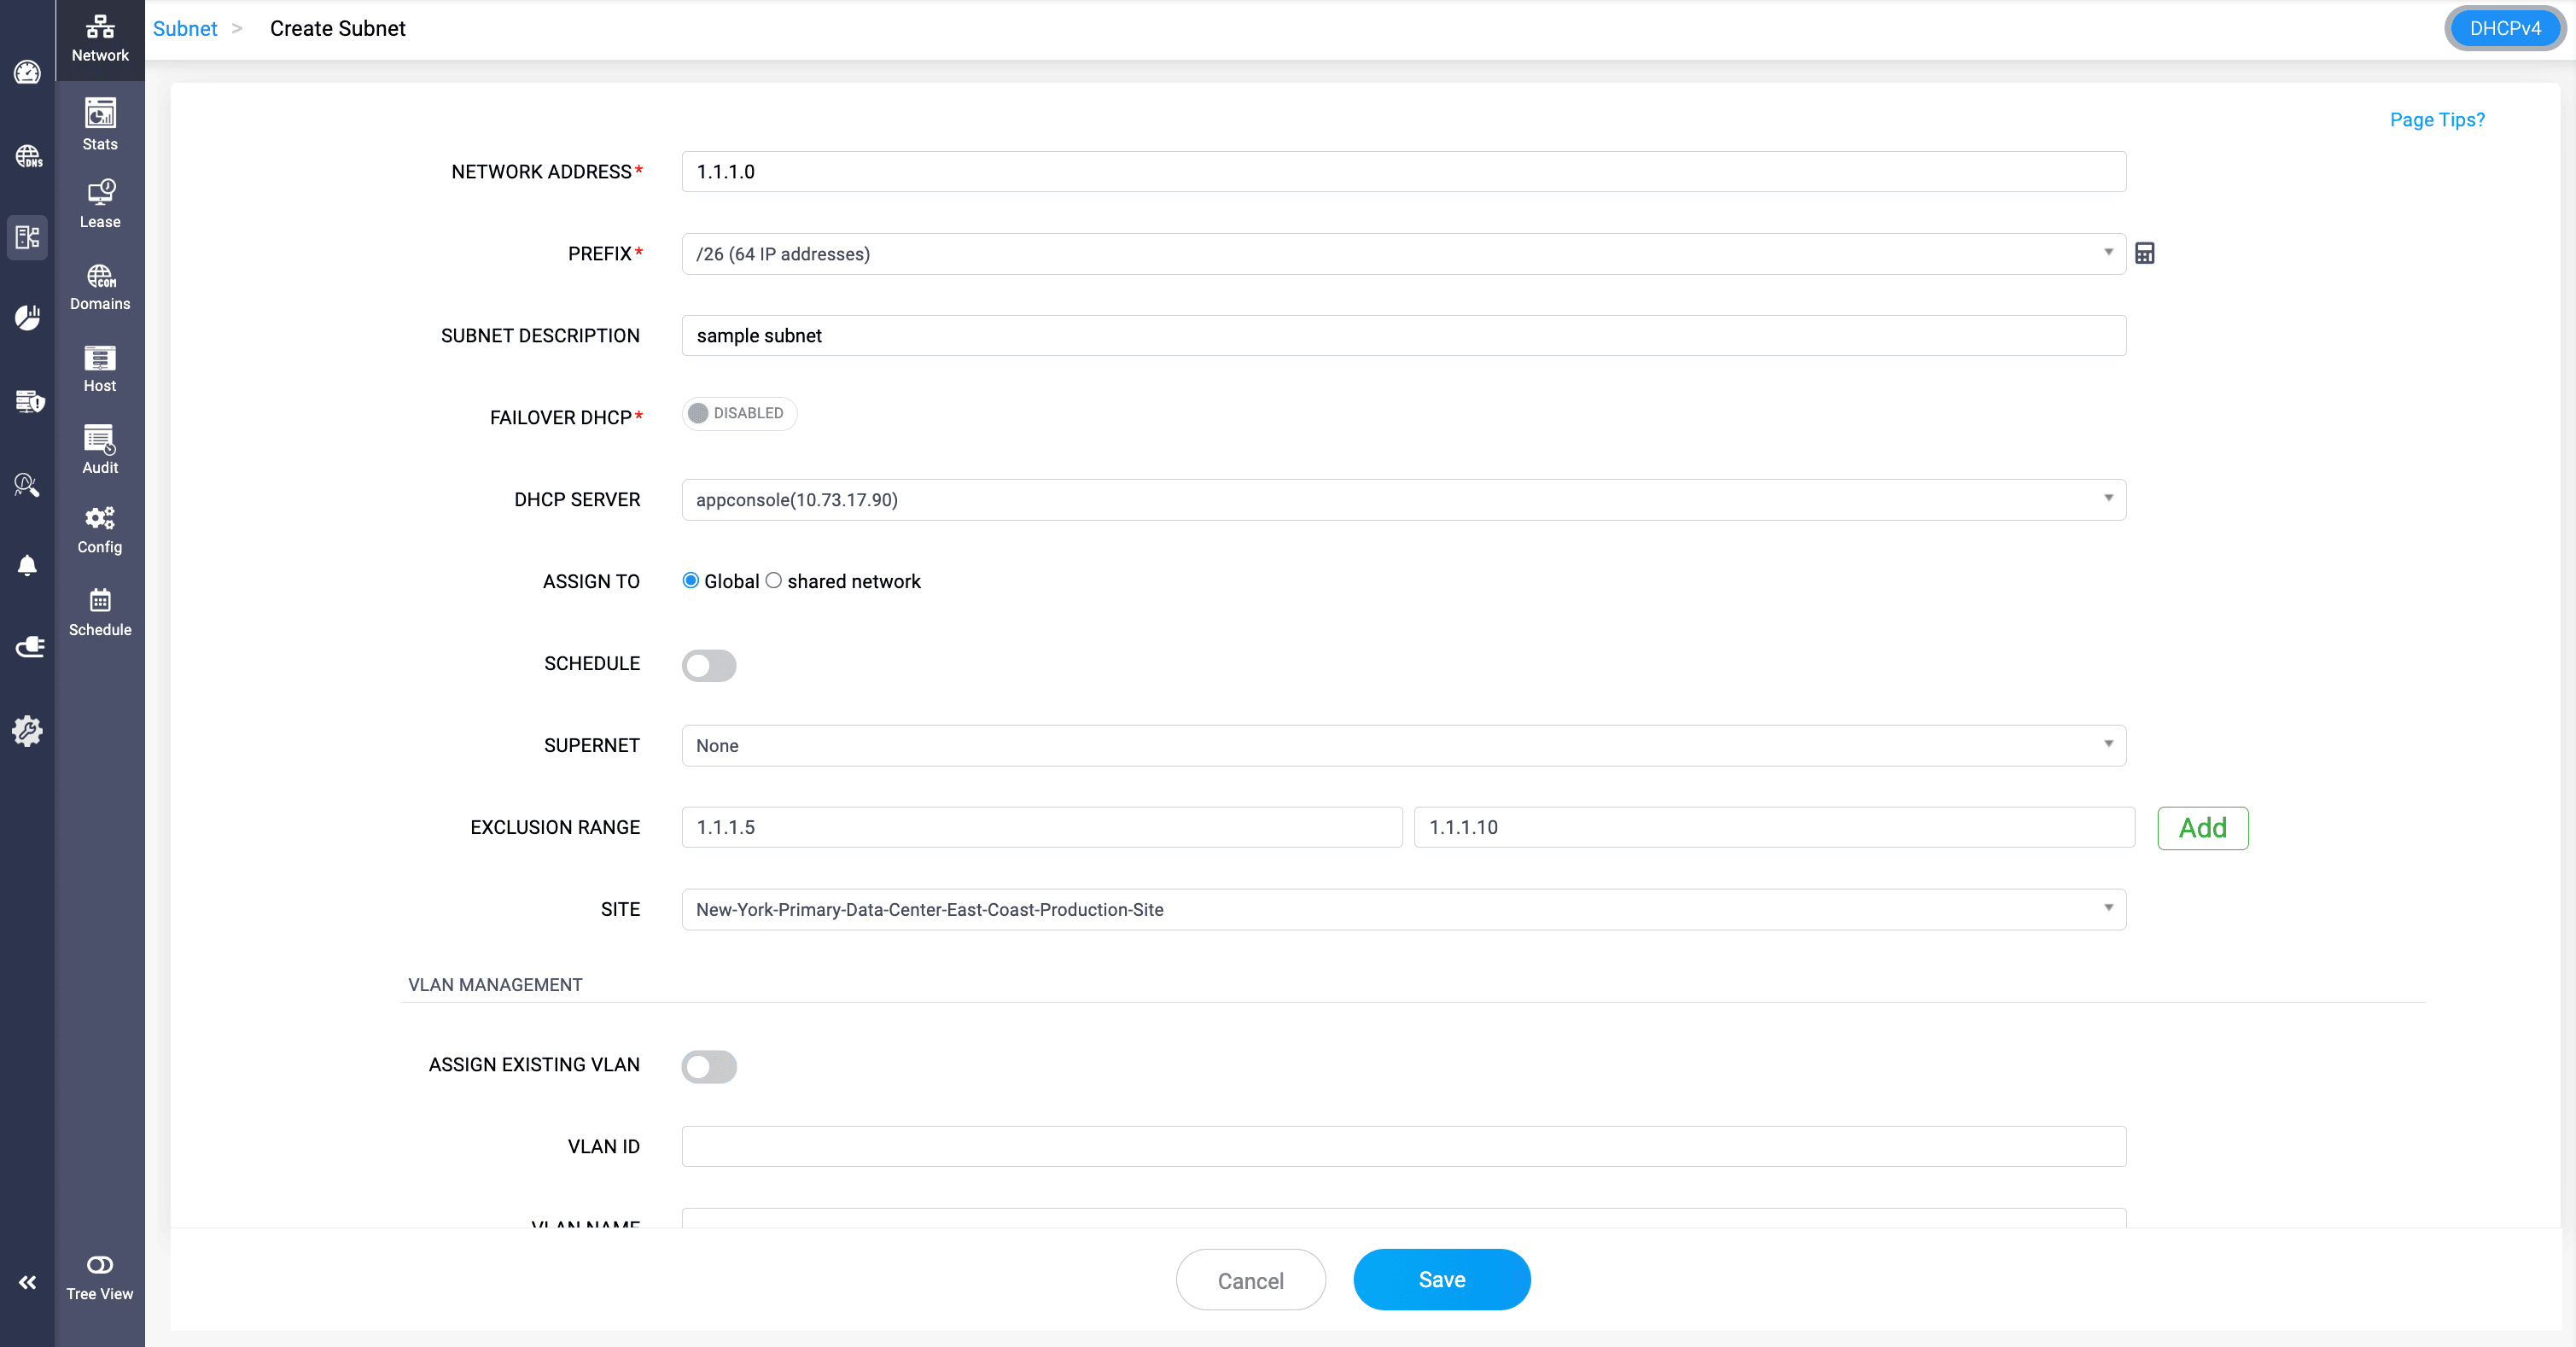
To create a DHCPv4 subnet:
- Go to DHCP > Network > Subnet.
- Switch to the DHCPv4 view, if required, and click Add Subnet.
- Specify the Network Address and Prefix to define the IPv4 address space.
- Enter a suitable Subnet Description.
- Select the DHCP Server that should manage the subnet.
- Choose whether the subnet should be assigned globally or associated with a Shared Network.
- Define the address pool or pool ranges that can be dynamically leased to clients.
- Configure an Exclusion Range for addresses that must not be dynamically assigned.
- Associate VLAN details where required.
- Assign the required DHCP Options and Custom Options.
- Click Save.
A longer prefix creates smaller subnets from the current range. Once a longer prefix is entered, DDI Central automatically loads and displays the first and last addresses for the resulting prefix range.
Legacy DHCP (ISC DHCPD) - DHCPv4 subnet
For Legacy DHCP, create and manage the subnet using the standard Scope Manager fields for network address, prefix, DHCP server, pool data, exclusions, VLAN association, and DHCP options.
Modern DHCP (Kea DHCP) - DHCPv4 subnet
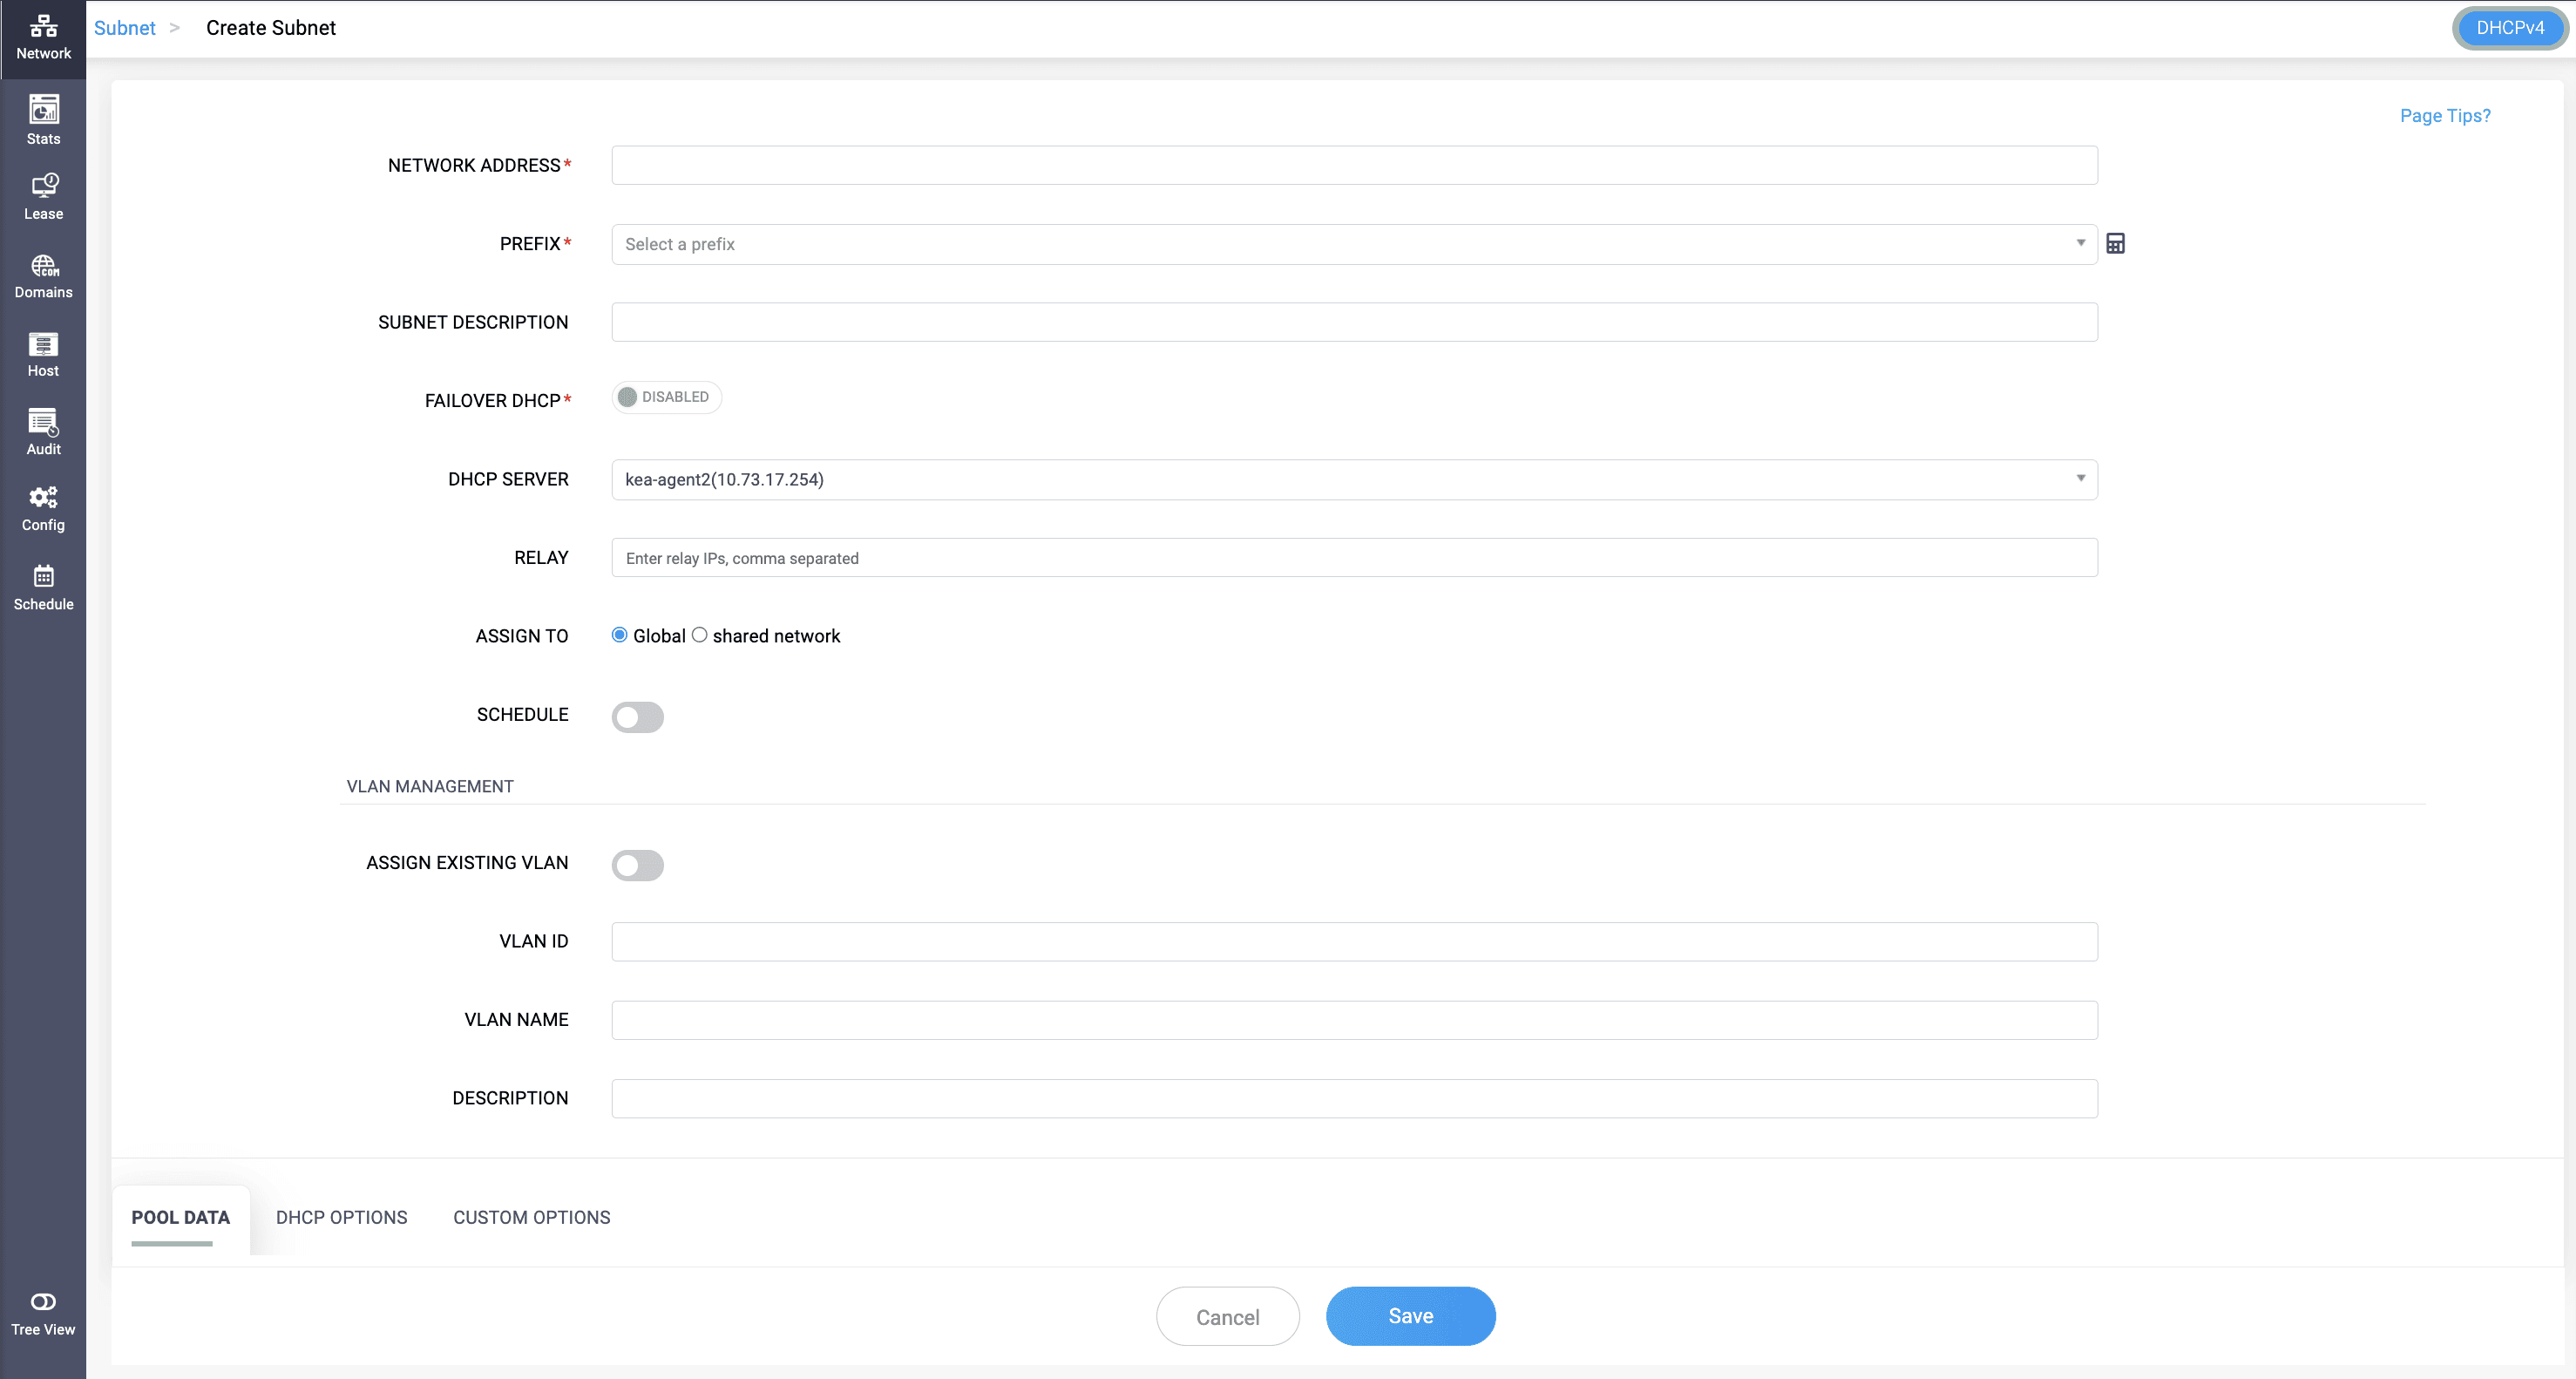
Kea subnet creation uses the same set of fields as DHCPD subnet creation, with one addition: Relay.
- RELAY: A single field, available on both Kea DHCPv4 and DHCPv6 subnets, where you enter the relay agent's IP address. It tells Kea which relay to trust for this subnet, so requests arriving through that relay get matched to the right subnet instead of falling through to the wrong pool.
Pool Data
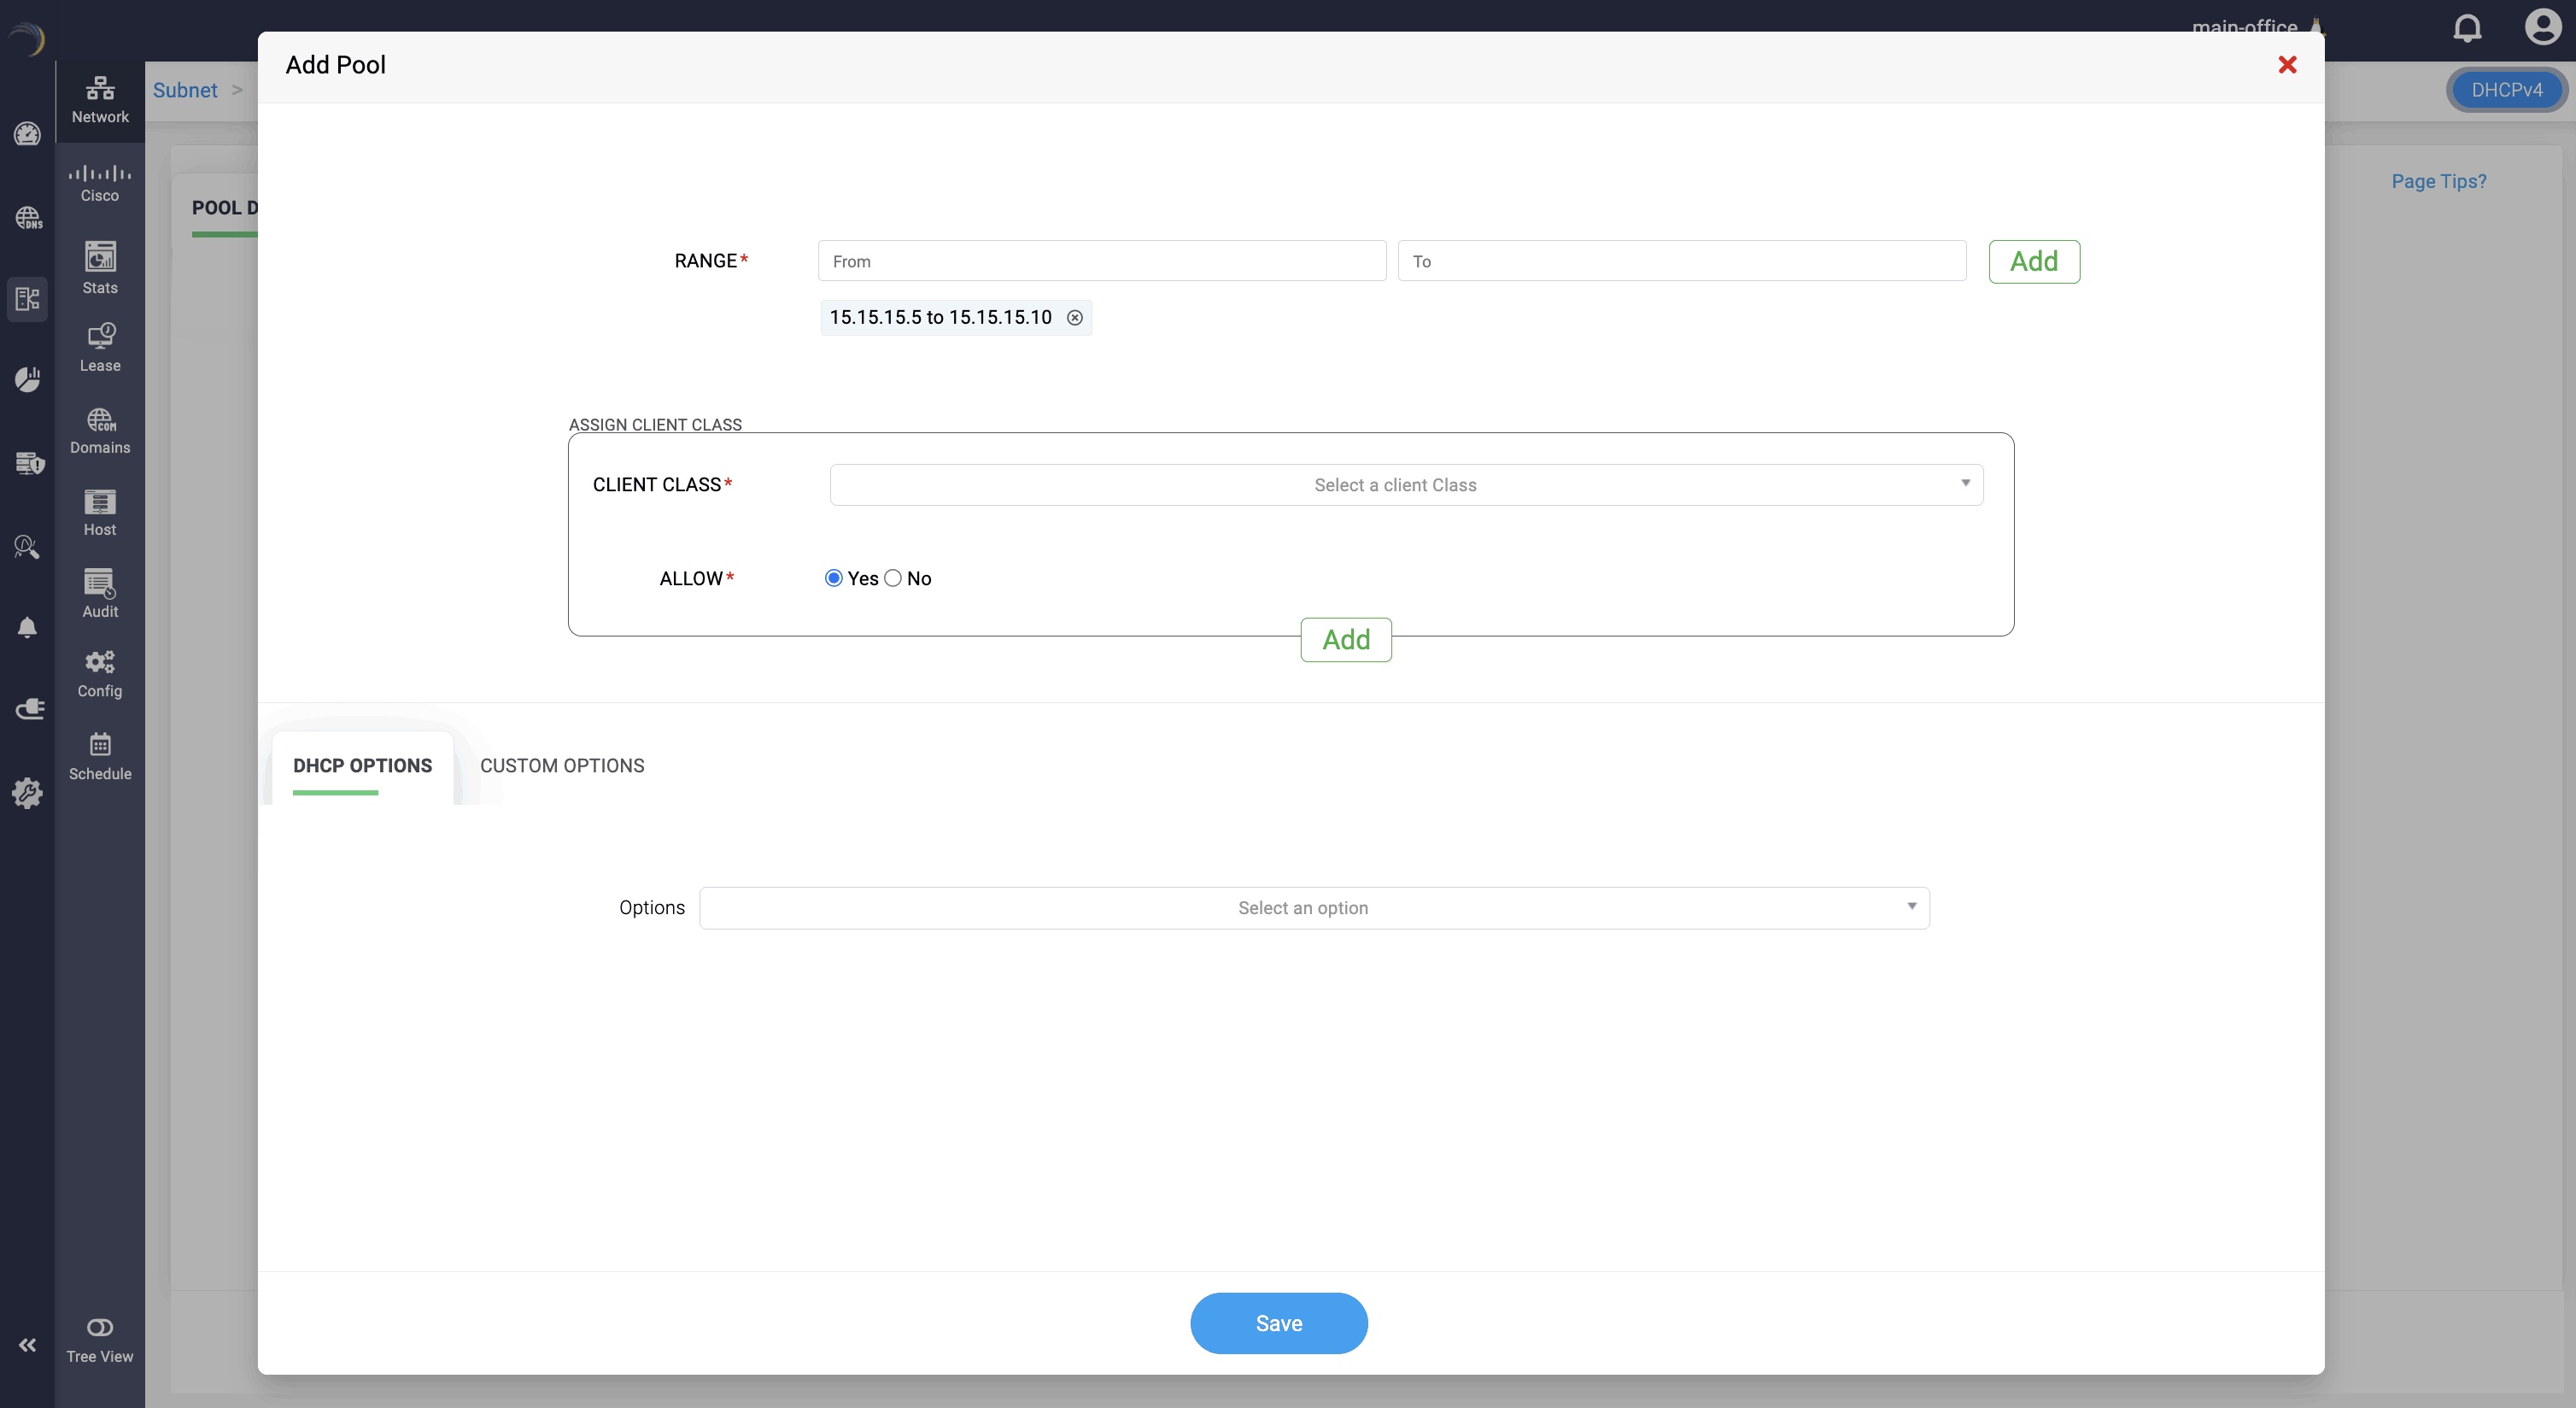
Declare one or more pool ranges within the defined subnet. Each pool can be linked with specific client classes, enabling you to:
- Customize address assignment based on device type or identity.
- Apply targeted DHCP options or custom options
This ensures precise control over how addresses and options are distributed within the subnet.
DHCP Options
Select from a list of standard DHCPv6 options (such as DNS servers, domain search lists, preferred lifetime, etc.) to be associated with the subnet or specific pools. These options help define the behavior and network parameters for the assigned clients.
Custom Options
Define and assign custom DHCPv6 options using option codes and hexadecimal values or string formats, as required by specific applications or hardware needs. This allows support for vendor-specific or non-standard configurations.
Click Save to finalize the configurations.
Address Pools
- An address pool within a subnet specifies the range of IP addresses available for dynamic assignment.
- Pools are used to control the distribution of IP addresses to clients within a subnet. They allow for more granular management of IP address allocations, including setting different options or restrictions for different pools within the same subnet.
- When configuring options at the subnet level, you can add and define the pool or address range within the subnet that should be configured with a specific set of options. Multiple combinations of options can be applied to various address ranges within the same subnet.
- Address pool configurations in a subnet can either allow or deny specific client classes for dynamic IP provisioning. If "Allow" is set to "yes," the pool permits provisioning for the chosen client class, while setting it to "NO" excludes provisioning for that class. Choosing "none" means the address pool is open for dynamic provisioning to all clients in the subnet without class restrictions.
DHCPv6 Subnet
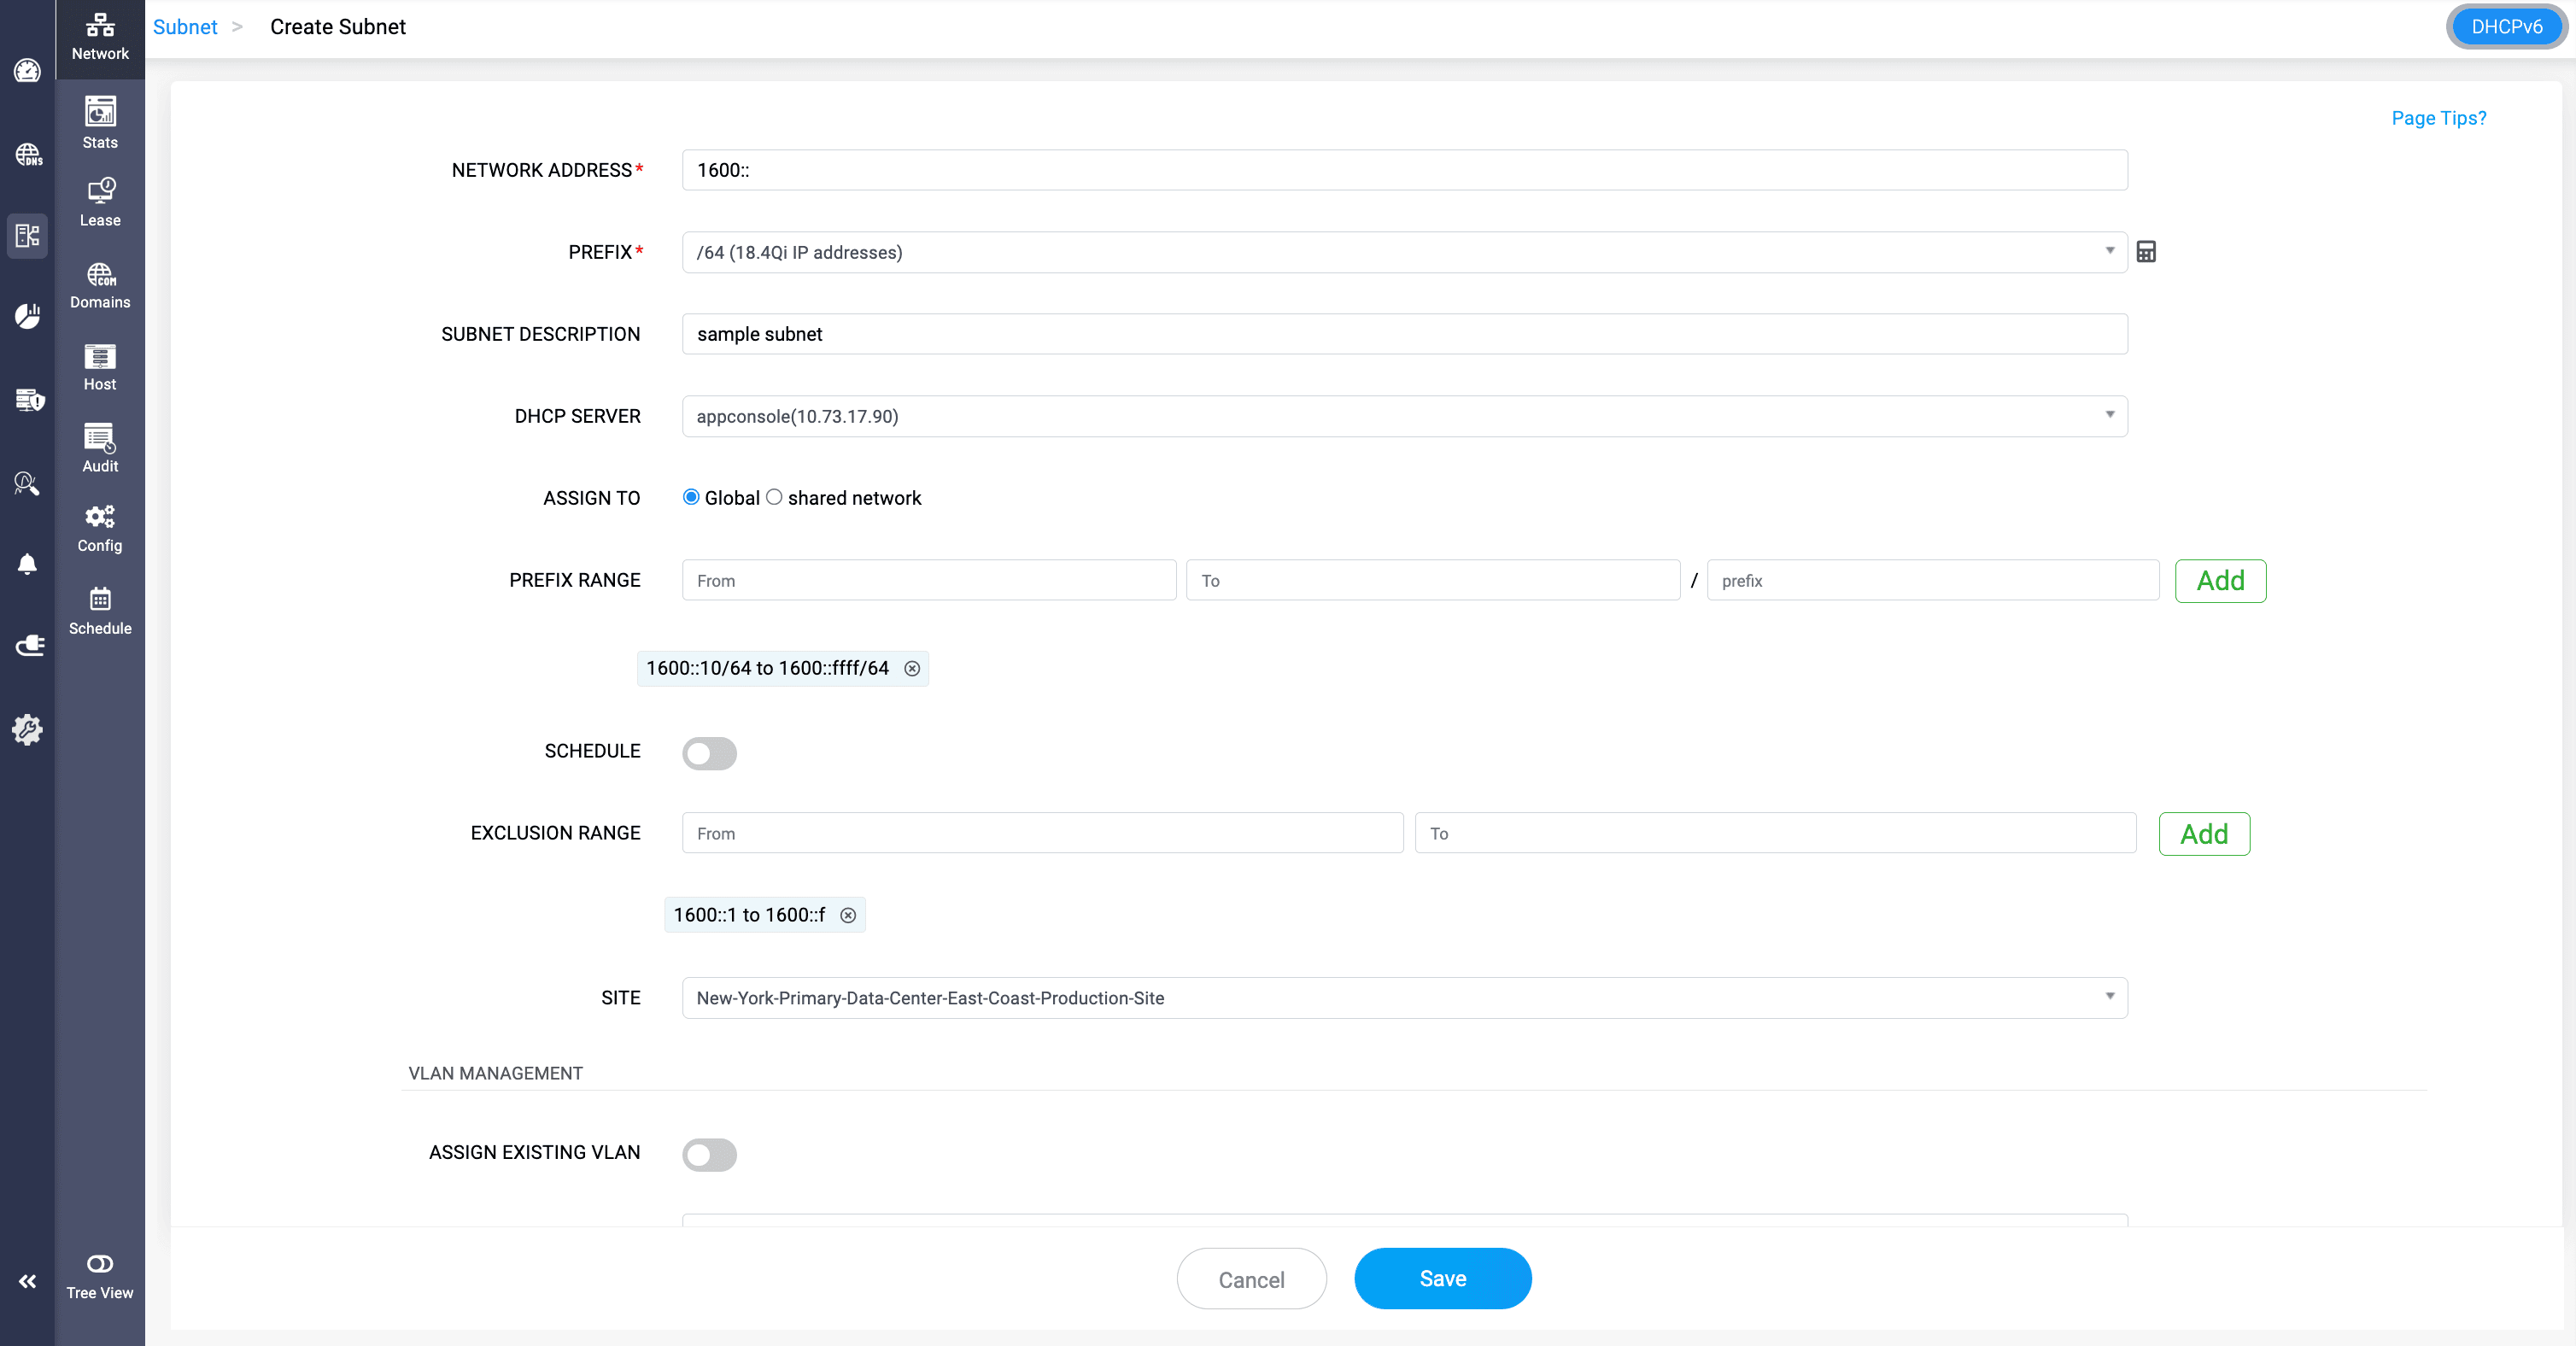
A DHCPv6 subnet defines an IPv6 network segment and its address or prefix-assignment policy. DDI Central supports DHCPv6 subnet management for both Legacy DHCP and Modern DHCP through the same Scope Manager workflow.
To create a DHCPv6 subnet:
- Go to DHCP > Network > Subnet and switch to the DHCPv6 view.
- Click Add Subnet.
- Network Address: Specify the base IPv6 address of the subnet.
- Prefix: Specify the prefix length that defines the subnet size.
- Subnet Description: Enter optional information that identifies the purpose of the subnet.
- DHCP Server: Select the server that should manage IPv6 address assignment.
- Assign To: Choose whether the subnet applies globally or belongs to a shared network.
- Prefix Range: Define a more granular prefix range where required.
- Schedule: Enable the subnet for a scheduled activation window, where applicable.
- Exclusion Range: Reserve addresses that should not be assigned dynamically.
- Associate existing VLAN information or define VLAN details where required.
- Define Pool Data, standard DHCP Options, and Custom Options.
- Click Save.
- Kea DHCPv6 subnet creation includes the additional Relay field.
- Kea DHCPv6 also supports enabling DHCP Failover and selecting the server that participates in the failover mechanism. DHCPv6 failover is not available for Legacy DHCP (ISC DHCPD) in this workflow.
Legacy DHCP (ISC DHCPD) - DHCPv6 subnet
Legacy DHCP uses the common DHCPv6 subnet fields for network addressing, prefix range, pool data, exclusions, VLAN association, and options. DHCPv6 failover is not exposed for ISC DHCPD.
Modern DHCP (Kea DHCP) - DHCPv6 subnet

Kea DHCPv6 subnet creation includes a DHCP Failover option with no DHCPD equivalent — DHCPD has no failover support for IPv6 at all. Enable it and select the peer server for the failover relationship.
Prefix delegation for Modern DHCPD6
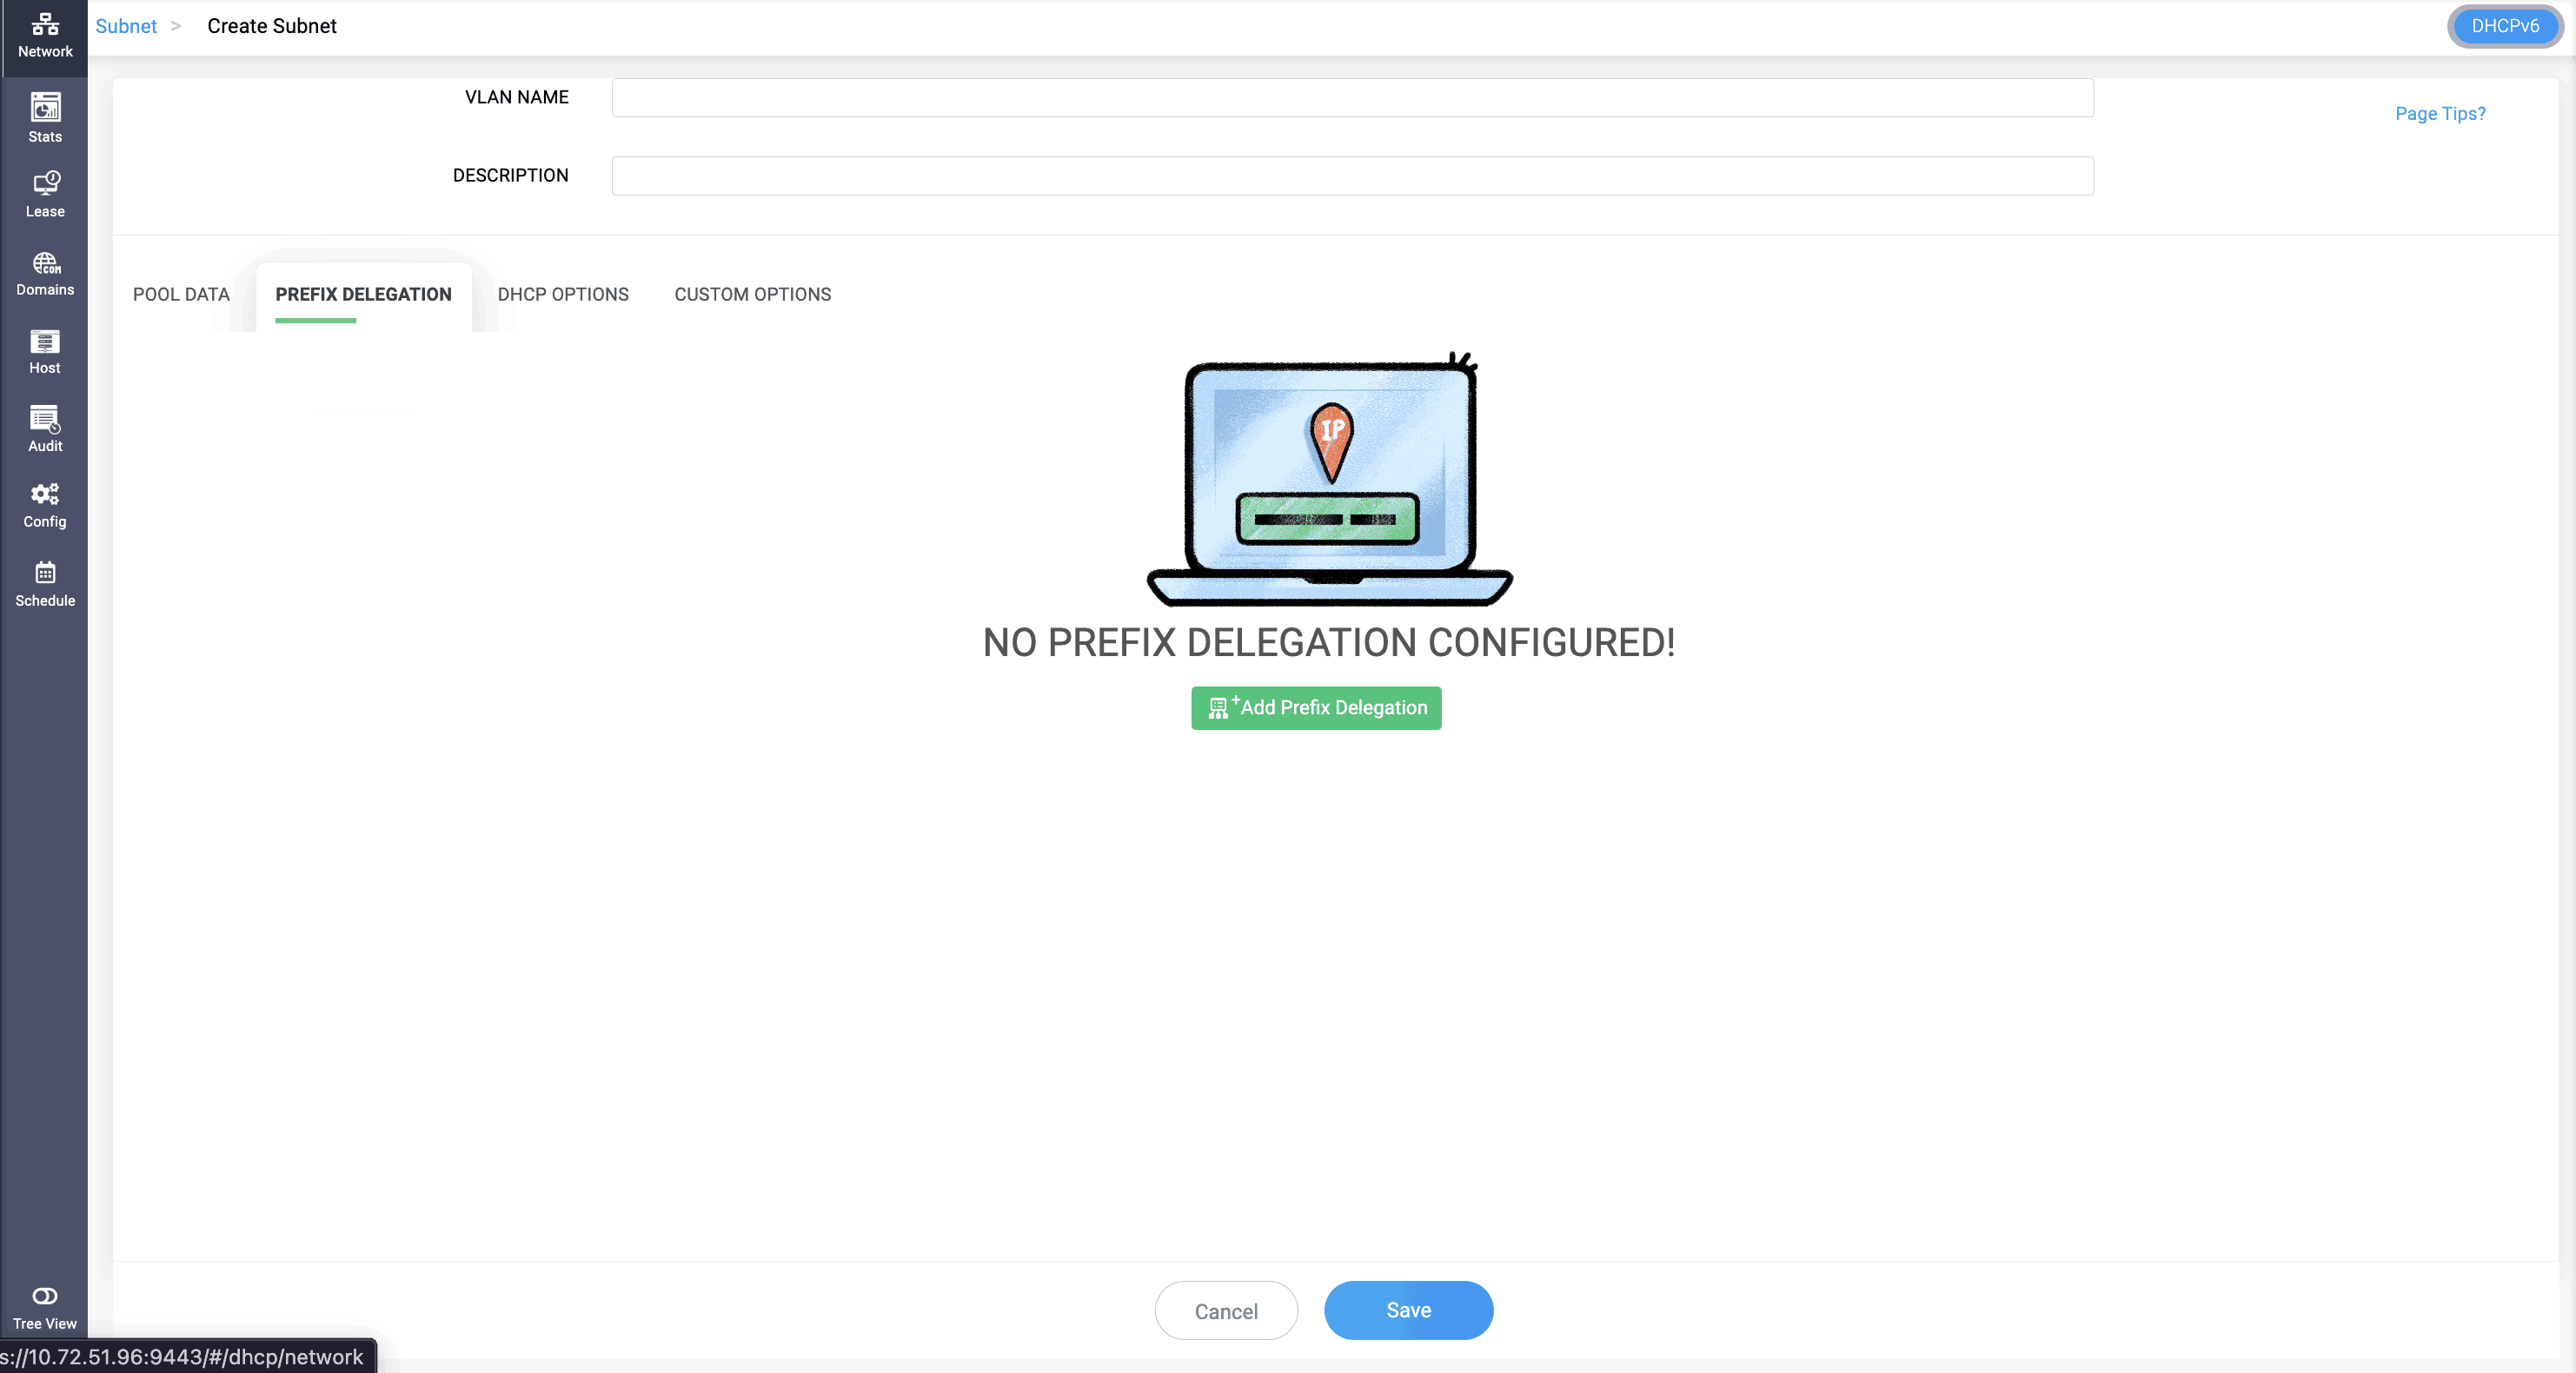
Kea DHCPv6 supports Prefix Delegation (PD) pools, which allow the server to delegate IPv6 prefixes to requesting clients.

- PREFIX: Specifies the prefix of the prefix delegation pool.
- PREFIX LENGTH: Specifies the length of the prefix used for the prefix delegation pool.
- DELEGATED LENGTH: Specifies the length of the prefixes delegated to clients.Note: The Delegated length value must be greater than the prefix length value.
- EXCLUDED PREFIX: Specifies the prefix to be excluded from the delegated prefix.
- EXCLUDED PREFIX LENGTH: Specifies the length of the excluded prefix.
To create a custom column, select the **Custom Column** option from the **Actions** dropdown and enter the column name and default value to be displayed. These values can be edited on the **Edit Subnet** page.


You can view all the custom columns created by selecting the **Columns** dropdown option. You can also deselect columns to prevent them from being displayed.

When importing data from a CSV file, create and add the custom columns to the table beforehand. This ensures that the values in the custom columns in your CSV file are imported seamlessly into the application.

DHCPv4 Host
A DHCPv4 host, or DHCP reservation, maps a client to a fixed IPv4 address and related DHCP settings. Reservations are typically identified using the client's MAC address so the same client receives the intended address and configuration consistently.
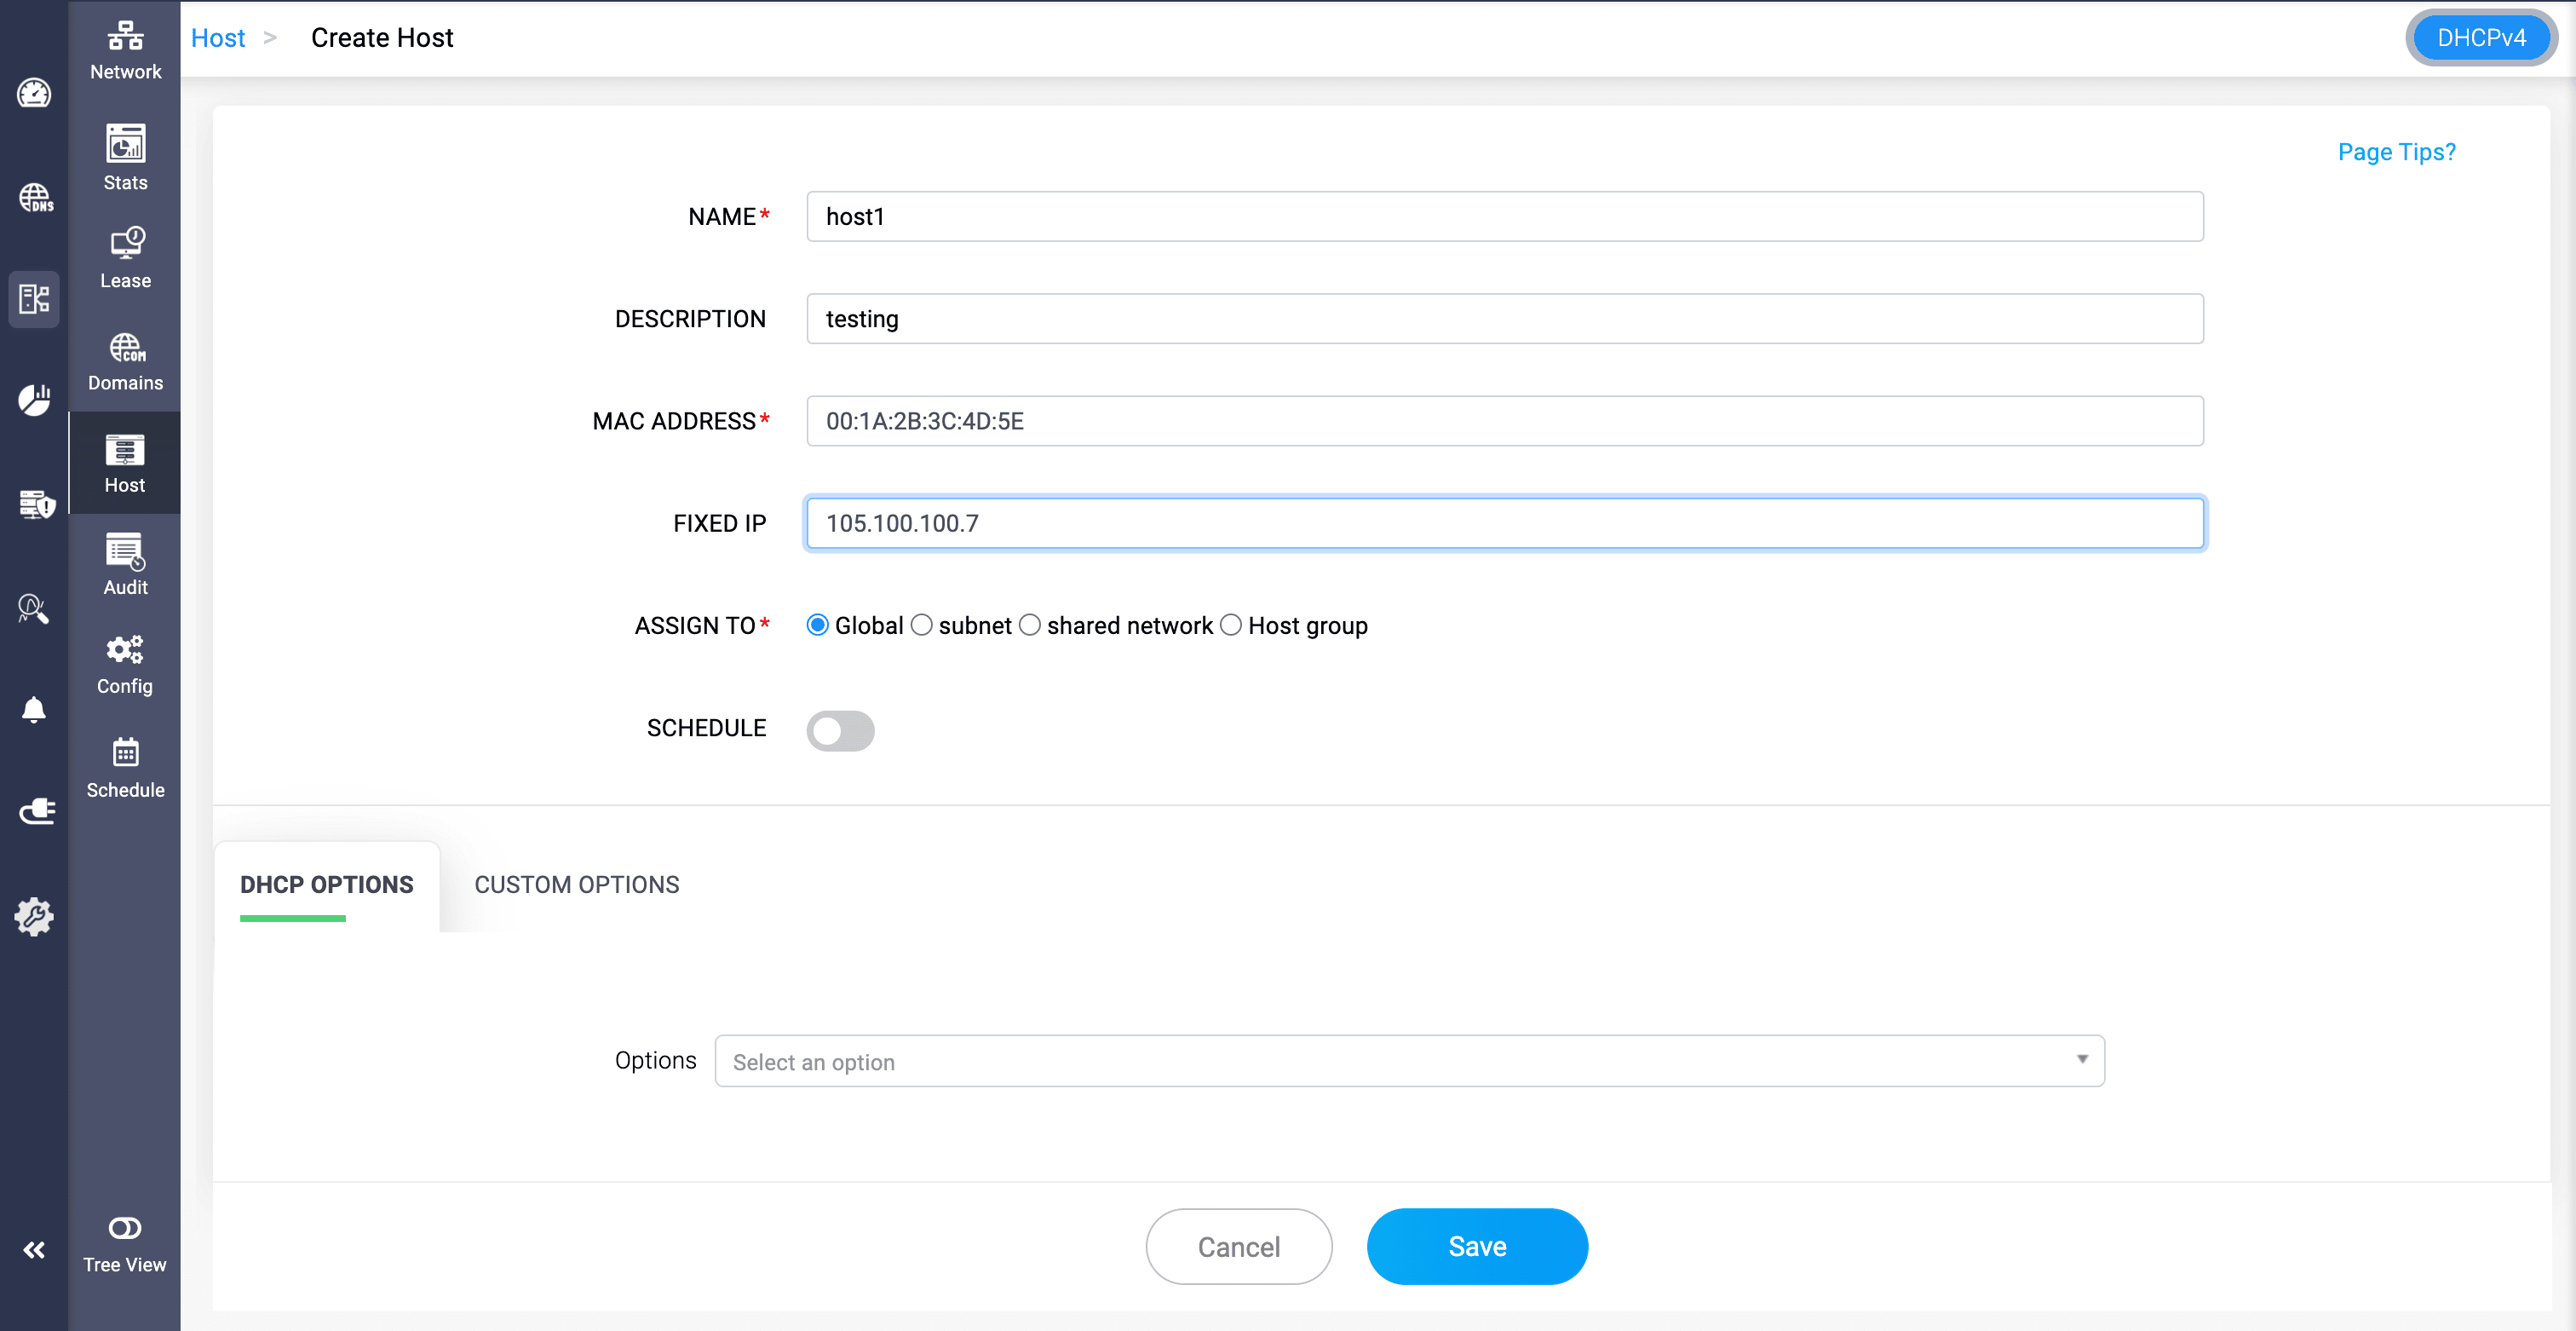
To create a DHCPv4 host:
- Go to DHCP > Network > Host.
- Switch to the DHCPv4 view and click Add Host.
- Enter a unique Name and optional Description.
- Enter the client's MAC Address.
- Specify the Fixed IP address to be reserved for the client.
- Assign the reservation to the required scope, where applicable.
- Configure DHCP options or custom options as required.
- Click Save.
Legacy DHCP (ISC DHCPD) - DHCPv4 host
Legacy DHCP uses the standard host-reservation workflow to bind a MAC address to a fixed IPv4 address and host-specific settings.
Modern DHCP (Kea DHCP) - DHCPv4 host

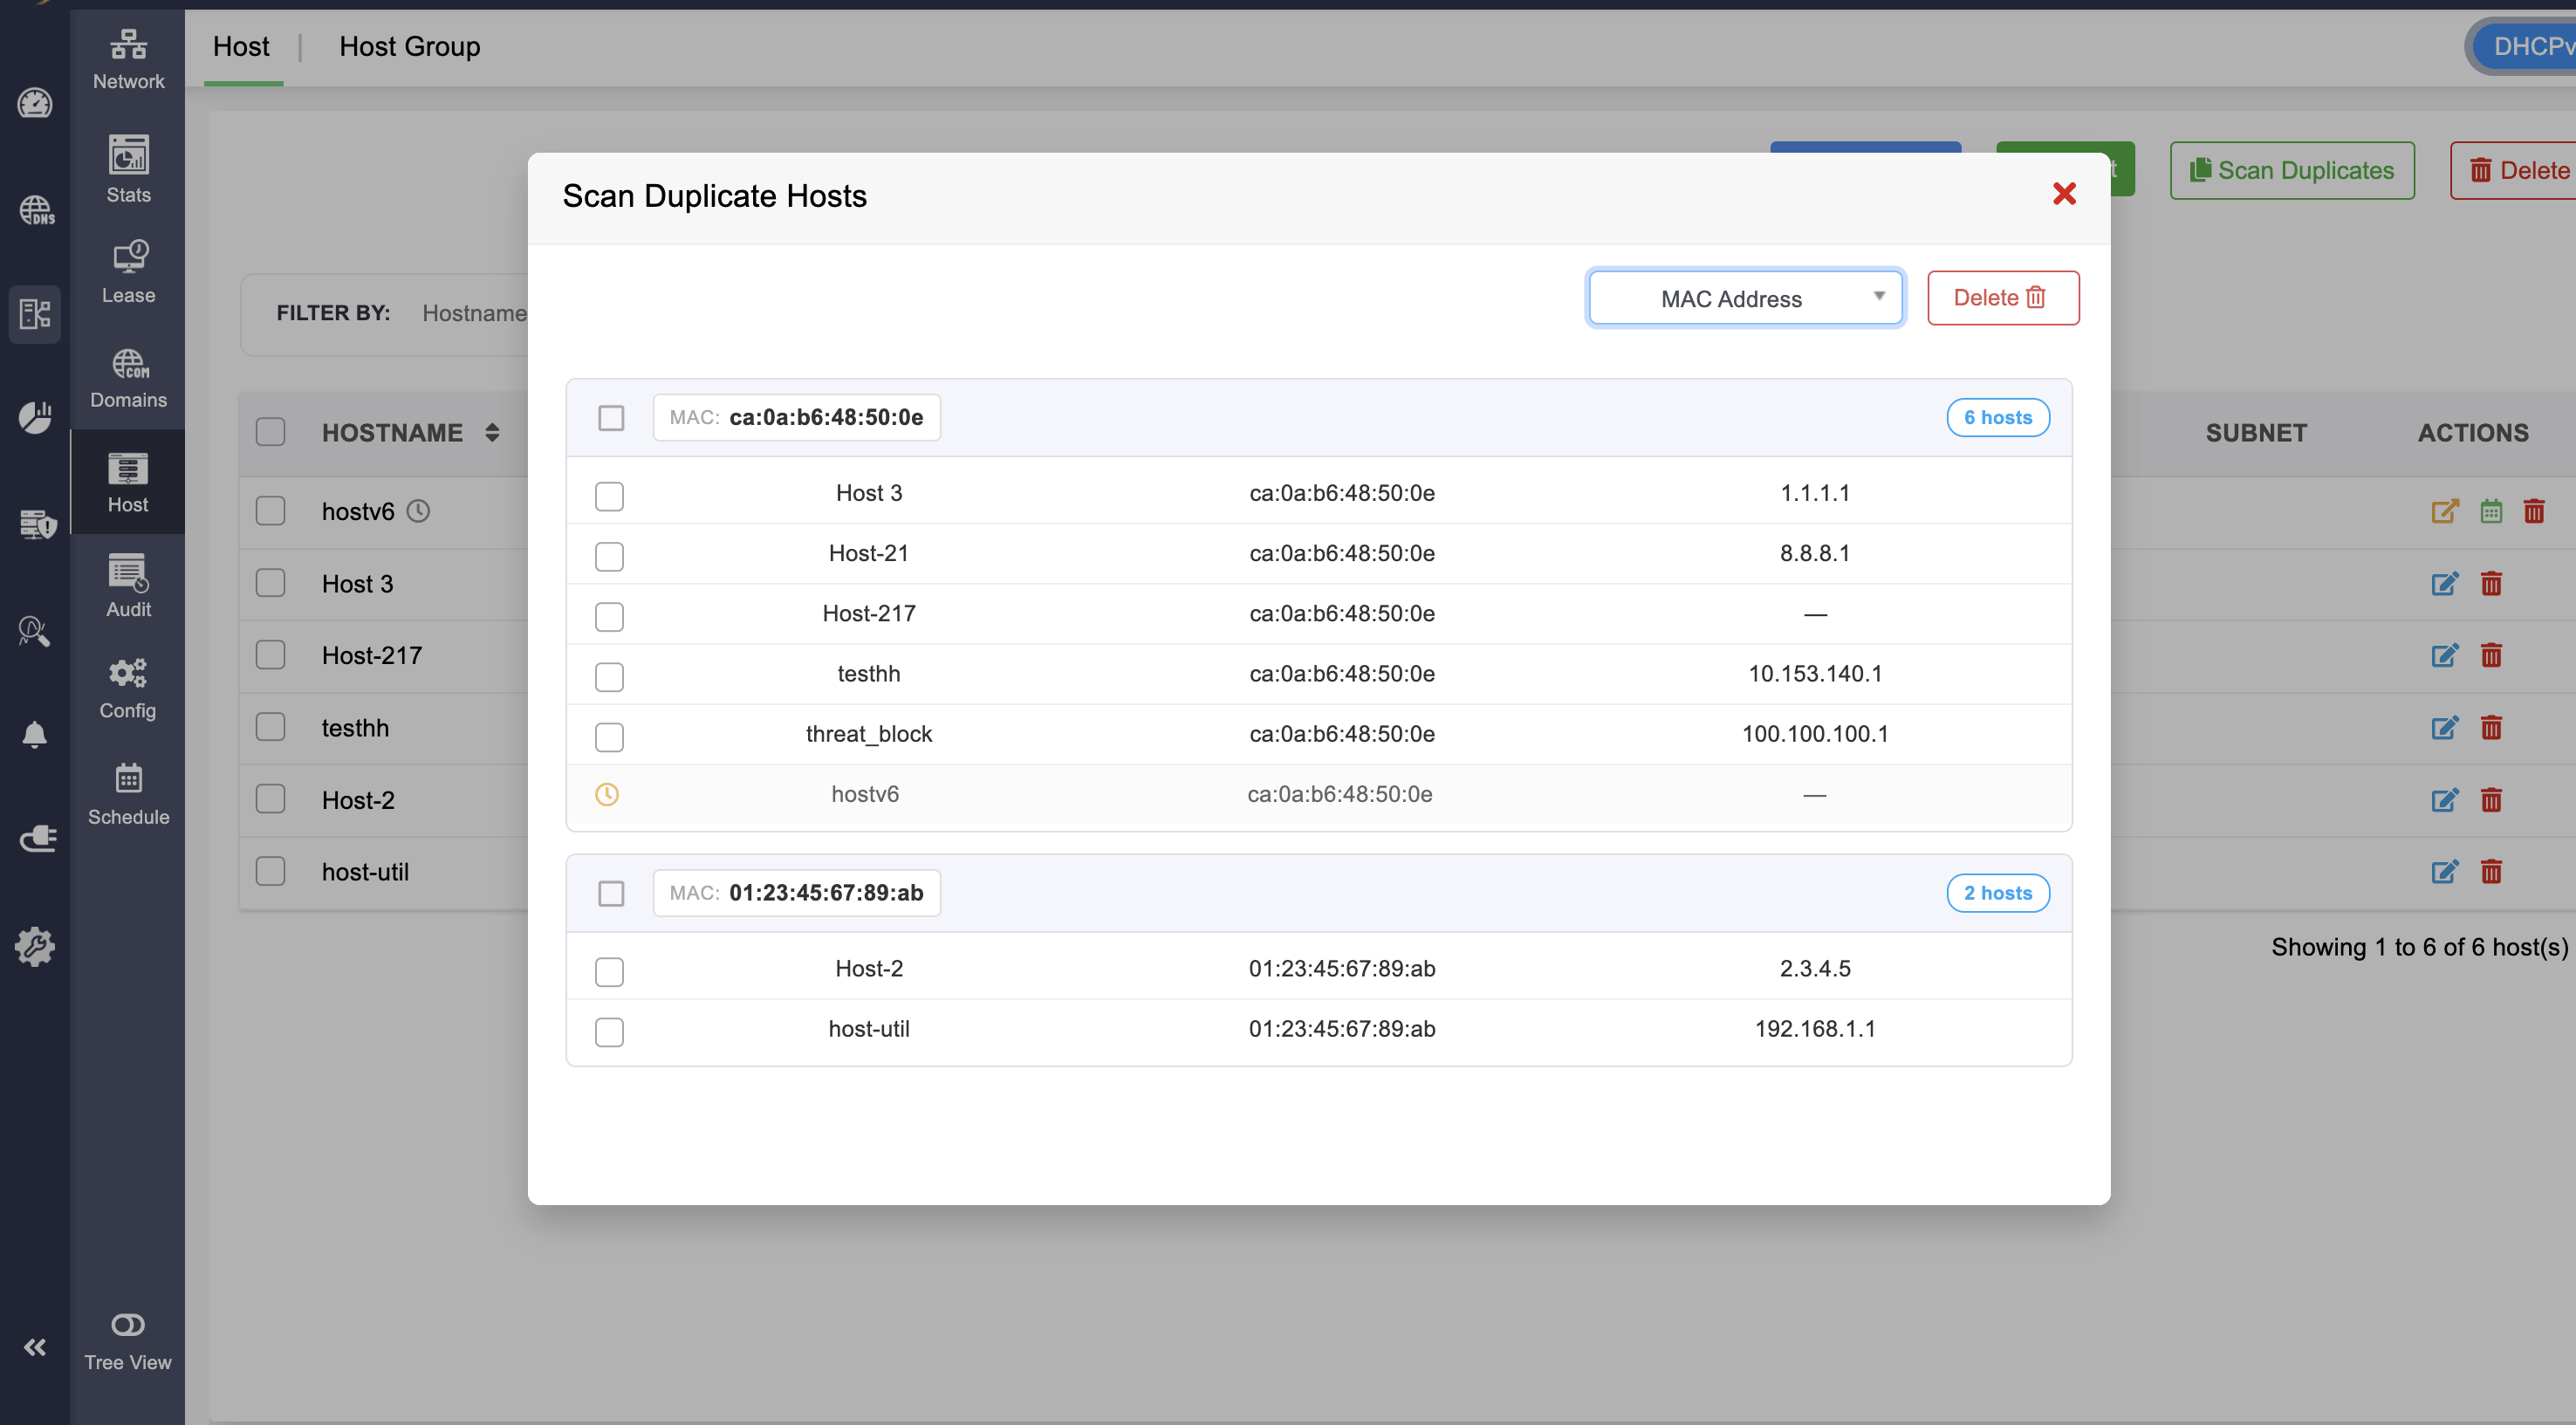
Kea host creation adds one field beyond ISC: Deny Lease.
- Deny Lease: Blocks the host from getting a lease. Under the hood, Kea keeps a special built-in class called DROP; enabling this silently adds the host's MAC address to that class, so Kea drops any DHCP packet from it instead of responding — no lease sent back at all. Useful for a misbehaving or unauthorized device you want gone from the network quietly rather than actively rejected.

DHCPv6 Host
A DHCPv6 host reservation assigns a fixed IPv6 address, prefix, or other reservation-specific parameters to an identified DHCPv6 client.
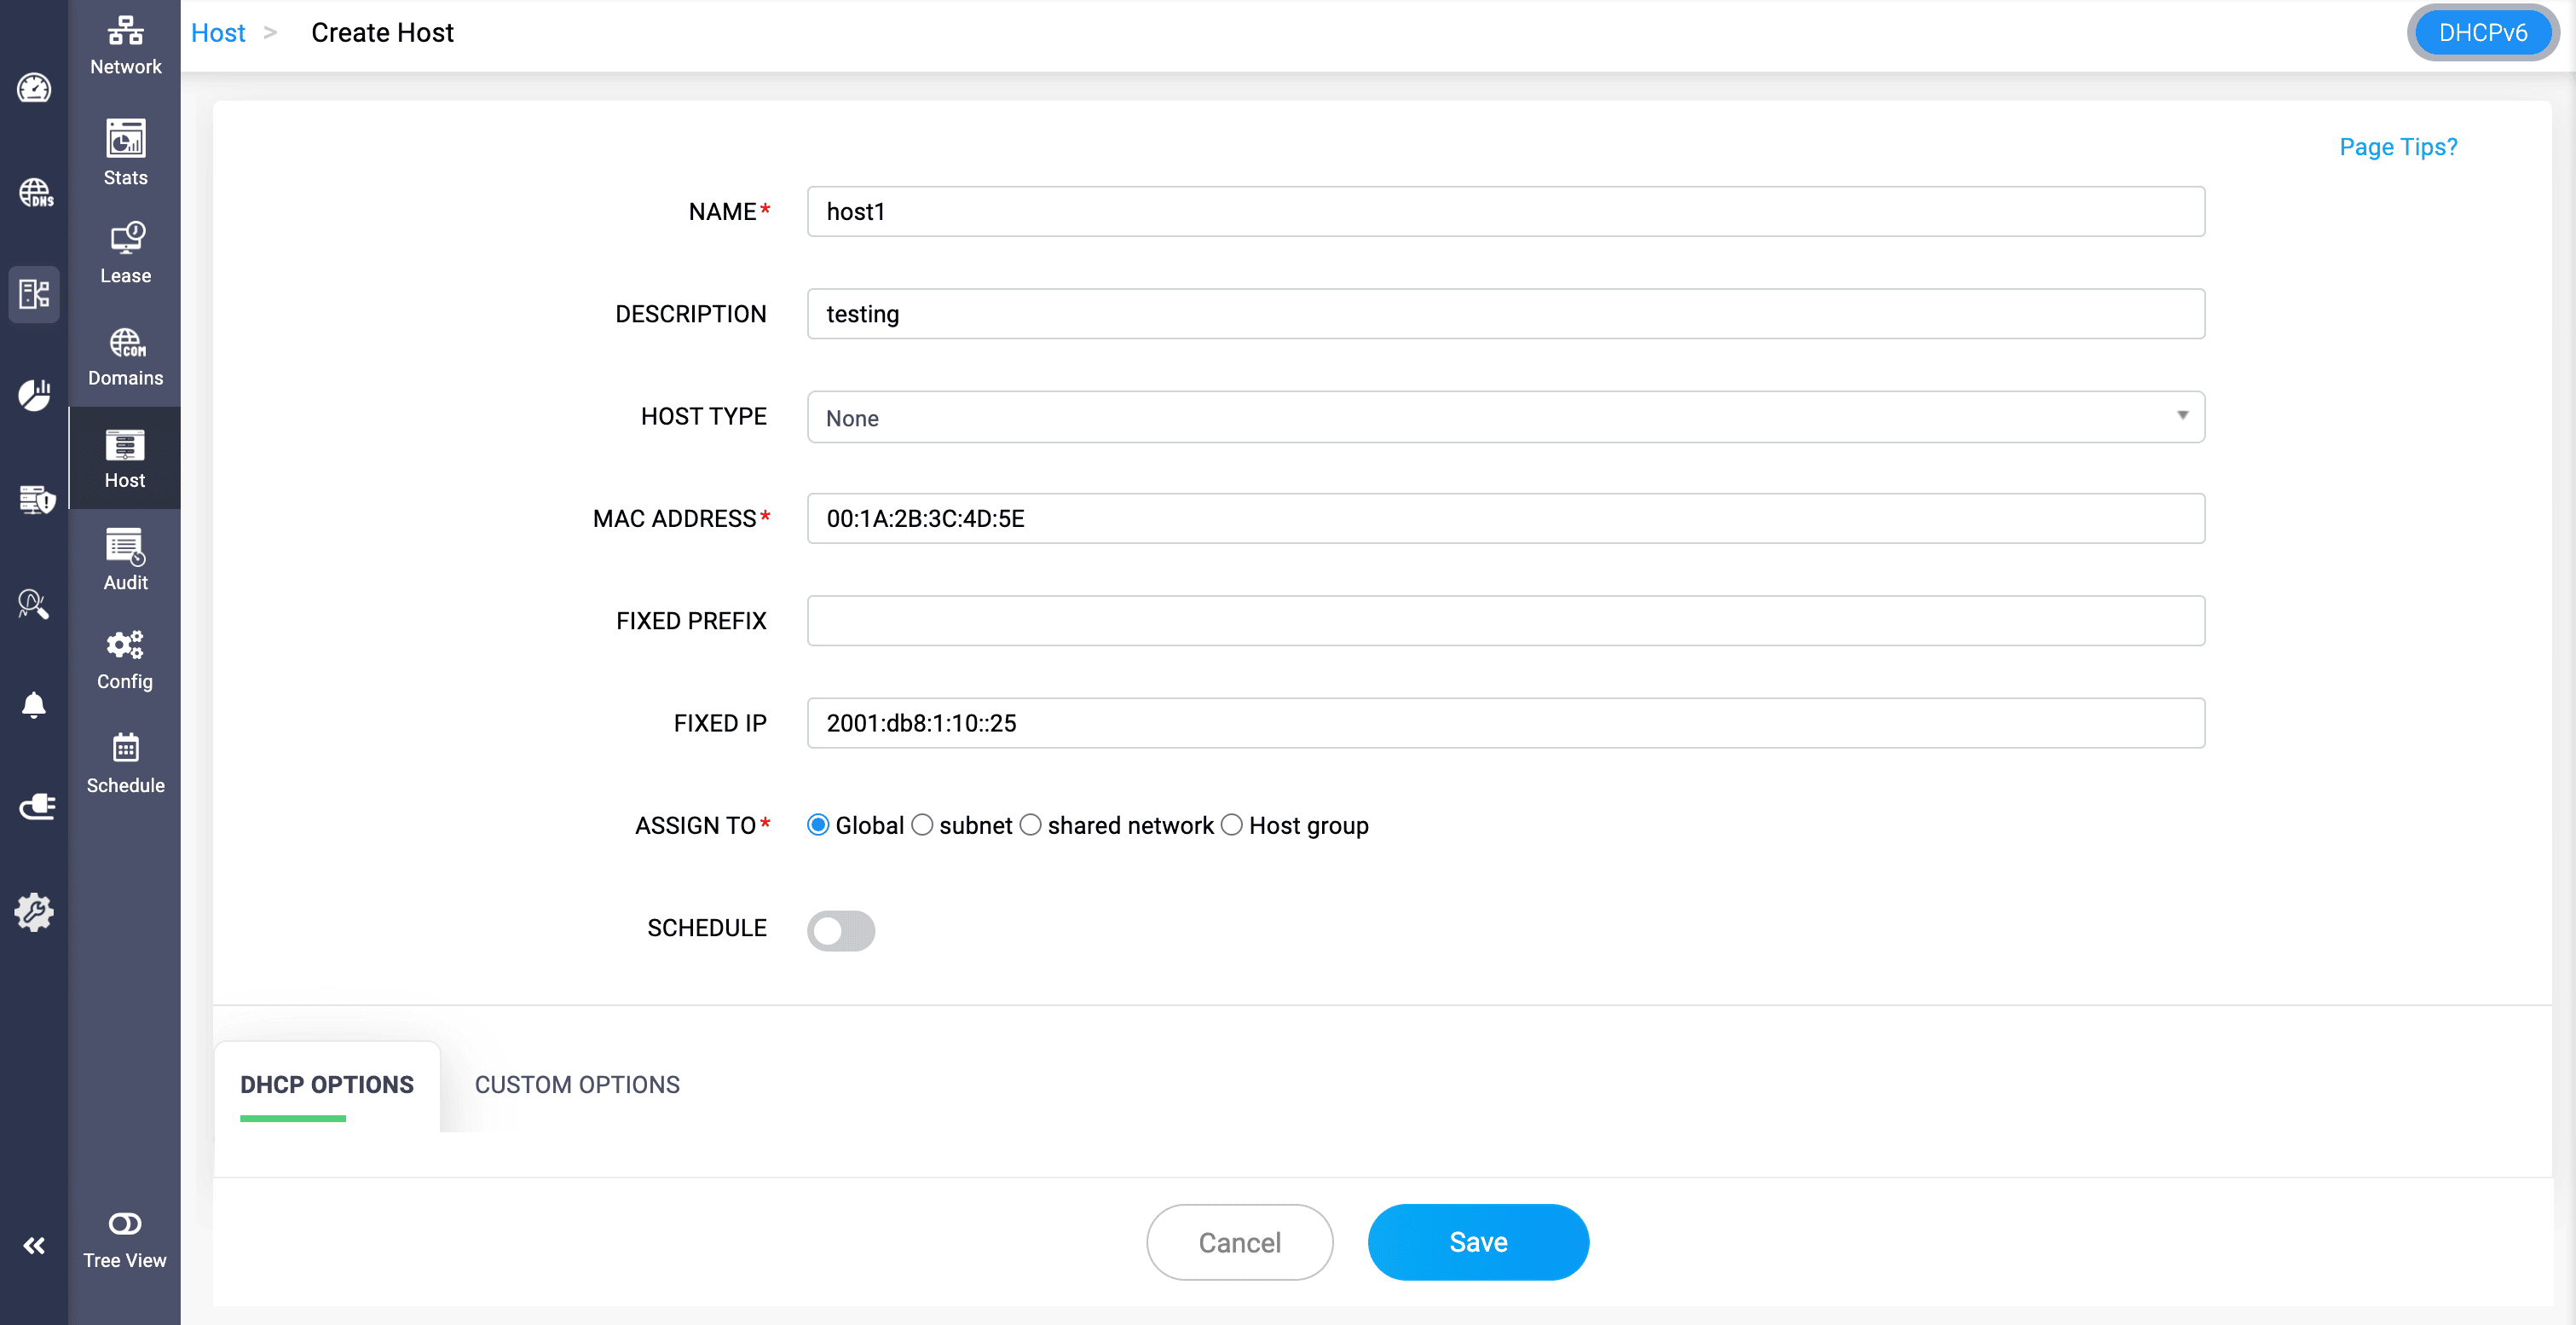
To create a DHCPv6 host:
- Go to DHCP > Network > Host and switch to the DHCPv6 view.
- Click Add Host.
- Name: Enter a unique name for the reservation.
- Description: Enter optional information describing the host.
- Host Type: Select the identifier that the DHCPv6 server should use to match the client.
- Enter the corresponding client identifier, such as a MAC address or DUID, according to the selected host type.
- Fixed Prefix: Specify an IPv6 prefix where prefix delegation or a fixed-prefix assignment is required.
- Fixed IP: Specify the IPv6 address to reserve for the host.
- Assign To: Associate the reservation globally or with a subnet, shared network, or host group as supported by the configuration.
- Schedule: Configure a time-bound activation period when required.
- Assign the required DHCP Options and Custom Options.
- Click Save.
Legacy DHCP (ISC DHCPD) - DHCPv6 host
Legacy DHCP supports DHCPv6 host reservations through the common Scope Manager interface and the supported DHCPv6 host identifiers.
Modern DHCP (Kea DHCP) - DHCPv6 host

Modern DHCPv6 Host only requires to give the DUID as the Host identifier, compared to the Legacy DHCPv6 Host which asks to select the specific identifier from the Host Typedrop down field.

And, just like the Modern DHCPv4 Host, the Deny Lease checkbox field is also available here.
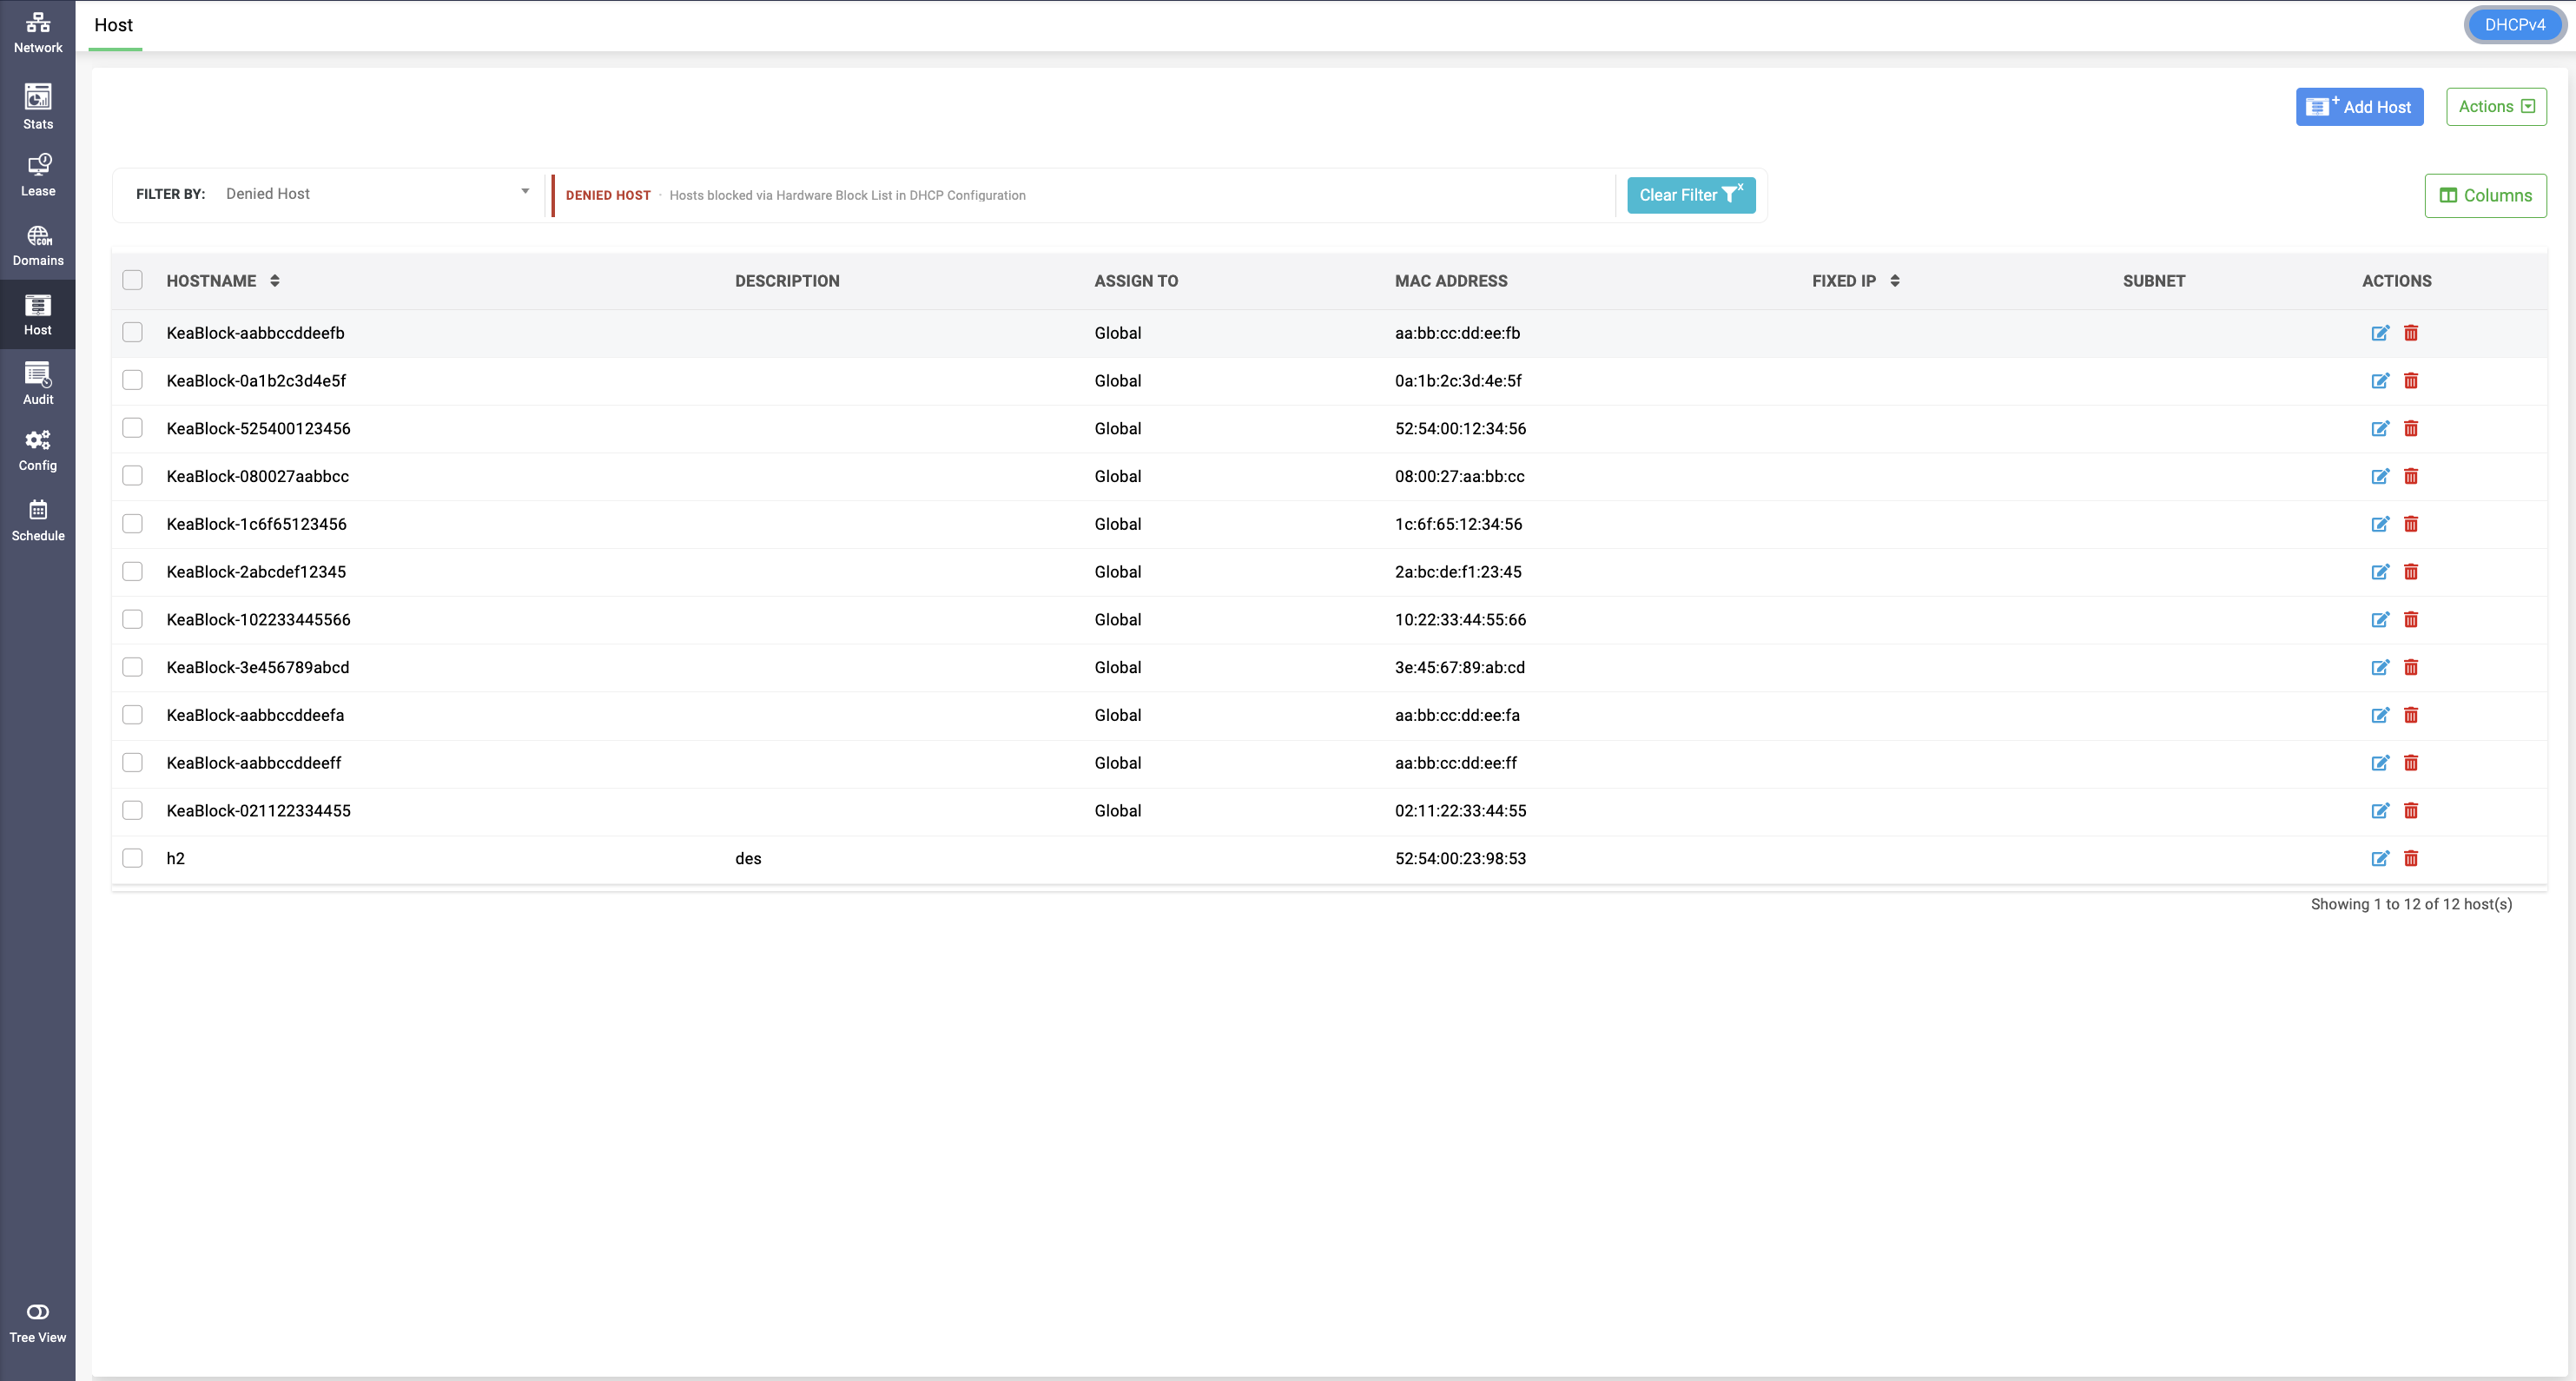
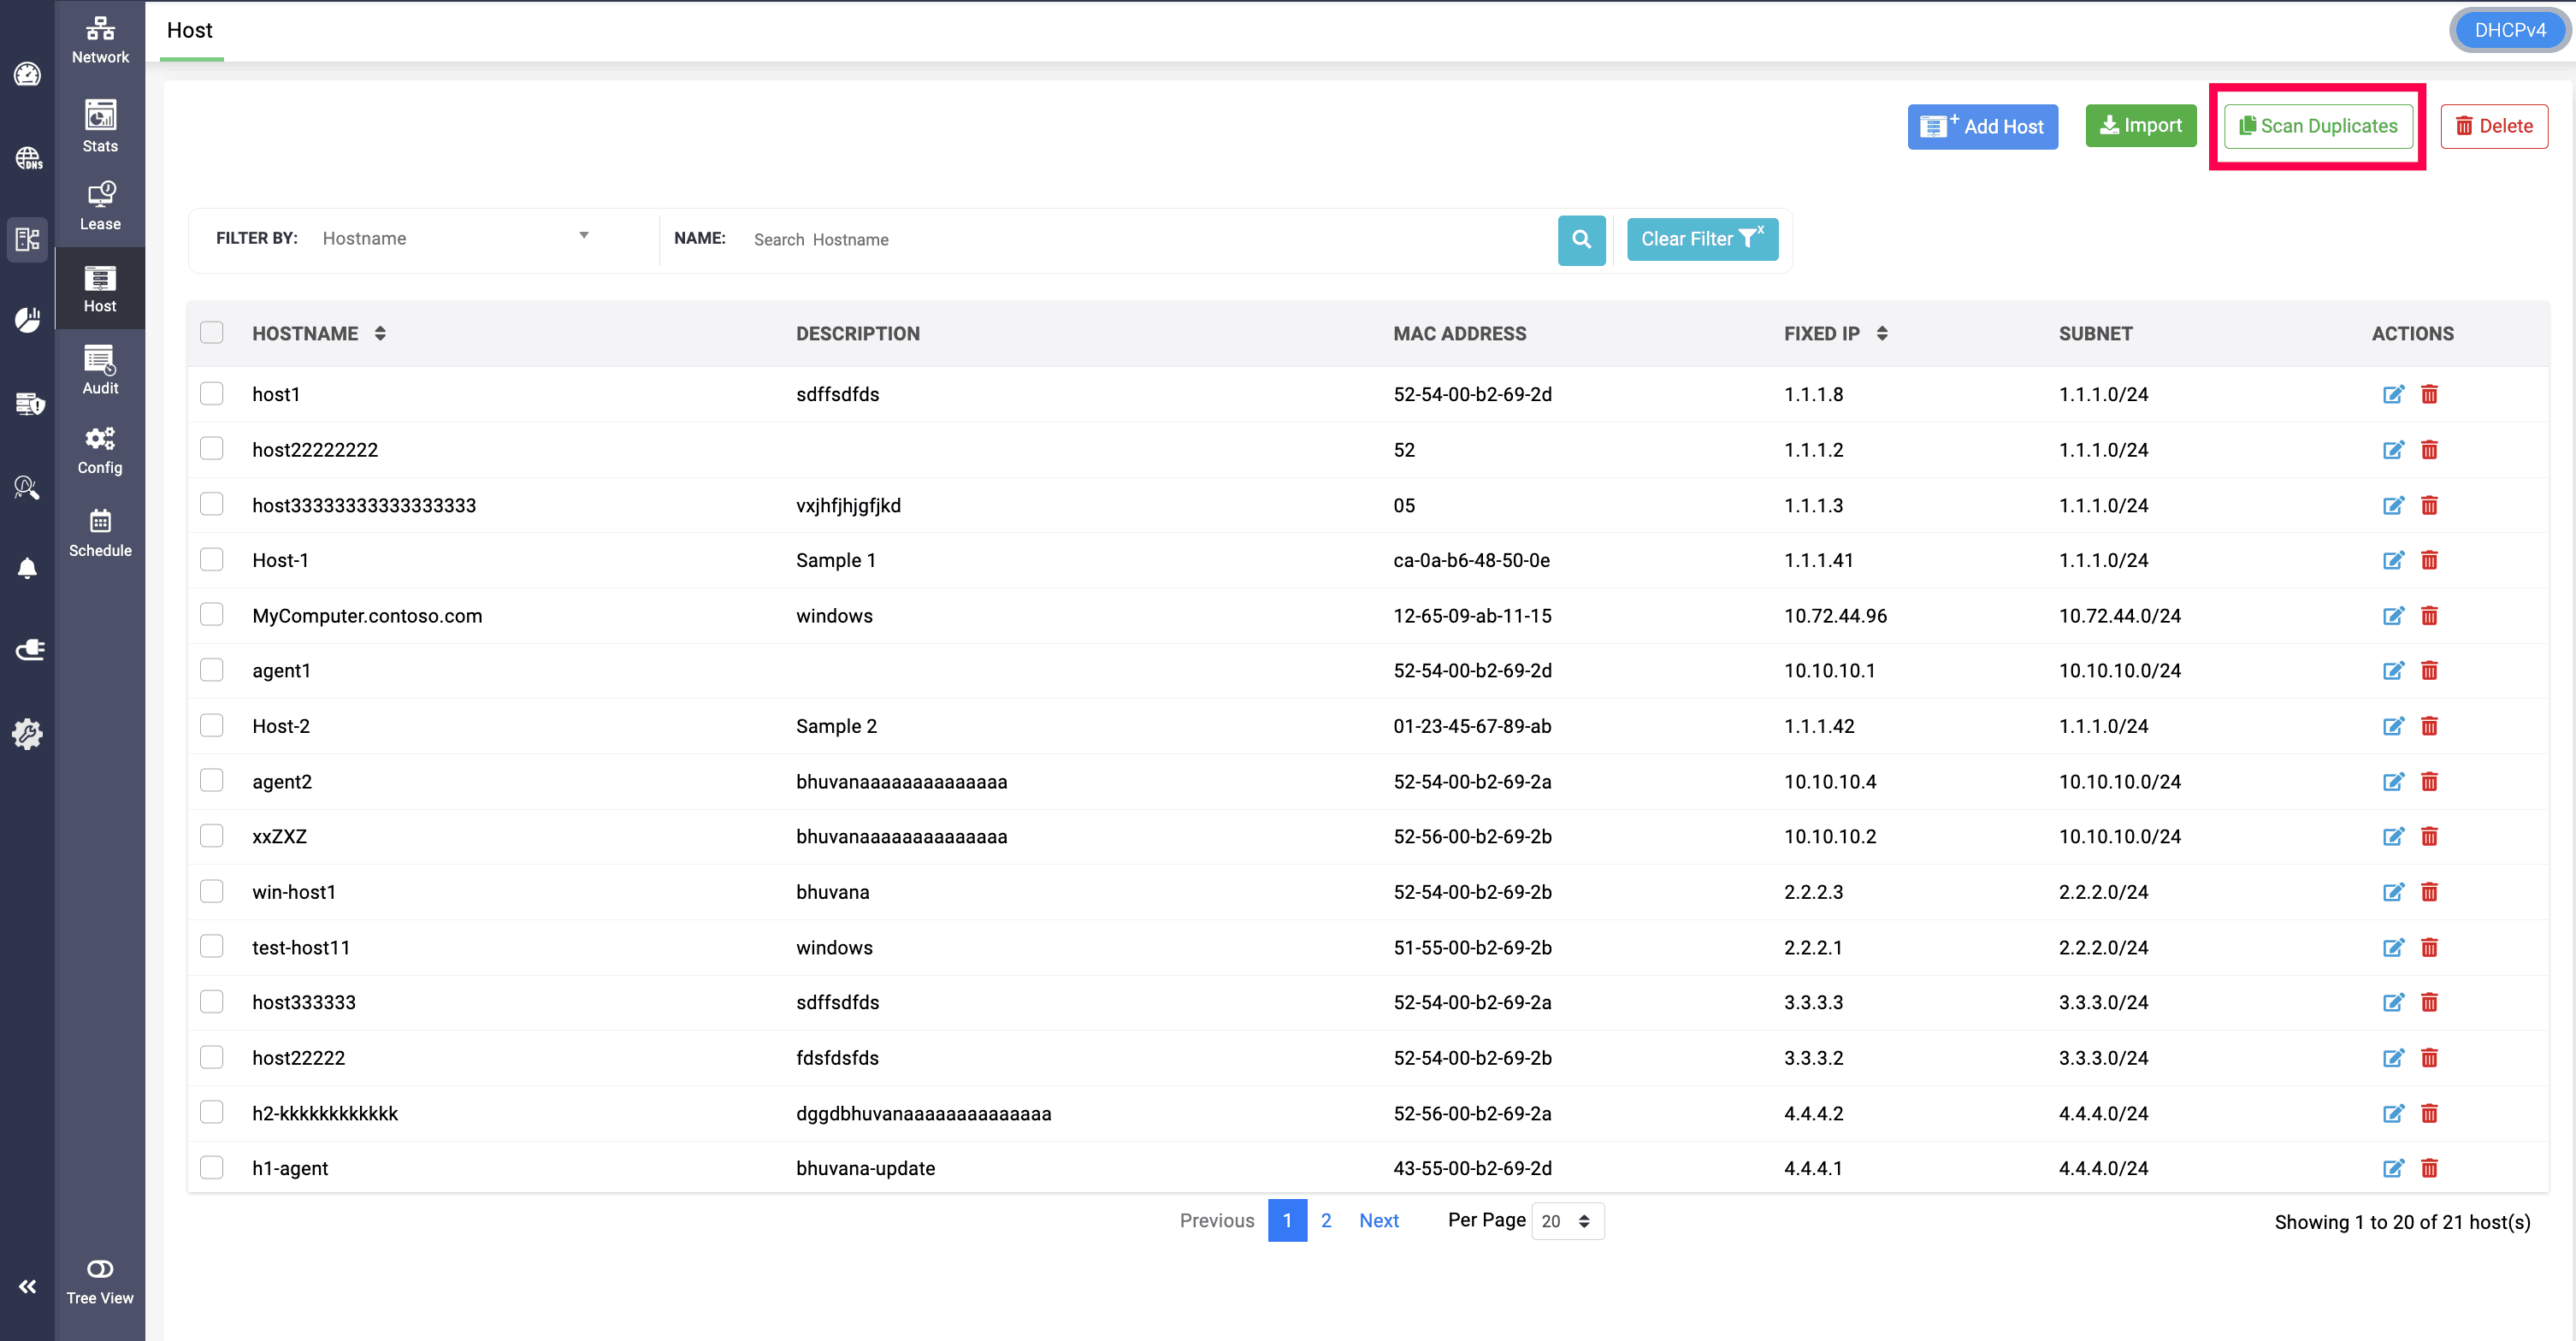
To create a custom column, select the **Custom Column** option from the **Actions** dropdown and enter the column name and default value to be displayed. These values can be edited on the **Edit Host** page.


You can view all the custom columns created by selecting the **Columns** dropdown option. You can also deselect columns to prevent them from being displayed.

When importing data from a CSV file, create and add the custom columns to the table beforehand. This ensures that the values in the custom columns in your CSV file are imported seamlessly into the application.

Guidelines for Importing DHCP Scopes Using CSV Files
- The CSV file size must not exceed 50 MB. Files beyond this size limit will not be processed by DDI Central.
- Ensure that the columns in the CSV file follow the format specified in the sample files for each DHCP scope:
Following these guidelines will ensure a smooth and error-free import process.
Host Groups
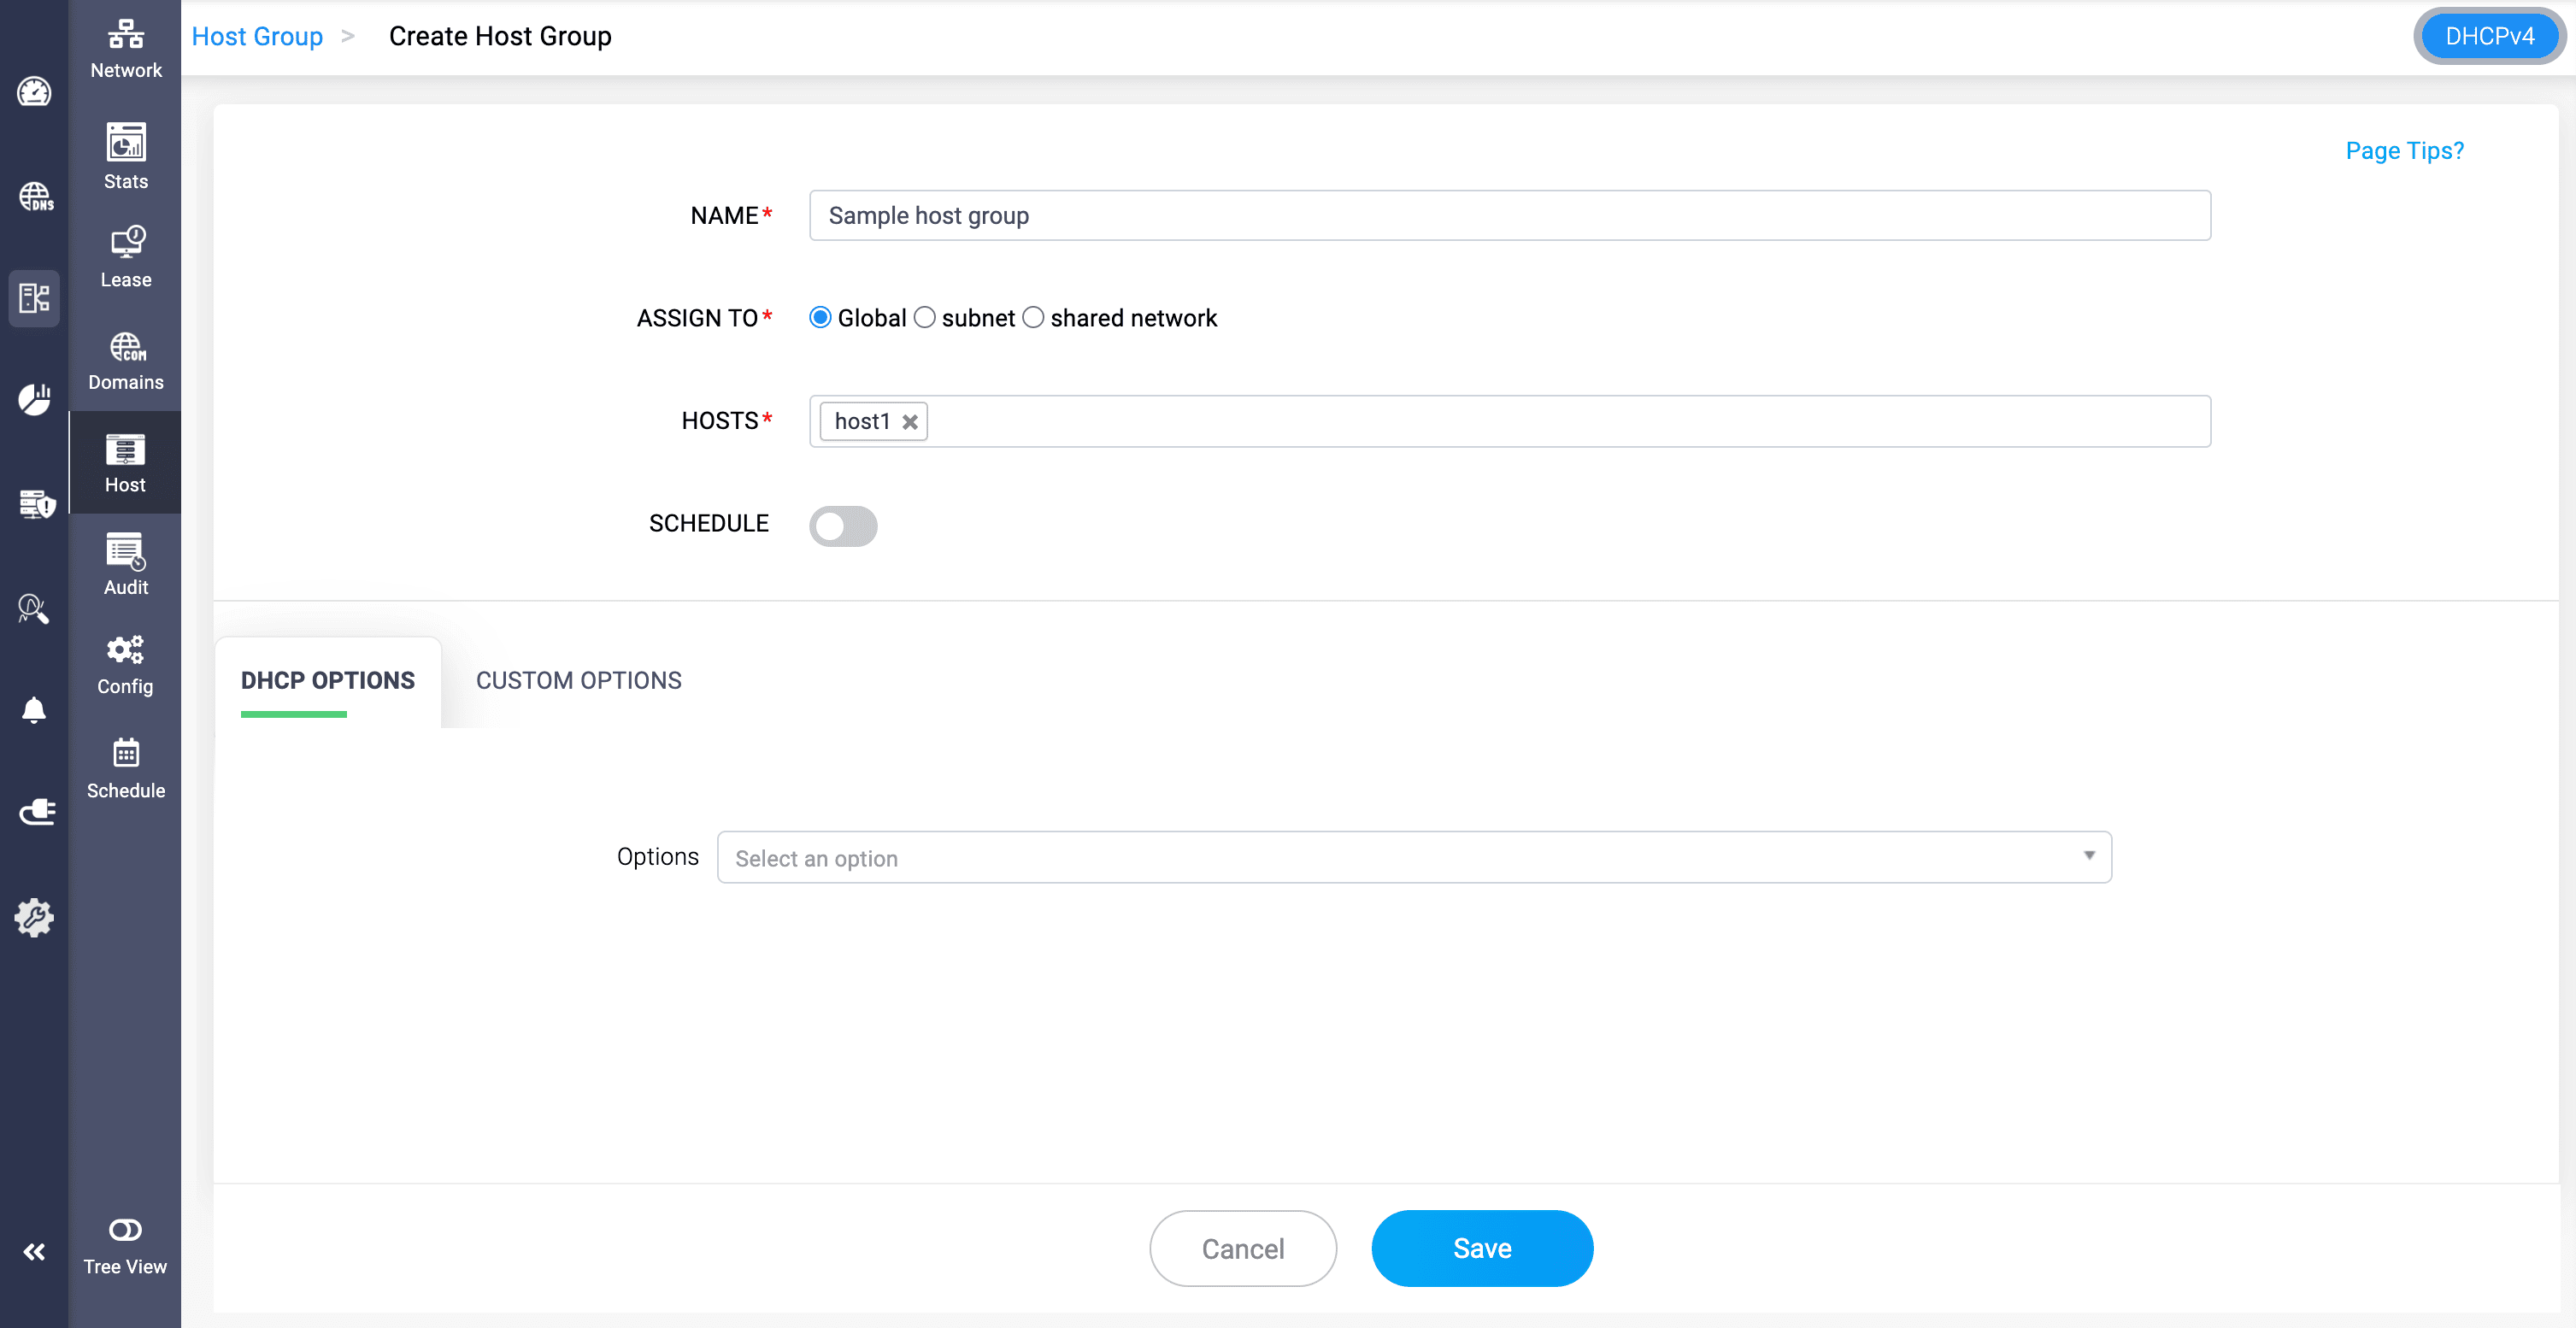
- Host groups are a group of hosts combined logically for easier management.
- Grouping hosts can simplify configuration, especially in large networks, by applying common settings to multiple hosts.
- You can apply a multiple DHCP options over this combination of hosts for customized management.
VLANs (Virtual LANs)
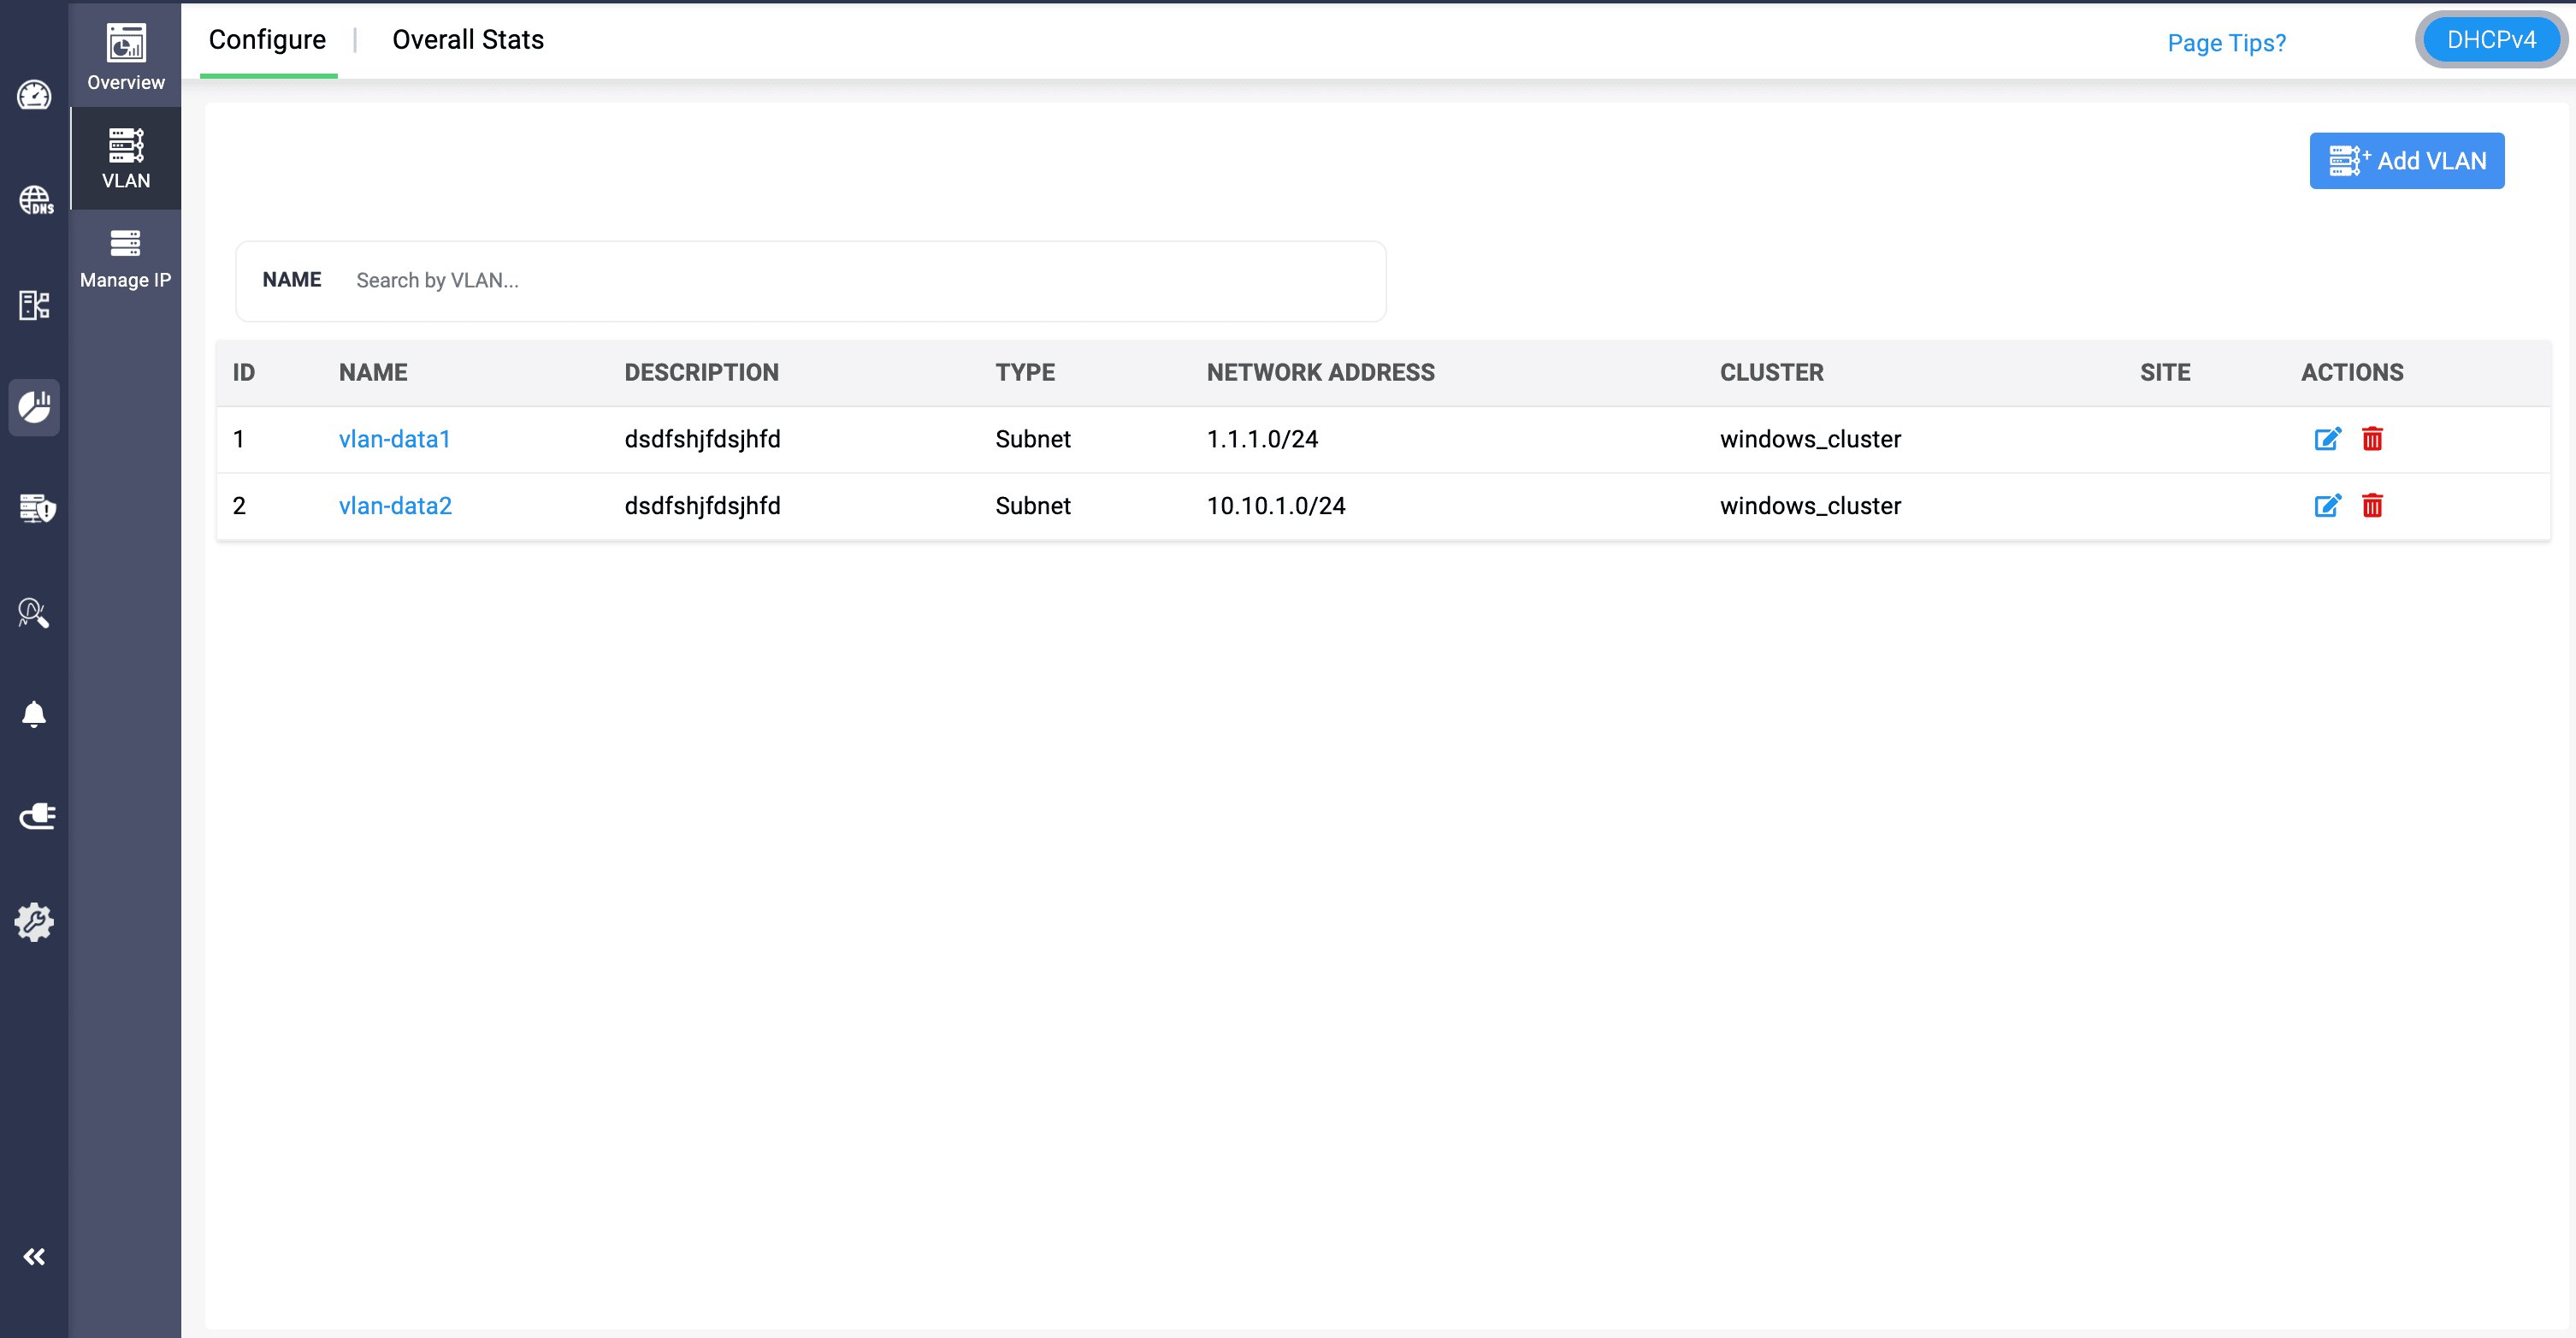
- VLANs are a network configuration that segments a physical network into multiple logical networks at the data link layer (Layer 2).
- DDI enables DHCP servers to serve different VLANs as distinct subnets or shared networks.
- Each VLAN you create within a subnet functions as a separate network, which improves performance by reducing broadcast traffic, enhances security by isolating sensitive data, and simplifies management by grouping devices according to function, department, or project.You can also associate an already existing VLAN to the subnet.
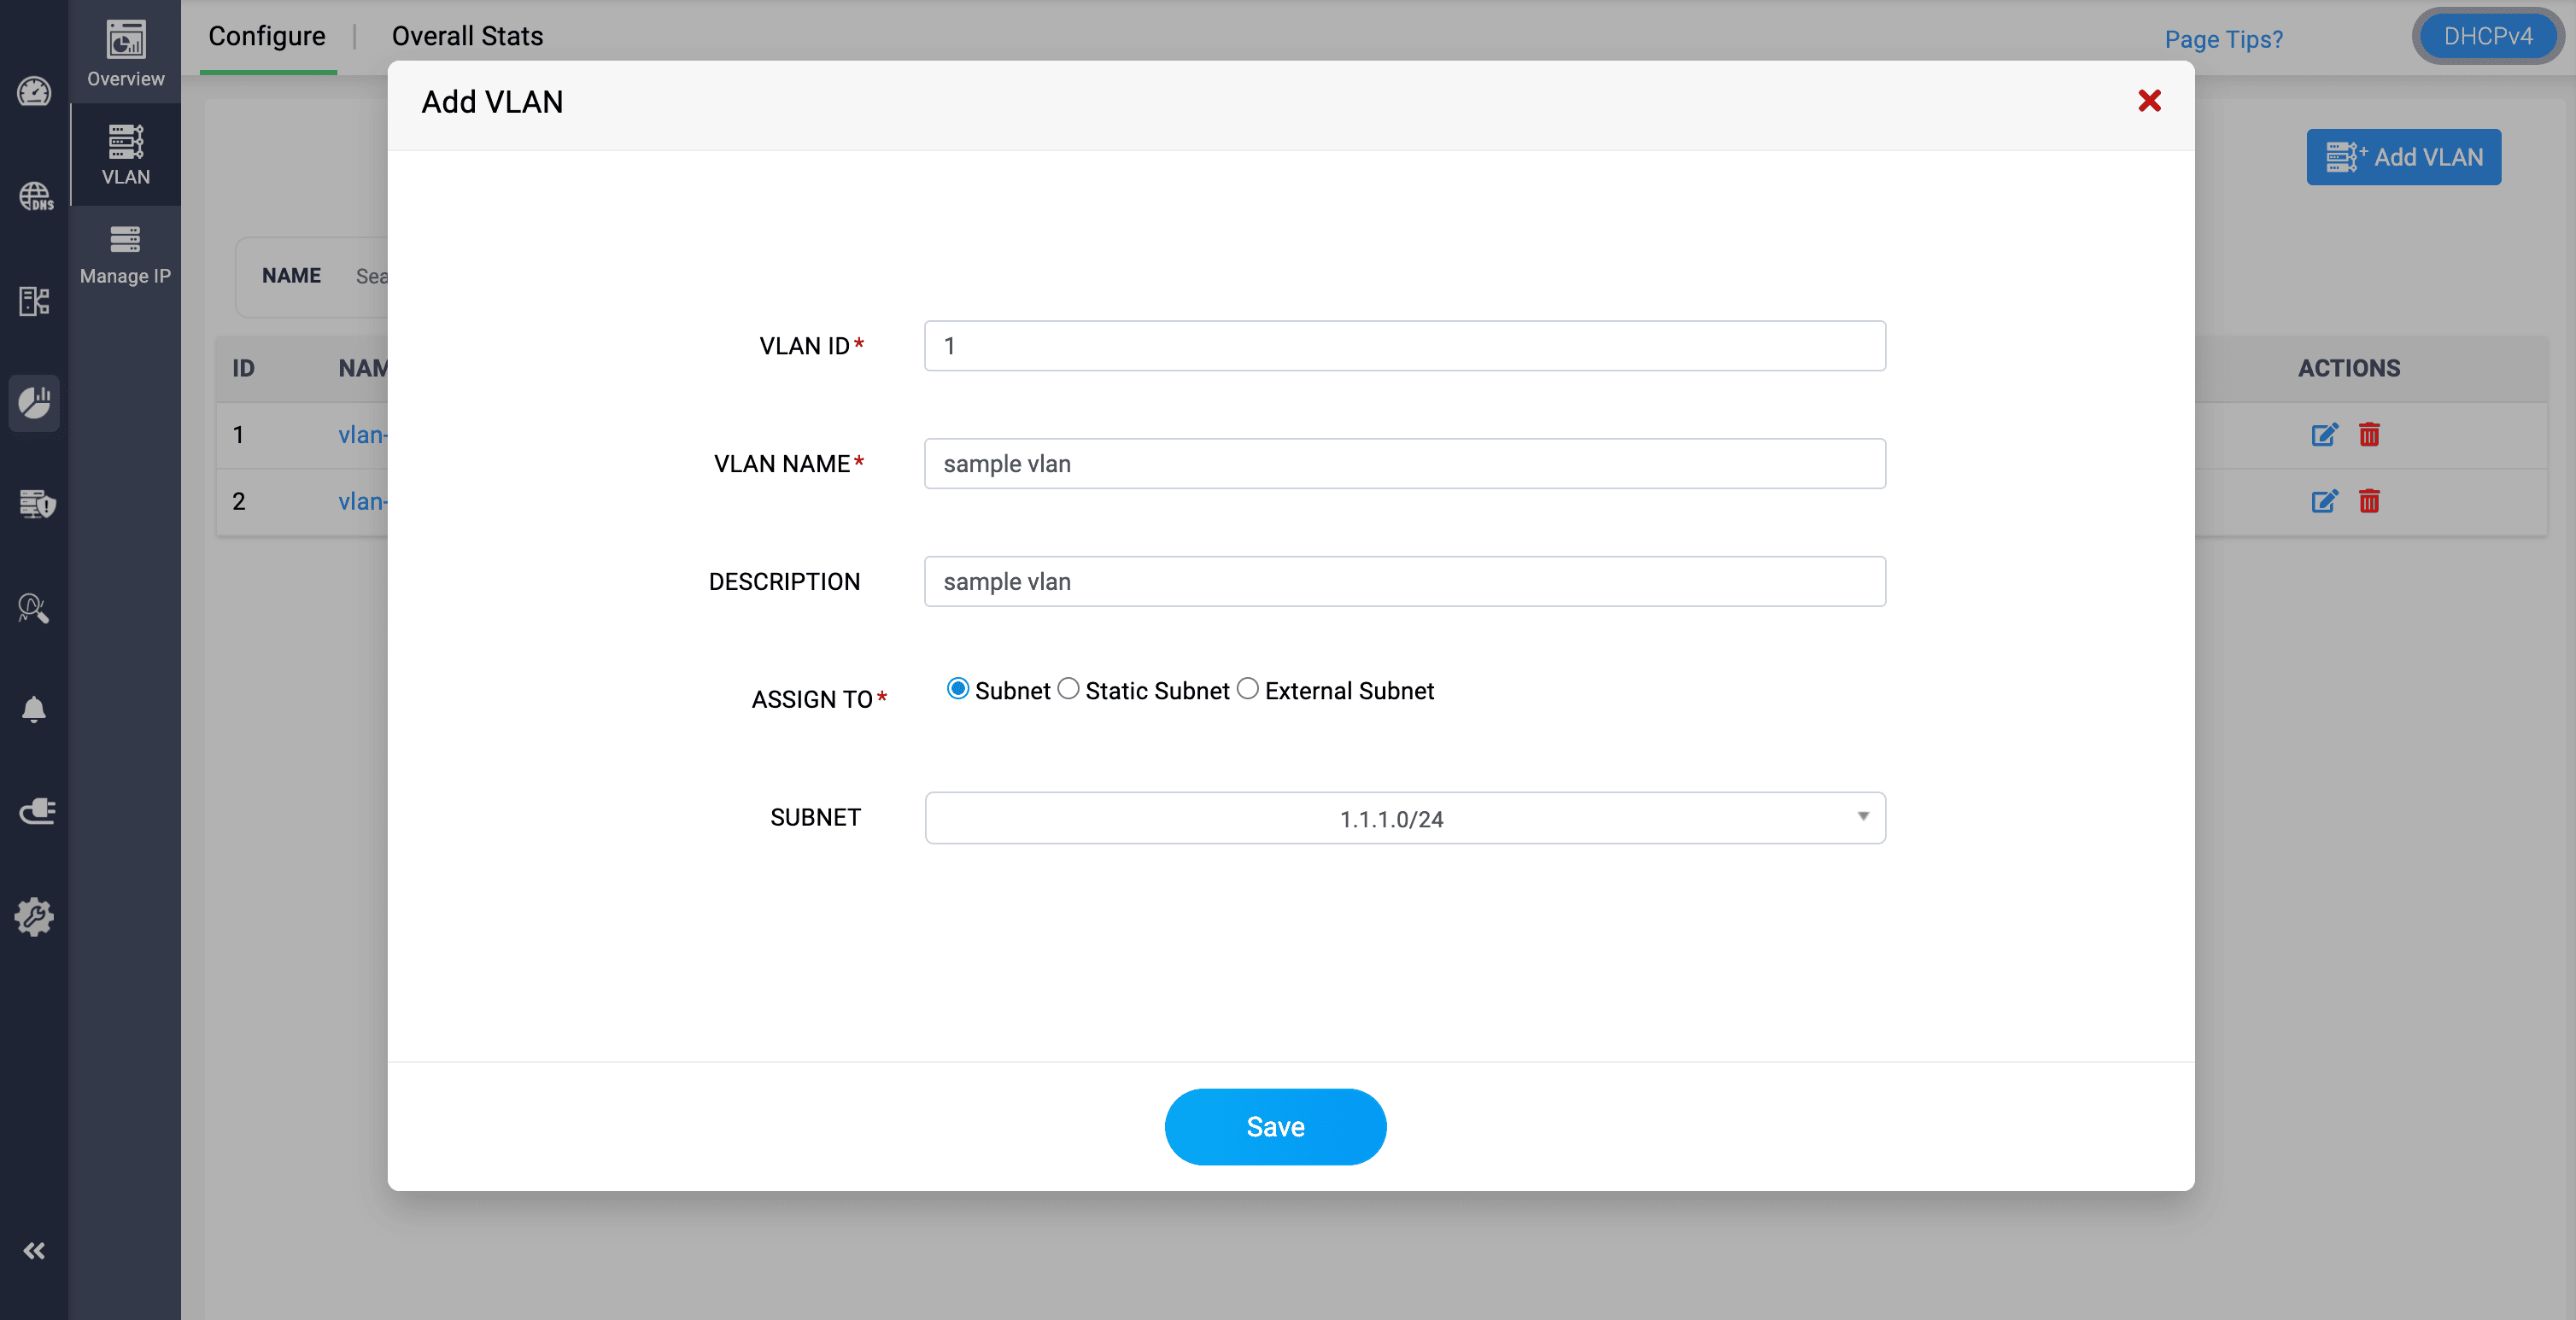
- Name and provide a suitable description to quickly identify the new VLAN. Also assign a suitable VLAN ID.
- Note: VLAN IDs are represented by a 12-bit number, but the usable range of VLAN IDs is from 2 to 4094.
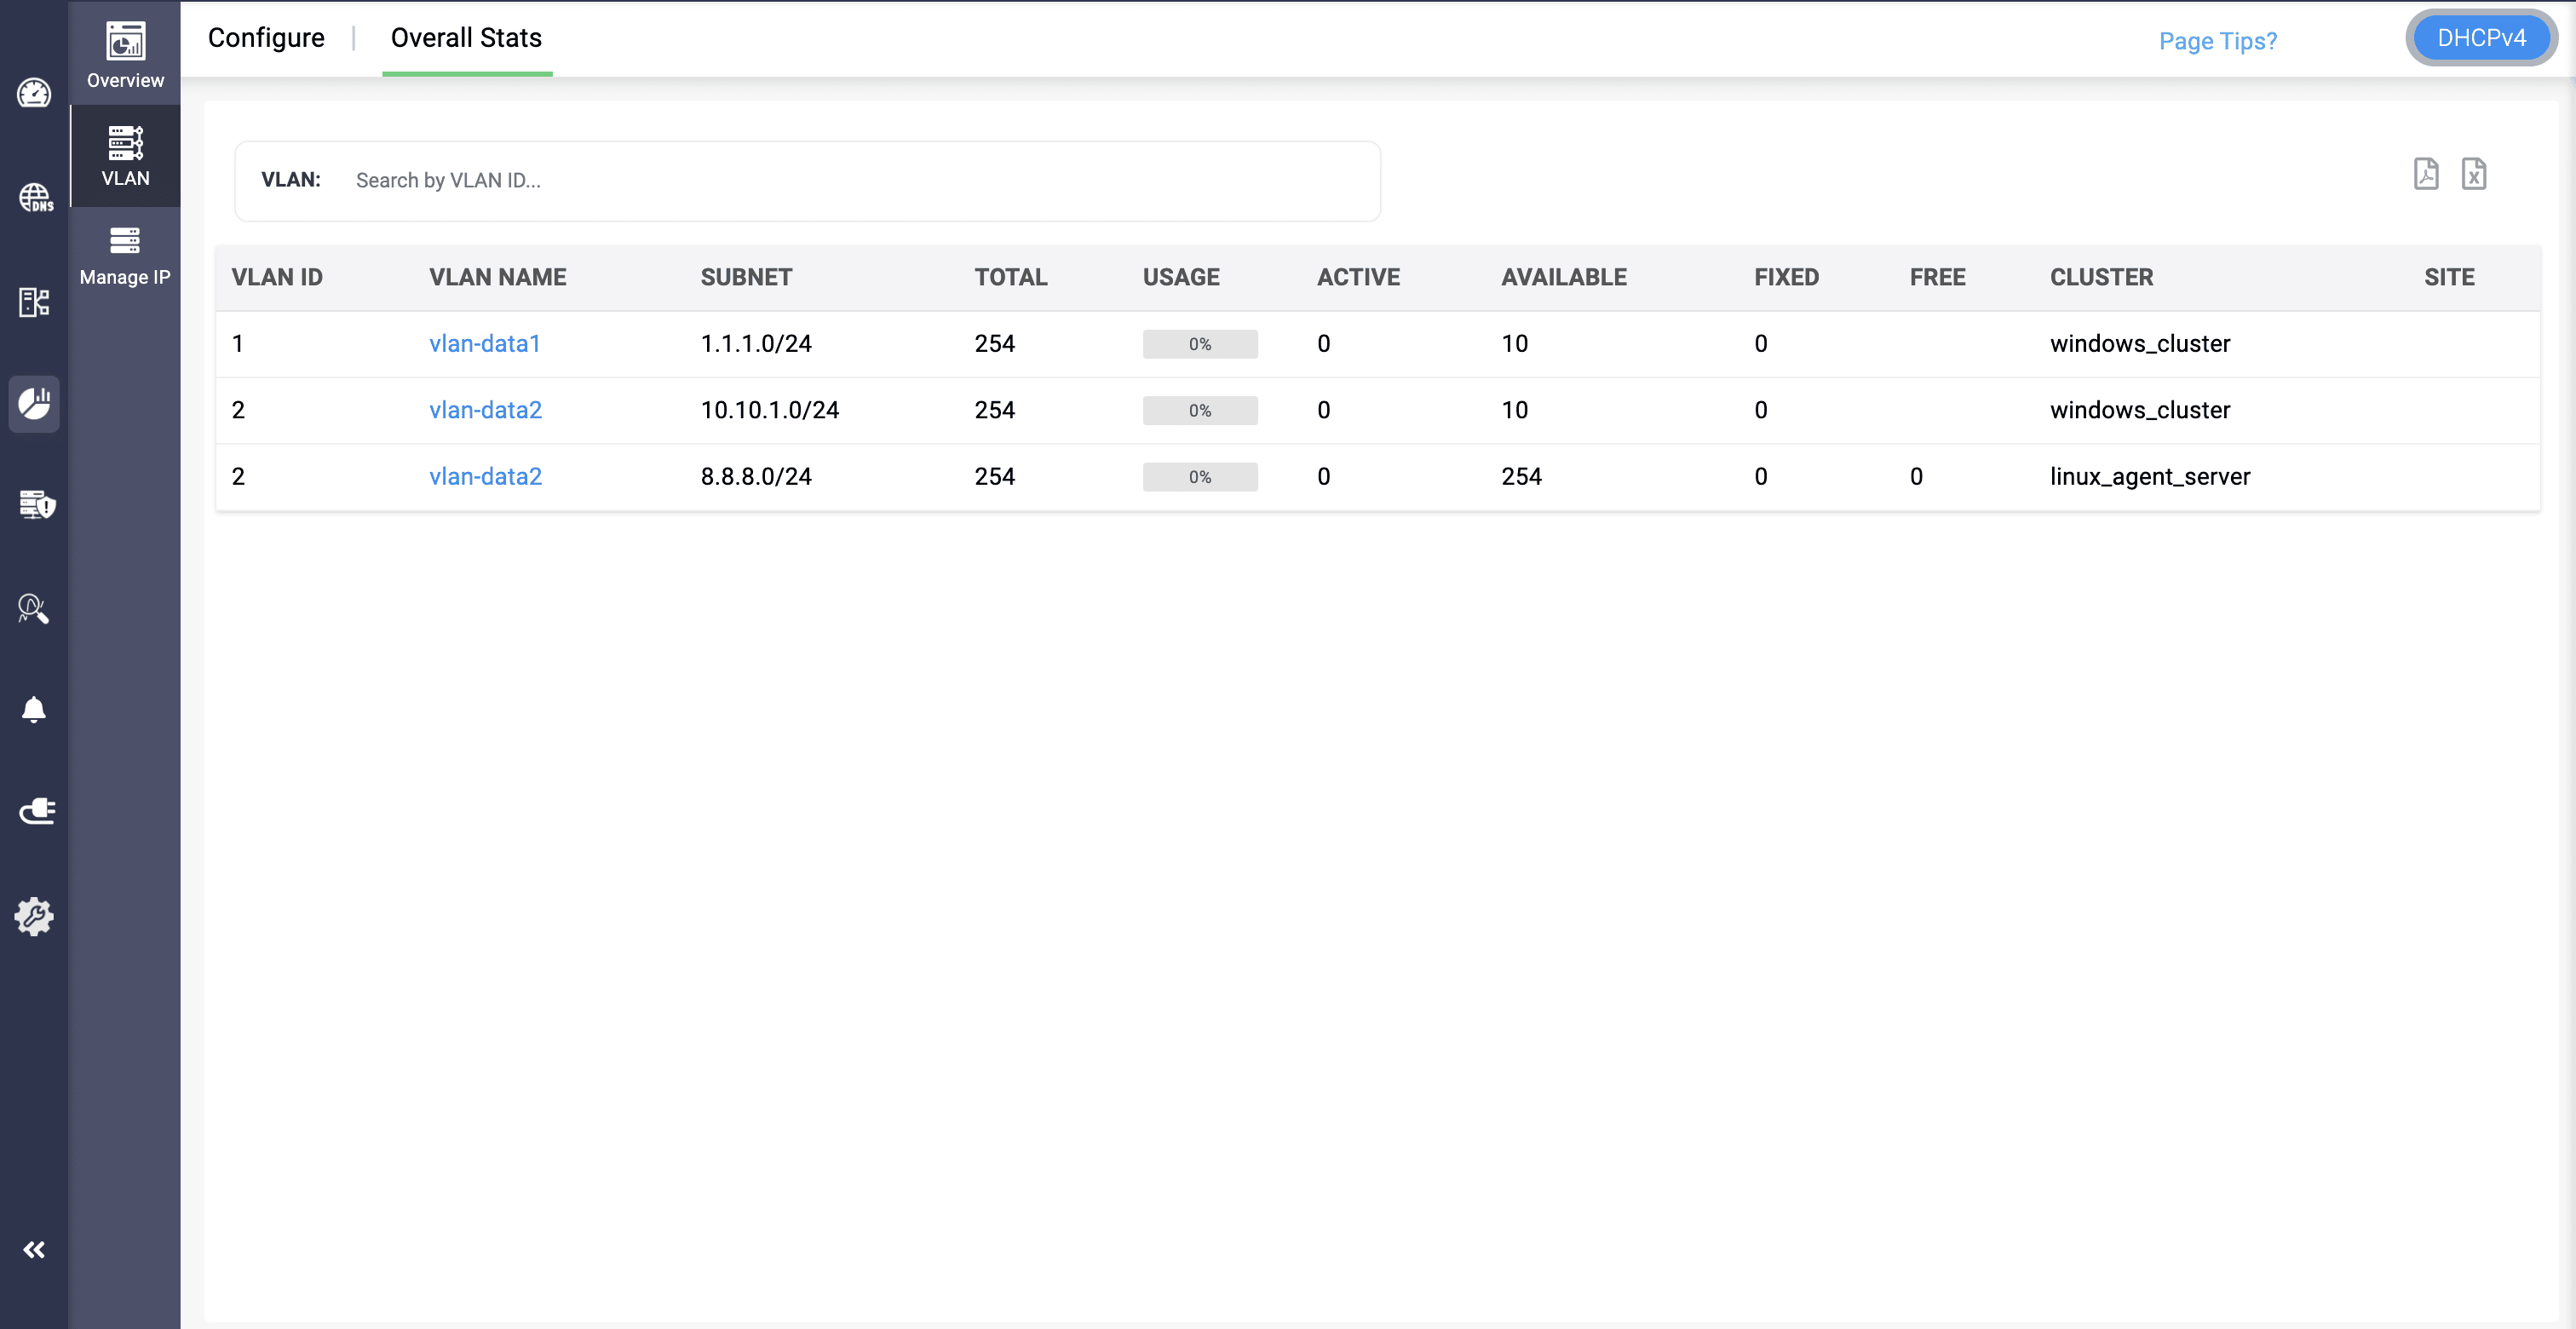
Also, when discovering your current configurations from your network infrastructure using DDI Central discovery tools, it's crucial to note that VLANs and Supernets configured in your network will not be discovered. Therefore, ensure that you configure them separately in DDI Central for comprehensive and accurate network management.
Note: Modern DHCP (Kea) Host's can only be assigned to Global or Subnet level, there's no option for host groups assigning. Host groups are not available in Modern DHCP.
Also, Custom columns are not available for Host groups and VLAN in both Modern and Legacy.
Note:
Unknown Clients
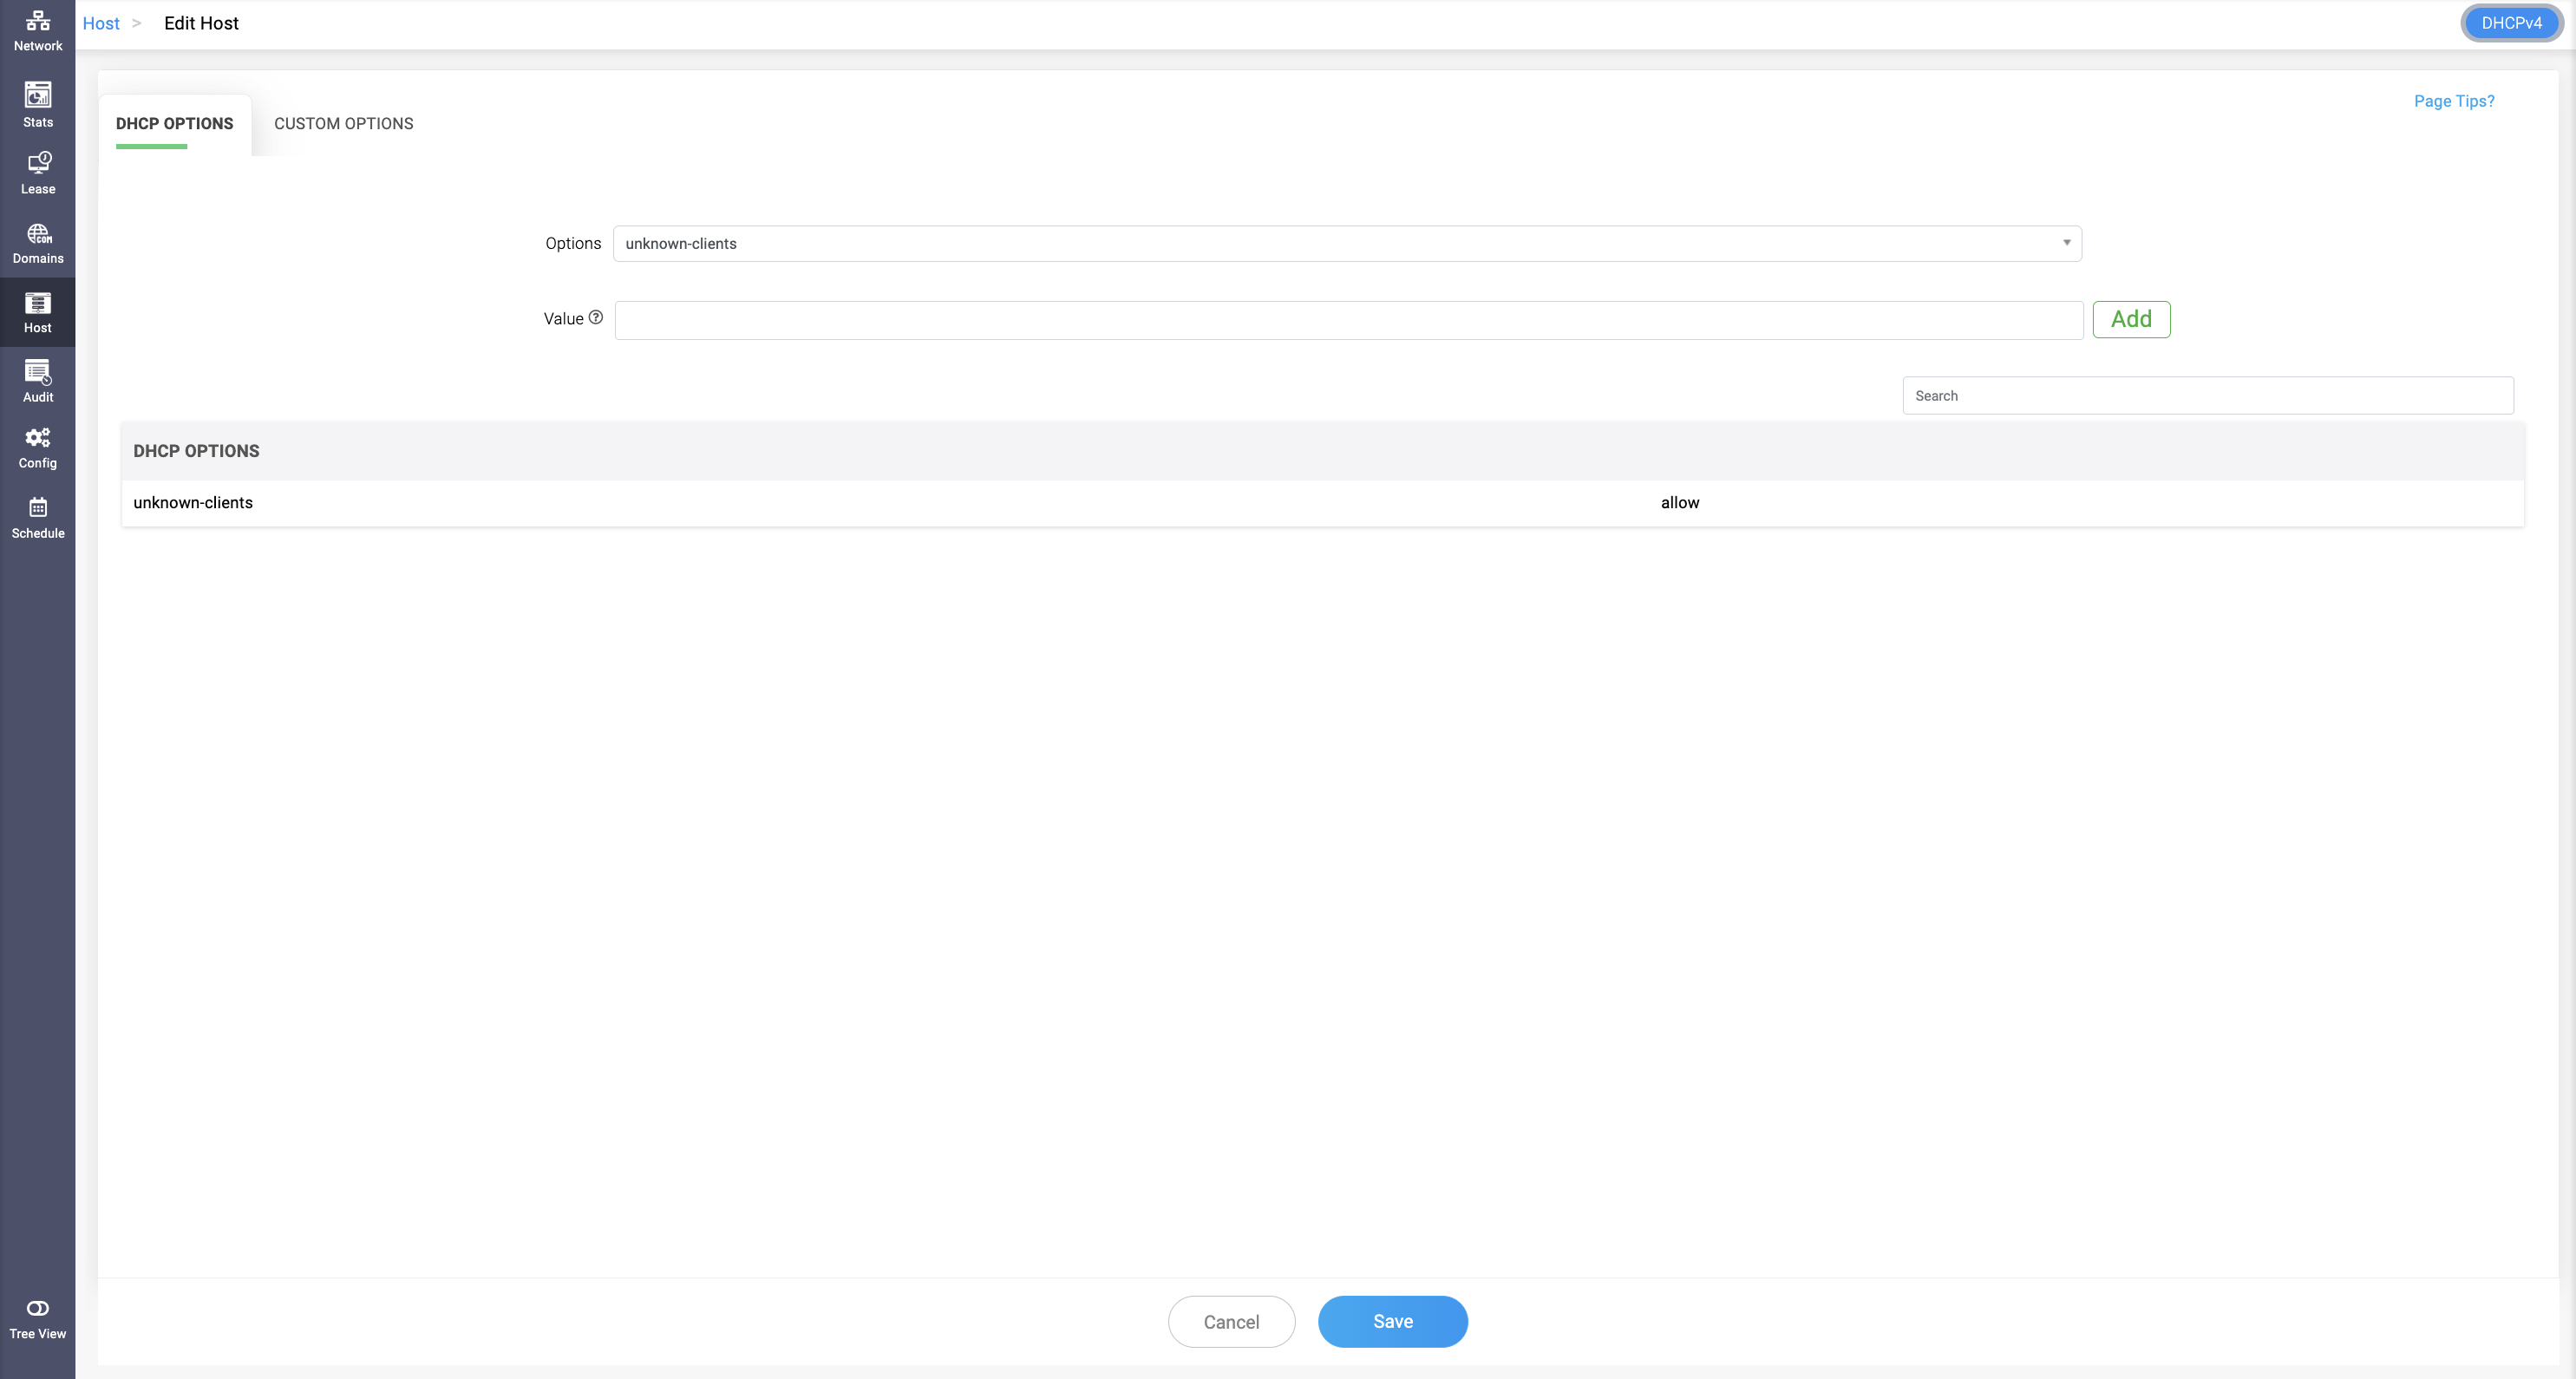
Under the DHCP options, you can configure the Unknown Clients option, which allows network administrators to specify an IP pool range and configure whether to allow or deny unknown clients from receiving a fixed IP address. Unknown clients are those that are not configured under the host with their MAC address. Known clients, on the other hand, are configured under the selected host.
Allow: Unknown clients can get an IP address from the specified pool range, while known clients cannot get an IP address from that range.
Deny: Known clients can get an IP address from the specified pool range, while unknown clients cannot get an IP address from that range.
Static Subnet
Static subnets refer to segments of a network that have fixed IP addresses assigned to them. Unlike dynamic subnets, where IP addresses can be assigned on-the-fly by a DHCP server, static subnets have pre-defined IP ranges and the IP addresses are usually assigned manually to devices.
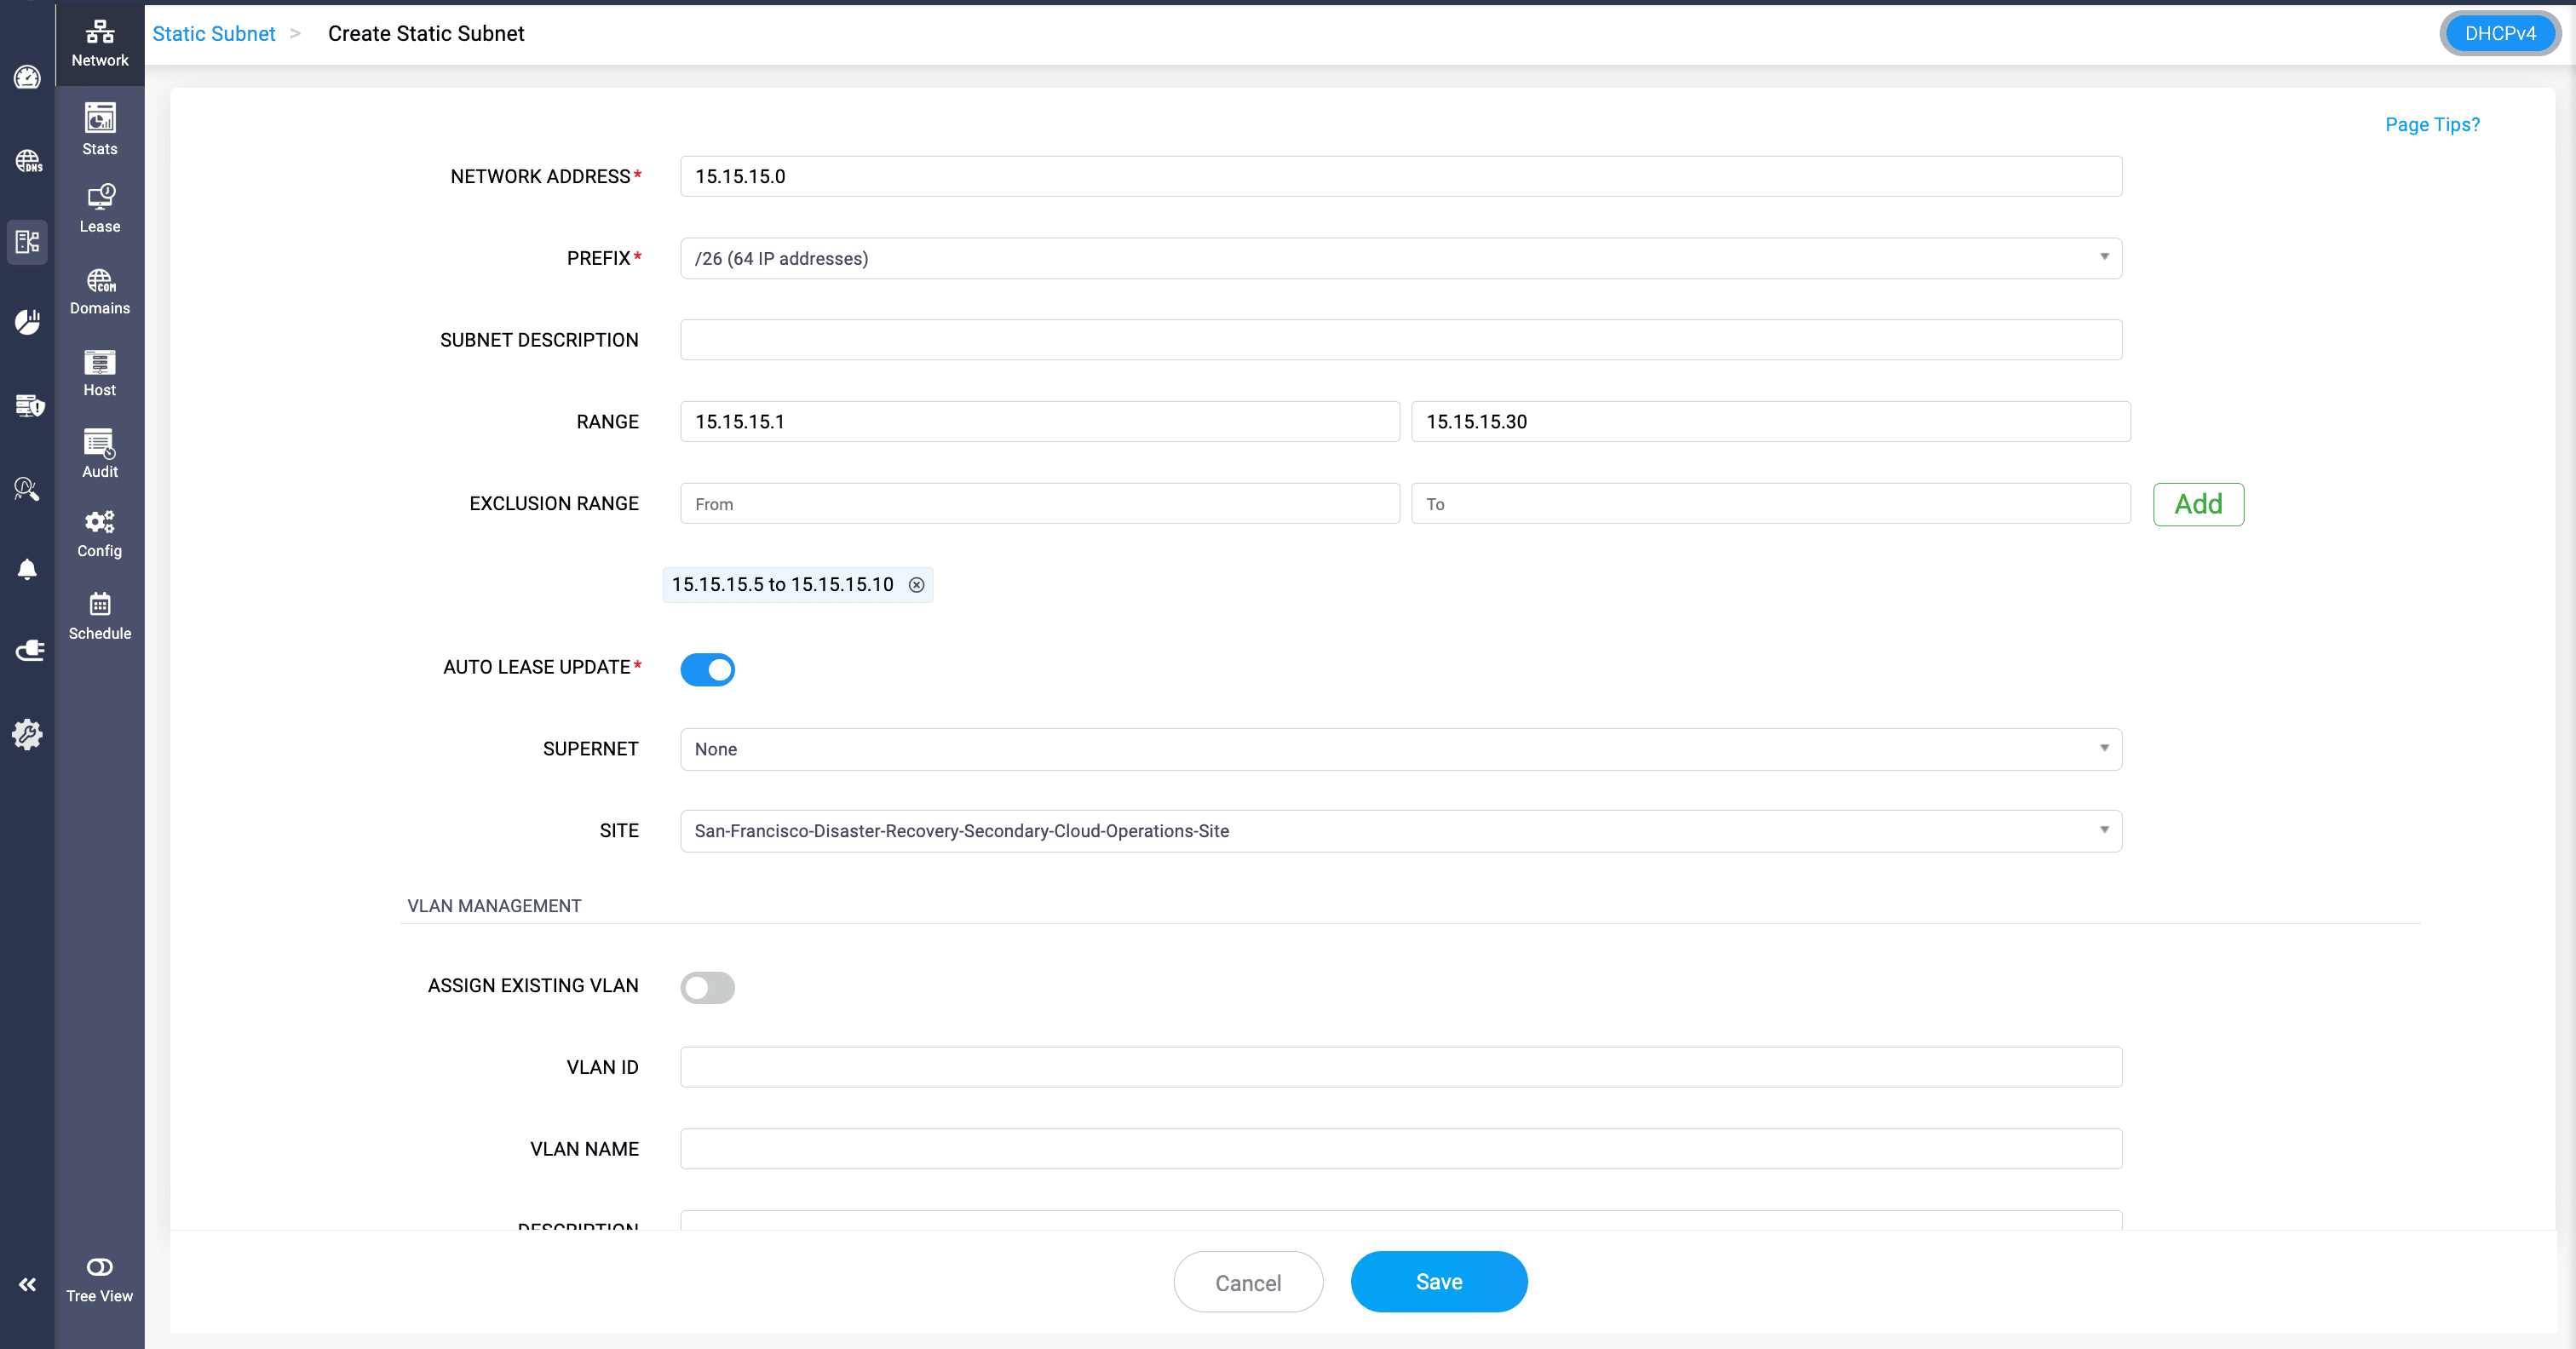
To create a static subnet:
- Go to DHCP > Network > Static Subnet.
- Click Add Static Subnet, or use Import when static lease information is maintained in a spreadsheet.
- Enter the Network Address and Prefix.
- Enter a suitable Subnet Description.
- Associate the subnet with a Supernet where hierarchical IP address planning is required.
Enable Auto Lease Update to automatically check the status of statically assigned IP addresses within the subnet. DDI Central periodically performs ping checks on these IP addresses to determine whether they are currently active (reachable) or down (unreachable) and updates their status accordingly.
This helps administrators track the availability of manually managed static IP addresses without having to verify them individually.
- Associate VLAN details where required.
- Click Save.
Importing static subnets
There are two ways you can import your network's static subnets into DDI Central: Without Lease and With Lease. Here are the sample files:

If you want to create static subnets by importing your existing data, select the Import option and import them as a CSV file. Or, if you want the application to create static subnets using the lease data that you already have, select Import with Lease.
To create a custom column, select the **Custom Column** option from the **Actions** dropdown and enter the column name and default value to be displayed. These values can be edited on the **Edit Static Subnet** page.


You can view all the custom columns created by selecting the **Columns** dropdown option. You can also deselect columns to prevent them from being displayed.

When importing data from a CSV file, create and add the custom columns to the table beforehand. This ensures that the values in the custom columns in your CSV file are imported seamlessly into the application.
Shared Network
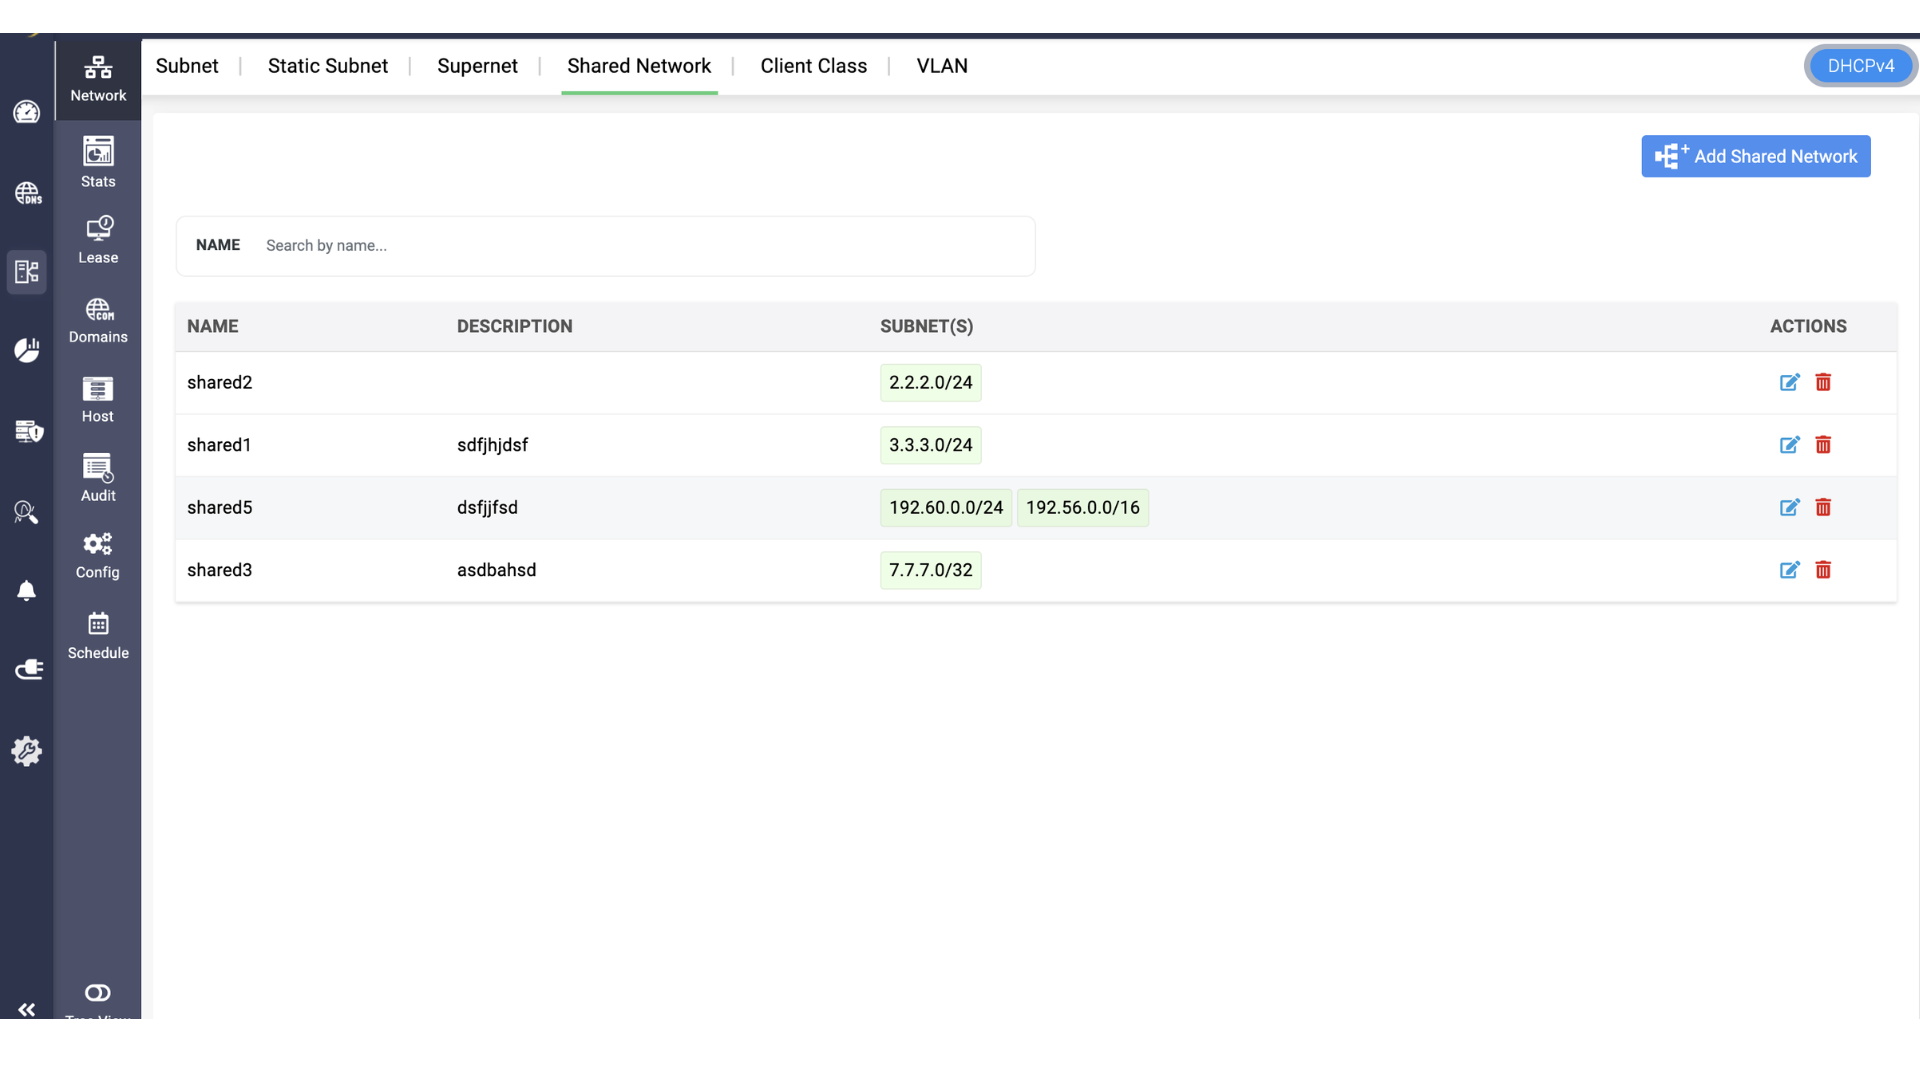
A shared network groups multiple logical IP networks or subnets that share the same physical network segment. It allows DHCP to serve clients from multiple subnets on the same underlying network while applying the appropriate address ranges and DHCP configuration.
The Shared Network workflow is common to both Legacy DHCP (ISC DHCPD) and Modern DHCP (Kea DHCP). The supplied Kea implementation notes do not identify any Kea-specific Shared Network field differences, so the same workflow applies to both server types.
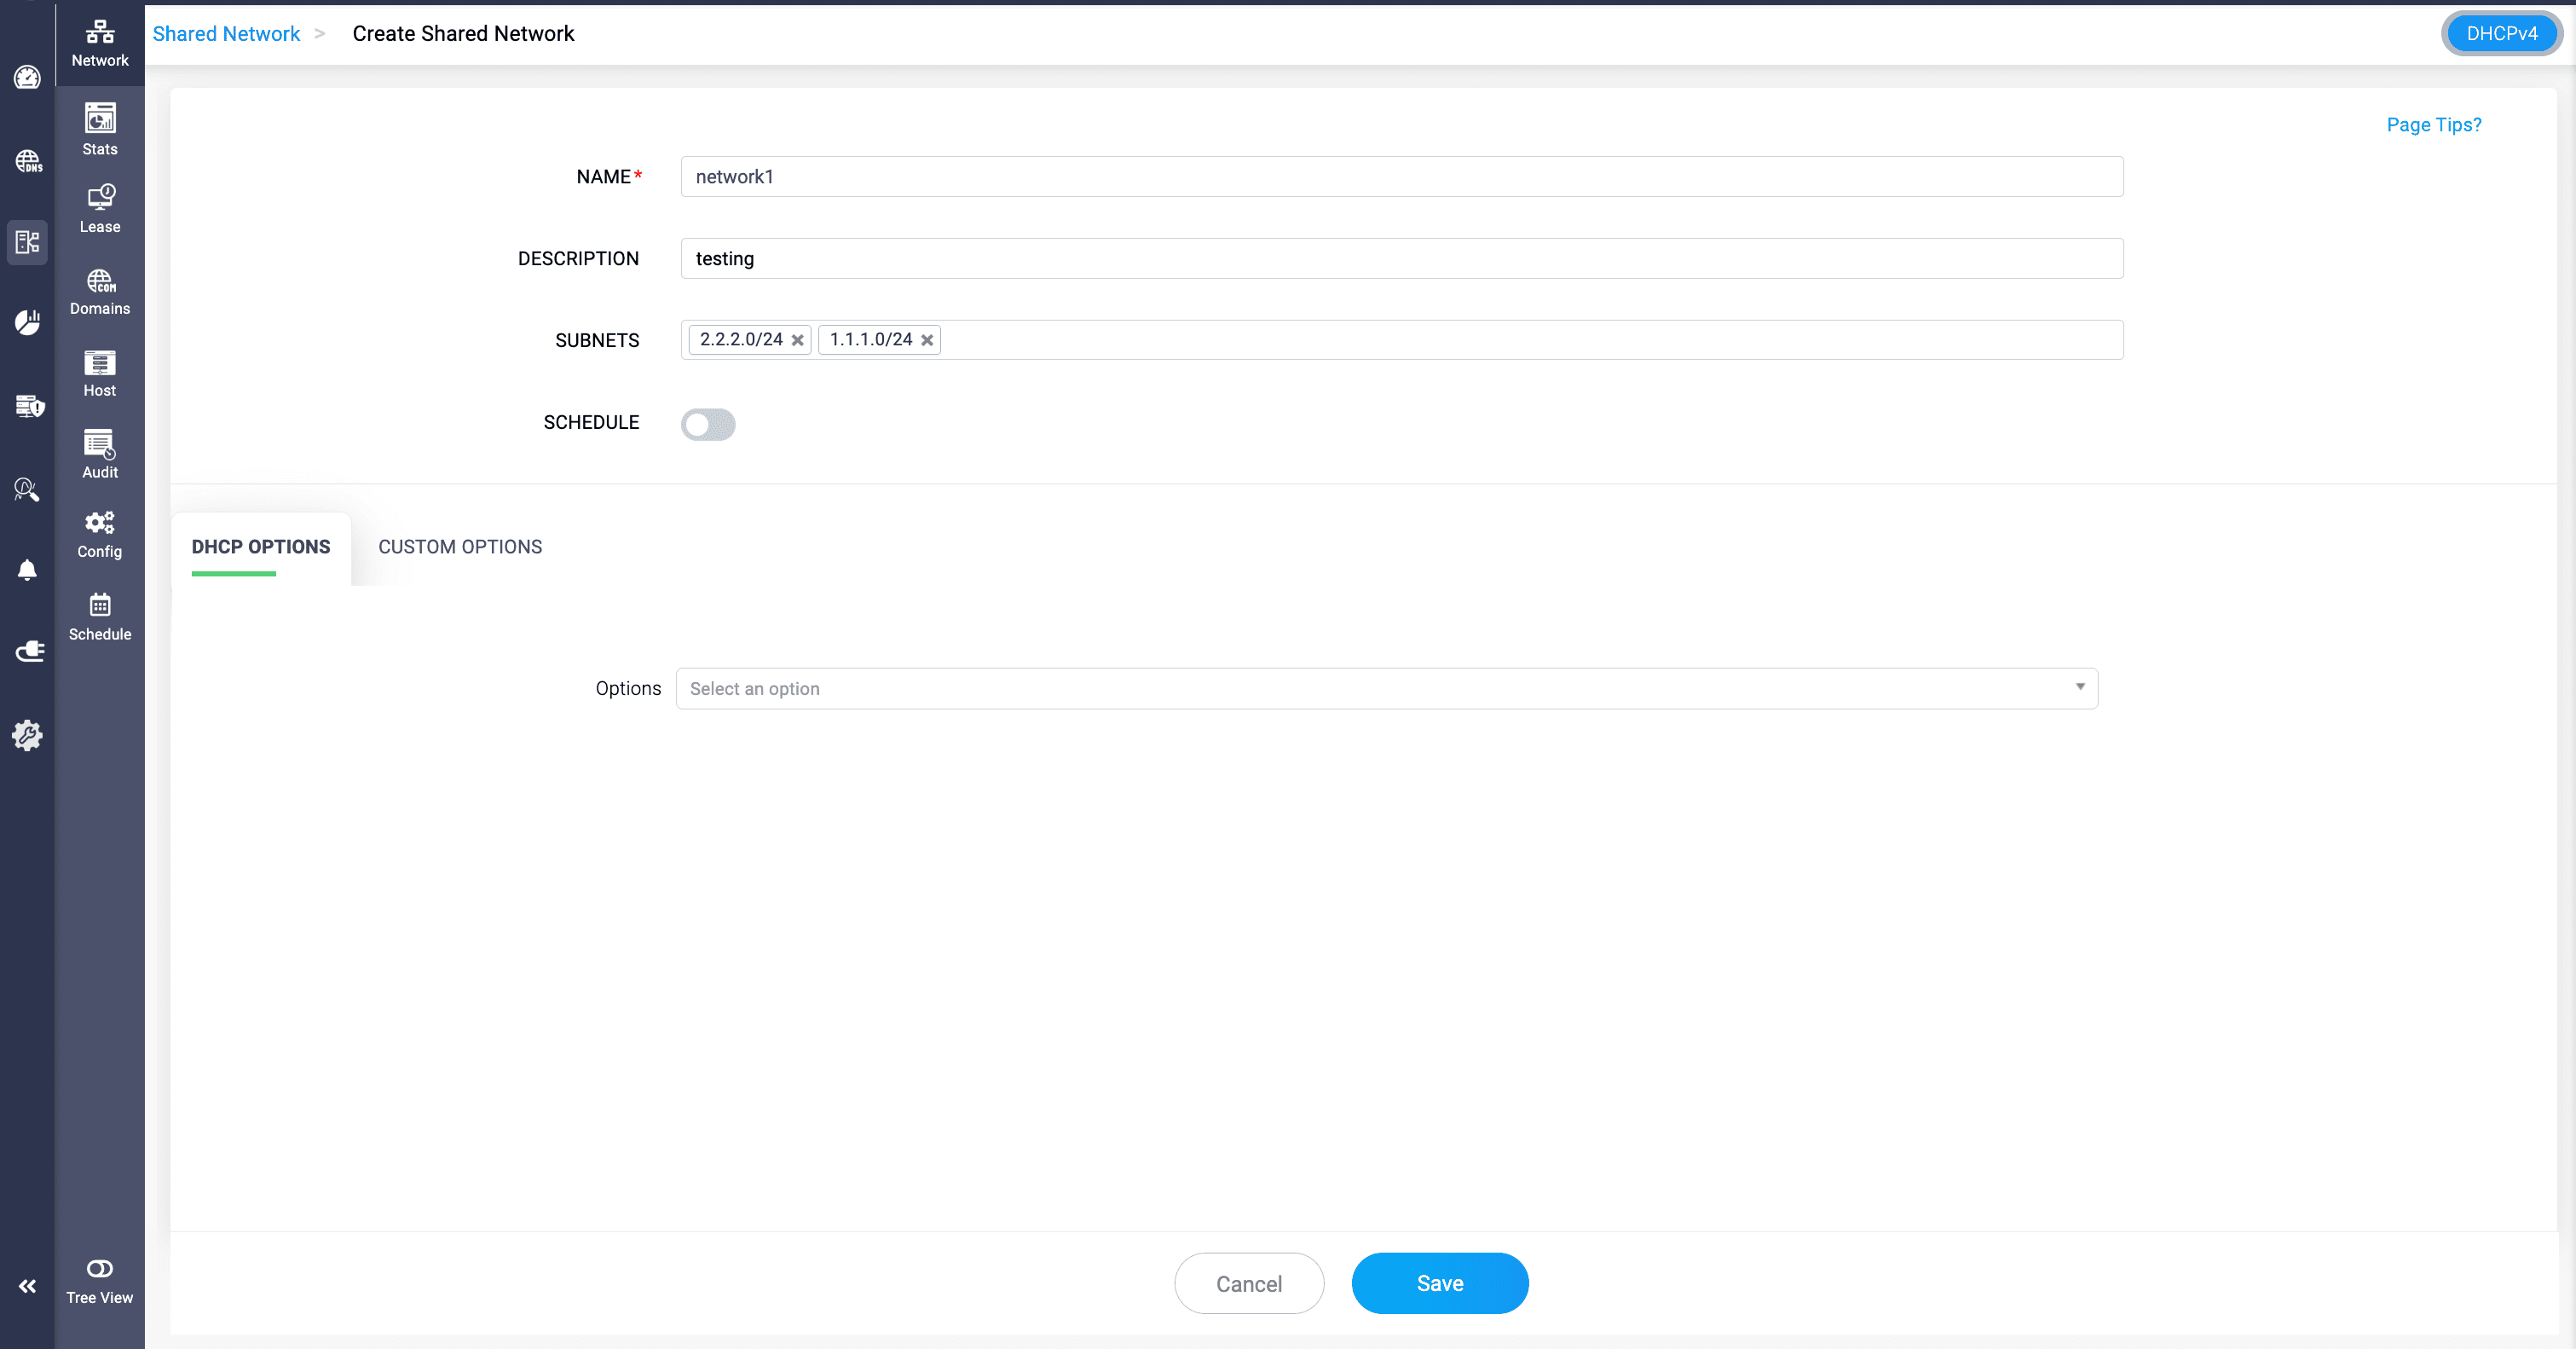
To create a shared network:
- Go to DHCP > Network > Shared Network.
- Click Add Shared Network.
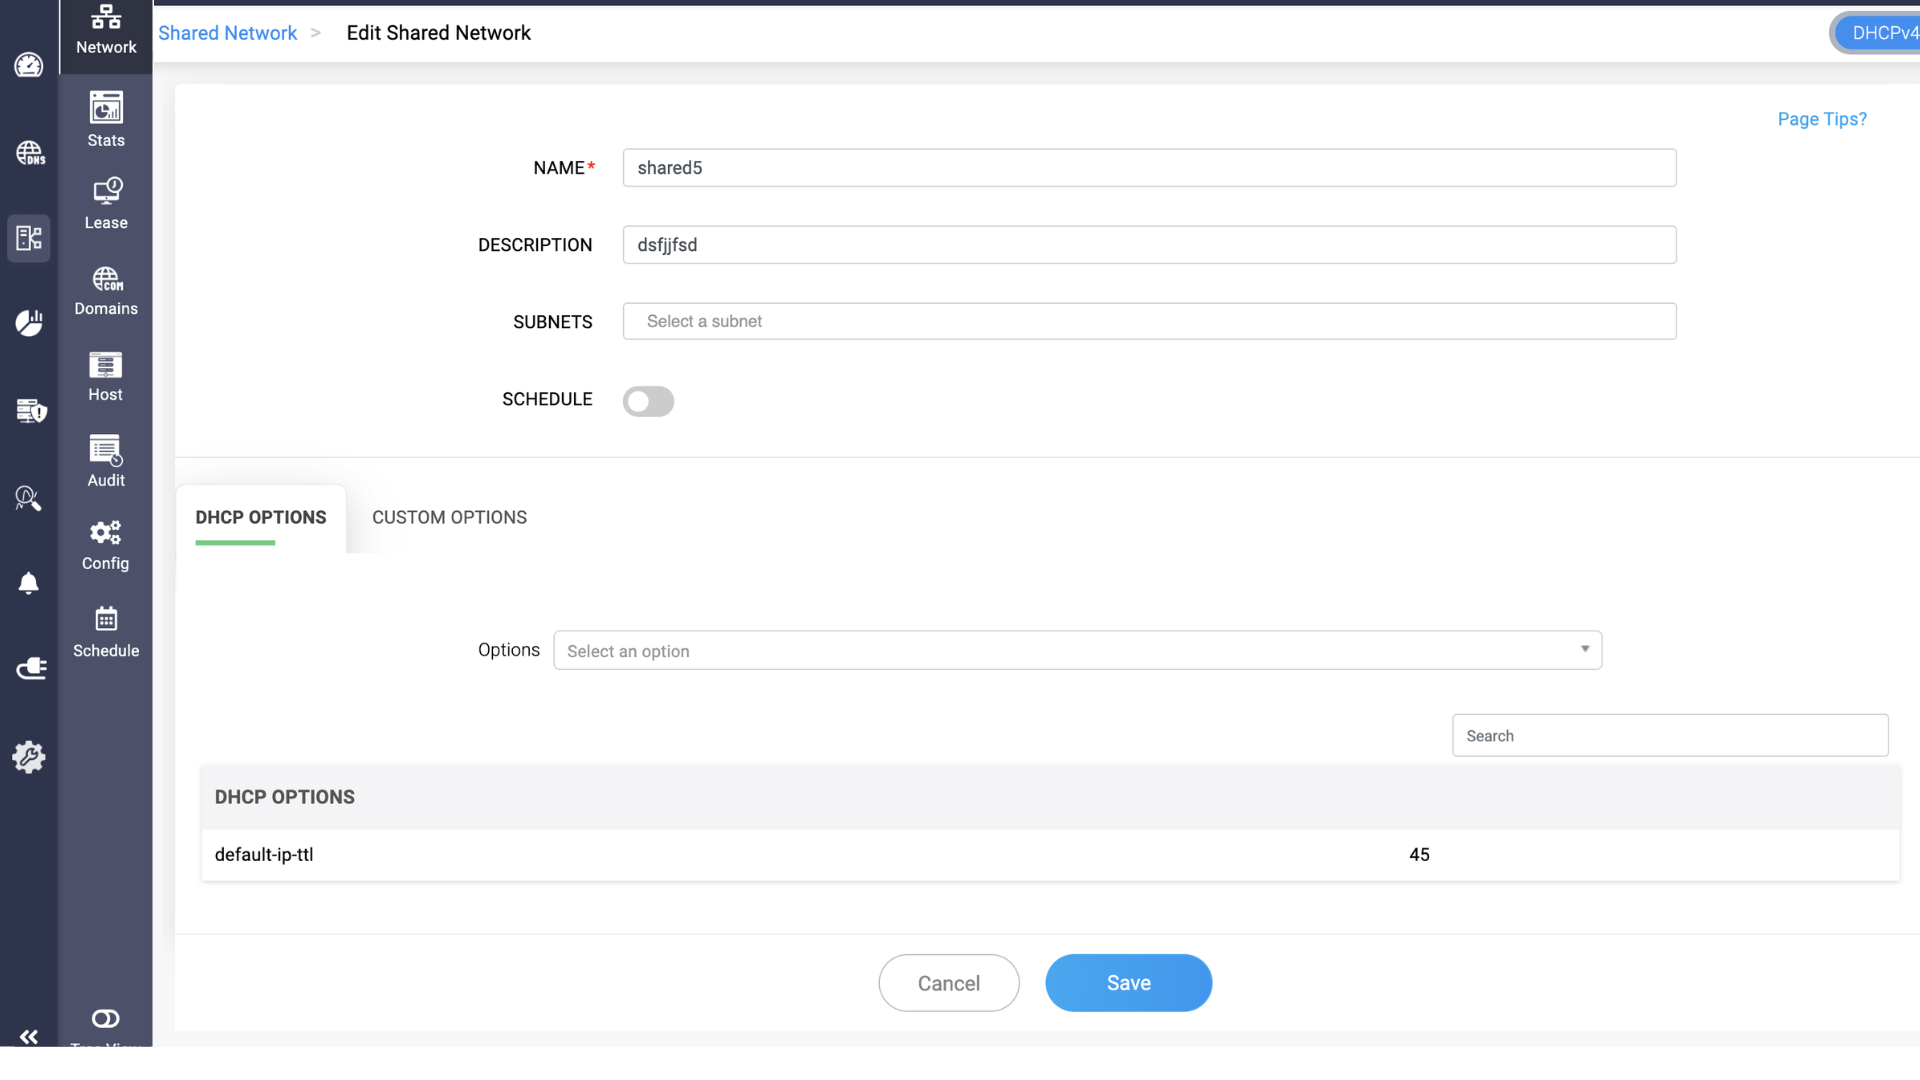
- Enter a unique Name and suitable Description.
- Add the required DHCP subnets to the shared network.
- Assign the required standard DHCP Options and Custom Options.
- Click Save.
Note: Custom columns option is not available for Shared Network.
Additional scope management
Managing and unmanaging DHCP subnets
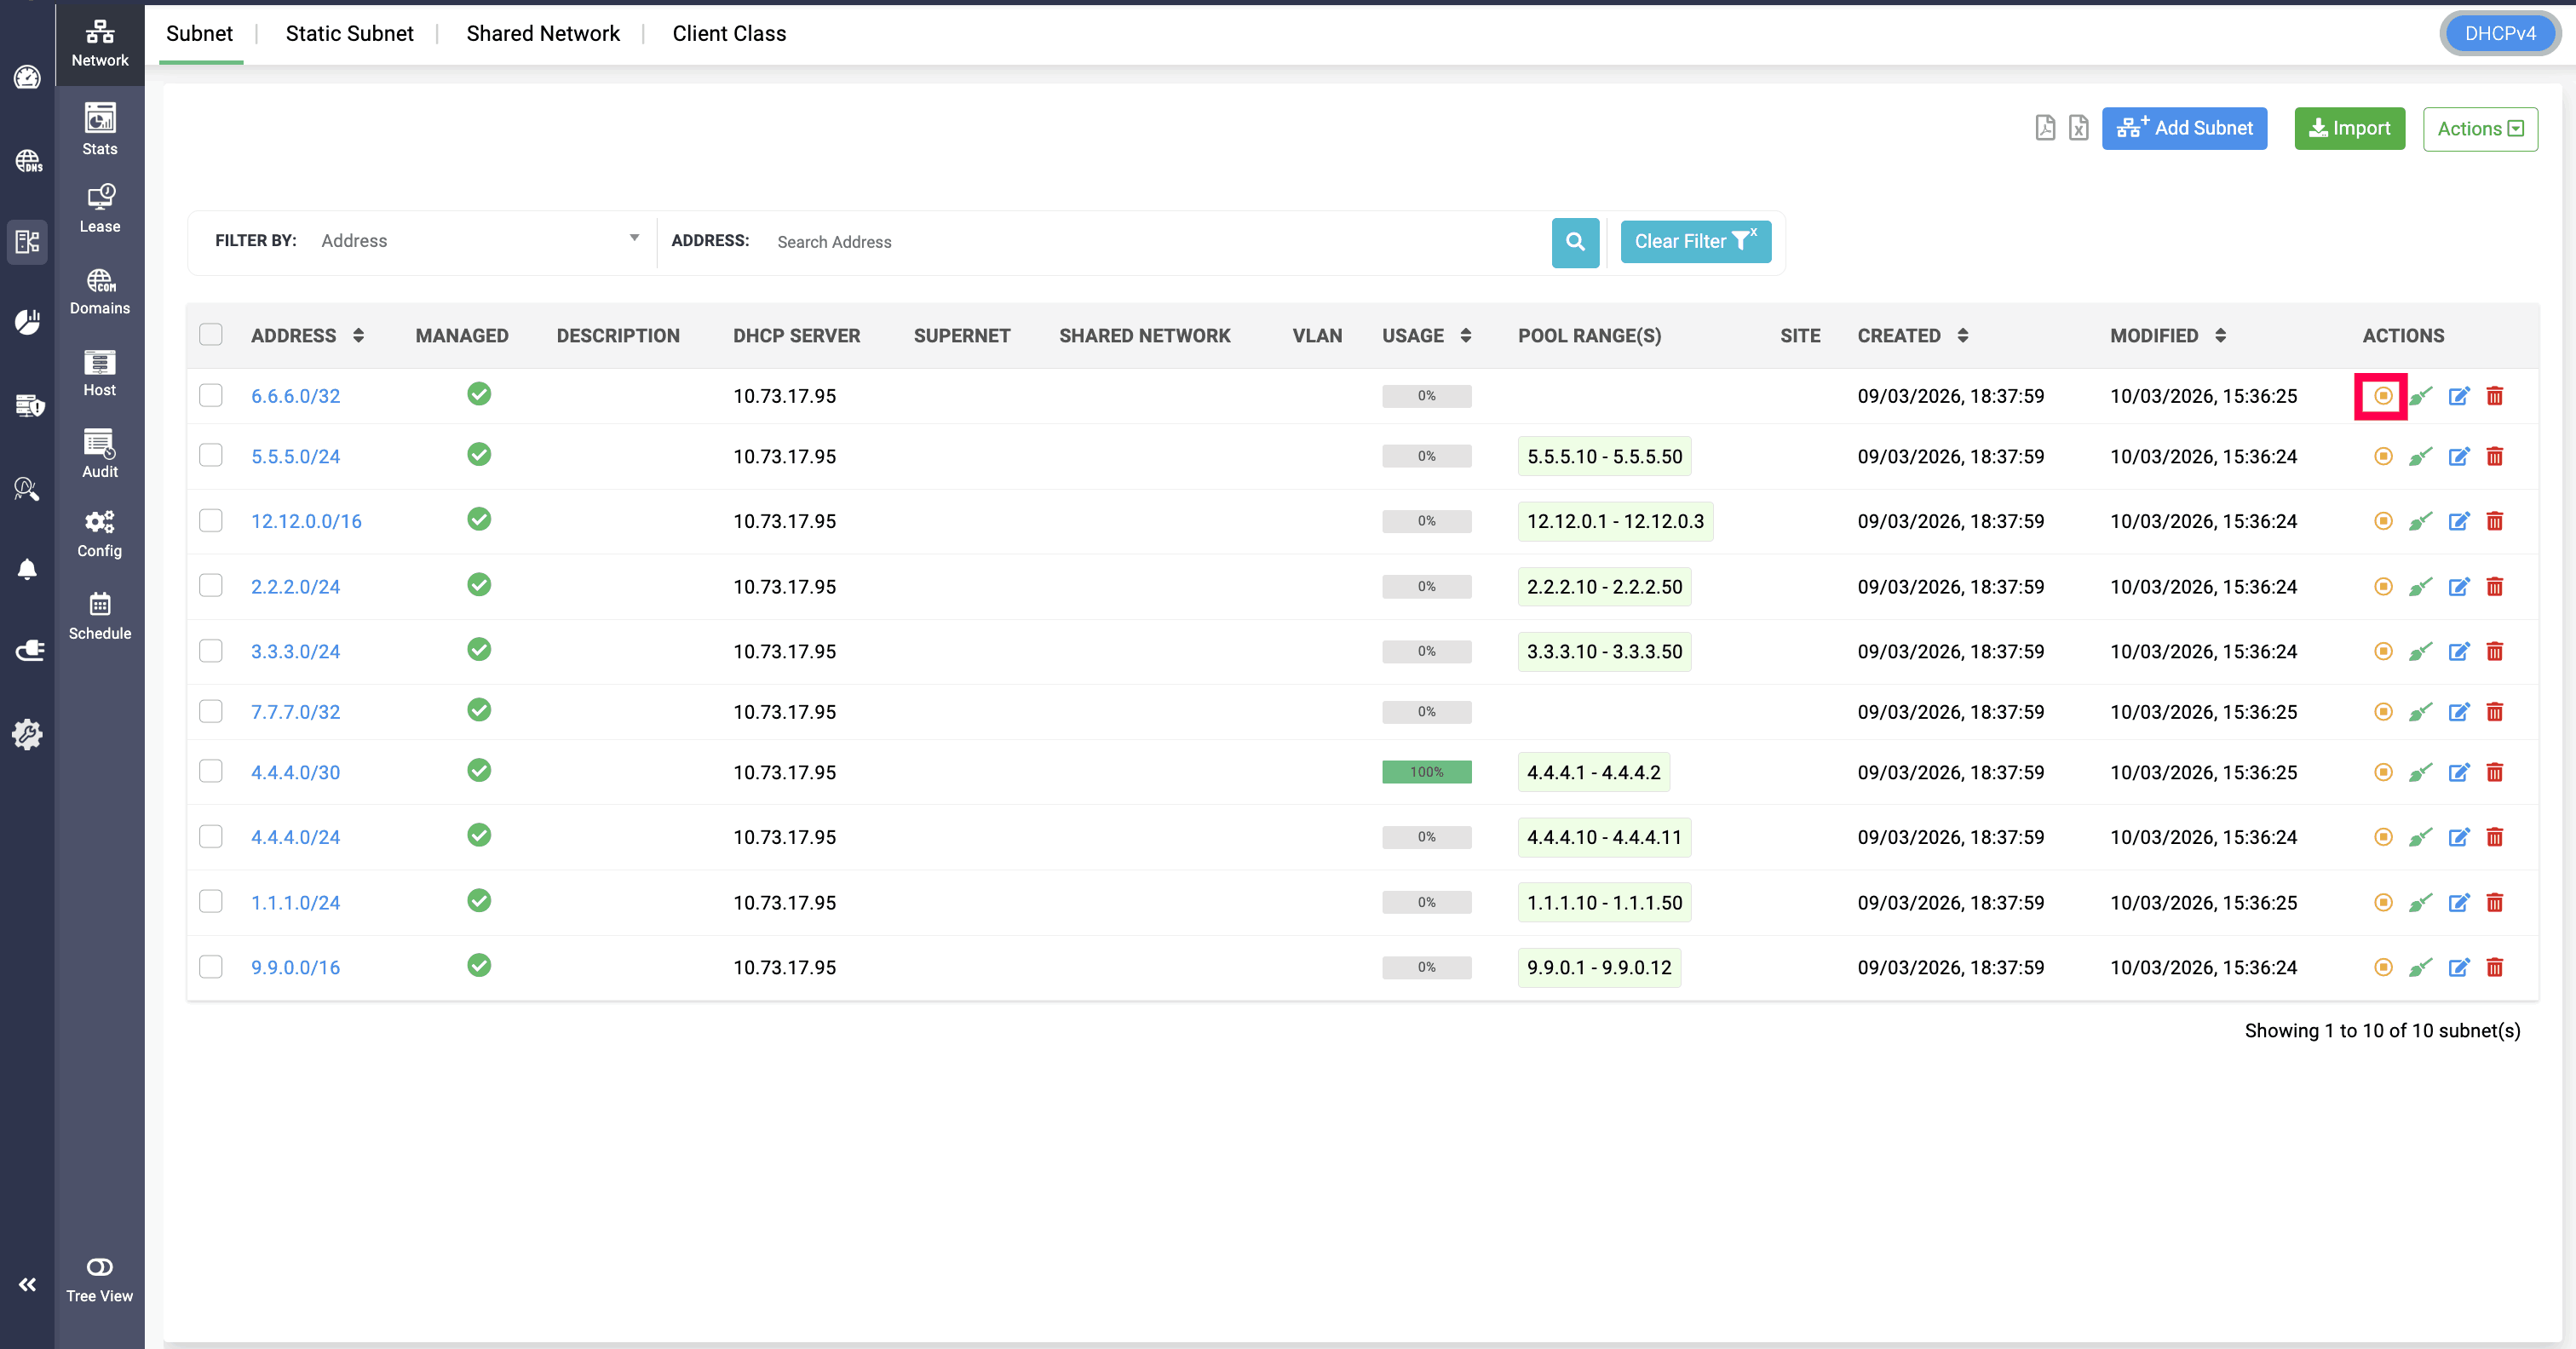
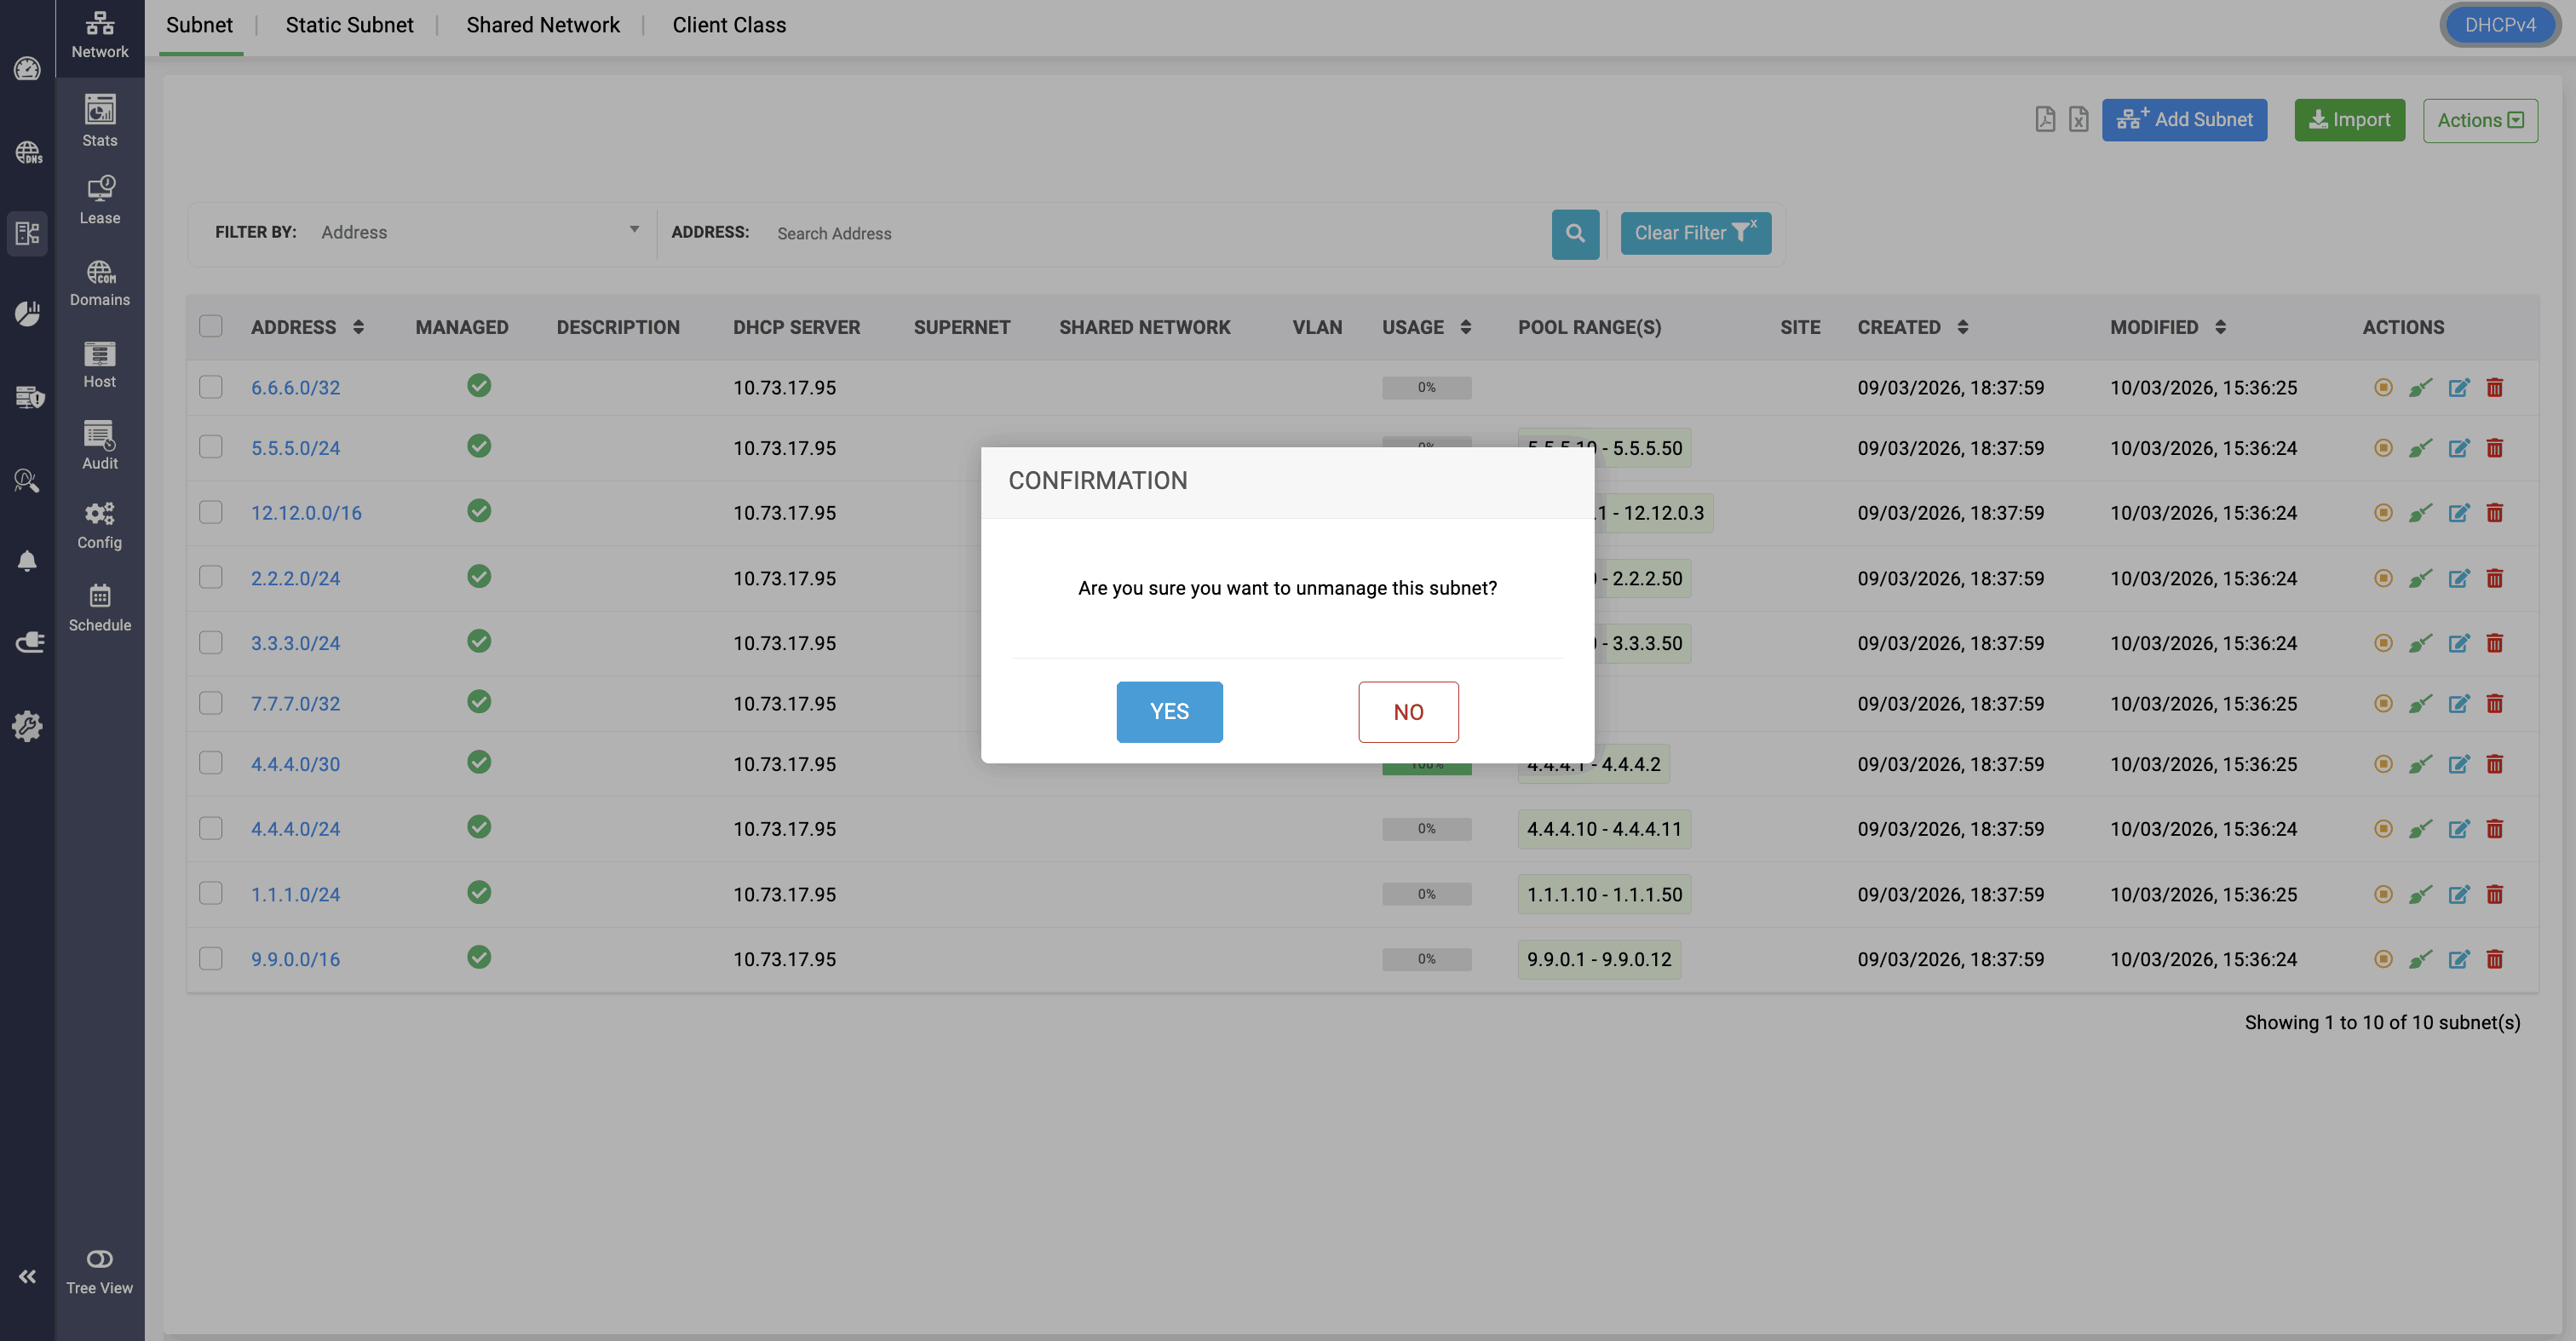
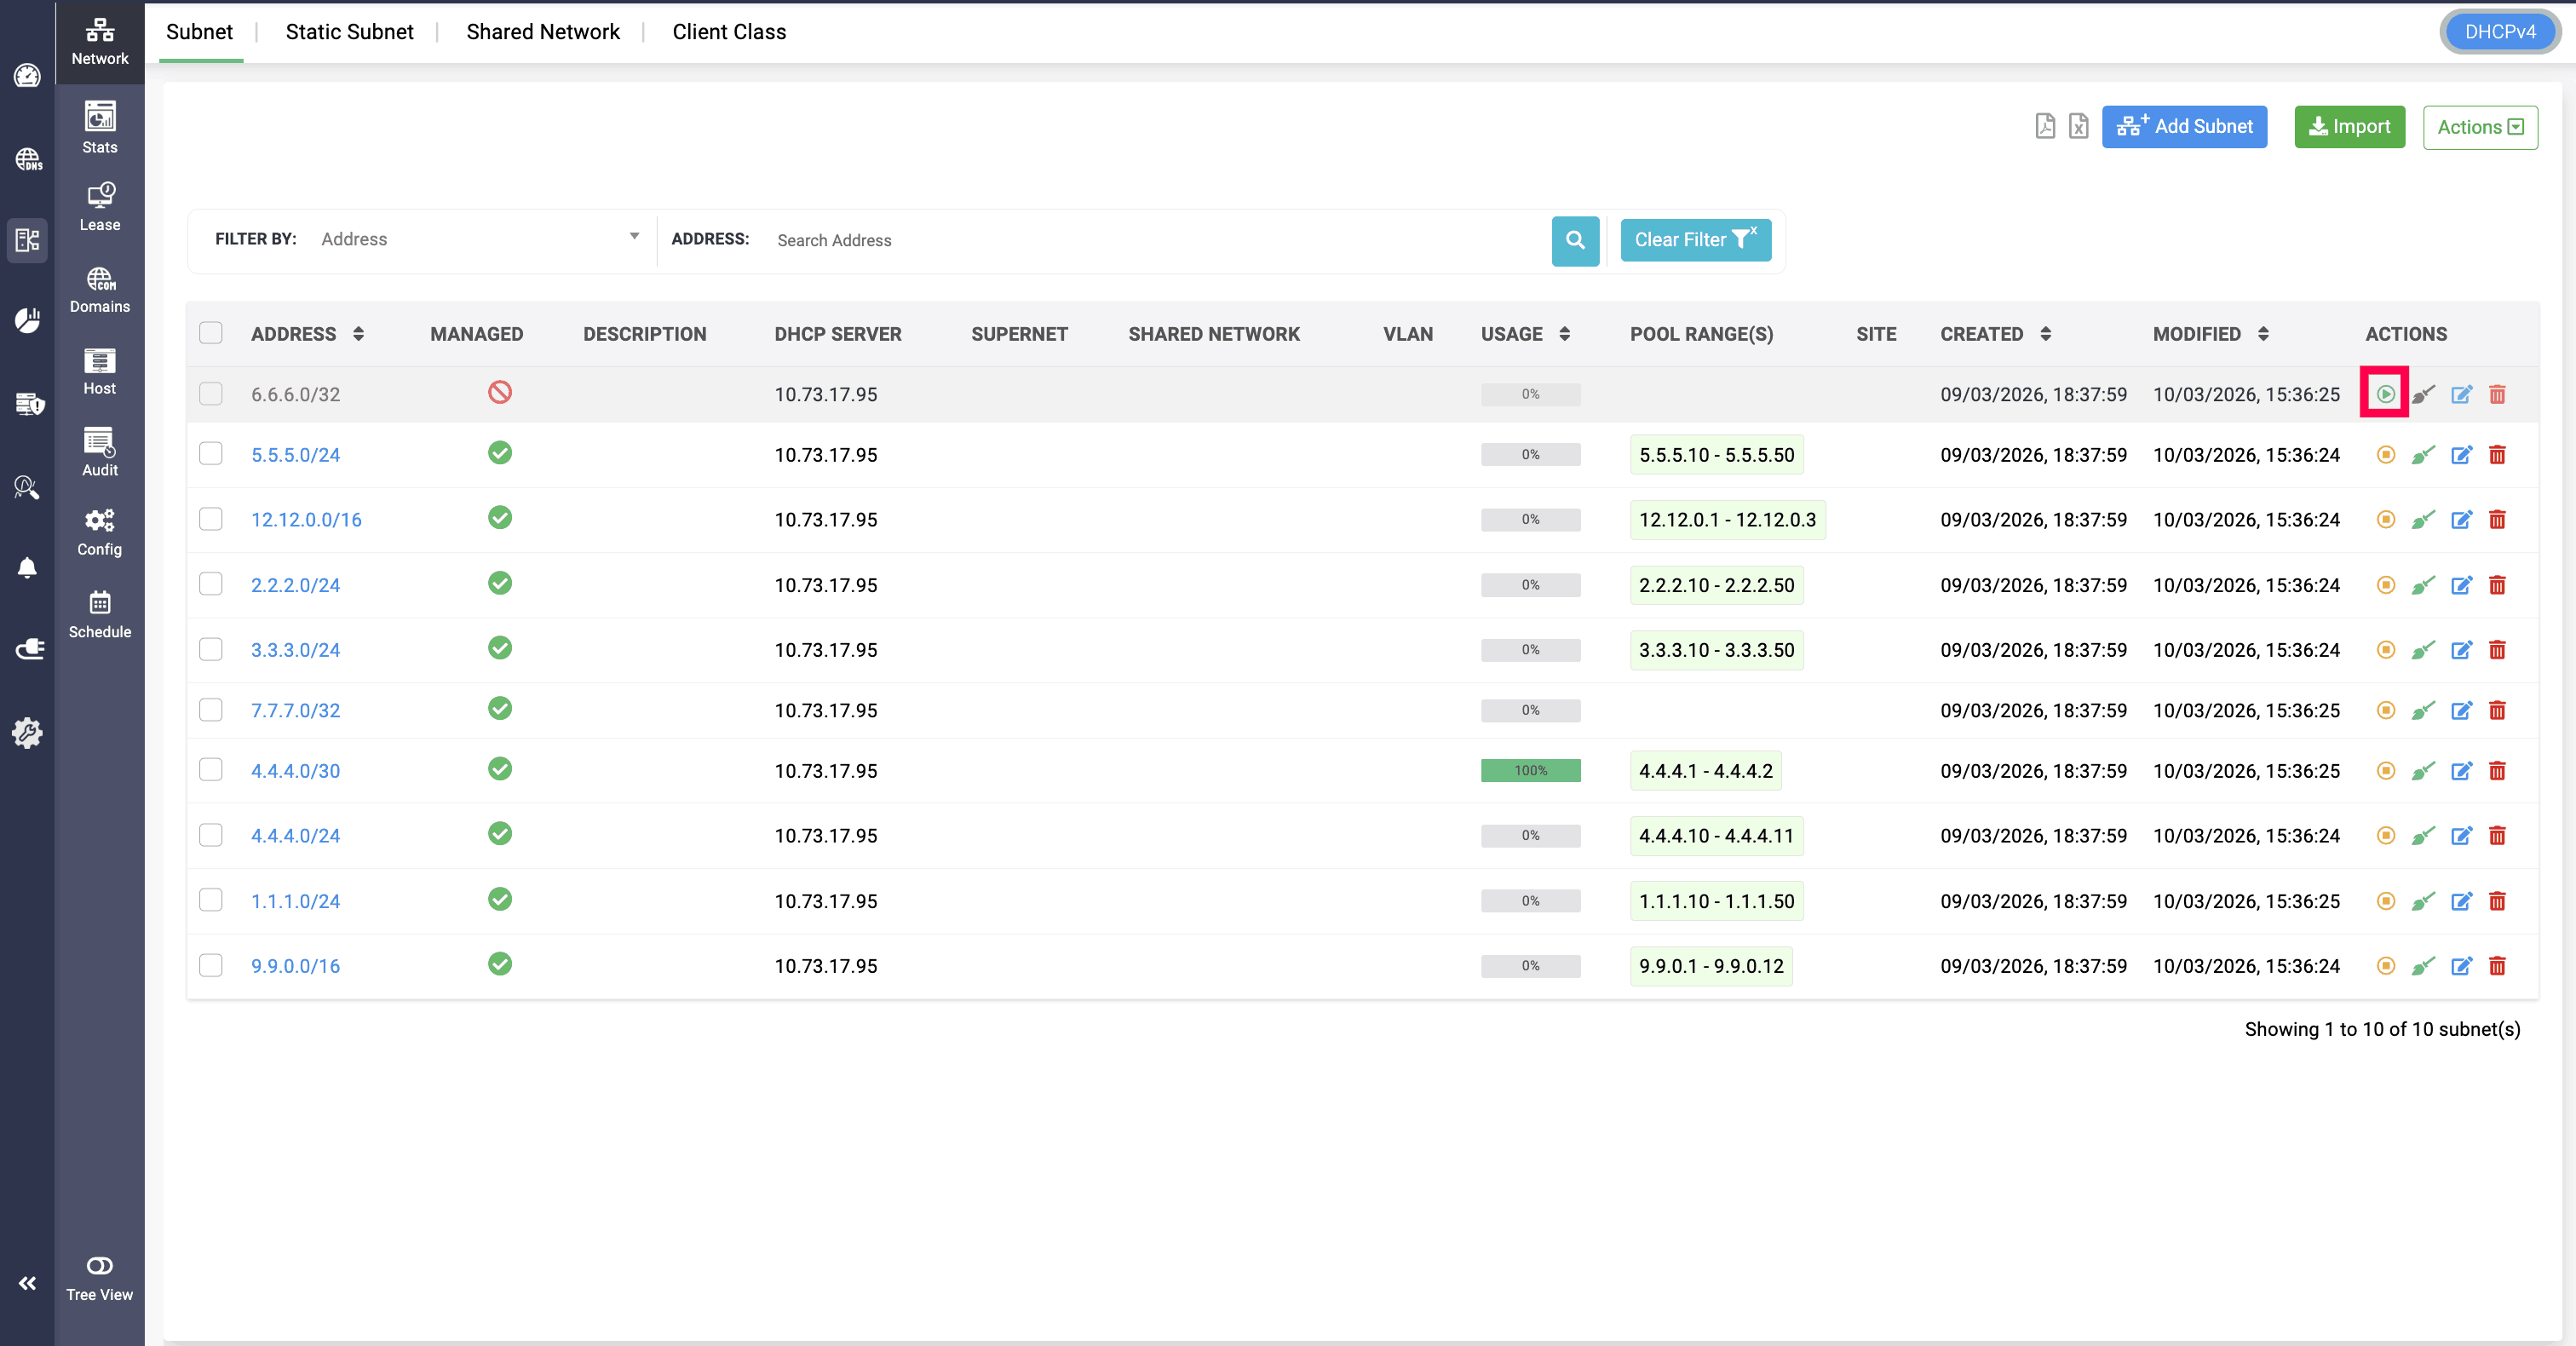
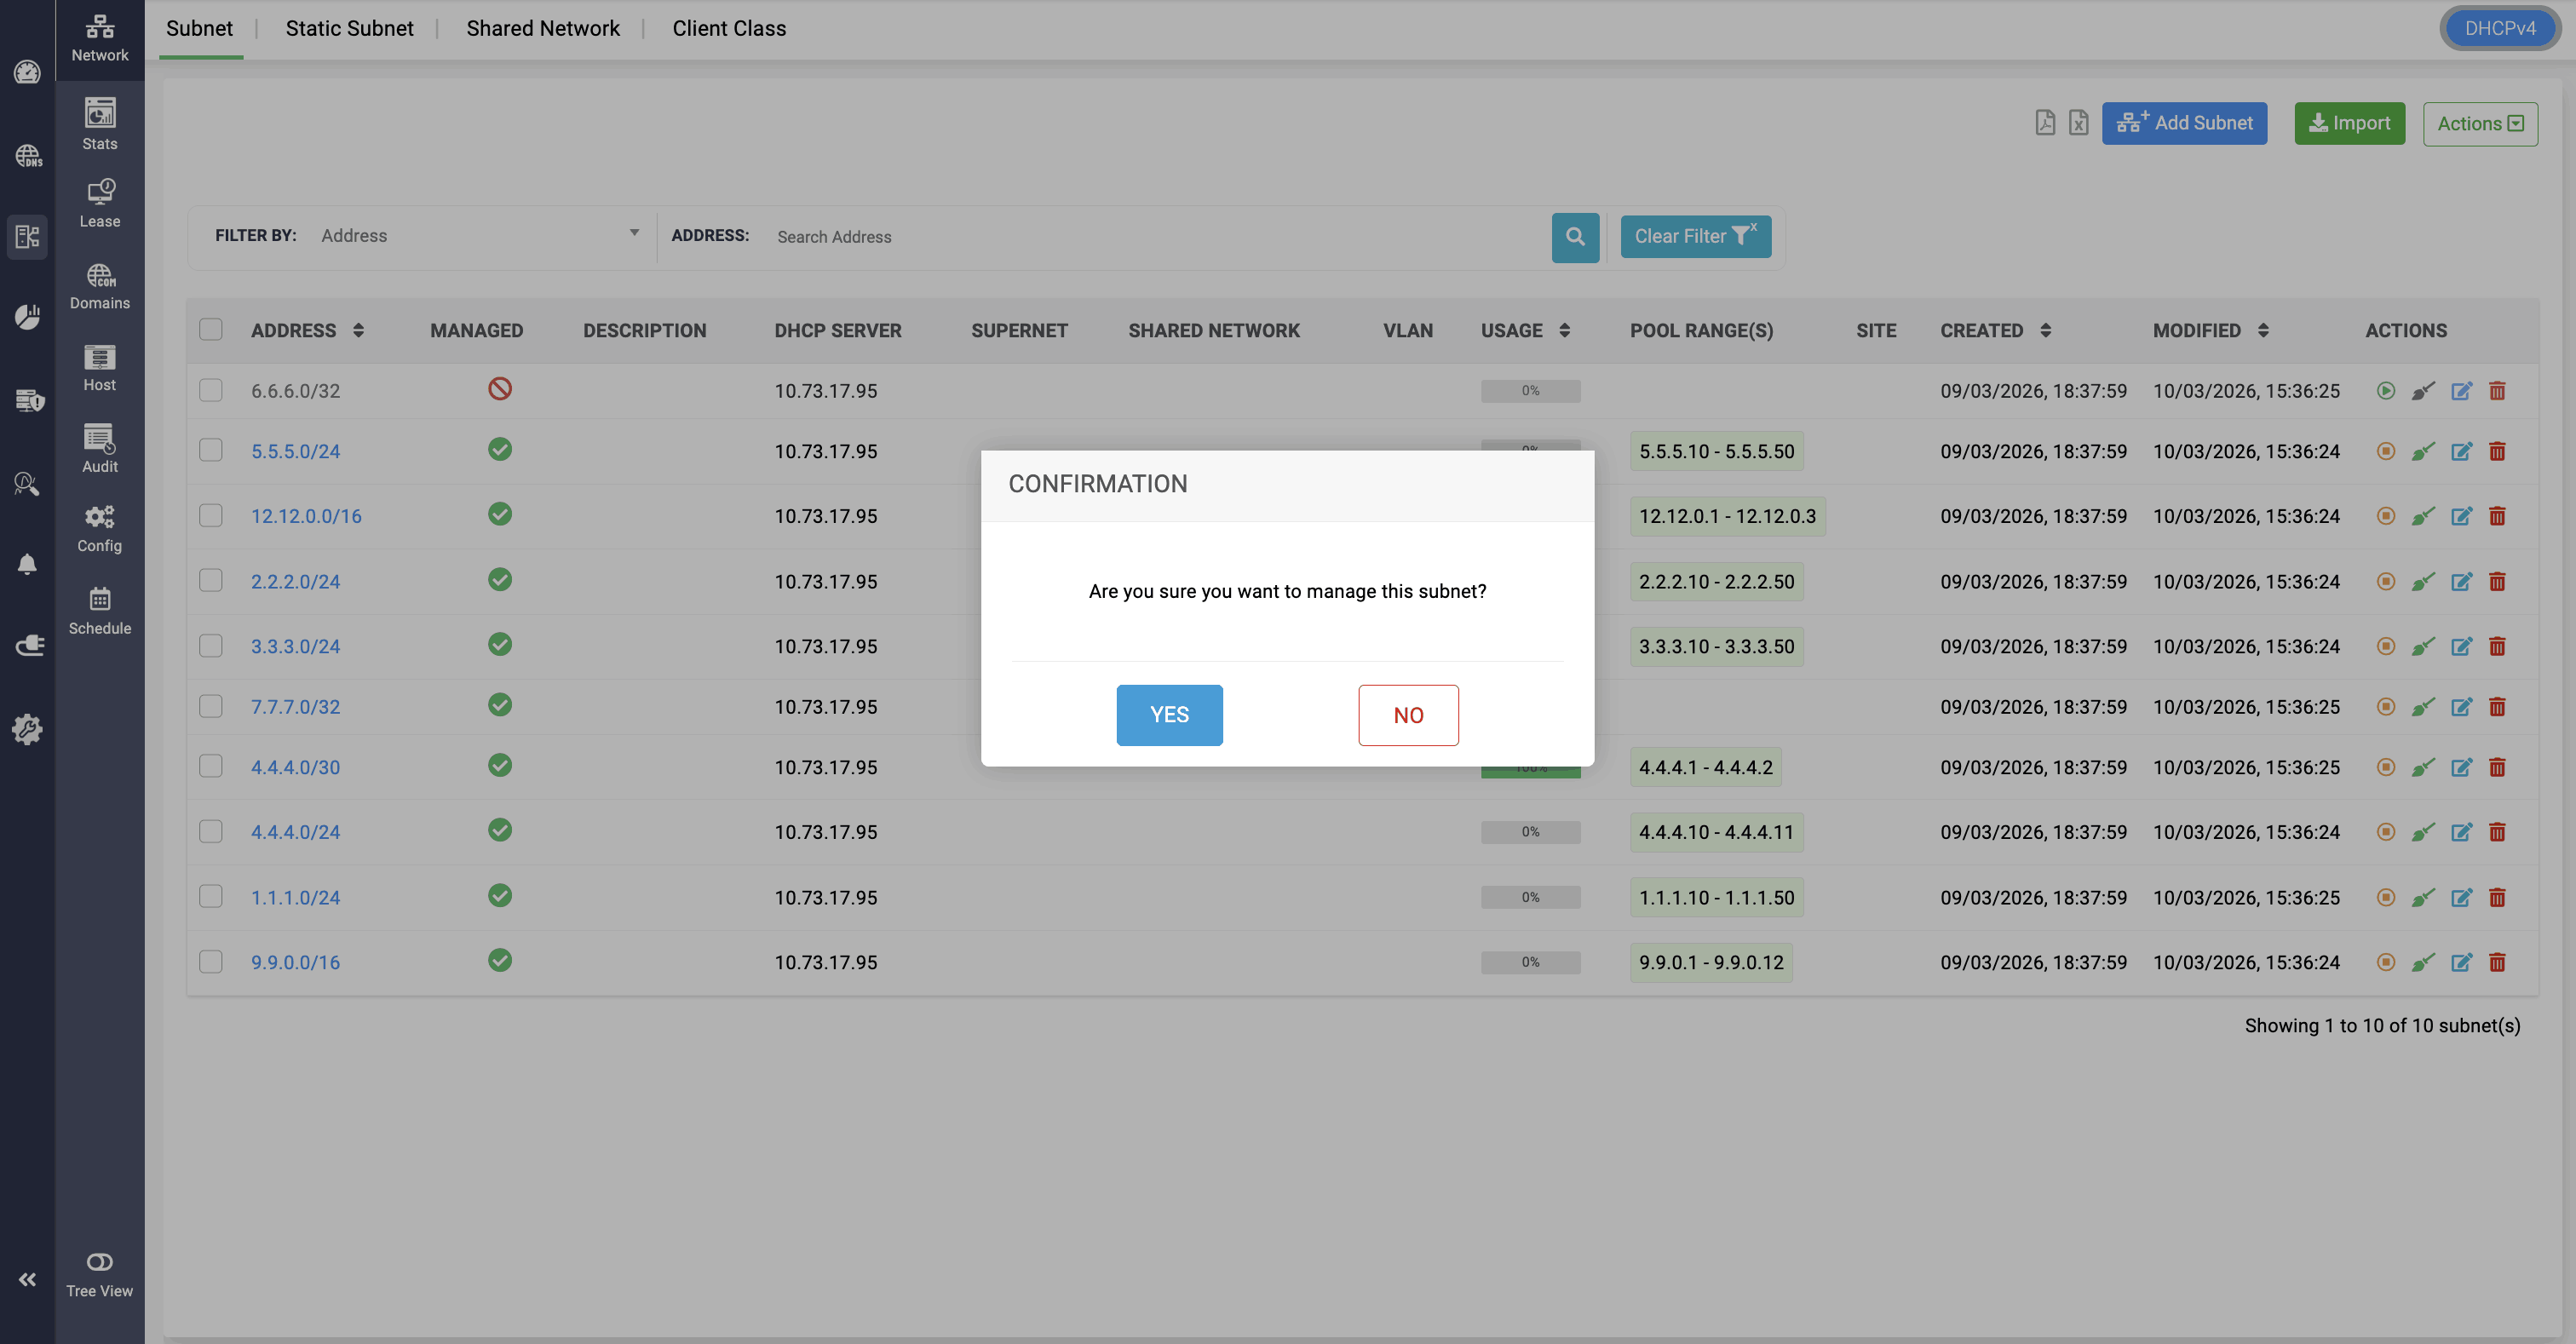
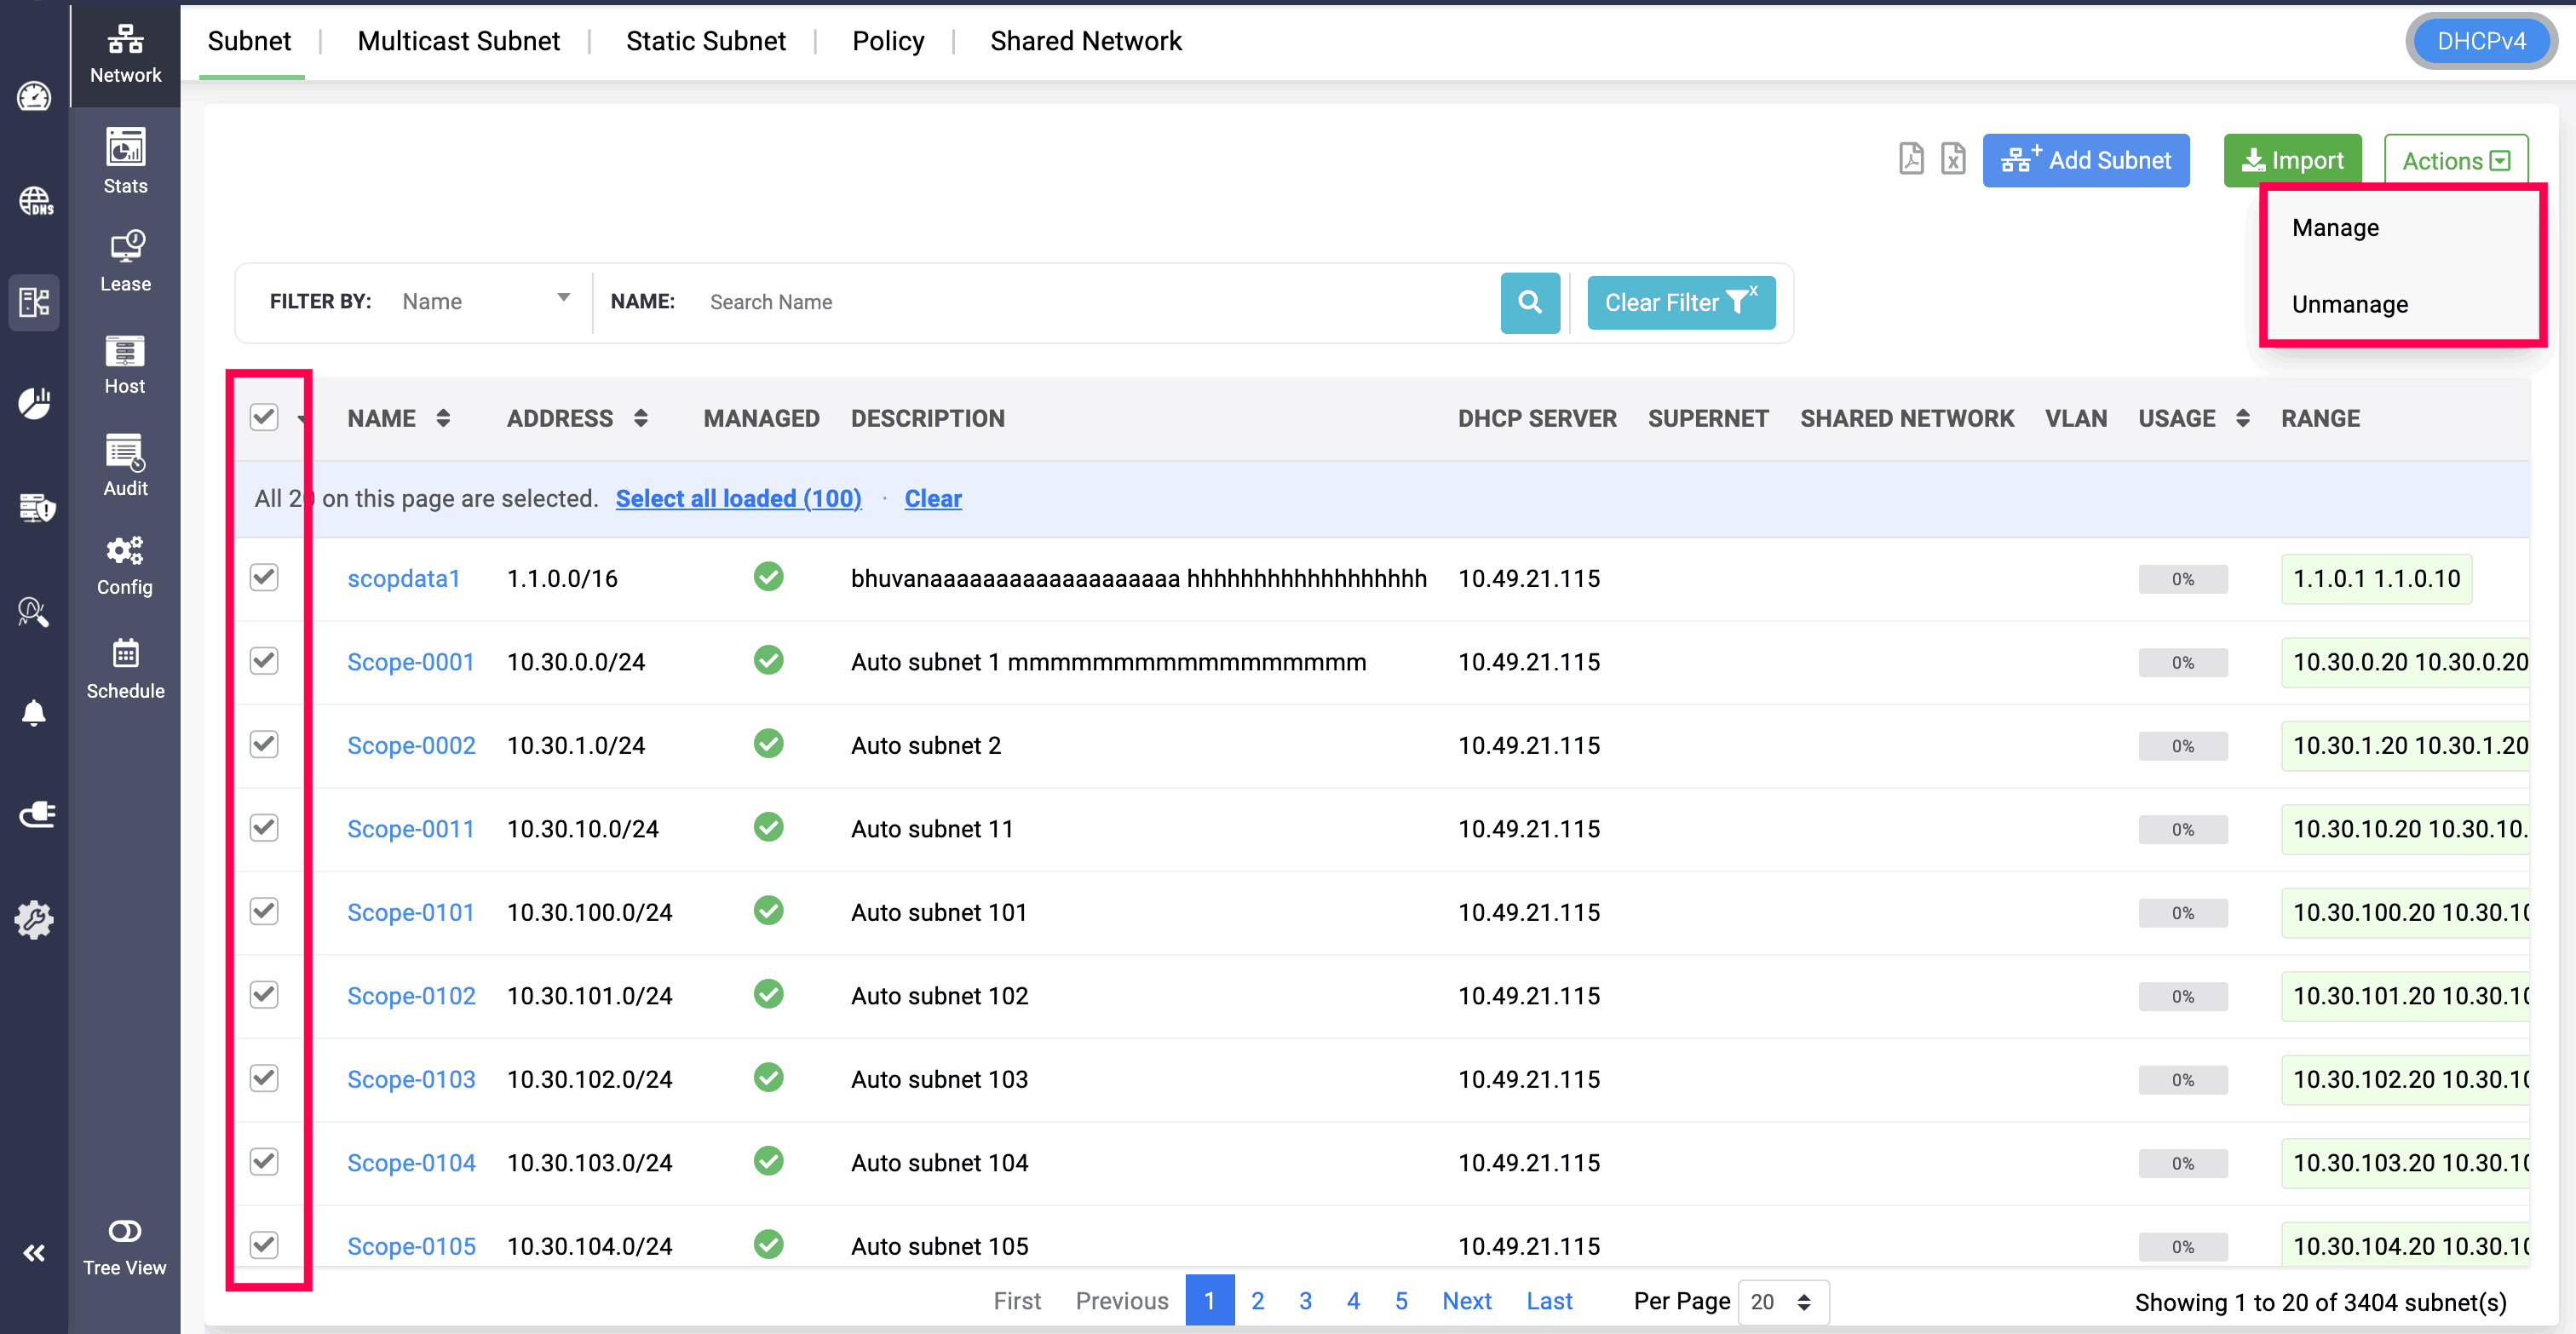
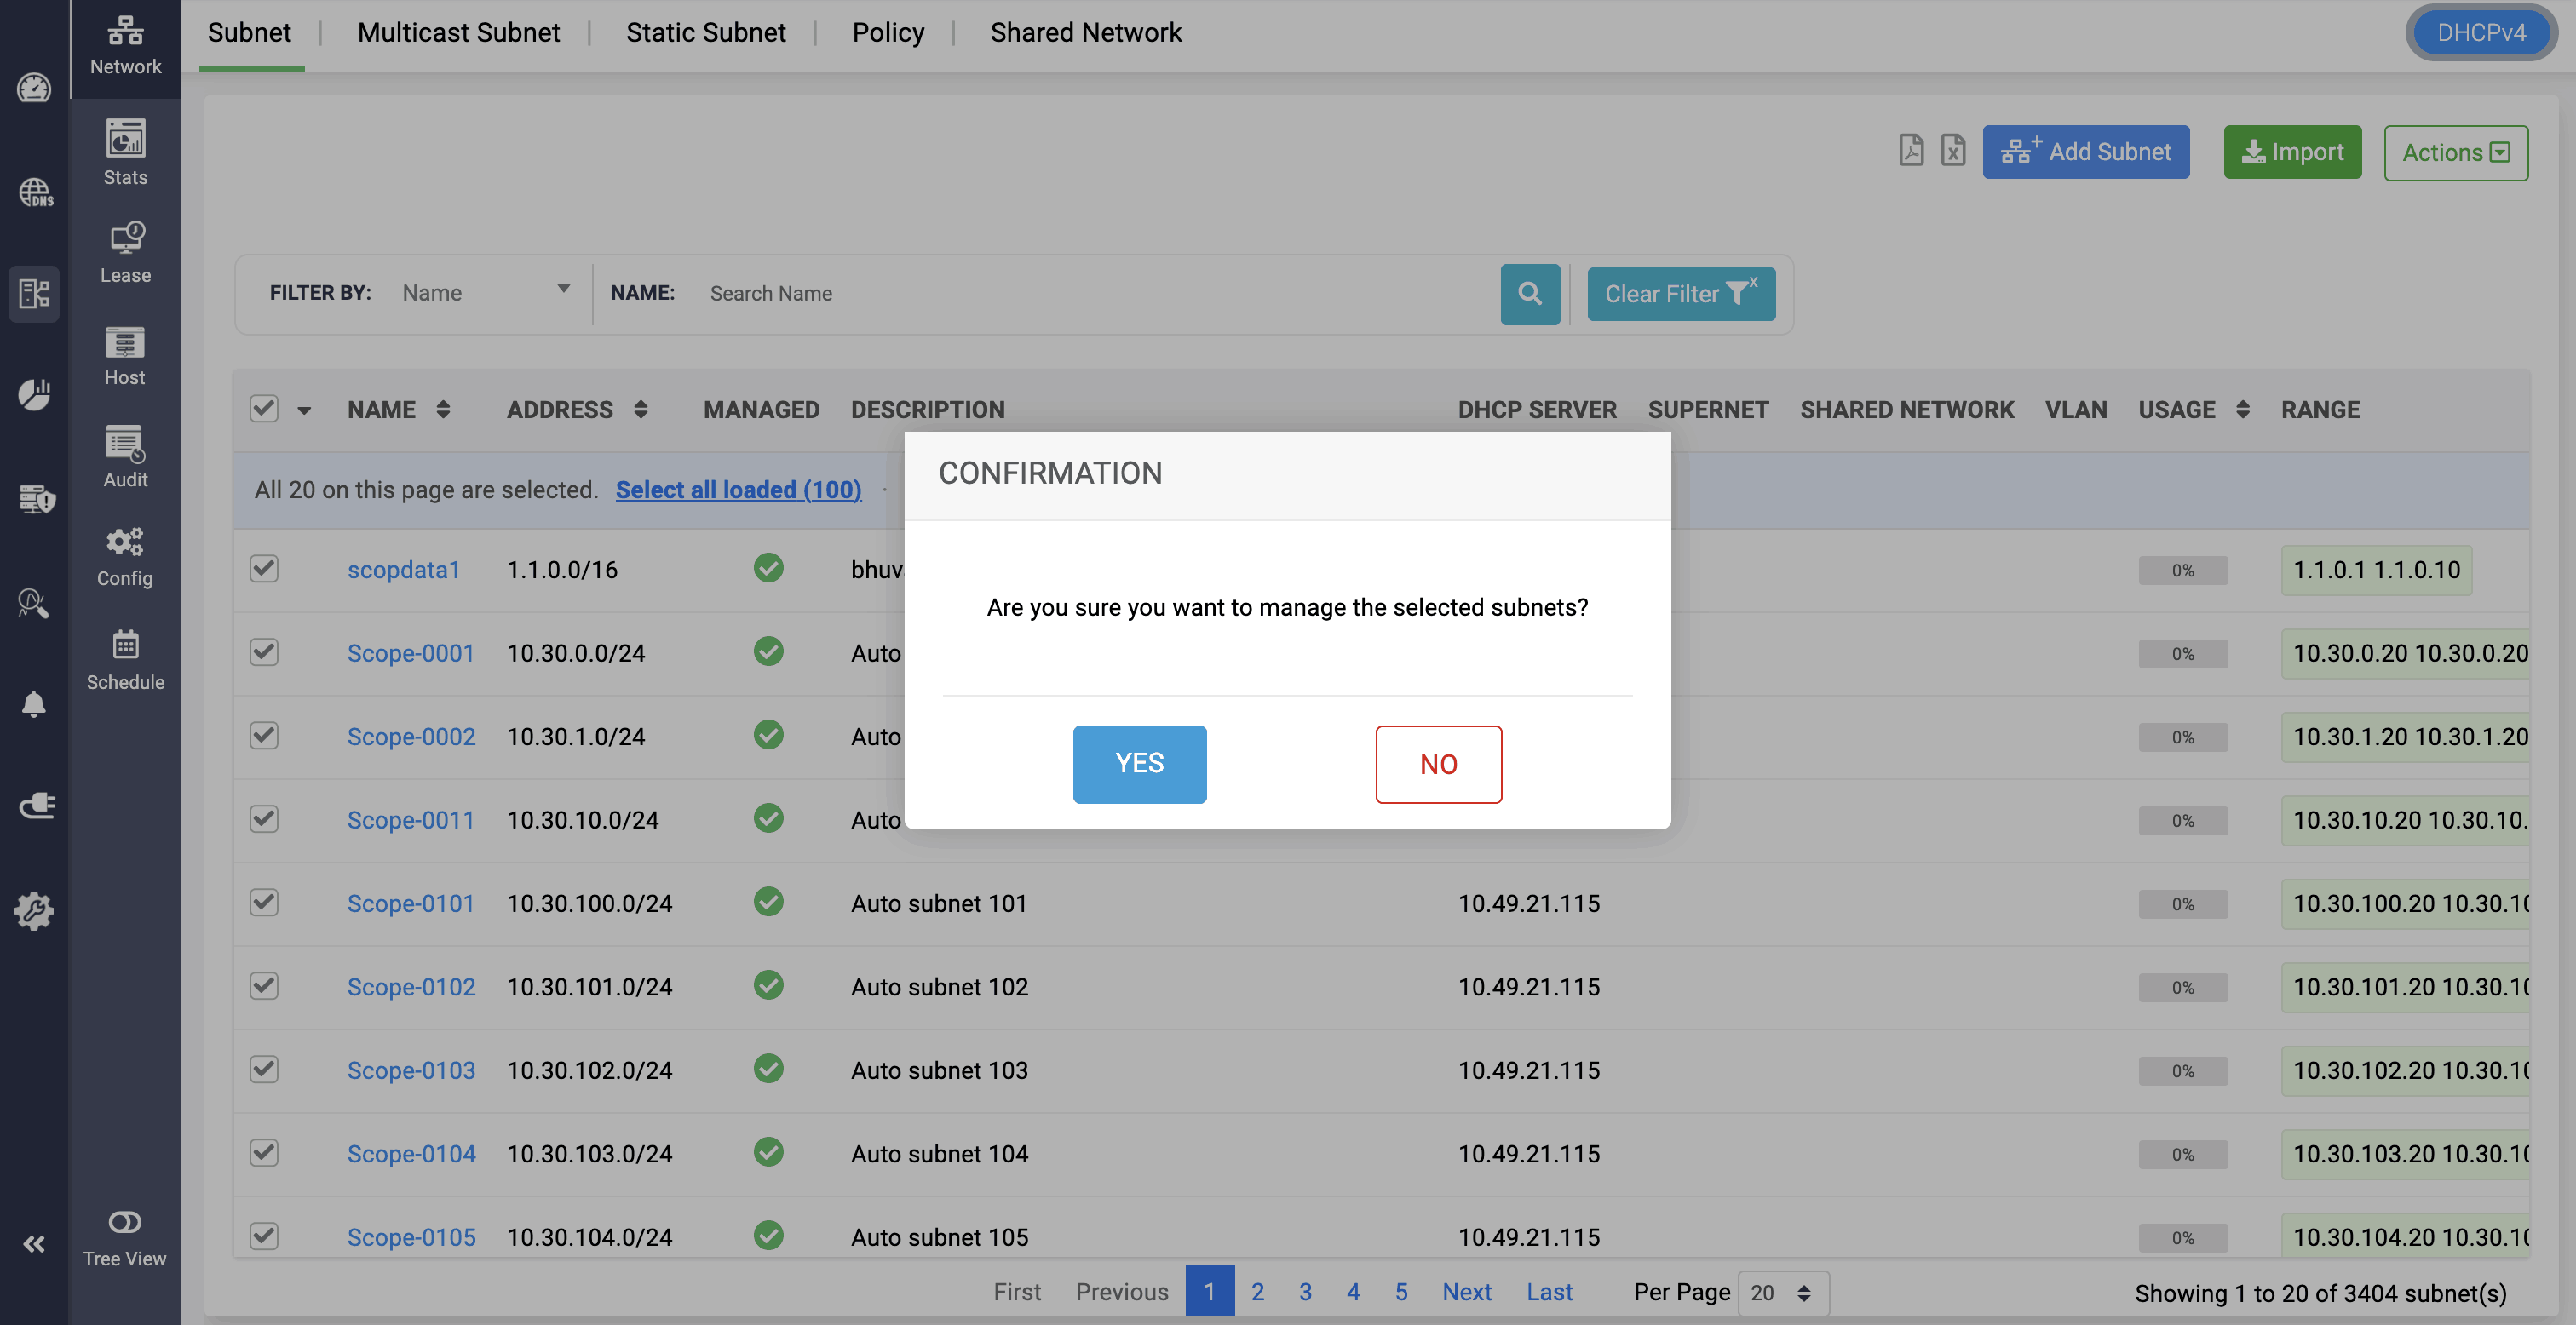
Admins can exclude managing the scopes that exceed their license limits by clicking on the yellow Unmanage icon, which switches the subnets to an unmanaged state.
DHCP scope visualization
DDI Central provides a hierarchical tree view for visualizing how DHCP scopes relate to one another. This helps administrators quickly locate subnets and other scope objects for configuration and troubleshooting.