SAML
SAML is one of the single sign-on (SSO) methods you can use to integrate a custom application. It follows the SAML 2.0 standard to exchange authentication between the product, which acts as the identity provider (IdP), and the application, which acts as the service provider (SP). Once SSO is set up, users authenticate once with the identity provider and are then signed in to the application without entering separate credentials.
How it works
SAML SSO works by establishing a trust relationship between Identity360 (the IdP) and the application (the SP). Identity360 holds the user identities and authenticates users, and the application relies on Identity360 to confirm who each user is.
When a user signs in, Identity360 authenticates them and issues a digitally signed SAML assertion (the authentication claim). The assertion carries the user's identity attributes, such as first name, last name, and email address, but never the password. The application validates the assertion against Identity360's signing certificate, using either the certificate's SHA fingerprint or the X509 certificate itself, and if the signature is valid, it trusts the assertion and signs the user in.
Because the application trusts the signed assertion instead of handling the user's Identity360 password, users authenticate once with Identity360 and reach the application without entering separate credentials. This exchange happens through the user's browser, and it can start from either side, as described below.
SP-initiated and IdP-initiated SSO
SAML SSO supports two flows:
- SP-initiated SSO: The user tries to open the application (the SP) and is redirected to the IdP to sign in. After successful authentication, the IdP sends a signed authentication claim to the application. The claim carries user attributes such as first name, last name, and email address. The application verifies the IdP's digital signature and signs the user in.
- IdP-initiated SSO: The user signs in to their IdP portal first, then selects the application from the Applications tab. If a conditional access policy applies to the application, the user completes MFA before it launches. The IdP then sends the authentication claim directly to the application, without receiving a request from it, and the application verifies the signature and signs the user in.
Prerequisites
Before you configure SAML SSO:
- Sign in to the application (the SP) as an administrator.
- Get the SAML details you will enter during configuration from the application, either on its SAML SSO configuration page, through its SAML request, or on its help documentation. You need either the application's SP metadata file (XML), or the individual values: the ACS URL (Assertion Consumer Service URL) and, if you are configuring IdP-initiated SSO, the application's Entity ID. For SP-initiated SSO you also need the application's login page URL, which you enter separately as the SAML URL. The login page URL is the address users visit to sign in to the application, so it is usually not listed on the application's SAML configuration page.
Configuring SAML SSO for a custom application
To configure SAML-based SSO for a custom application:
- Go to Applications > Application Integration, and click Custom Application.
- On the General Settings tab, enter an Application Name. Optionally, add a Description and upload a Logo Icon.
- Under Choose Capabilities, select Single Sign-on, then click Continue.
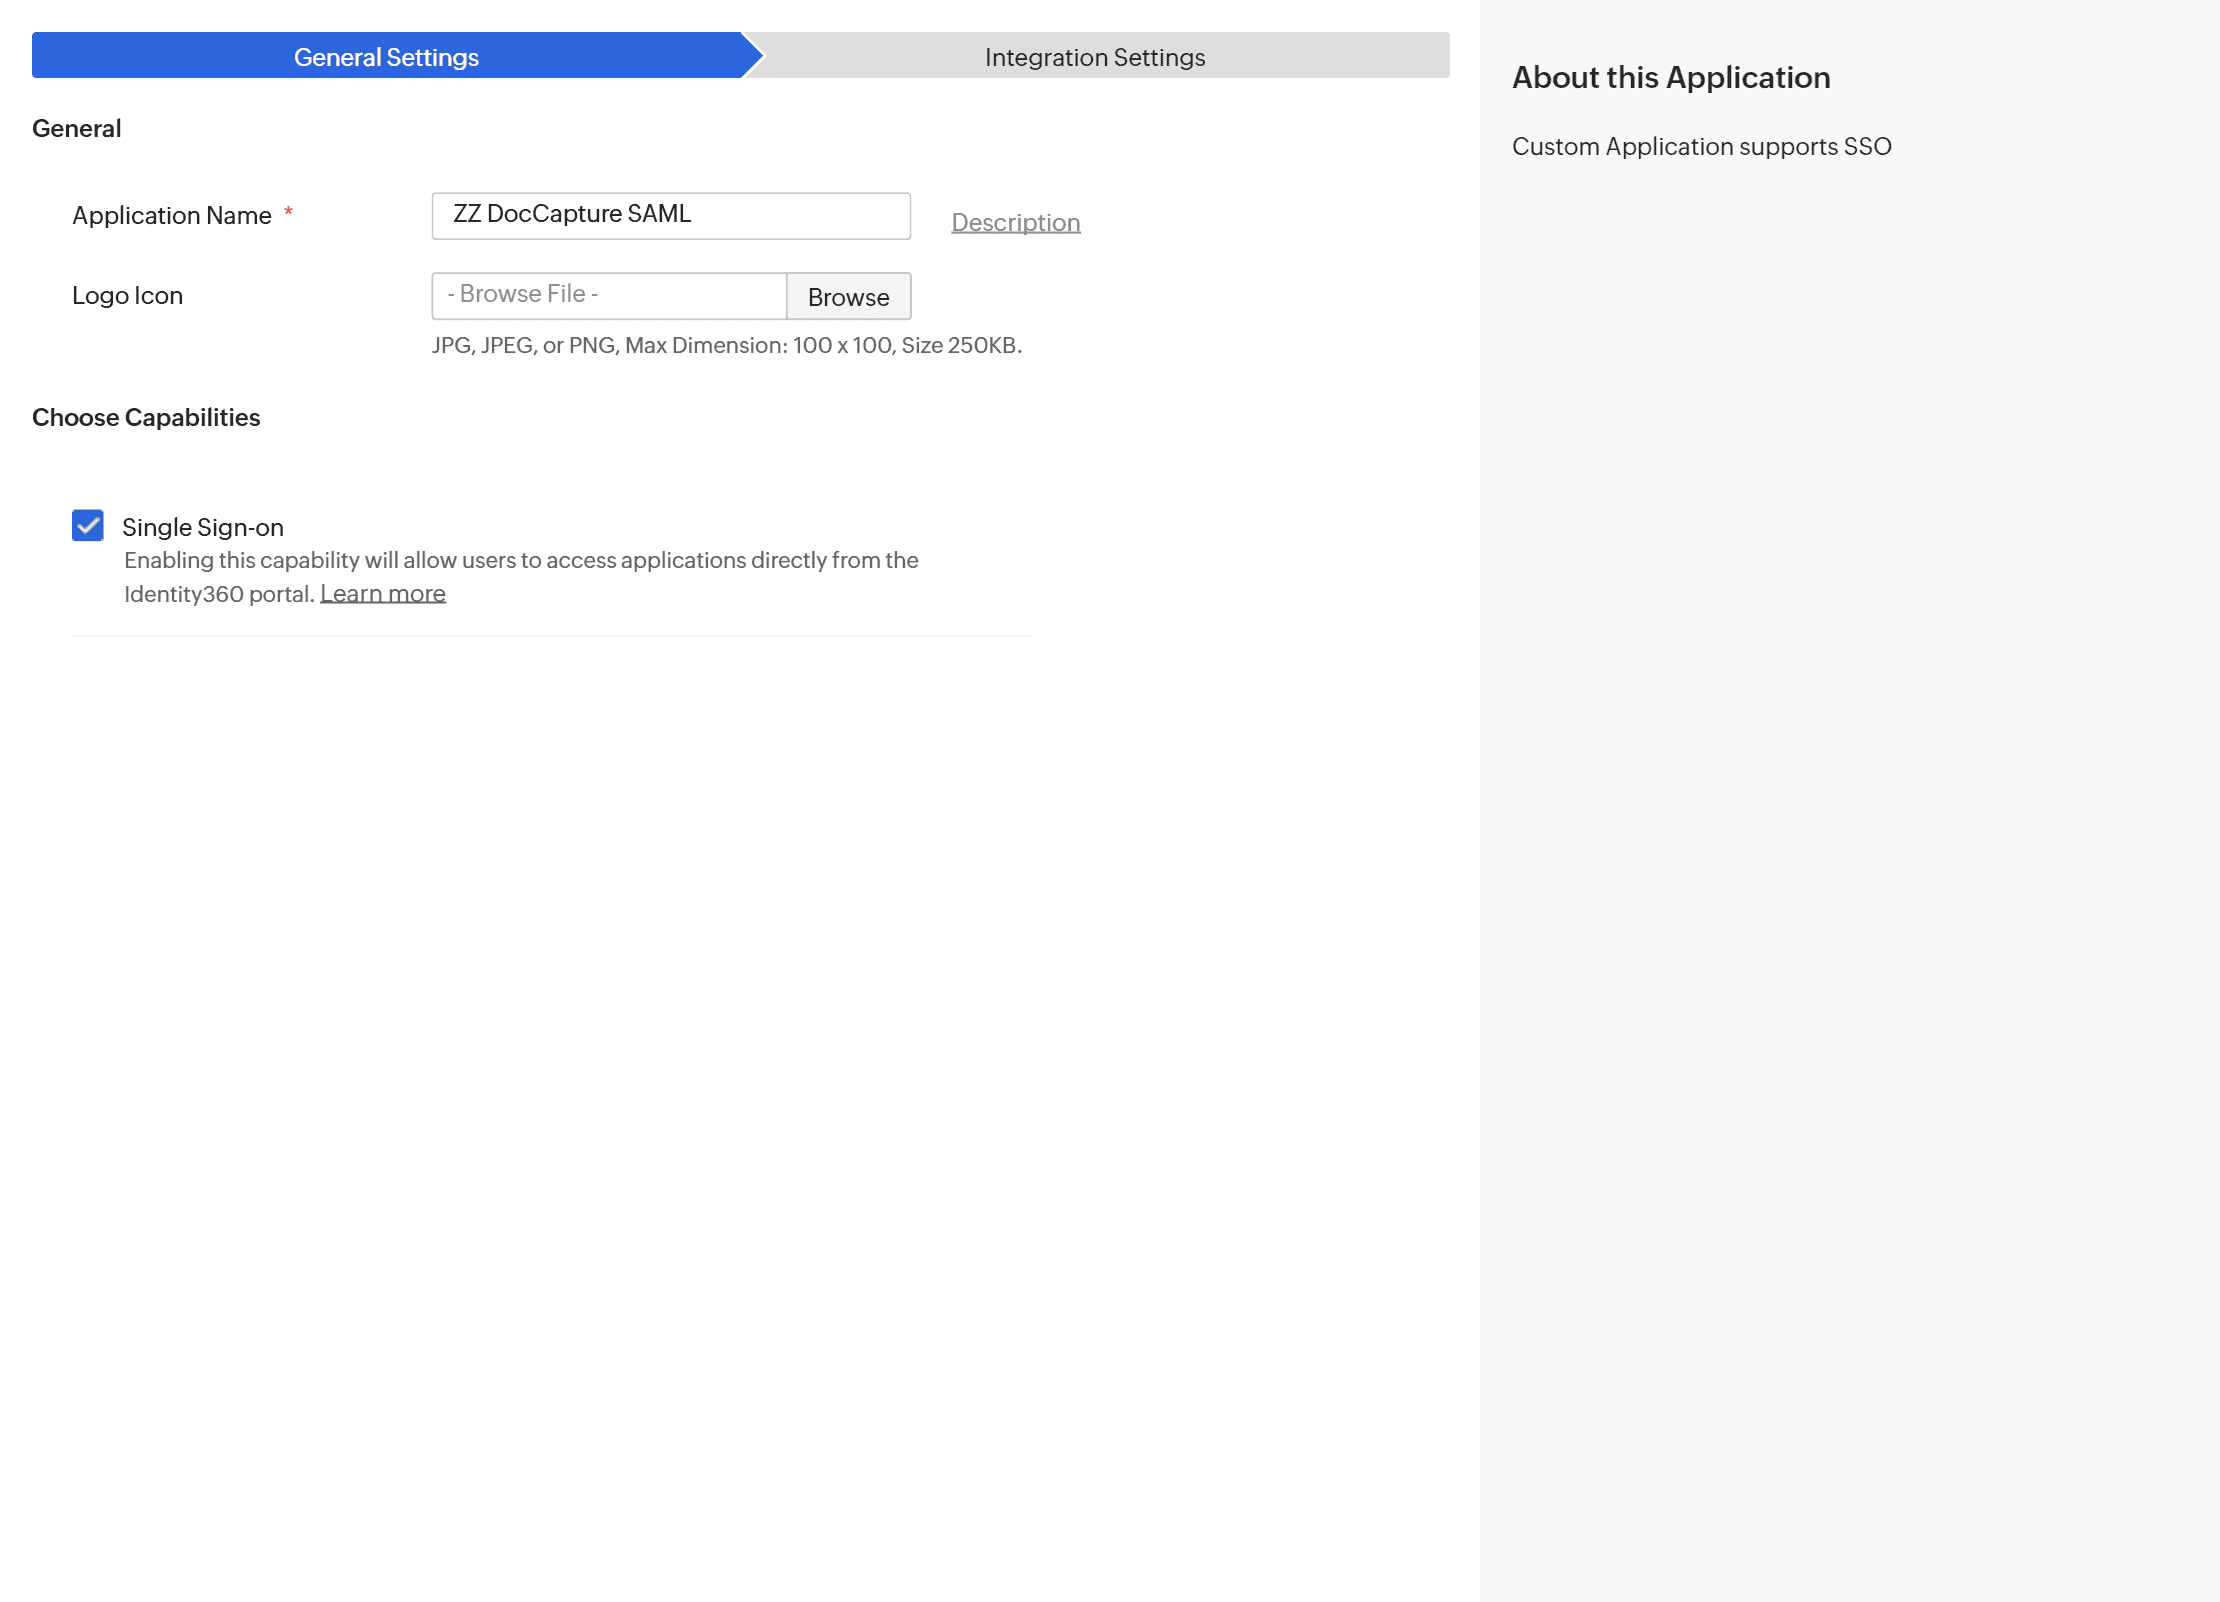
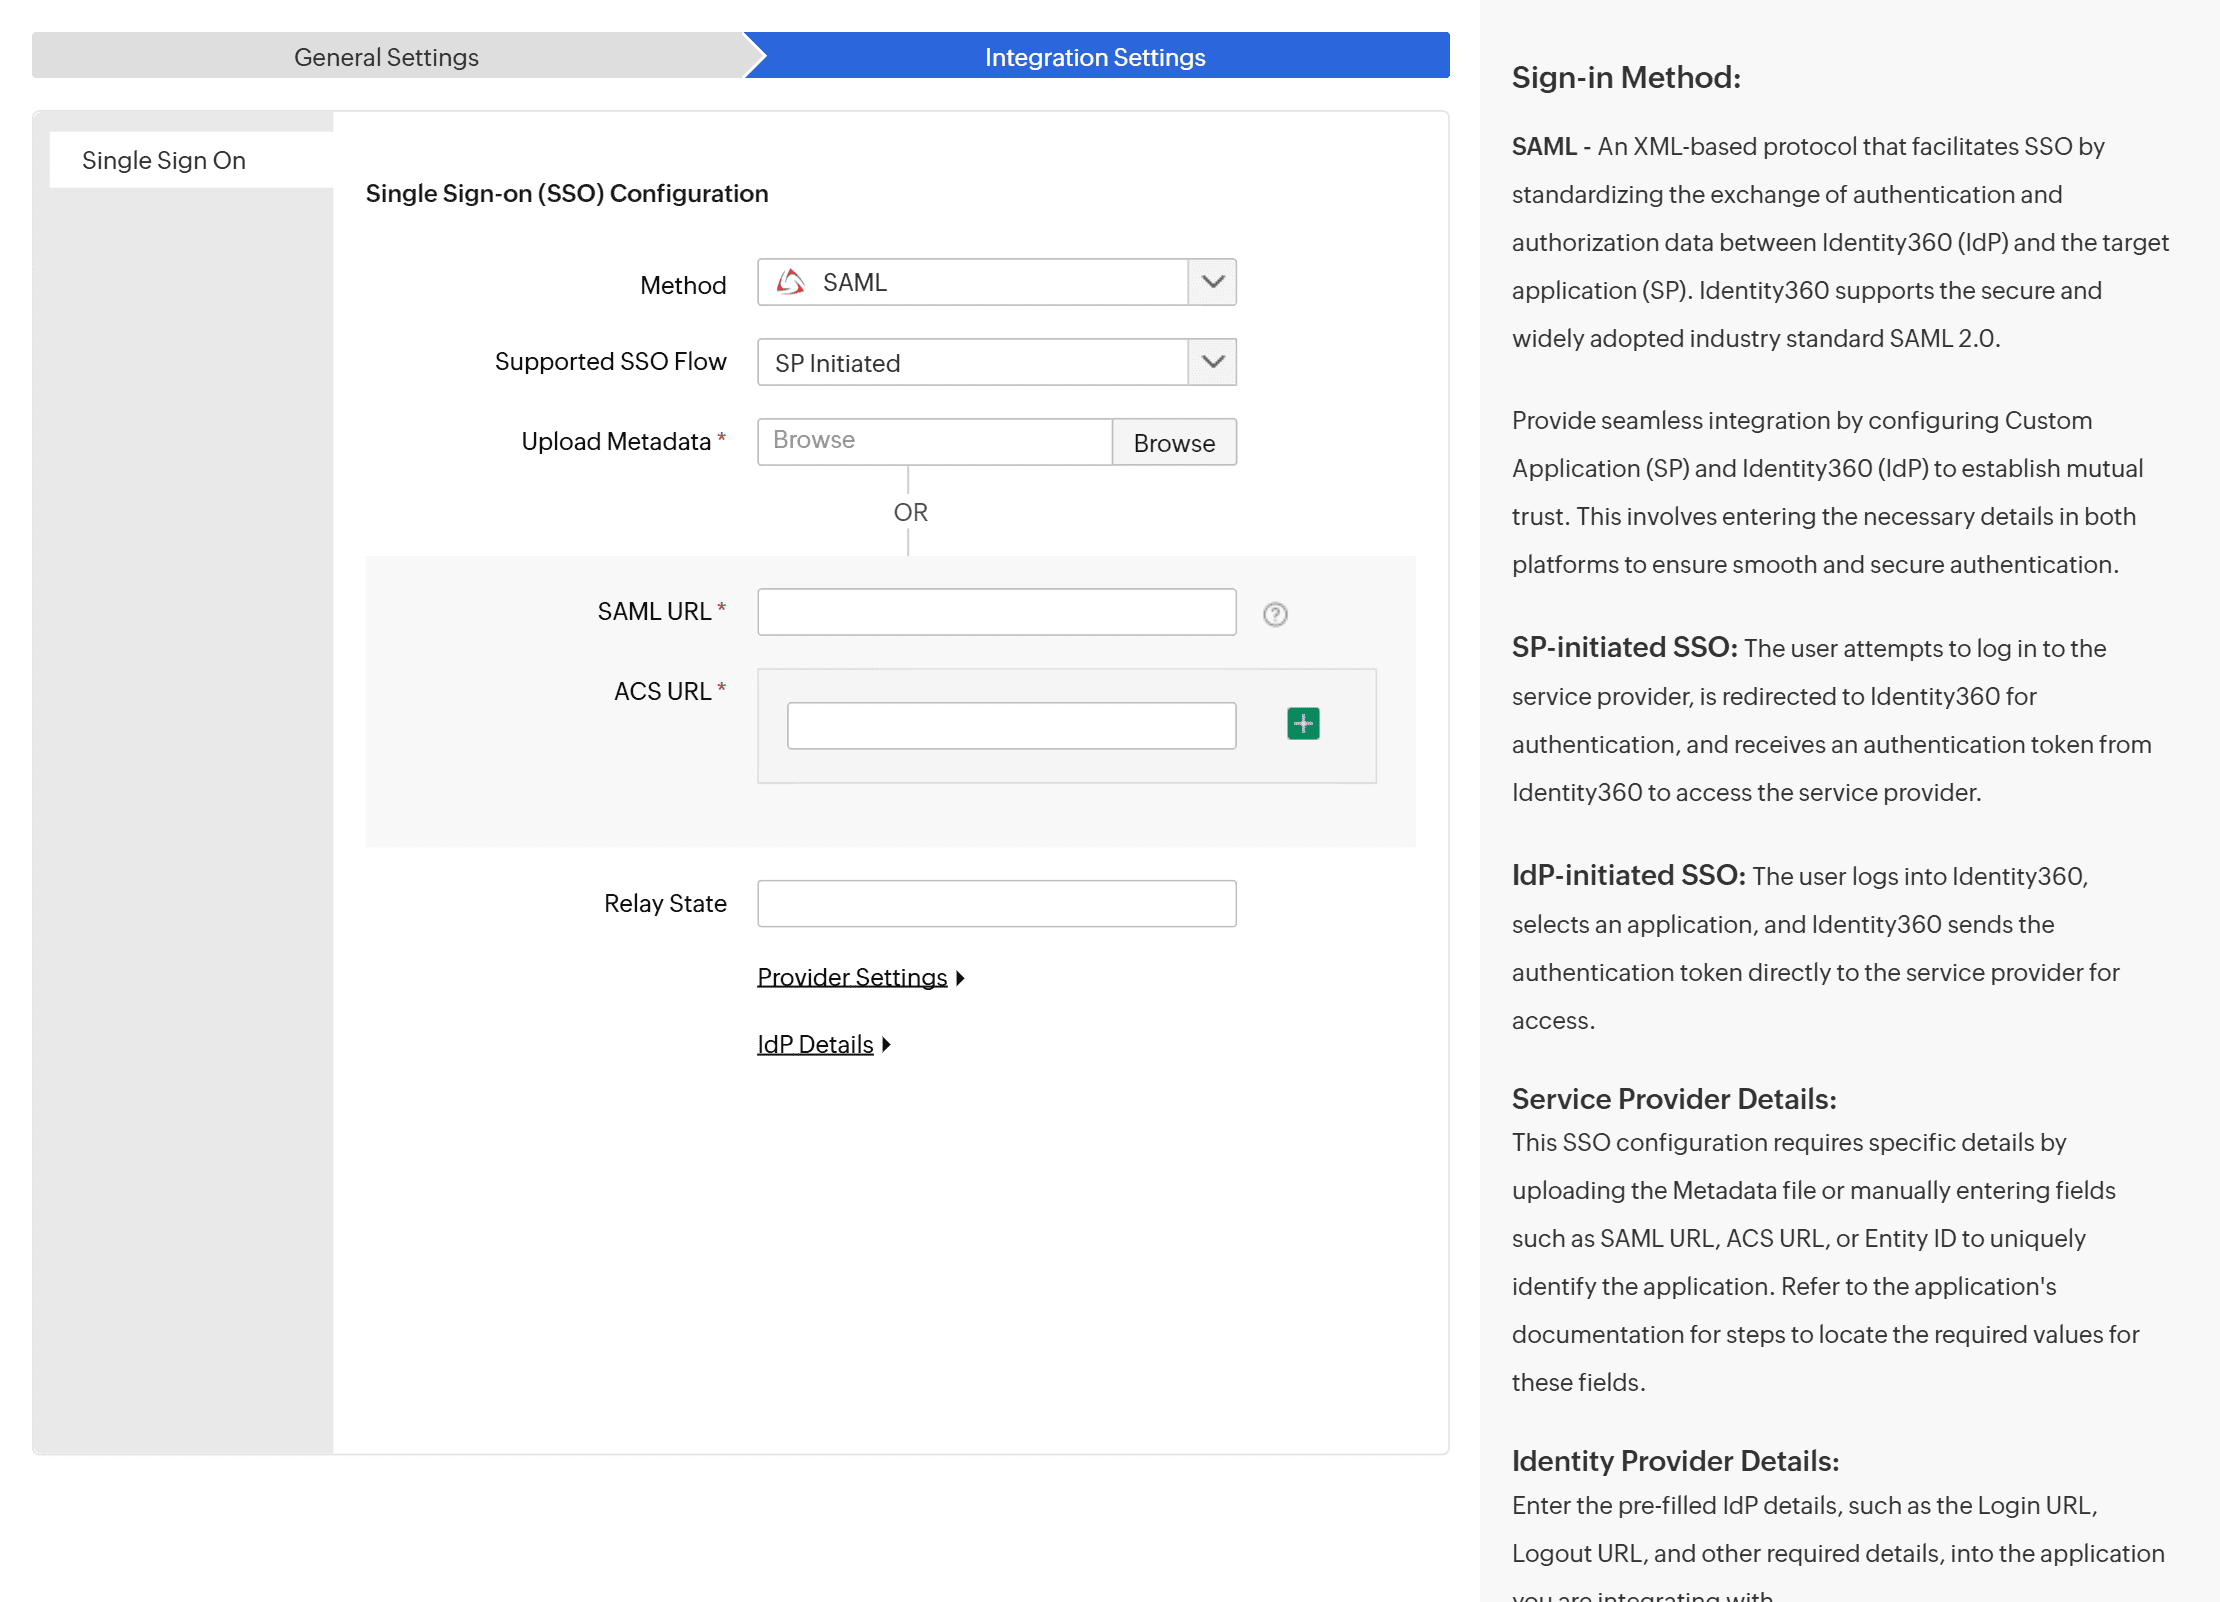
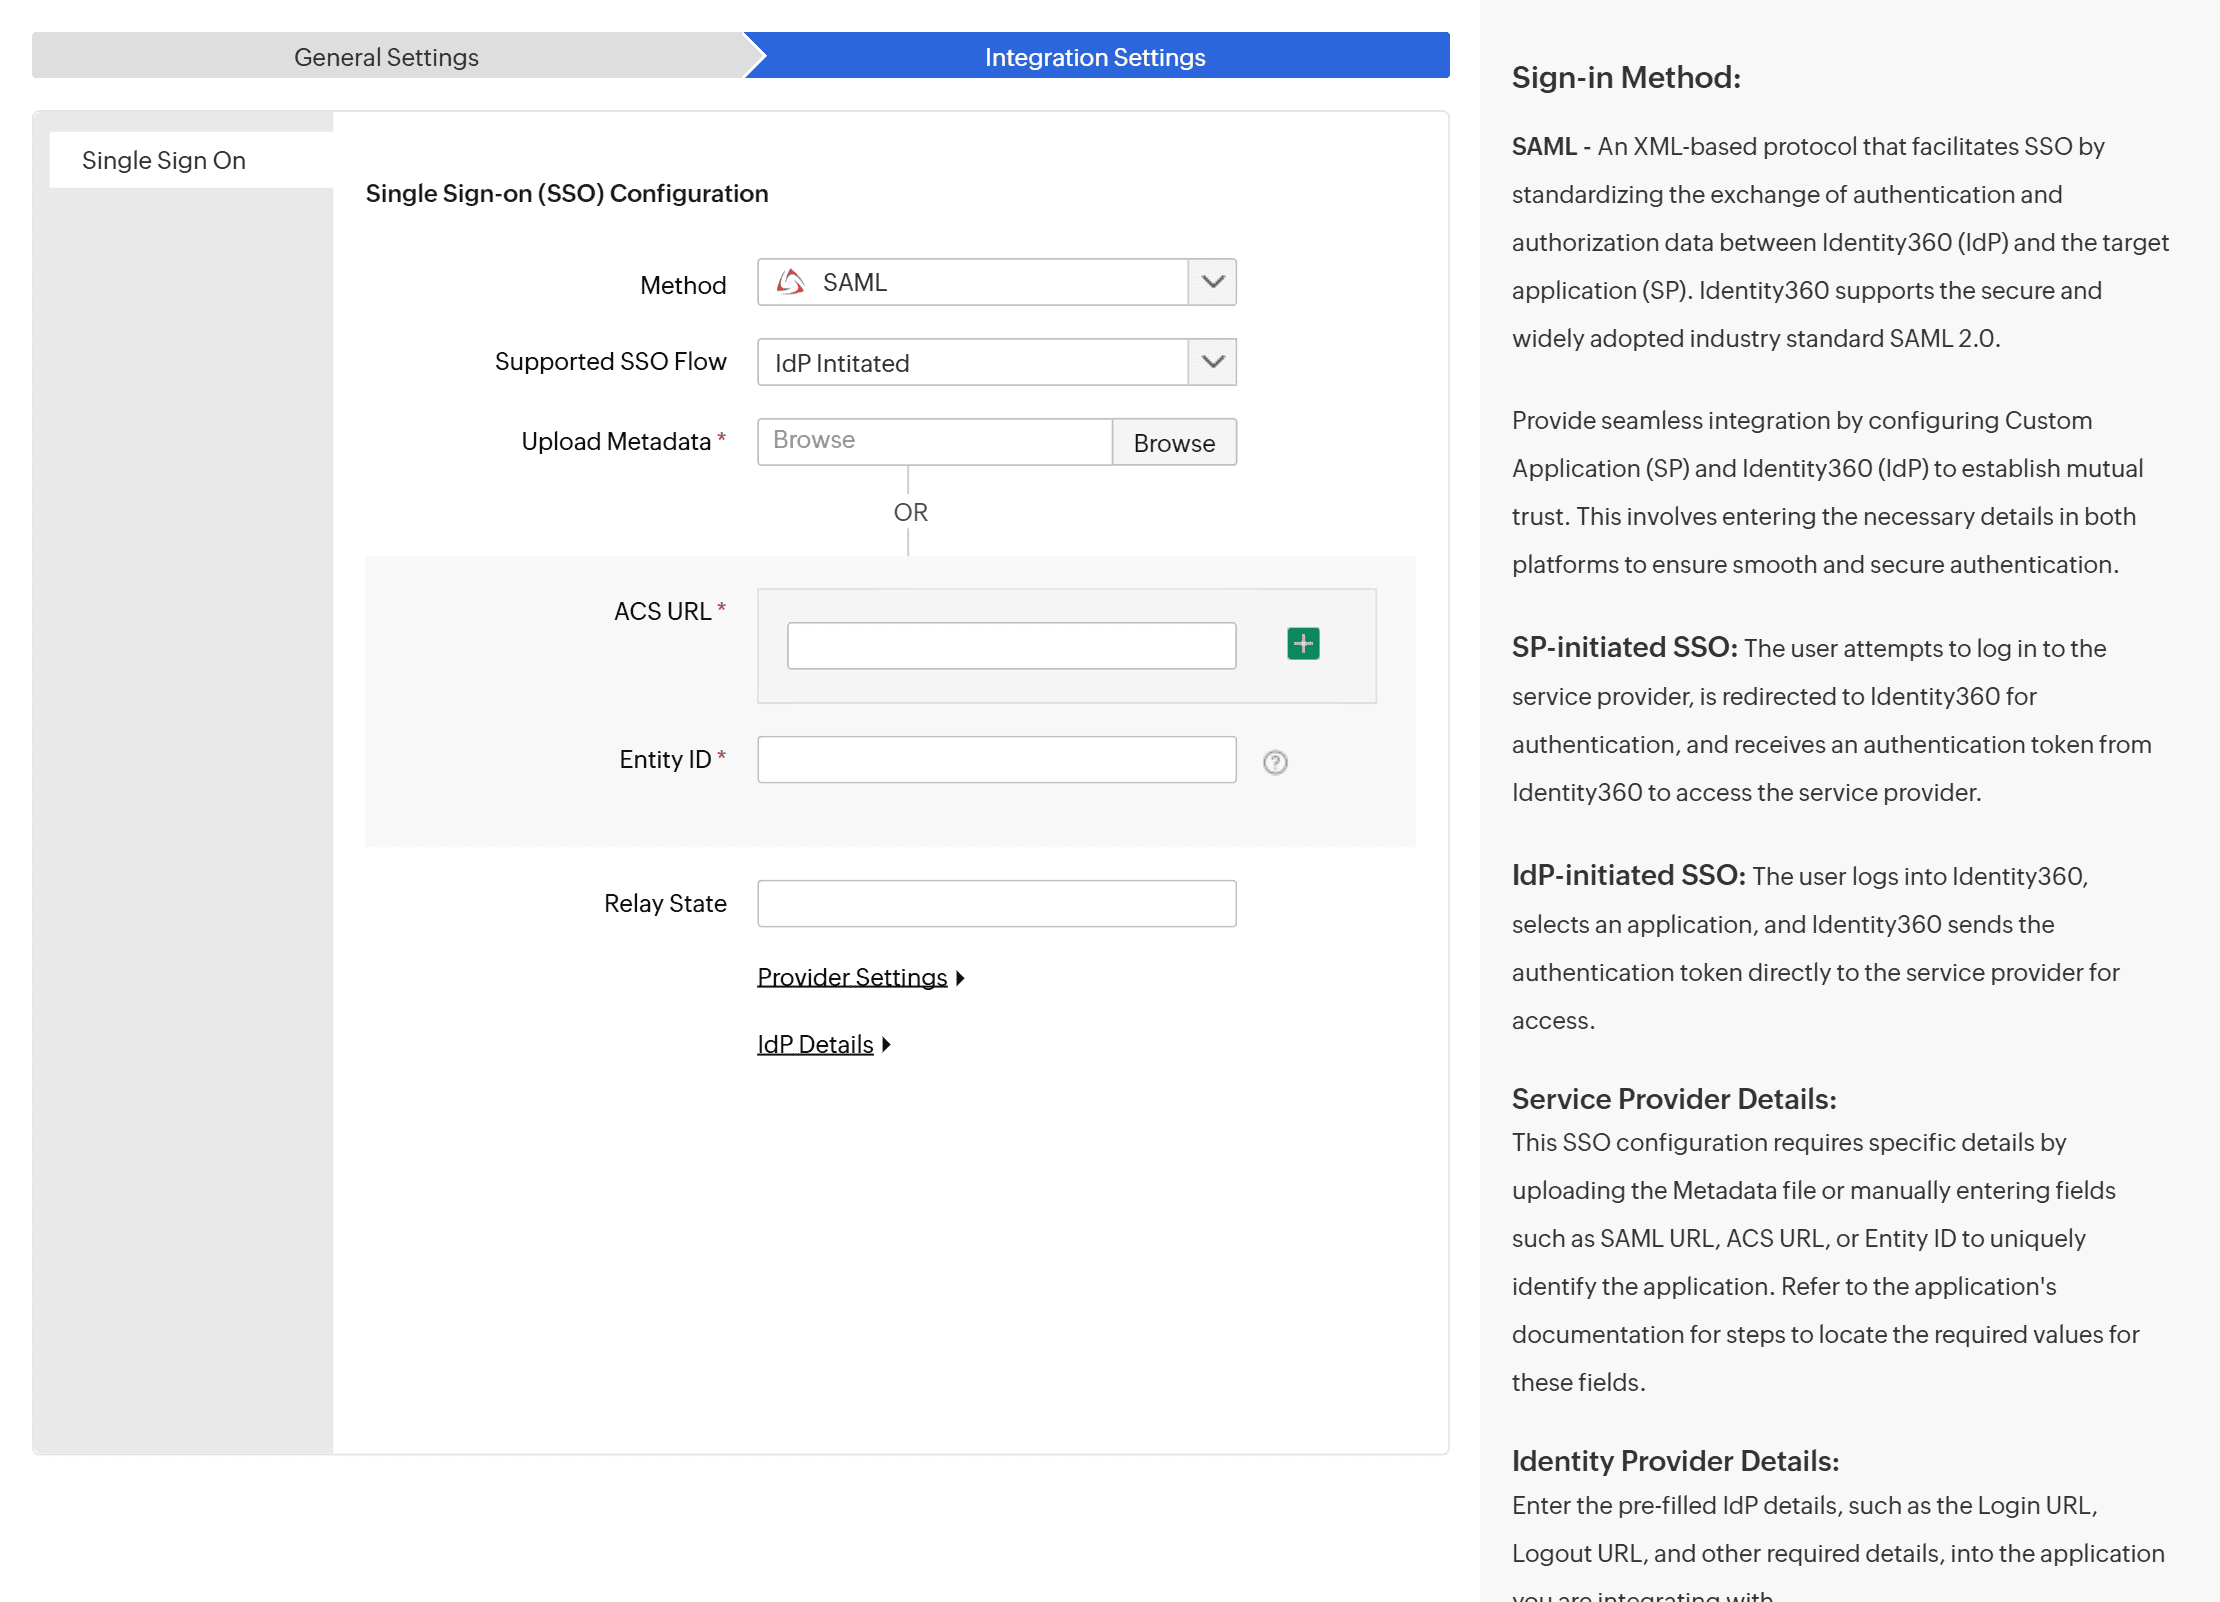
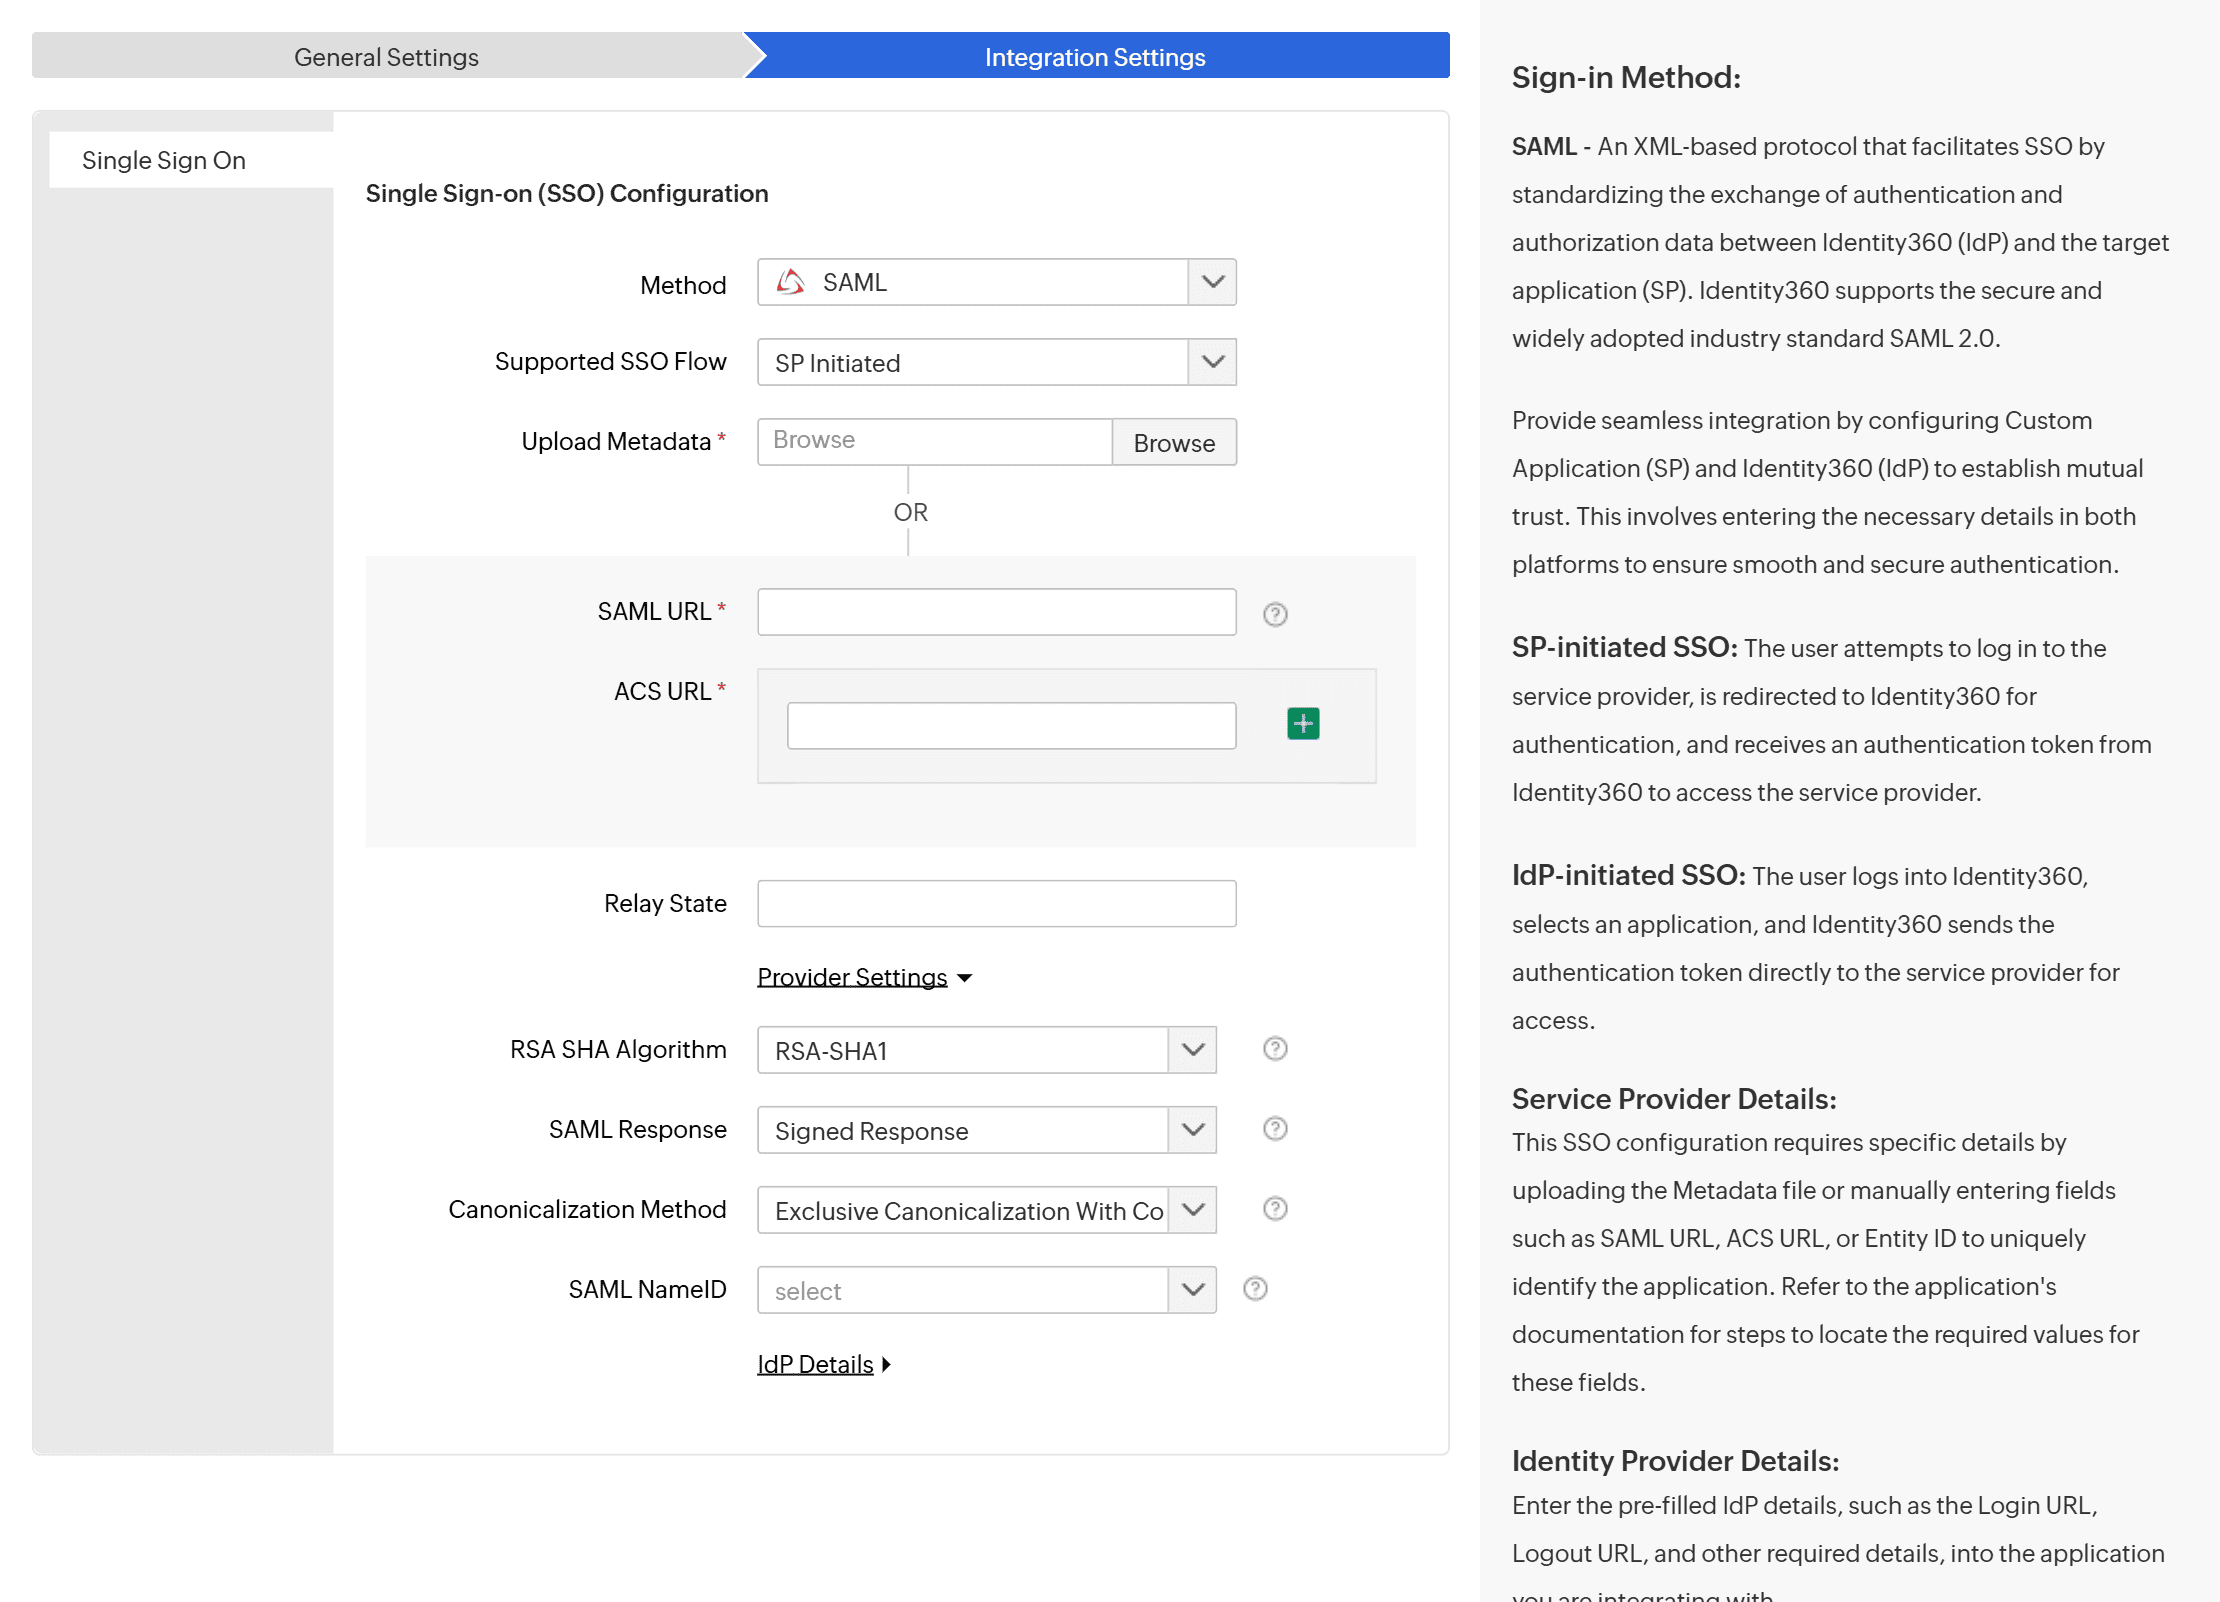
Fig 1: The General Settings tab, with Single Sign-on selected under Choose Capabilities. - On the Integration Settings tab, select SAML as the Method, then set Supported SSO Flow to SP Initiated or IdP Initiated.
- Provide the application's SAML details. Upload the metadata file, or enter the values manually:
- If you have the application's metadata file, click Browse and select the XML file. Identity360 fills in the ACS URL from the file.
- If you selected SP Initiate, enter the ACS URL. The ACS URL, or Assertion Consumer Service URL, is the endpoint on the application that receives and consumes the SAML assertion Identity360 sends after the user signs in.
- If you selected IdP Initiated, enter the ACS URL and the application's Entity ID. The Entity ID is the unique identifier the application uses to identify itself in SAML, usually a URI. Because IdP-initiated SSO starts without a request from the application, Identity360 needs the Entity ID to address the assertion to the target service provider.
- If you selected SP Initiated, enter the SAML URL. Enter it whether or not you uploaded a metadata file, since metadata files do not carry this value. The SAML URL is the application's login page URL, for example: https://app.example.com/login.
- Optionally, enter a Relay State to redirect users to a specific page after they sign in, if your application requires or supports one. If you leave it blank, users land on the application's default page.
- Under Provider Settings, configure how Identity360 signs and formats the SAML assertion. Set each option to match what your application expects. If you are unsure, check the application's SAML documentation or keep the defaults.
- RSA SHA Algorithm: the algorithm Identity360 uses to sign the SAML response and assertion, either RSA-SHA1 or RSA-SHA256. A higher number is stronger, so choose RSA-SHA256 unless the application requires SHA1.
- SAML Response: whether Identity360 signs the SAML response, either Signed Response or Unsigned Response. Choose the option the application expects.
- Canonicalization Method: how the XML is normalized before signing. The options are Exclusive Canonicalization, Exclusive Canonicalization With Comments, Inclusive Canonicalization, and Inclusive Canonicalization With Comments. Match the application's requirement.
- SAML NameID: the NameID format that identifies the user in the assertion. The options are Email Address, Entity, Kerberos, Persistent, Transient, Unspecified, Windows domain qualified name, and X509 subject. Choose the format the application uses to match users, commonly Email Address.
- Click Save.
- Get the IdP details the application needs. They are available in two places:
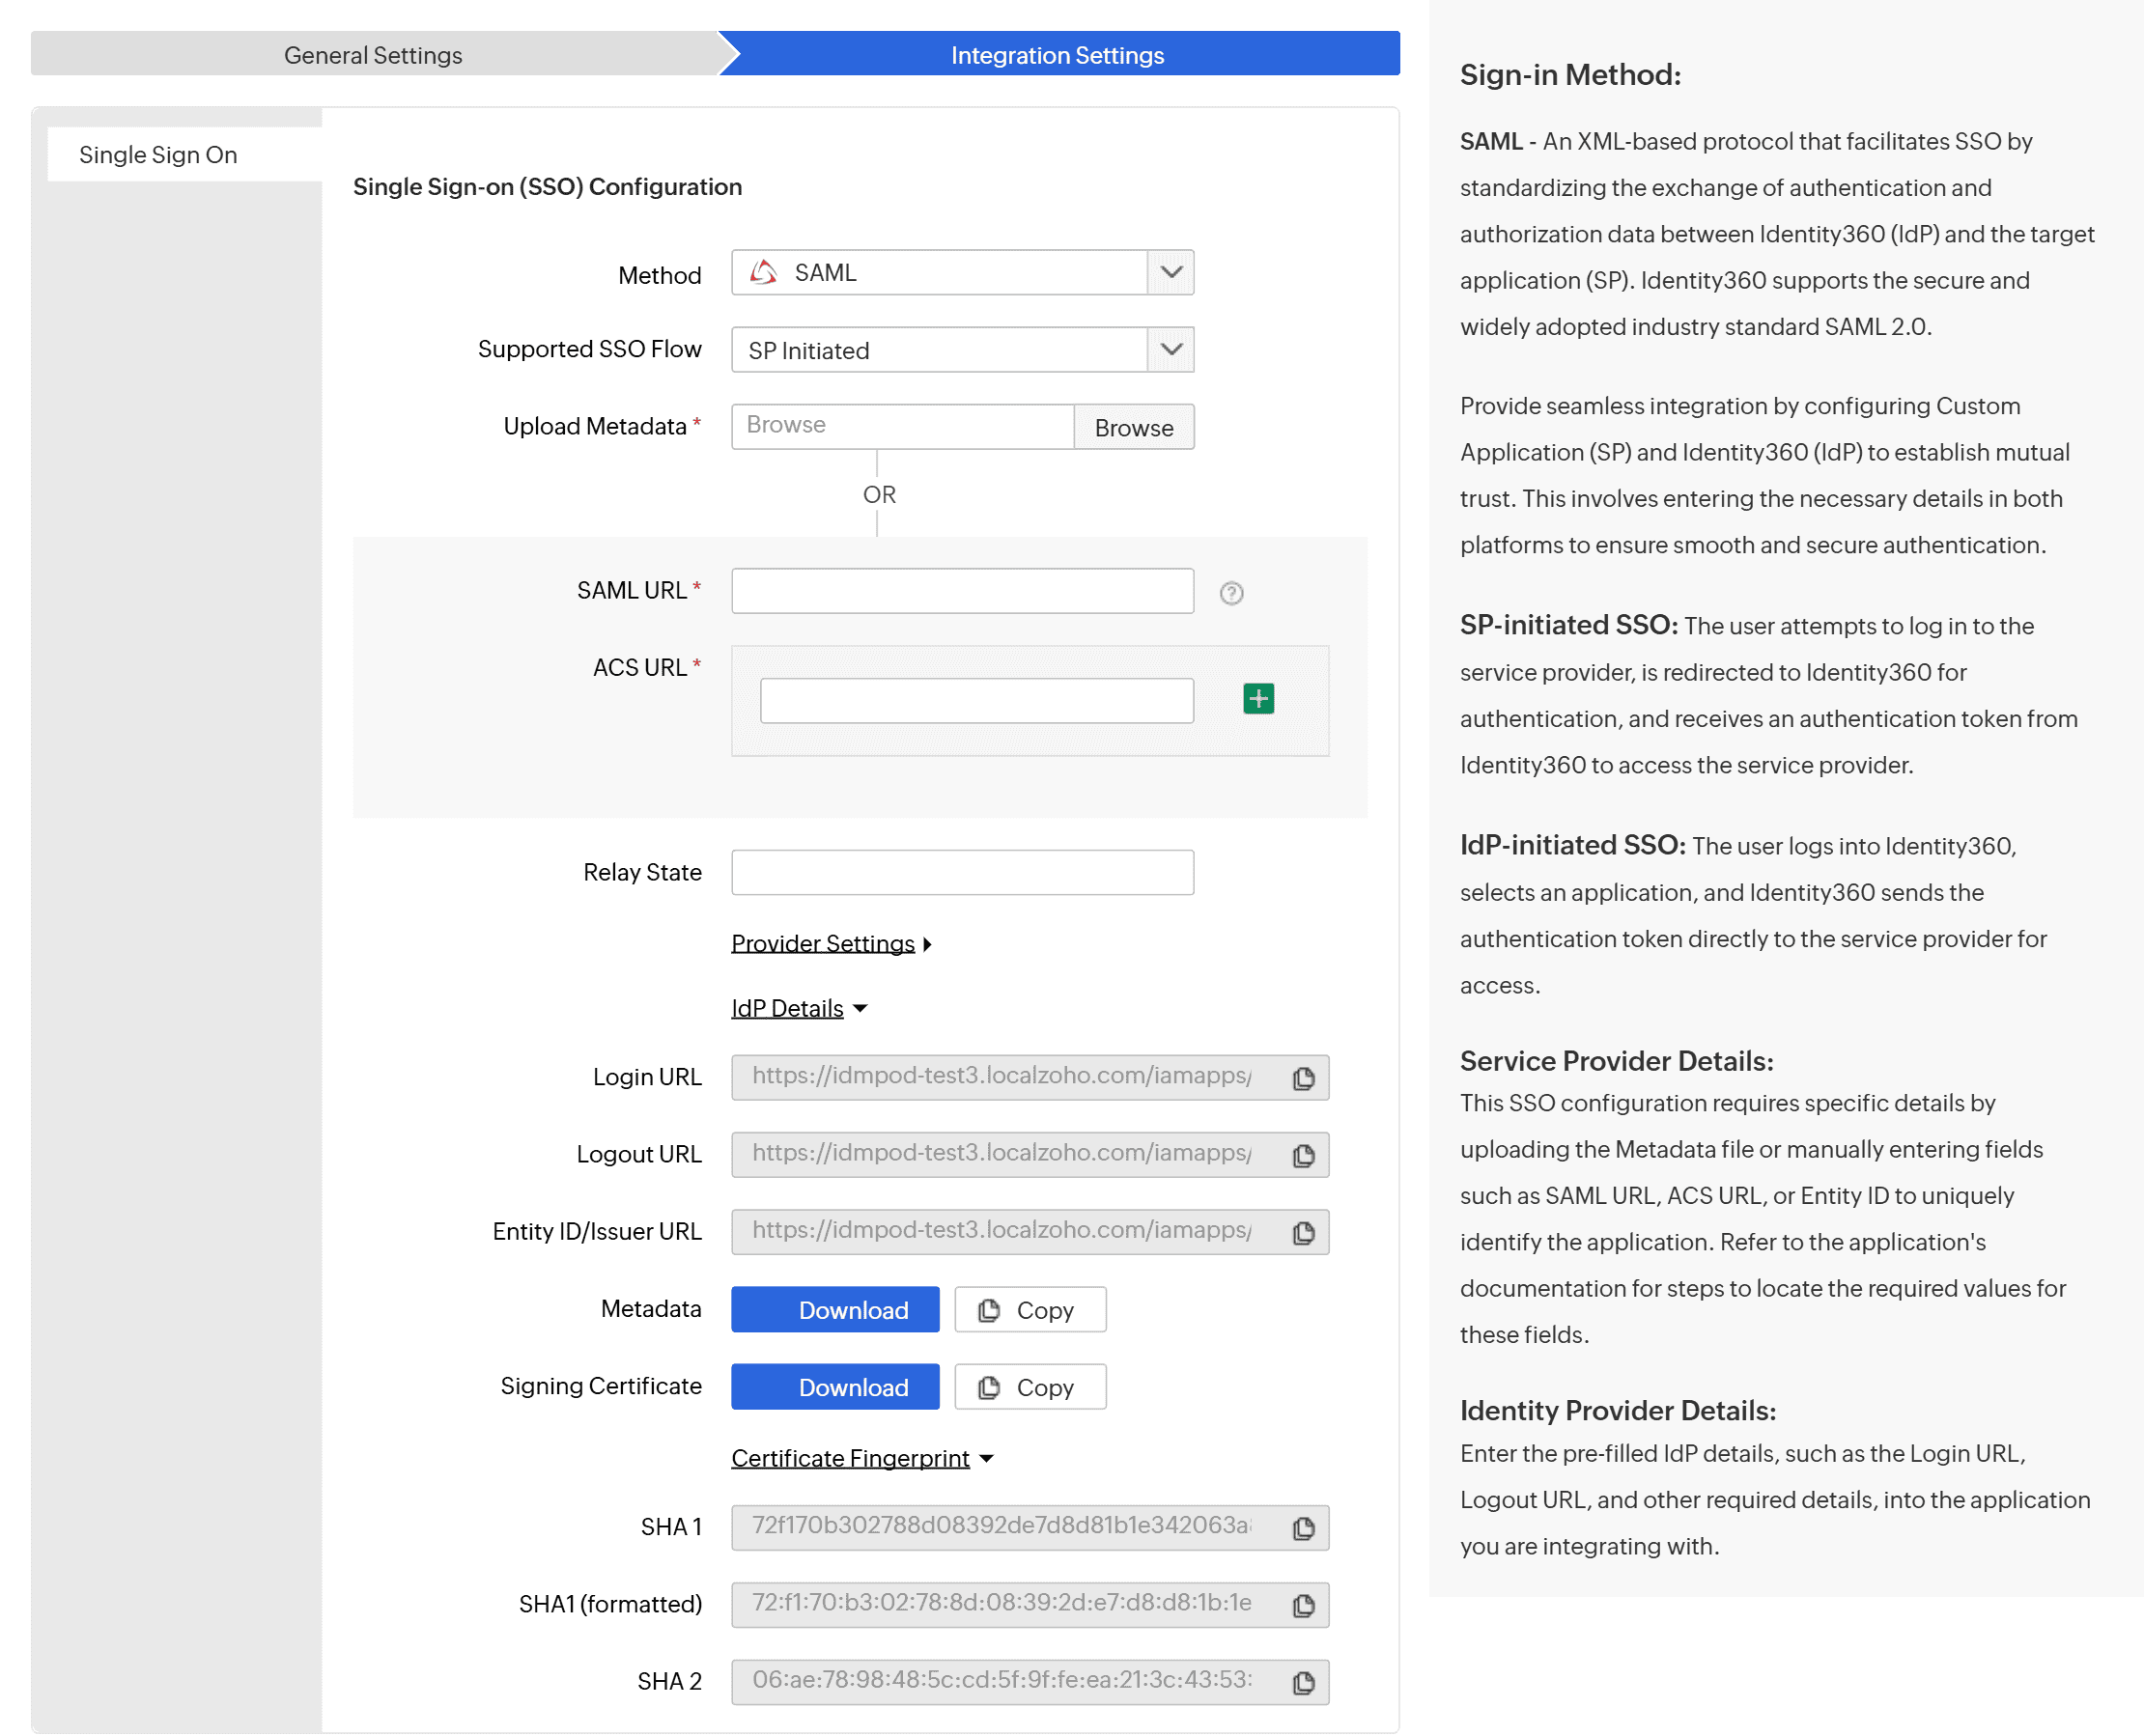
- Before you save: in the IdP Details section on the Integration Settings tab, alongside the fields you just filled in.
- After you save: go to Applications > Single Sign-on and click View in the IdP Details column. You can also reopen the application from Applications > Application Integration and find the details on the Integration Settings tab.
- Copy the Login URL, Logout URL, and Entity ID/Issuer URL. Then give the application either a fingerprint from Certificate Fingerprint or the Signing Certificate, whichever it requires. You can also use Metadata to download or copy the IdP metadata. Then complete the SAML SSO setup in the application using these details.
- Login URL: Where the IdP expects the service provider to redirect the user for authentication.
- Logout URL: Where the user is redirected after logging out from the SP.
- Entity ID/Issuer URL: Uniquely identifies Identity360 as the issuer of the SAML assertion.
- Metadata: The IdP's SAML configuration details in XML format that you can download or copy.
- Signing Certificate or Certificate Fingerprint: The IdP's signing certificate or the fingerprint of the signing certificate, available as SHA 1, SHA1 (formatted) with colon separators, and SHA 2. The SP uses either a fingerprint or the signing certificate to validate the signature of the SAML response sent by the IdP.
- Assign the application to the users and groups who need access. Go to Applications > Single Sign-on and, in the Assigned To column for your application, click the user or group count. In the Assign Users panel, use the Users and Groups tabs to select who should have access, then click Assign. Until at least one user or group is assigned, no one can access the application.
The IdP details include: