Accessing and applying object filtering
Last updated on:
Overview
Object filtering capability lets you refine rules using intuitive GUI (Graphical User Interface), for optimized functionality by allowing you to apply the rules for specific users, groups, or OUs (Organizational Units) of Active Directory for improved results. This helps ensure that monitoring and exceptions target the right entities without unnecessary noise.
NOTE The object filter capability is available only for pre-defined Windows and Active Directory rules.
Implementing object-filtering
Object filtering can be applied at different points in the product to refine rule and alert configurations. You can set filters during rule installation via the Rule Library, adjust them in Rule Management by configuring Objects and Exceptions, apply them while enabling rules, and configure them within Alerts for precise monitoring.
Rule library
The solution lets you configure object filters for the rules even at the time of installation from the Rule Library. To do this,
- Access the solution's web console, navigate to the Security tab to access the Security Analytics Dashboard and click on Manage Rules in the top-right corner.

Image 1: Security dashboard widgets - In the Manage Rules module, click on Rule Library.
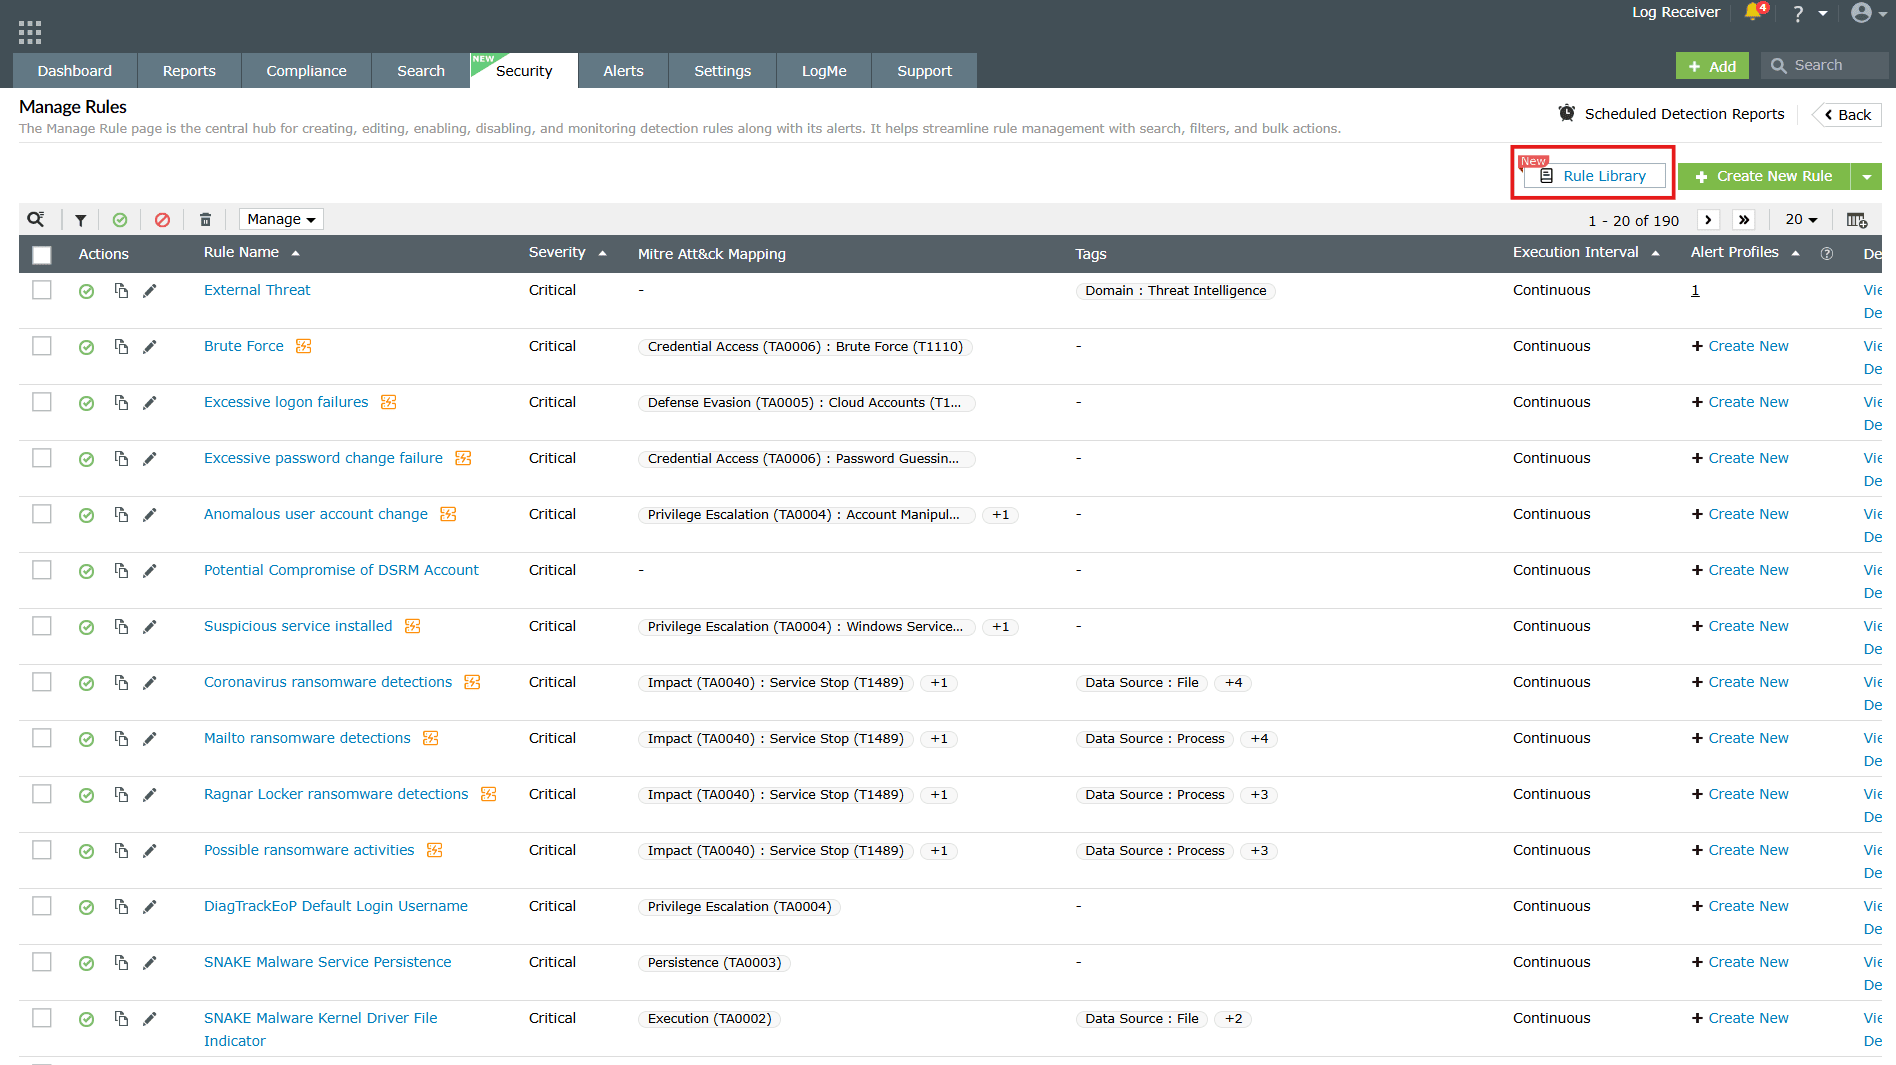
Image 2: Rule library in manage rules module - The object filter is available for both Windows and Active Directory rules. Click on the Active Directory category available in the left pane if you wish to apply the filter for these rules in specific.
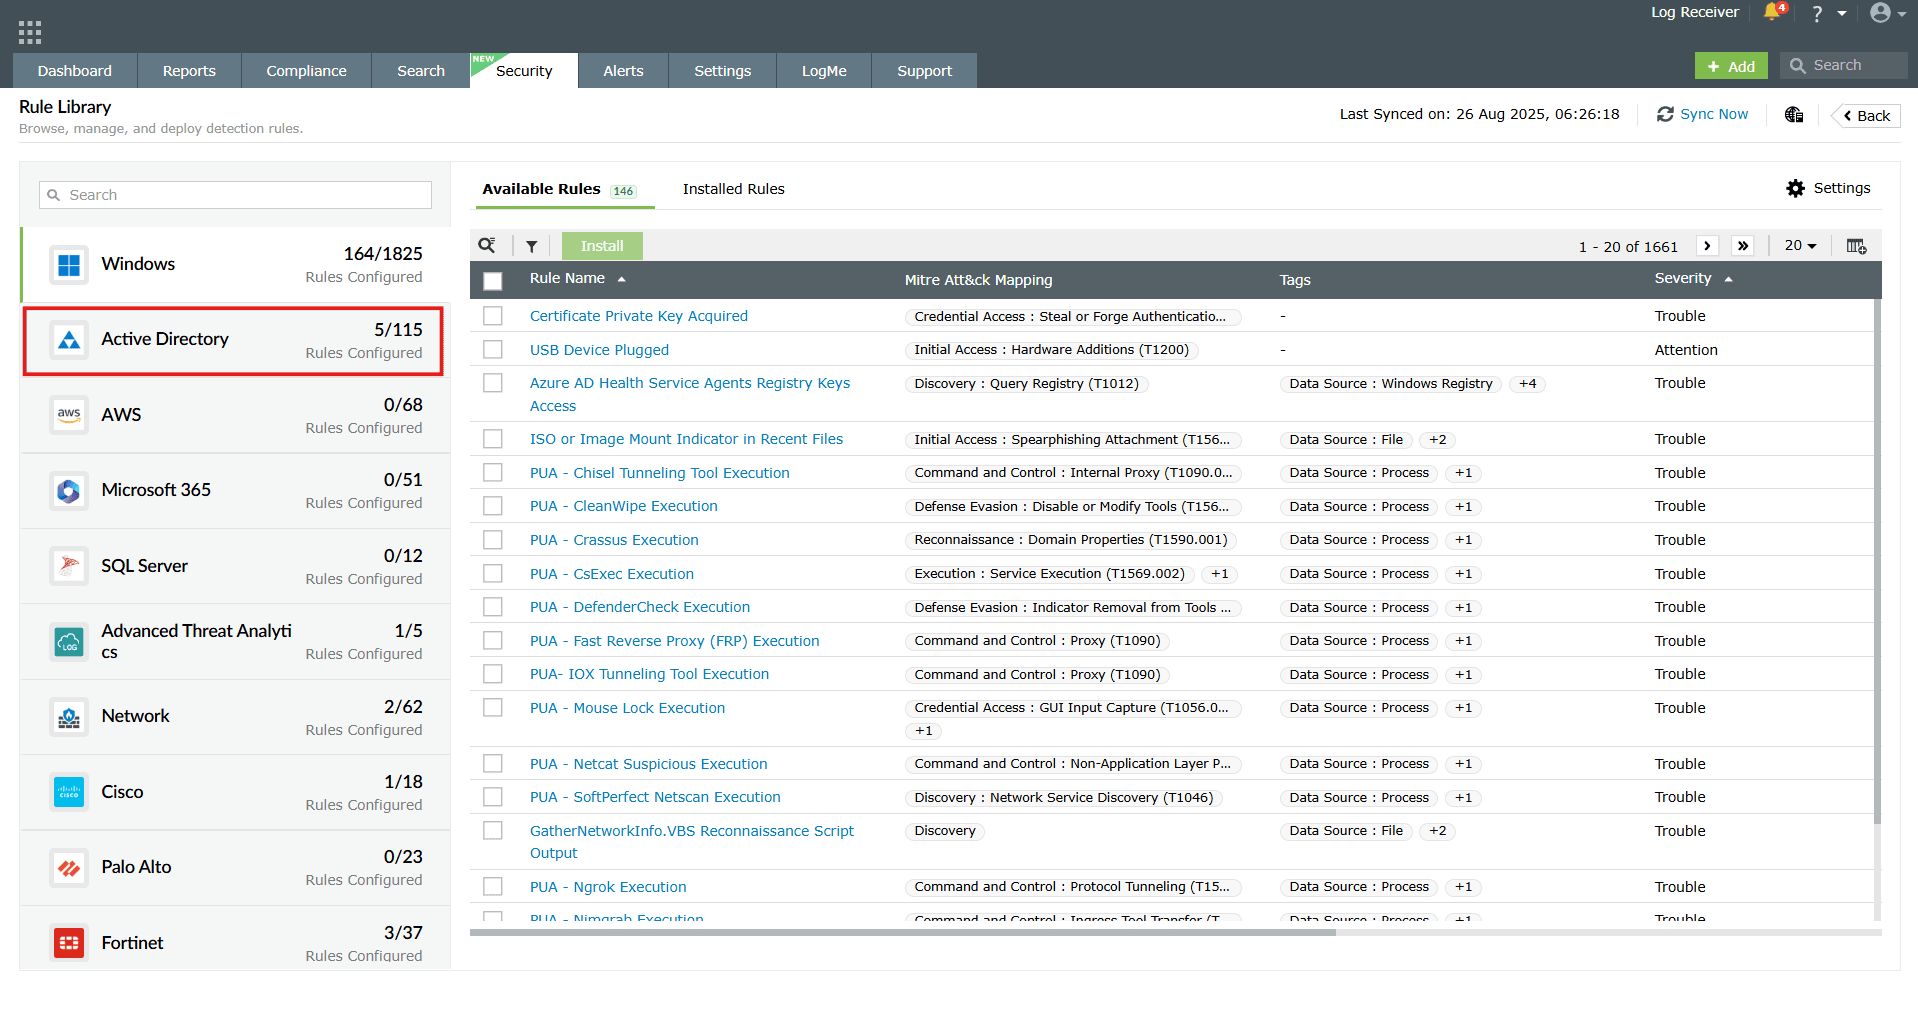
Image 3: Rule library in manage rules module - Click on the required rule name. You can use the search feature available to find the rule quickly.
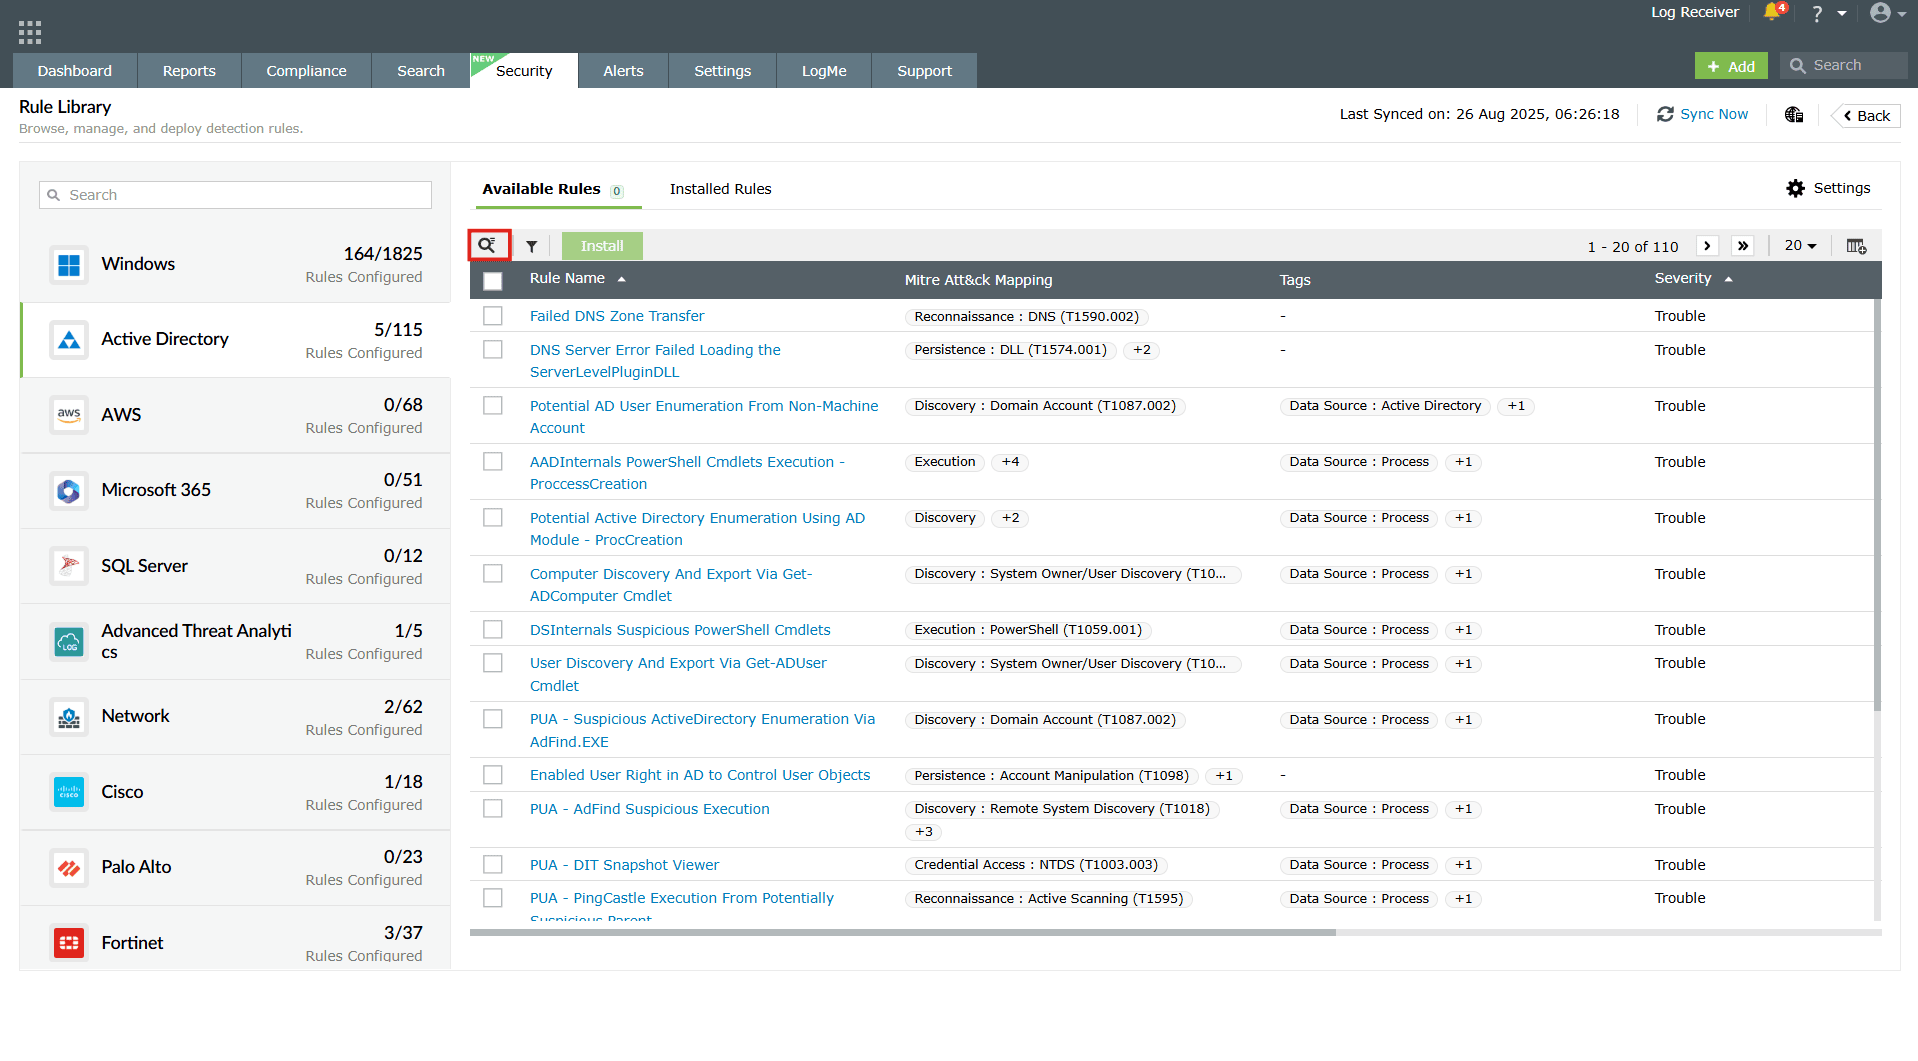
Image 4: Rule library in manage rules module - Clicking on the rule prompts open the Rule Summary box and the install button. Click on Install.
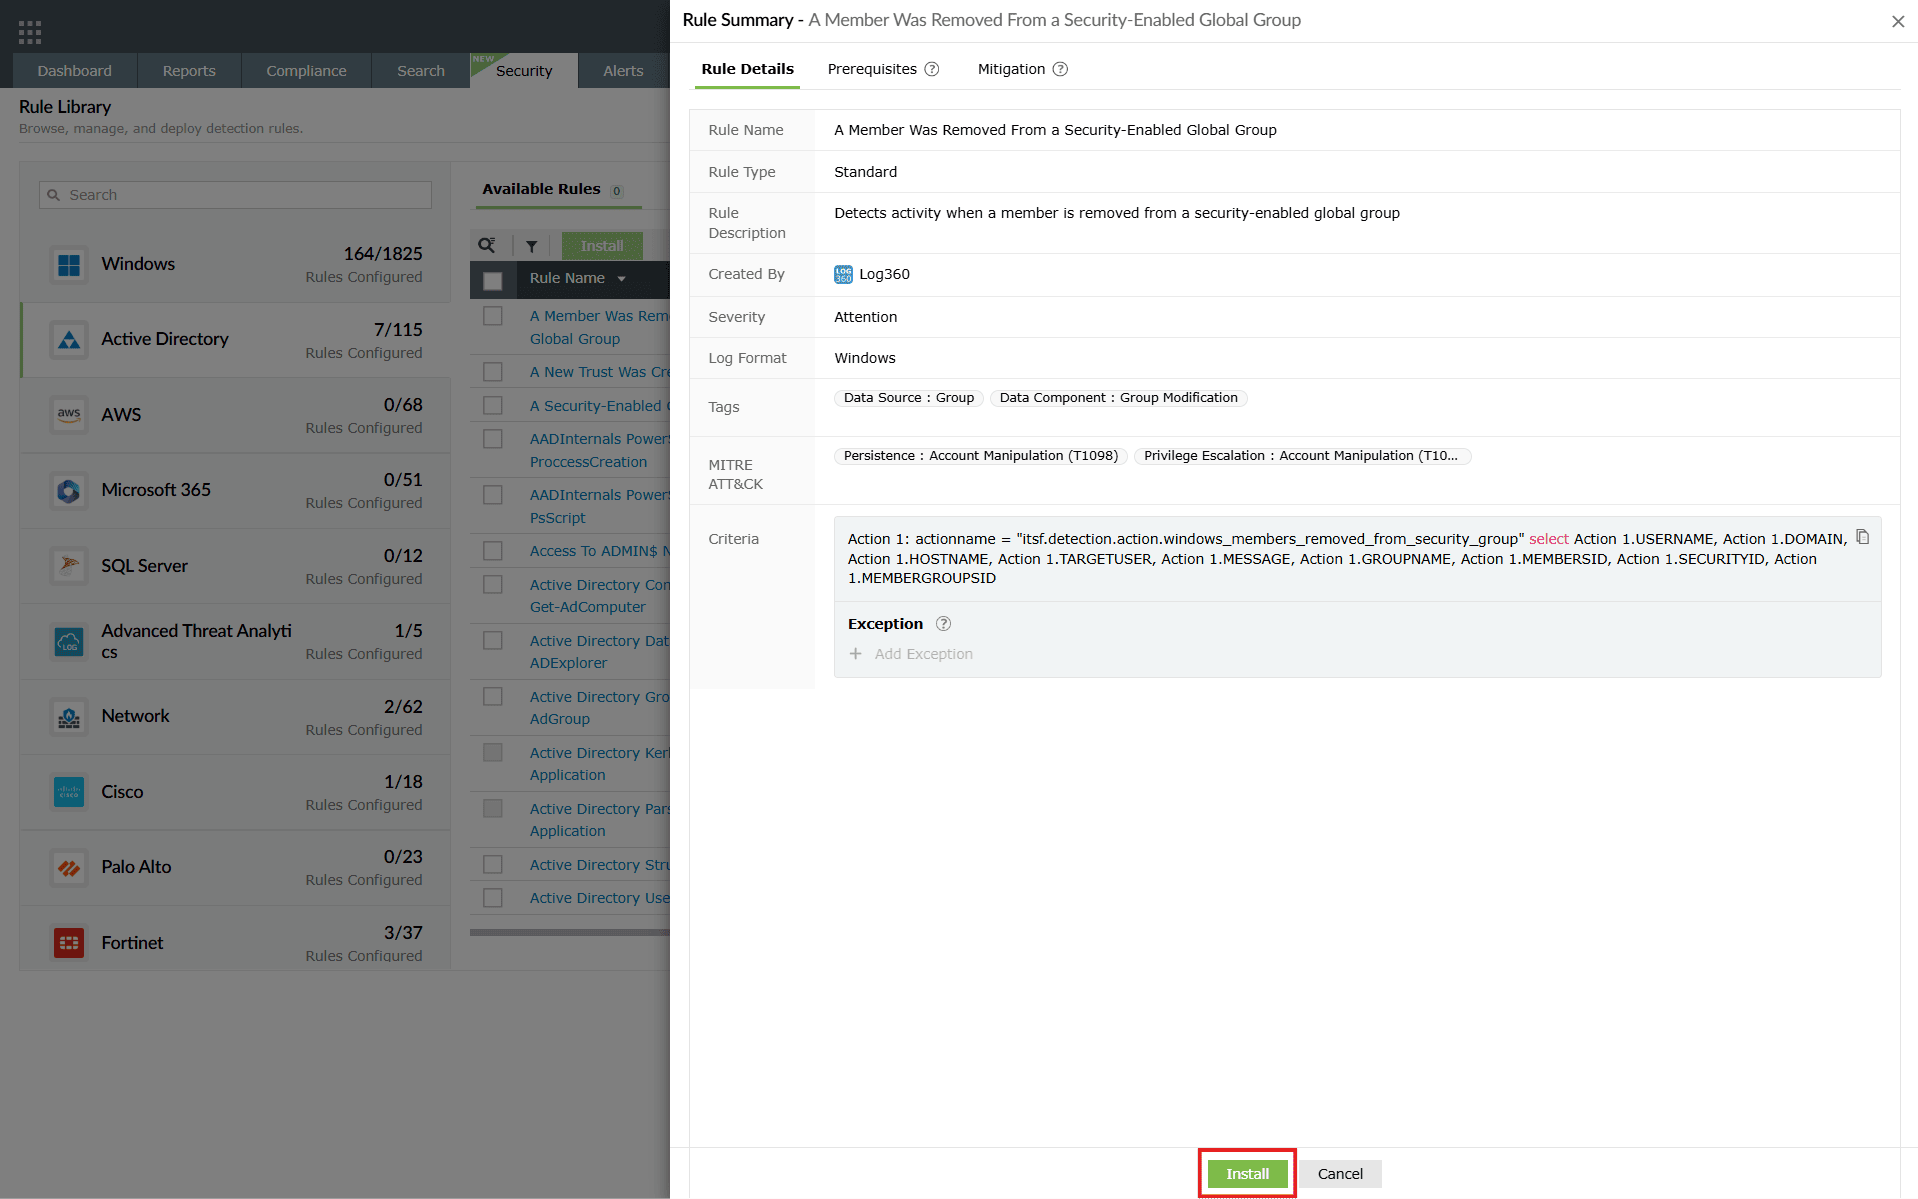
Image 5: Rule details in rule library - After clicking on Install, the Install Rules box slides open. Click on the add icon as highlighted below.
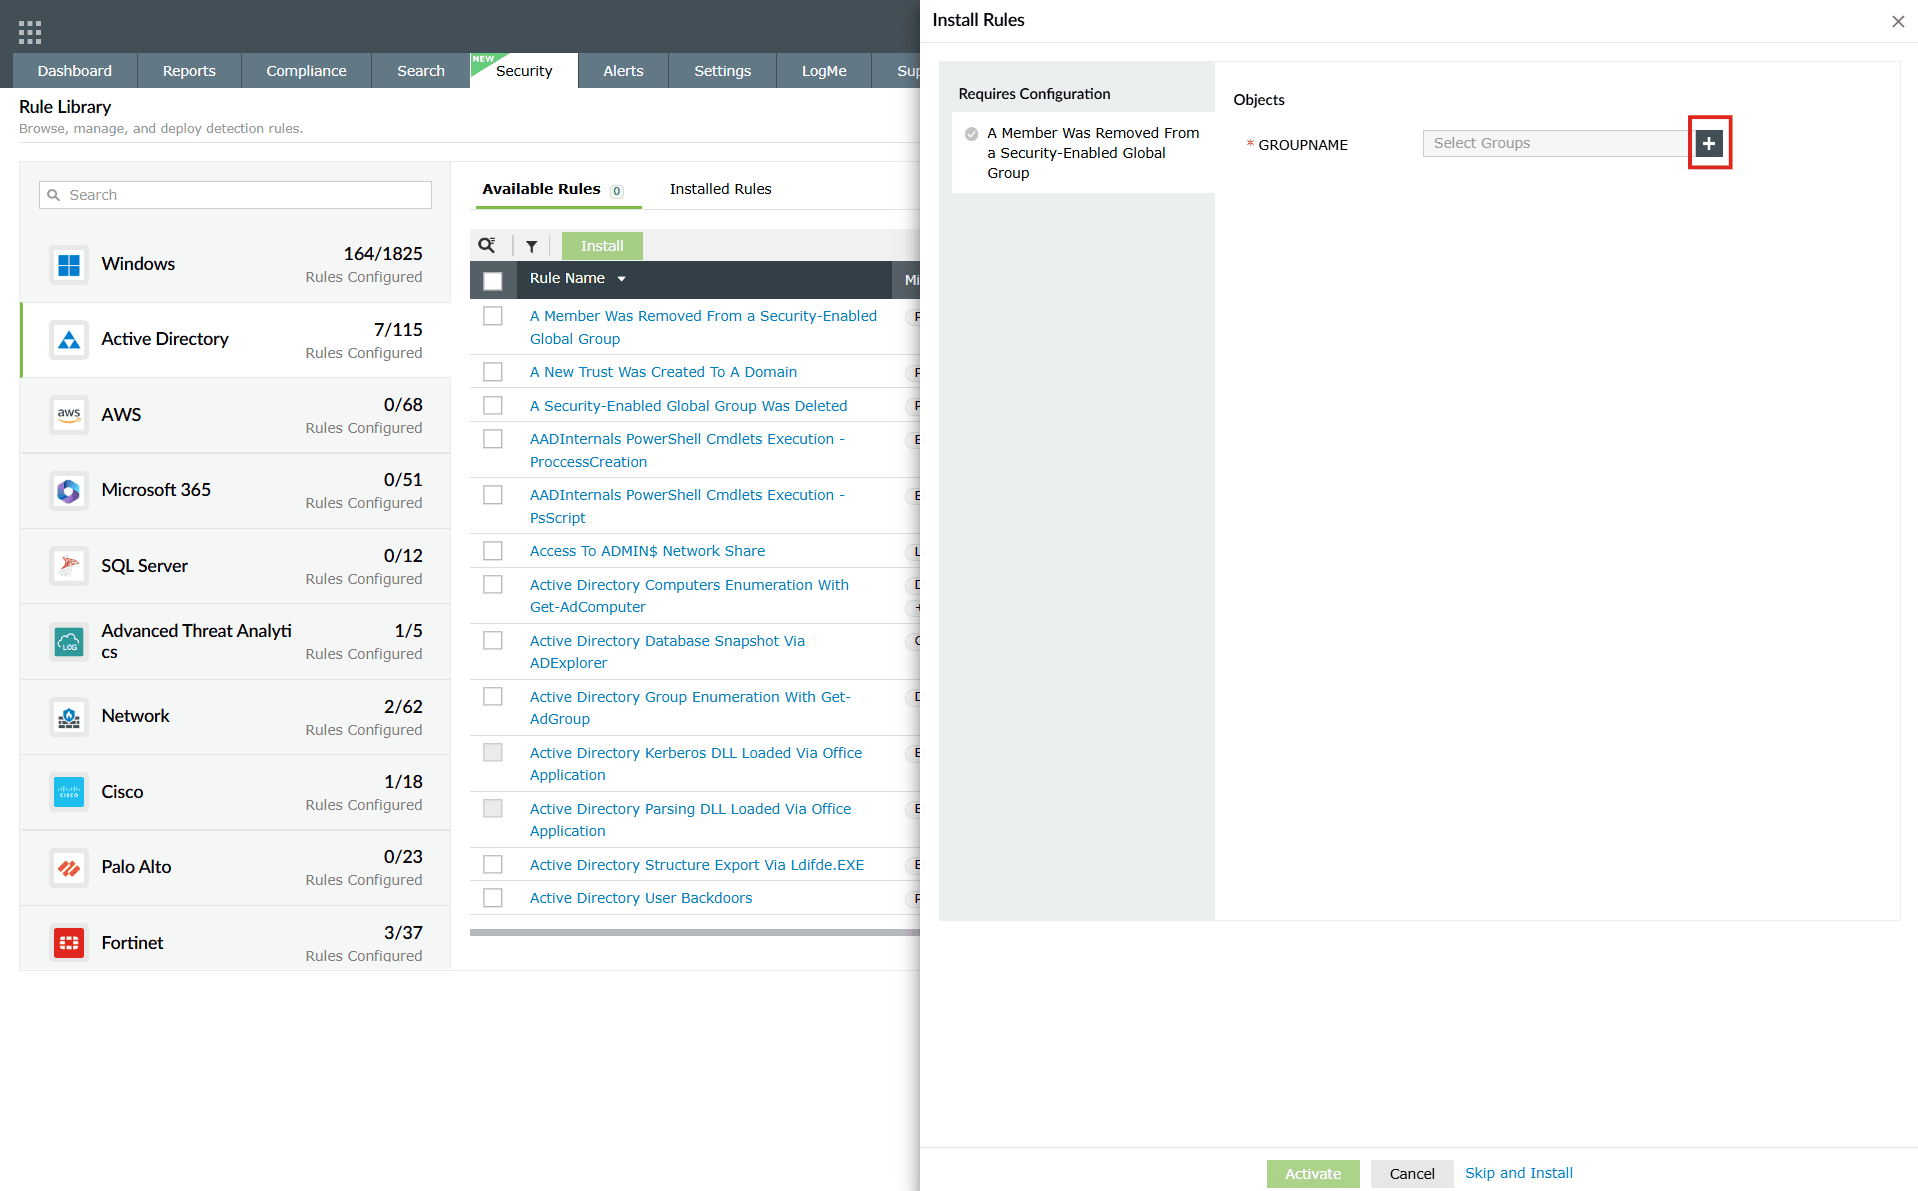
Image 6: Object filter in rule details in rule library NOTE You can choose to skip the below process by clicking on the Skip and Install option available in the Install Rules panel.
- You will be taken to the Groups sub-tab displayed along with the object filter feature in order to be able to filter and choose what groups of users you wish to group under this rule before installation itself.

Image 7: Applying object filter in rule details in rule library - Similarly, the OU based Groups sub-tab also includes the filter for user selection.
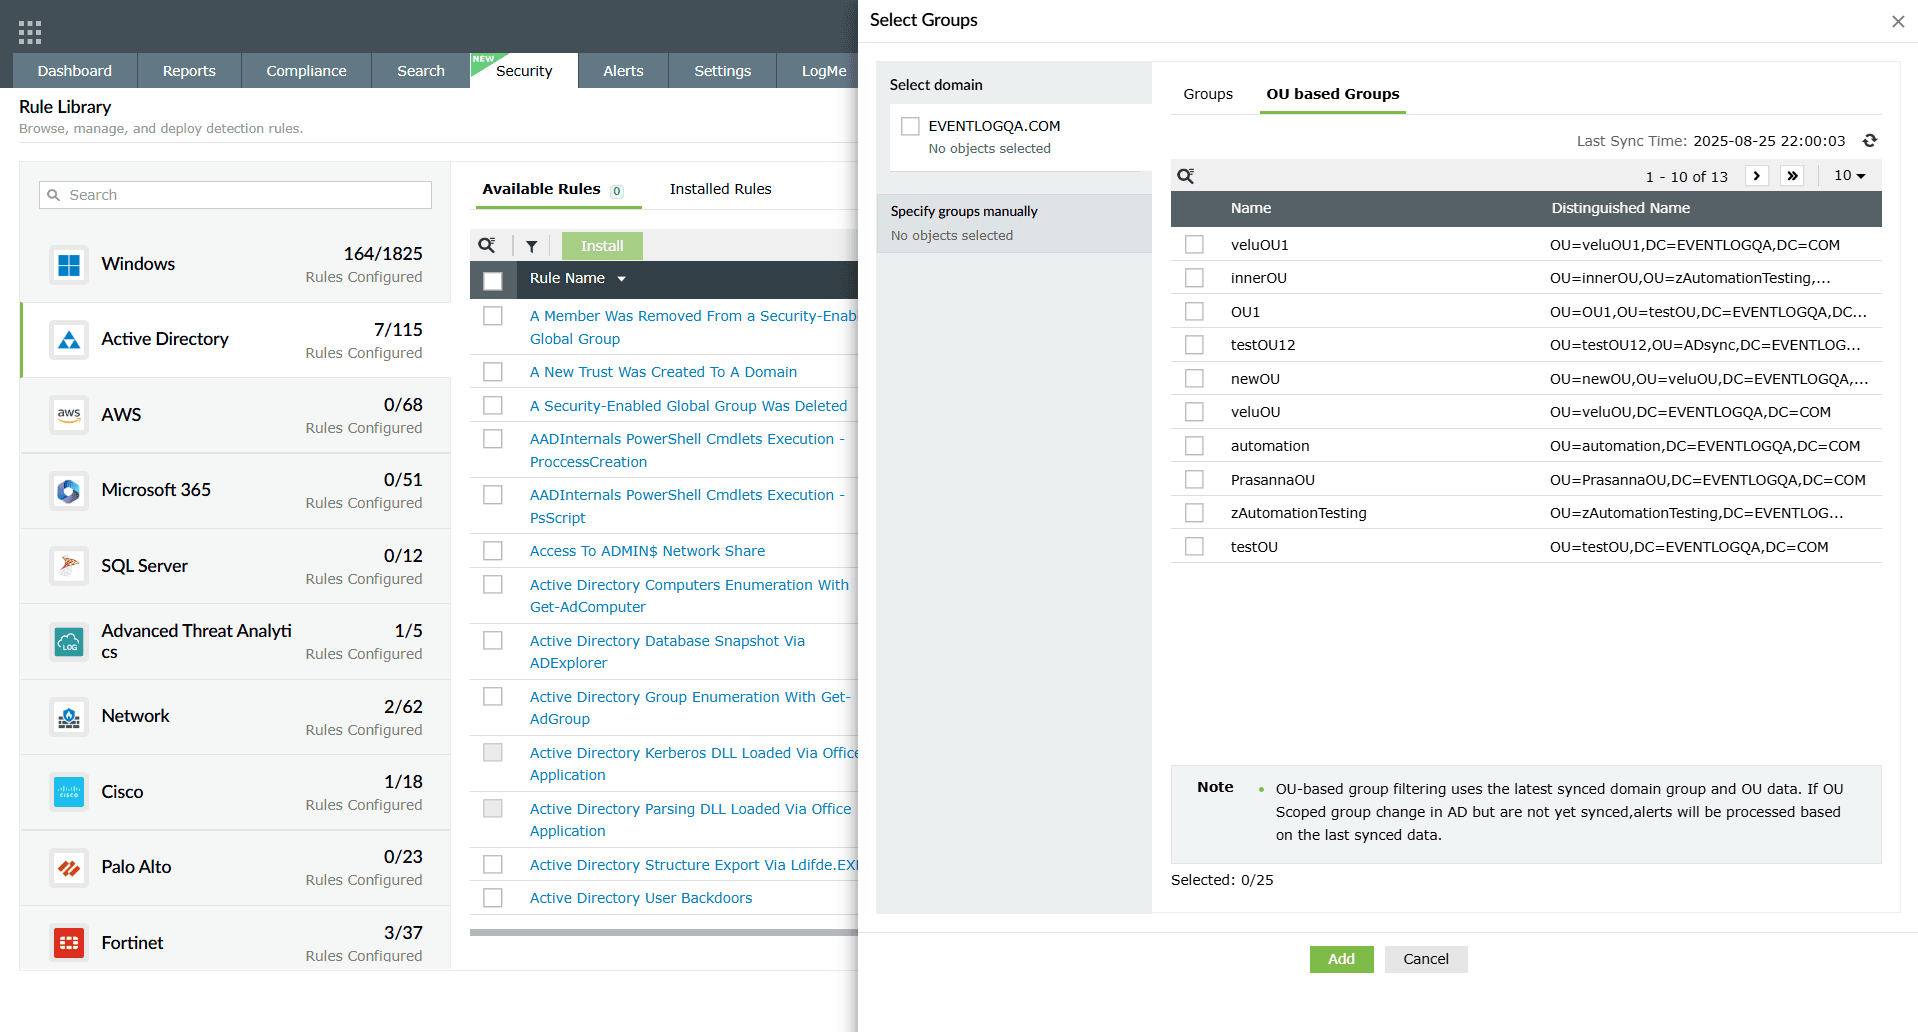
Image 8: Applying object filter in rule details in rule library - After selecting the preferred groups, you can view your selection by clicking on the View option below.
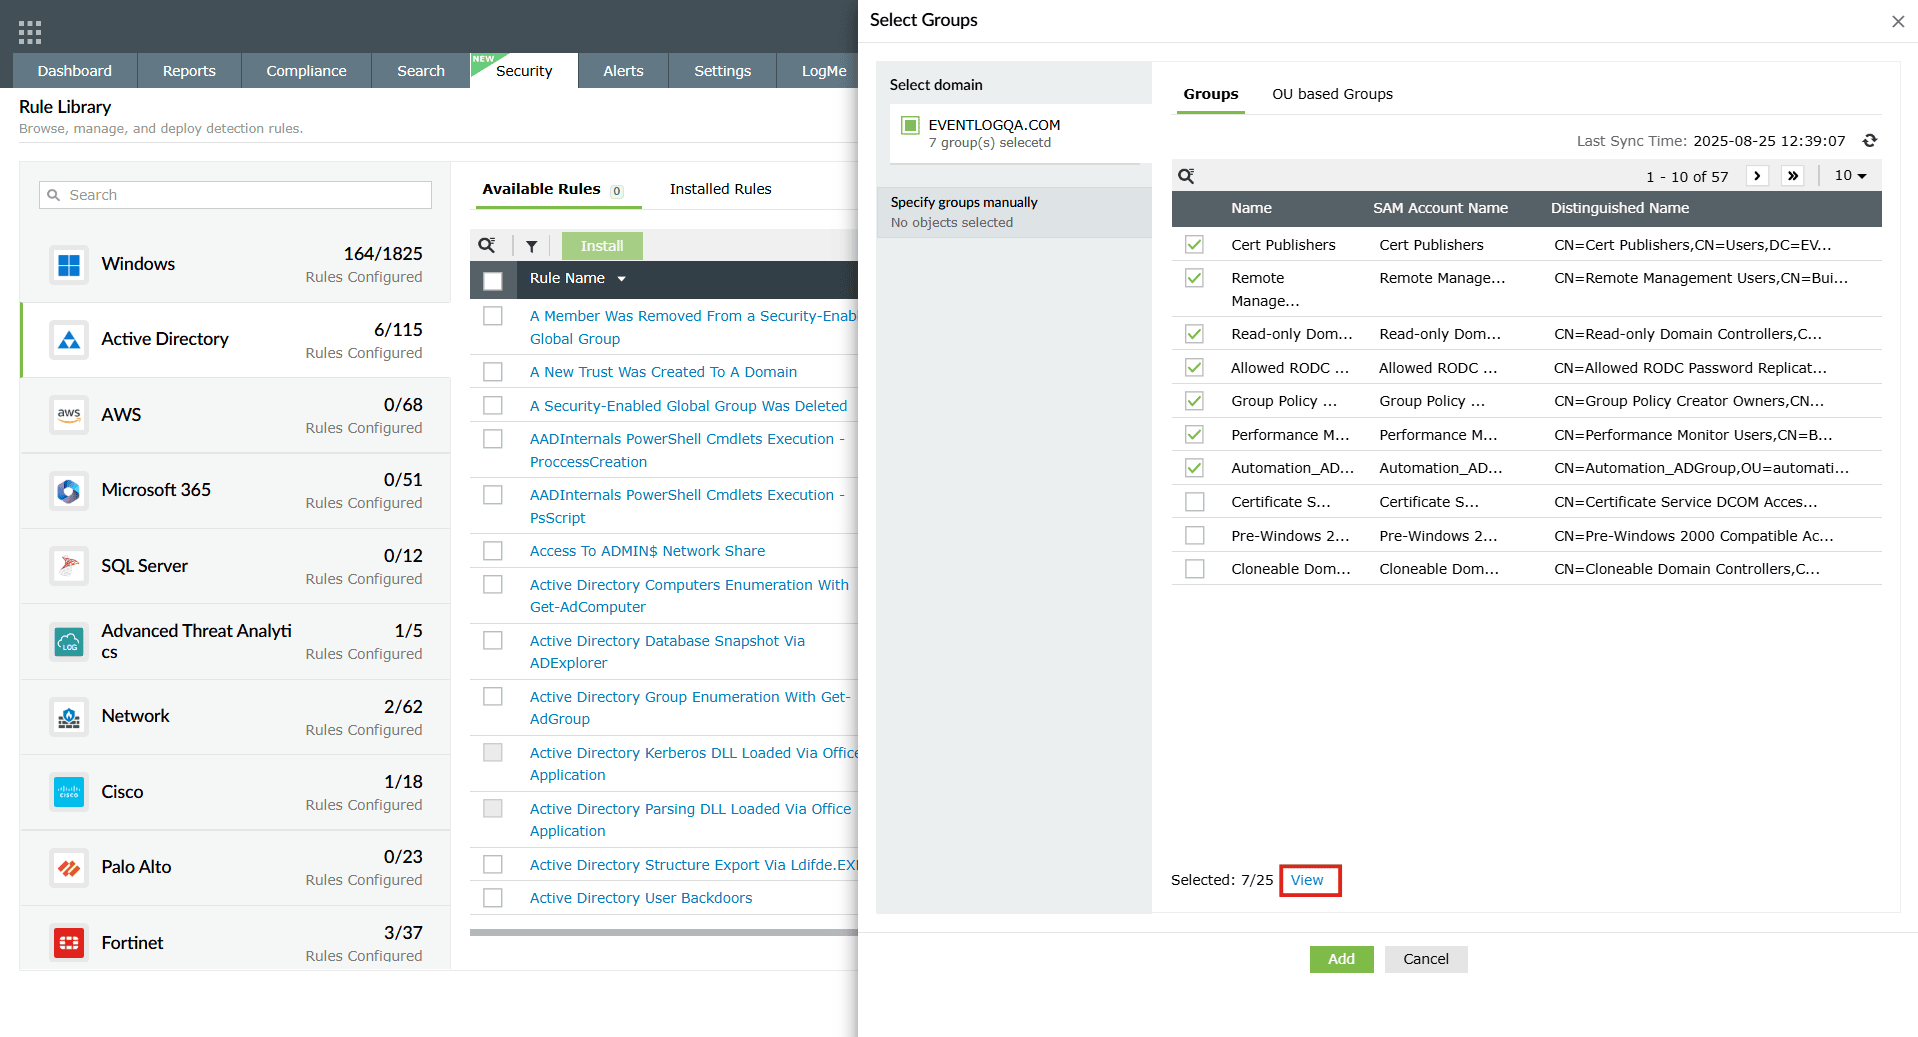
Image 9: Viewing the object filtering list - The list of selected user groups will be displayed.
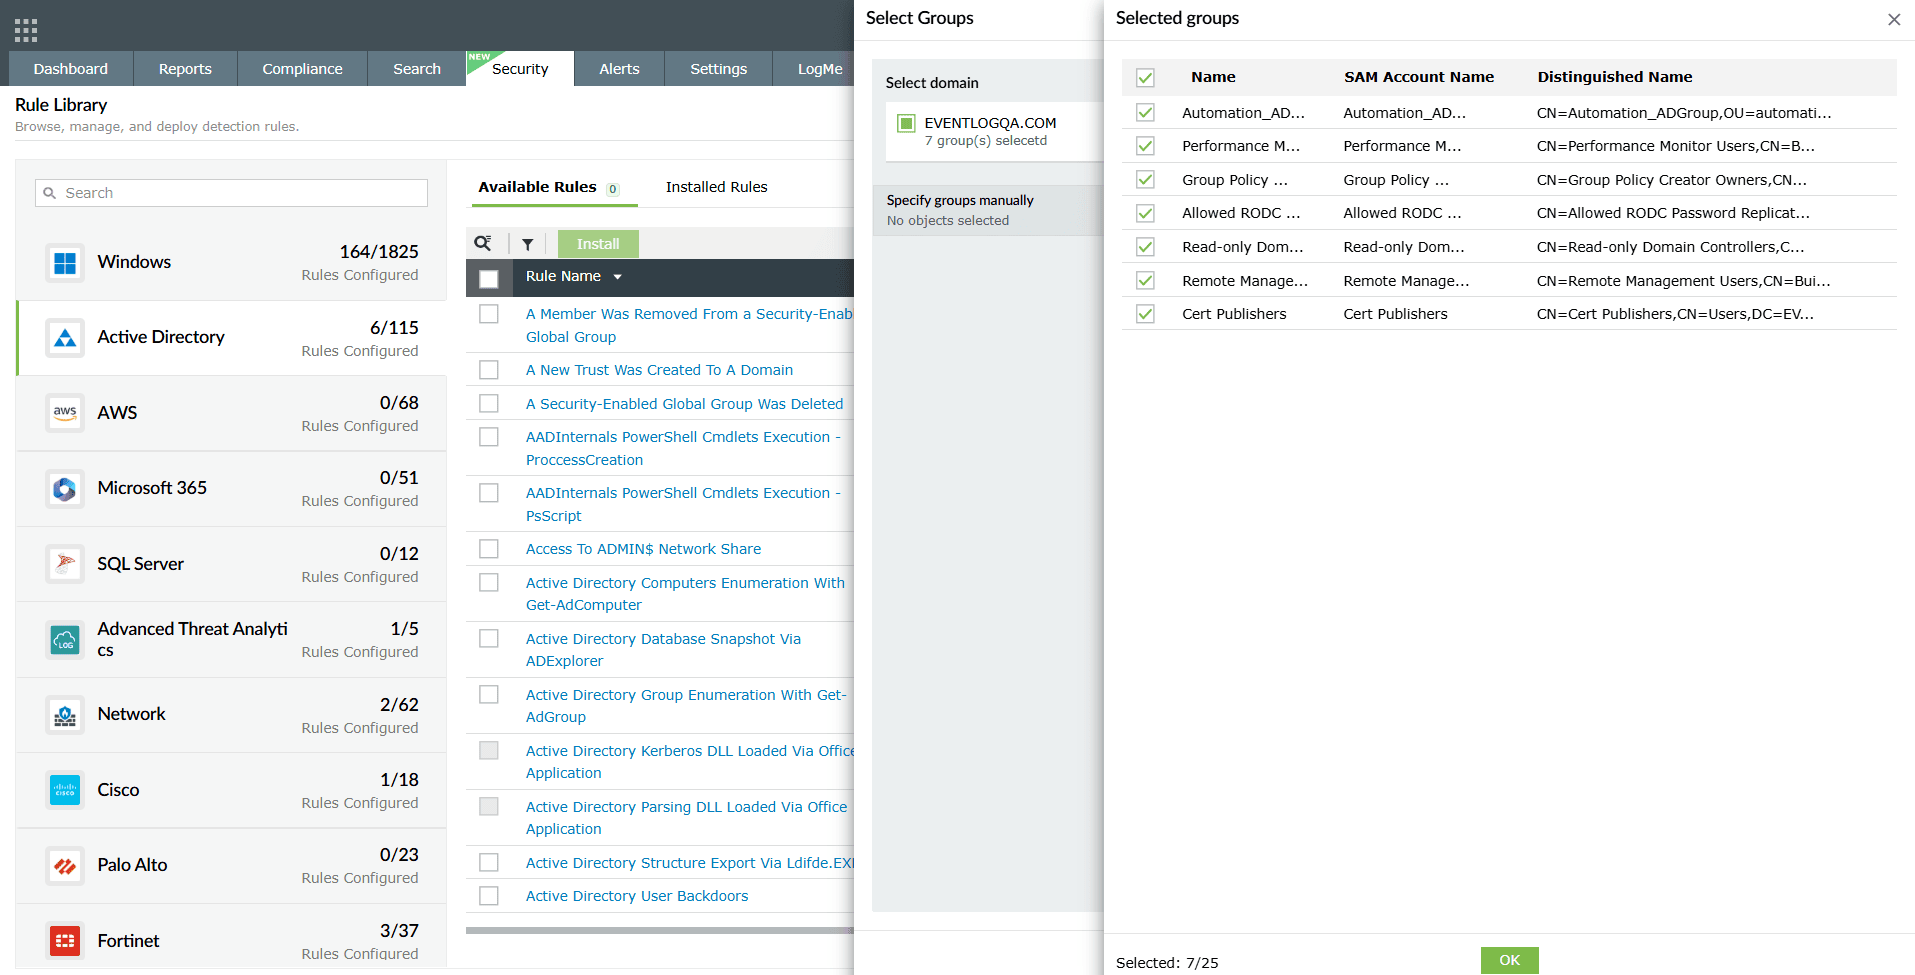
Image 10: Viewing list of configured object filter users/groups - Once the selection is done, click on OK in the selection list and then click on Add in the Select Groups pane. The Install Rules pane will display the Requires Configuration section with a green check mark.
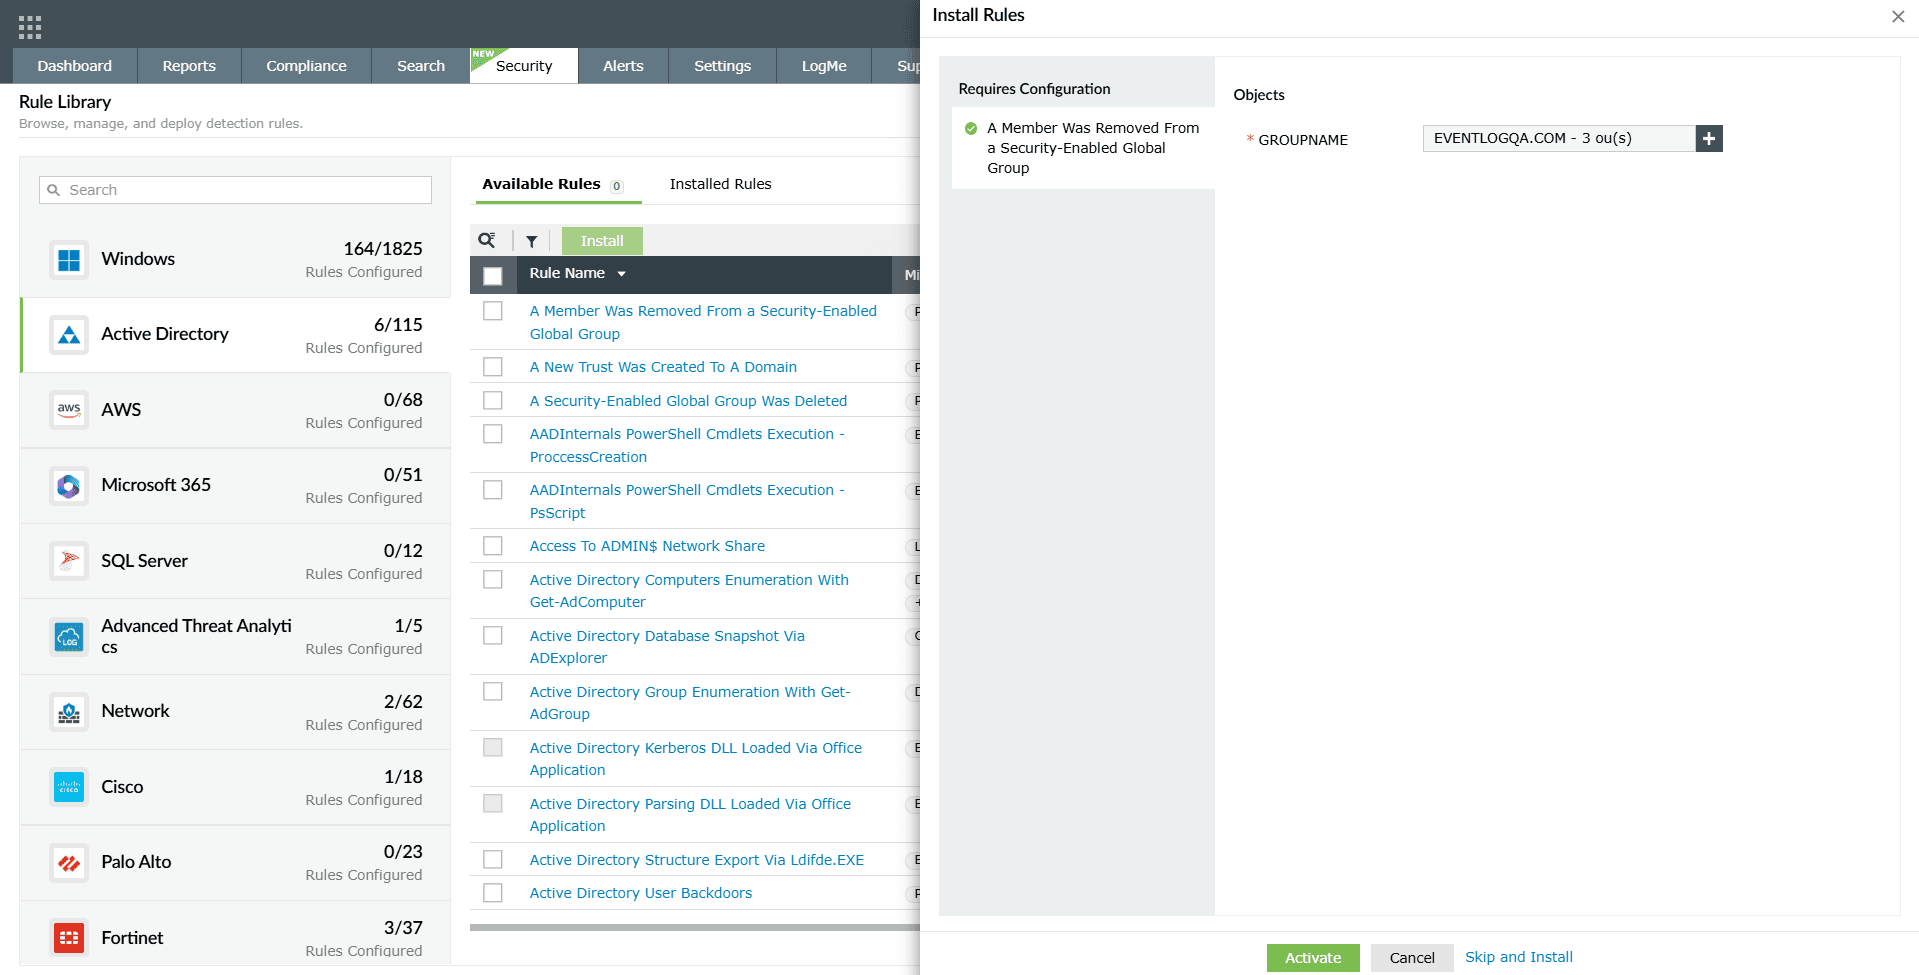
Image 11: Configuring object filter users/groups - Click on the Activate button. Upon successful completion of the action, the below pop-up appears.

To learn more about the Rule Library, refer to the help document.
Rule management
The solution allows you to configure or update object filters for existing rules through the Rule Management module. The filters can be applied in both the Objects and Exception sections of a rule's summary. To do this, follow the steps below:
- In your account, navigate to the Security tab to access the Security Analytics Dashboard and click on Manage Rules in the top-right corner.
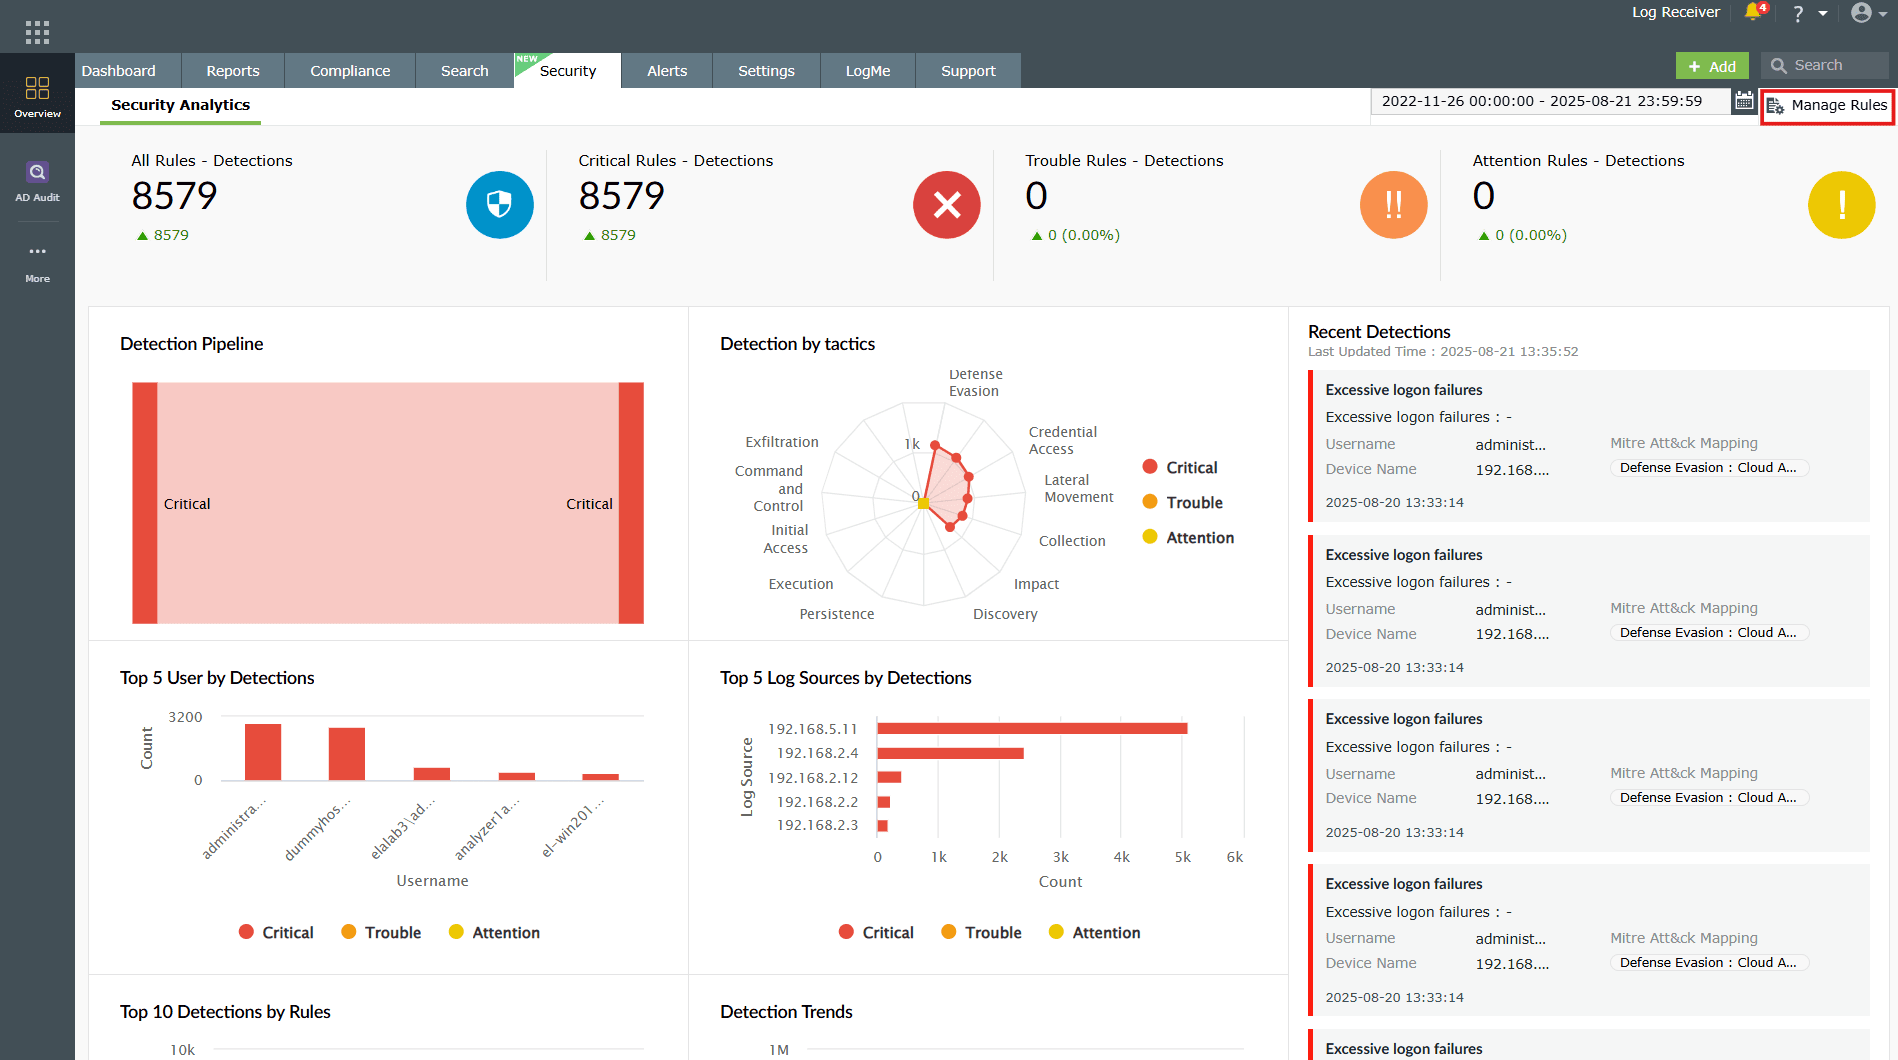
Image 12: Manage rules in the security dashboard - You will be taken to the Manage Rules module.
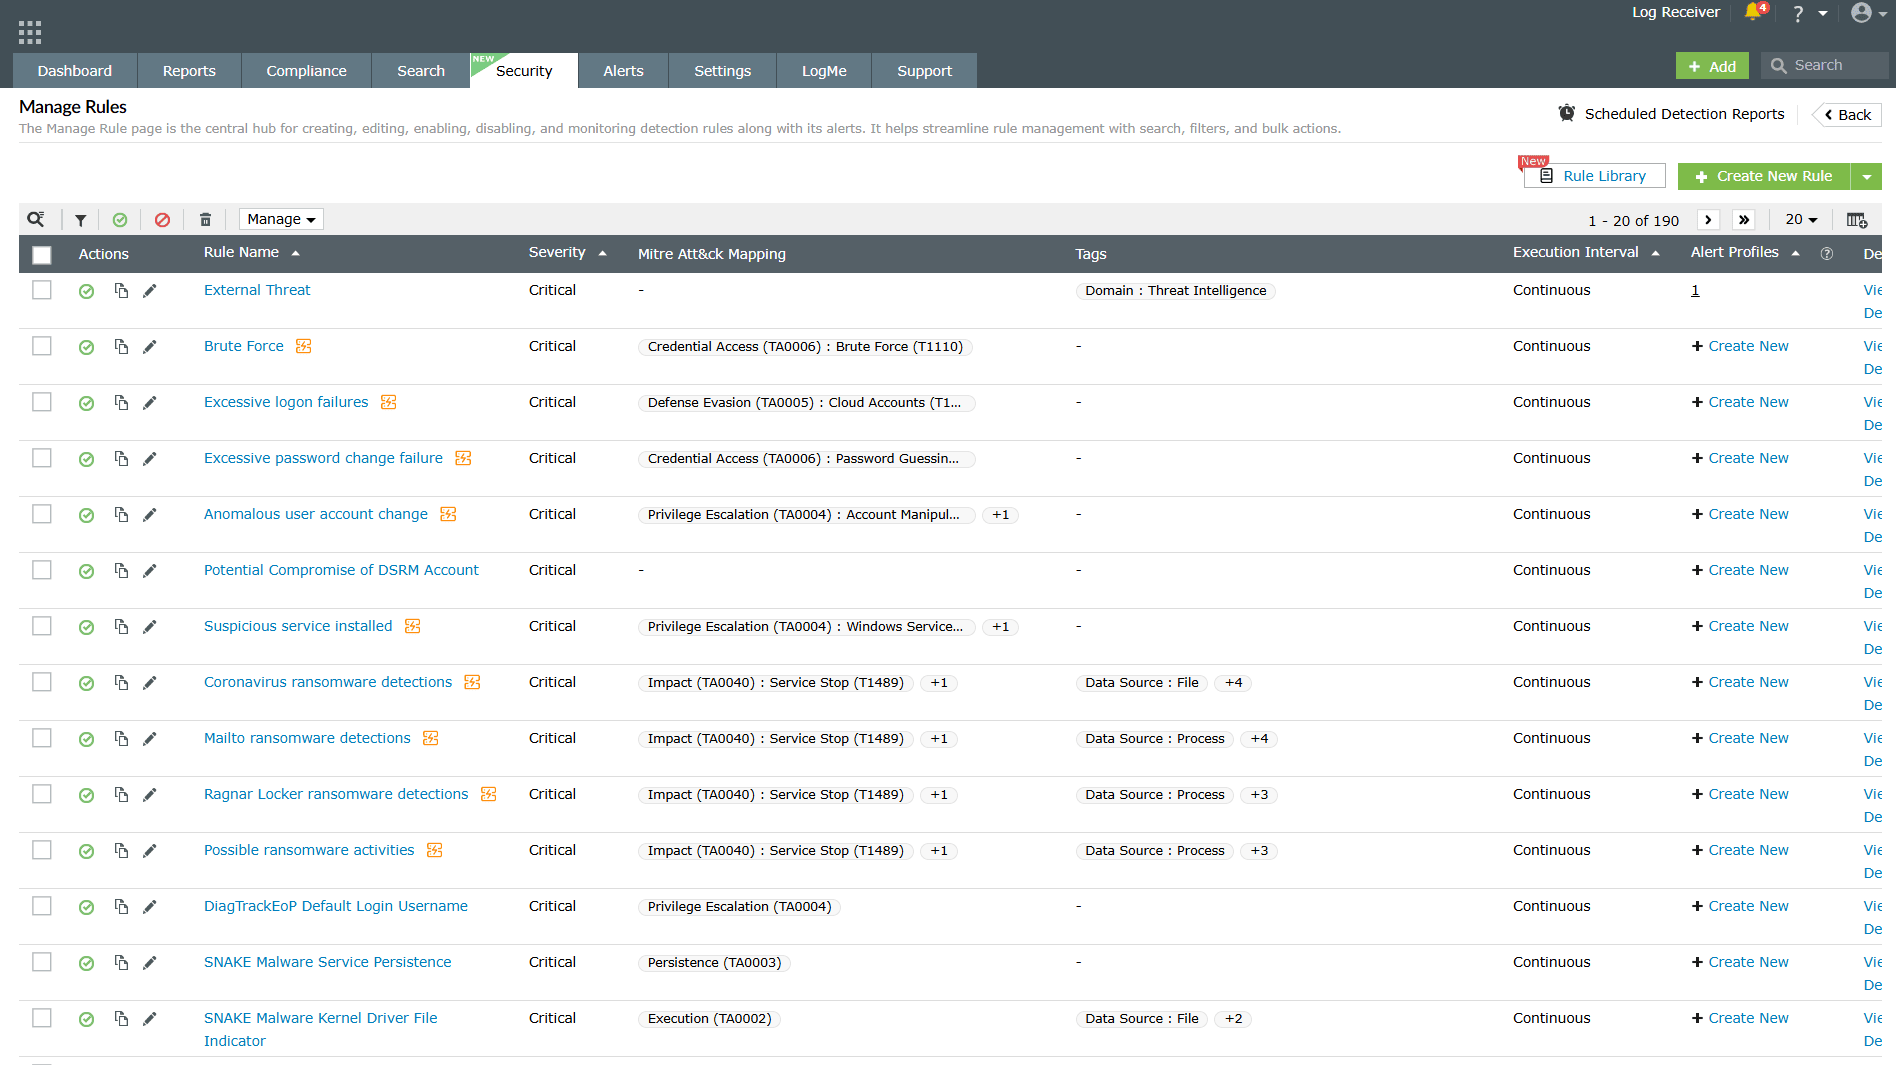
Image 13: Manage rules module - Click on the required rule name. You can use the search feature available to find the rule quickly.
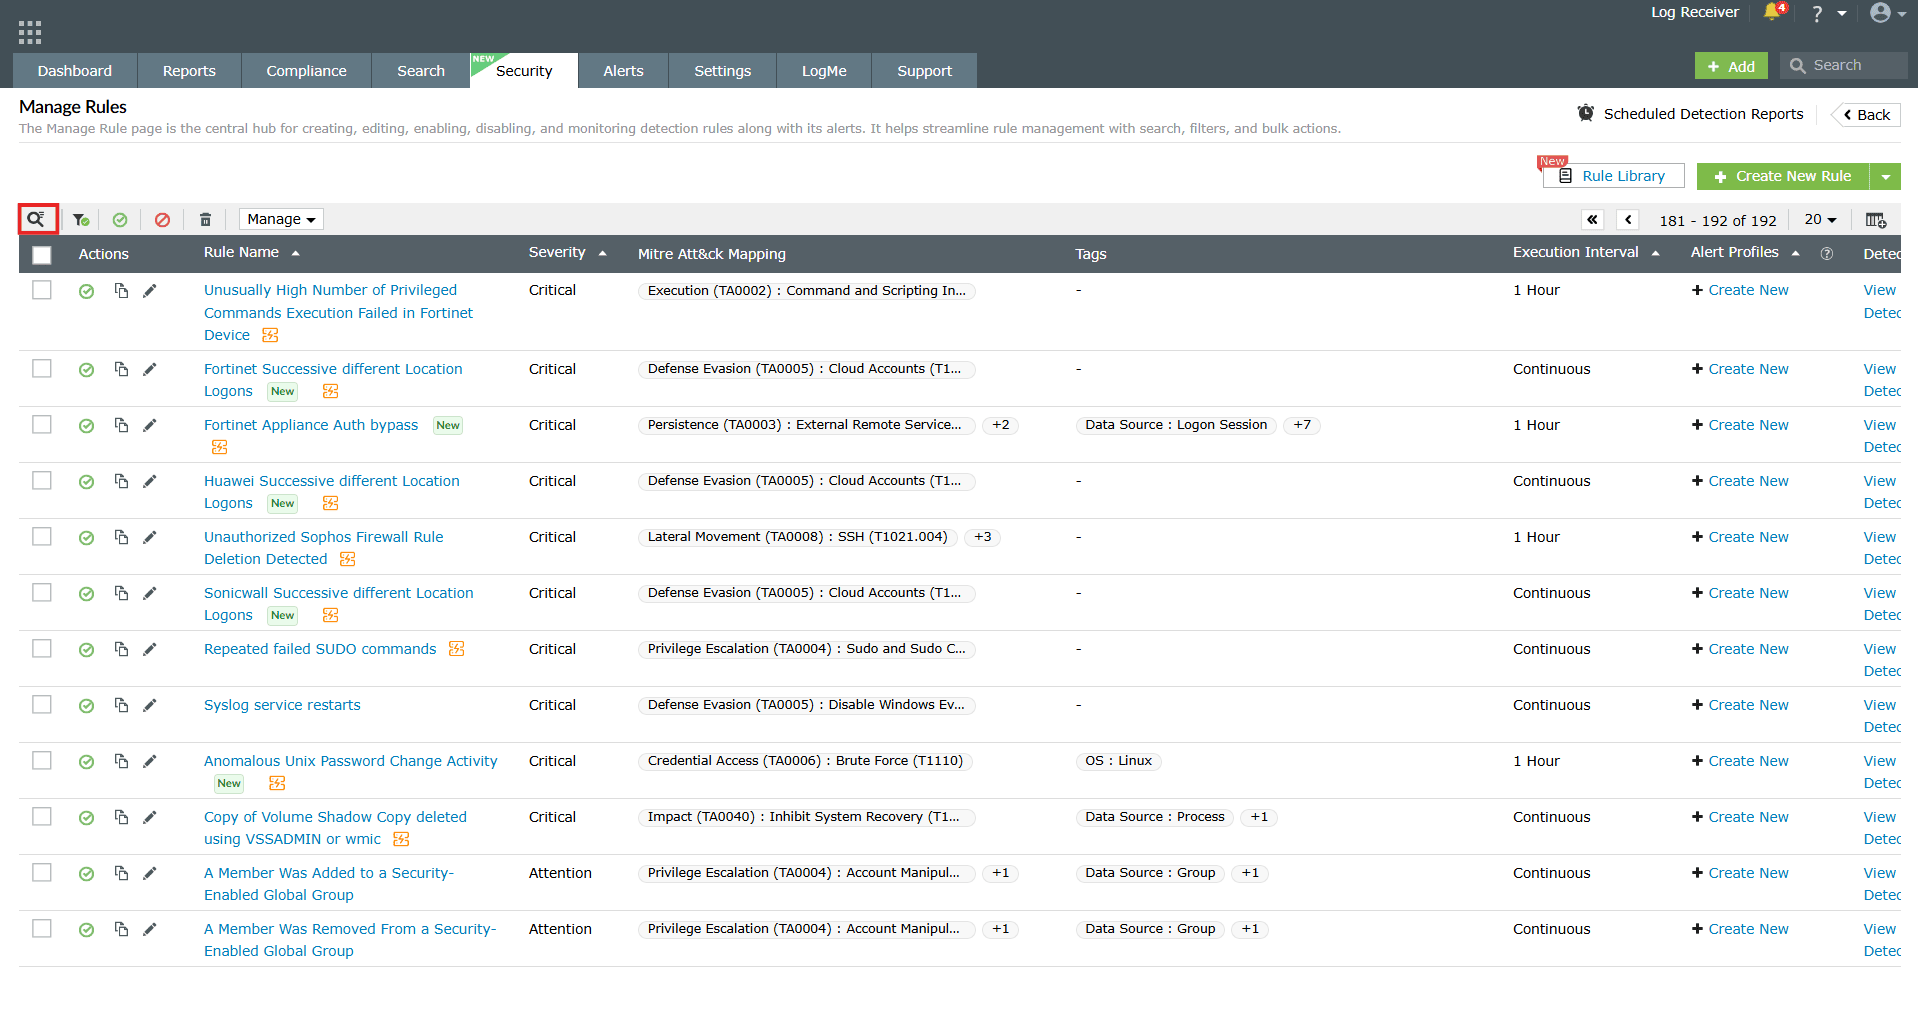
Image 14: Search option in manage rules module - Upon clicking on the rule name, the Rule Summary box slides open. The object filter feature is available for the below sections in the Rule Details sub-tab of Rule Summary.
A. Objects section
- Navigate to the Criteria section as highlighted below and click on the edit icon
 in Objects.
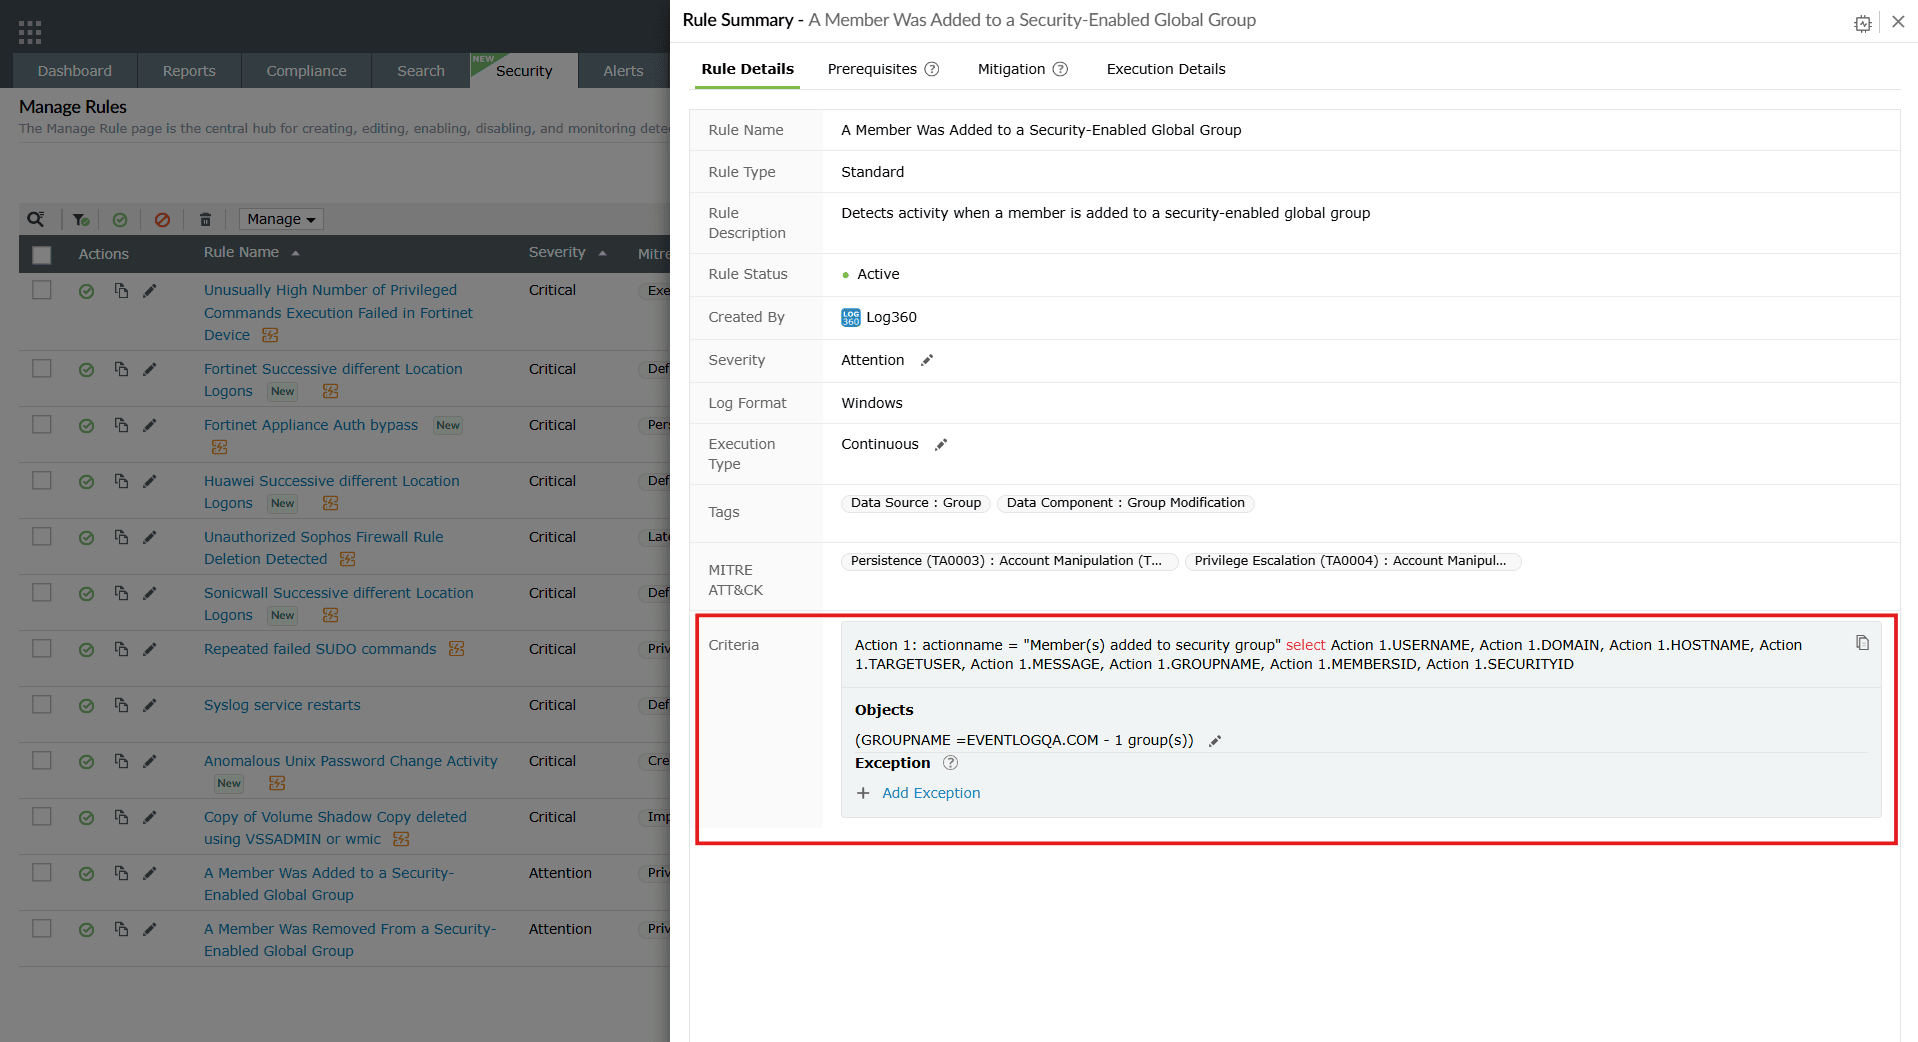
Image 15: Object filtering in rule summary in manage rules module NOTE- The edit icon will be available only if you have previously selected user groups during rule installation from the Rule Library.
- In the case where you had chosen to Skip and Install rule, in the above mentioned Objects field in the Criteria section, the option Add Objects will be visible. Click on it to access the object filter and follow the steps mentioned below to select user groups.
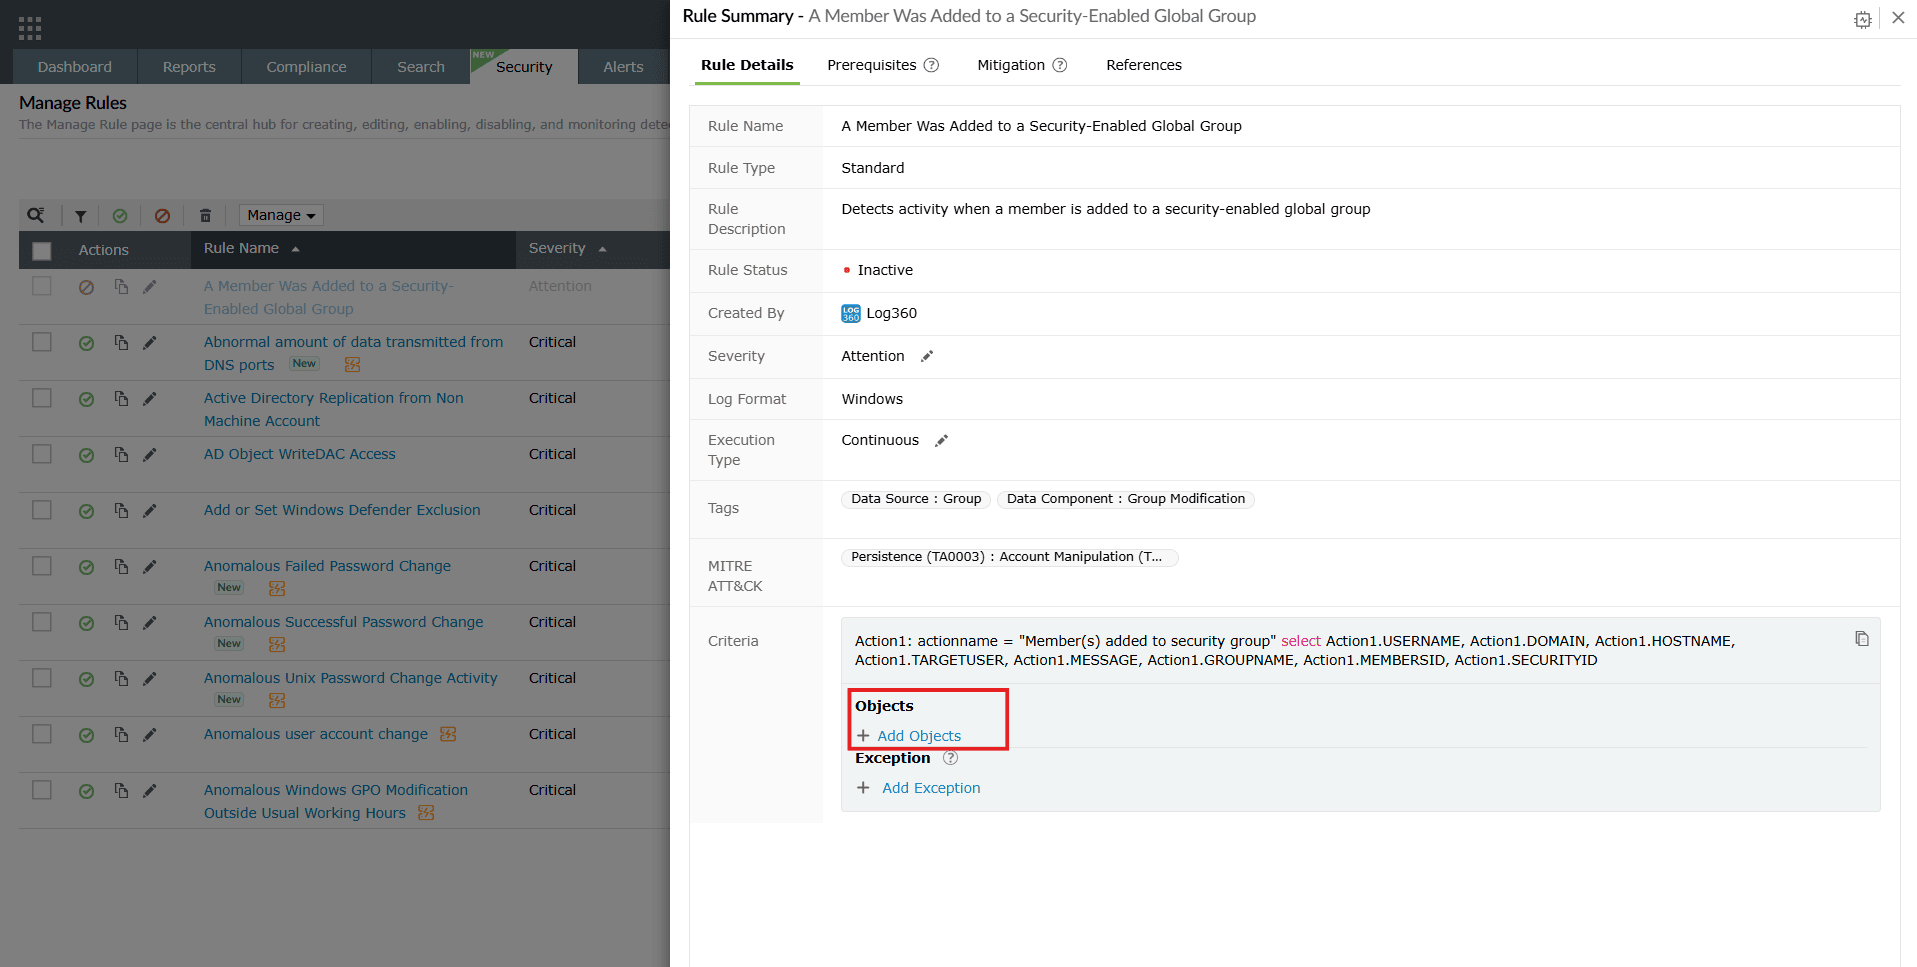
Image 16: Adding objects in rule summary
- The Add Object pane slides open. Click on the add icon as highlighted below.
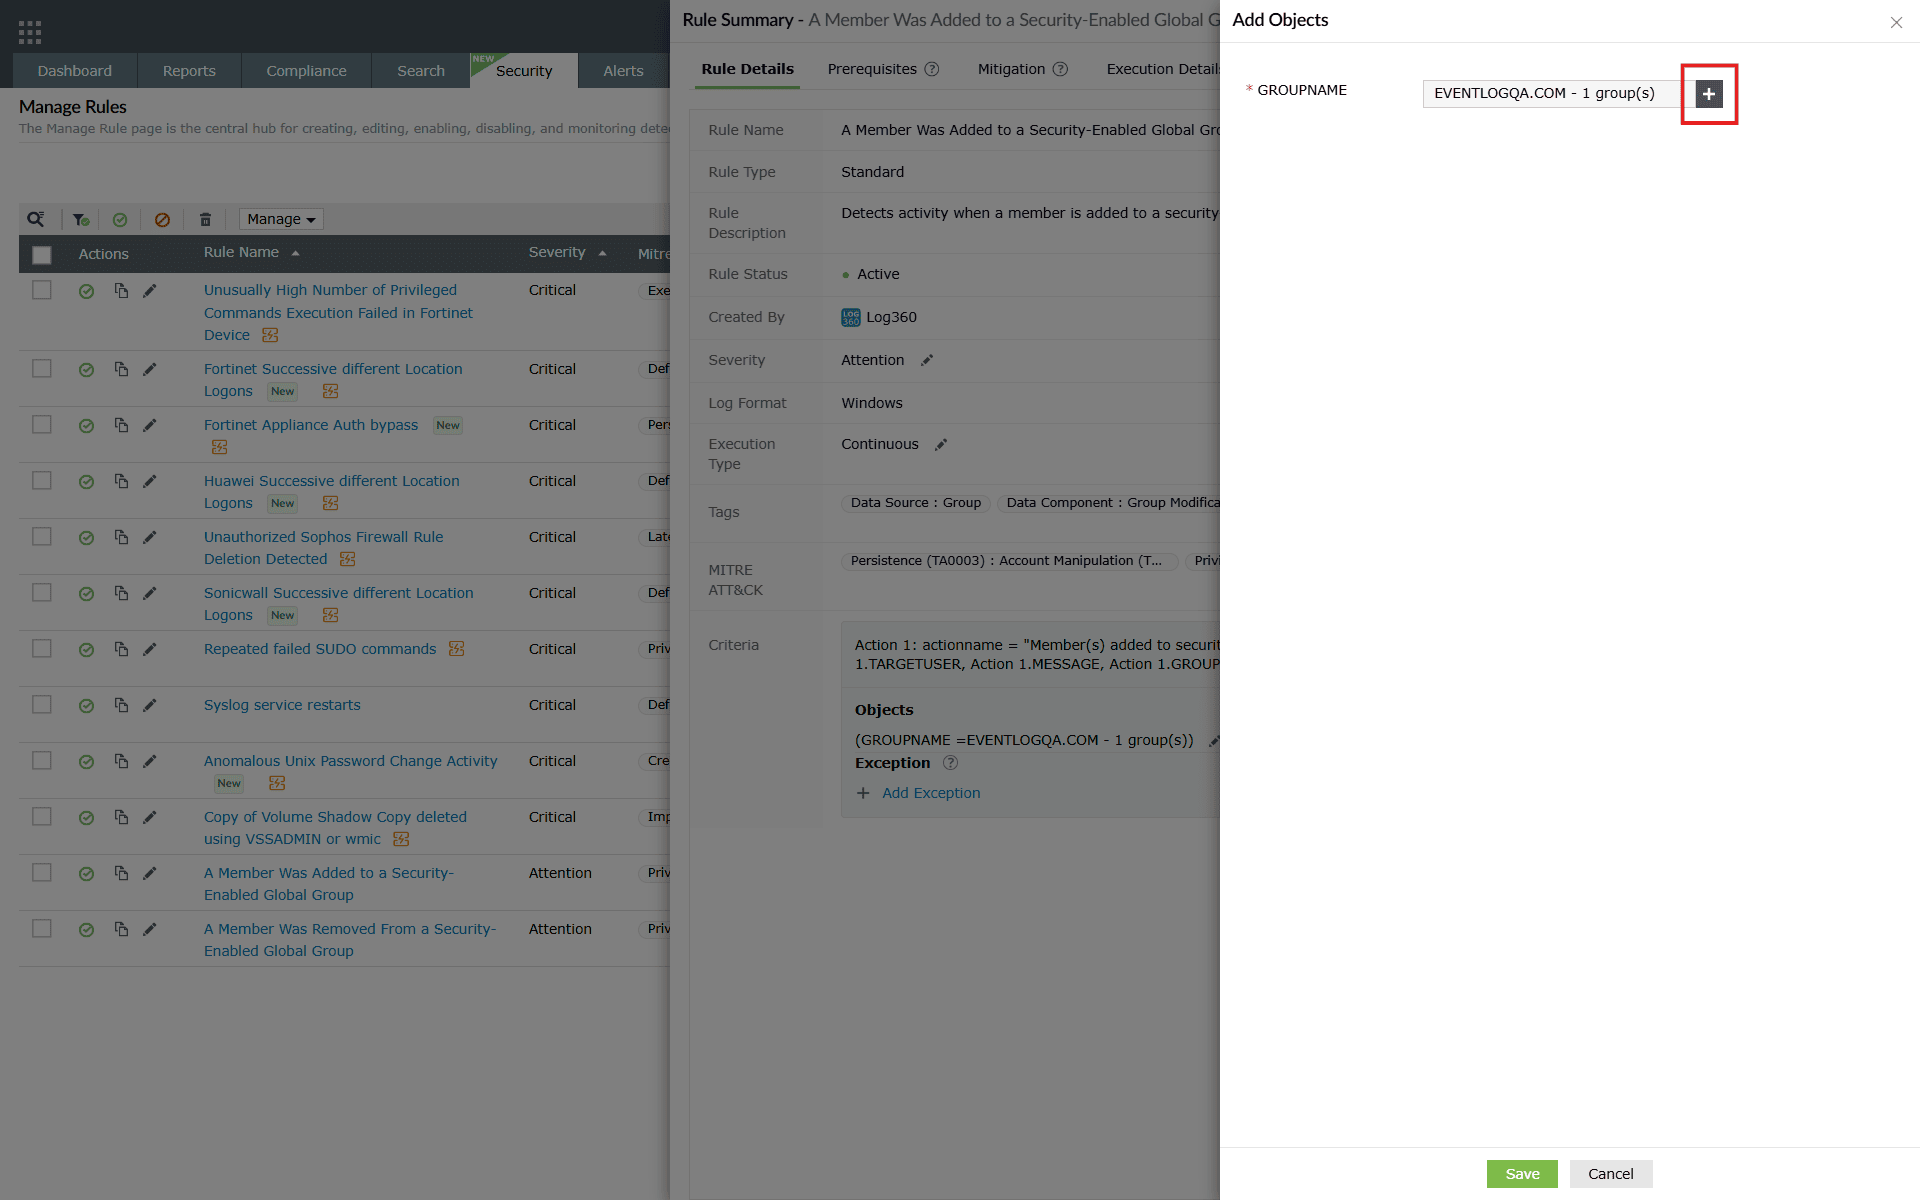
Image 17: Object filtering in rule summary - The Select Groups pane slides open. You will be taken to the Groups sub-tab displayed along with the object filter feature in order to be able to filter and choose what groups of users you wish to group under this rule.

Image 18: Object filtering in rule management - Similarly, the OU based Groups sub-tab also includes the filter for user selection.
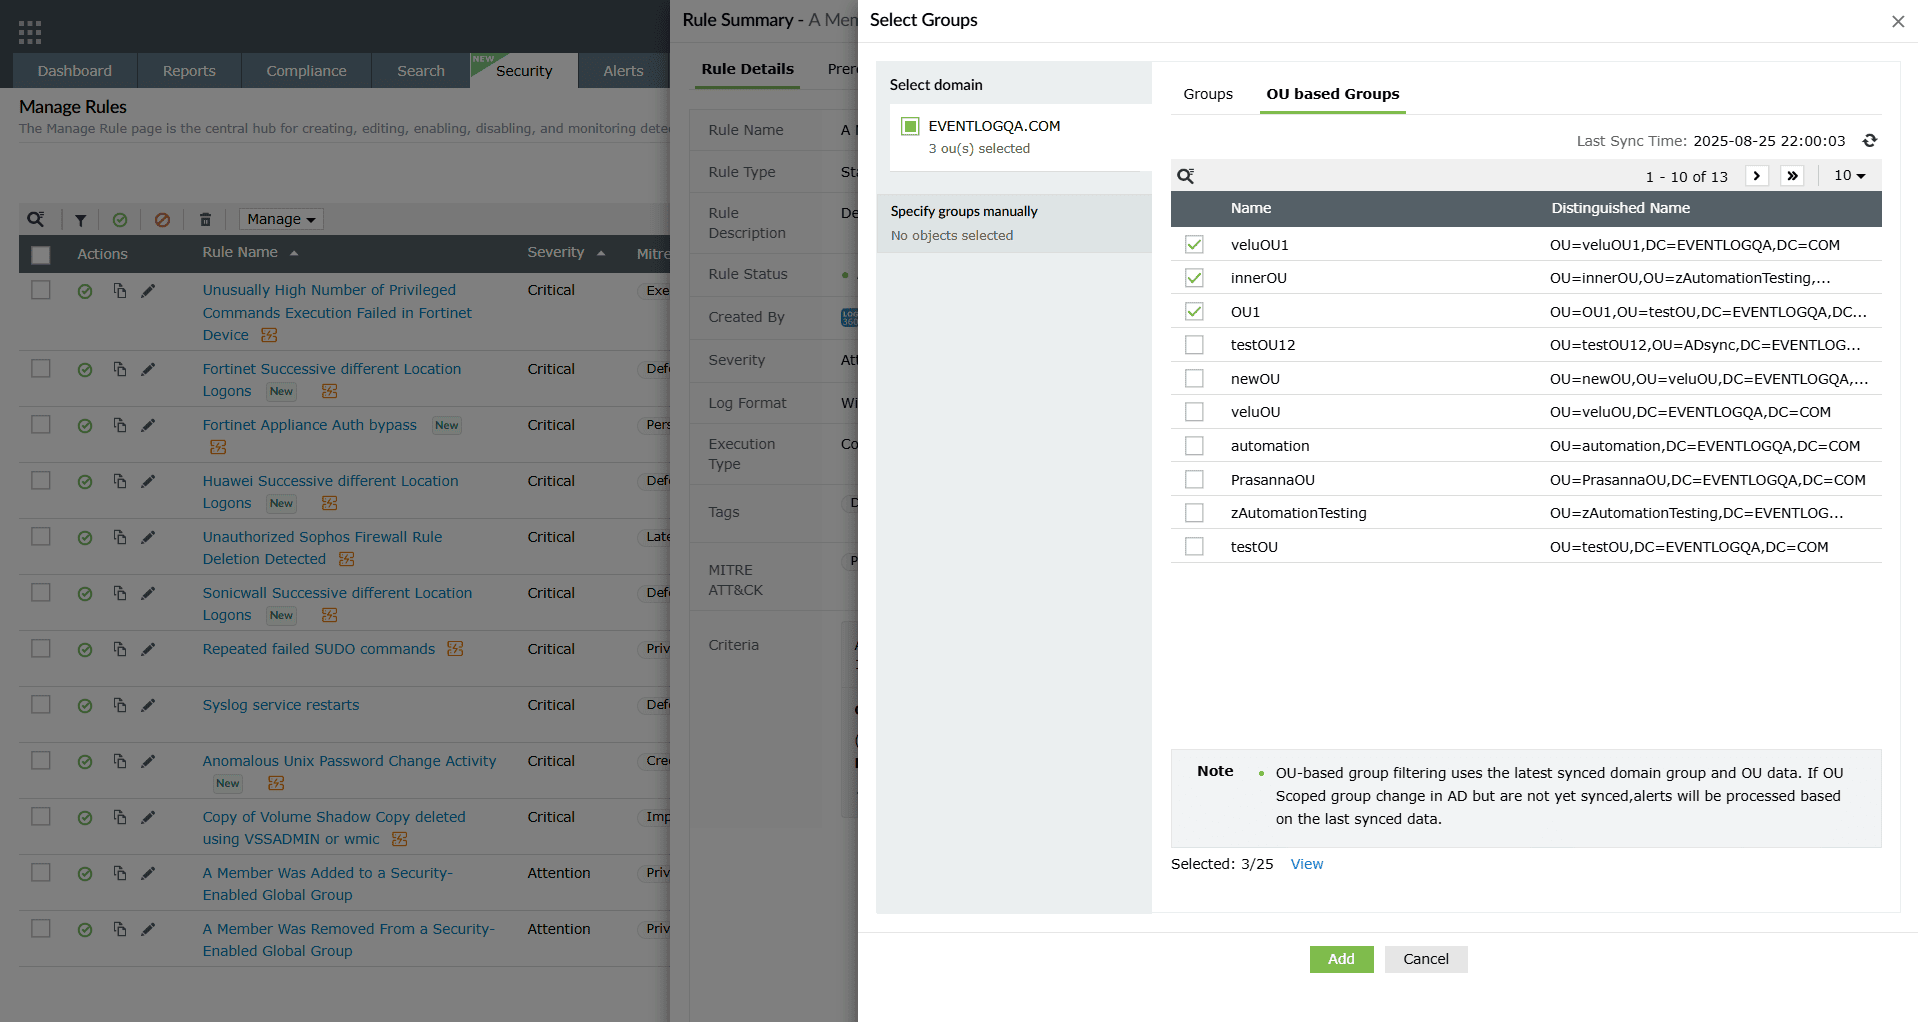
Image 19: Group selection in object filtering - After selecting the preferred groups, you can view your selection by clicking on the View option highlighted below.
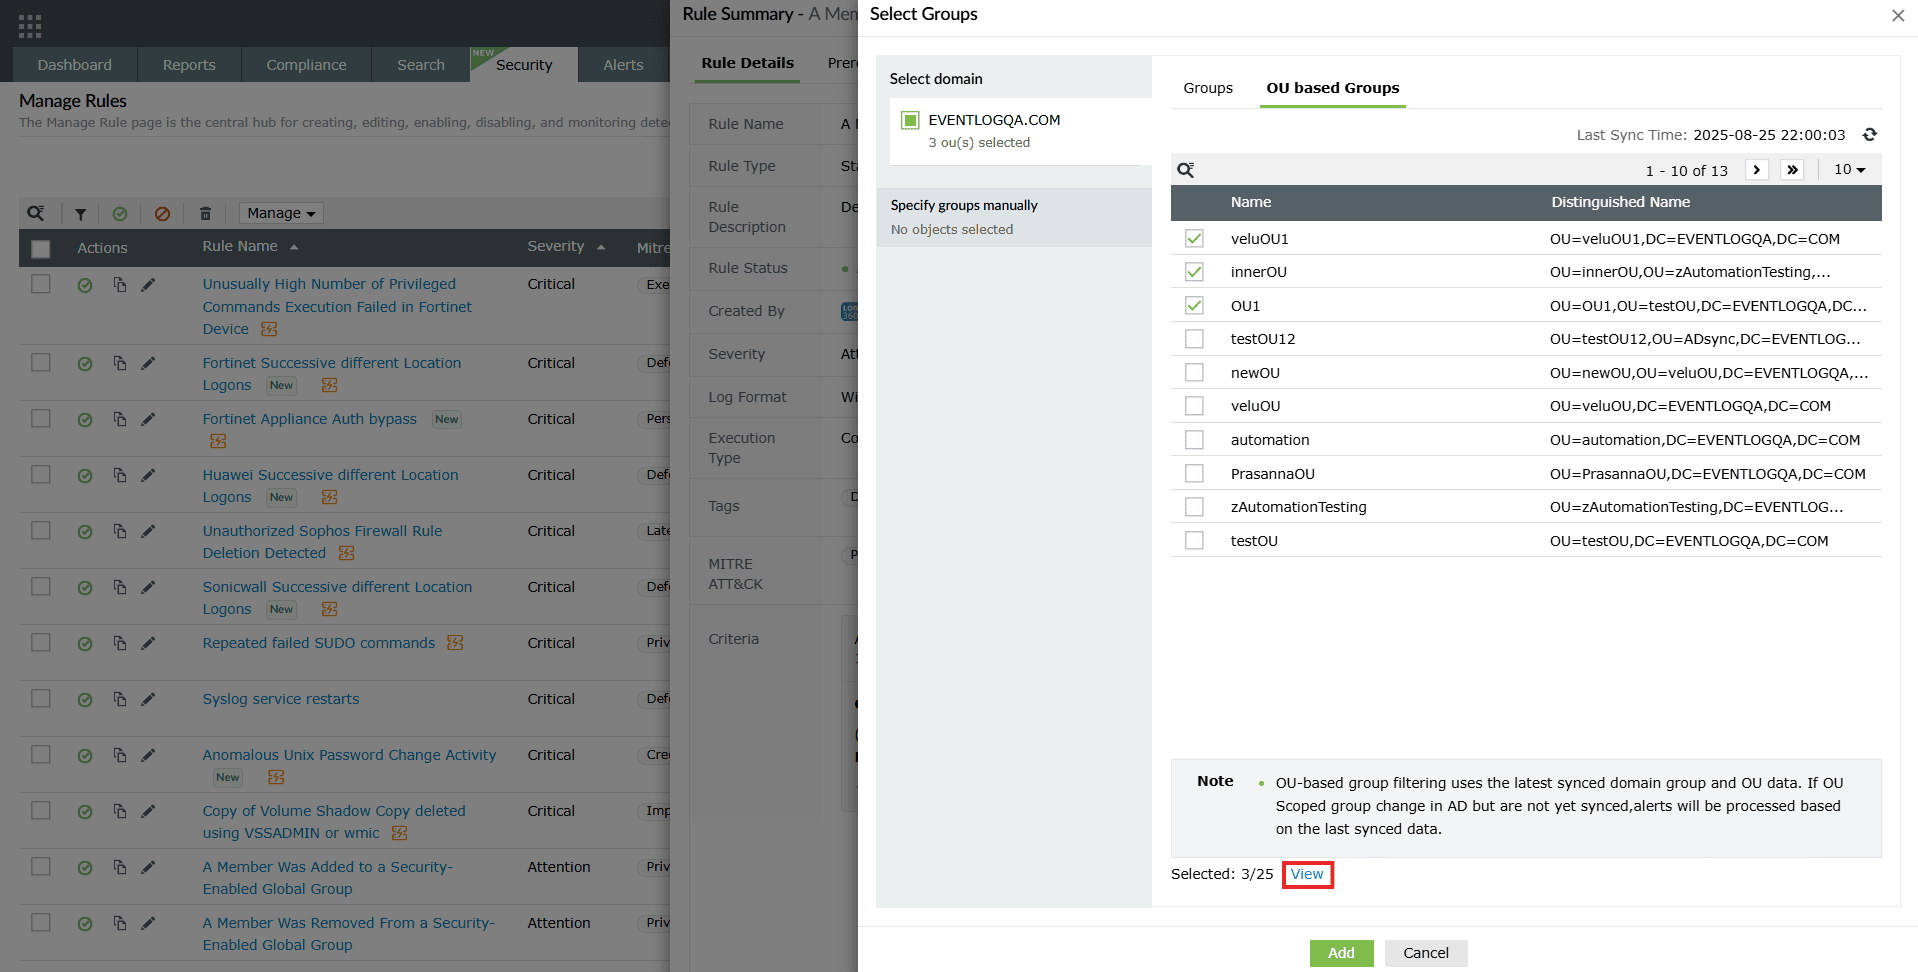
Image 20: Viewing list of configured object filter users/groups - The list of selected user groups will be displayed.
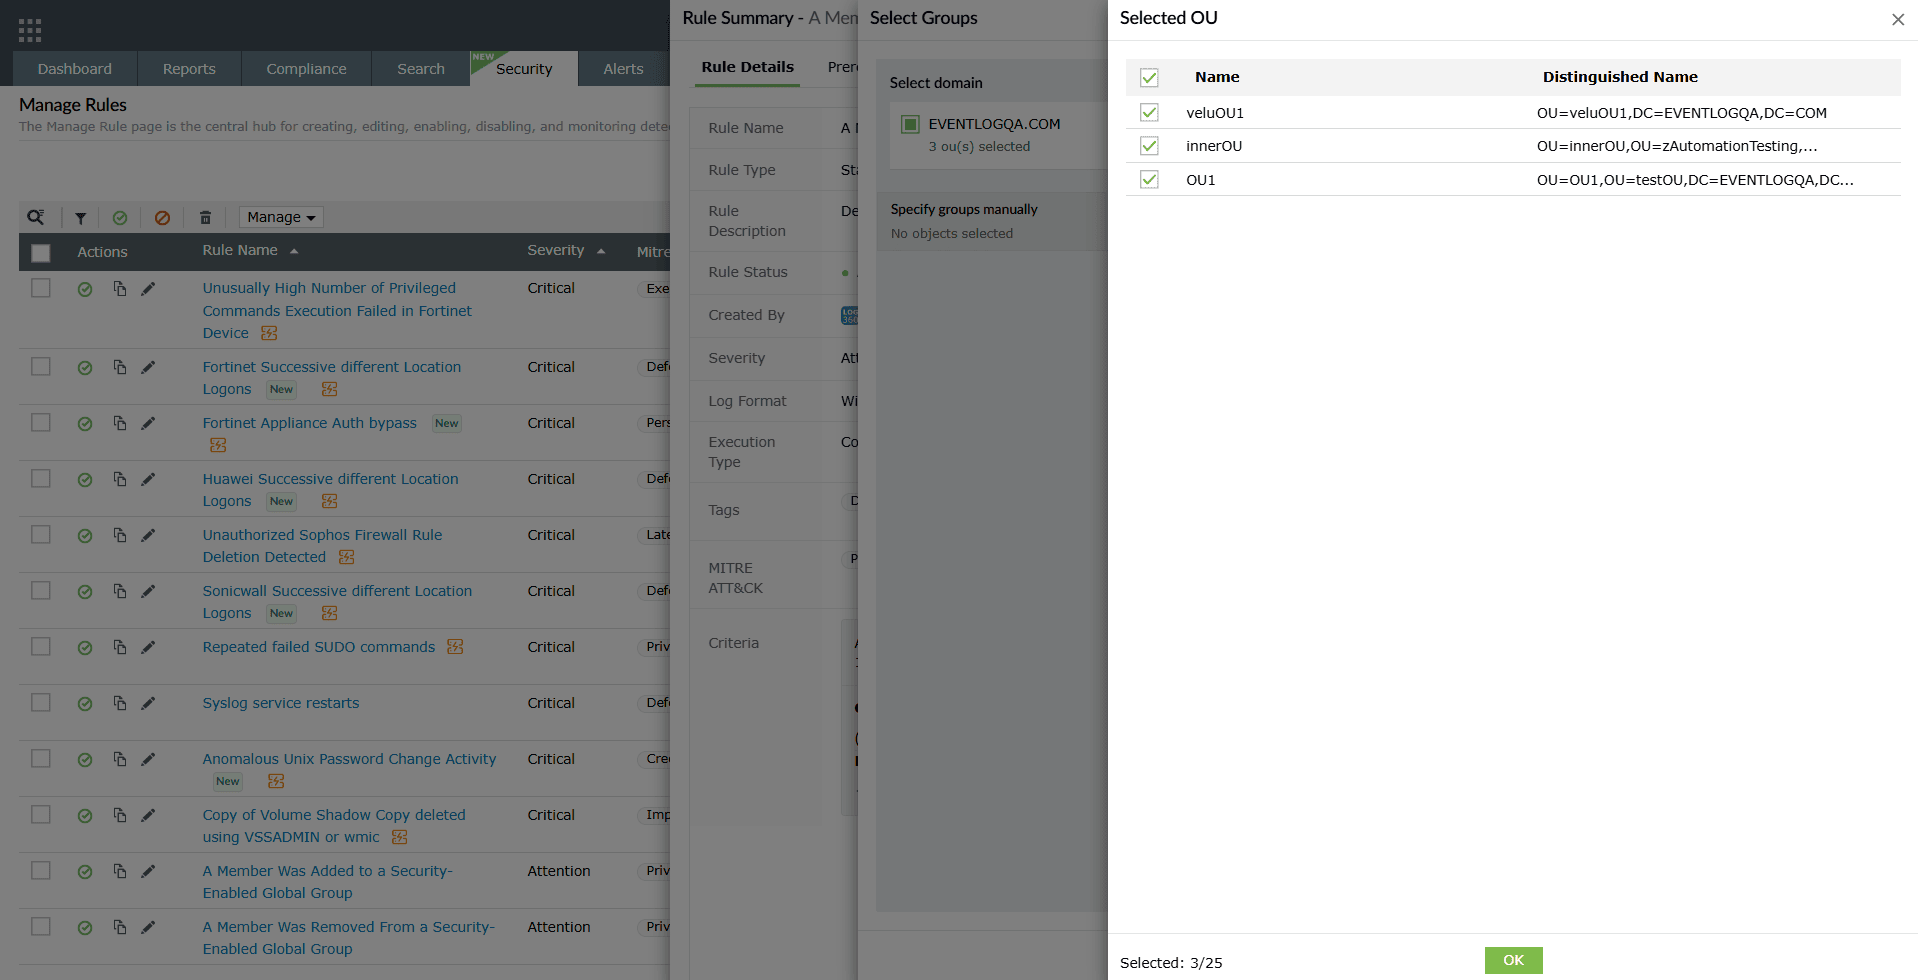
Image 21: Configuring object filter users/groups - Once the selection is done, click on OK in the selection list and then click on Add in the Select Groups pane. Click on the Save button in the Add Objects pane.
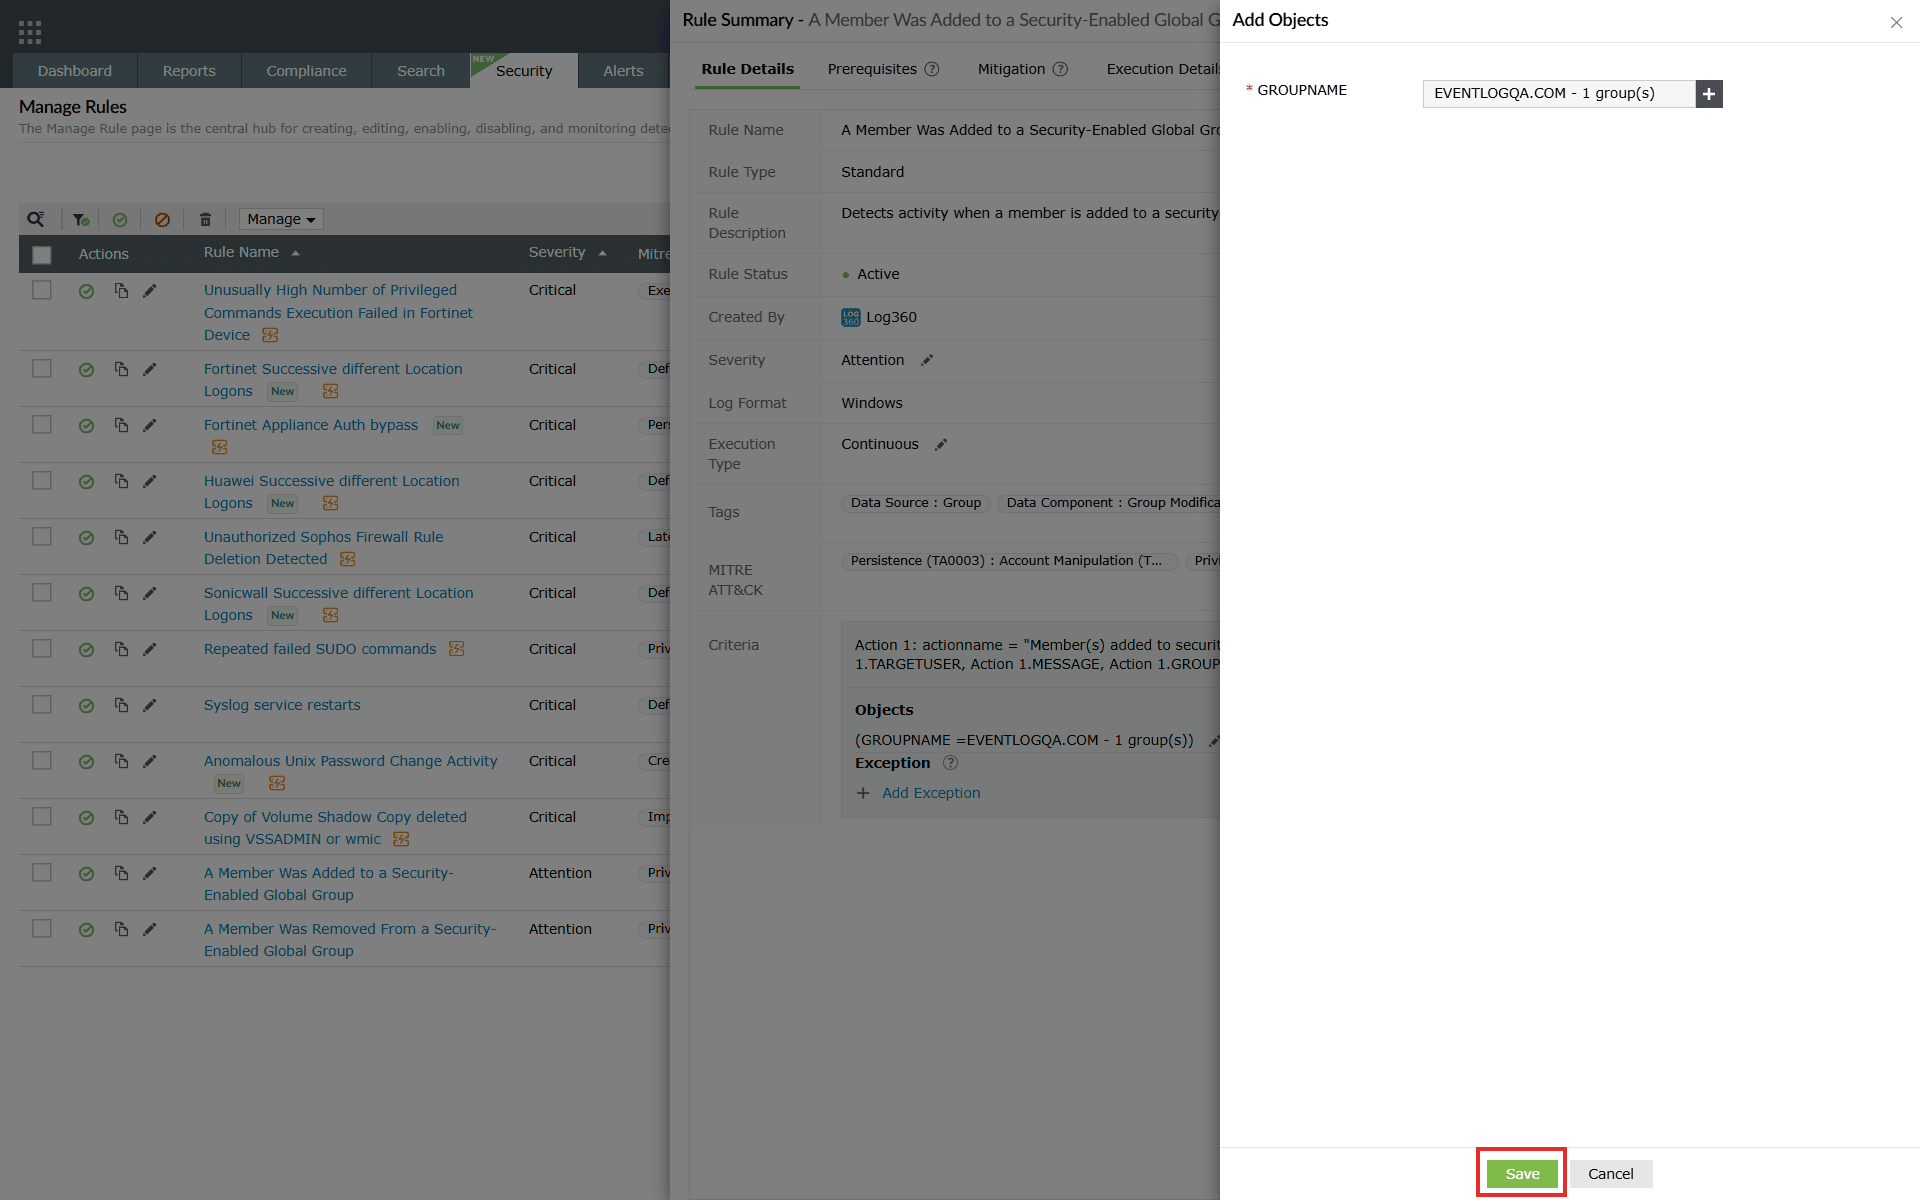
Image 22: Configuring object filter users/groups in rule management - Upon successful completion of action, a Success pop-up appears briefly, and the selection changes are instantly updated and are visible in the Objects section.
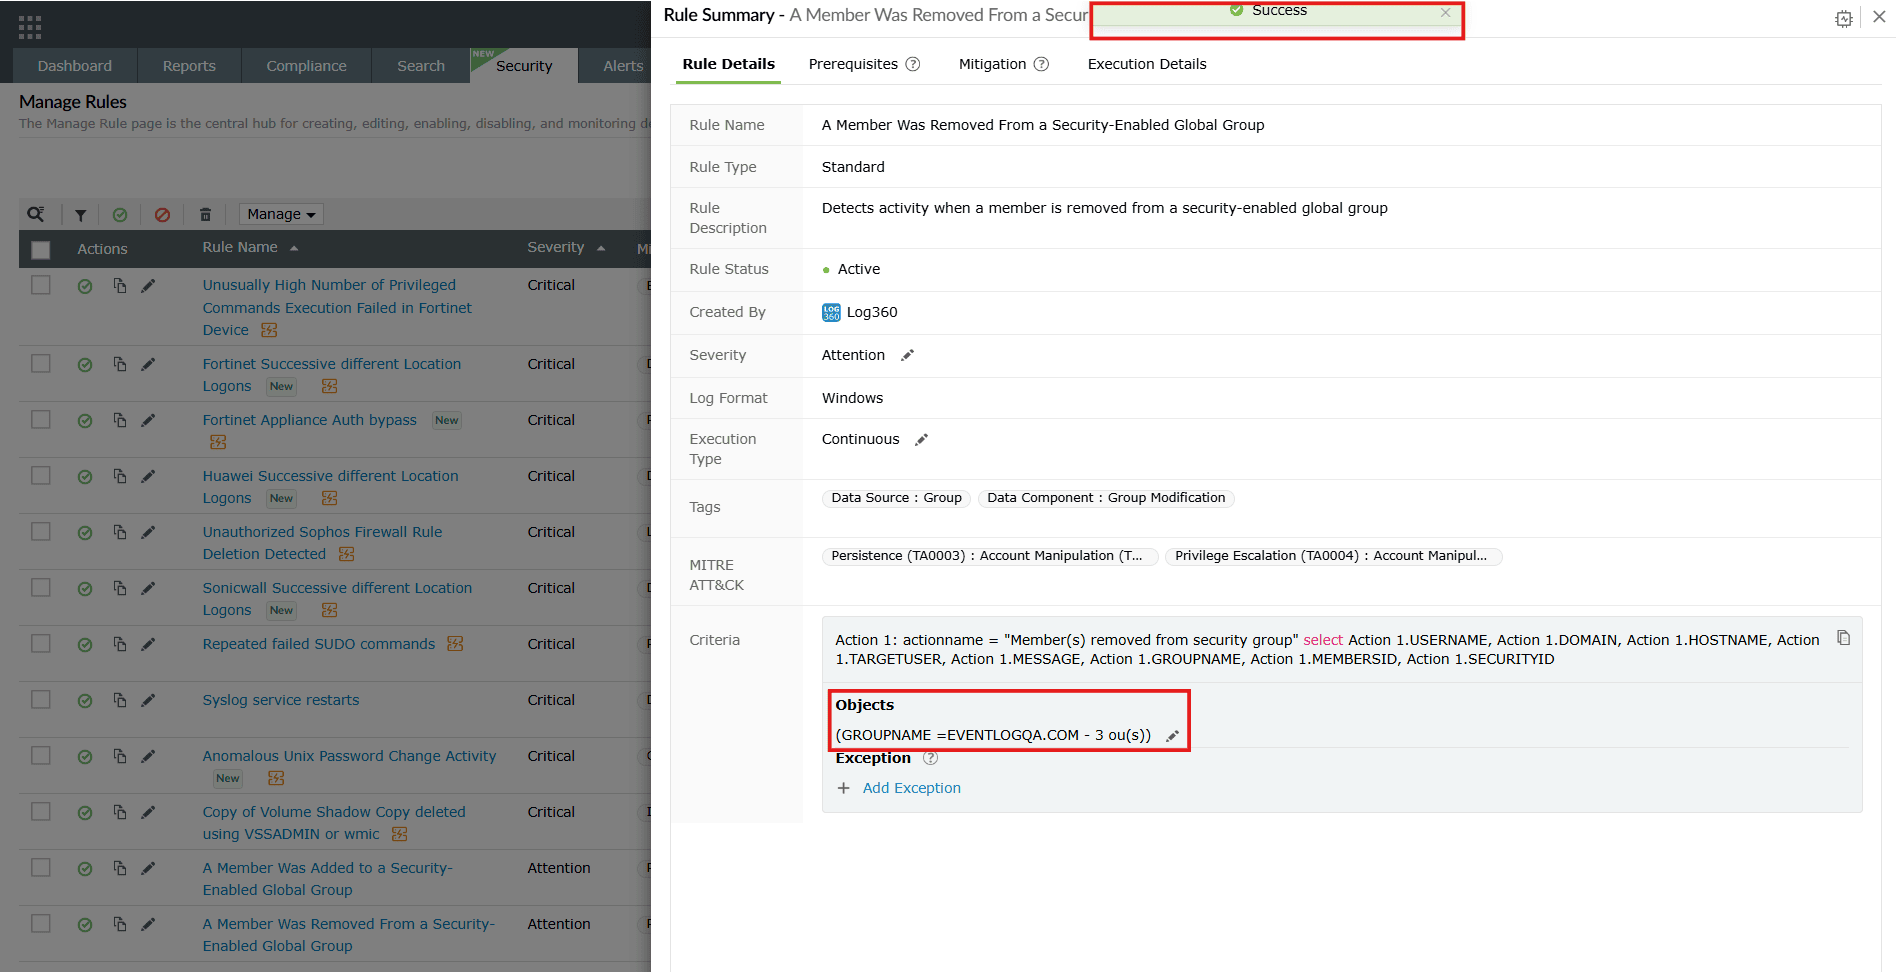
Image 23: Configuring object filter users/groups in rule management
B. Exception section
- Navigate to the Criteria section as highlighted below and click on the Add Exception option as highlighted below.
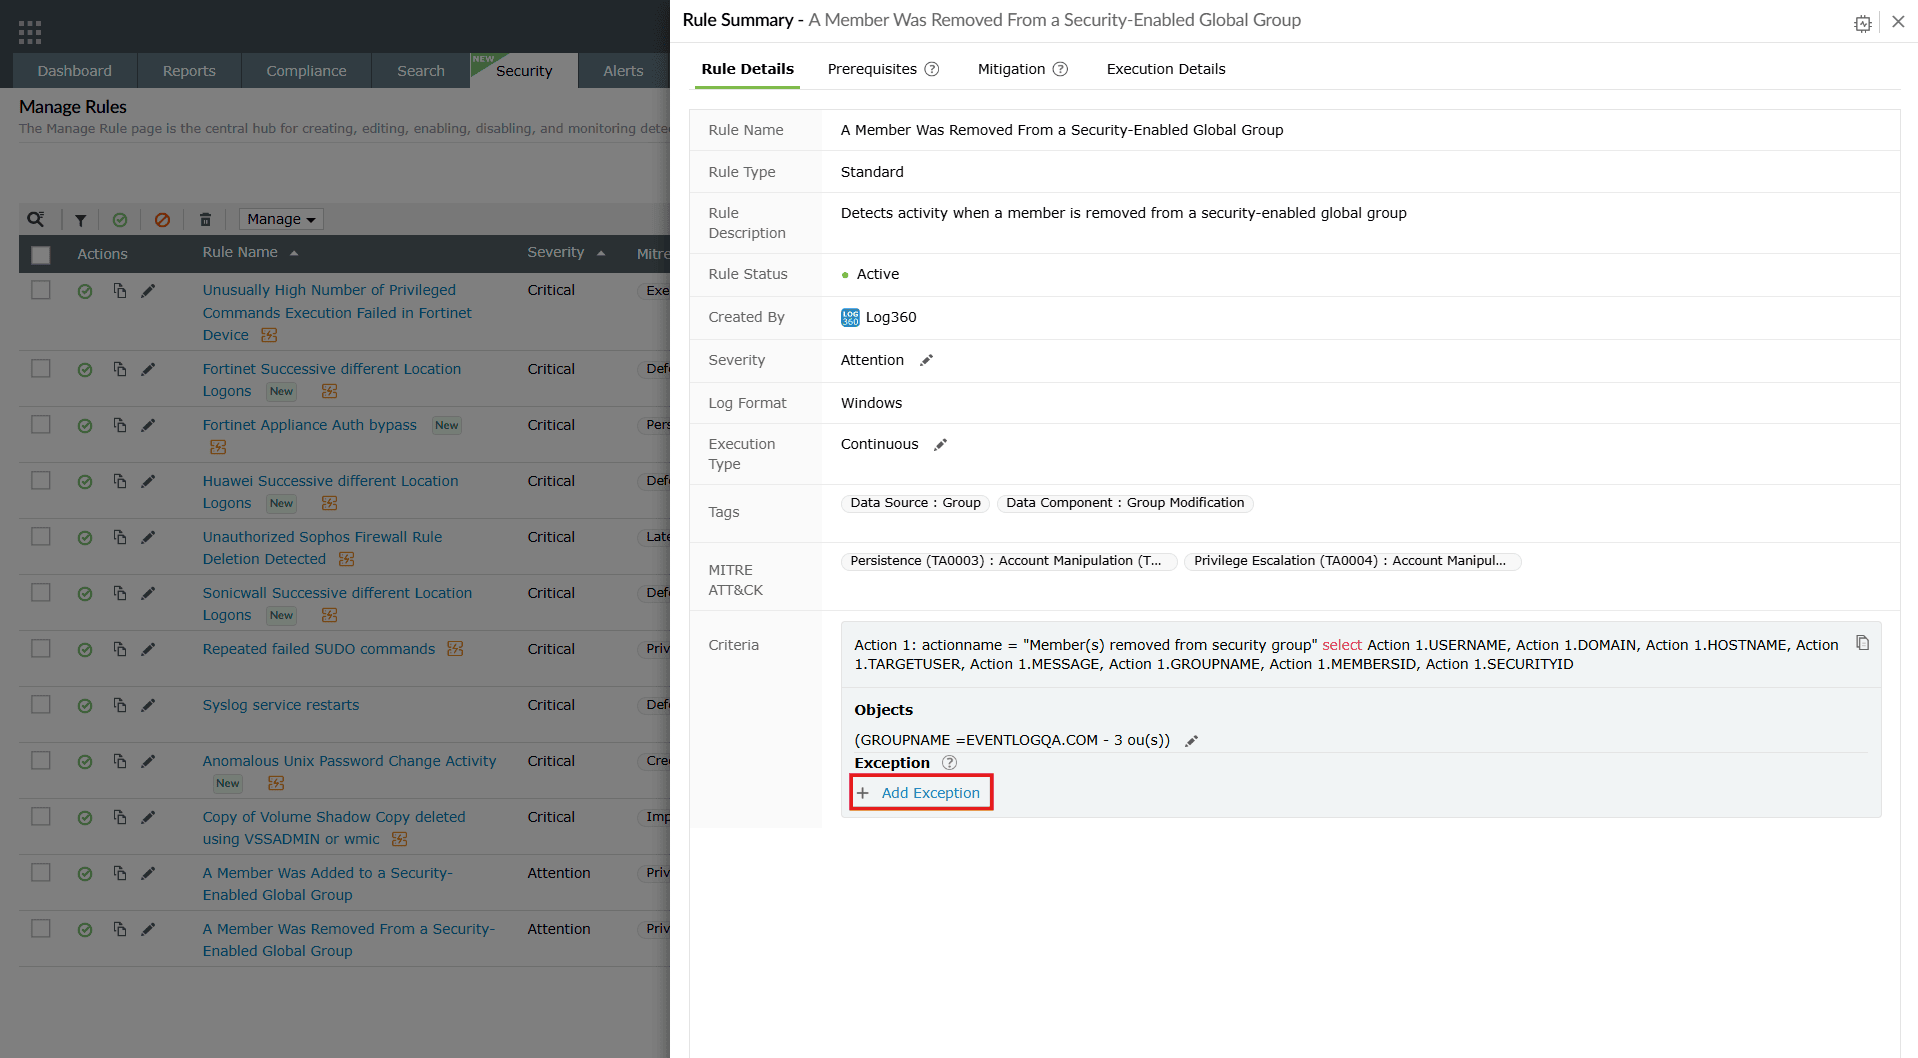
Image 24: Adding exceptions in rule summary NOTE- Rule exception can be configured only post installation.
- In case these configurations are made, you will be able to view the edit option to configure the exception instead of creating a new one.
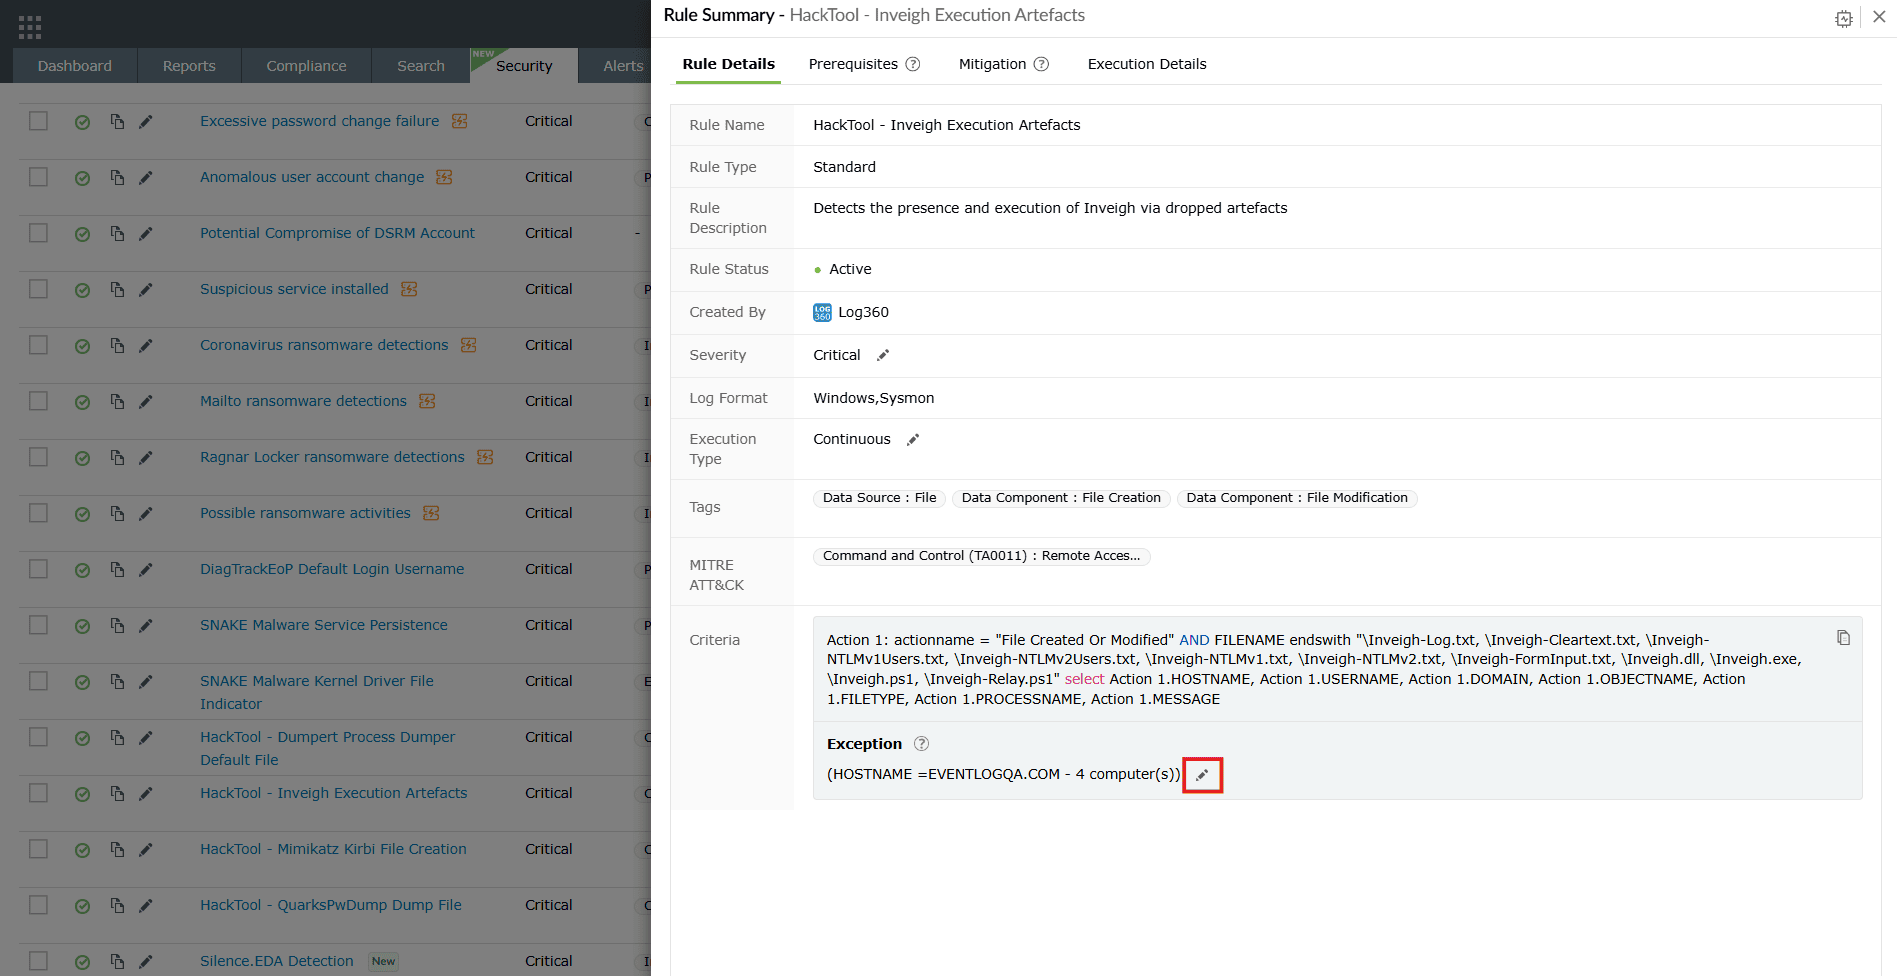
Image 25: Editing exceptions in rule summary - Click on the edit icon as highlighted above and follow the steps given below.
- The Add Rule Exception pane slides open. Make the necessary configurations with the preferred variables from the available drop-downs and then click on the add icon as highlighted below.
This will allow you to filter through the devices and make selections as to which devices are to be configured for exceptions.
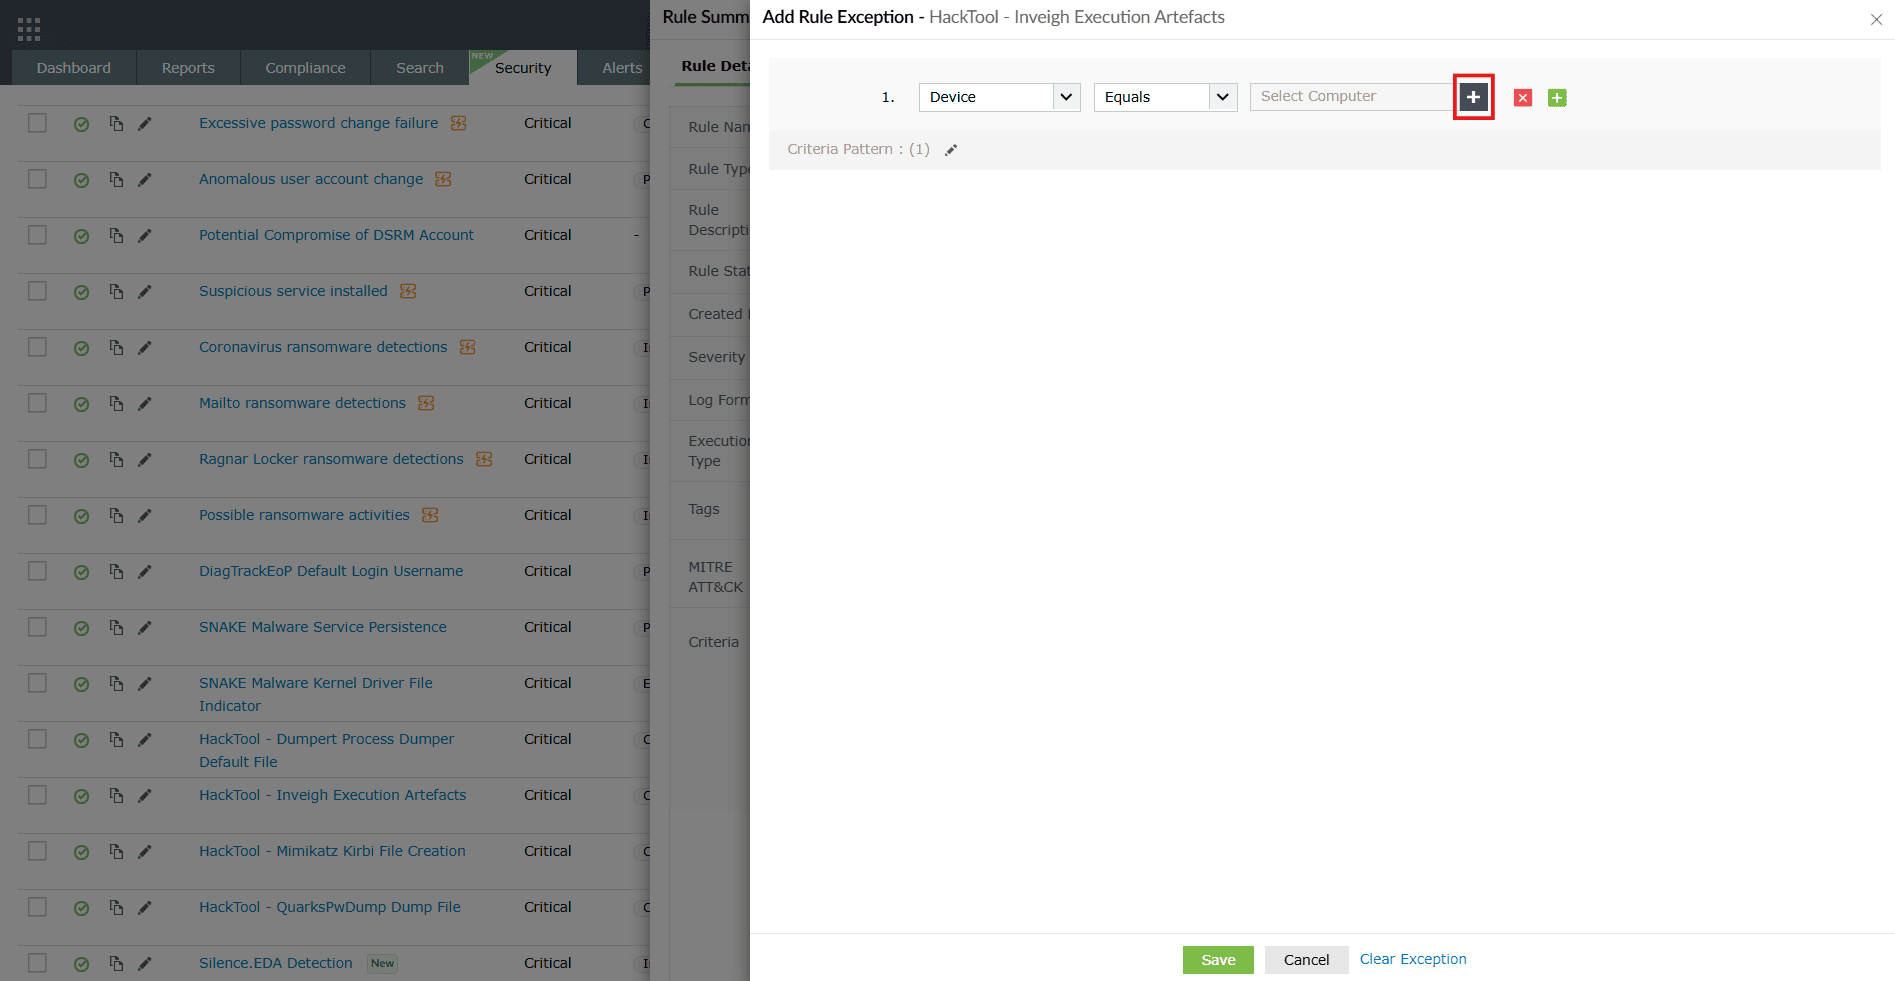
Image 26: Editing exceptions in rule summary with object filter - The Select Computer pane slides open. The device names will be displayed along with the object filter feature in order to be able to filter and choose what devices you wish to group under this rule.
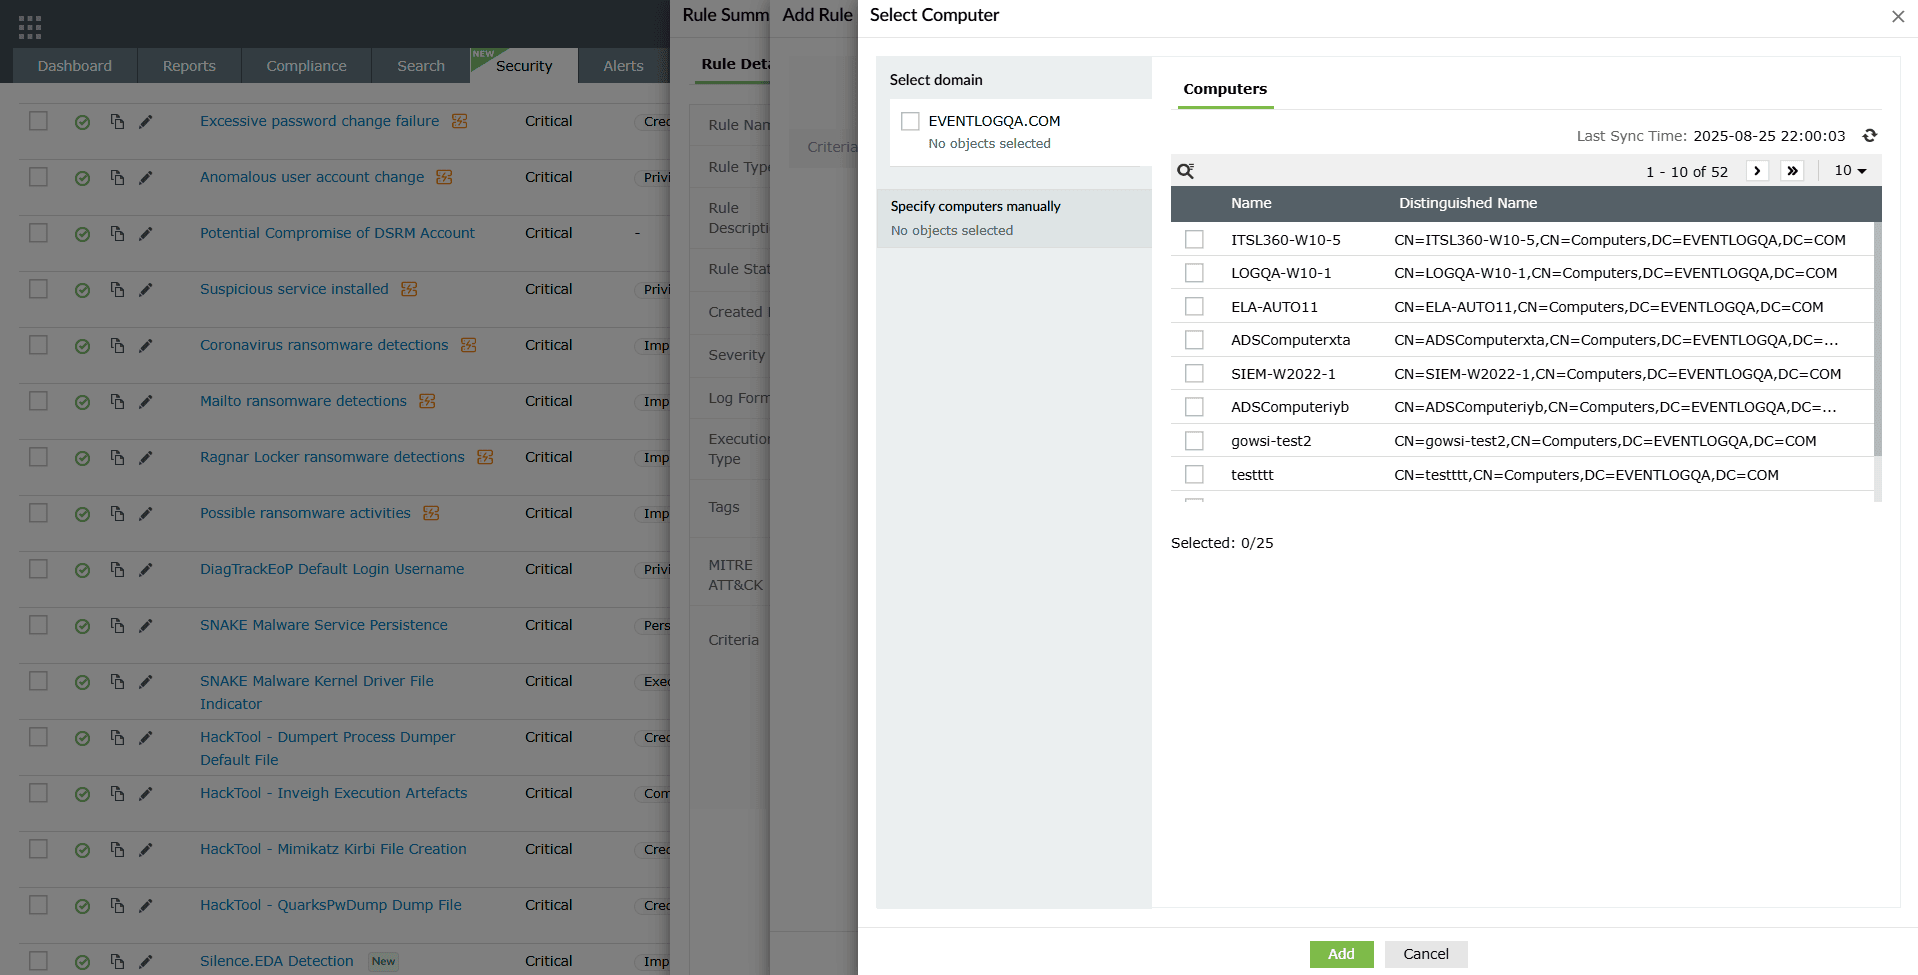
Image 27: Configuring object filter users/groups in exception - After selecting the preferred devices, you can view your selection by clicking on the View option as highlighted below.
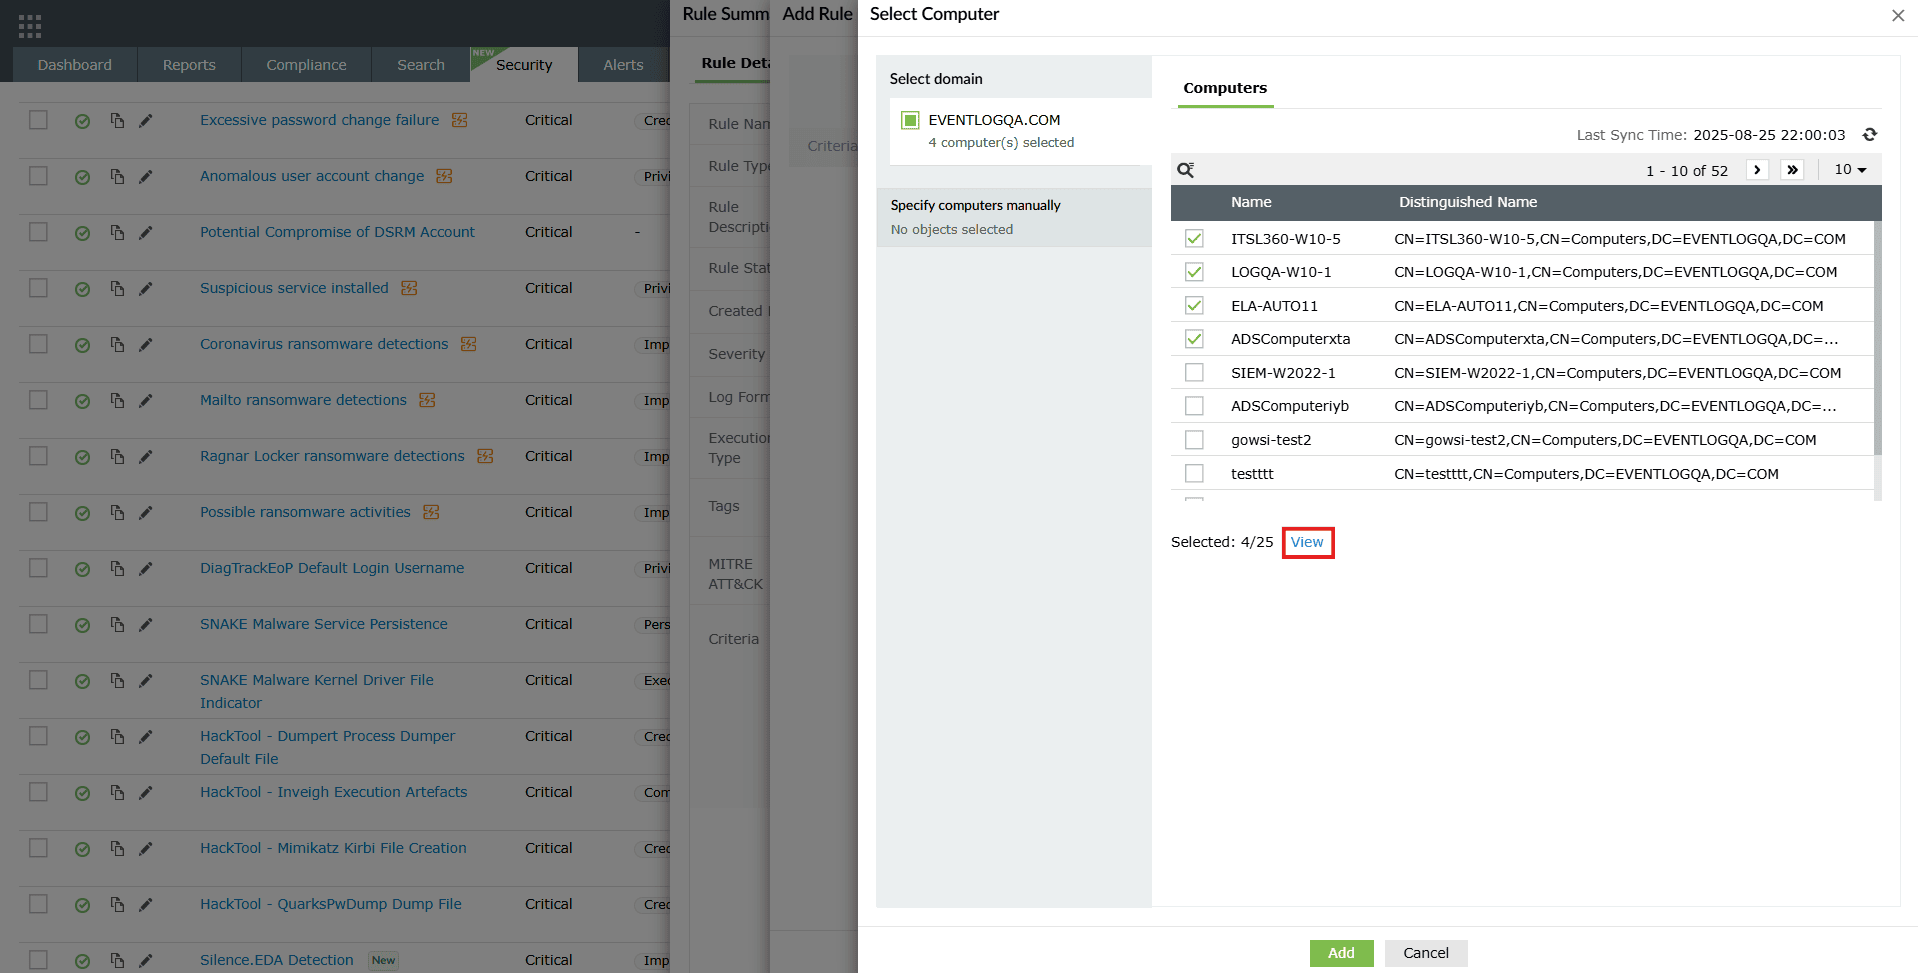
Image 28: Viewing list of configured object filter users/groups - The list of Selected computers will be displayed.

Image 29: Configuring object filter users/groups - Once the selection is done, click on OK in the selection list and then click on Add in the Select Computer pane. Click on the Save button in the Add Rule Exception pane as highlighted below. In case you wish to reset the exception configurations and redo them, click on Clear Exception.
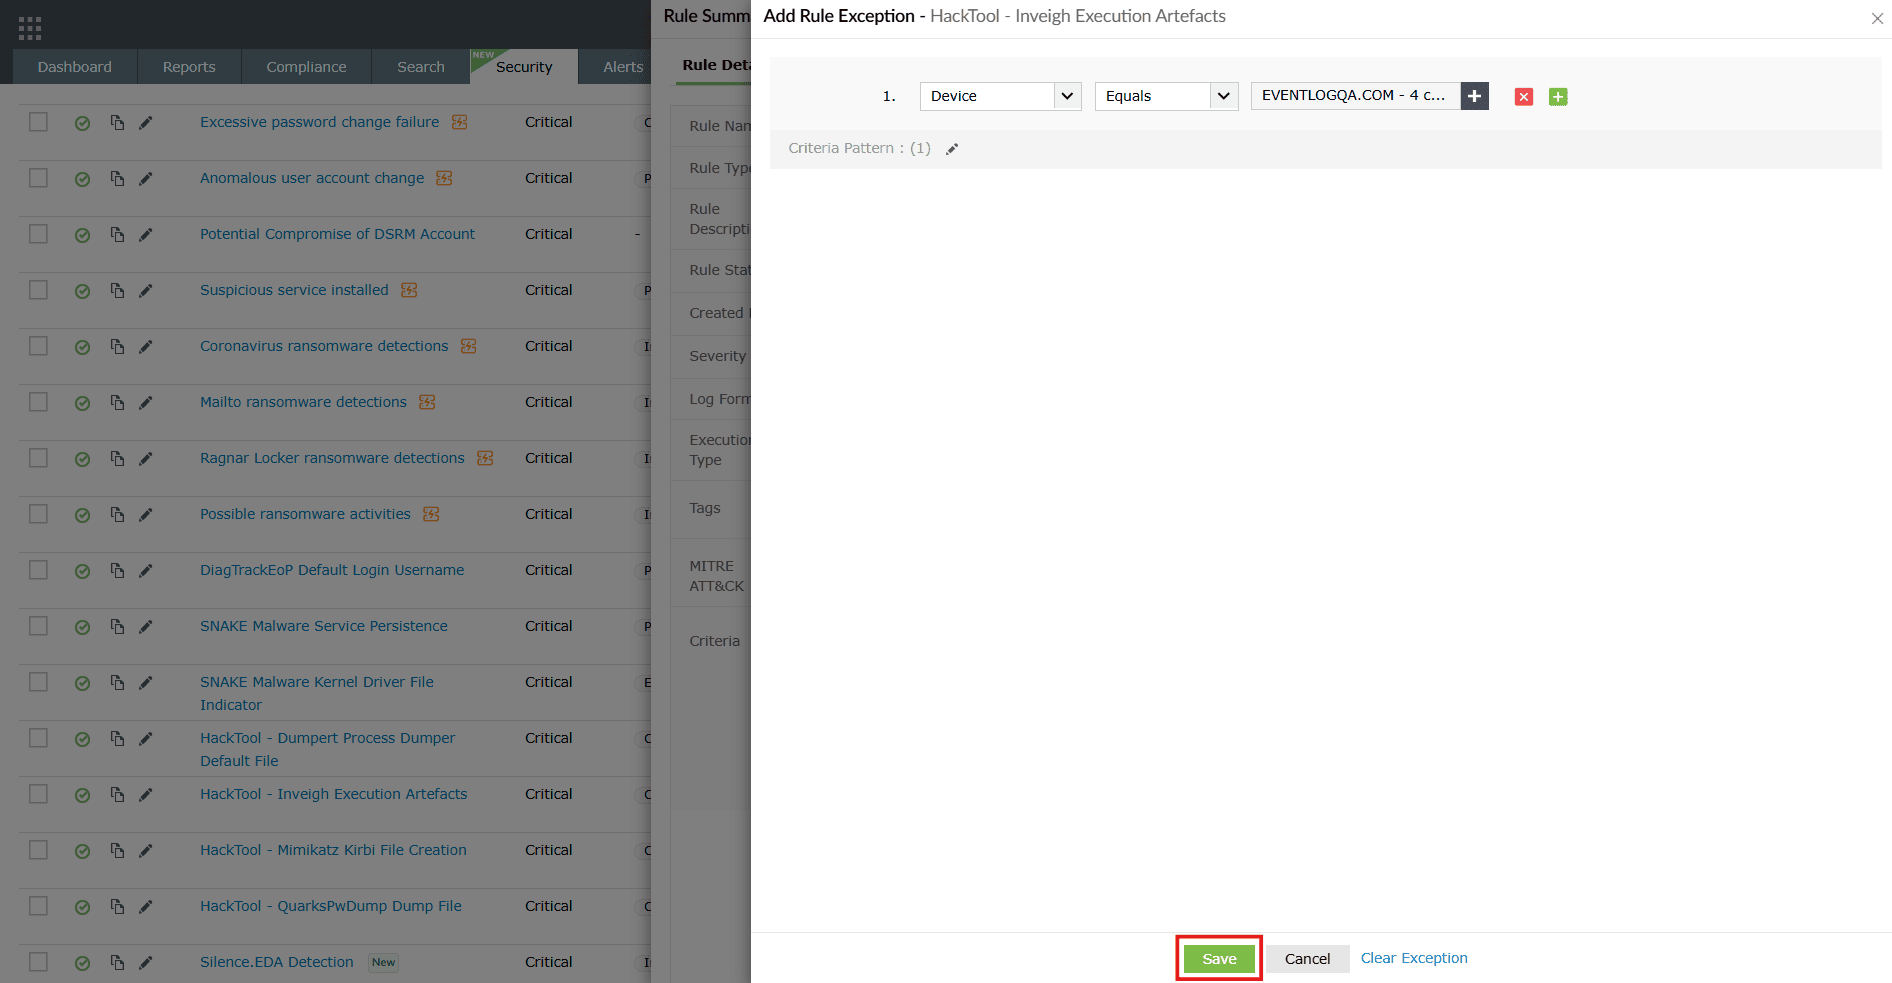
Image 30: Configuring object filter users/groups in rule management - Upon successful completion of action, a Rule Exception saved Successfully pop-up appears briefly, and the selection changes are instantly updated and are visible in the Exception section.
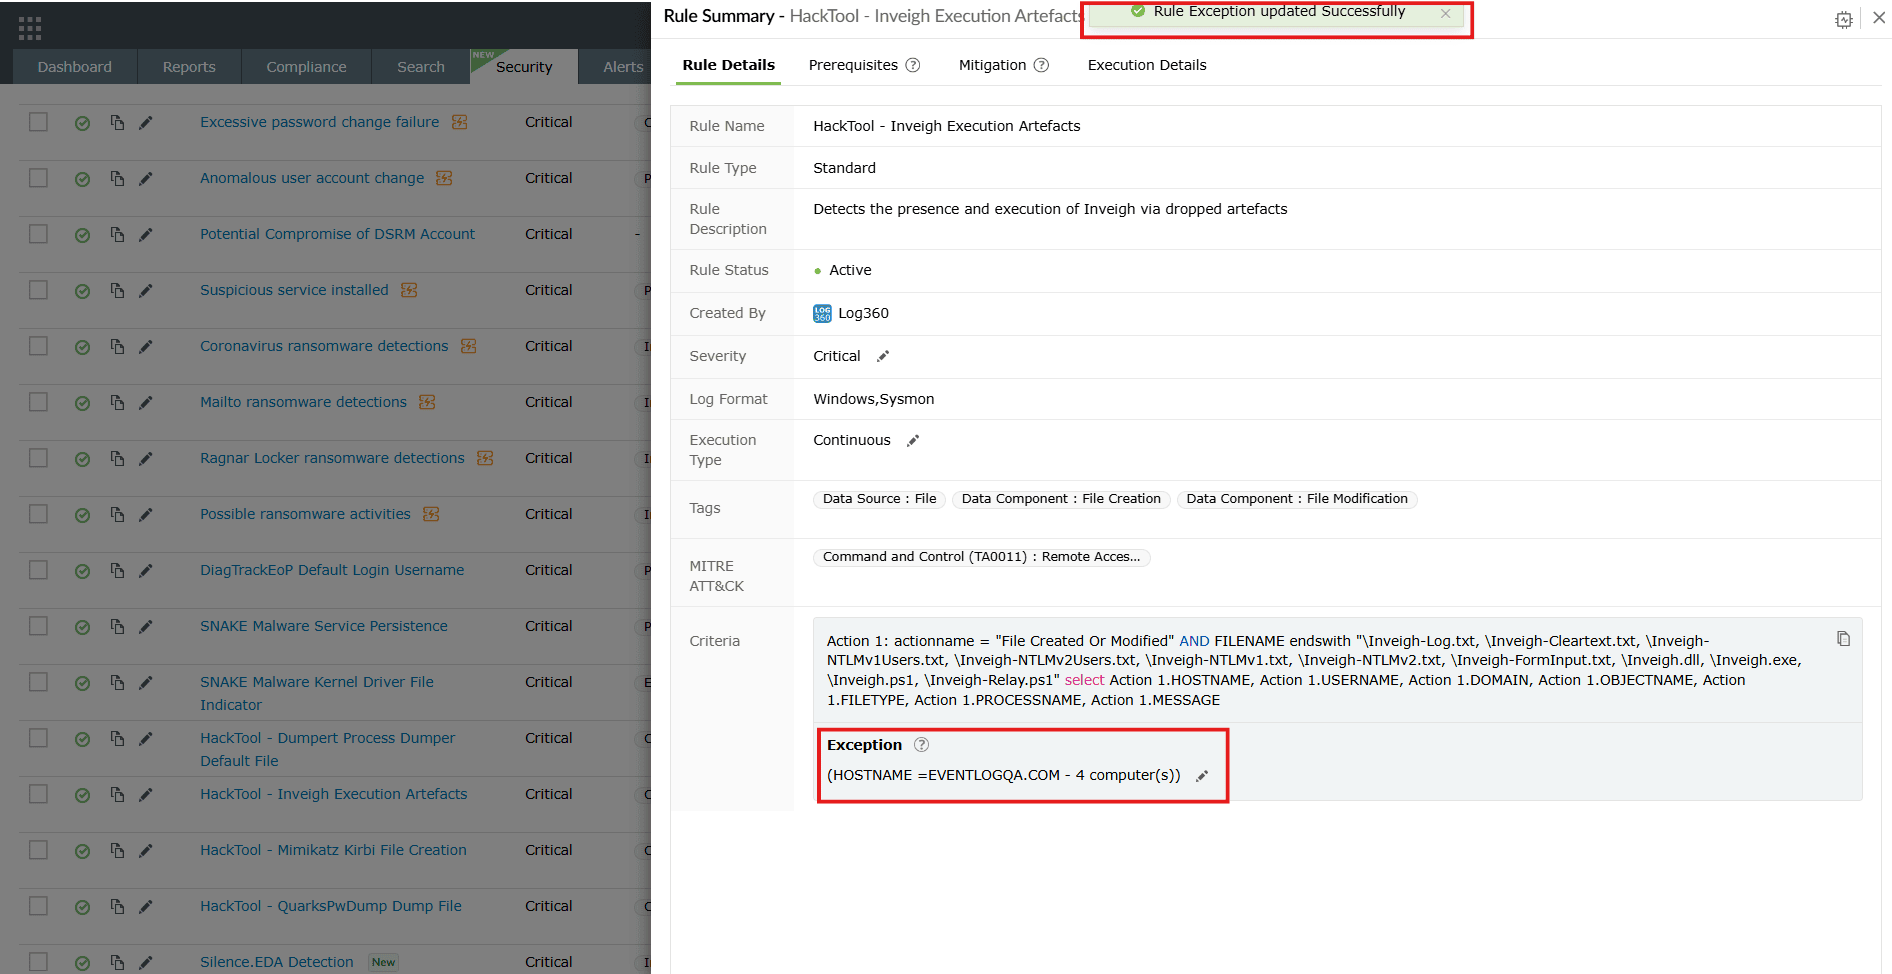
Image 31: Configuring object filter users/groups in rule exceptions
C. Enabling rule
When activating a rule, the object filter automatically slides open for that particular rule.
- Click on the currently disabled icon
 under the Actions column to enable the rule.

Image 32: Enabling a rule - The object filter pane slides open upon clicking on the disabled icon.

Image 33: Object filtering while enabling a rule - Select preferred users/groups and click on the Activate button.
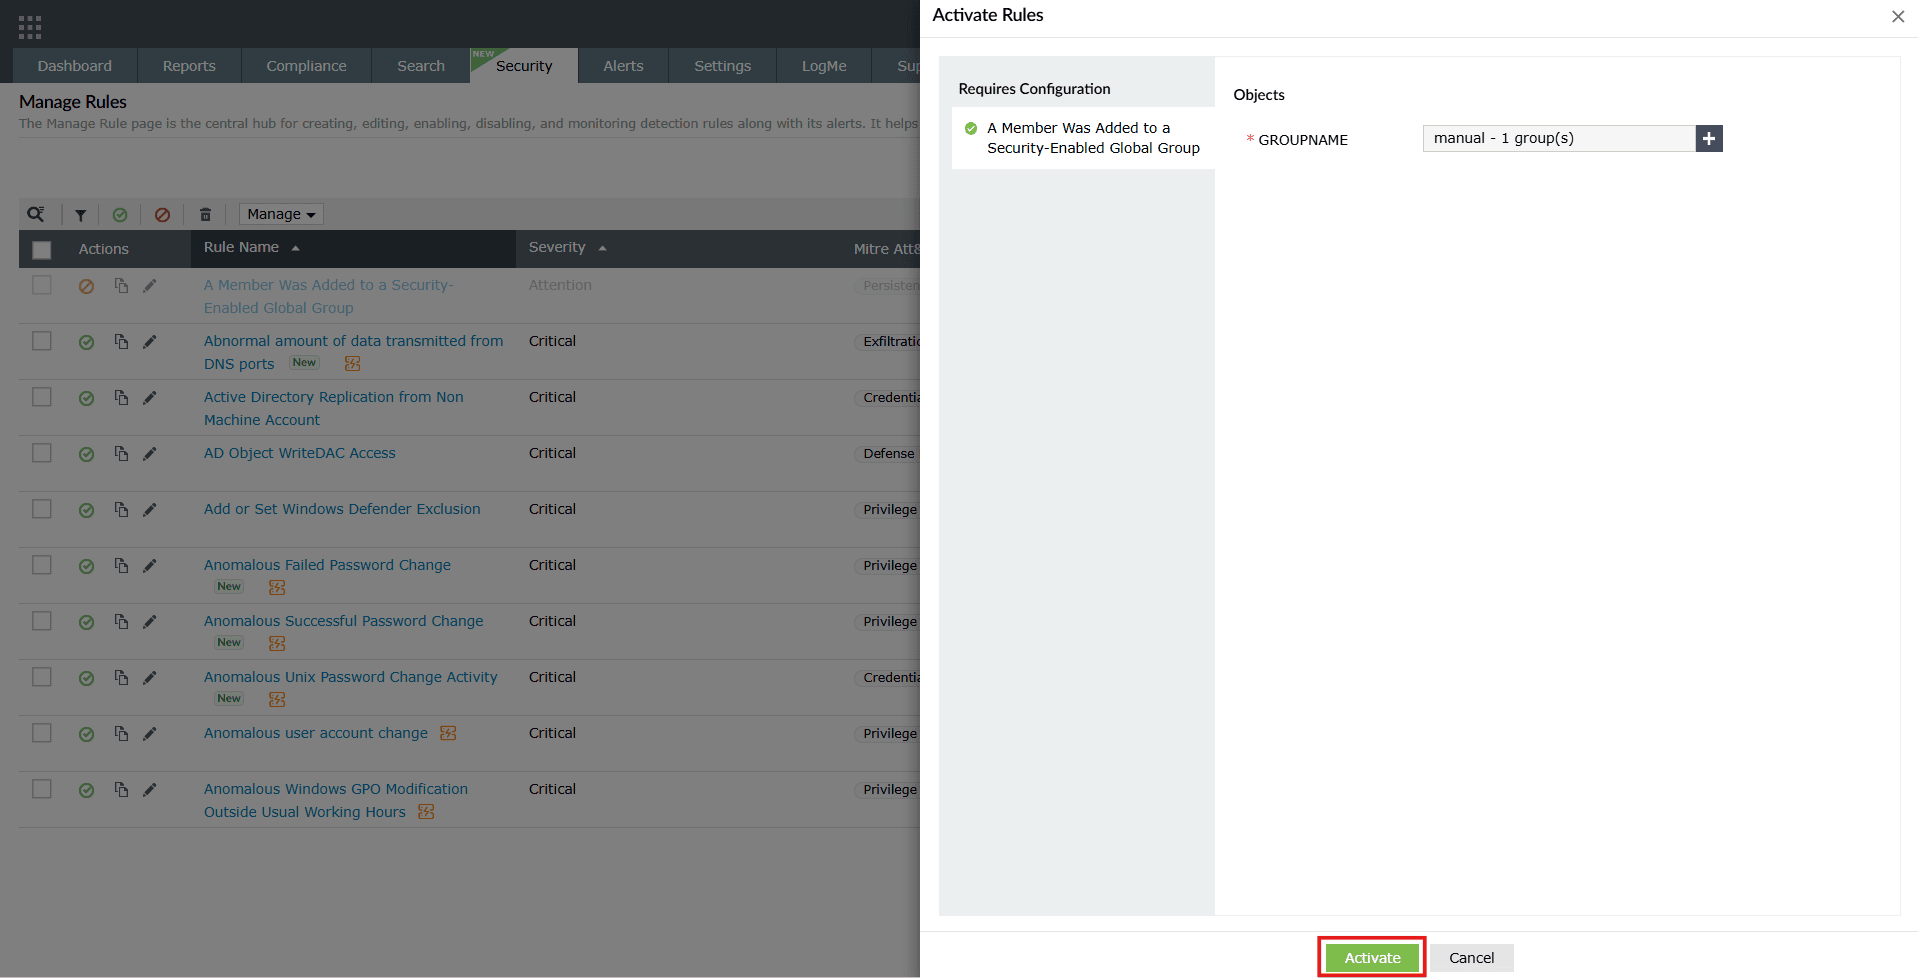
Image 34: Object filtering while enabling a rule - Upon successful completion of action, the below pop-up appears.

Alerts
The solution also supports object filters when creating or editing alert profiles, enabling you to refine Active Directory-based criteria with user, group, or OU selections. To do this, follow the steps below:
NOTE The Active Directory object filter is accessible only for the rules and criteria under the Active Directory log type.
- In the product console, navigate to the Alerts tab and click on Add Alert Profile.
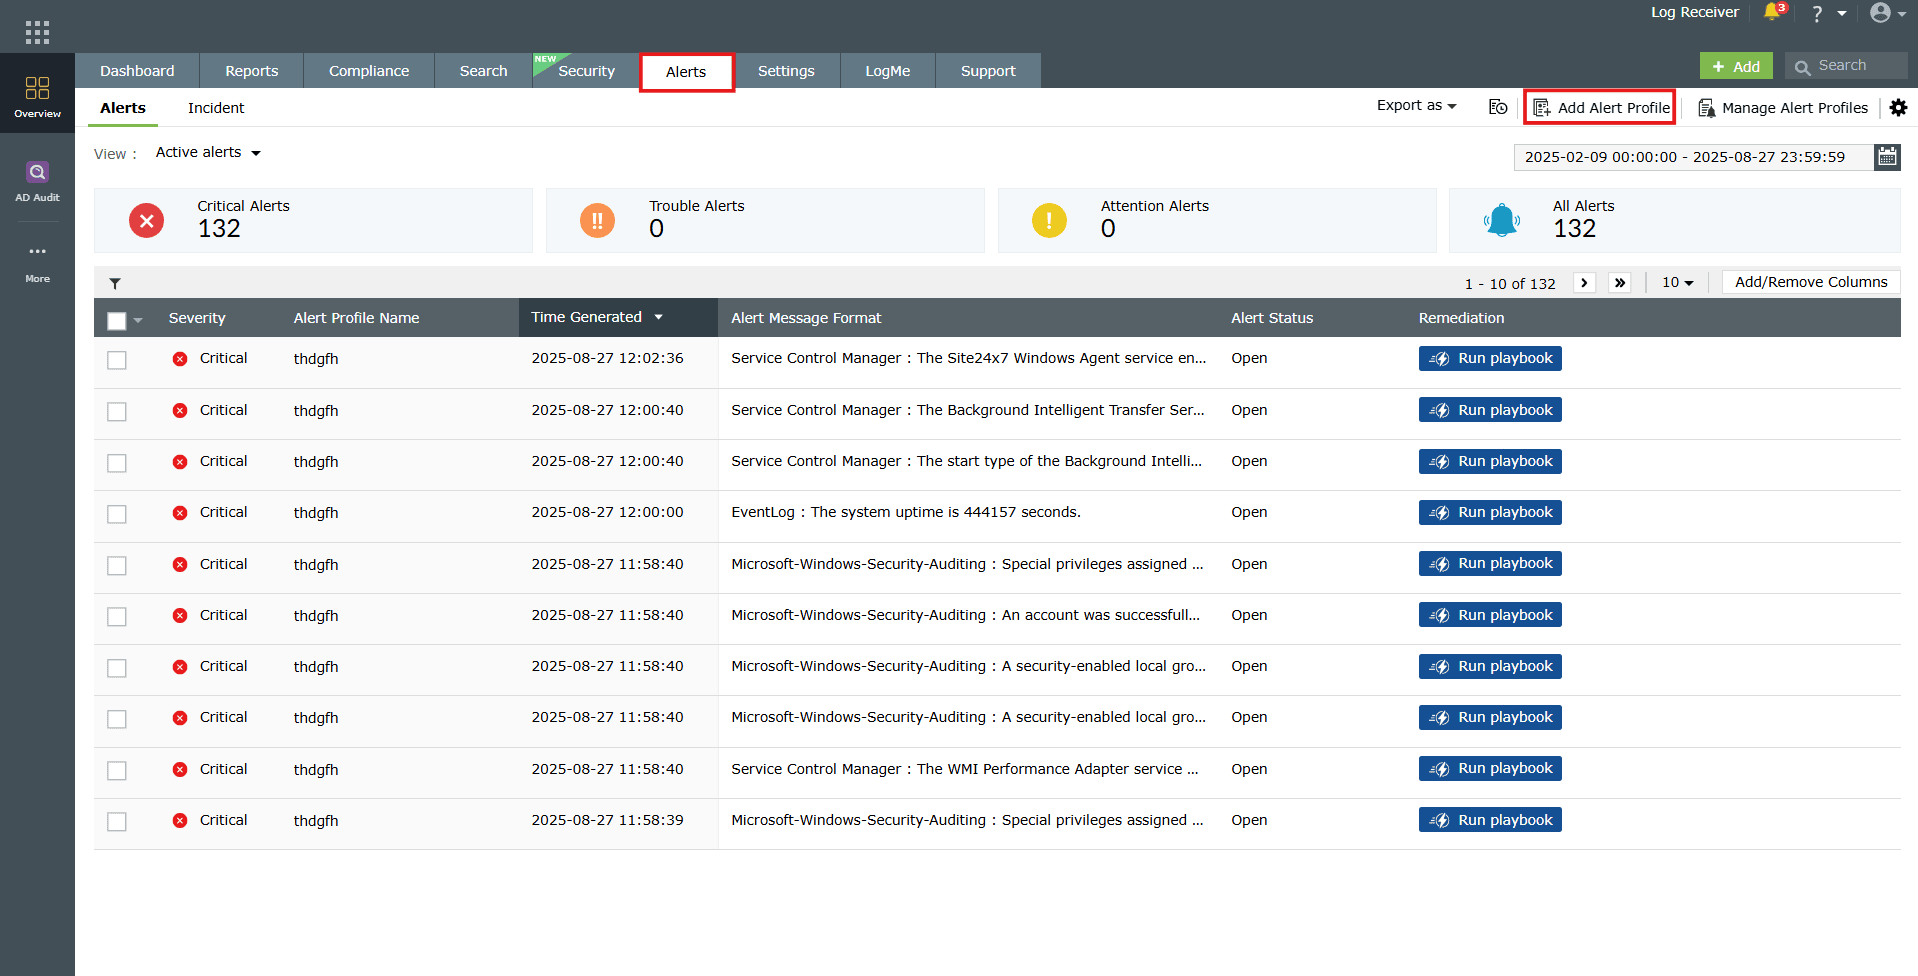
Image 35: Adding an alert profile - The Add Alert Profile module is displayed.
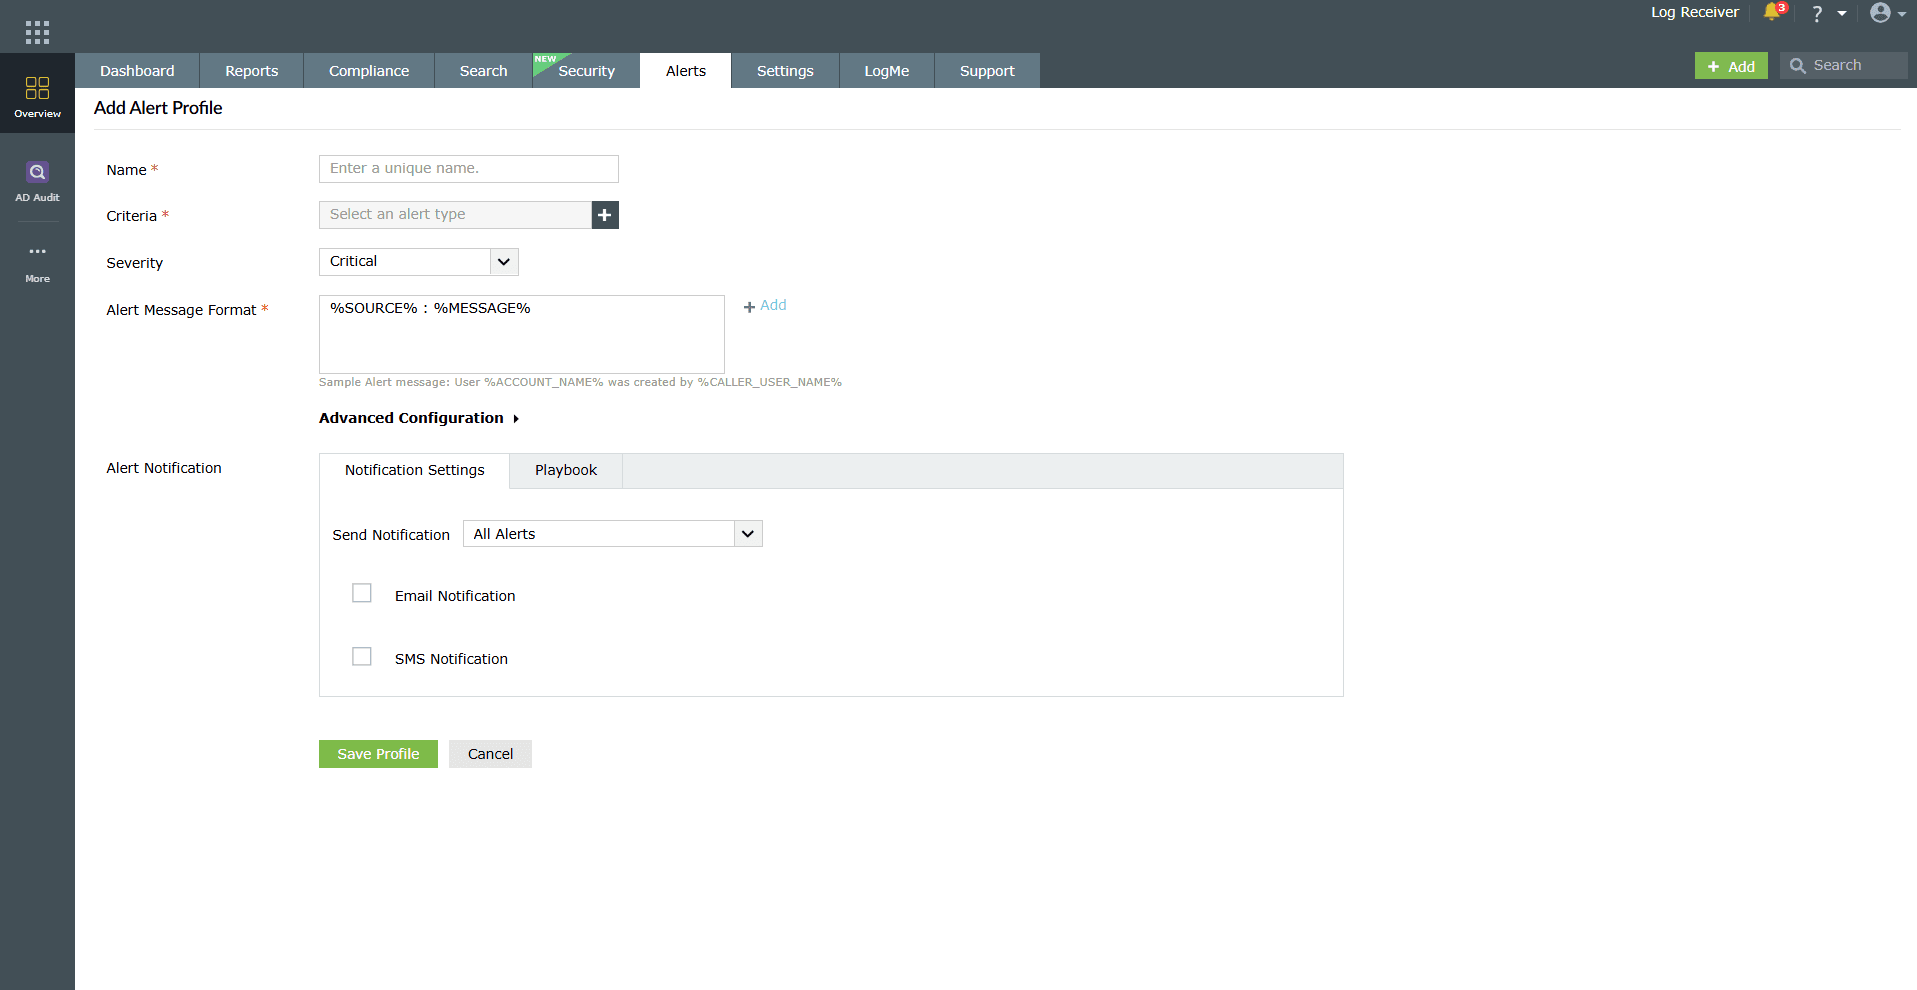
Image 36: Add alert profile module - Provide the Name for the alert. Add Active Directory specific Criteria by choosing Active Directory as the Log Type in the Rules sub-tab of the Alert Criteria Builder. Click on the Select button.
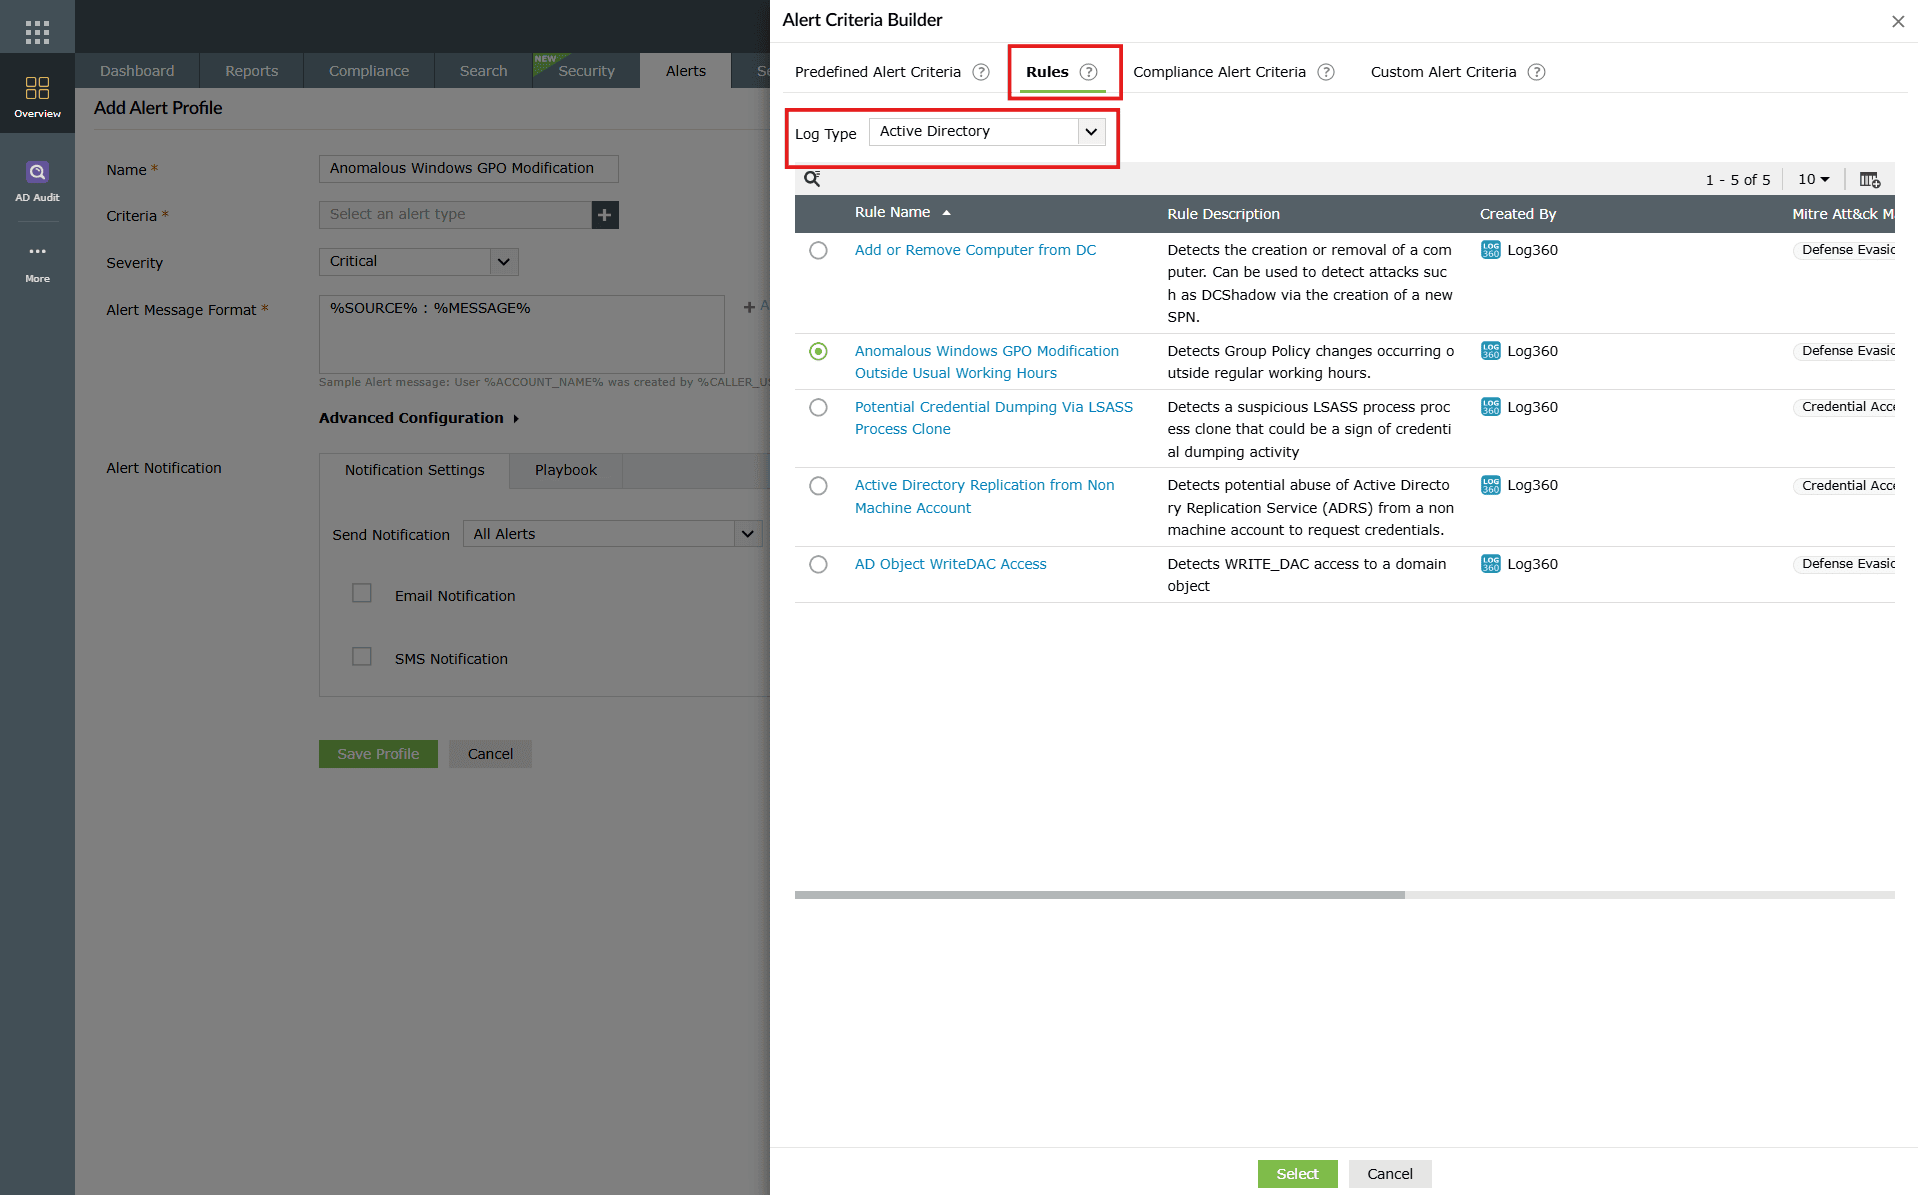
Image 37: Object filtering in the alerts module - Choose the domain under the Select Domain drop-down. Tick the Filter checkbox and then configure the filter based on your requirements. Click on the add button of the object filter to select users to be grouped under this.
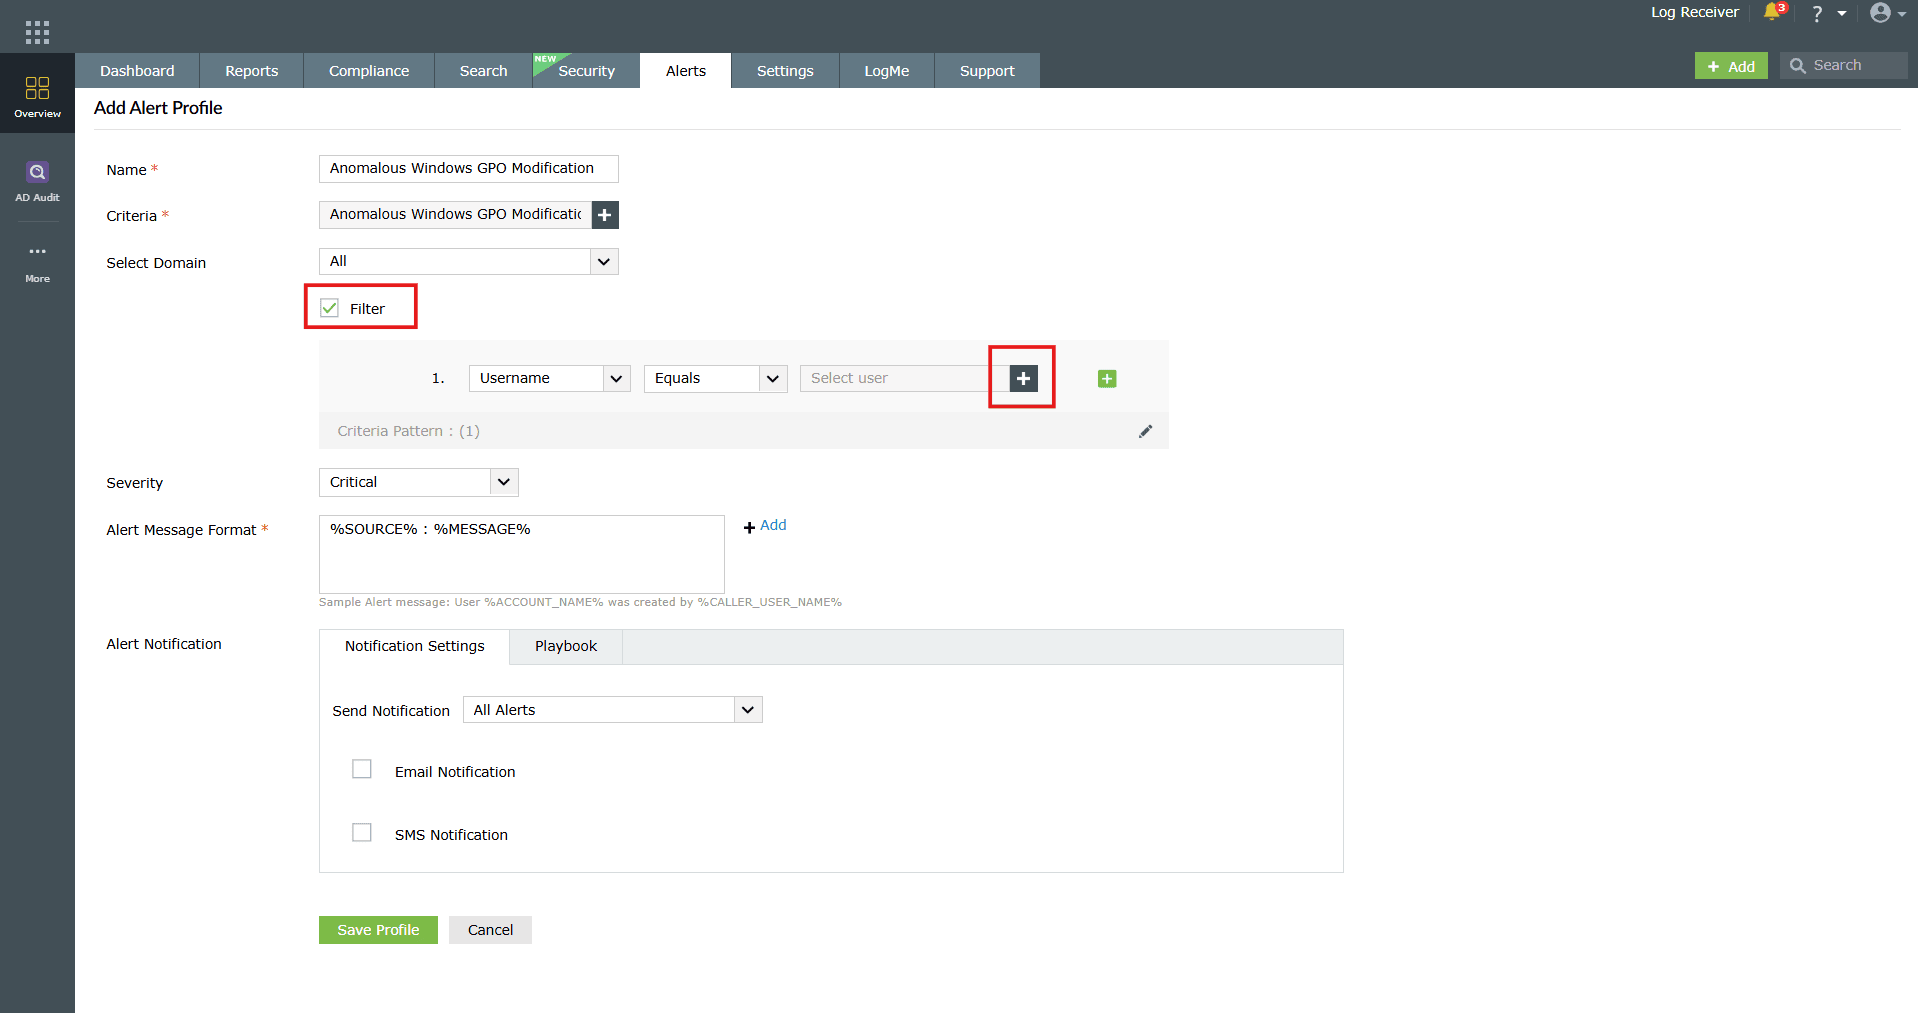
Image 38: Object filtering while adding an alerts profile - The Select user pane slides open. The user names will be displayed along with the object filter feature in order to be able to filter and choose which users you wish to group under this alert configuration.
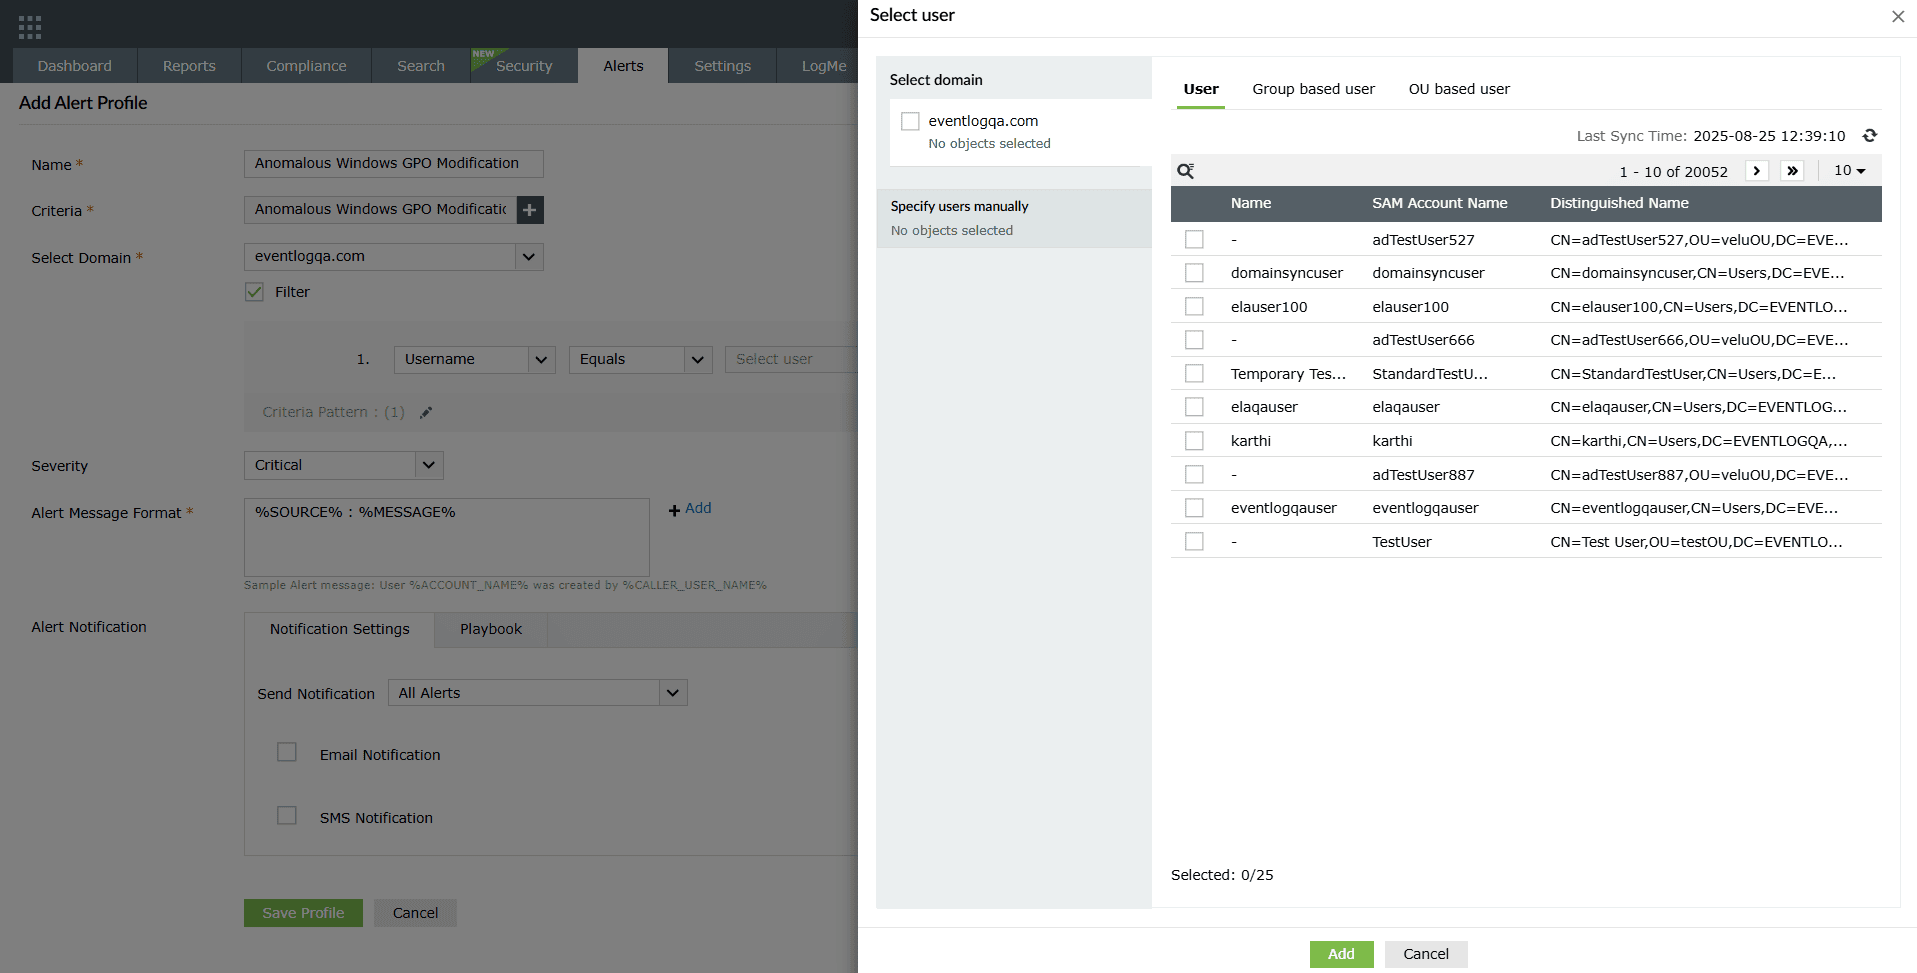
Image 39: Object filtering in the alerts module - Similarly, the Group based user sub-tab also includes the filter for user selection based on user groups.
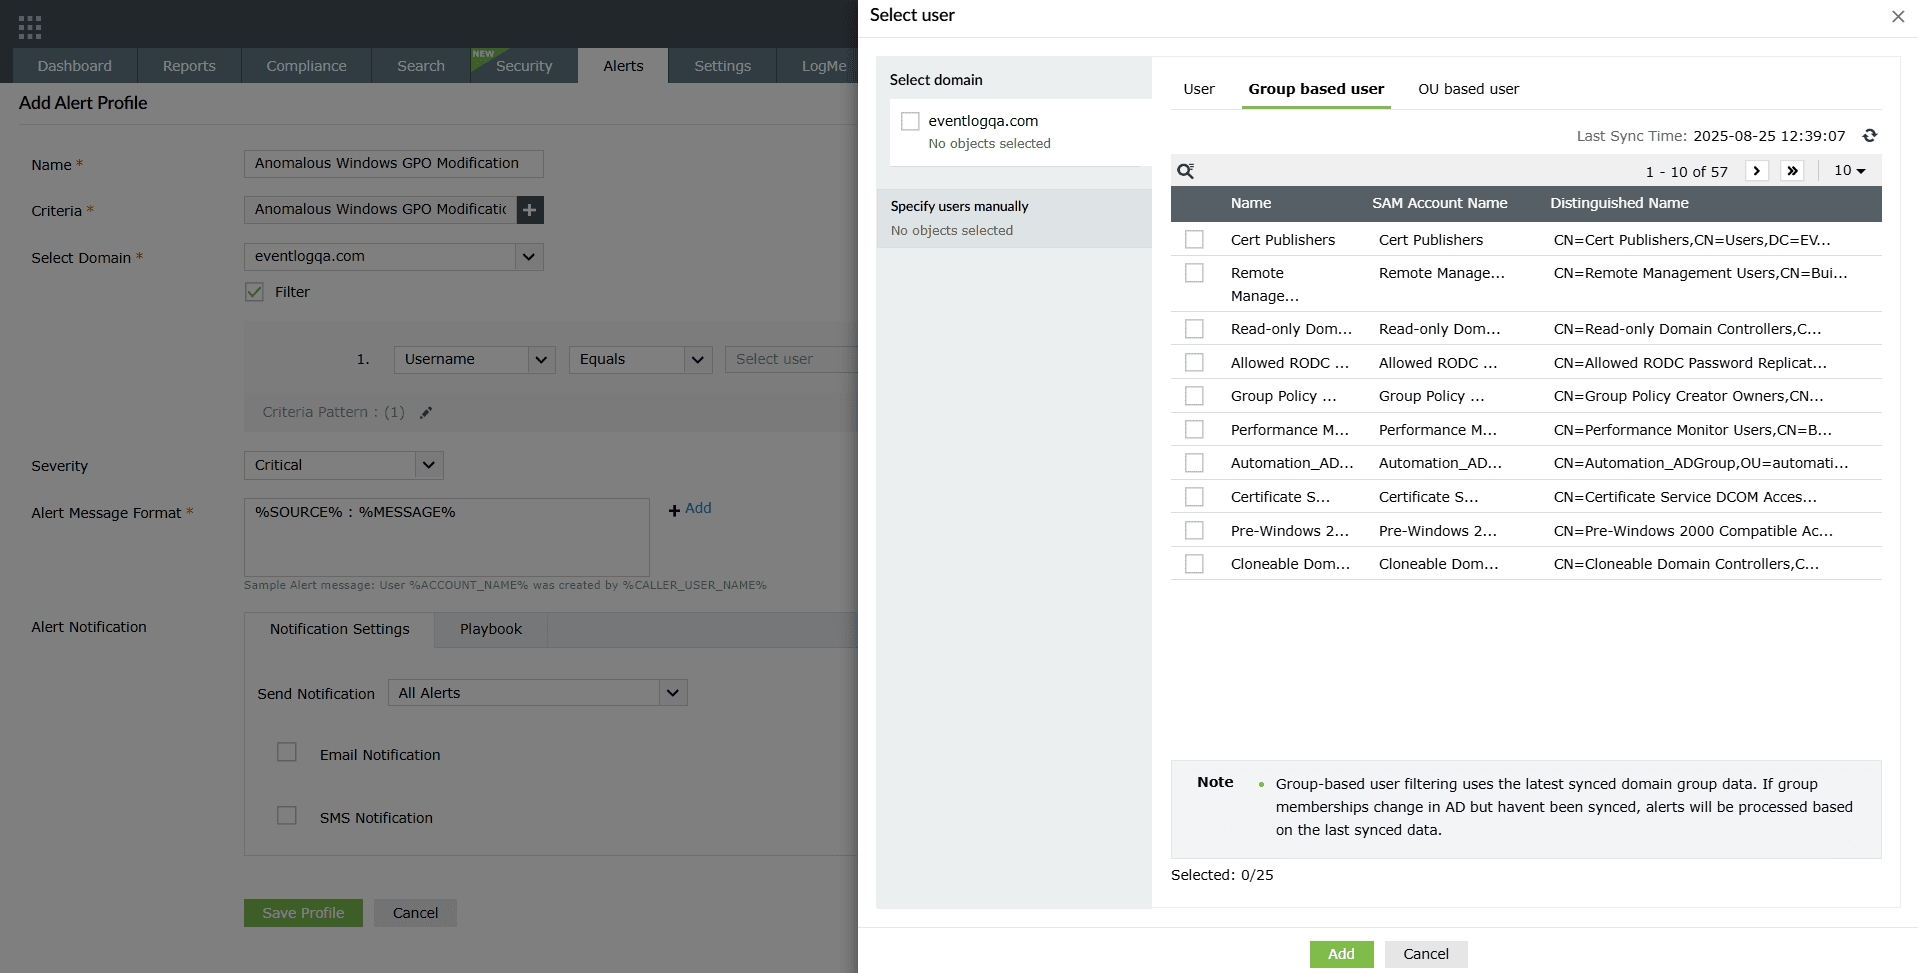
Image 40: Configuring object filter users/groups - The OU based user sub-tab also includes the filter for user selection where the users are listed categorized by their OUs.
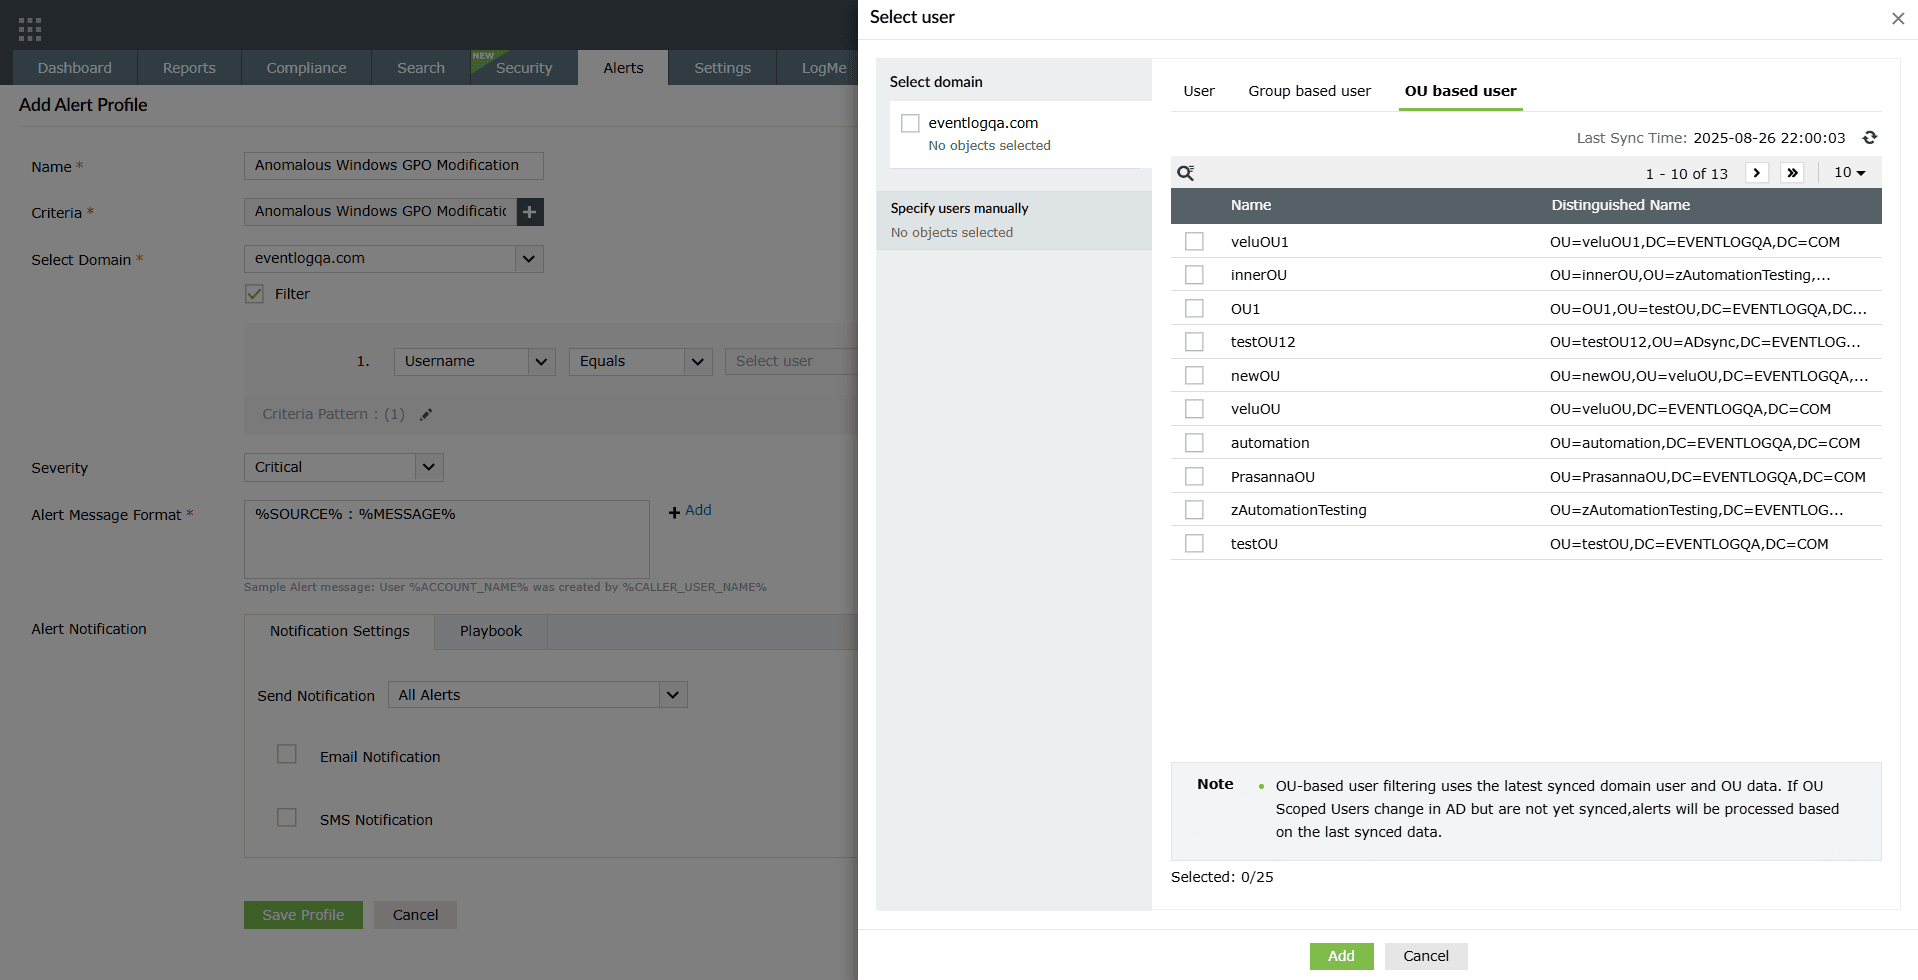
Image 41: Configuring object filter users/groups - After selecting the preferred users, you can view your selection by clicking on the View option as highlighted below.
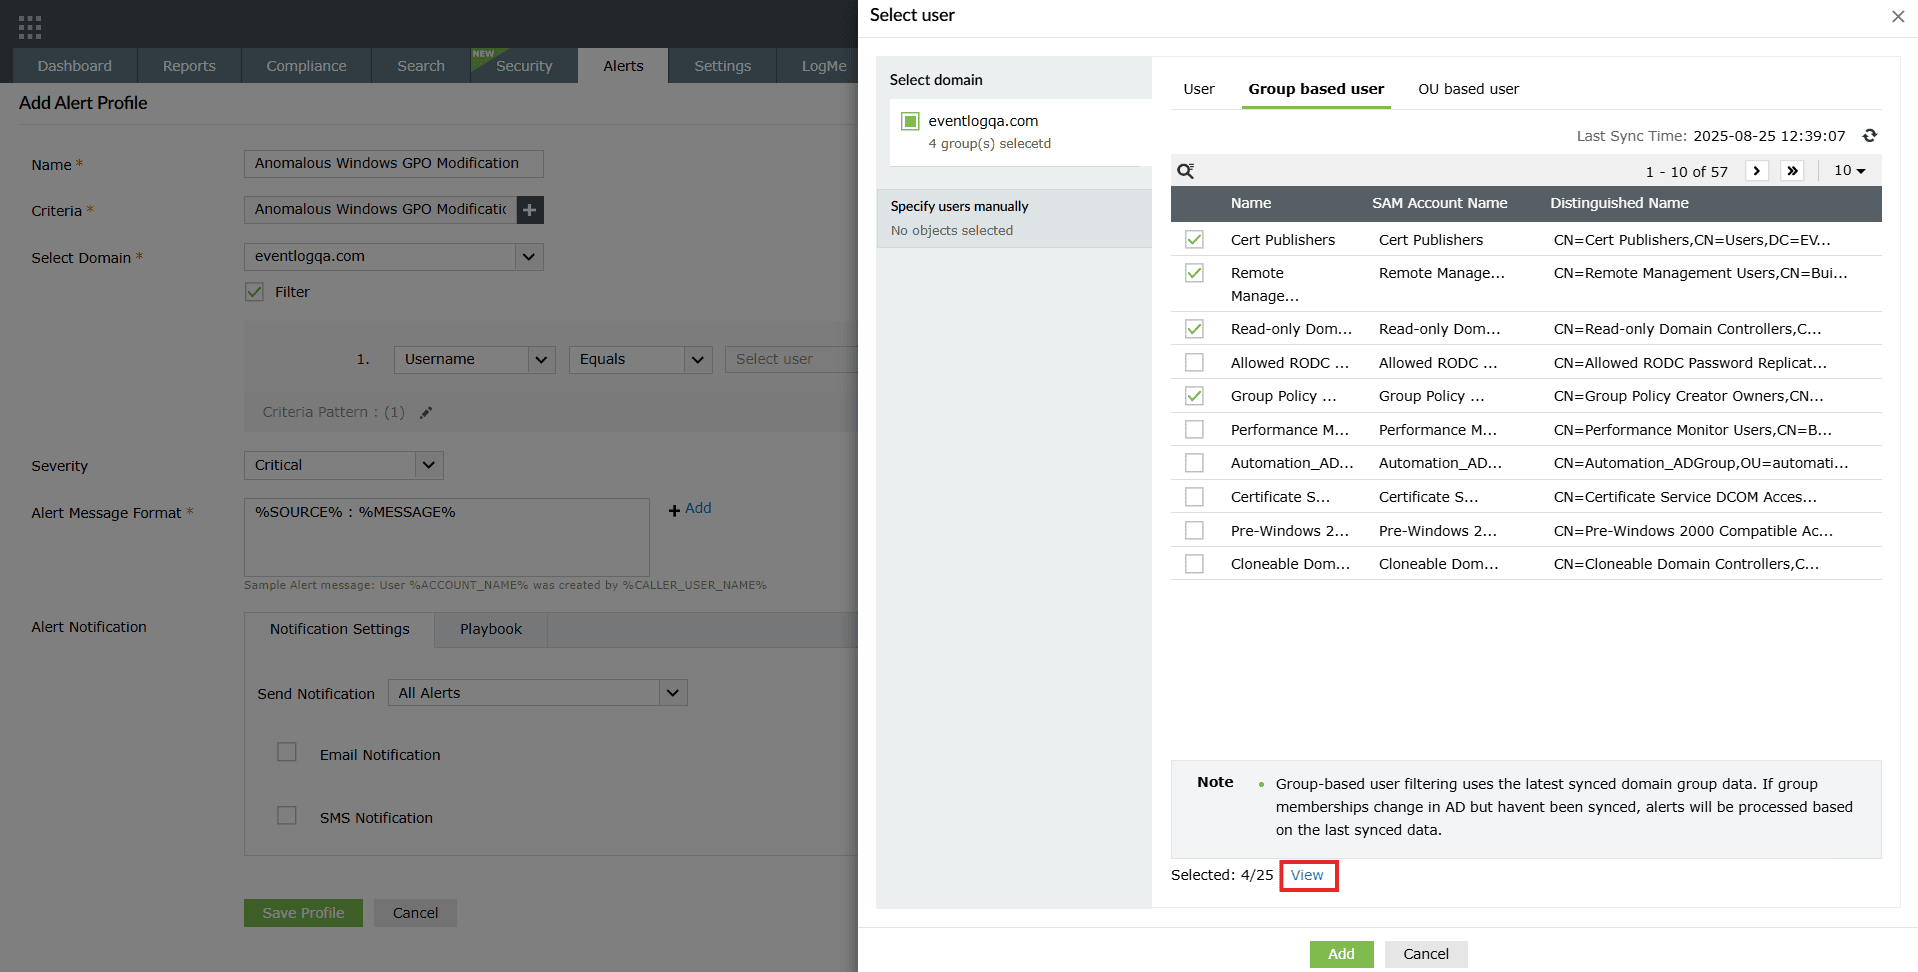
Image 42: Viewing list of configured object filter users/groups - The list of Selected users/groups will be displayed.
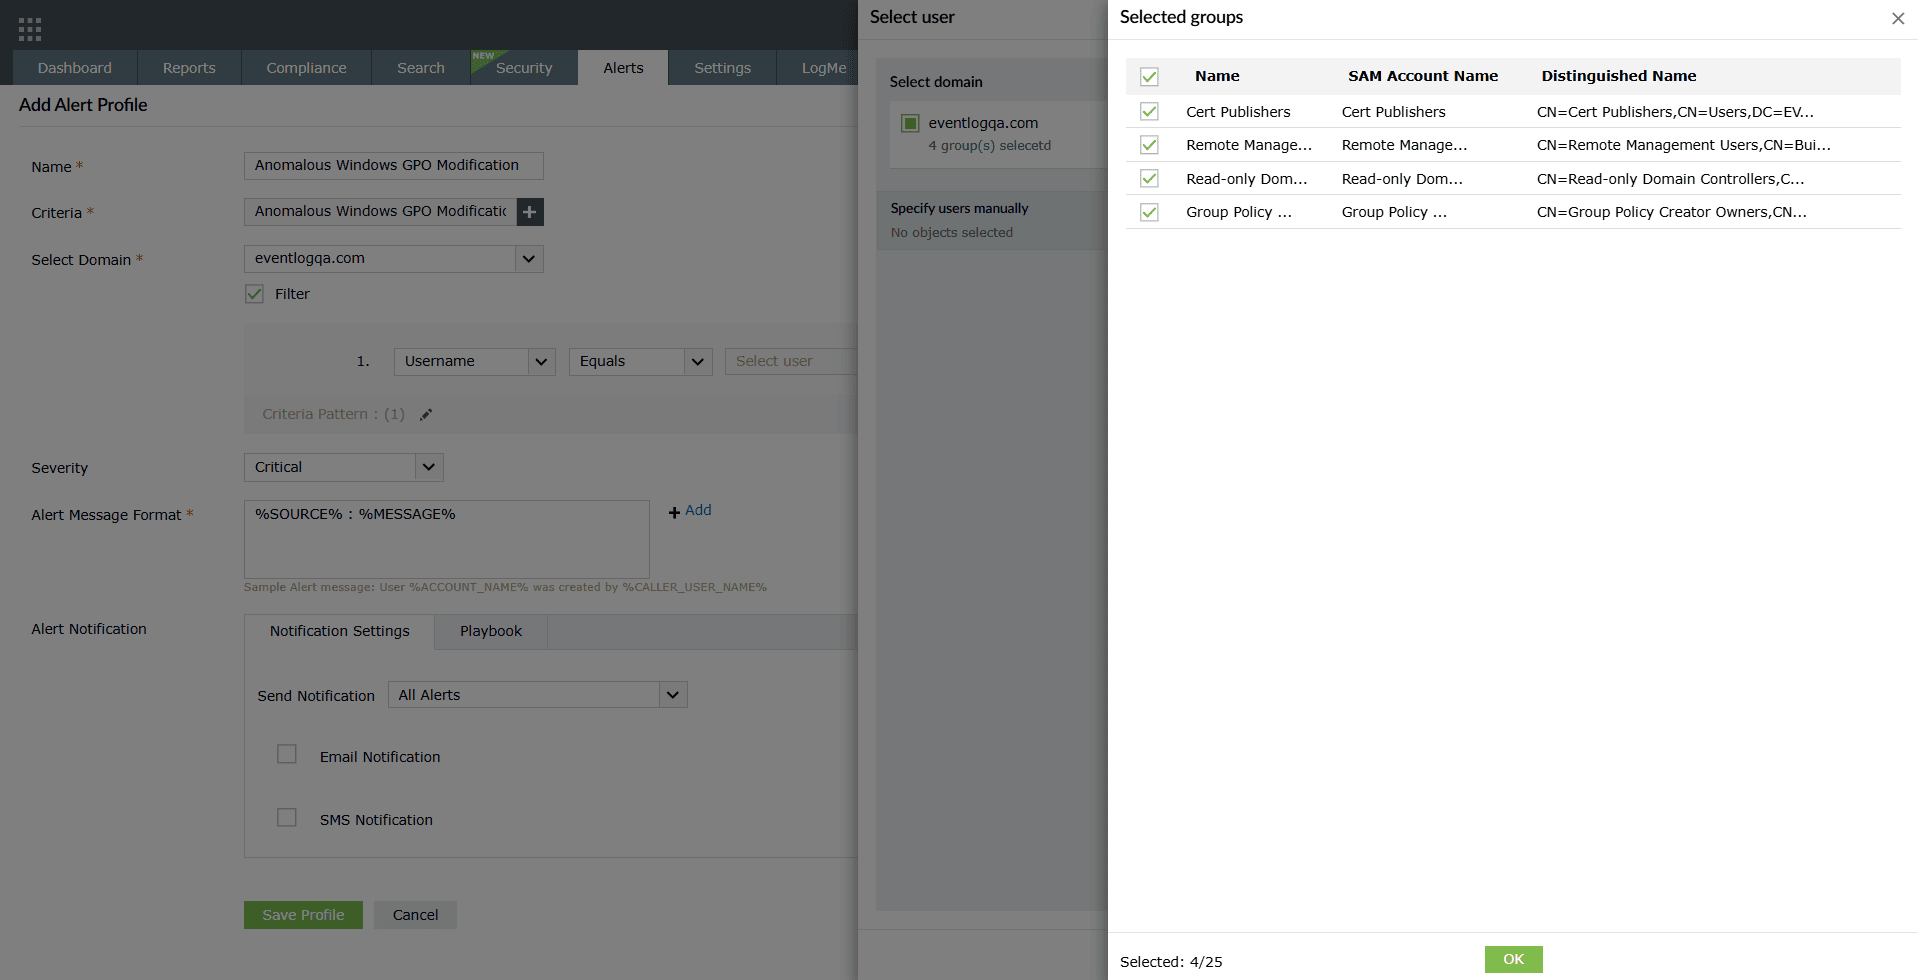
Image 43: Configuring object filter users/groups - Once the selection is done, click on OK in the selection list and then click on Add in the Select user pane.
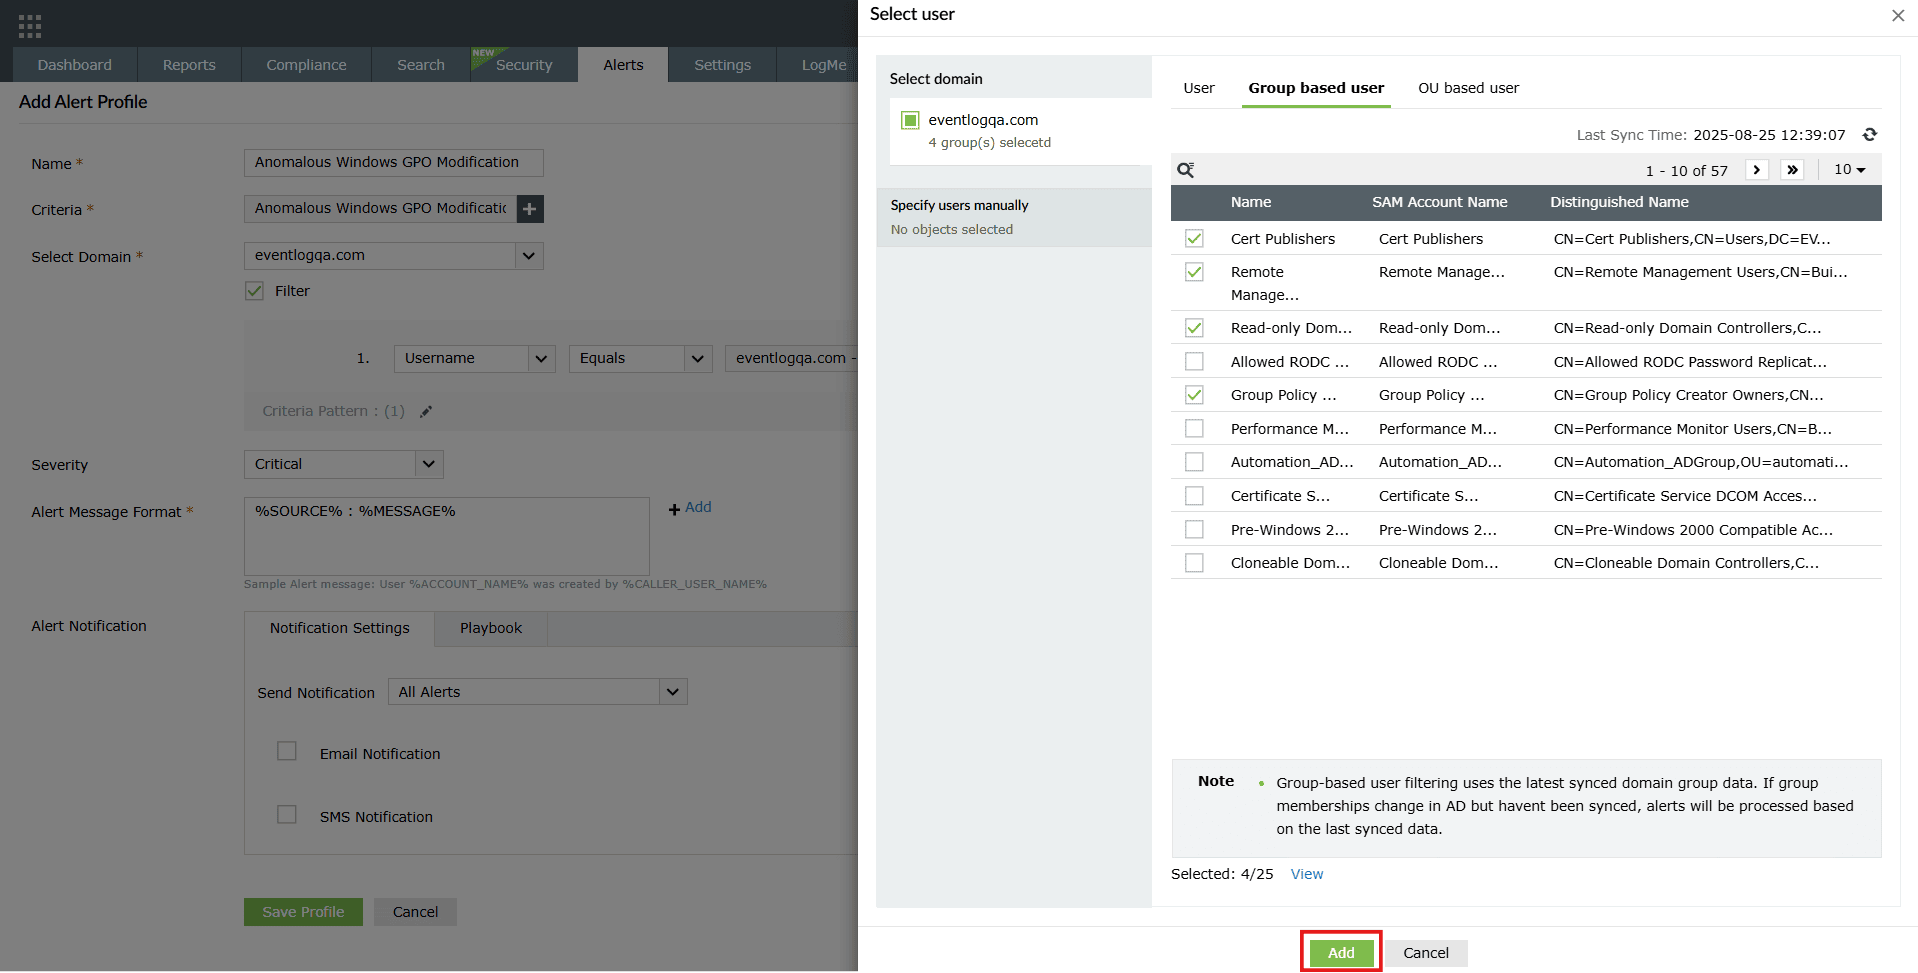
Image 44: Configuring object filter users/groups - Upon successful completion of action, the selection changes are instantly updated.
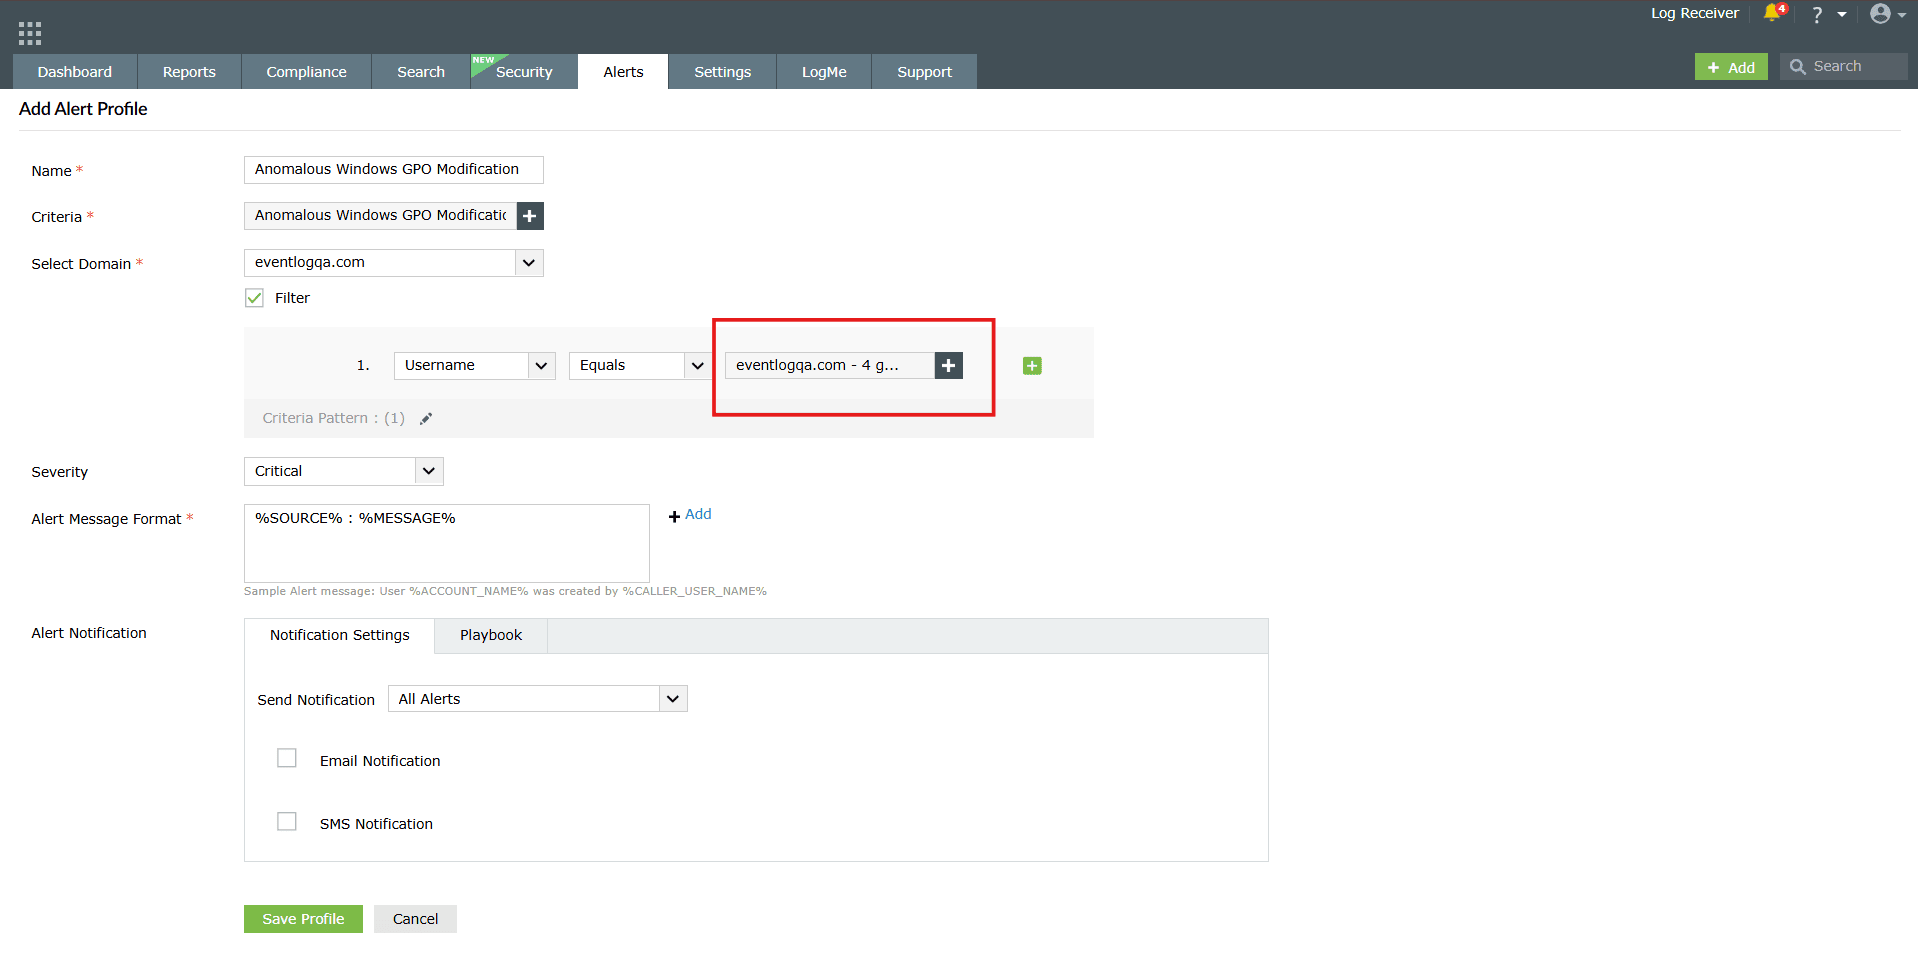
Image 45: Configuring object filter users/groups in alerts module
NOTE The object filter can also be used in a existing alert profile by clicking on the edit icon ![]() of an alert profile and following the above mentioned steps. To learn more about creating and managing alert profiles, refer to the Alerts help document.
of an alert profile and following the above mentioned steps. To learn more about creating and managing alert profiles, refer to the Alerts help document.
Read also
This document explained how to use the object filter during rule installation, rule management, and alert configuration. You also learned how it can be applied in the objects and exception sections, as well as in alert profiles, to improve accuracy in monitoring.