Creating custom rules
Last updated on:
In this page
Overview
This page explains the process of building custom rules to detect security events. You can create standard rules for basic filtering, anomaly rules for unusual single-event behavior, or advanced rules for complex multi-step patterns. Each rule type supports fields like severity, filters, thresholds, anomaly models, and MITRE ATT&CK mappings to add context and make detections more actionable.
Rule creation
Functionality:
A simple and robust way of building security rules that are required for their environment.
Use case:
To create security rules of any type (standard, anomaly-based, or advanced) with detailed tagging, MITRE ATT&CK mappings, and additional context like prerequisites and mitigations for better organization and actionable insights.
High computation rules
If a threshold is applied to any rule, it will be calculated for licensing since it is highly intensive, and it will be marked as a High Computation Rule. The indicator will be visible in the rules list and also during the creation of the said rule.
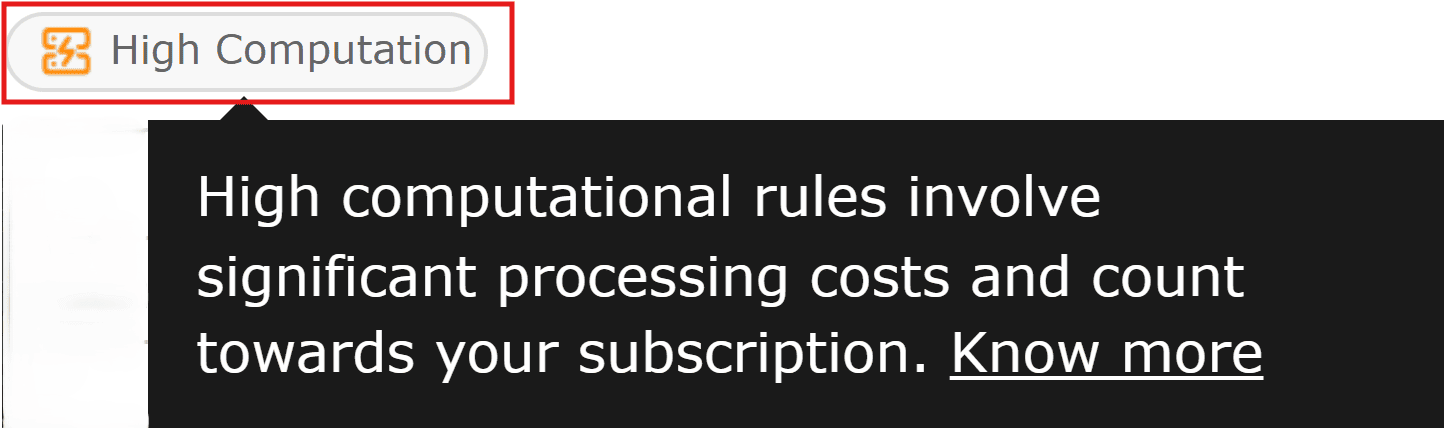
A rule is determined as a high computational if it uses any one of the following:
- Threshold
- Anomaly model
- Multi-action
How to create a new rule?
- In the product console, click on the Security tab.
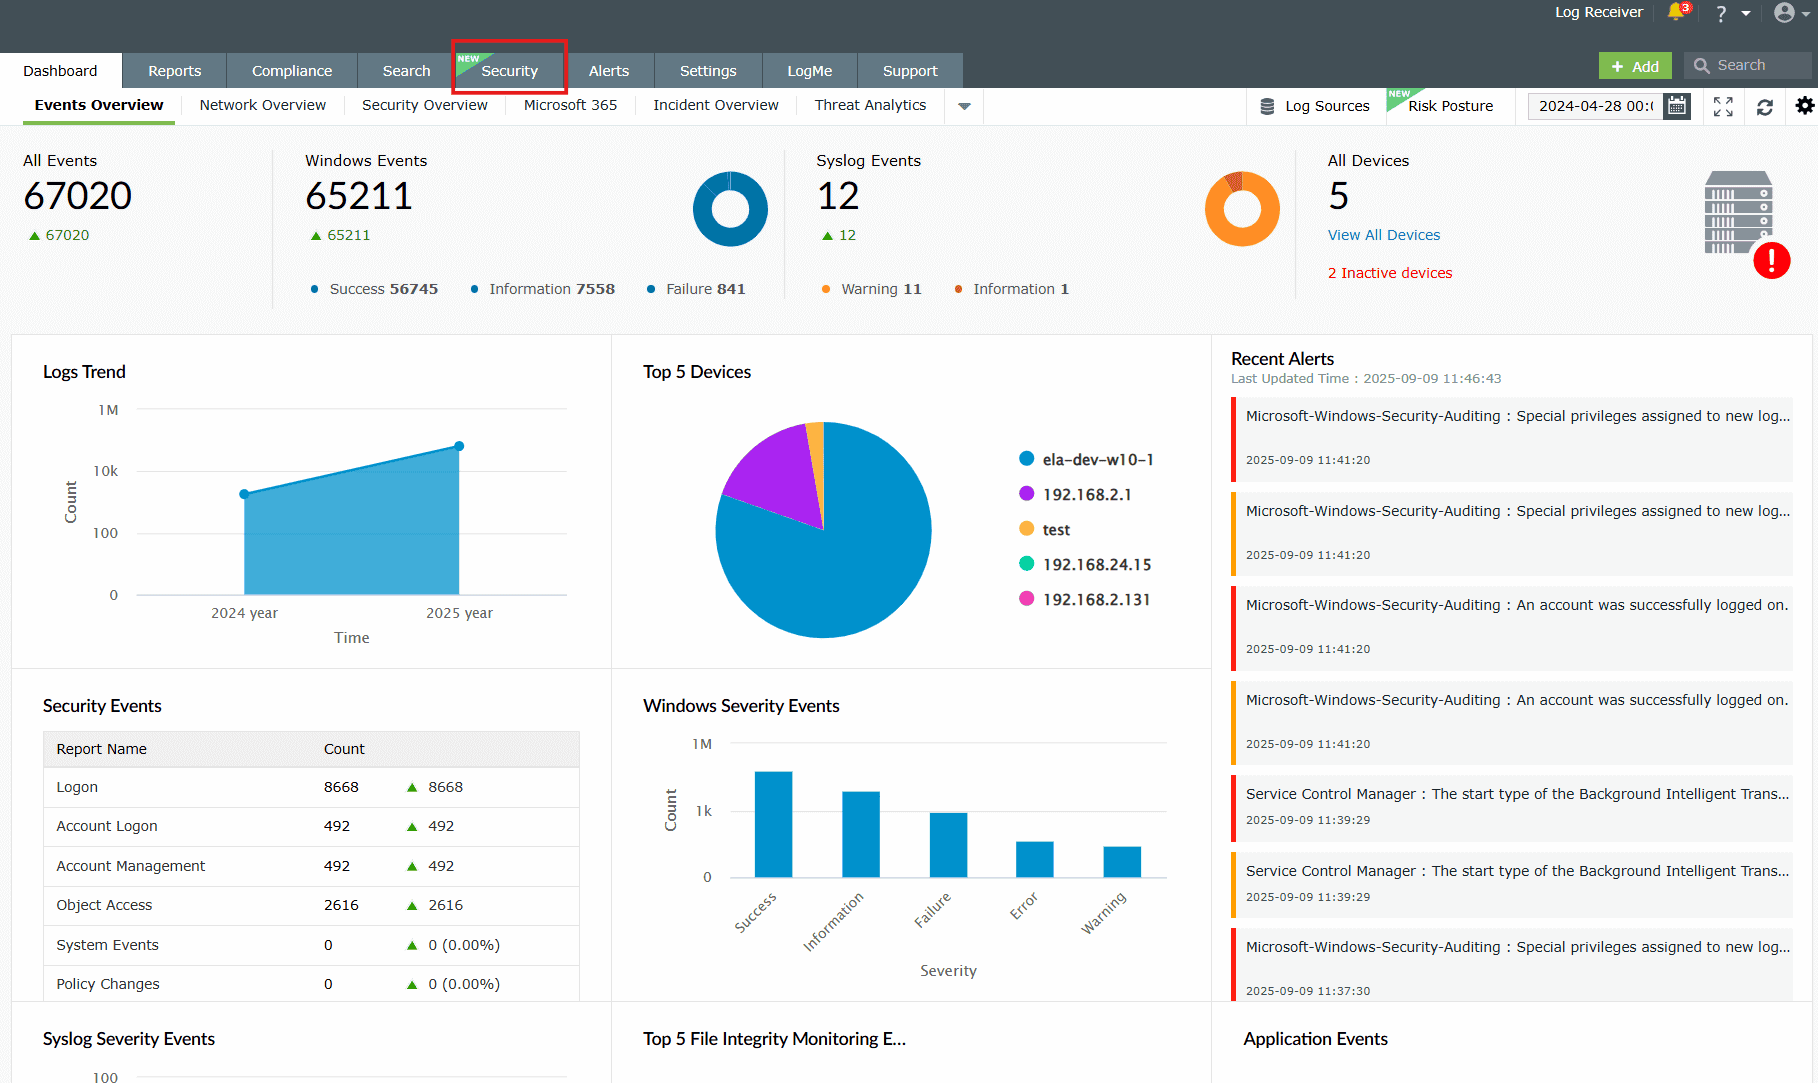
Image 1: Security tab in dashboard - Click on the Manage Rule option in the right end.
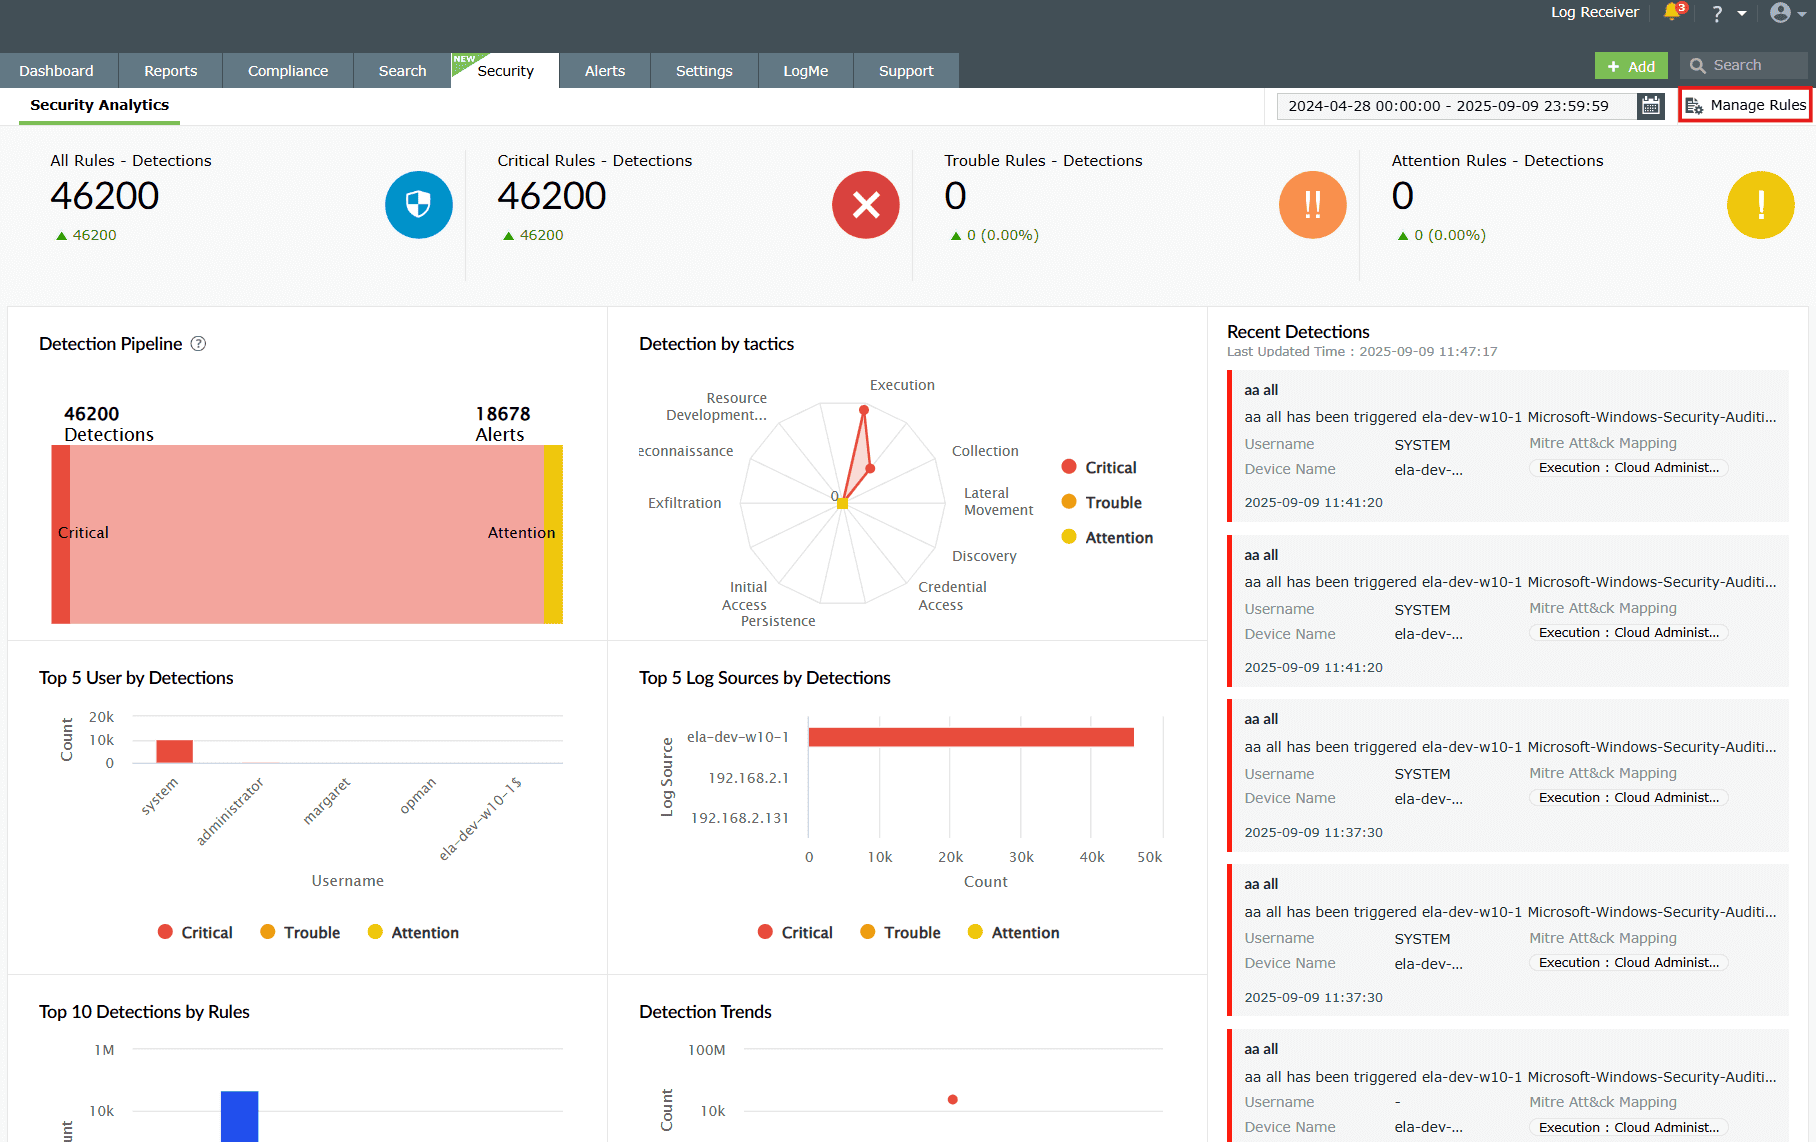
Image 2: Manage rules in security dashboard - You will be taken to the page with the complete list of rules. In the right side, you
will find "Create New Rule". Click on the drop-down button available
for this option.
NOTE: If you click directly on Create New Rule, you will be directly taken to the Standard Rule creation page.
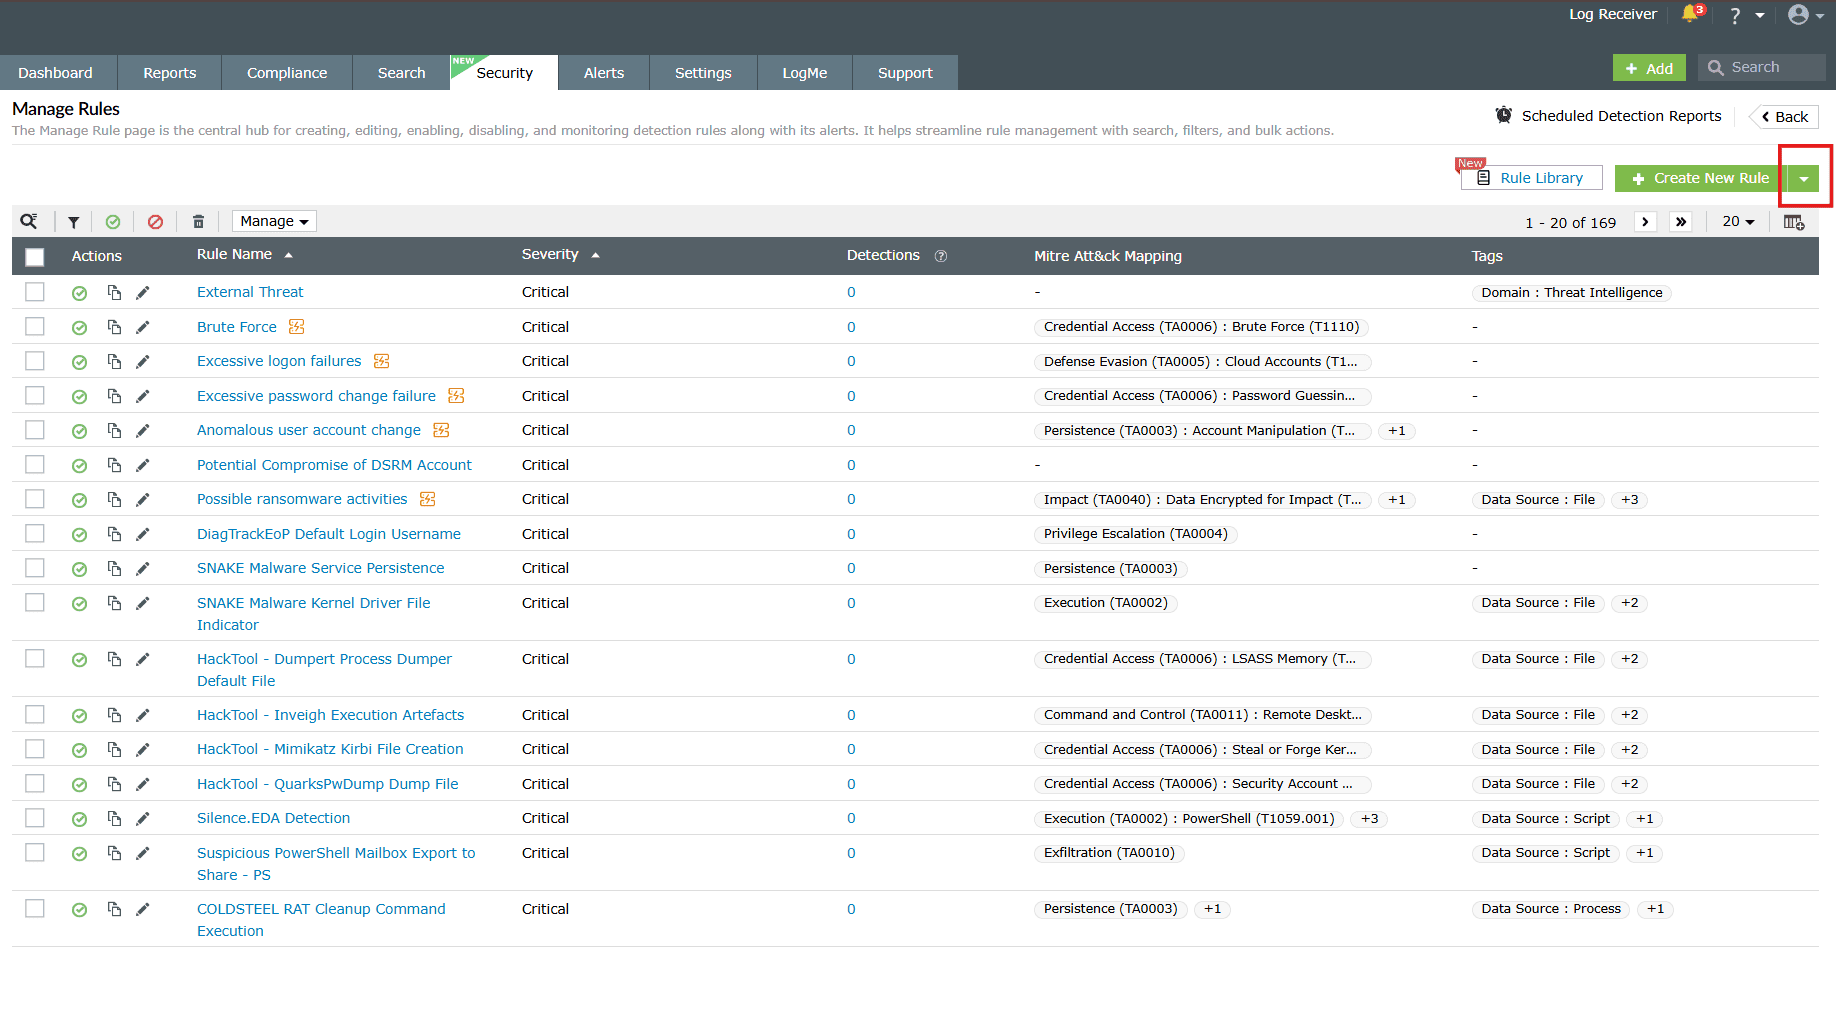
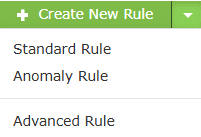
Image 3: Manage rules module via the security dashboard - The drop-down expands into the Standard Rule, Anomaly
Rule, and Advanced Rule options of
rule creations. Click on your preferred rule type based on your requirements.
Read further on how to create a rule in each of the three rule types.
Standard Rule
Steps to create a Standard rule
- Navigate to the Standard Rule type. You will be taken to the page
consisting of fields
that define the rule criteria, like in the below image. To understand more about the
fields refer to the Understanding rules help document.
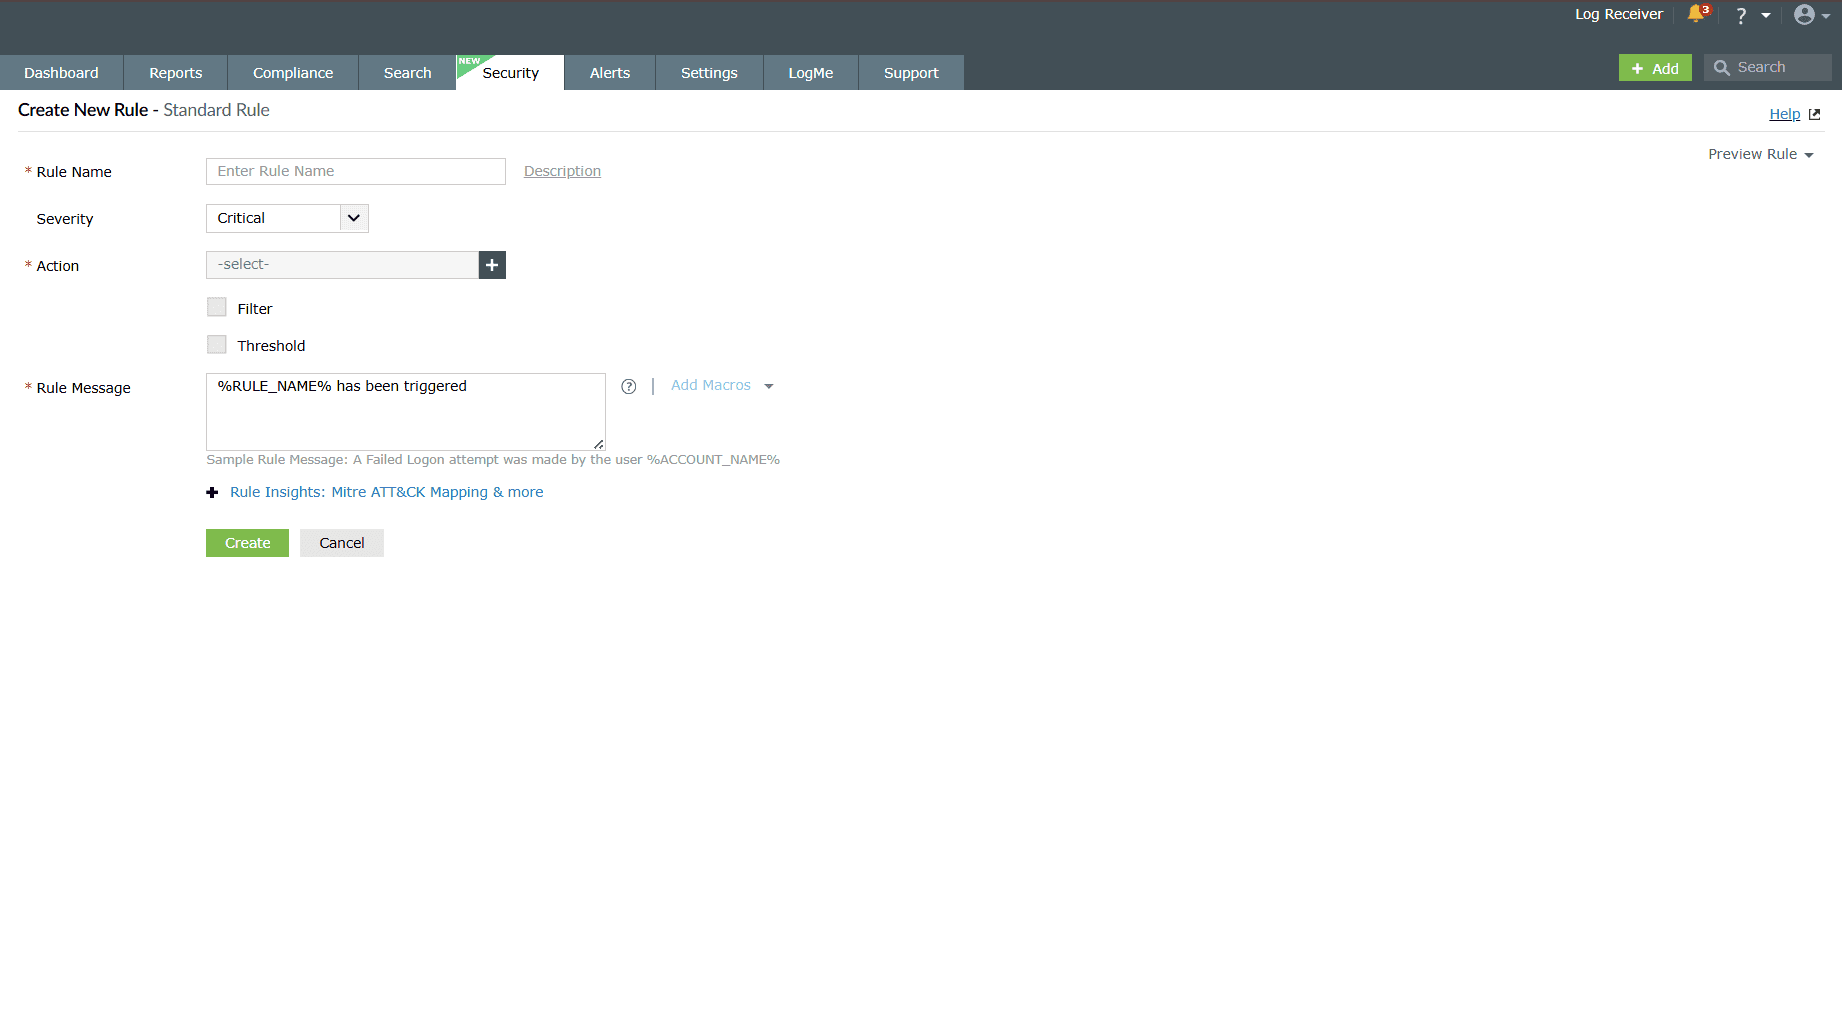
Image 4: Create a standard rule - Rule Name should be given, and a description for a rule is optional. Click on Description, and a popup will open for the same in case you want to add description.
- Choose a Severity level from Critical, Trouble, and Attention. This field will be Critical by default.
- Choose the Action based on which you wish to create the rule. Read
further to know how
to Create Custom Action.
- Filter can be applied but only if a rule needs to run for just a specific case.
- List of fields will be displayed with respect to the selected action and its log format.
- If the list of fields exceeds 5, a search option will be shown to find and navigate to that field.
- Threshold can be applied if a rule needs to run after a certain threshold value.
- Rule Message can also be given to provide a formatted message across
the detection
reports for the triggered rule.
- Fields in the message will be defined from Macros.
- Rule Insights: MITRE ATT&CK Mapping & more is optional and can also be configured for a rule.
- After entering the required fields, click on Create.
- Upon successful completion of the action, the below pop-up appears.

Anomaly Rule
Steps to create an Anomaly rule
- Navigate to the Anomaly Rule type. You will be taken to the page
consisting of fields
that define the rule criteria, like in the below image. To understand more about the
fields refer to the Understanding rules help document.
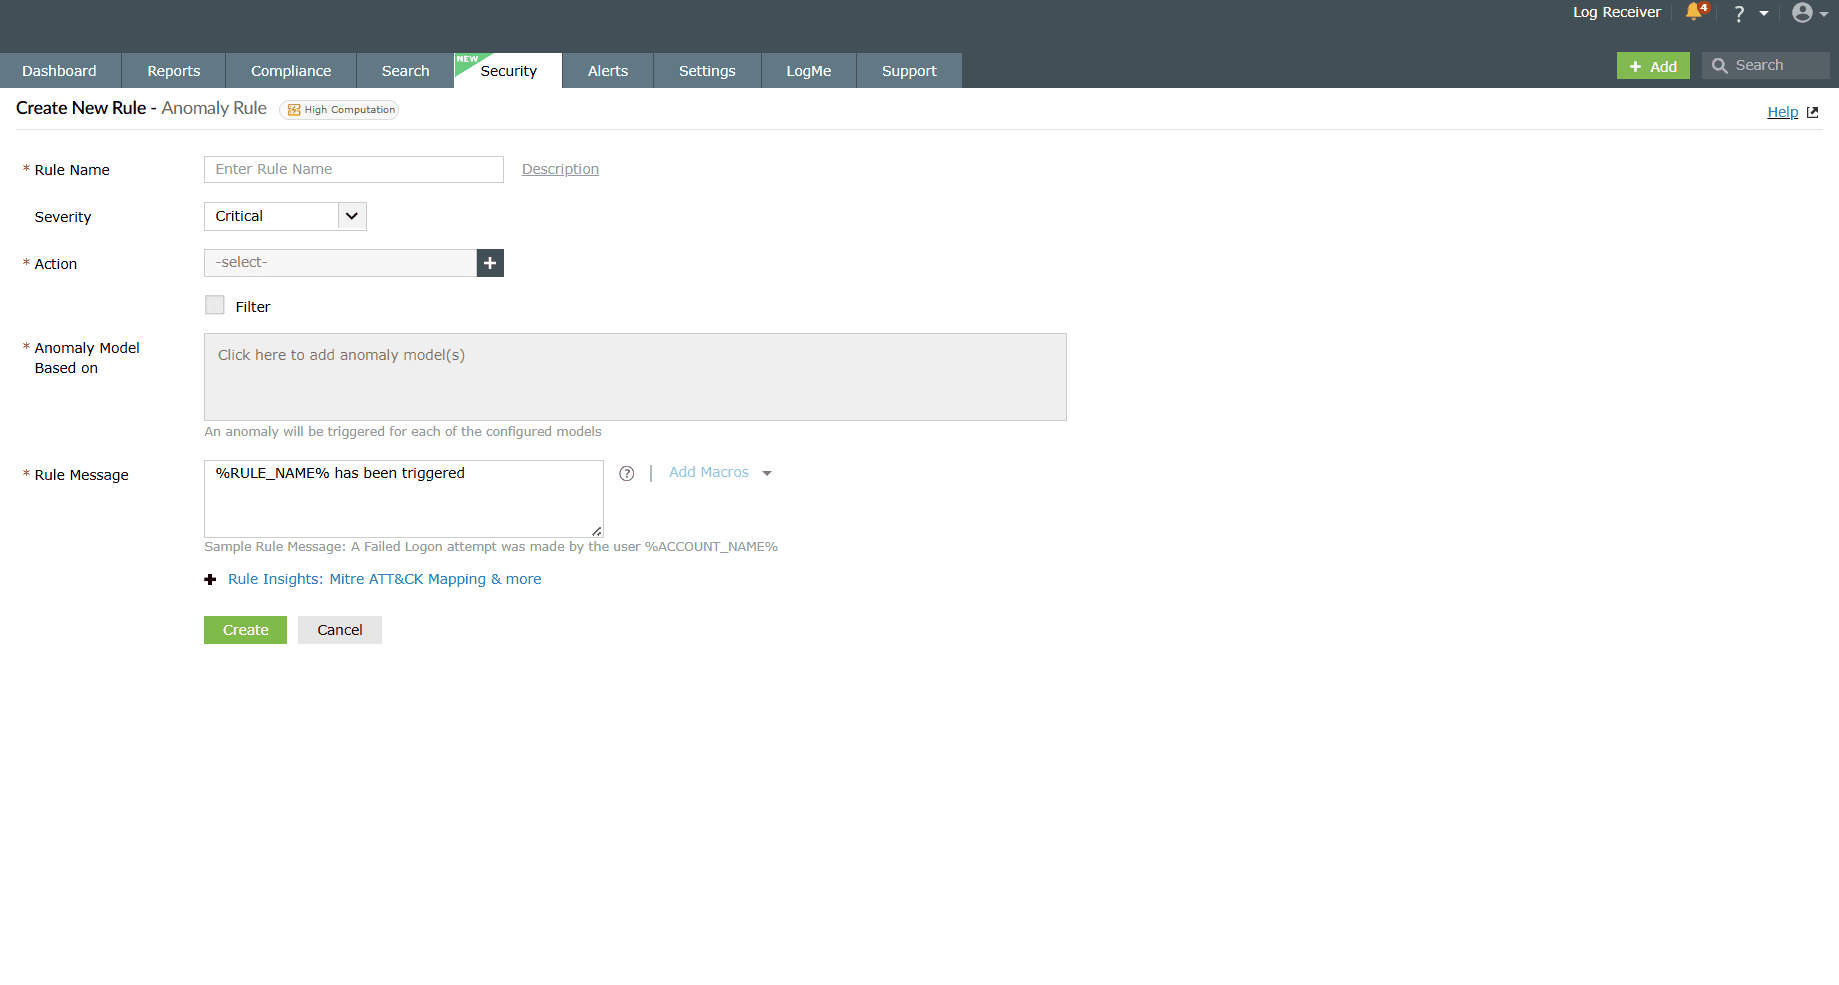
Image 5: Create an anomaly rule - Rule Name should be given, and Description for a rule is optional. Click on description, and a popup will open for the same in case you want to add description.
- Choose a Severity level from Critical, Trouble, and Attention. This field will be Critical by default.
- Choose the Action based on which you wish to create the rule. Read
further to know how
to Create Custom Action.
- Filter can be applied but only if a rule needs to run for just a specific case.
- List of fields will be displayed with respect to the selected action and its log format.
- If the list of fields exceeds 5, a search option will be shown to find and navigate to that field.
- Threshold can be applied if a rule needs to run after a certain threshold value.
- Choose the Anomaly Model Based on to define how deviations from normal behavior will be detected. A maximum of 10 models can be selected.
- Rule Message can also be given to provide a formatted message across the detection reports for the triggered rule. Fields in the message will be defined from Macros.
- Rule Insights: MITRE ATT&CK Mapping & more is optional and can also be configured for a rule.
- After entering the required fields, click on Create.
- Upon successful completion of the action, the below pop-up appears.

Advanced Rule
Steps to create an Advanced rule
- Navigate to the Advanced Rule type. You will be taken to the page
consisting of fields
that define the rule criteria, like in the below image. To understand more about the
fields refer Understanding rules page.
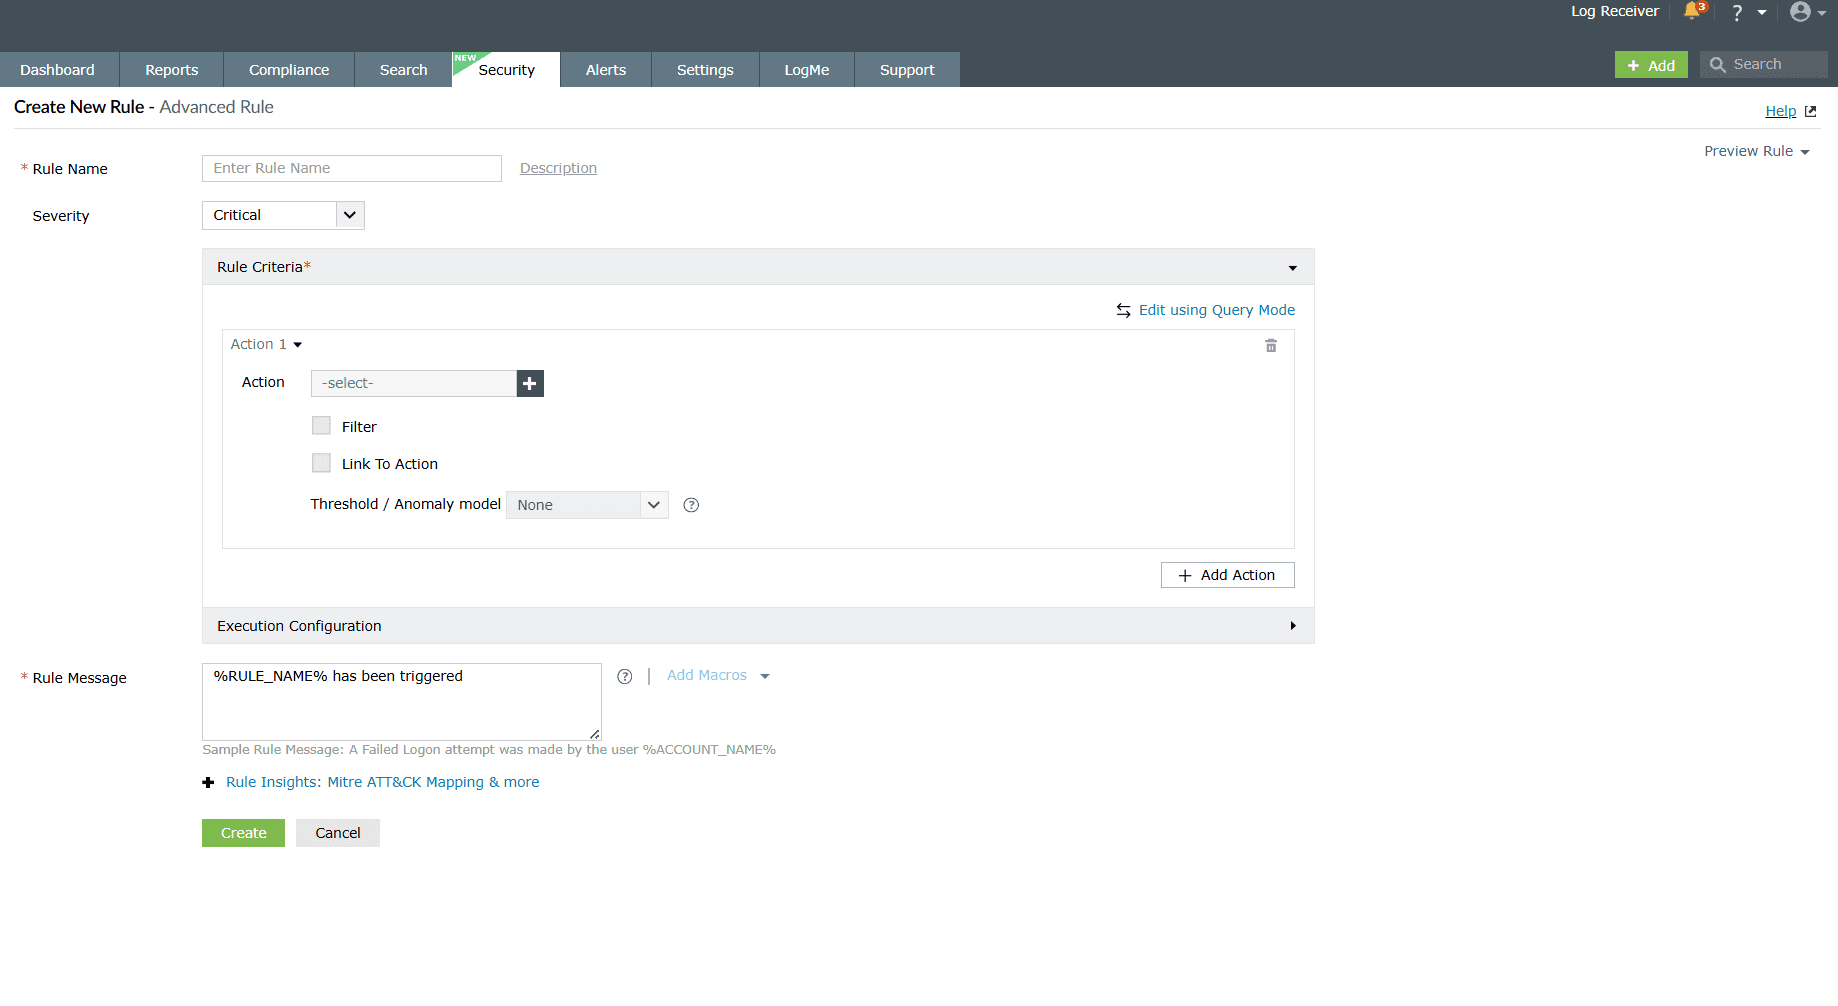
Image 6: Create an advanced rule - Rule Name should be given, and Description for a rule is optional. Click on description, and a popup will open for the same in case you want to add description.
- Choose a Severity level from Critical, Trouble, and Attention. This field will be Critical by default.
- Rule Criteria
Edit using Interactive Rule Builder
- Action selection will be the same as Standard Rule creation, but multiple actions can be selected as per existing correlation rules. Read further to know how to Create Custom Action.
- Filter and Threshold will also be the same as in Standard Rule creation.
- Link To Action: In the case where you have chosen multiple actions, you can link those actions to one another so that events involving those actions can be correlated and monitored for suspicious activity.
- Choose the Anomaly Model Based on to define how deviations from normal behavior will be detected. A maximum of 10 models can be selected.
Edit using Query Mode
- Exclusive to advanced rule building, in this mode, you can configure the criteria and parameters by querying with the help of Query Syntax and Query Grammar for the same. Refer to Query Grammar to know more.
- Define the Execution Configuration if you wish to schedule the rule.
- Rule Message can also be given to provide a formatted message across
the detection
reports for the triggered rule.
- Fields in the message will be defined from Macros.
- Rule Insights: MITRE ATT&CK Mapping & more is optional and can also be configured for a rule.
- After entering the required fields, click on Create.
- Upon successful completion of the action, the below pop-up appears.

How to create Custom Action in advanced rules?
- While choosing an Action during rule configuration, you can find an
option to create a
custom action as per your requirements. Click on Create Custom Action
as highlighted in
the below image.
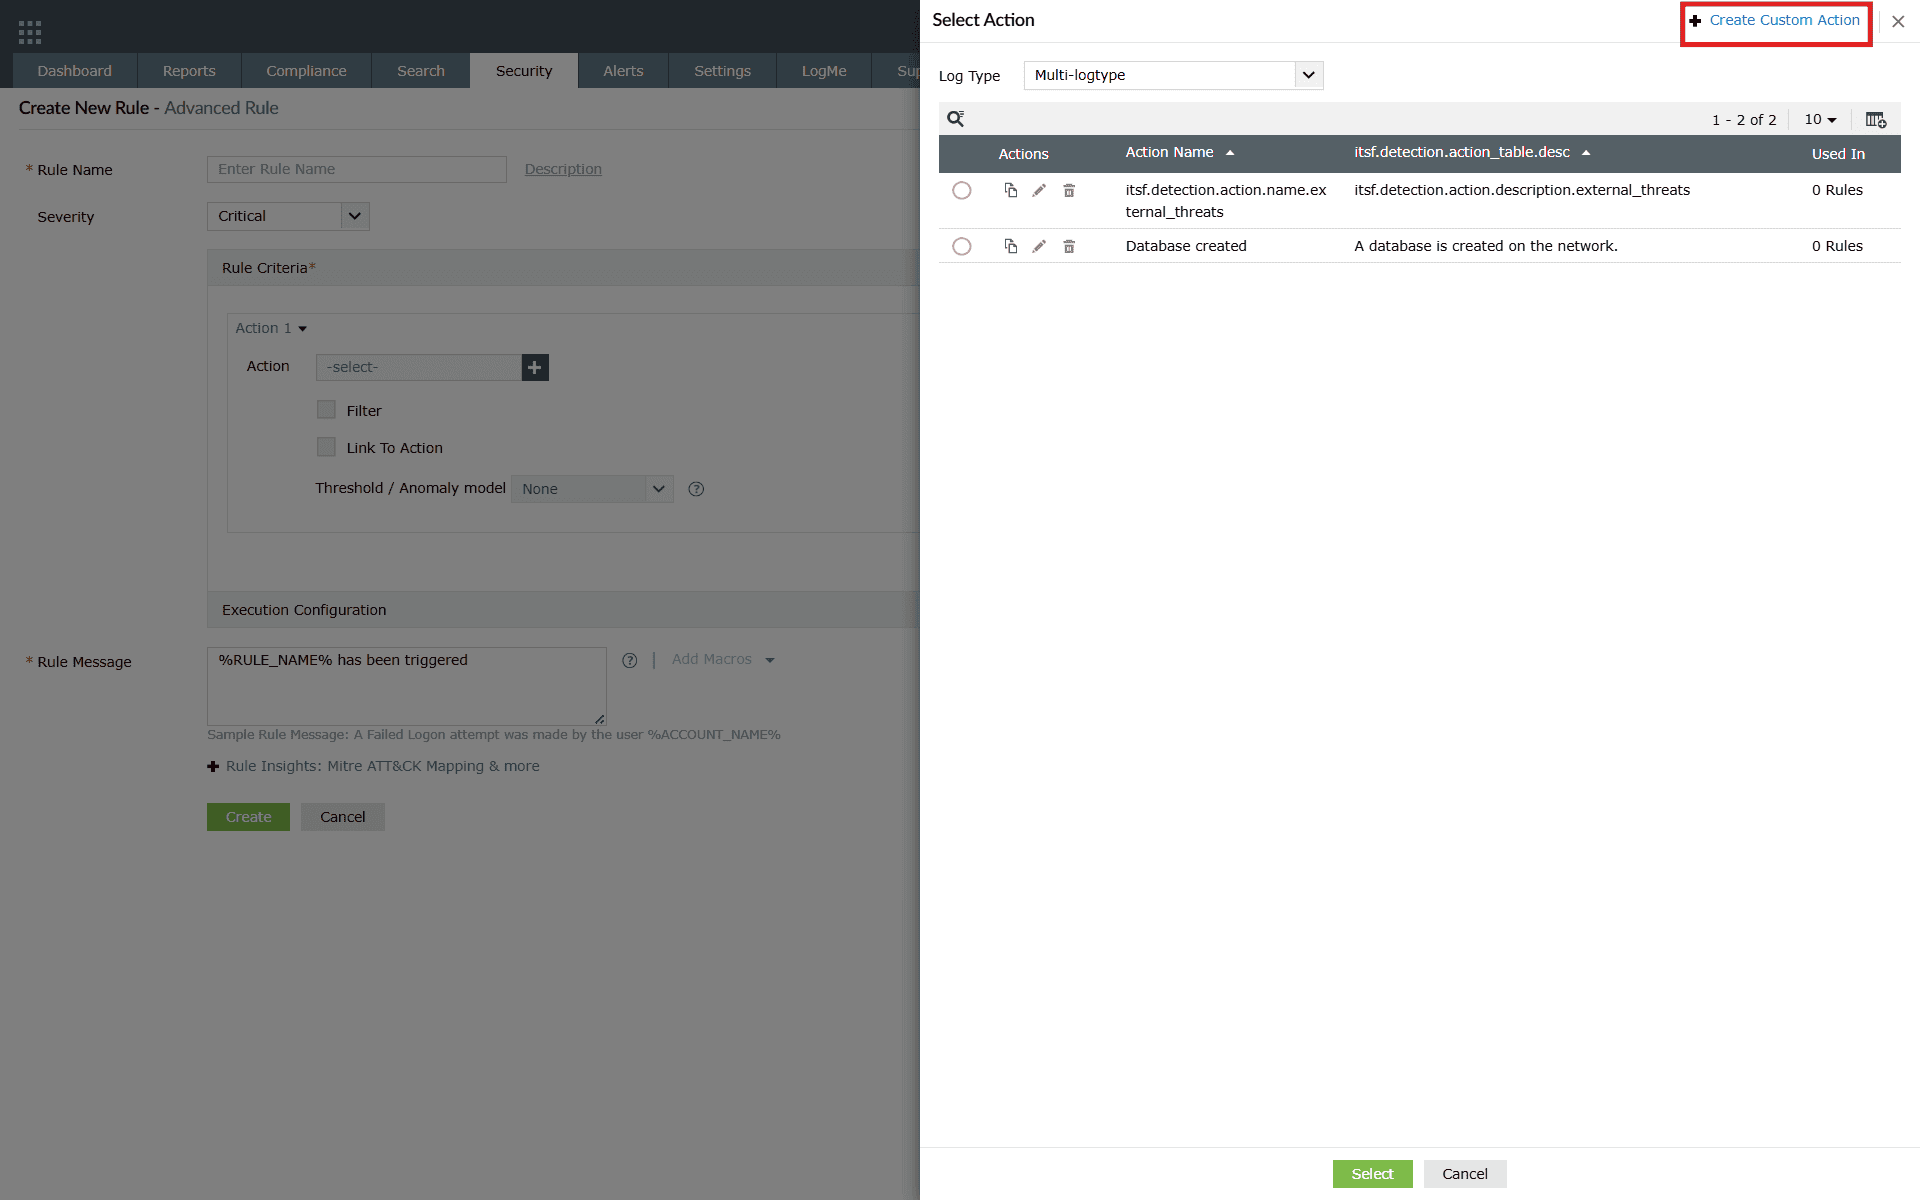
Image 7: Create custom action - The necessary fields to be defined will be shown as below.
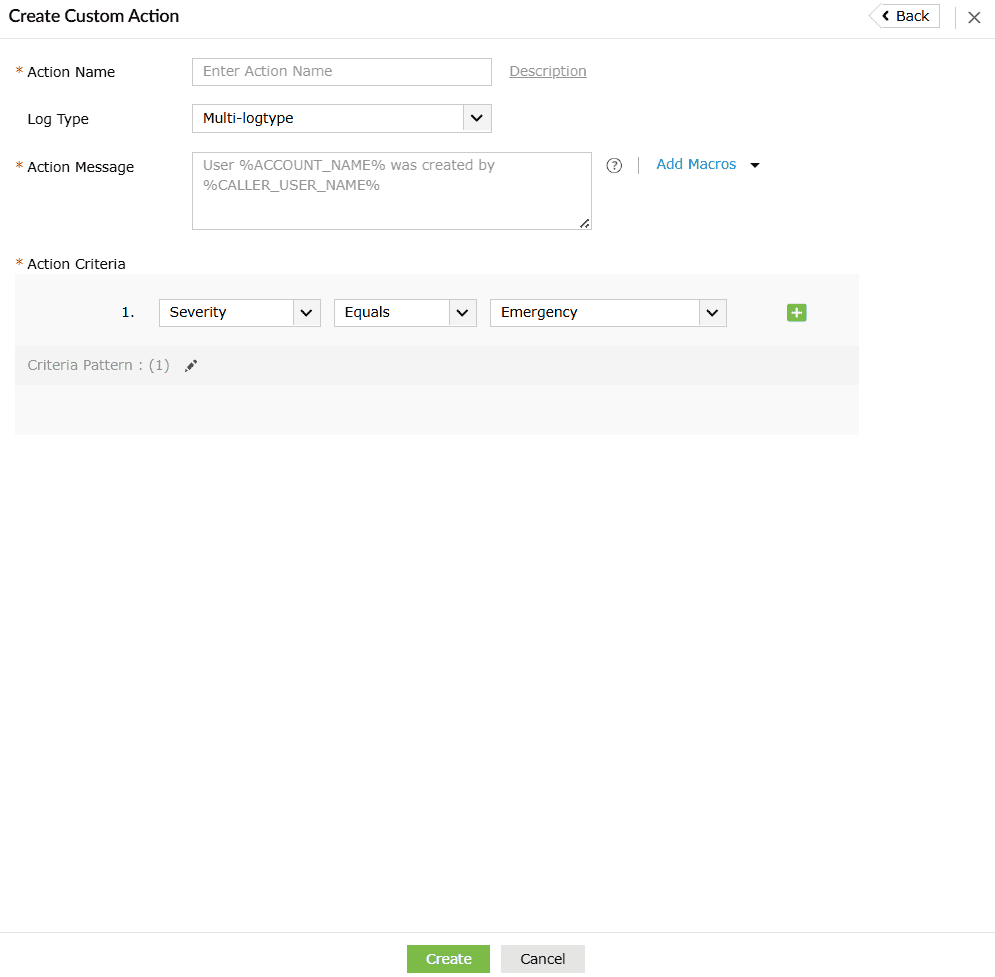
- Configure by setting the field values:
- Action Name and Log Type are mandatory fields.
- Description is an optional field. Click on it to view the description box.
- Action Message is used for displaying a formatted message for the action used.
- Macros can be added to the Action Message format.
- Action Criteria will define the conditions which must be met for that specific action to be triggered.
- Fields like Macros will be displayed with slight variations in the drop-down options depending upon the selected Log Type.
- Once you have entered the required field values, click on Create.
- Upon successful completion of the action, the below pop-up appears.

Read also
This document explained how to create new rules, configure standard, anomaly, and advanced rules, and set up custom actions for more flexible monitoring.