Honeywell Device Provisioning Guide using the Enterprise Provisioner Tool
This document provides a complete step-by-step guide to provisioning Honeywell Android devices using the Honeywell Enterprise Provisioner. It includes installing the ManageEngine MDM app (APK), setting the app as the device owner, and enrolling the device using a barcode scan.
Prerequisites
Before you begin, make sure:
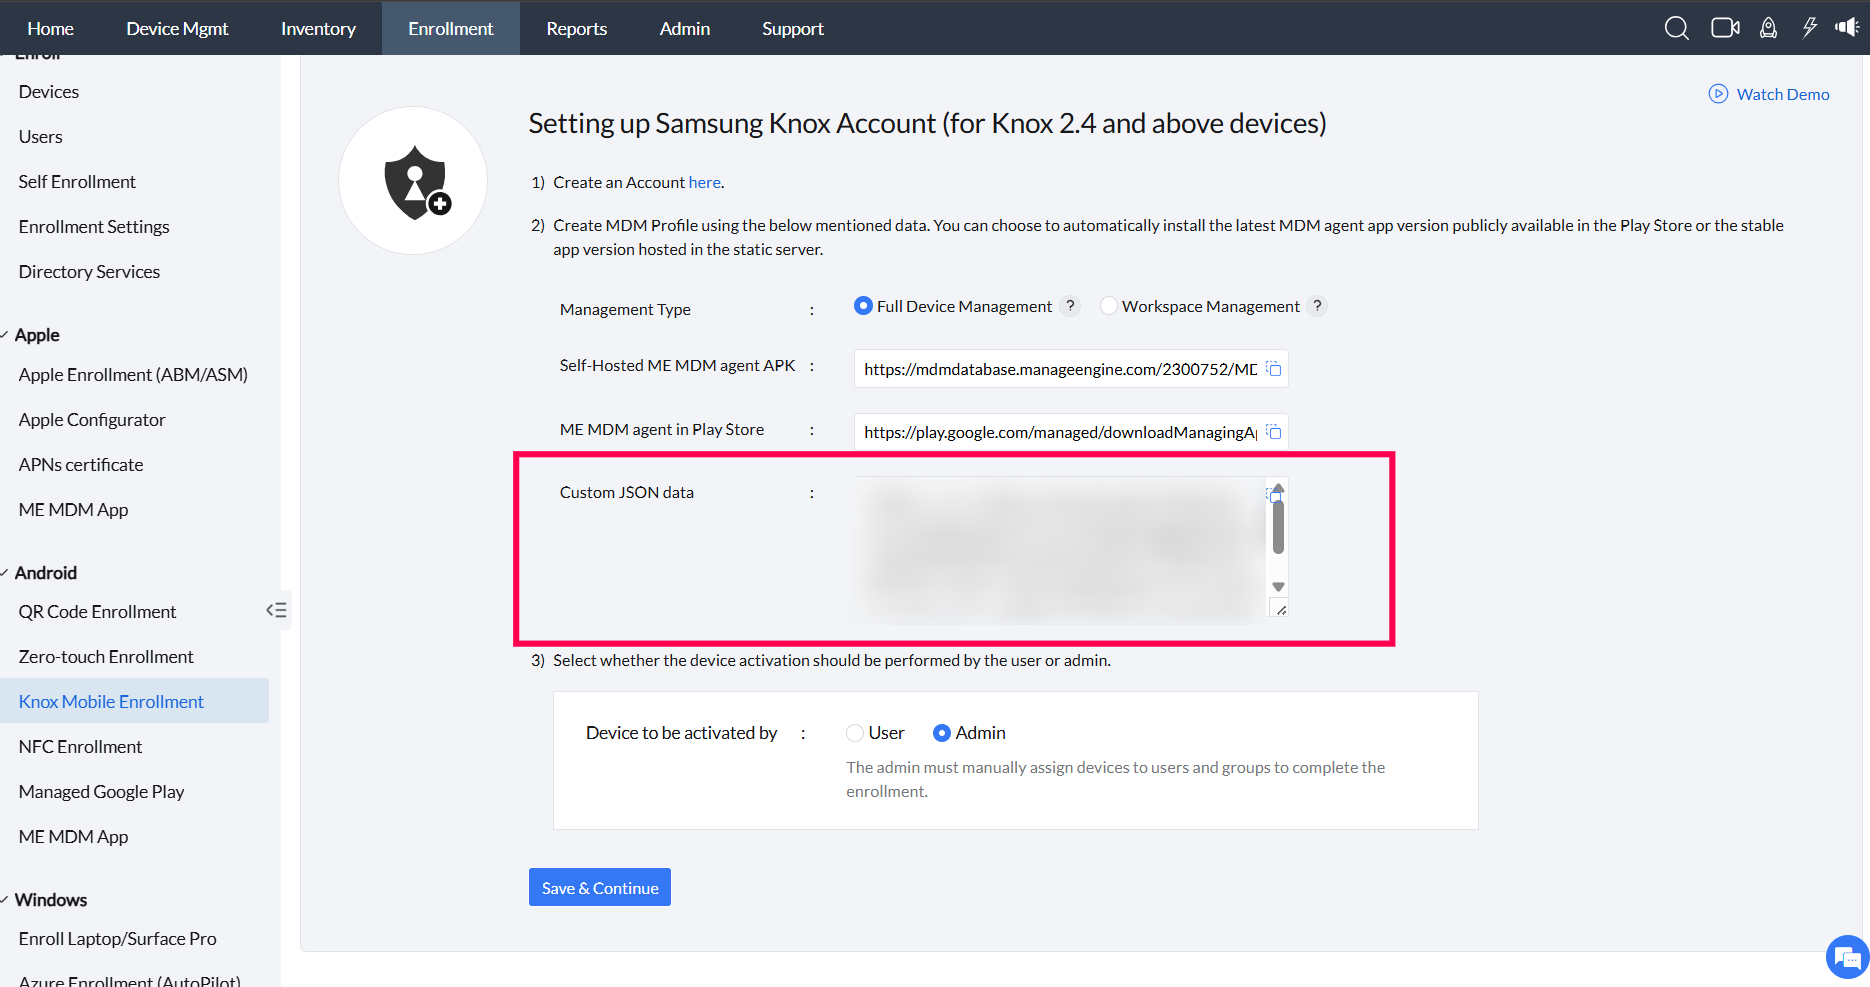
- Get the MDM APK file pre-configured with server details from MDM support team by approaching them with the JSON data shown in the image below.
- Make sure the Honeywell Download Manager Tool is installed on your PC before attempting to download Enterprise Provisioner Tool software.
- The Enterprise Provisioner tool is installed and accessible on your Windows PC.
Downloading the Enterprise Provisioner Tool
Follow the steps below to download the Enterprise Provisioner installer:
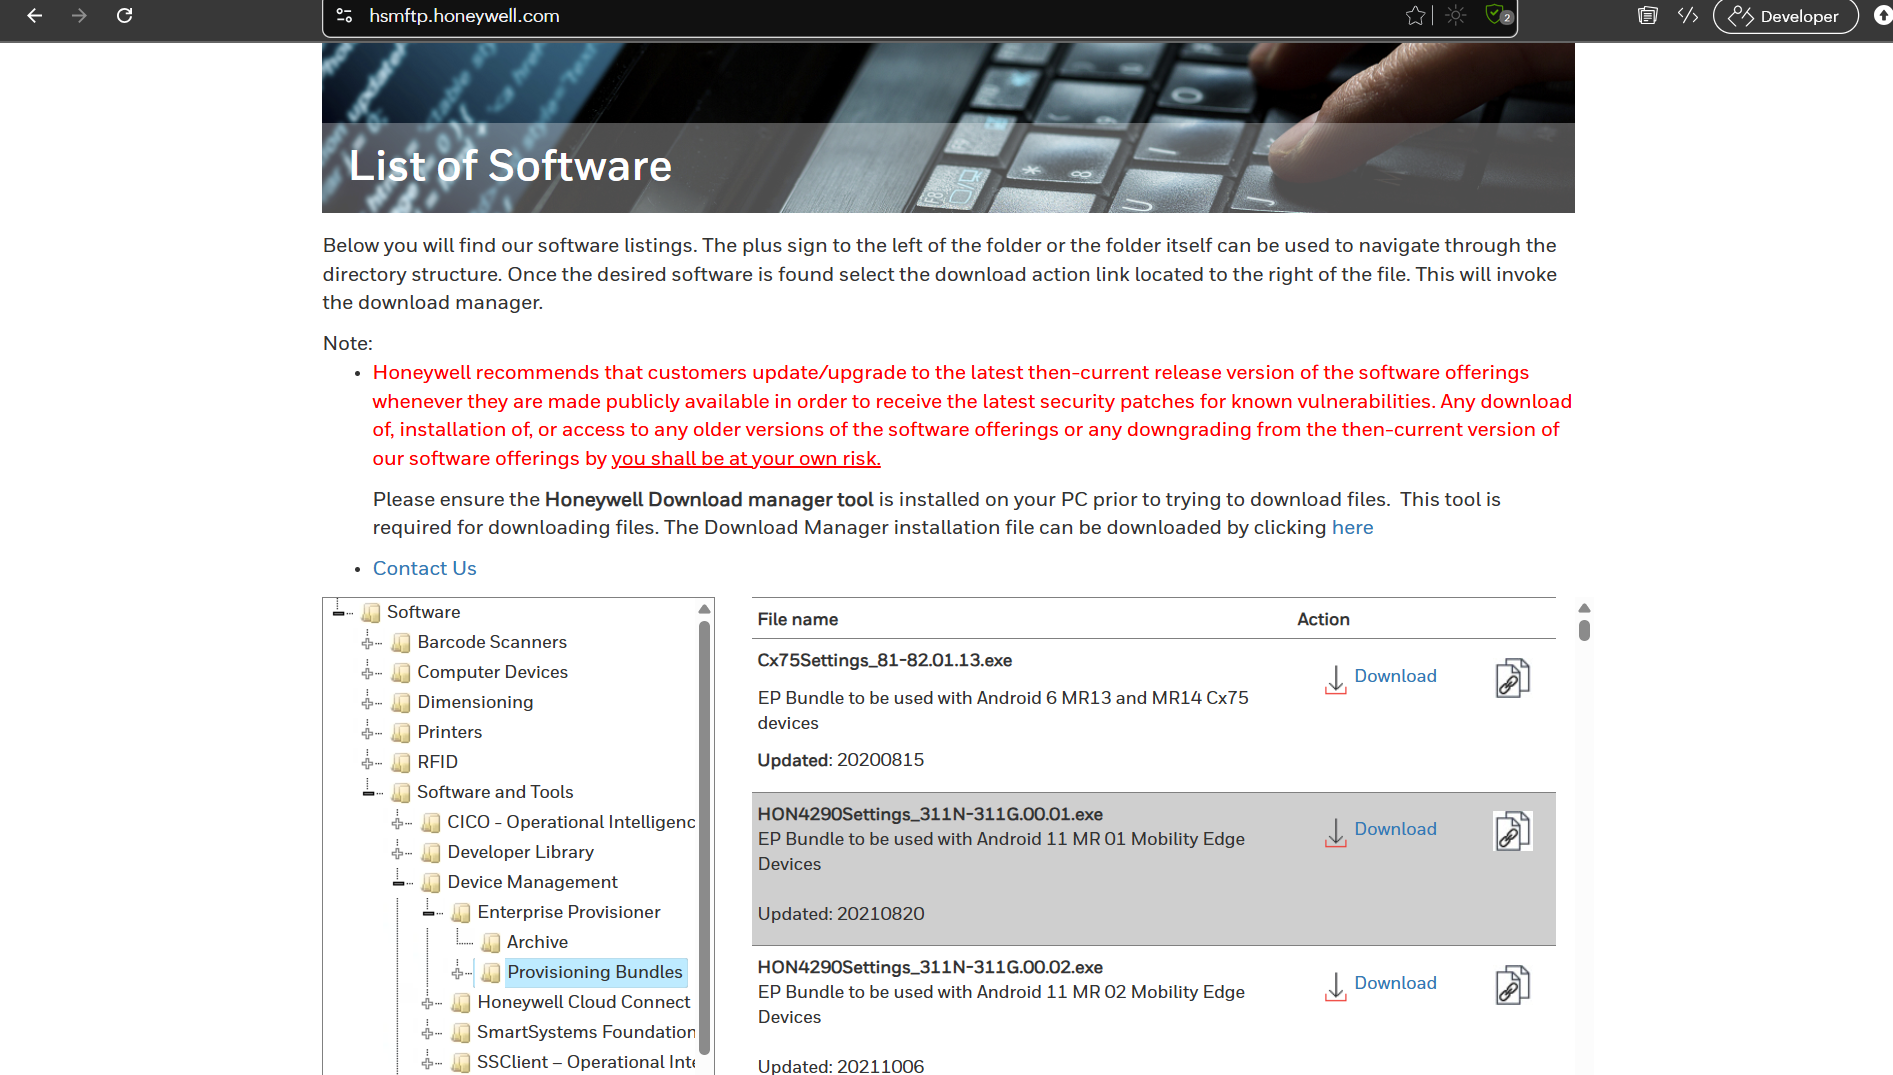
- Go to the Enterprise Provisioner Tool download page.
- Navigate to Software and Tools > Device Management > Enterprise Provisioner > Provisioning Bundles.
- Ensure that you have the Honeywell Download Manager tool installed on your machine before downloading the Provisioning Bundle.
- Click the Download button to download and install the tool on your system.
- Then, launch the tool and navigate to the Provisioning tab to begin creating provisioning tasks.
This step is part of the overall App Configuration process (download, install, and set as 'Device Owner'), which will be explained in the upcoming steps.
Choose How to install the MDM APK
You can download and install the ManageEngine MDM APK in two different ways. Choose the method that best suits your setup:
Installation Method | When to Use |
|---|---|
| Upload & Install APK Locally |
|
| Download APK via FTP Server |
|
Method 1: Upload & Install APK Locally
1.1 Upload the APK (Automatically Creates Task)
- Under the Provisioning Files section, click Choose files.
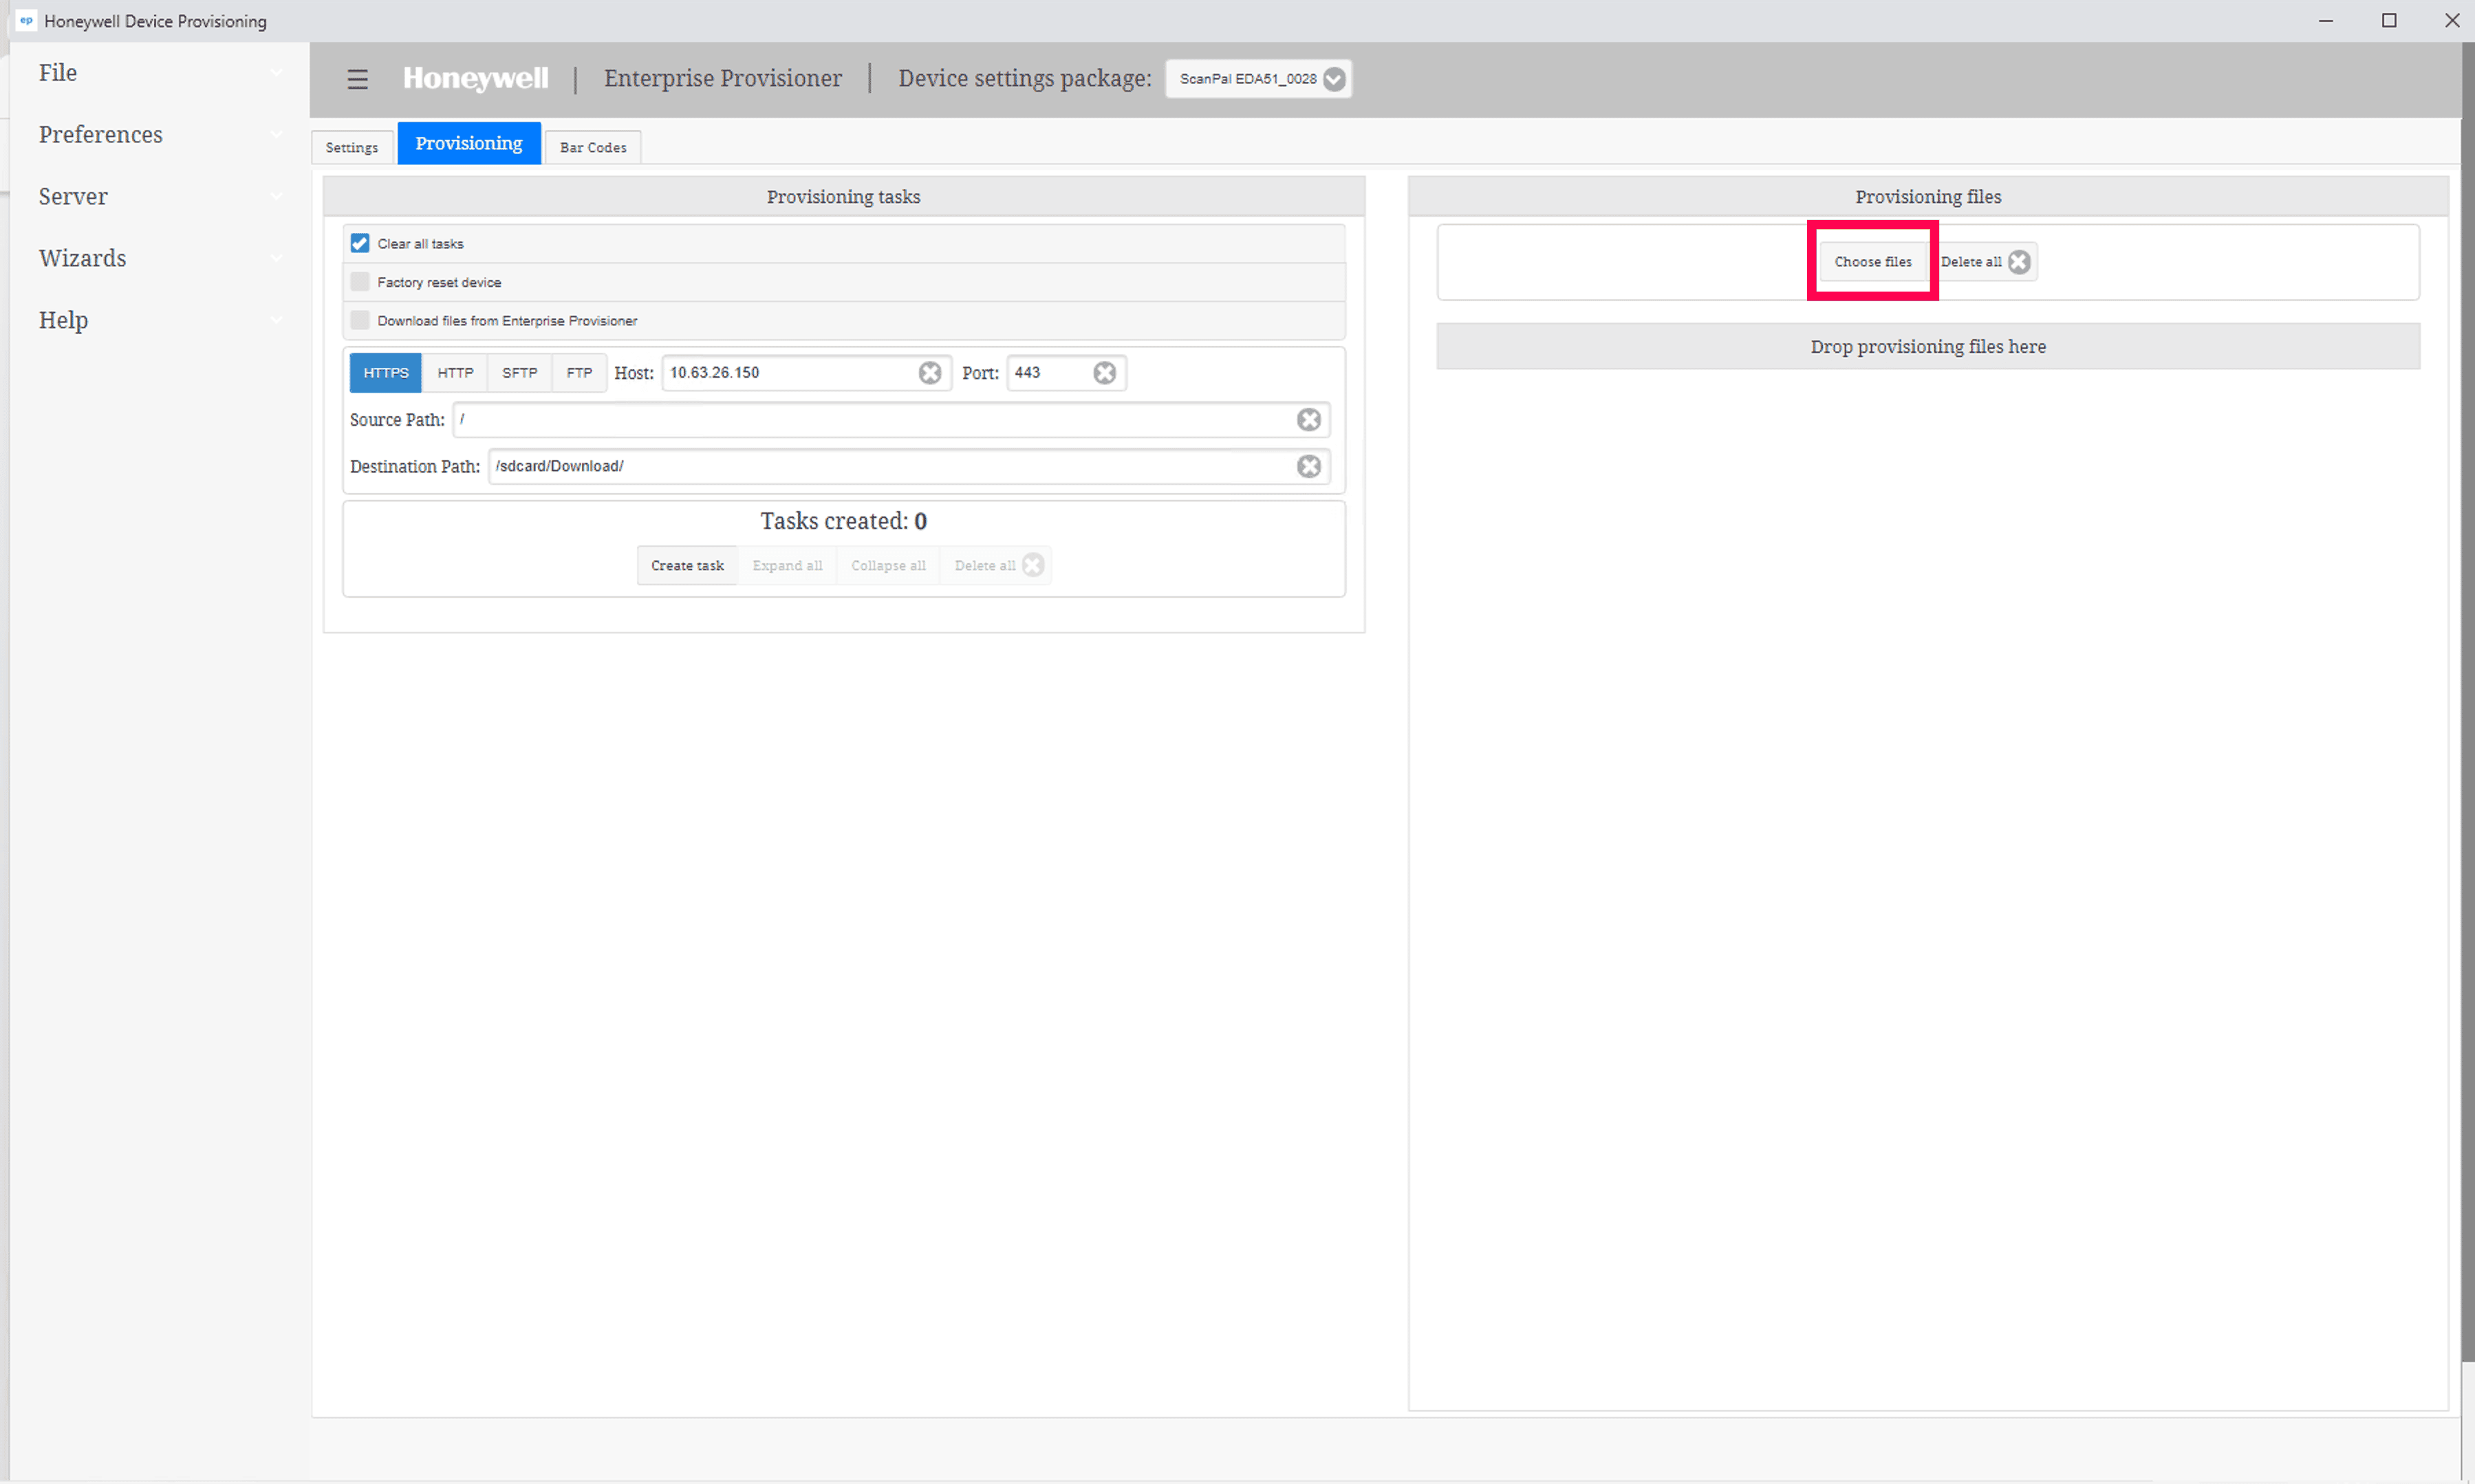
- Select the ManageEngine MDM APK file (MDMAndroidAgent.apk) from your PC.
- Once uploaded, a provisioning task is automatically created with the file name.
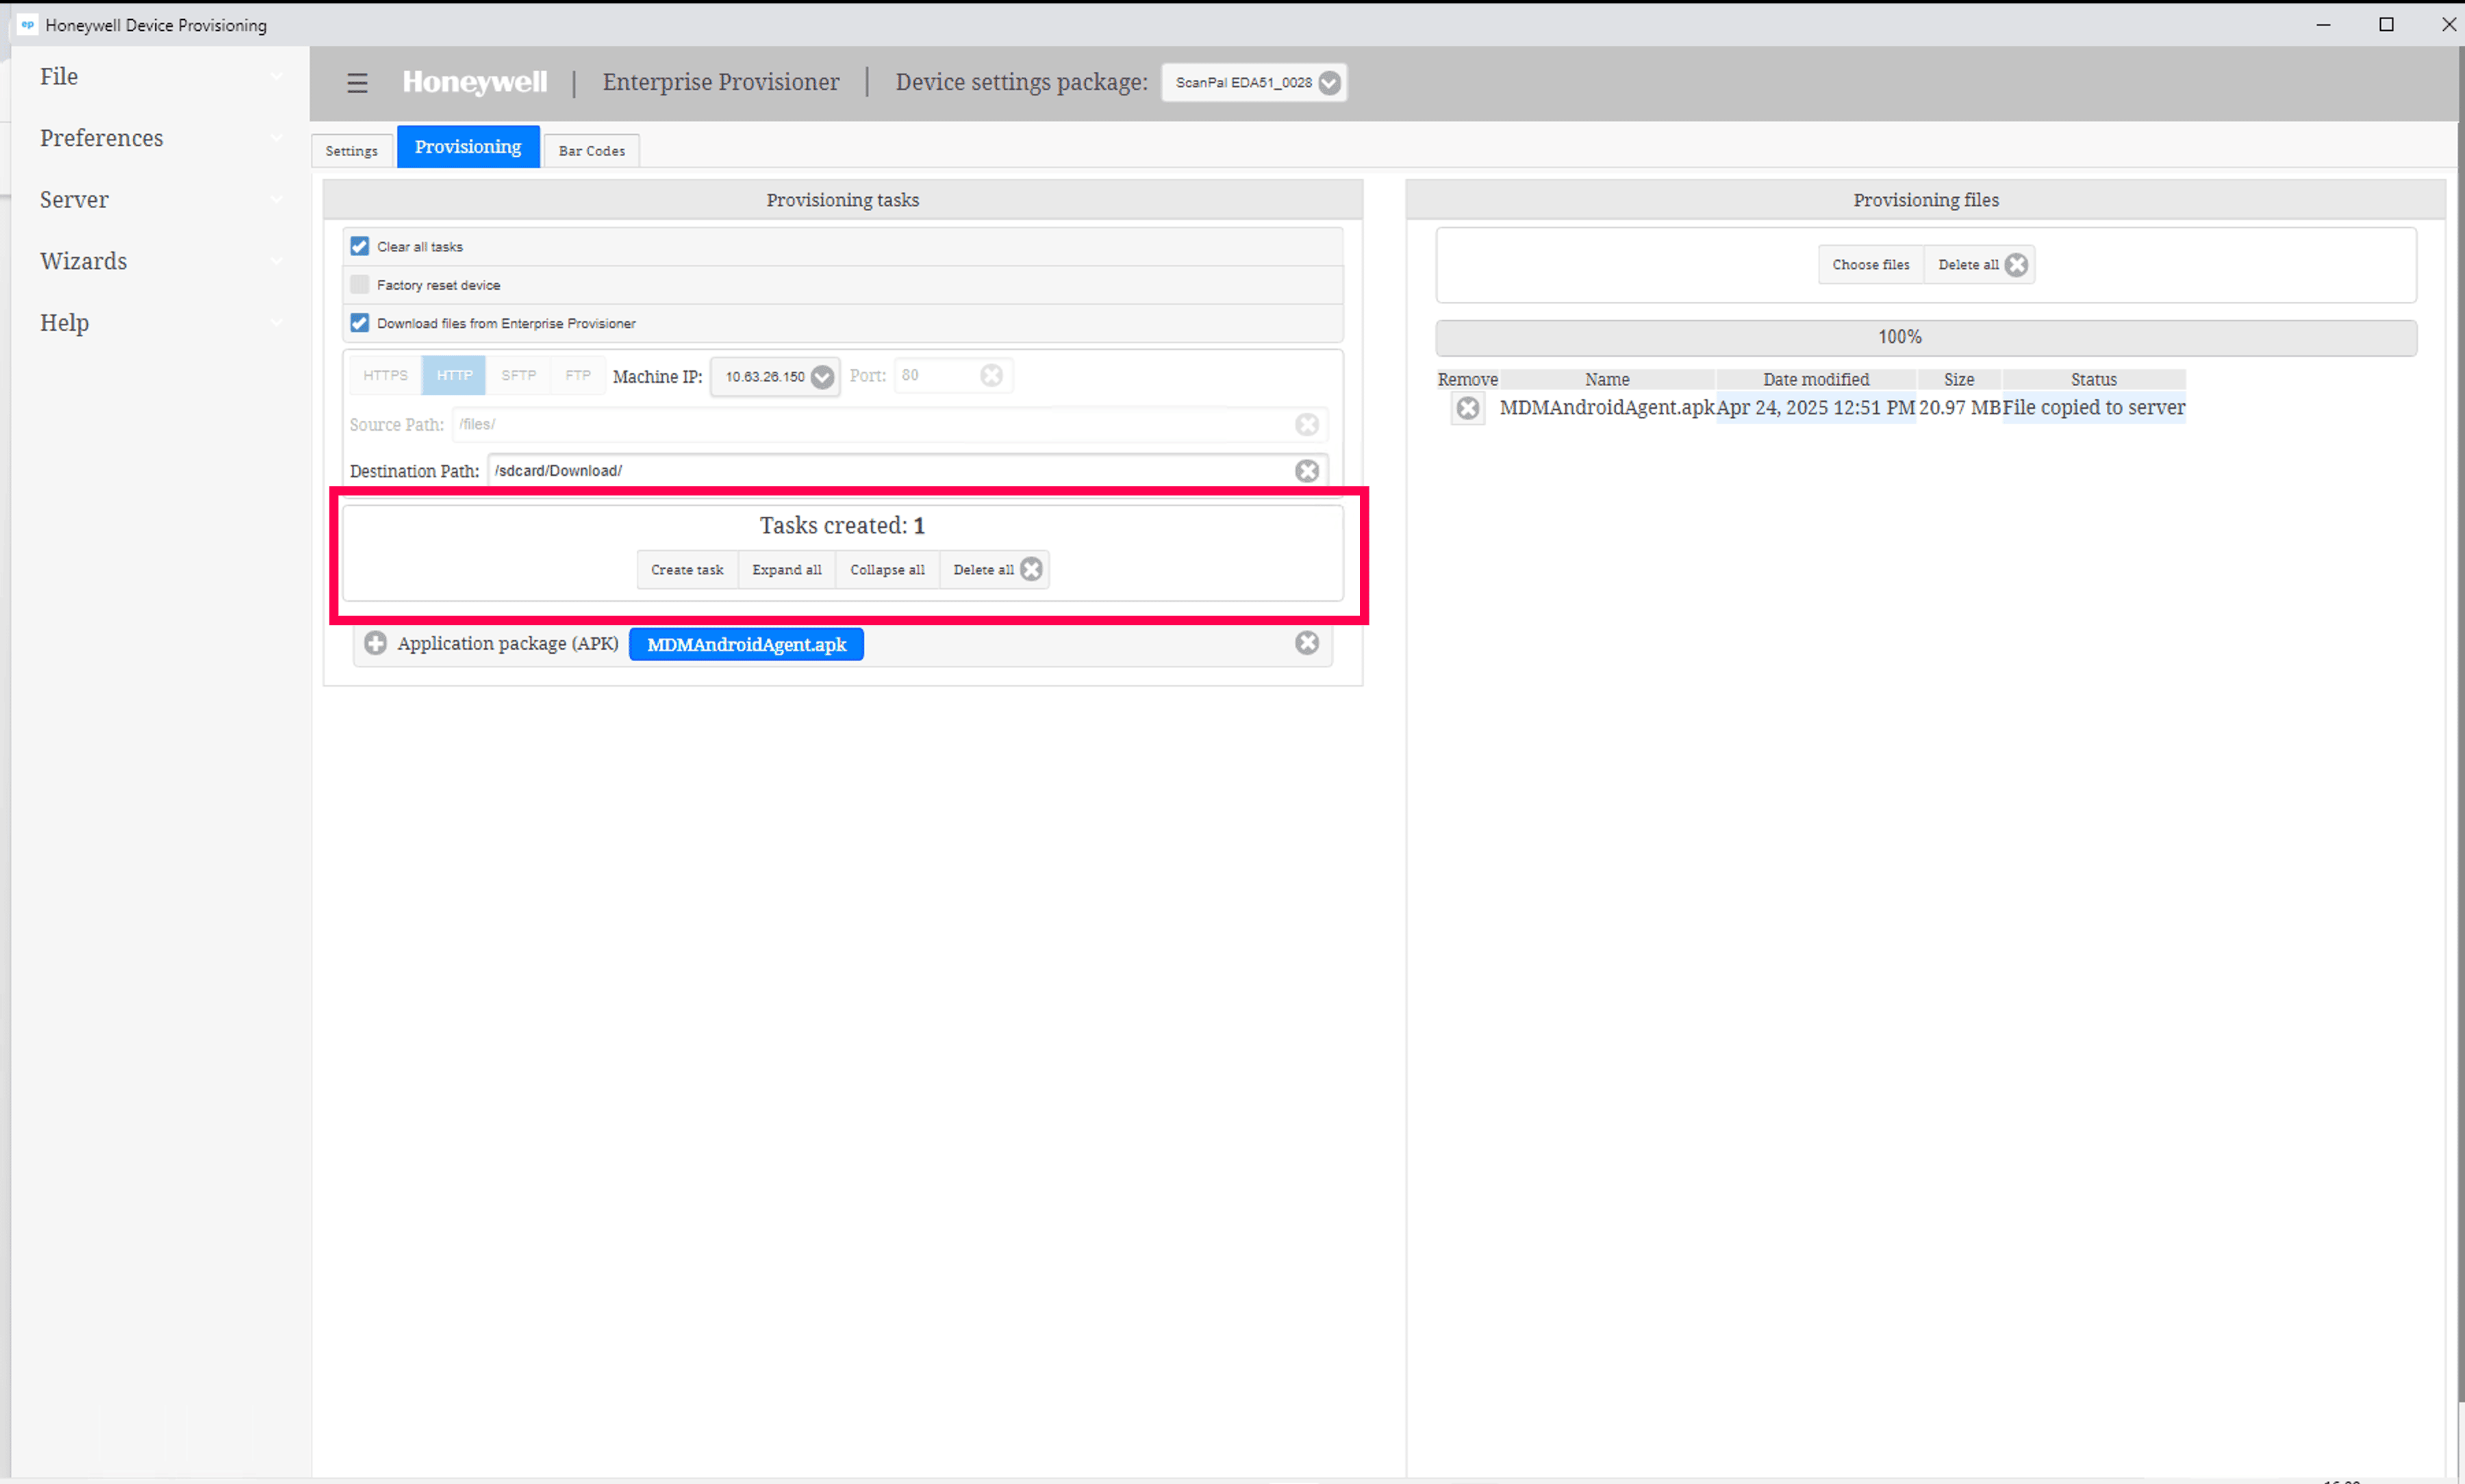
- The tool will handle downloading and installing the APK on the device during provisioning.
Note: You do not need to create a separate install task — the tool takes care of it once the APK is uploaded.
Method 2: Download APK via FTP Server
Before you begin:
You need to create two tasks — one to download the APK to the device’s local storage, and another to install it from local storage.
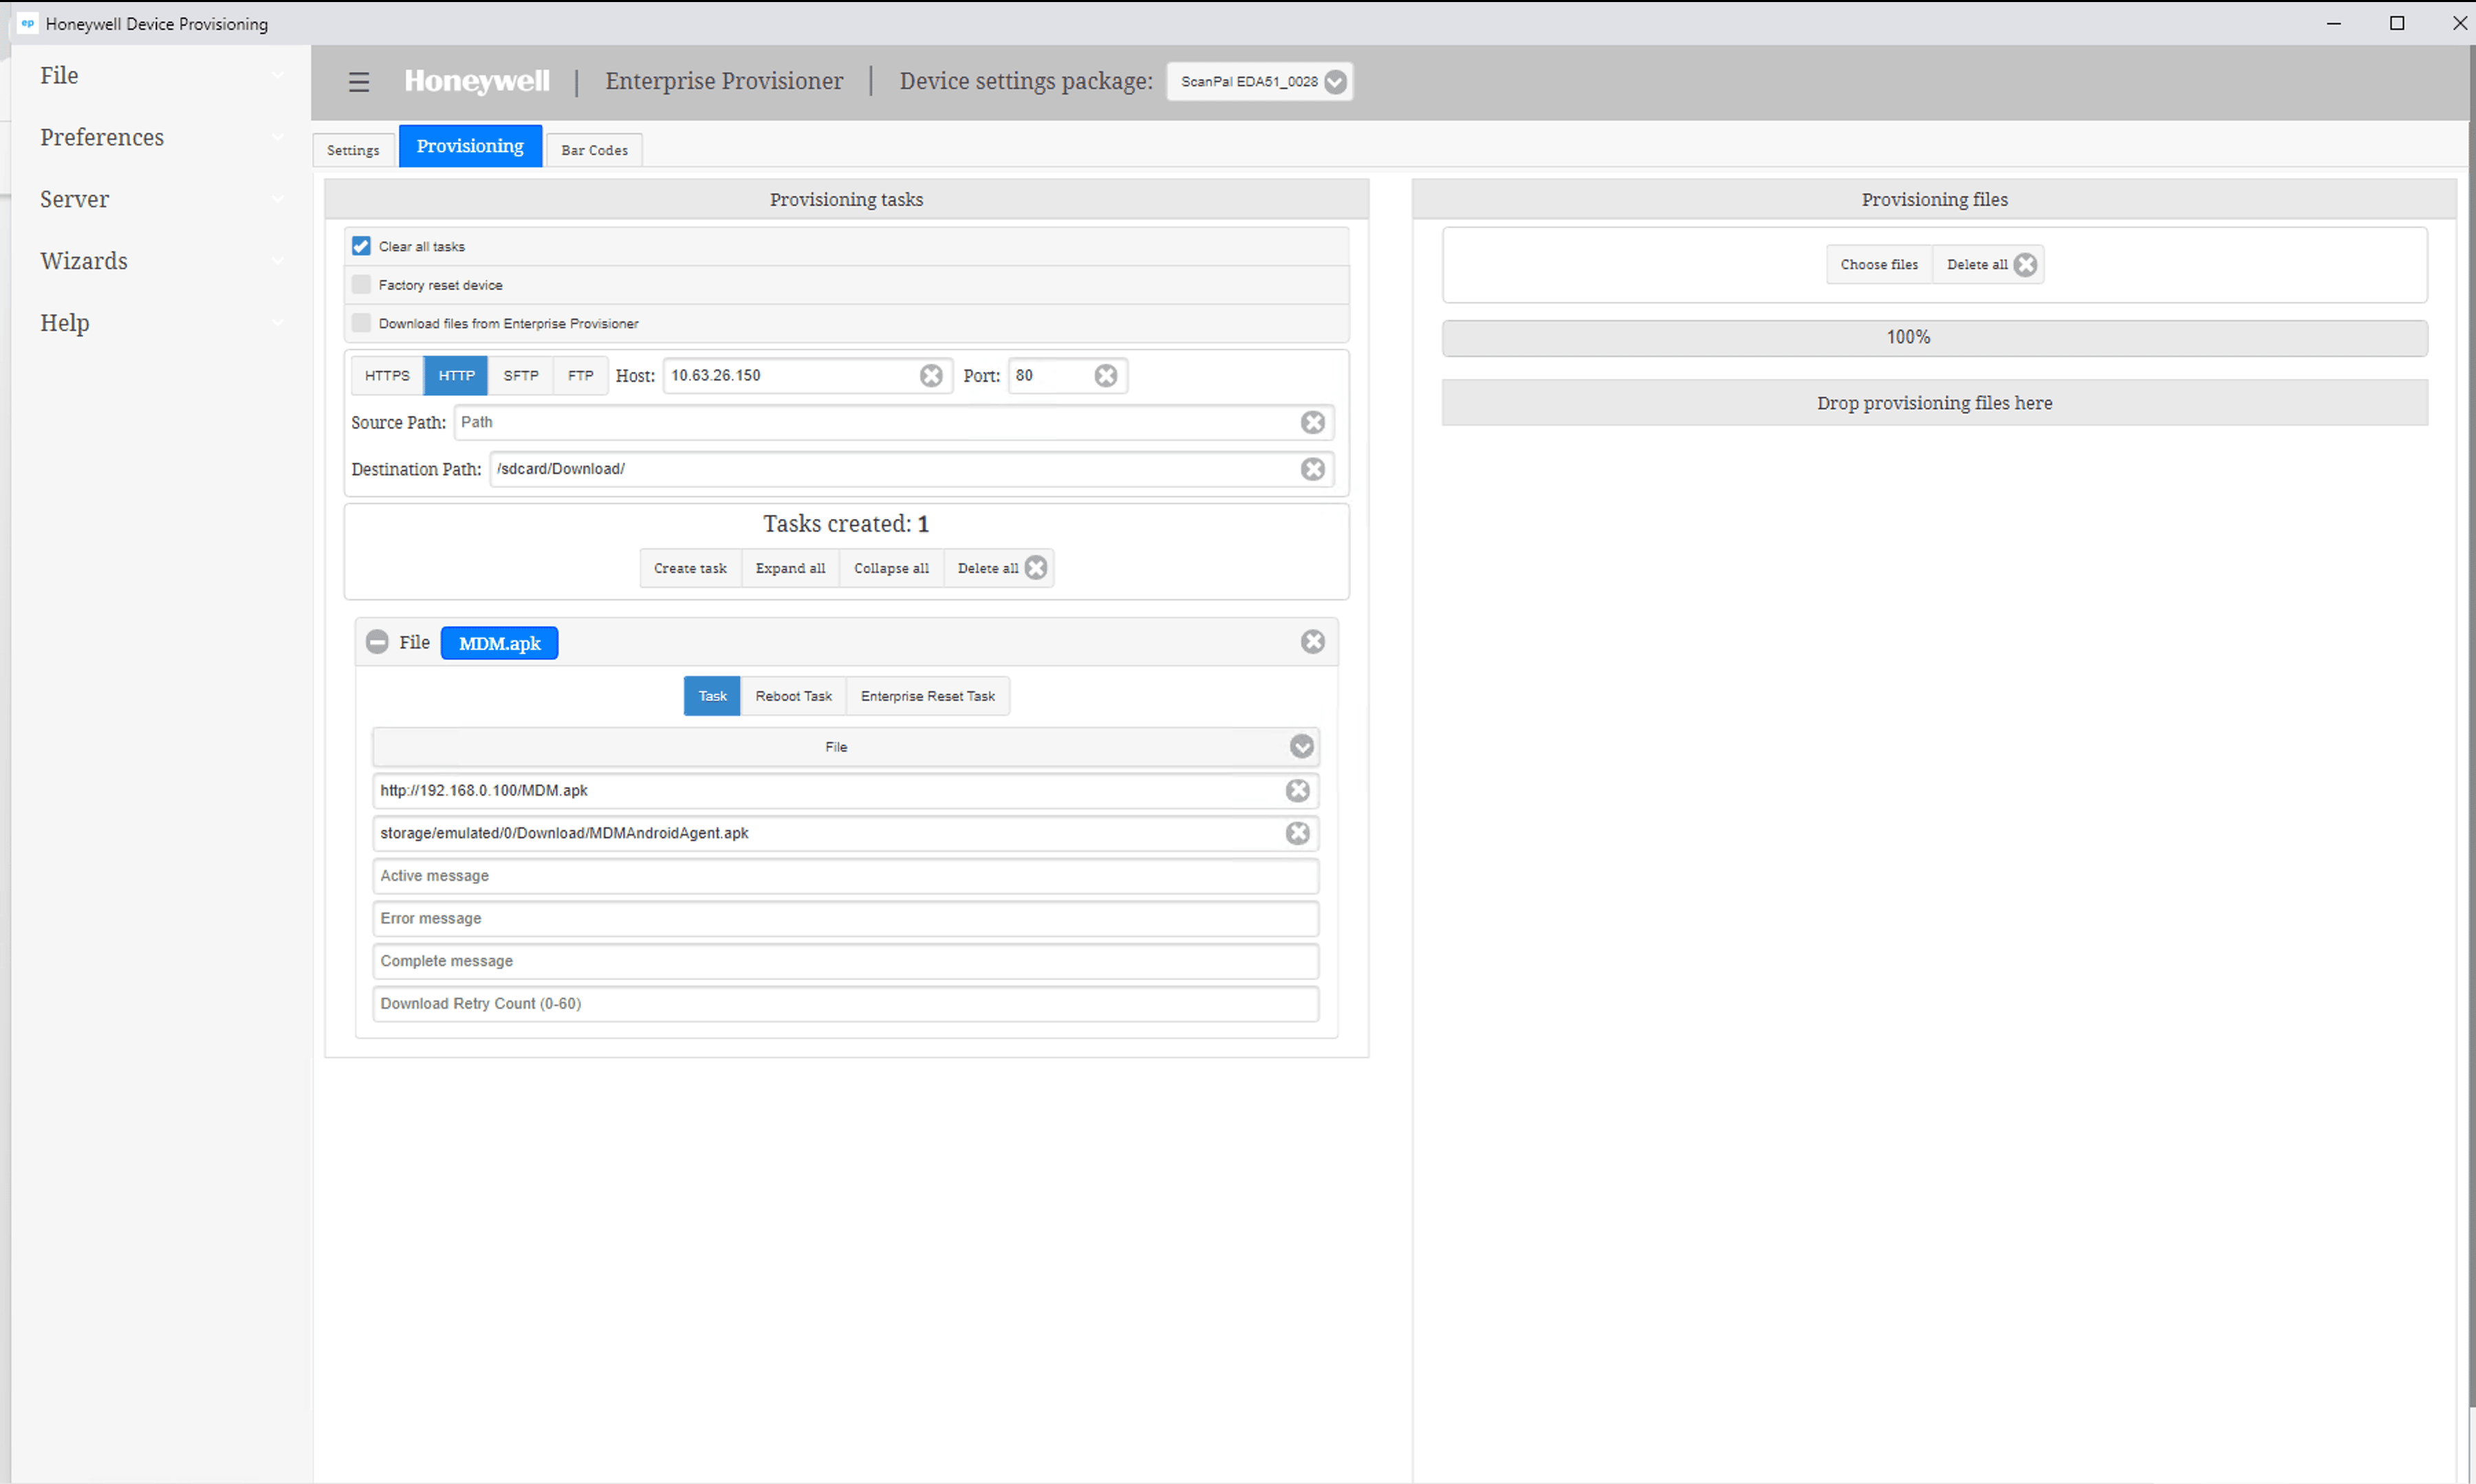
2.1 Create Download Task
- Under the Provisioning tab, click Create Task and select Files as the task type.
- In the Source Path field, enter the full URL to the APK file.
Example: http://192.168.0.100/MDMAndroidAgent.apk
(Make sure not to rename the APK file — use the exact name as shown) - In the Destination Path, specify where the file should be saved on the device.
Example: storage/emulated/0/Download/MDMAndroidAgent.apk
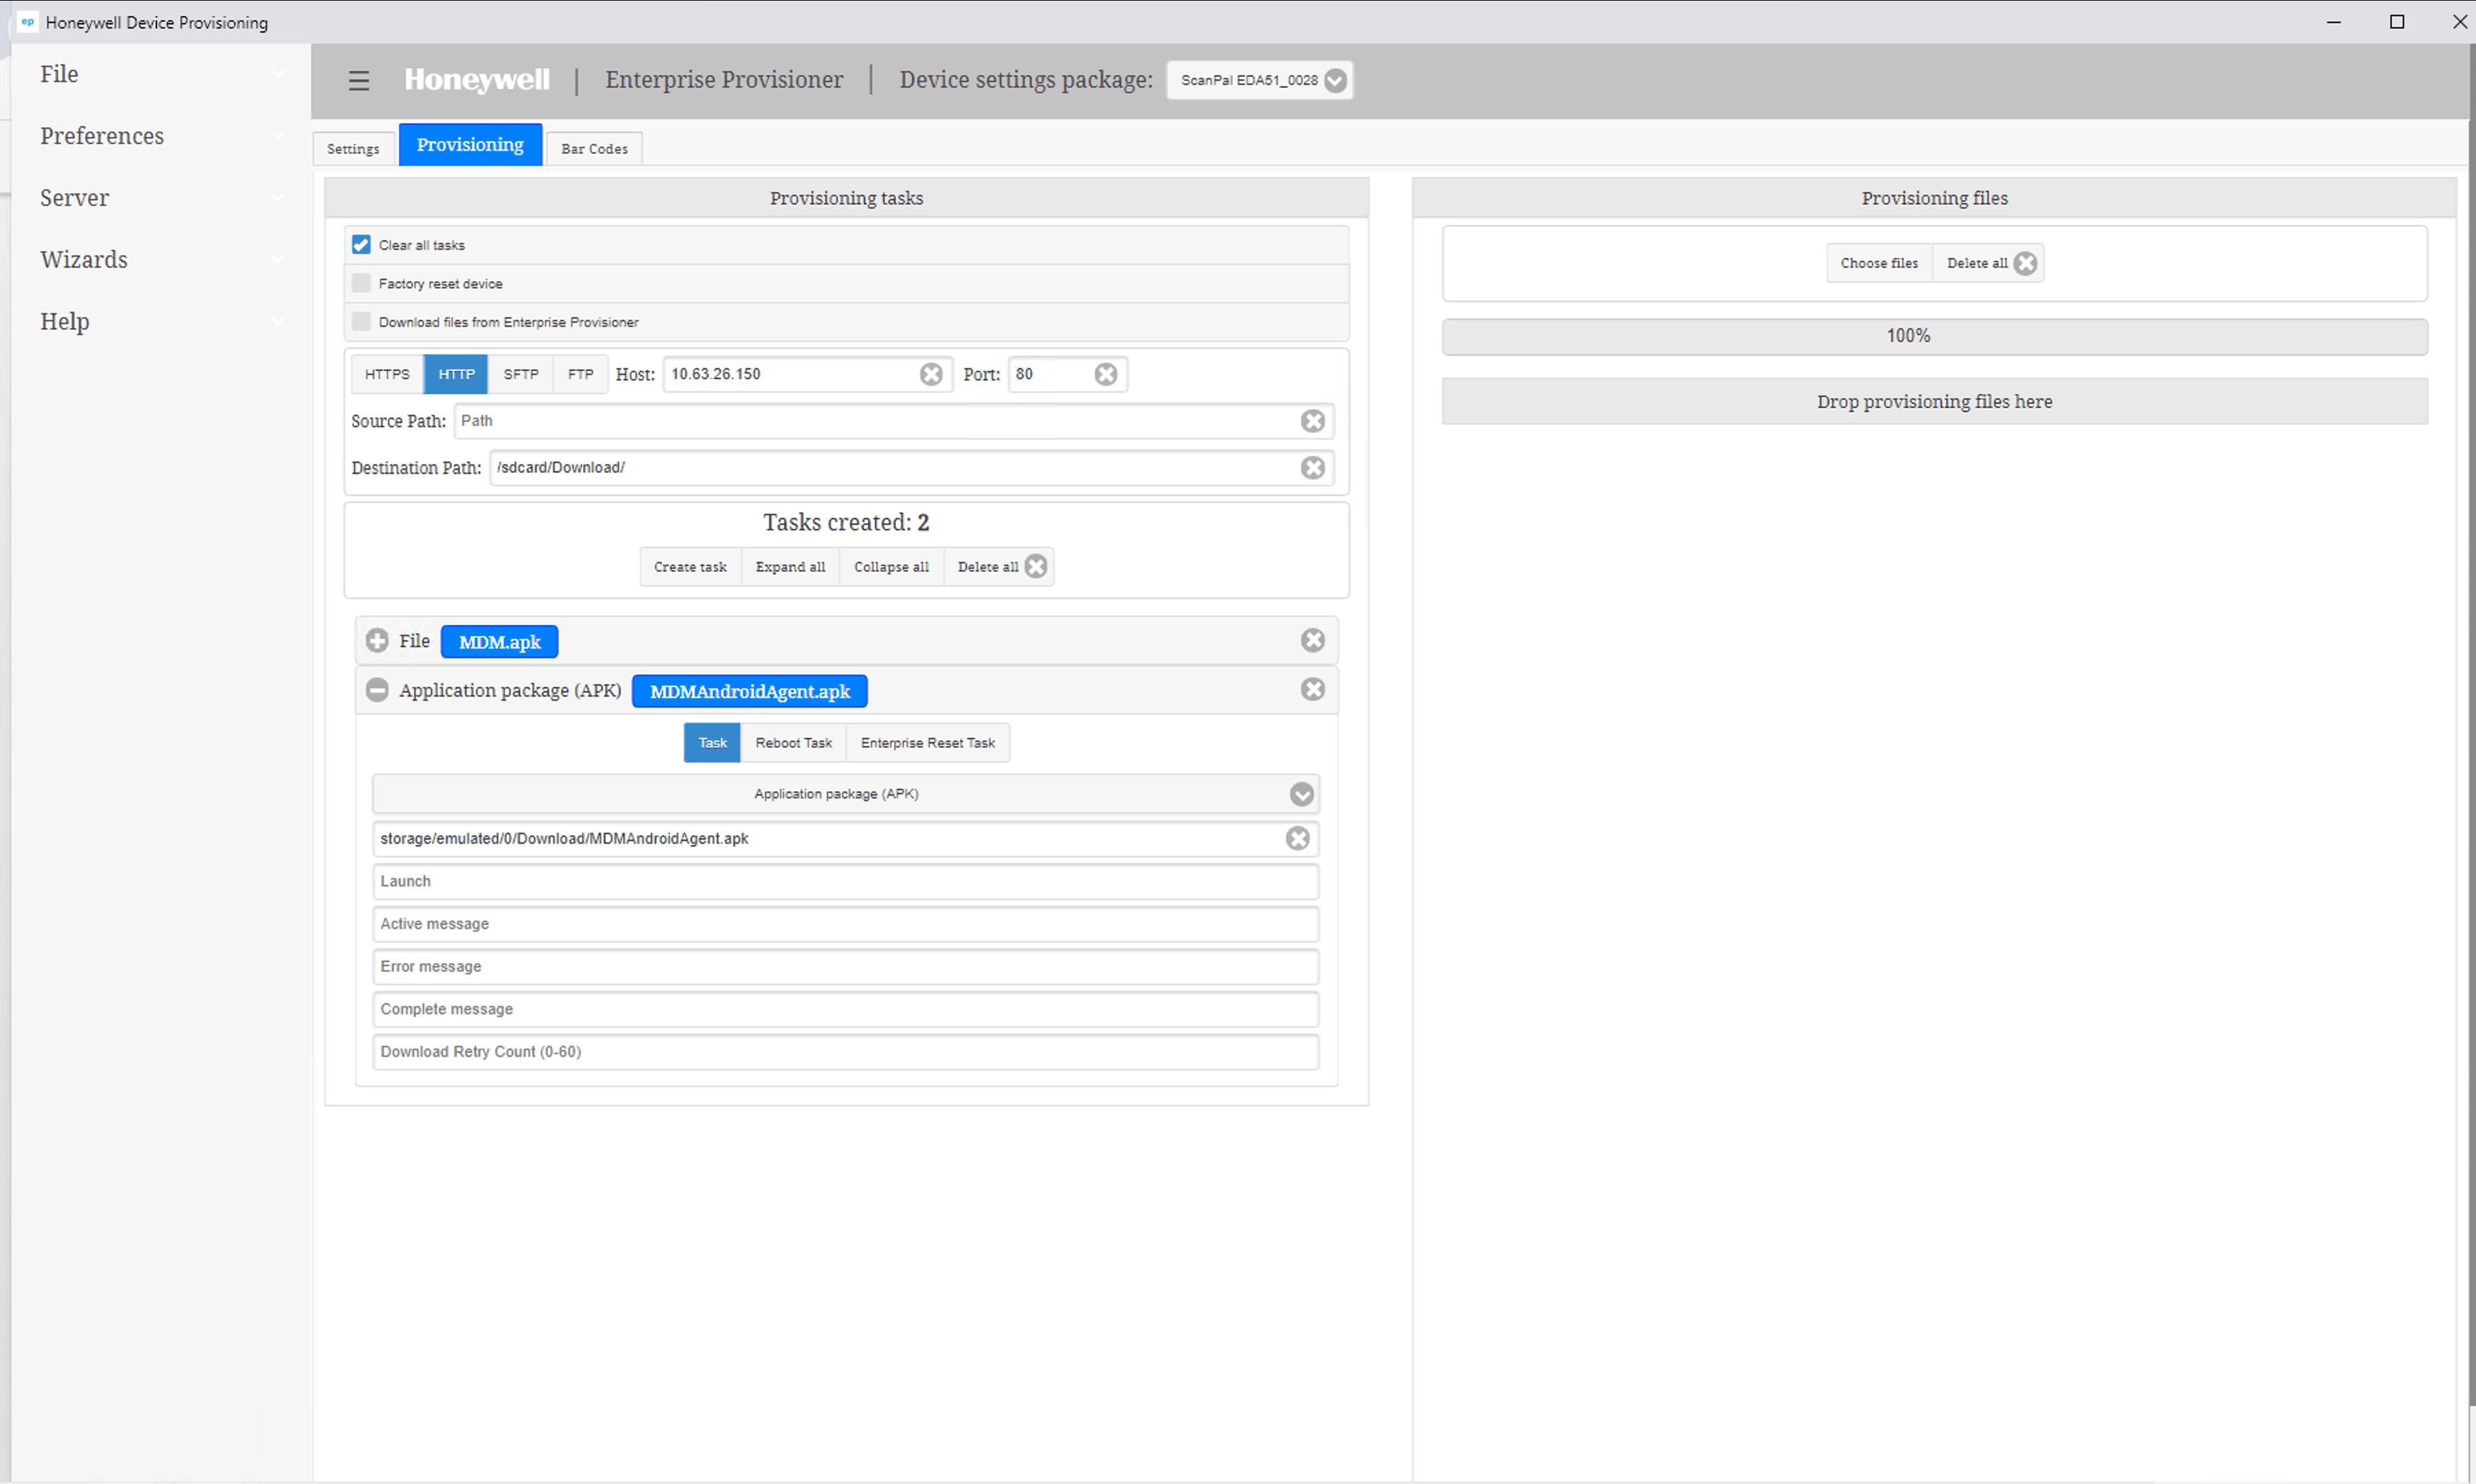
2.2 Add APK Install Task
- Again, click Create Task.
- Select Application package (APK).
- In the File path field, enter the exact destination path used earlier.
Example: storage/emulated/0/Download/MDMAndroidAgent.apk
Step 2: Set the MDM App as Device Owner
This step configures the installed MDM app to take device ownership, enabling full device management.
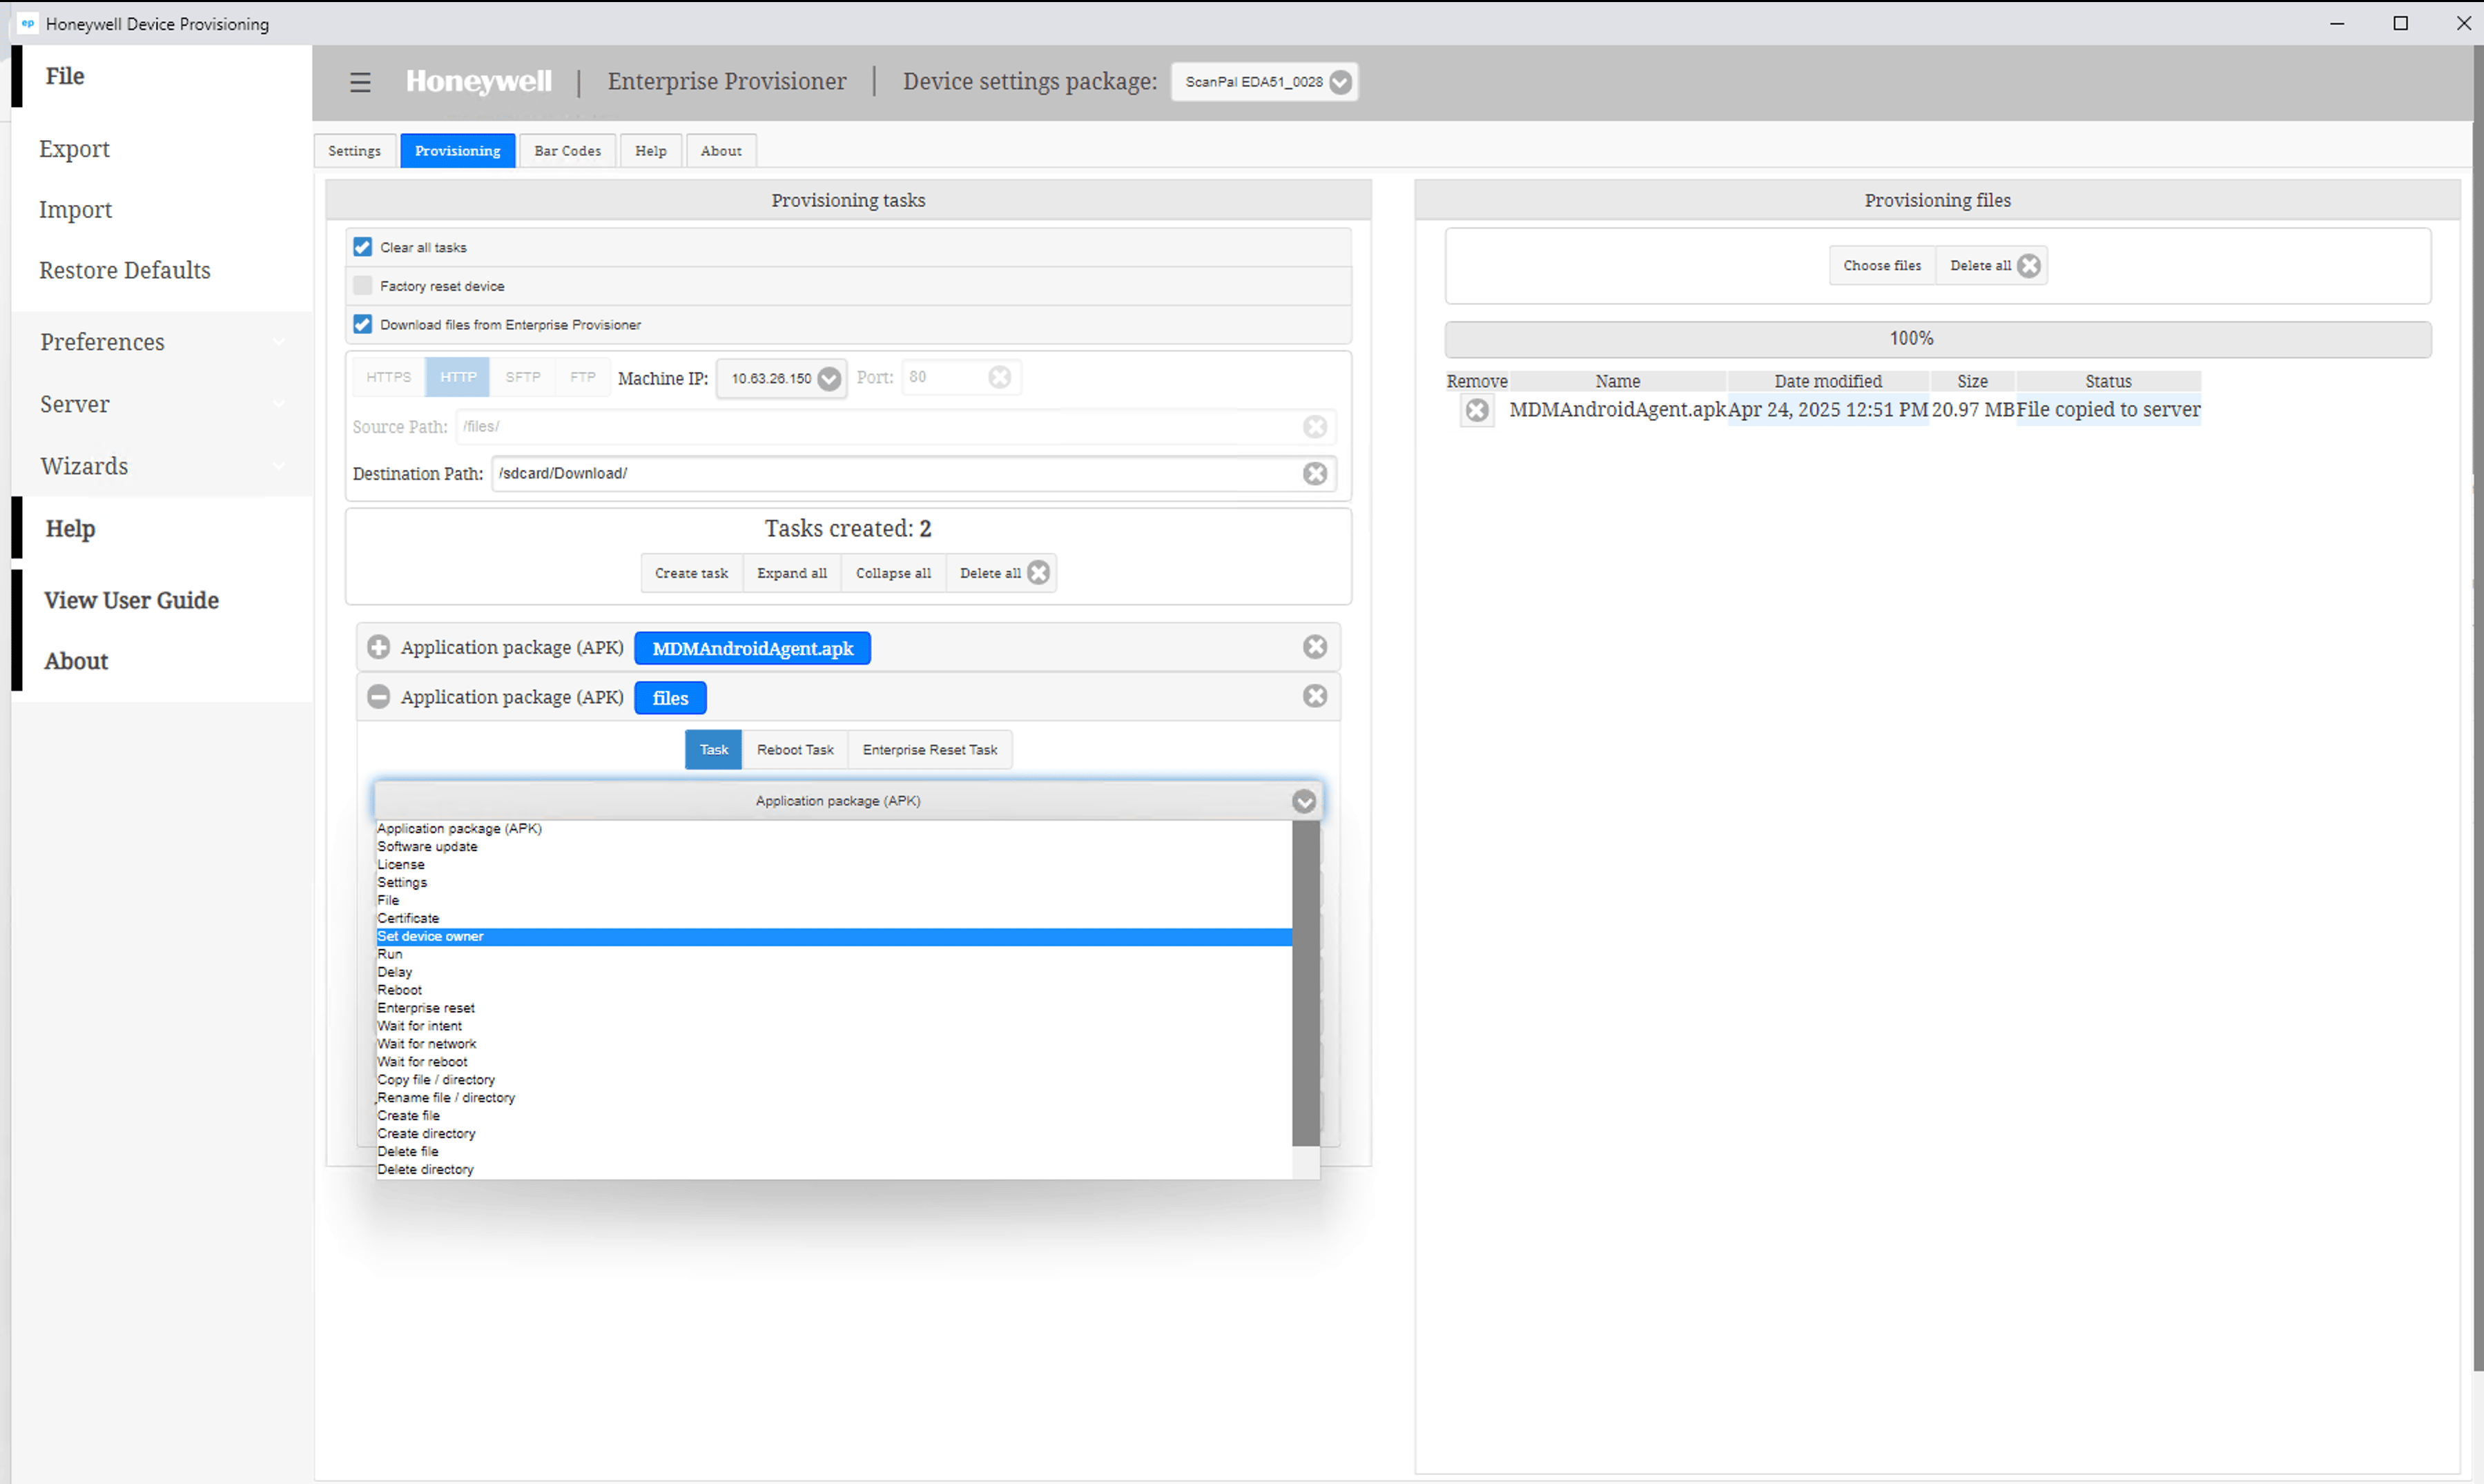
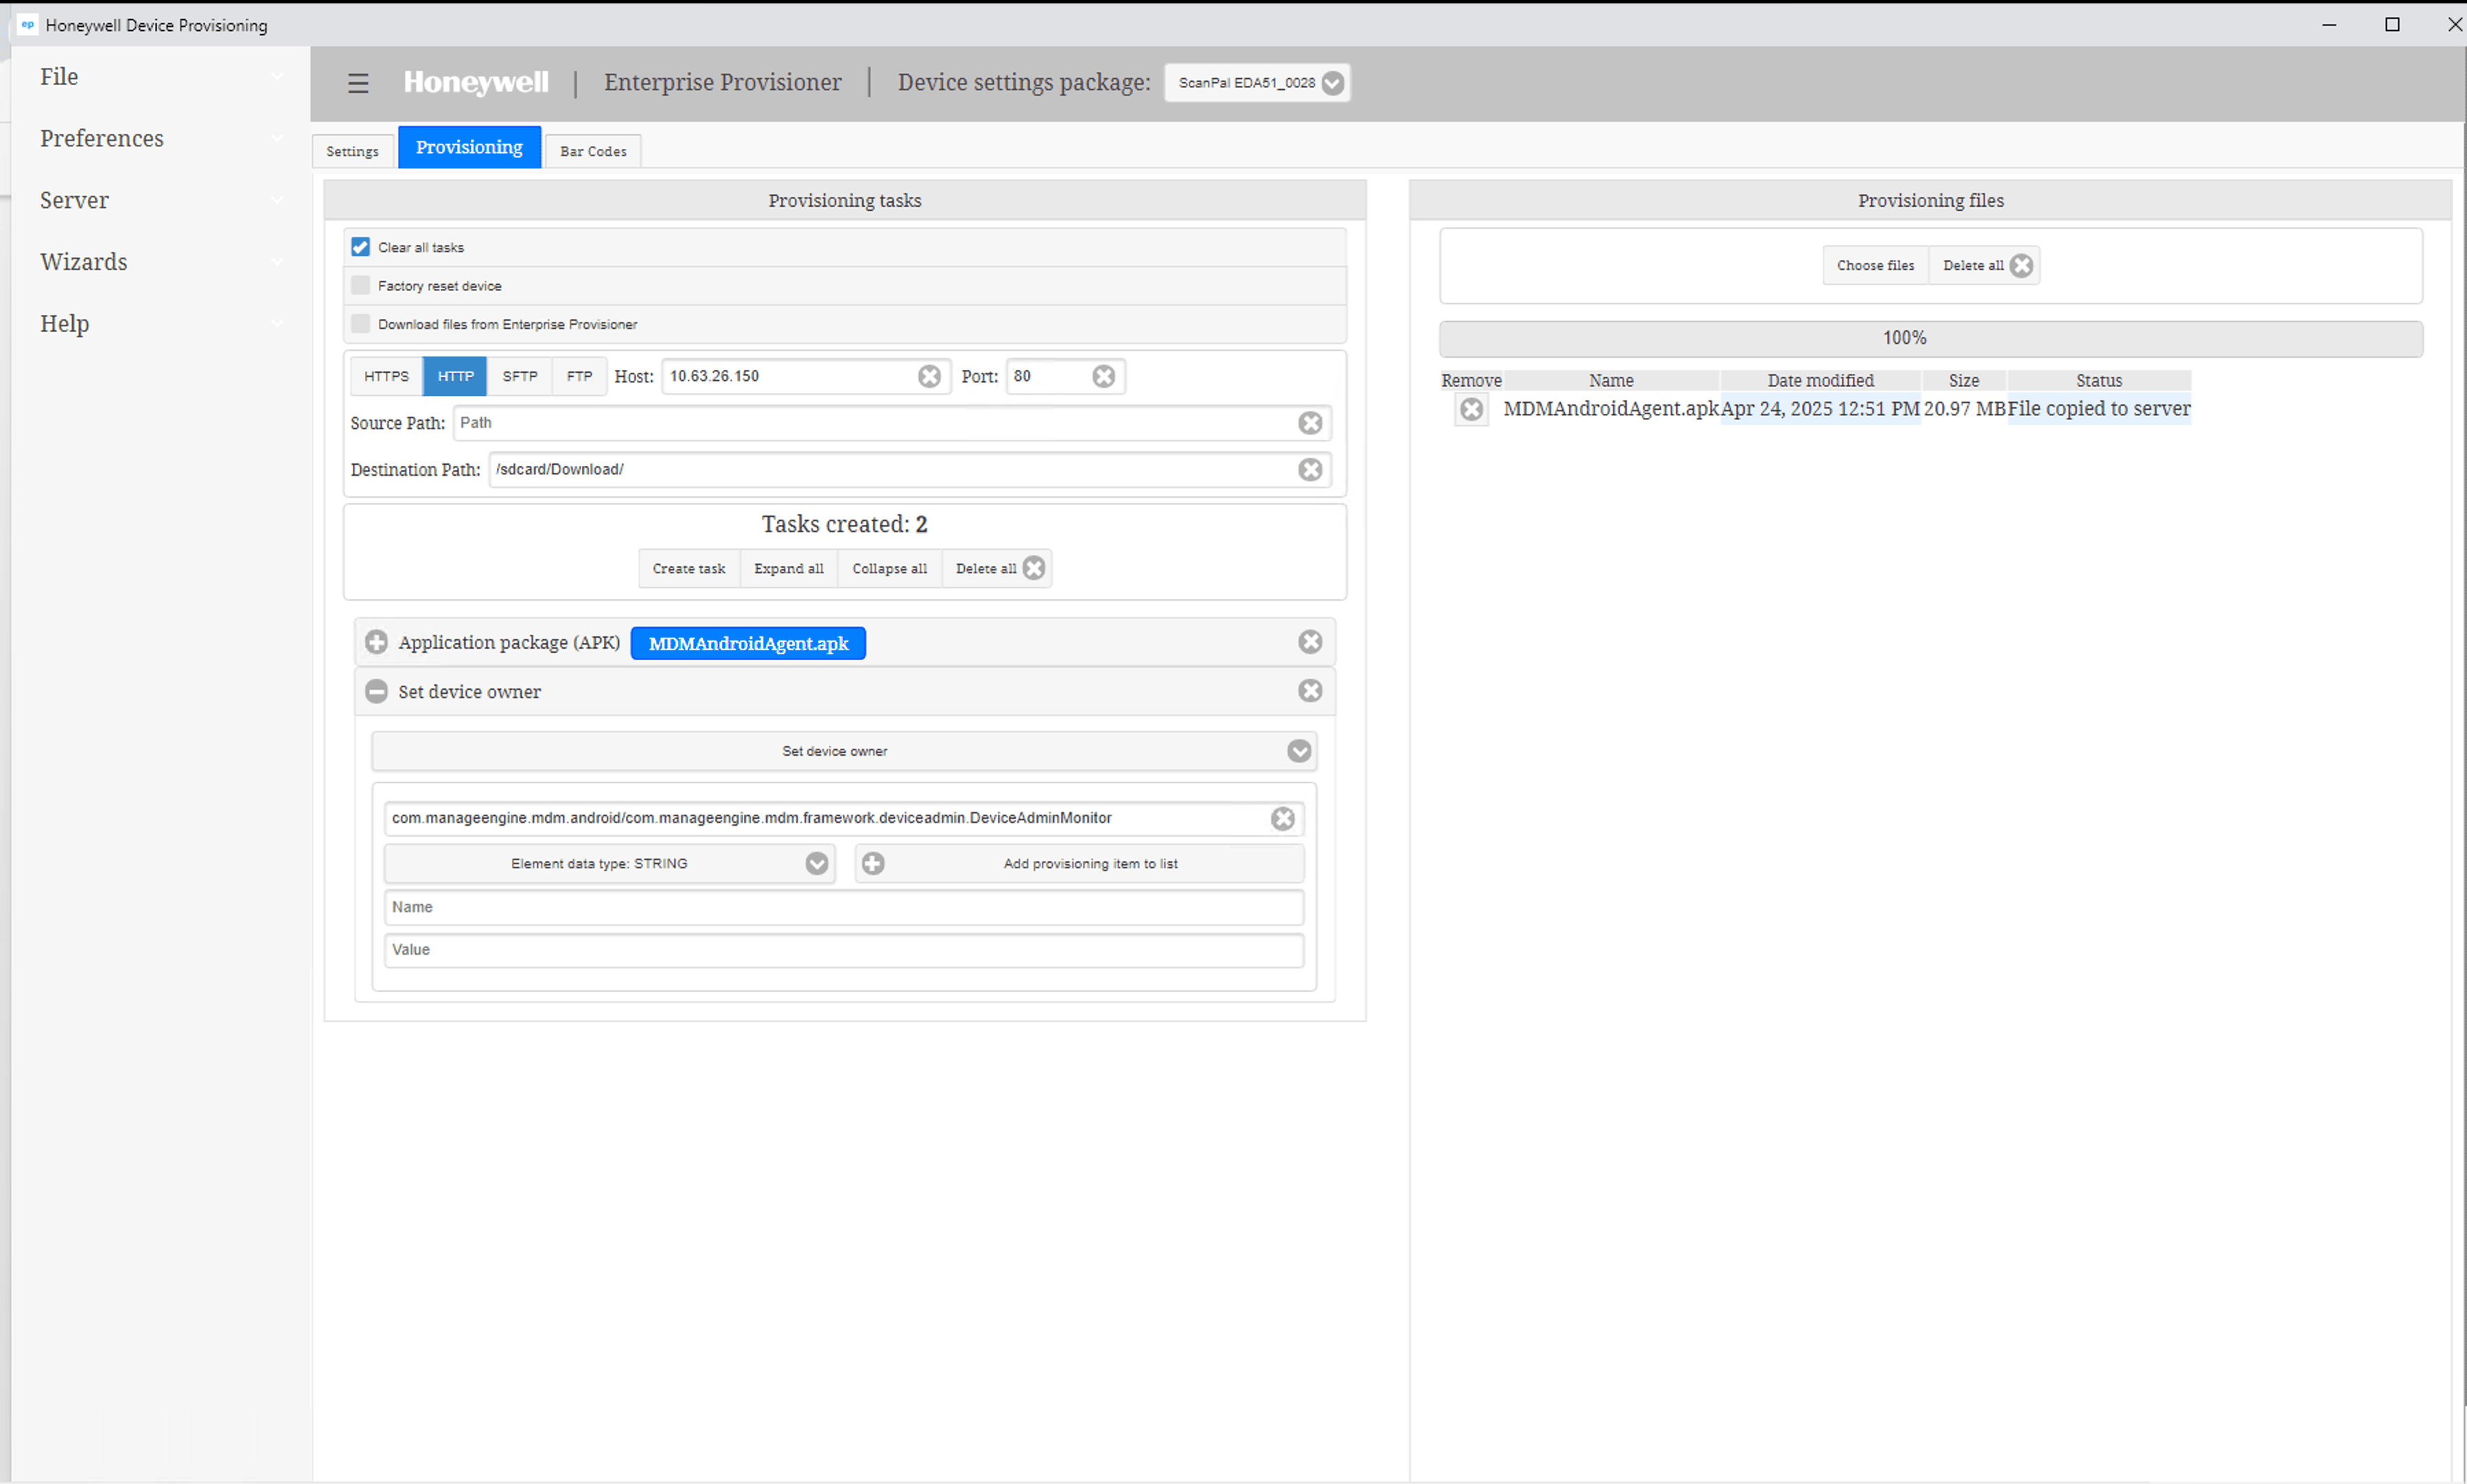
- Click Create Task.
- Choose Set device owner from the task type list.
- In the Component Name field, enter exactly:
com.manageengine.mdm.android/com.manageengine.mdm.framework.deviceadmin.DeviceAdminMonitor
(If you followed Download Method 2 (FTP), your configuration may include one additional task: File.)
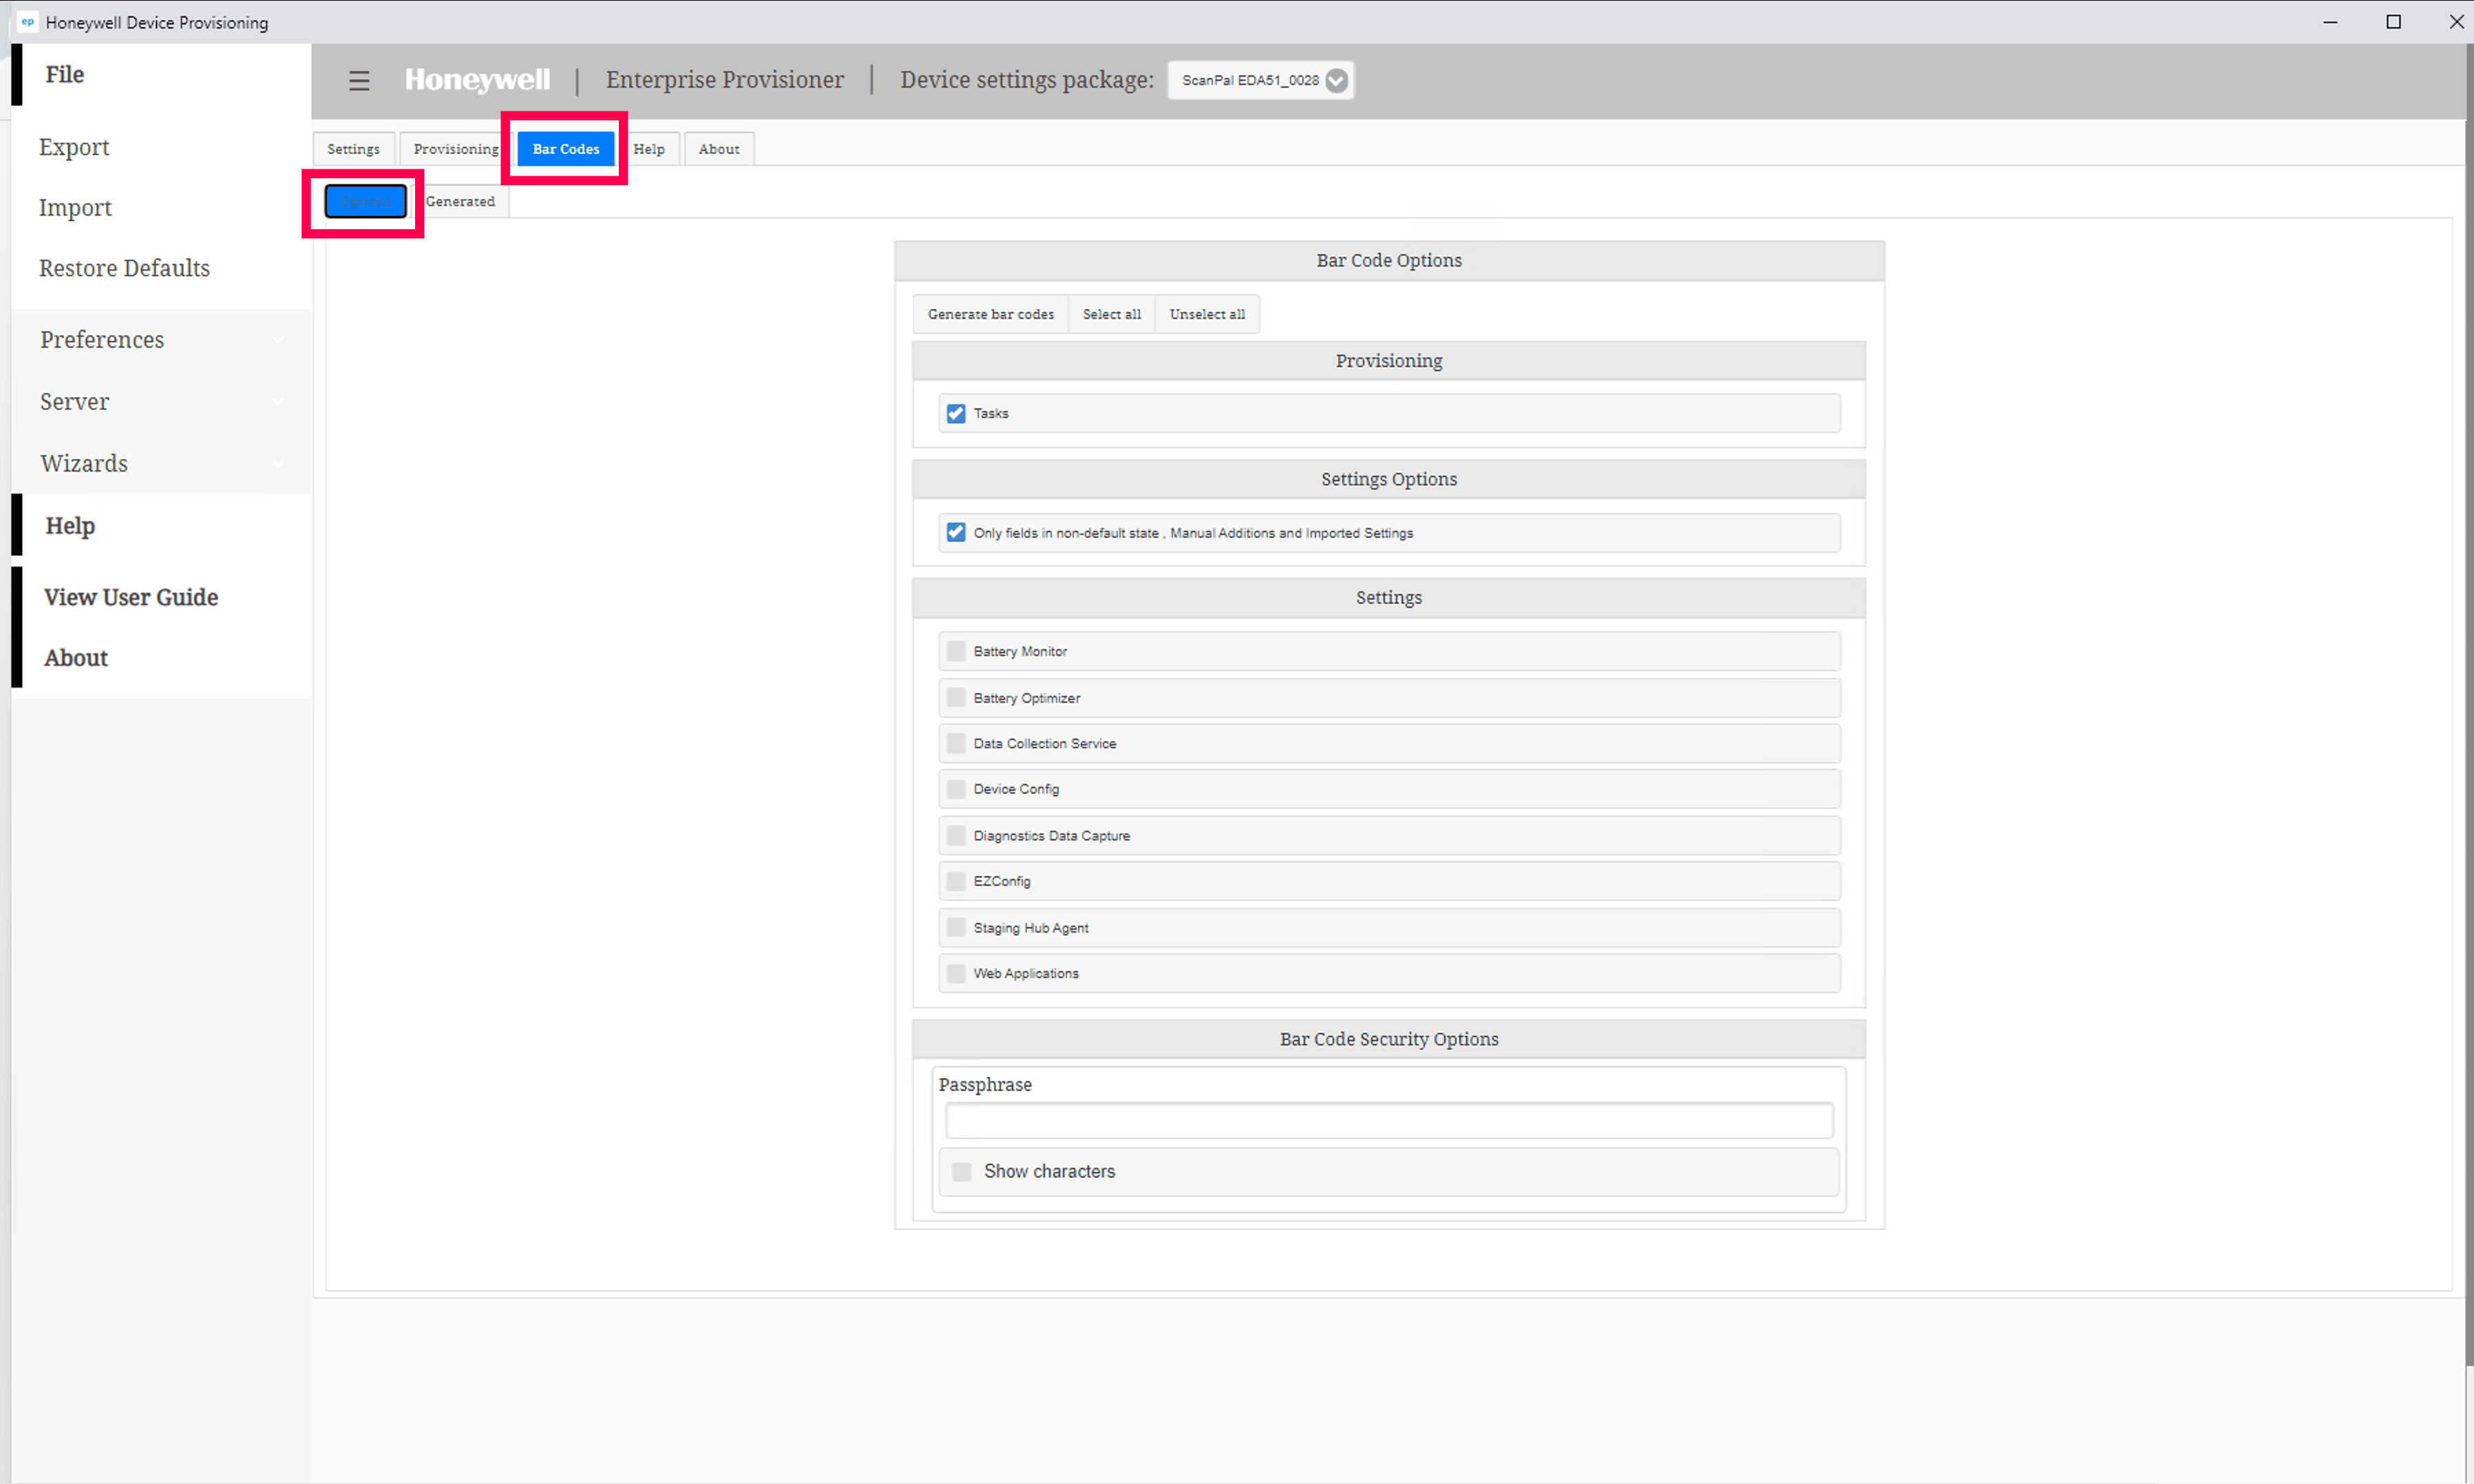
Step 3: Generate the Provisioning Barcode
Once all tasks are created, generate a barcode that the Honeywell device can scan to begin provisioning.
- Navigate to the Bar Codes tab at the top of the screen.
- Under Options, ensure the Tasks checkbox is selected so provisioning tasks are included.
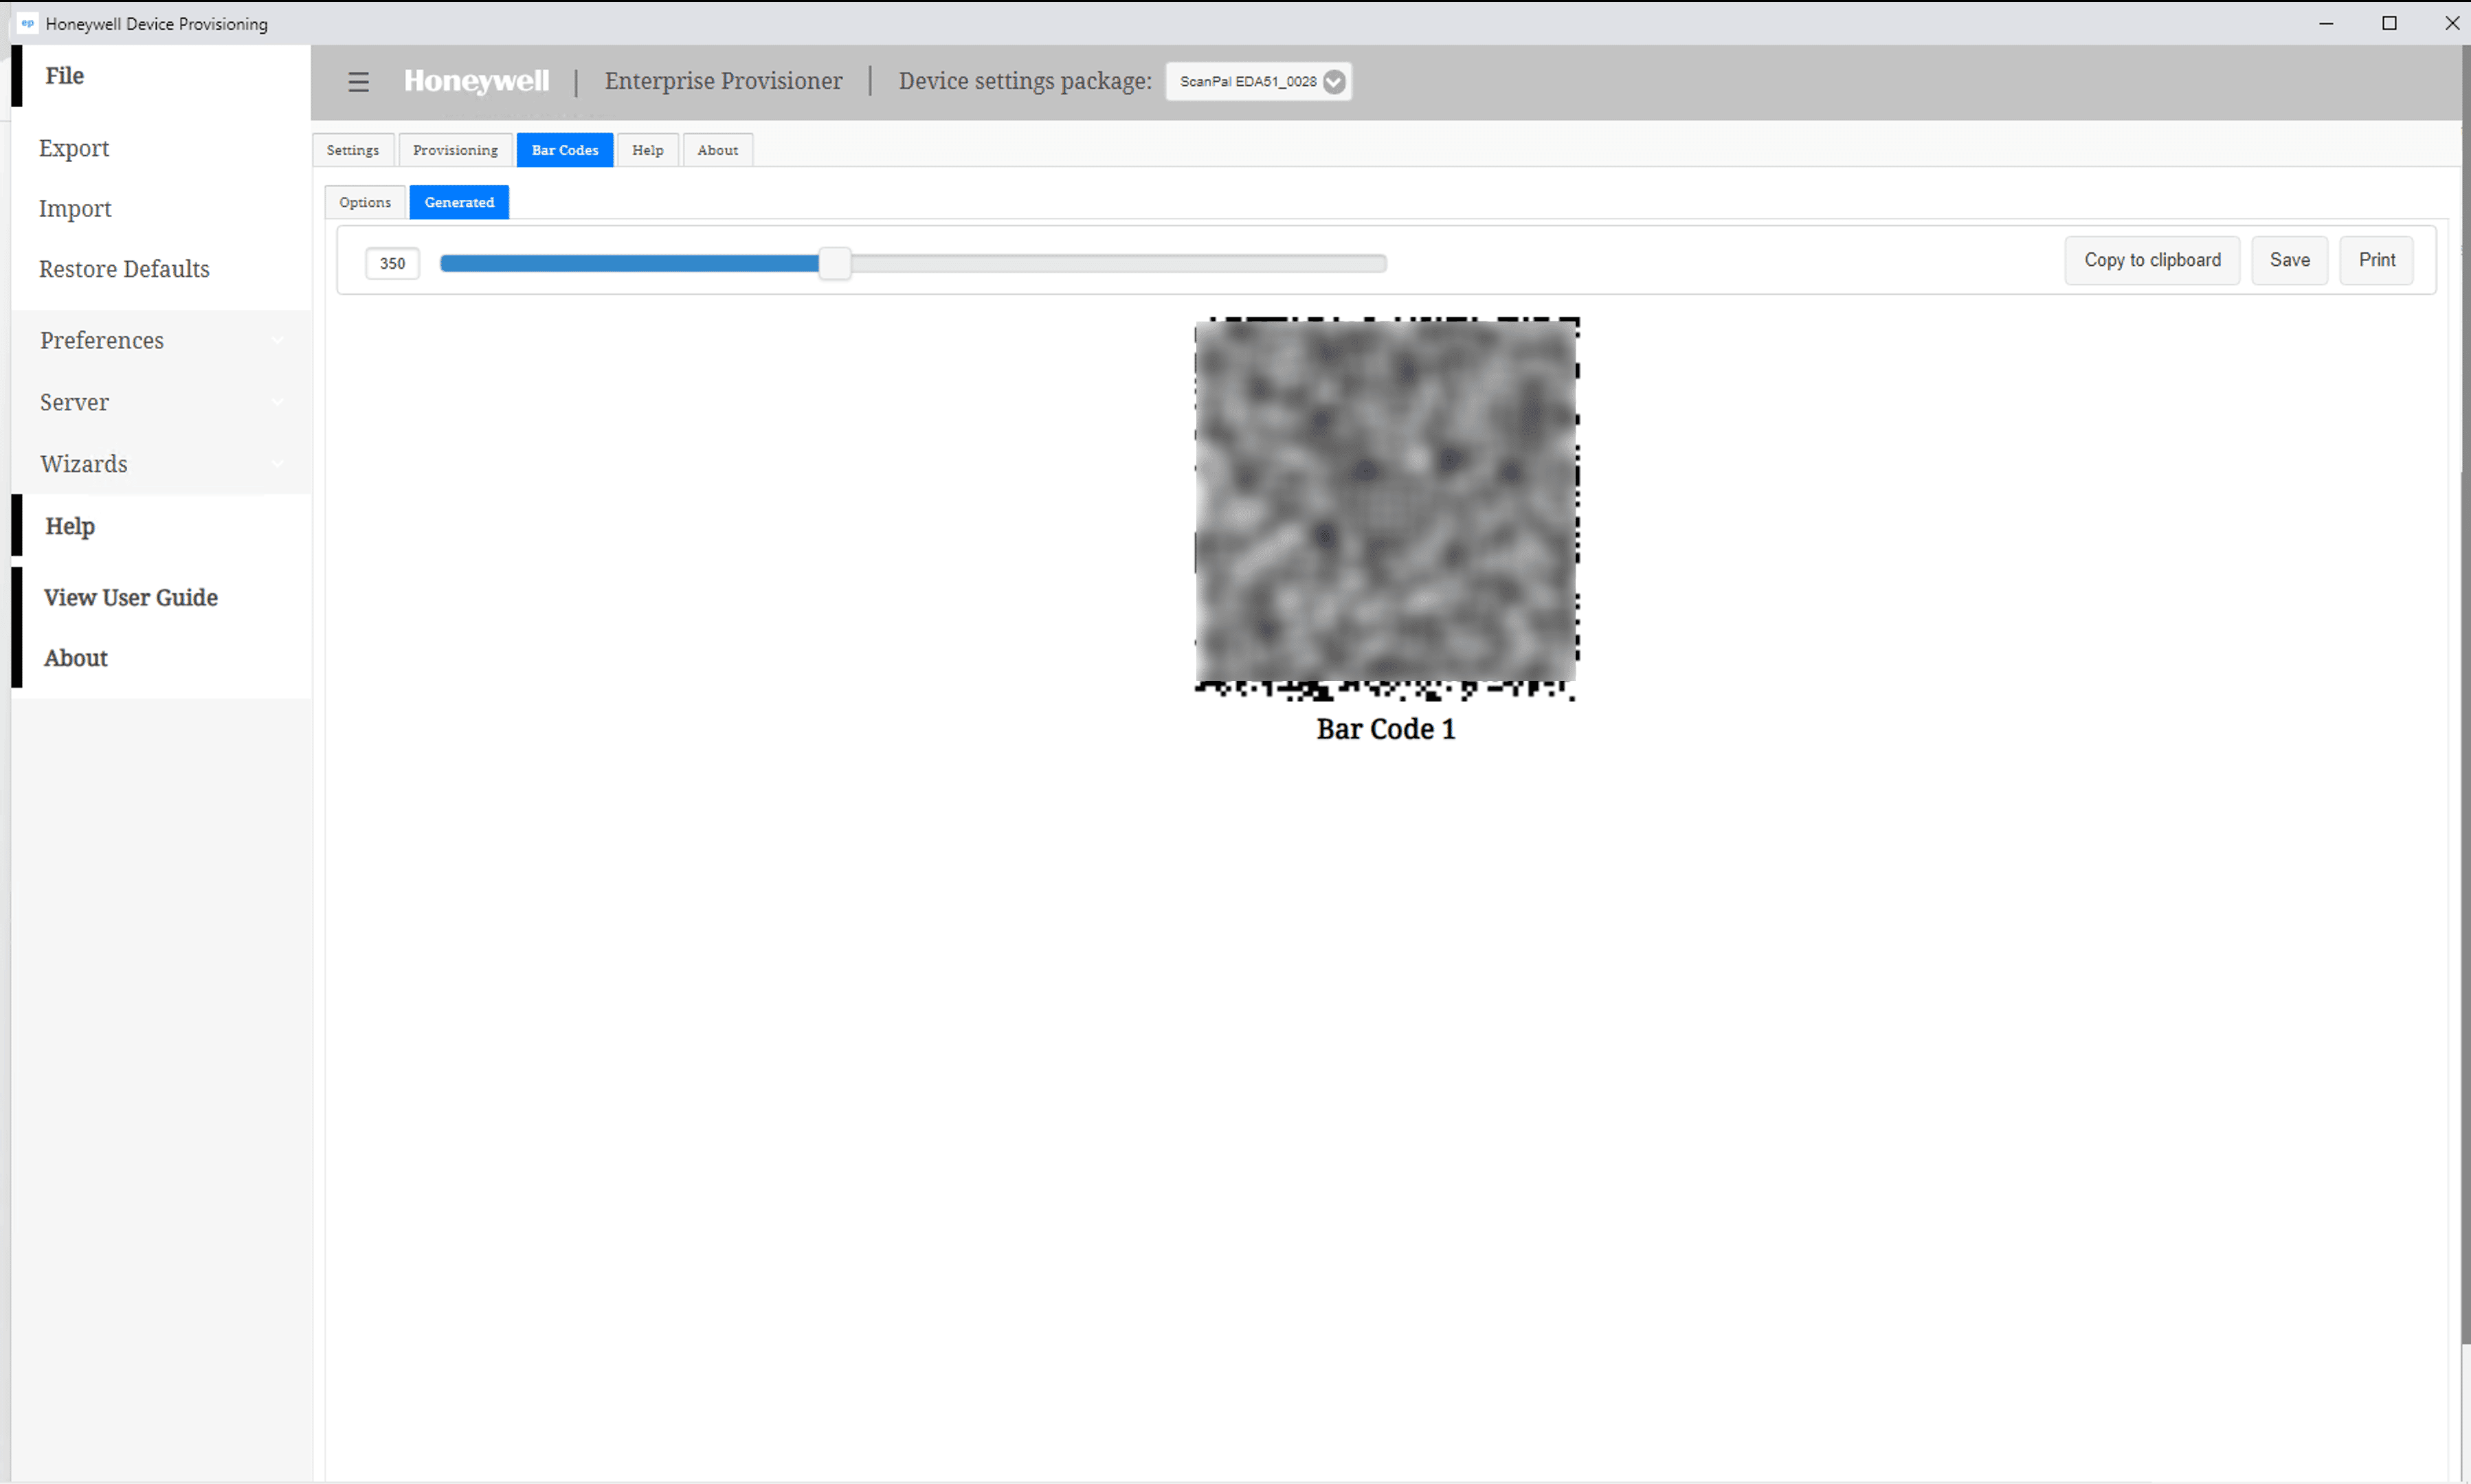
- Click Generate bar codes. The barcode appears in the Generated tab.
- You can print, copy, or save it.
Step 4: Scan the Barcode on the Device
Use the barcode to apply all provisioning steps to the Honeywell device.
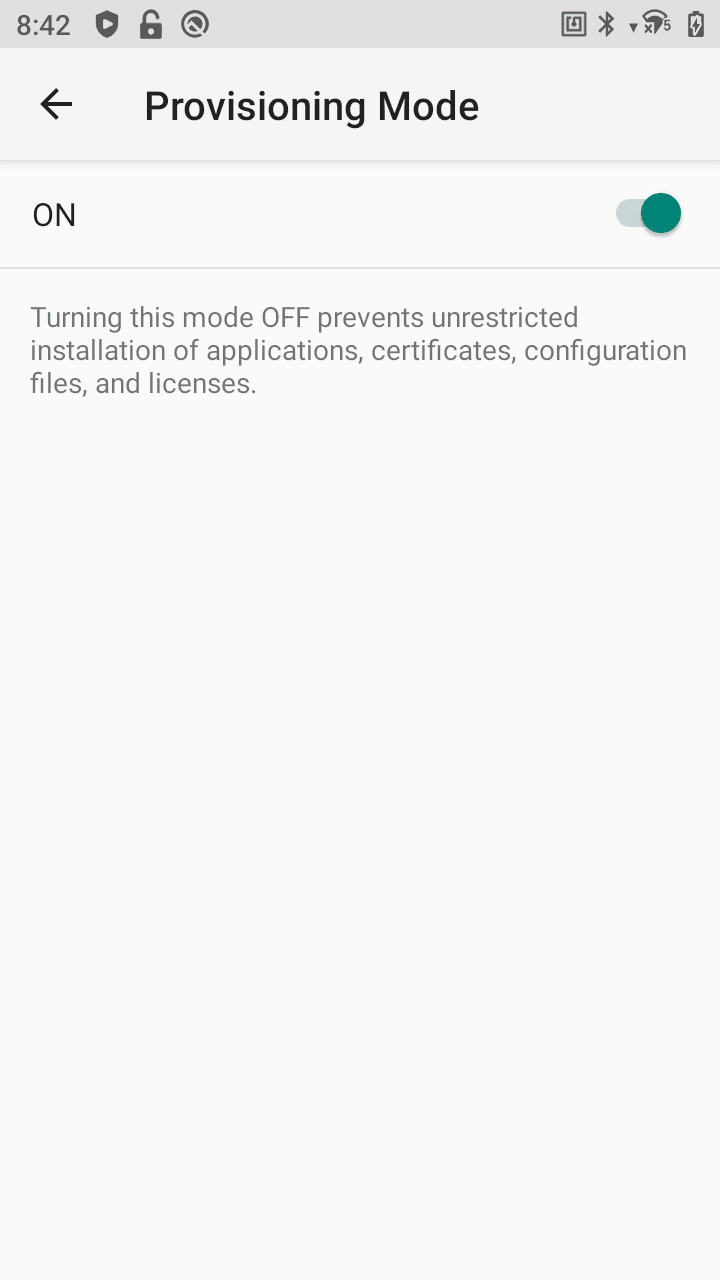
Before scanning, ensure that Provisioning Mode is turned ON.
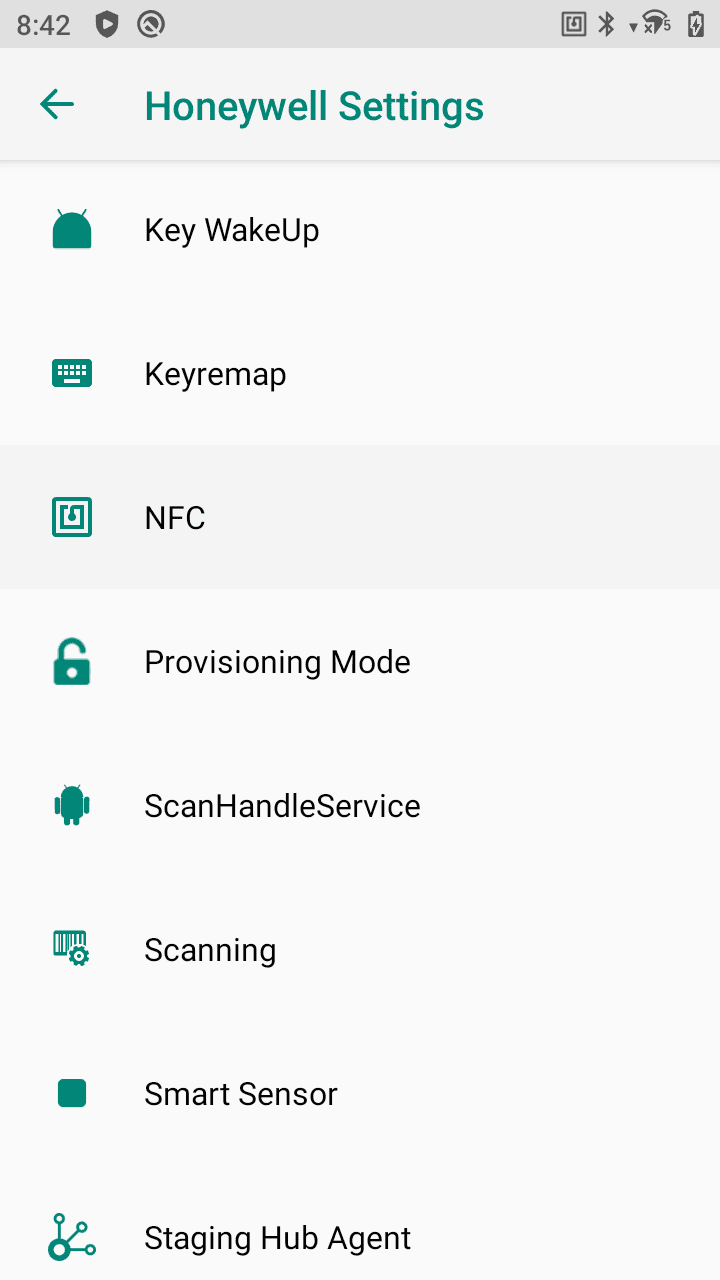
- On the device, go to:
Settings > Honeywell Settings > Provisioning Mode
- Turn ON the Provisioning Mode.
- Scan the barcode displayed in the provisioning tool.
- The device will be enrolled in the MDM Server successfully.