Create New Users
You can create users in OpManager and provide required privileges to them. The option to create users is available only for the admin login account or those accounts which have 'Full Control' privilege. (The account with 'Full Control' privilege here refers to an Administrator user with access to all devices with all the AddOn Modules enabled.)
Administrator User: Administrator Users have unrestricted access to perform read/write operations in OpManager. They add/remove devices, troubleshoot issues, change configurations and more without any limitations i.e., they have complete access.
Operator User: Operator Users have read-only/ restricted access in OpManager. They can be granted further access by the Administrator User.
Custom User: Custom user roles allow administrators to customize user access for different modules in OpManager. The different levels of access that can be provided in OpManager for users through Custom Roles include: Read/Write, Read and No Access. To learn how to create Custom User Roles, click here.
Note: (Applicable only for OpManager EE and OpManager Nexus EE)
From version 126332, users created in the Central server will automatically sync with all probe servers. When creating a user in the Central UI, you can specify the probe servers where the user will have login access. The options are given below,
- None: User is synced to all probes, but login access is disabled.
- All probes: User is synced and granted login access on all probes.
- Selected probes: User is synced to all probes, but login access is restricted to the selected probes only.
If a user with the same name already exists on a probe server, the synced username will be suffixed with "_noc", and login access to that specific probe will be disabled.
For more information on creating a user in the Enterprise Edition, click here.
Know more about the various user roles in OpManager.
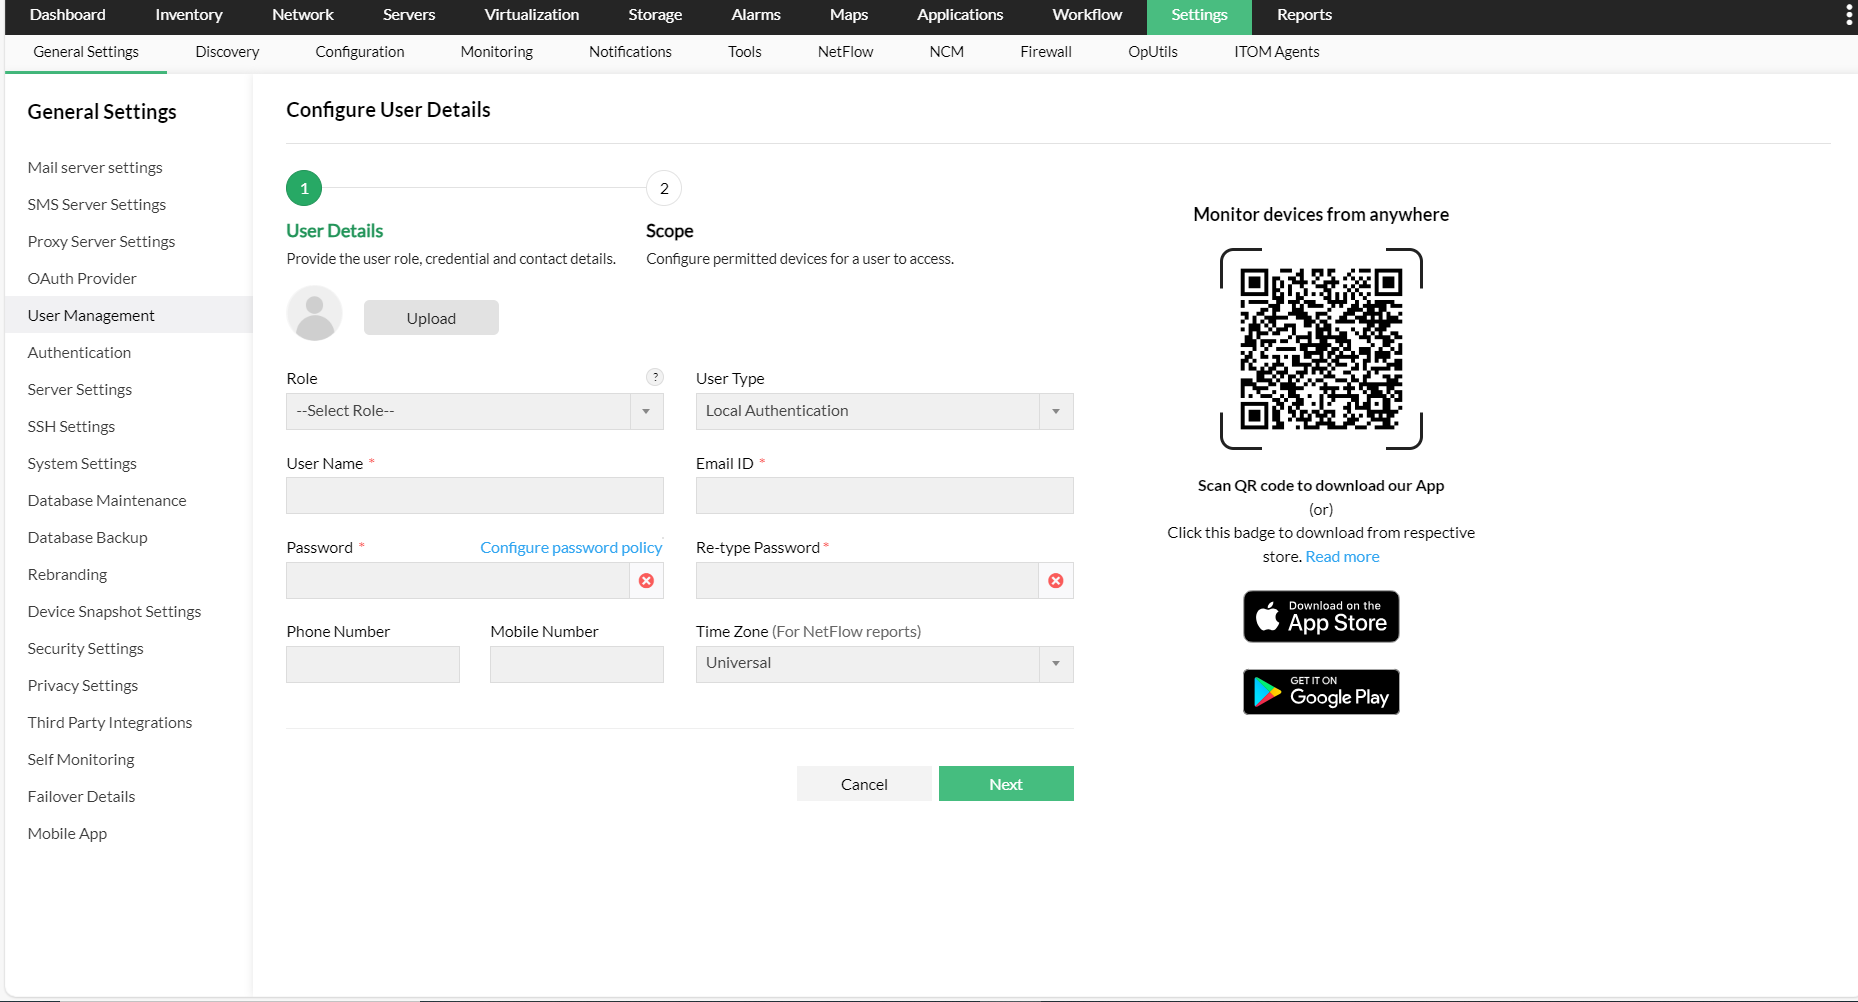
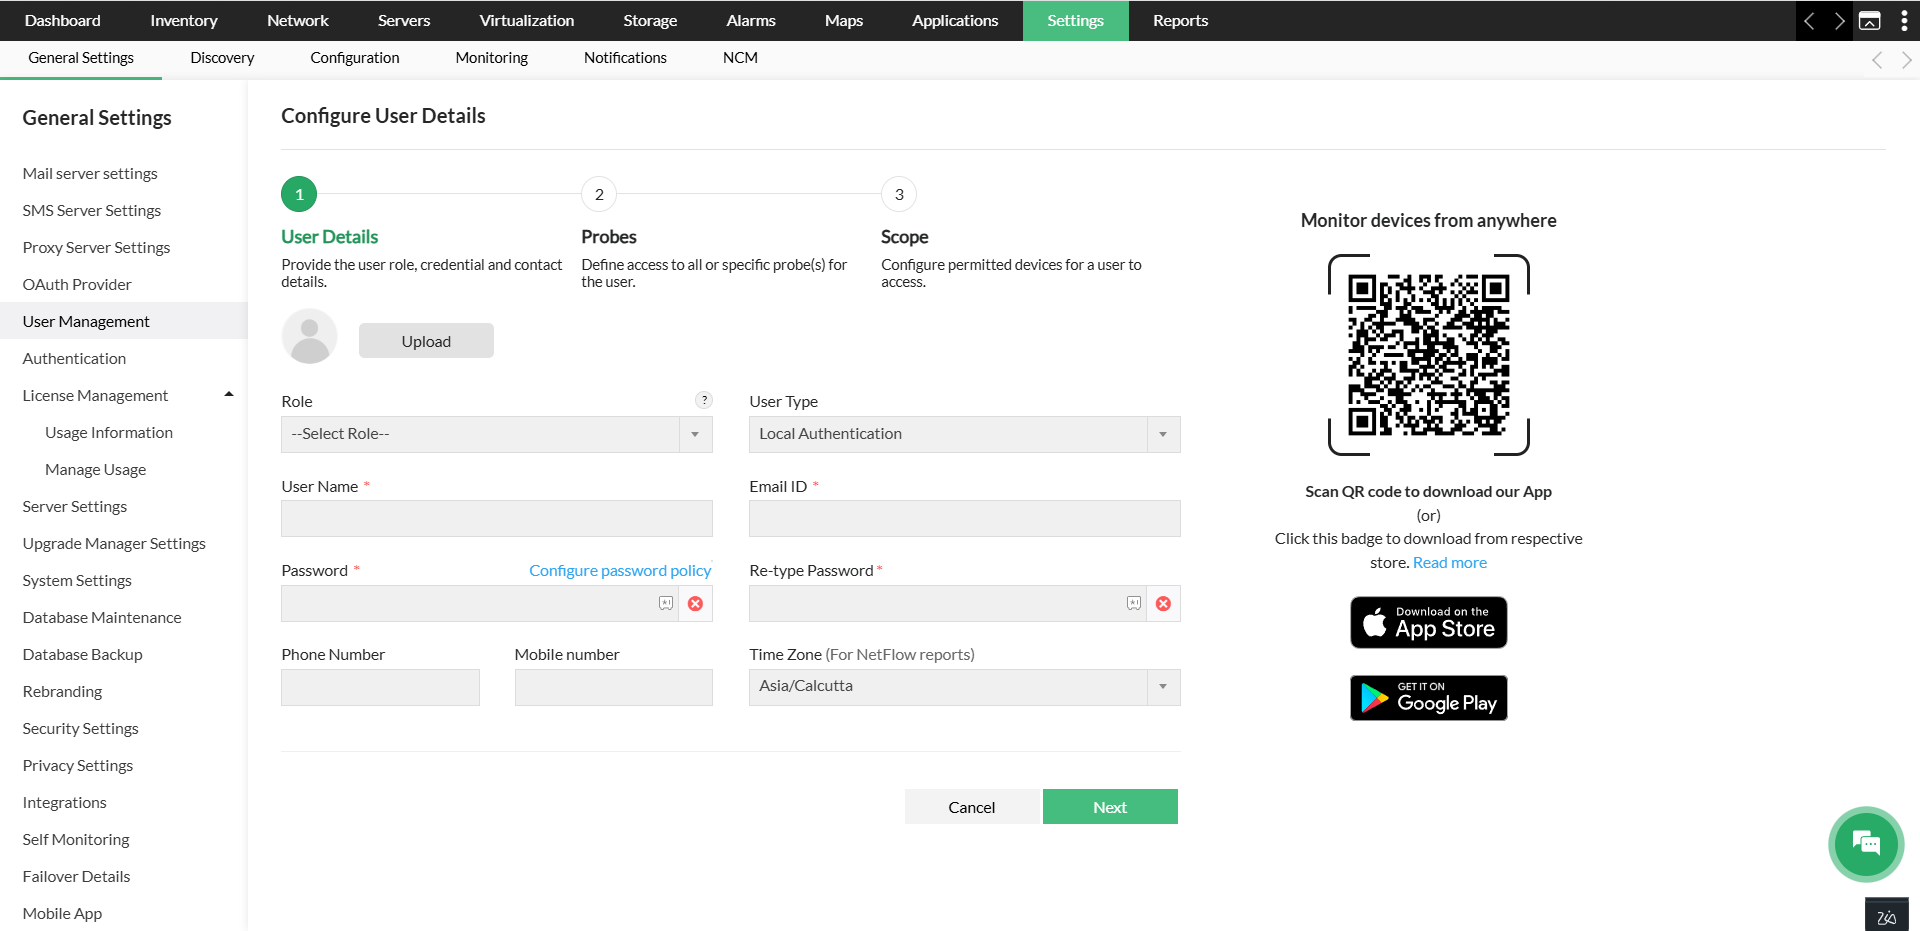
Steps to add a user:
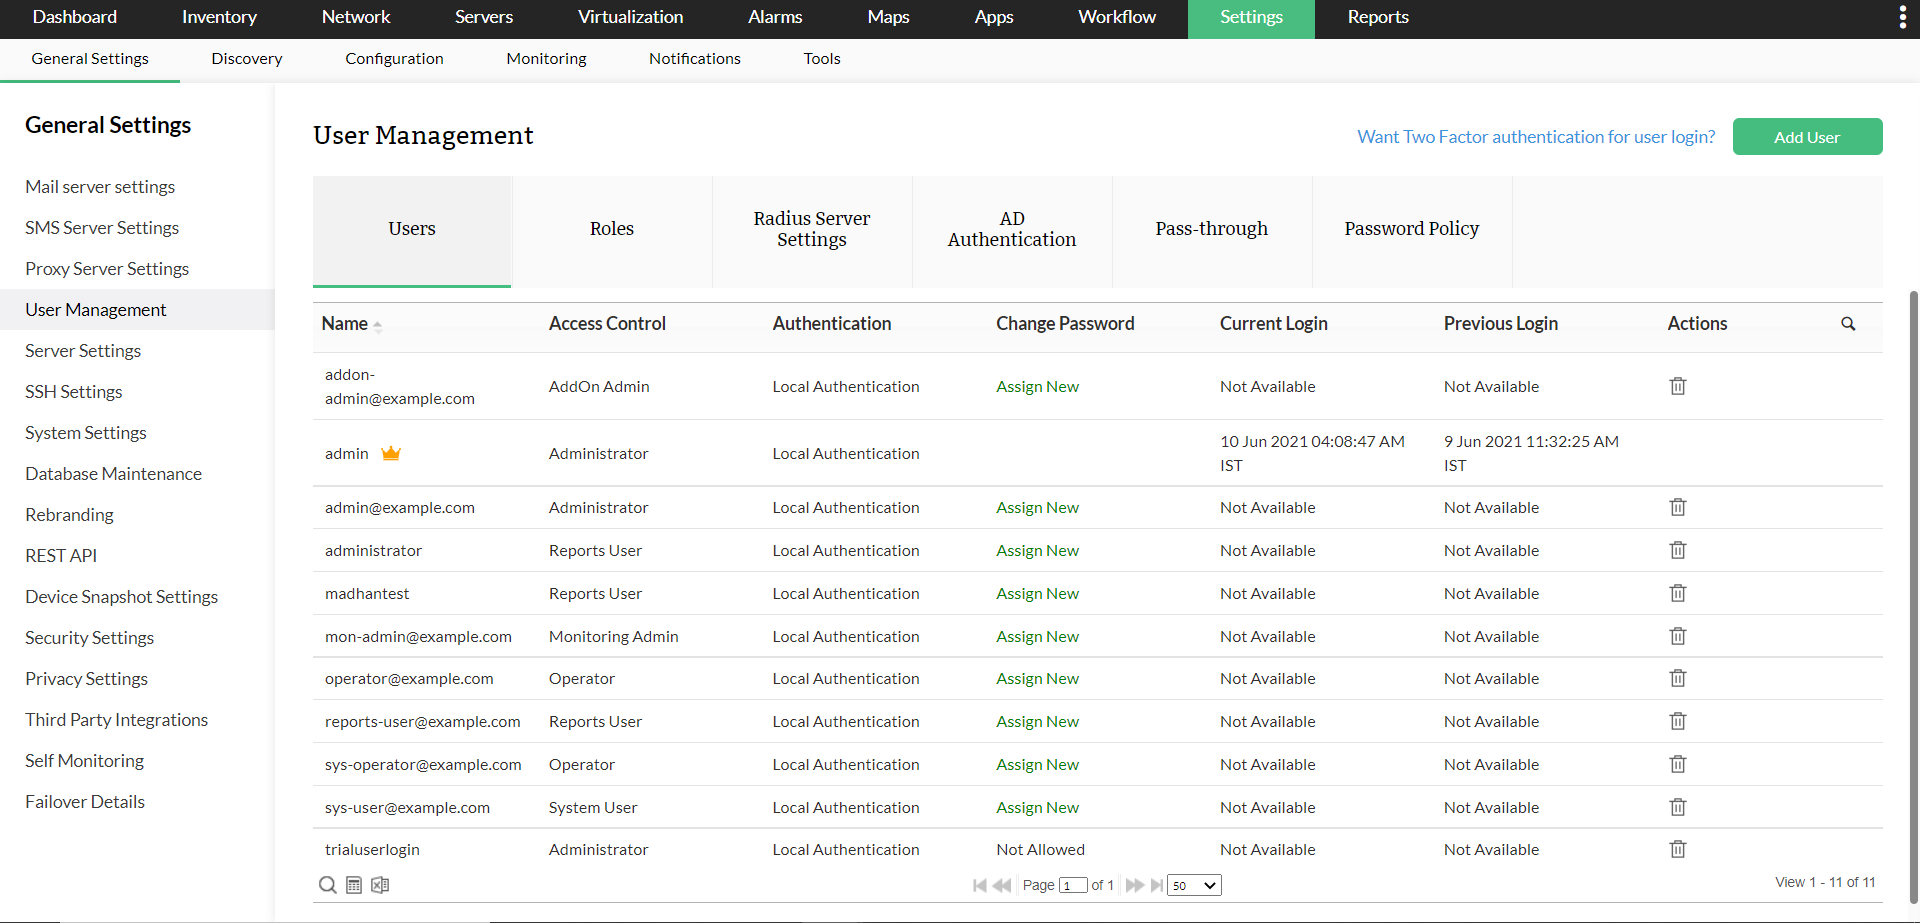
- Go to Settings → General Settings → User Management → Users → Add.
- Select user role under Role as Administrator, Operator or the desired Custom Role from the drop-down list
- Select User Type from the drop-down list and enter the required user details.
- Select any one of the following authentication methods.
- Local Authentication
- RADIUS Authentication
- AD Authentication
- User Details:
- Email ID: Email ID of the user
- Phone Number: Enter the user's phone number
- Mobile Number: Enter the user's mobile number
- Password: Create a password for the above user
- Re-type Password: Retype the password for confirmation
- Time Zone: Enter the Time zone of the user's location
- Domain Name: Select the desired AD domain from the list of available domains or Click Add Domain to add a new domain
Scope:
Modules - You can select the add-on modules that you want the user to have access for.
Monitor - Based on the option chosen here, access to devices in the allowed add-on modules will be determined. Click here to learn more about the types of User scopes in OpManager.
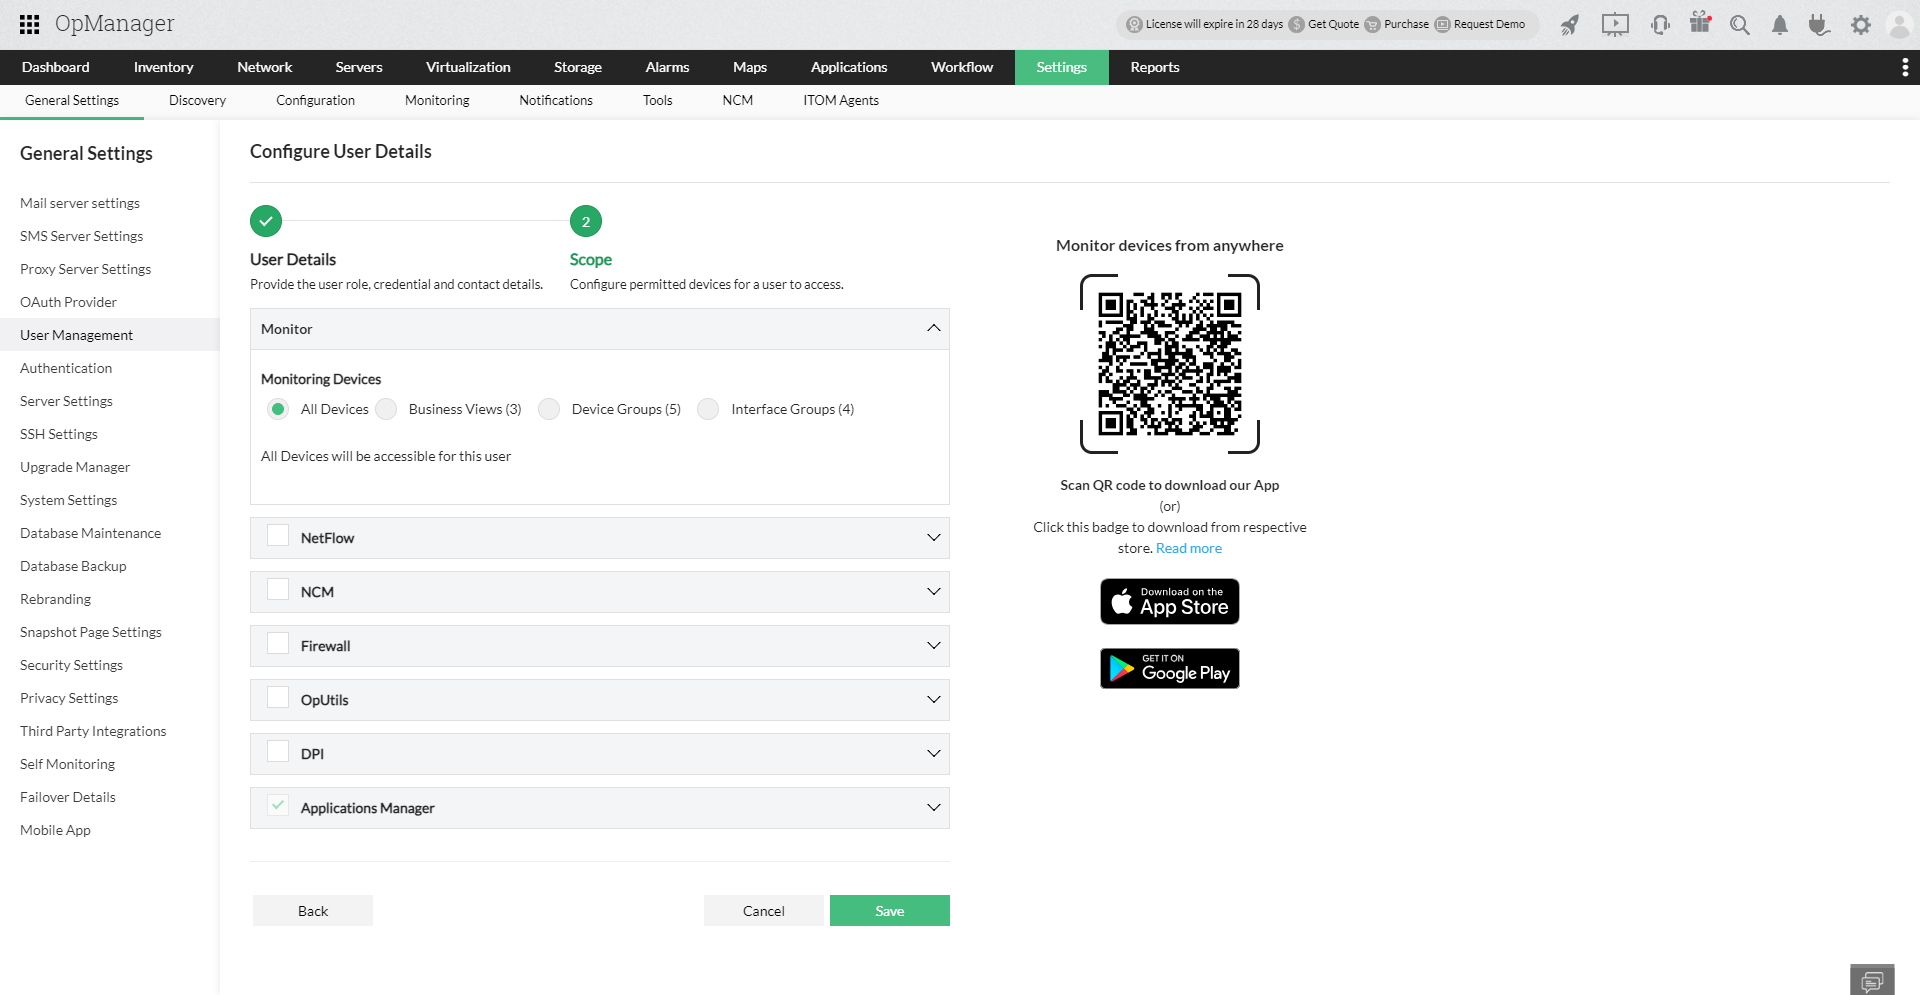
- Click Add User to add the user according to the scope specified here
Logout and try logging in as the new user and check the privileges.
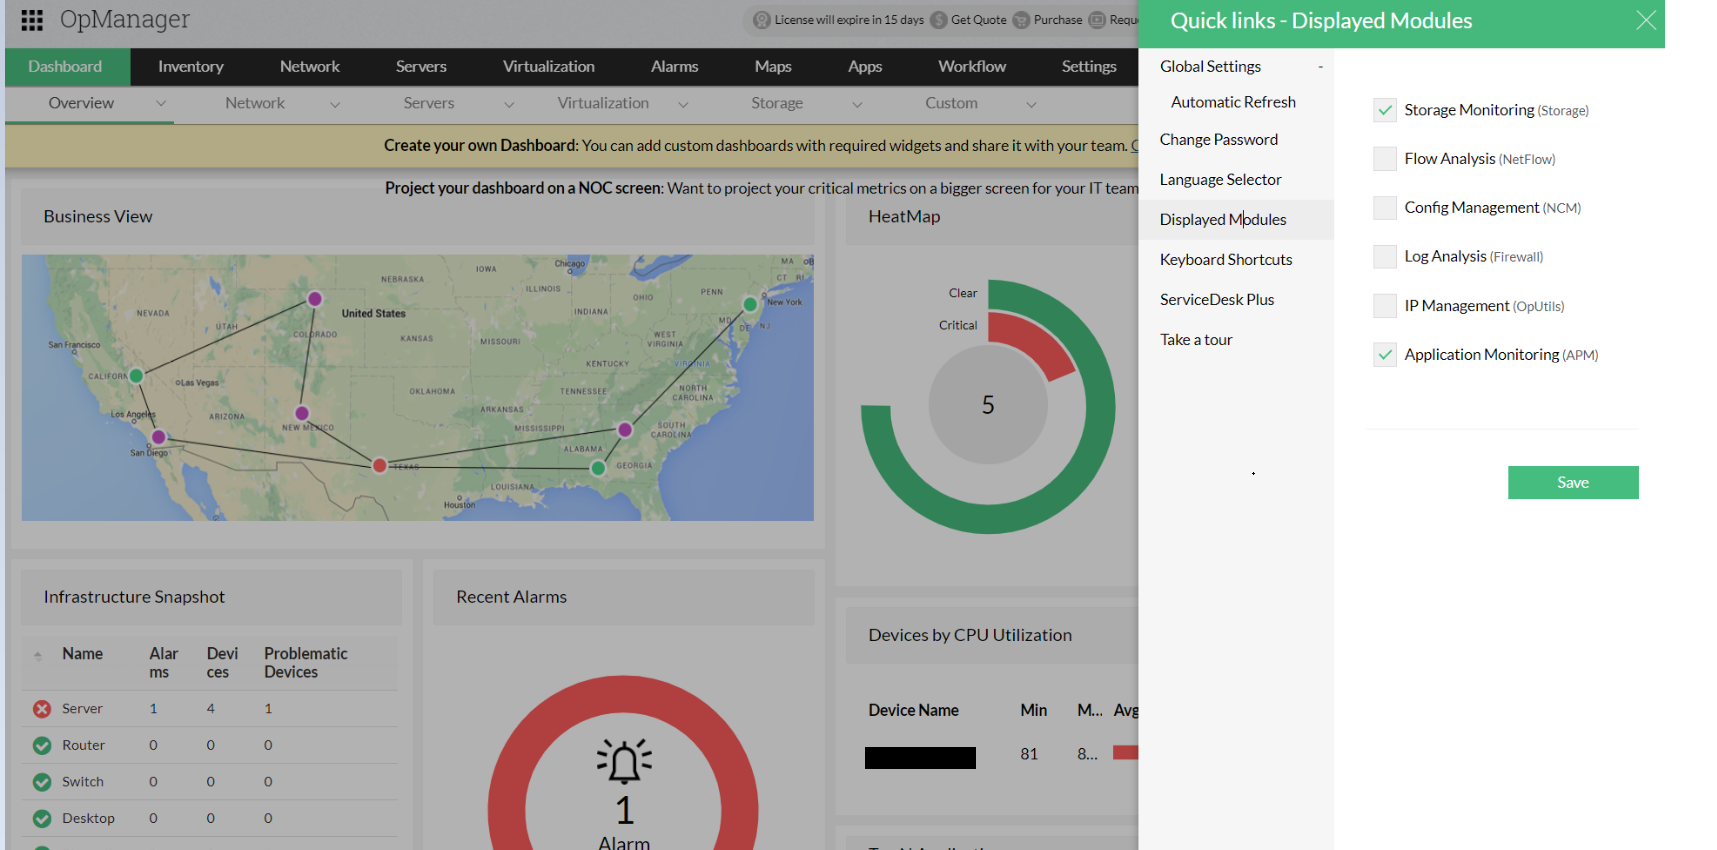
Note: The created user can customize the displayed modules (that they have access to) by clicking on the Settings icon at the top right corner right next to the profile icon, and then clicking on the Displayed Modules tab.
Enhanced User Creation: Probe-Based Scope
OpManager (version 12.9.104 and above) now introduces a Selected Probes scope option for users, along with a redesigned three-step user creation flow for a more streamlined experience.
Updated User Creation Flow
The user creation wizard is now organized into three clearly defined steps:
- User Details - Provide the user role, credentials, and contact details.
- Probes - Define access to all or specific probe(s) for the user.
- Scope - Configure permitted devices for the user to access.
This revised flow ensures that probe access is configured before scope is assigned, so the applicable scope options are determined based on the probe selection.
Probes
The Probes step allows administrators to control how a user's access is distributed across probe servers in a Central Server setup.
Probe Scope
Grants access to this user across probes in the Central Server.
- All Probes - The user is synced and granted access across all probes, including any probes added in the future.
- Selected Probes - The user is synced to all probes, but within Central, access is restricted to the selected probes only. The user will also only be able to log in to the web clients of these selected probes. Operations related to Discovery, General Settings, Workflow, Configuration Settings, and Tools will be restricted. Dashboards and Reports will be accessible with data limited to devices within the permitted probes.
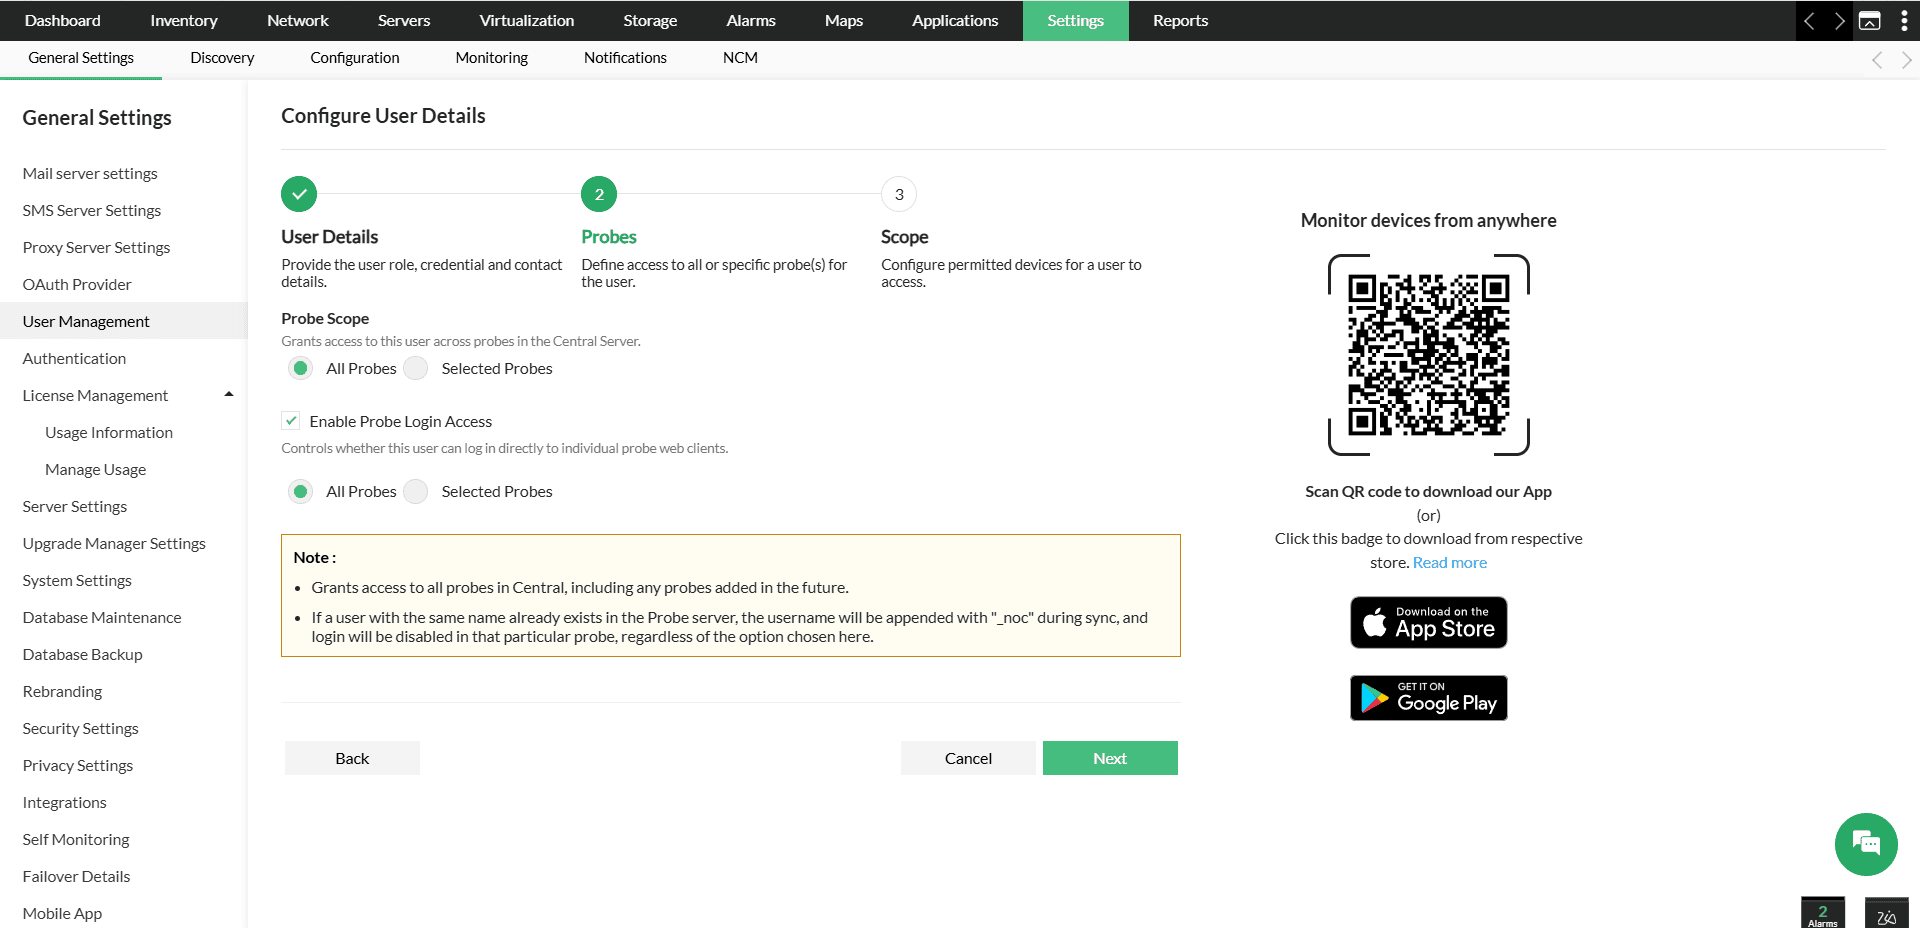
Enable Probe Login Access
Controls whether the user can log in directly to individual probe web clients. This can be set to All Probes or Selected Probes independently.
- Selecting All Probes grants access to all current and future probes in Central.
- If a user with the same name already exists on a probe server, the synced username will be suffixed with "_noc", and login access to that specific probe will be disabled, regardless of the option selected.
Scope
The Scope step lets administrators configure which devices and modules the user can access. The available scope options are determined based on the probe selection made in the previous step.
The Scope page is organized by module, including Monitor, NetFlow, NCM, Firewall, OpUtils, DPI, and Applications Manager. Each module can be expanded to review and configure access settings independently.
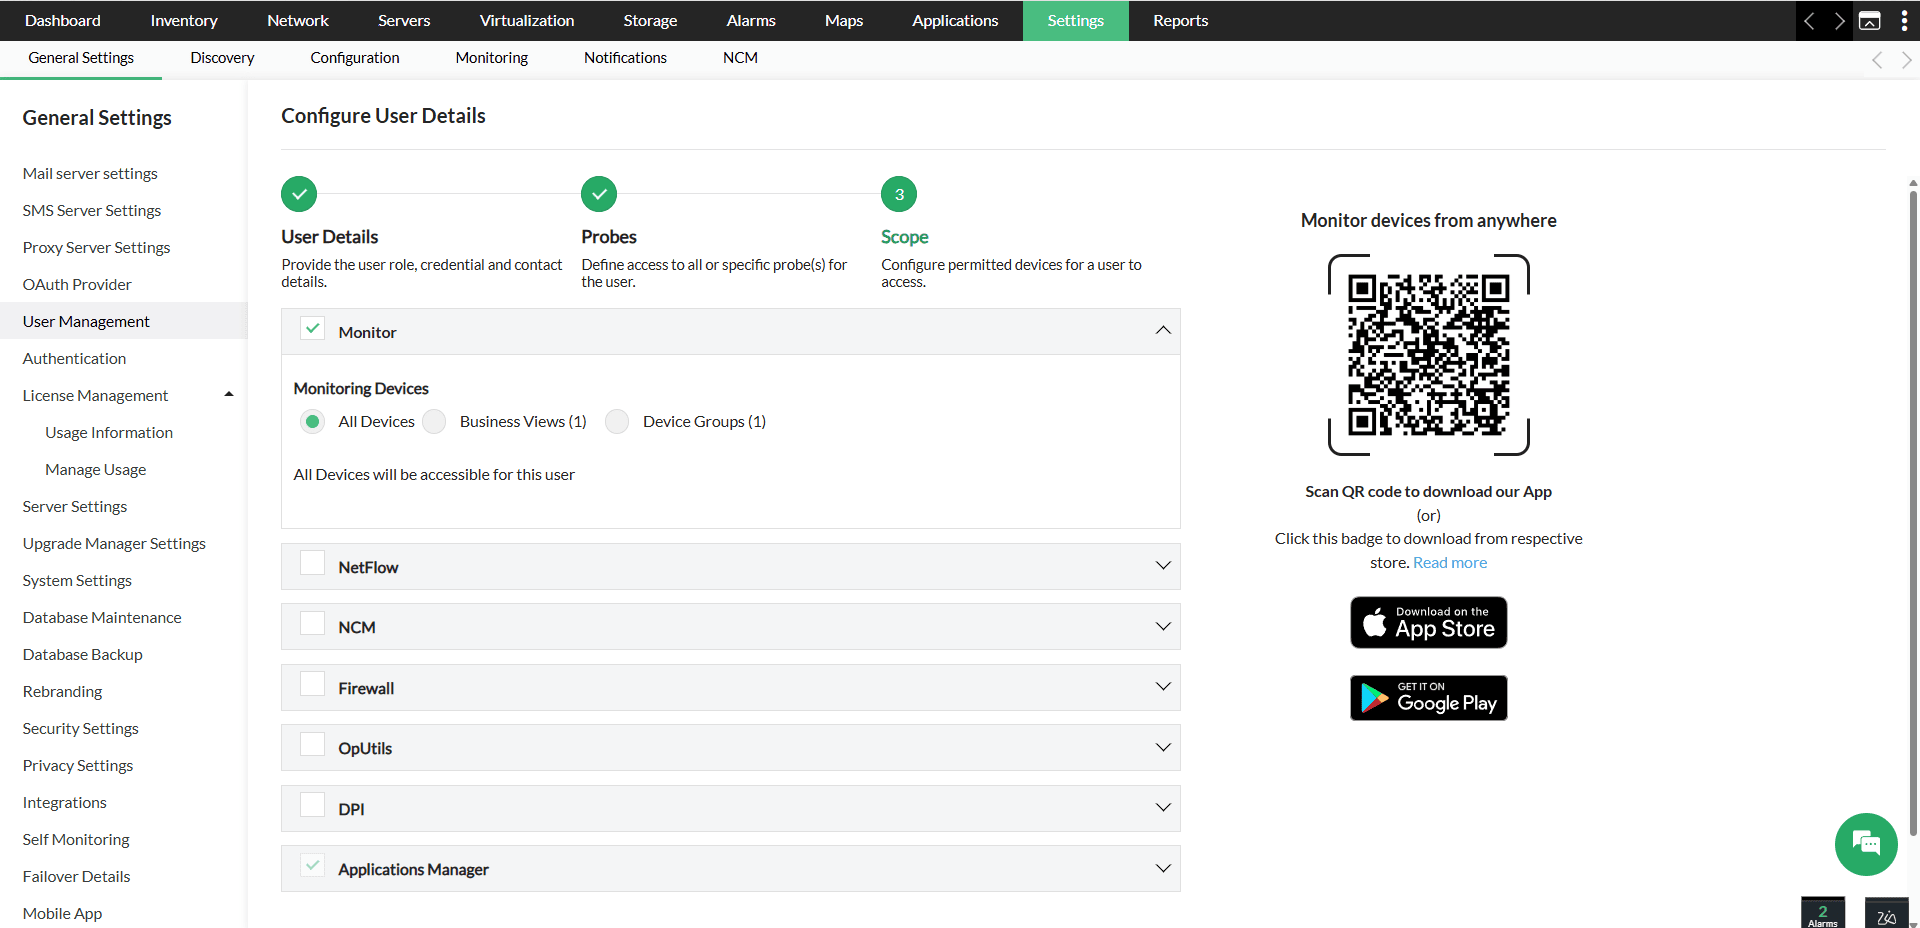
Monitoring Devices
Under the Monitor section, you can choose the device access level for the user:
- All Devices - The user can access all devices across the permitted probes.
- Business Views - Restrict access to specific Business Views.
- Device Groups - Restrict access to specific Device Groups.