Integrating ManageEngine OpManager with Jira Service Management(On-Premise)
By integrating a network monitoring solution with an ITSM tool, network admins can proactively monitor their network and handle issues at the earliest. This leads to faster resolution, higher uptime and improved MTTR. To integrate OpManager with Jira ServiceDesk(On-Premise) , kindly carry out the following:
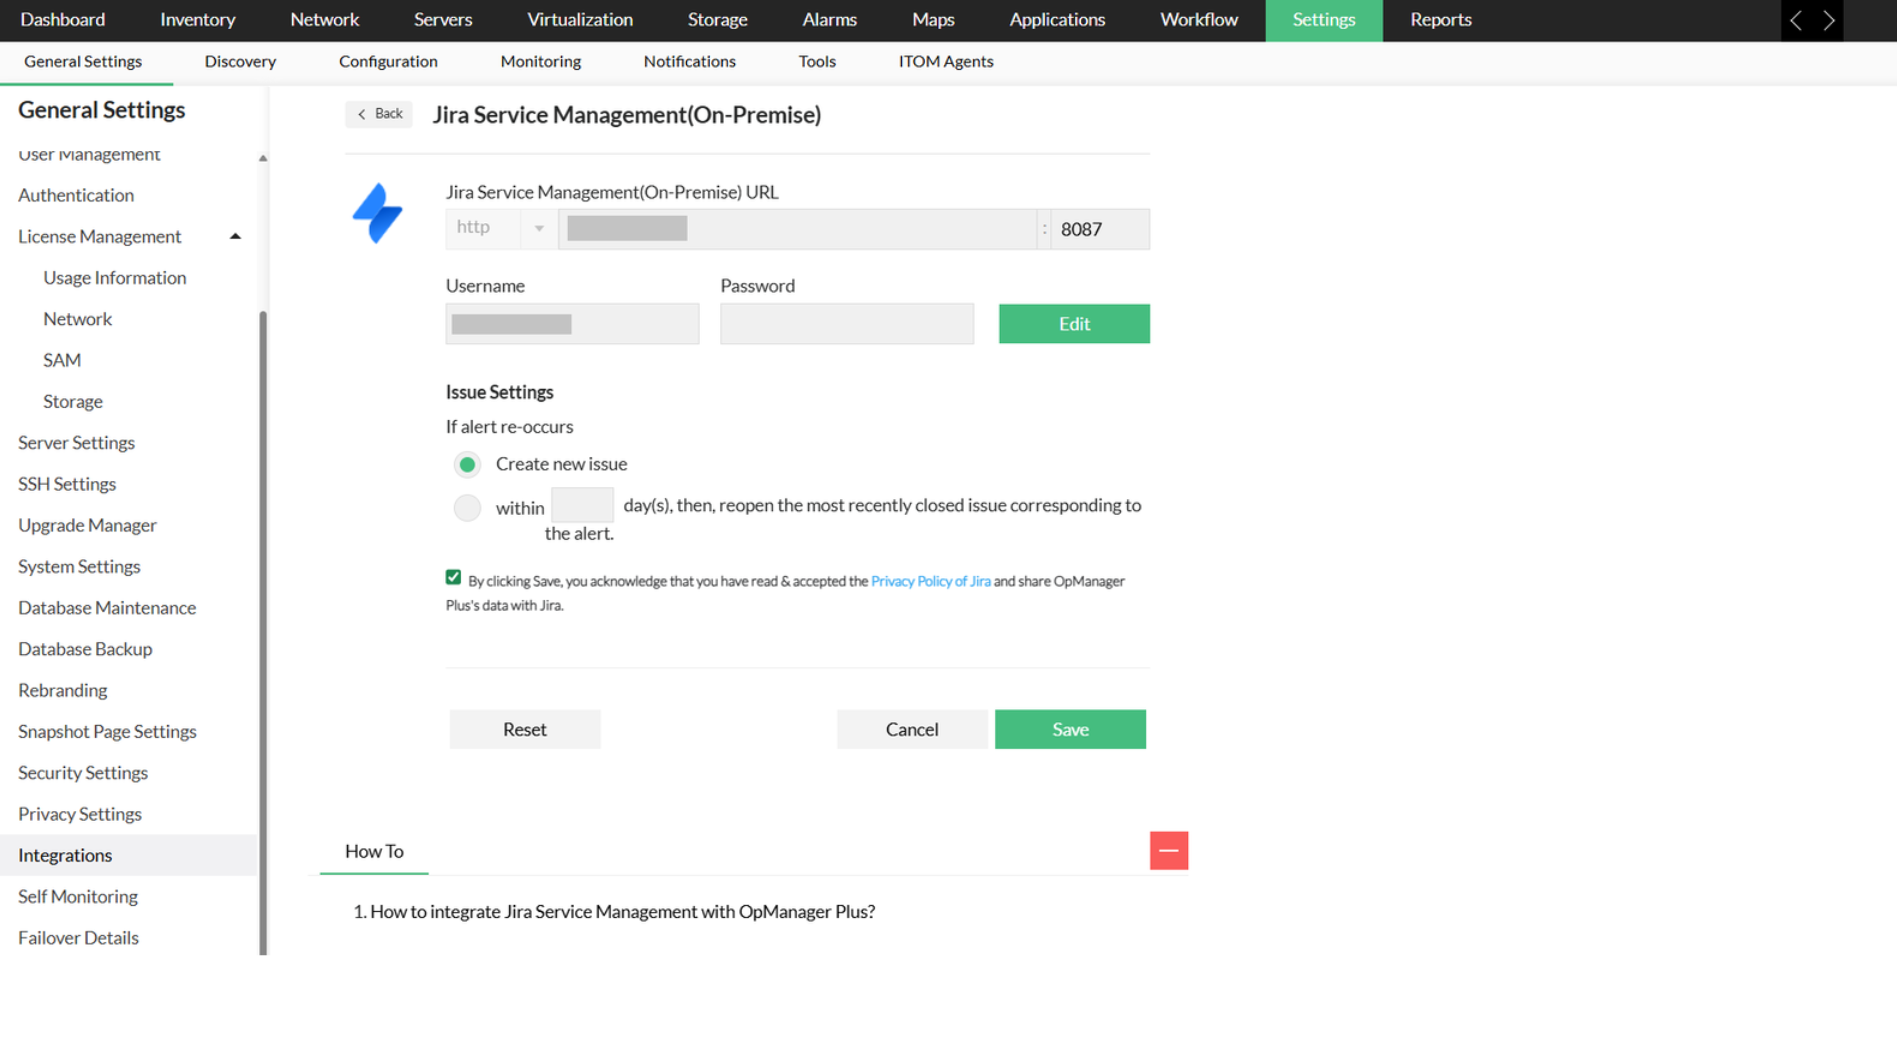
- Navigate to "Settings -> General Settings -> Integrations".
- Click on the "Configure" button at the bottom right of the "Jira ServiceDesk(On-Premise)" section.
- Now, configure the following values:
- Issue settings: Allows you to specify the appropriate action to be taken when an alert re-occurs.
- "Create new issue" allows you to log the ticket as a new issue.
- In case an alert re-occurs within the specified number of days mentioned by the user, the most recently closed issue corresponding to that particular alert, will be reopened.
- Check on the consent box and then click on "Save".
- Navigate to "Settings -> Notification Profile -> Add profile"
- Select the "Log a ticket" option.
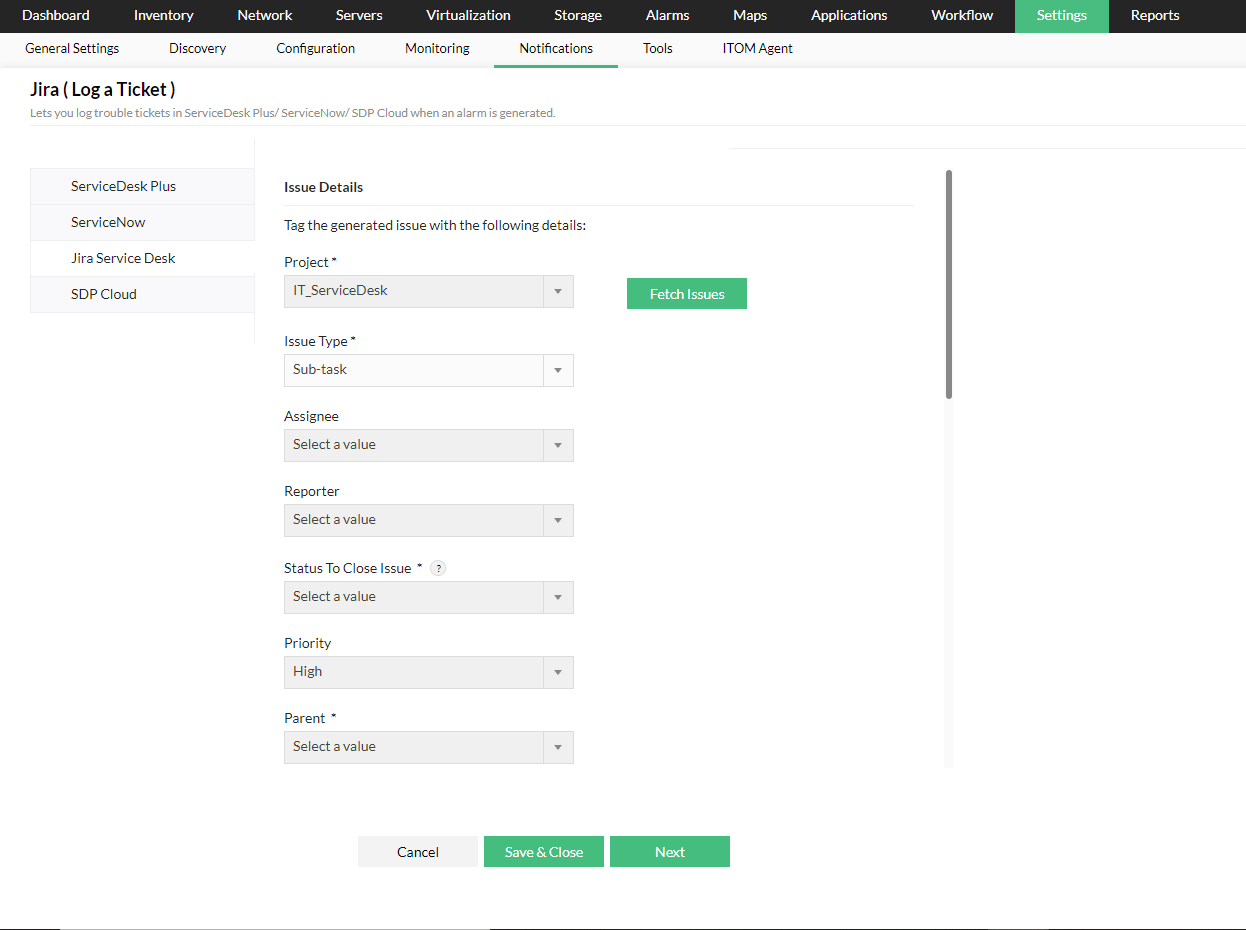
- Now, select the "Jira Service Desk" tab on the left side.
- Select the Project and click on "Fetch issues"
- Now, select the desired issue you want to focus on.
- Now that the issue type is selected, fill the issue fields. Kindly make sure that all the mandatory fields have been selected.
- Click on "Next".
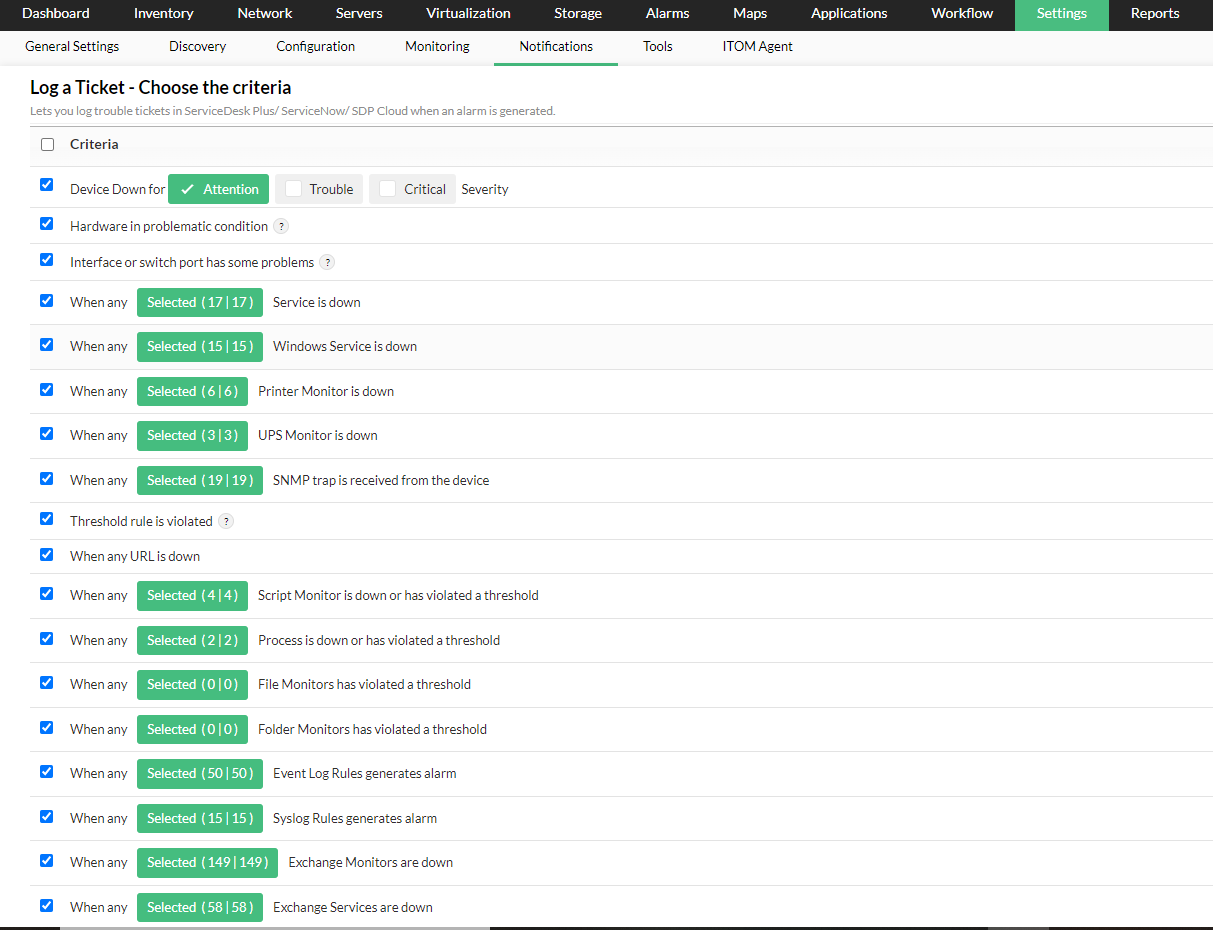
- Now select the severity and the criteria that must be met in order to trigger this notification profile.
- Select the devices you want to be associated with this notification profile.
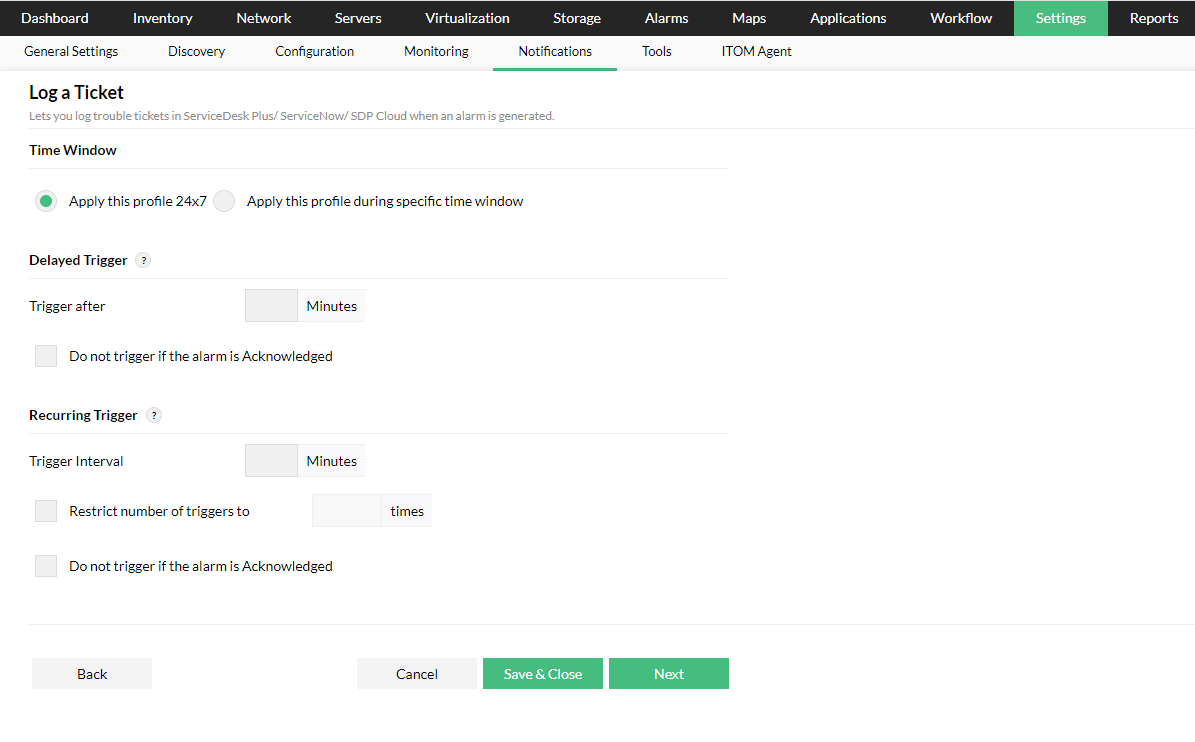
- Assign the time window, trigger values and then click "Next".
- Delayed Trigger: If you want to create a ticket after a specific time interval post alarm generation, you can mention the delay time in minutes. Now, tickets will be created only after the configured delay time. If you don't want to create a ticket when the alarm has been resolved in the meantime, select the "Do not trigger if the alarm is acknowledged" checkbox.
- Recurring trigger: If you want to re-trigger a ticket at regular intervals till the alarm is cleared, you can mention the trigger interval in minutes. You can also restrict the number of triggers by mentioning it under the "Restrict number of tickets to" checkbox.
- You can use the "Test Action" button to check whether the ticket is being logged correctly.
- Click "Next". Enter a "Profile Name" and then click on "Save".
The following is a sample issue that was created in OpManager and then later pushed to Jira ServiceDesk(On-Premise)
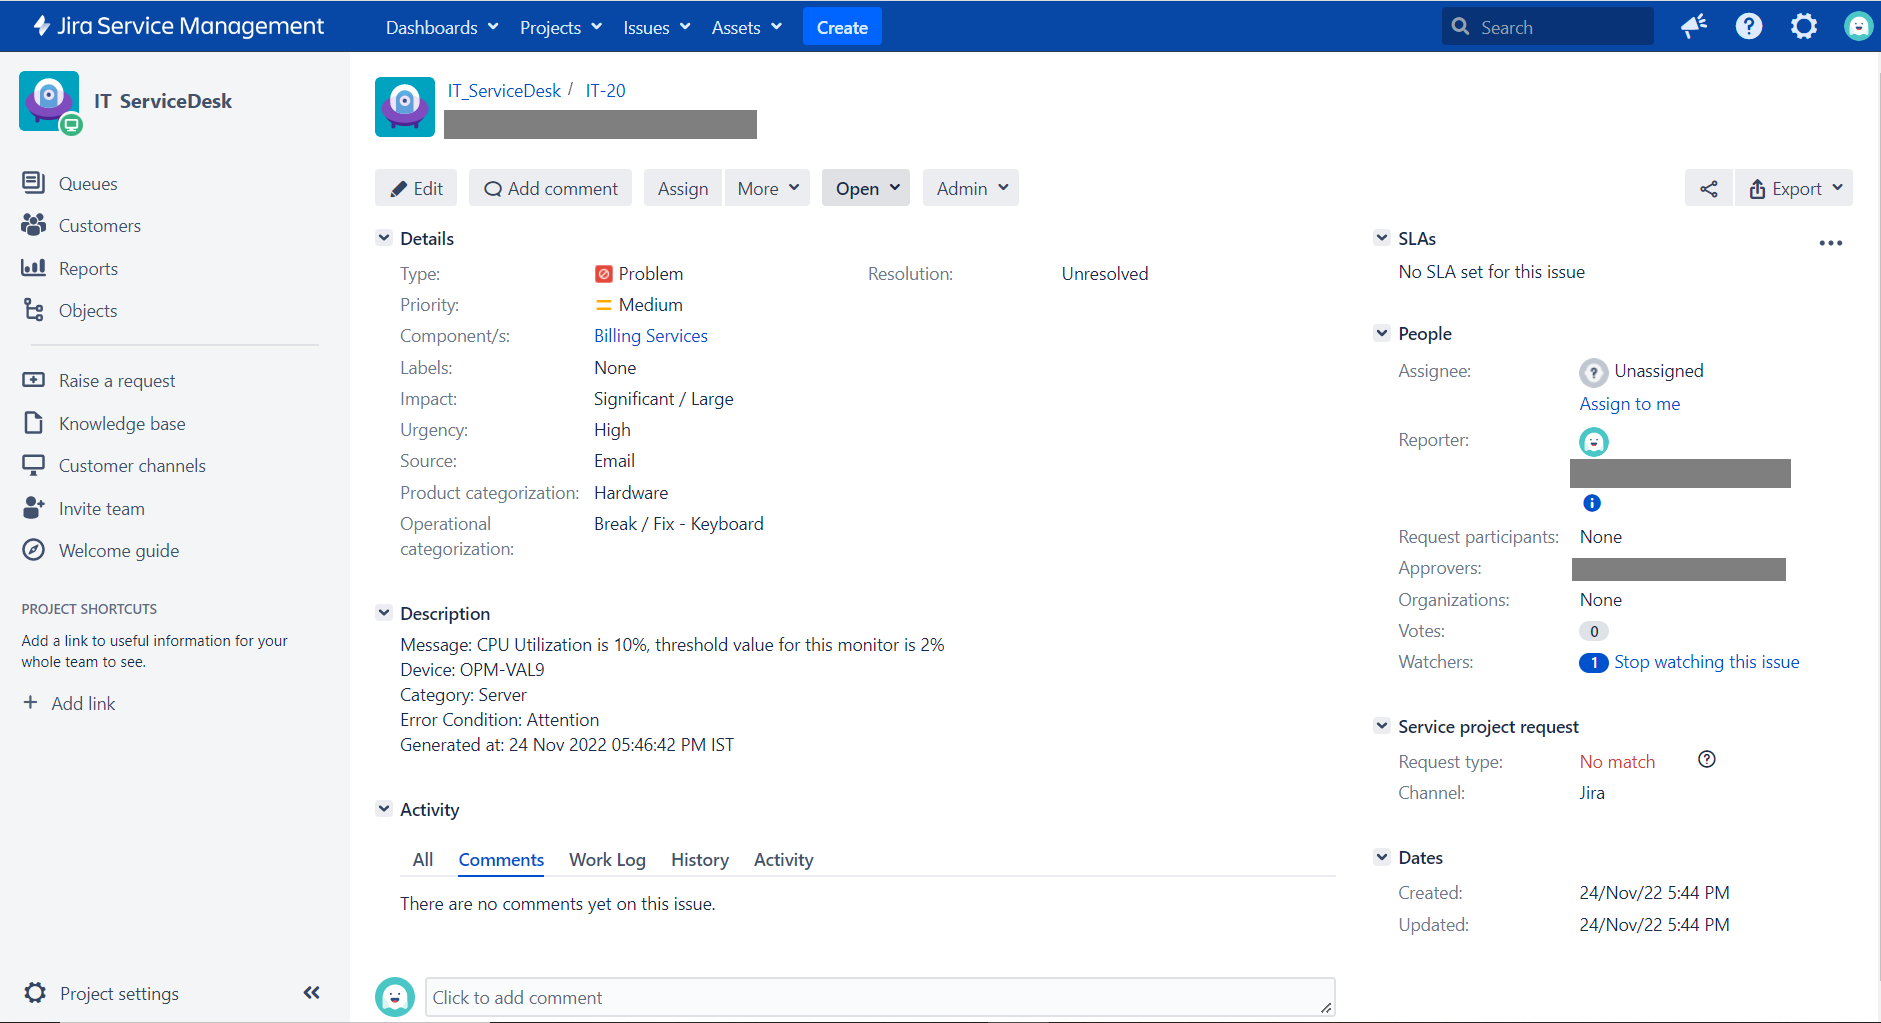
OpManager has now been successfully integrated with Jira ServiceDesk(On-Premise) . To know more about how to leverage this integration to the fullest, click here.
Thank you for your feedback!
