Bulk Installation of APM Insight .NET Agent in Windows
You can install the APM Insight .NET agent on multiple machines simultaneously by following the steps below.
Install the Bulk Installation Tool
The Bulk Installation Tool is included with version 4.x and above of the .NET Agent.
- The Bulk Installation Tool is enabled during the agent installation wizard.

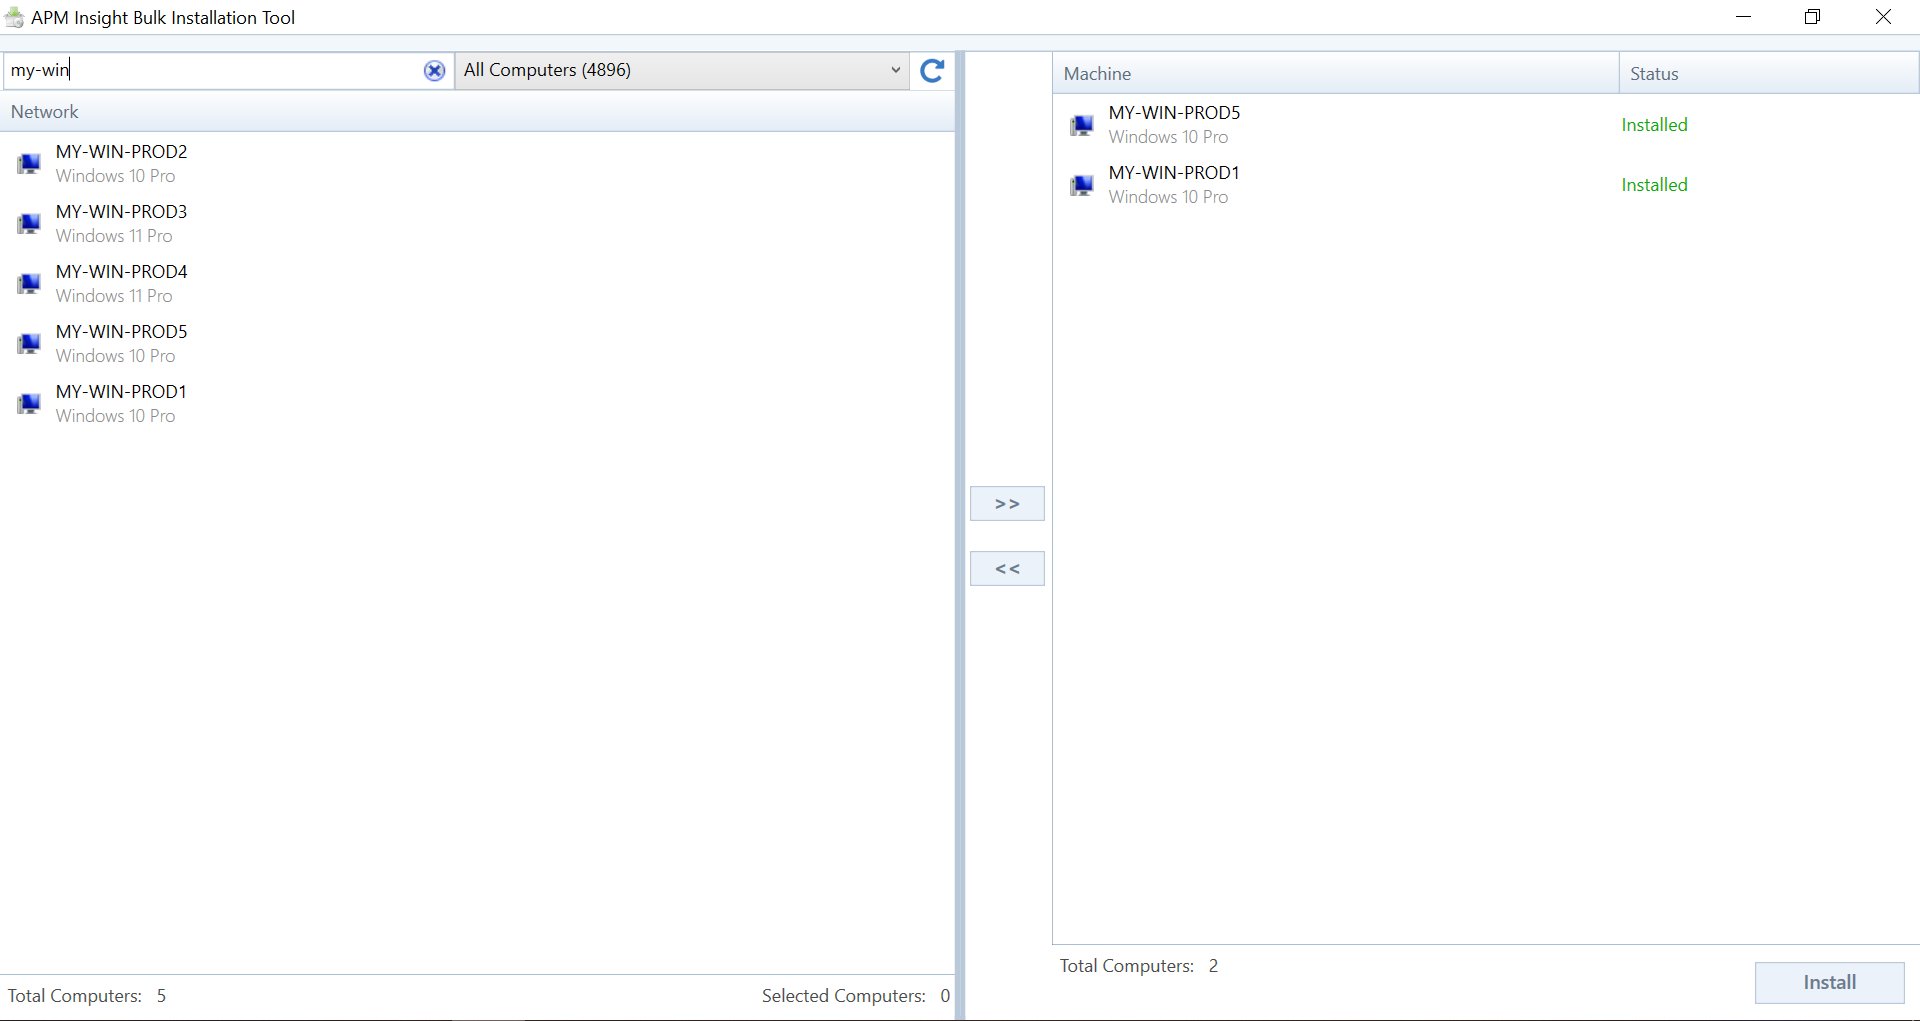
- After installation, navigate to Start → APMInsight.NETAgent → APMInsight.NET Agent Bulk Install to open the tool.
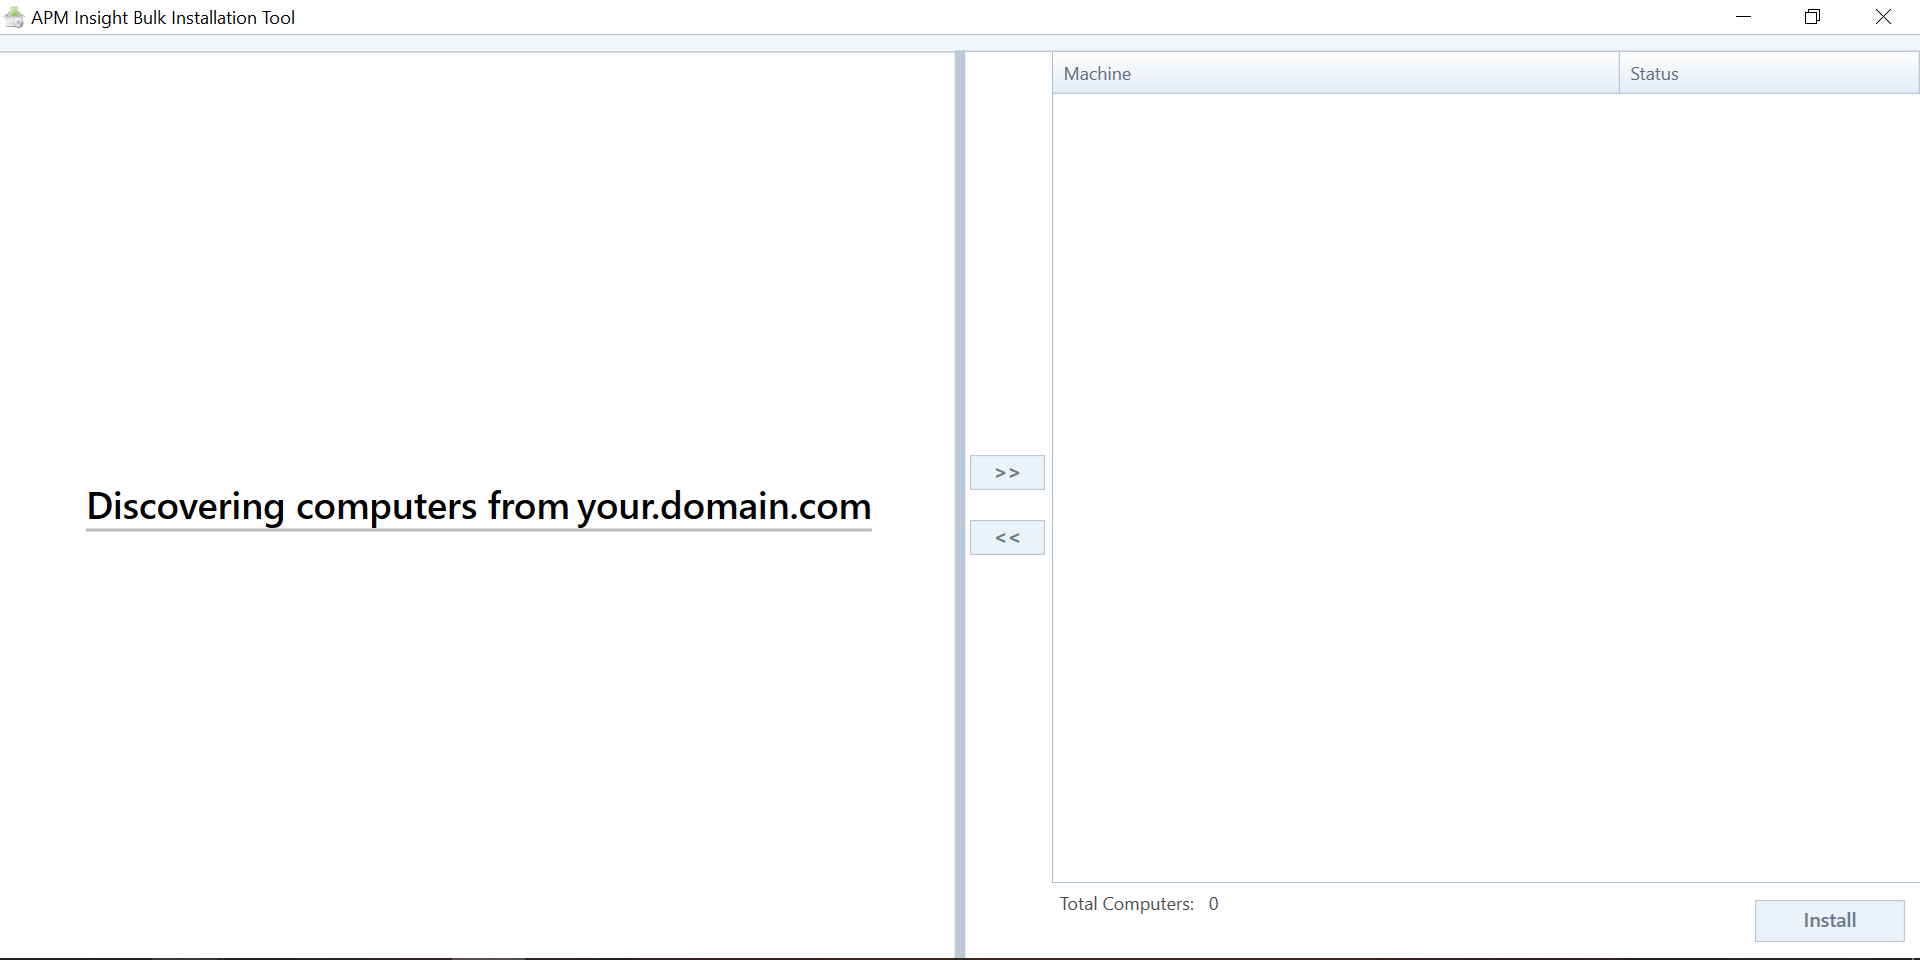
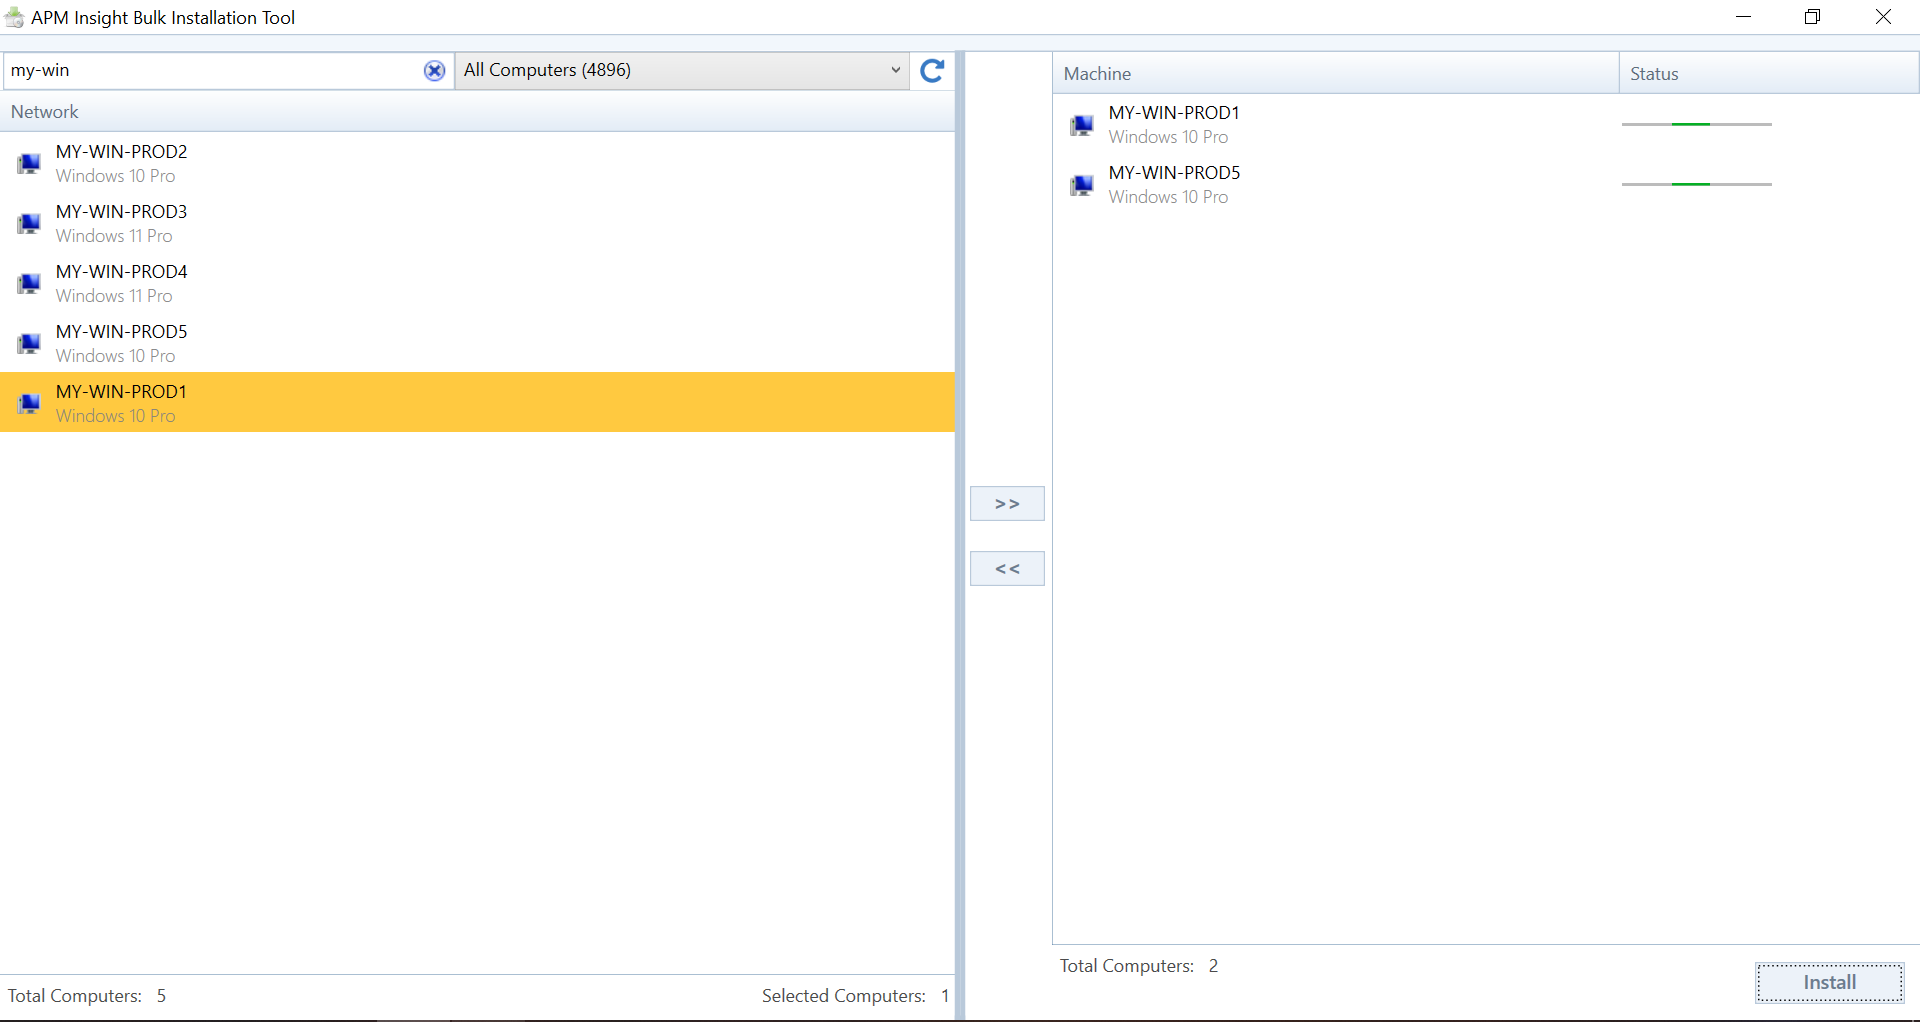
- When launched, the tool automatically discovers servers present in your Active Directory (AD) network.

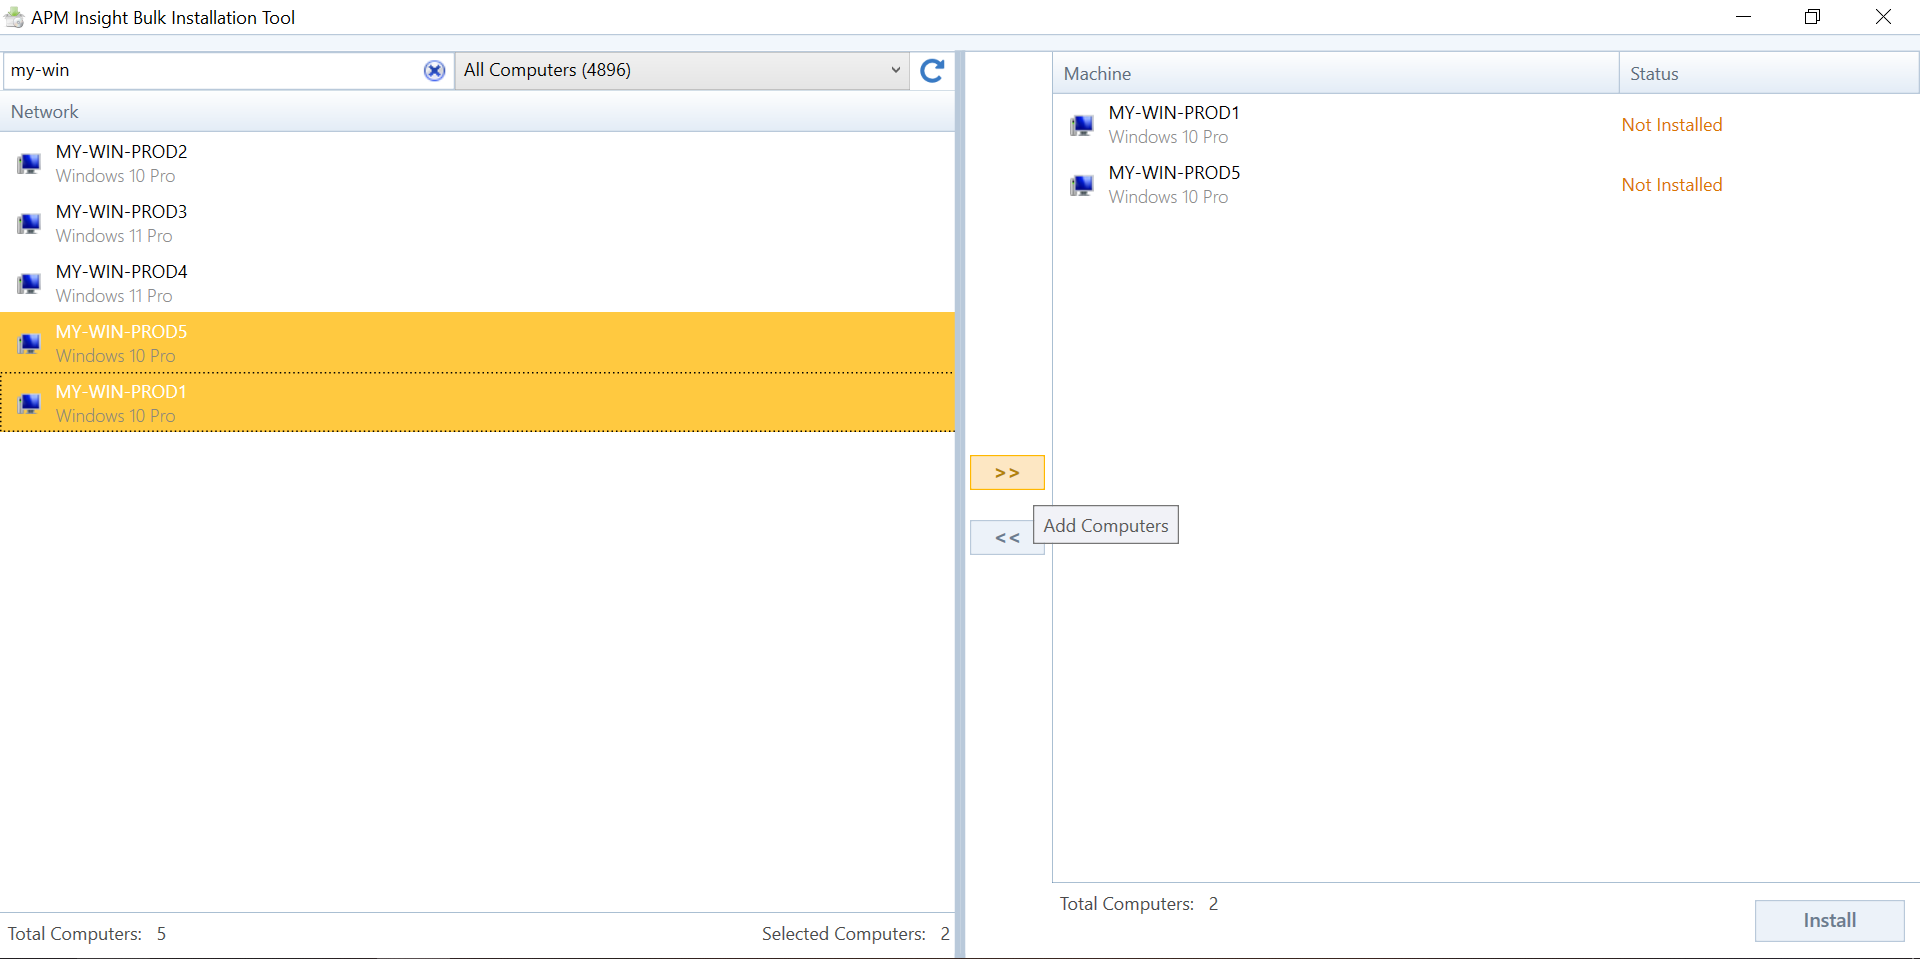
- Add the servers where you want to install the APM Insight .NET agent.
- Click Install and enter the AD user credentials and password. If a proxy is configured, provide the proxy details as well. The agent will use the license key and application filters configured in the current machine.
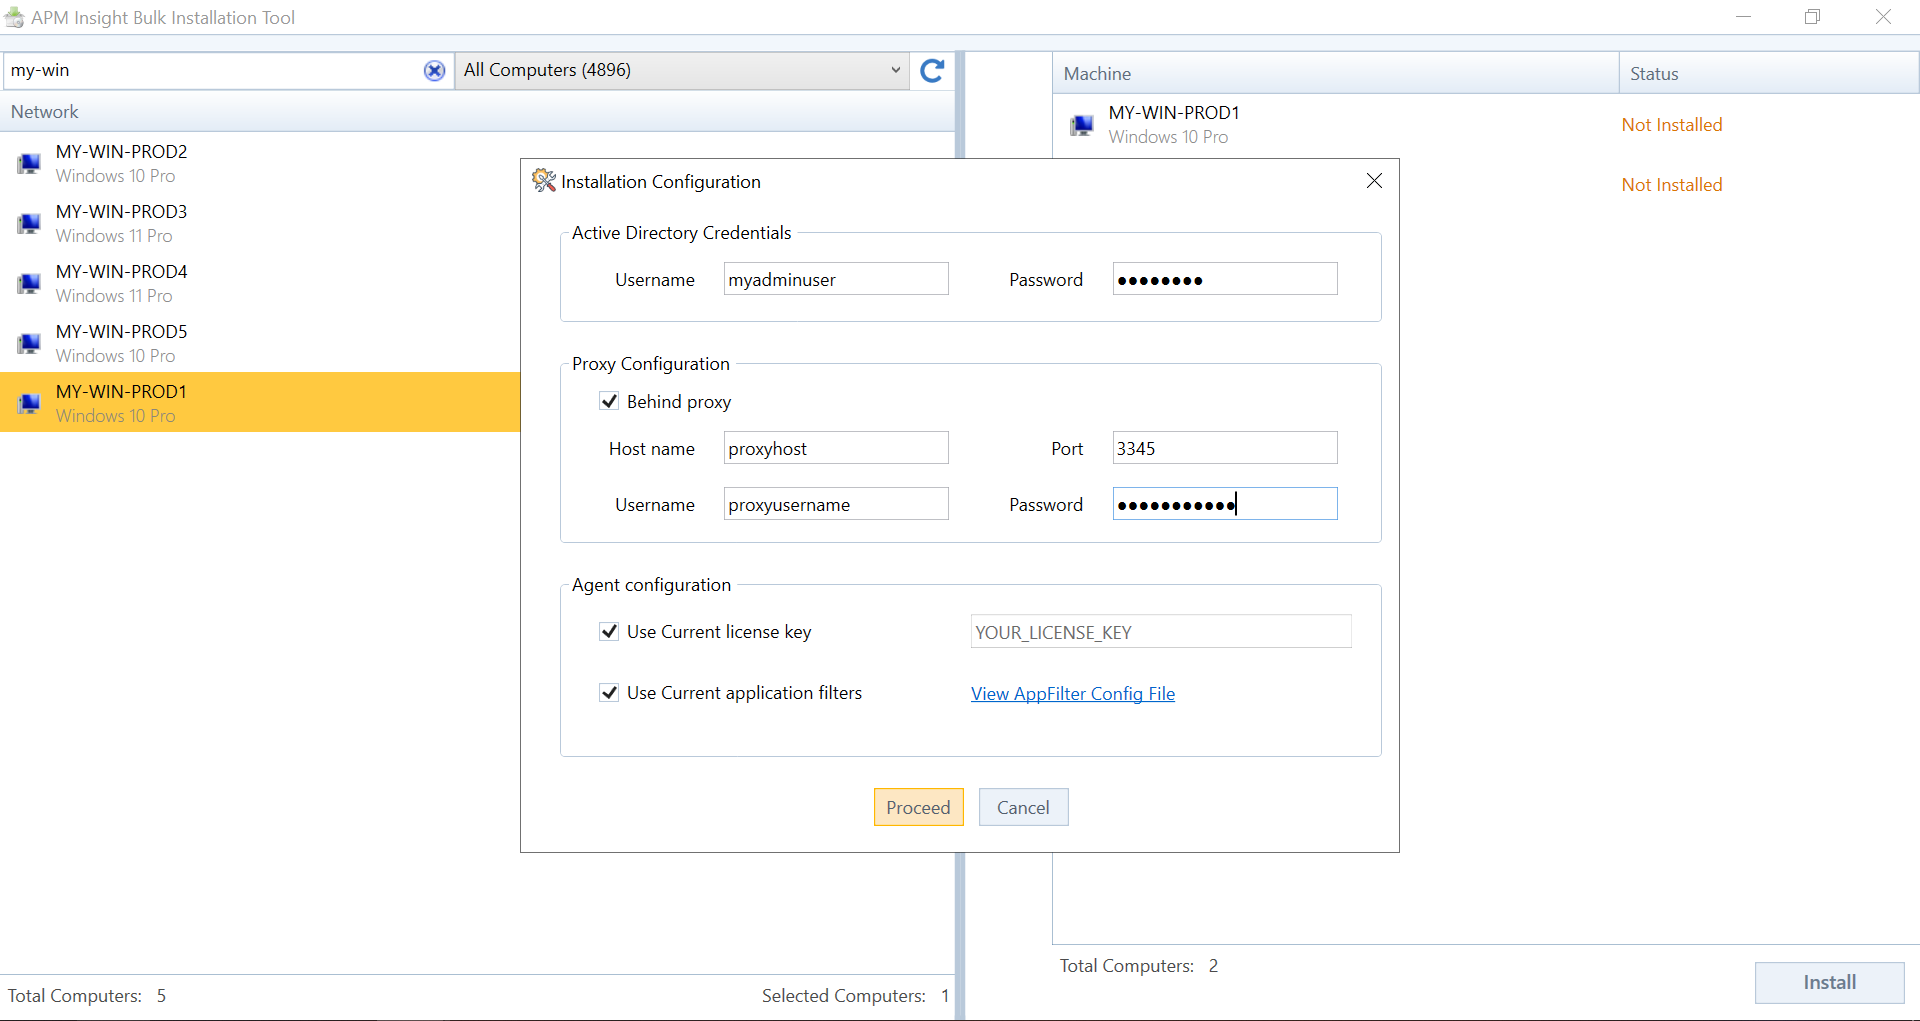
- Click Proceed to download the latest agent for installation on the selected servers.
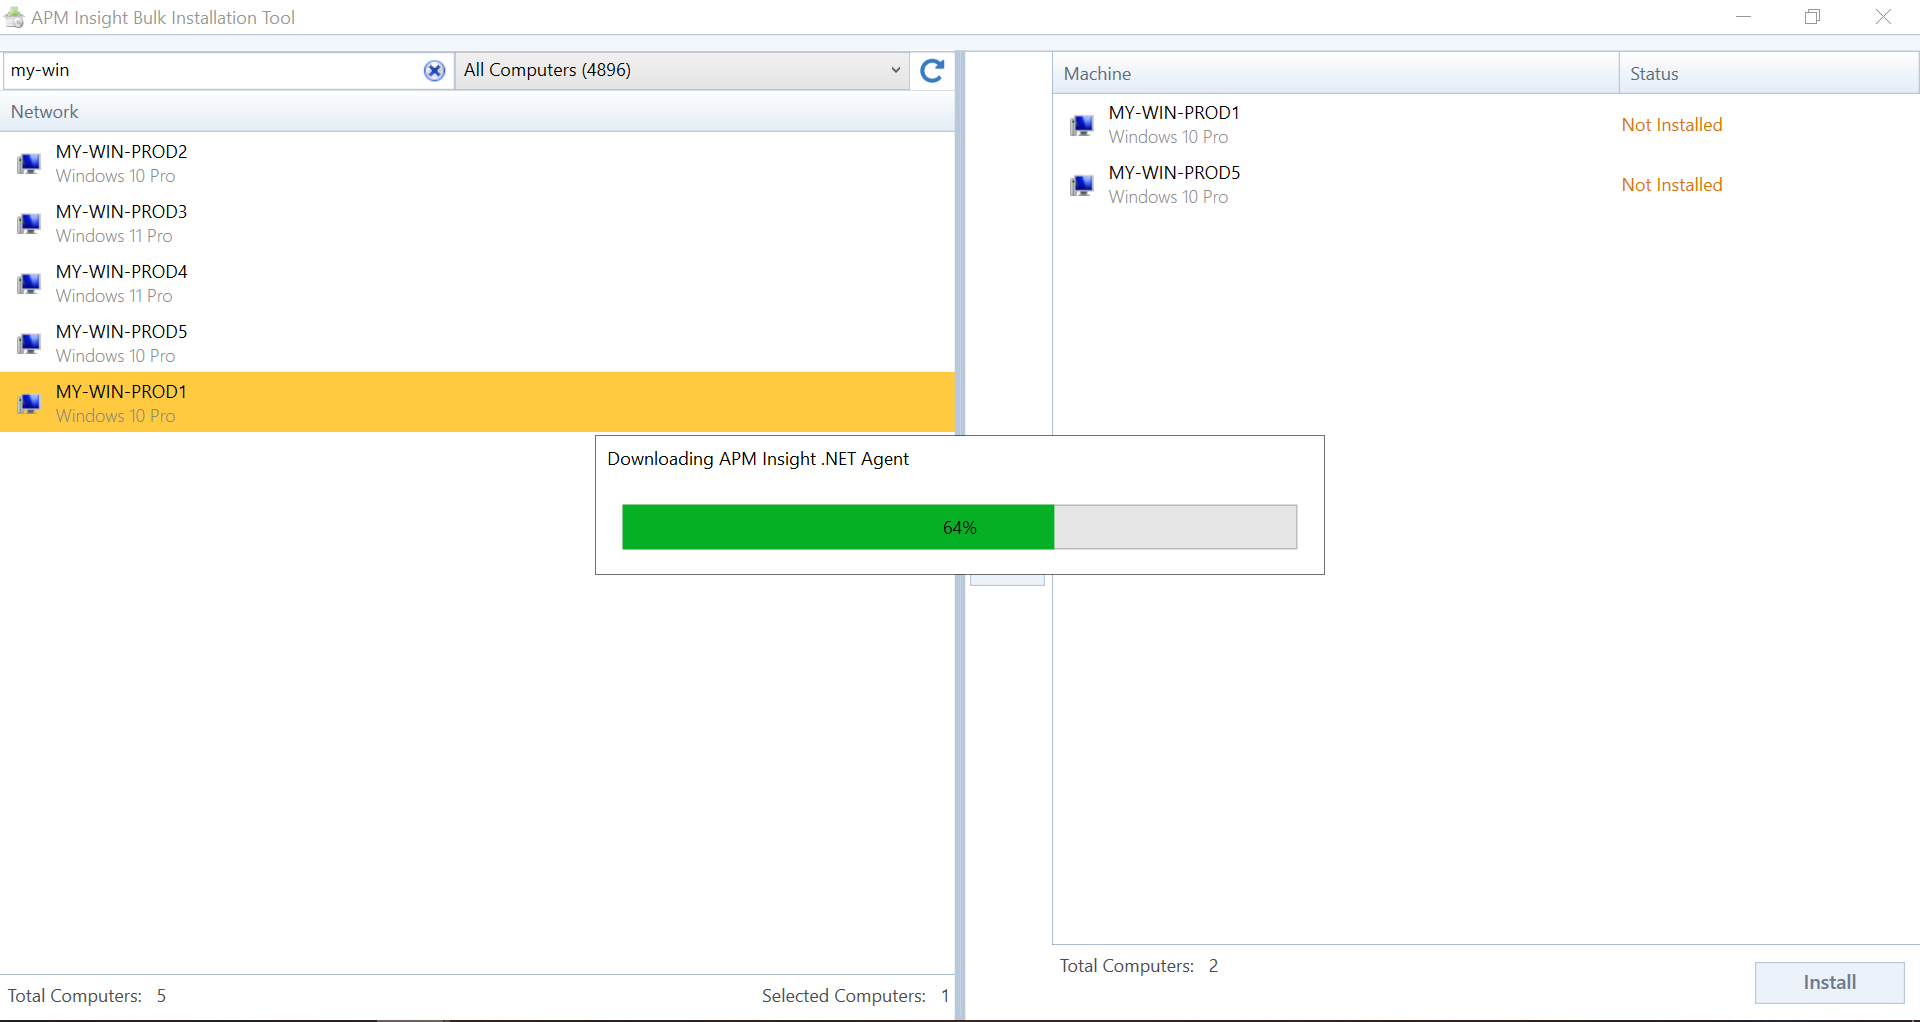
- After the download completes, the agent MSI file is copied to the selected servers and installed automatically.
- Once the installation is complete, the status in the tool automatically updates to Installed.