Agent Installation Methods
Endpoint Central is a client server model which manages all the endpoints in an enterprise from a centralized location. These are the various agent installation methods available for endpoint management.
Note:
- Reboot is not necessary after agent installation.
- To know about agent installation prequisites, click here.
- When copying the agent installation zip file, make sure you copy all the files. For example, if you miss .mst file, you may encounter error code: "Error applying transforms". In such cases, kindly refer here.
To install Windows agents on managed devices, follow the steps mentioned below.
The agents are installed automatically in the end-user's device and the installable gets deleted after a successful installation. This is used in places where there is minimal restriction on bandwidth consumption. Agents can be automatically installed in LAN network or in a remote office having a Distribution Server.
- From Web Console: Automate agent installation from the product web console
- Using SoM Policy: Agents get automatically installed in new machines when they are added to Active Directory
- Remote agent installation: Install agents in remote office with or without a Distribution Server
When there are numerous roaming users which move out of the network periodically or when there is bandwidth constraints, the installable can be downloaded and placed in a shared folder.
For enterprises which have new machines to be managed and where the required operating system has to be deployed, the agent can be deployed with the OS.
In enterprises with an Active Directory Domain setup and numerous endpoints to manage, Group Policy Objects (GPO) offer an efficient way to deploy agents across multiple devices. This method is particularly useful during the initial bulk onboarding of agents, as GPOs automate the installation process, ensuring consistency and reducing manual effort across the network.
When there are numerous endpoints in a workgroup based setup in an enterprise, using IP ranges, agents can be deployed in bulk to all the devices.
- IP ranges: Agent can be installed using IP address or IP ranges or using computer names
Agent installer files can be easily accessed from a common central location. There is no need for transferring complete agent installer files to all devices in a network.
The product server can be hosted in cloud using Microsoft Azure or AWS. The agents can be deployed in Azure AD and AWS instances.
- In Azure AD environment: Agents can be installed with Intune or Azure automation Service
- To AWS instances: Agents can be deployed in bulk in AWS
When there is no need for manual intervention, agents can be installed in a silent manner. Silent command can also be used to install agent from any other third party tool.
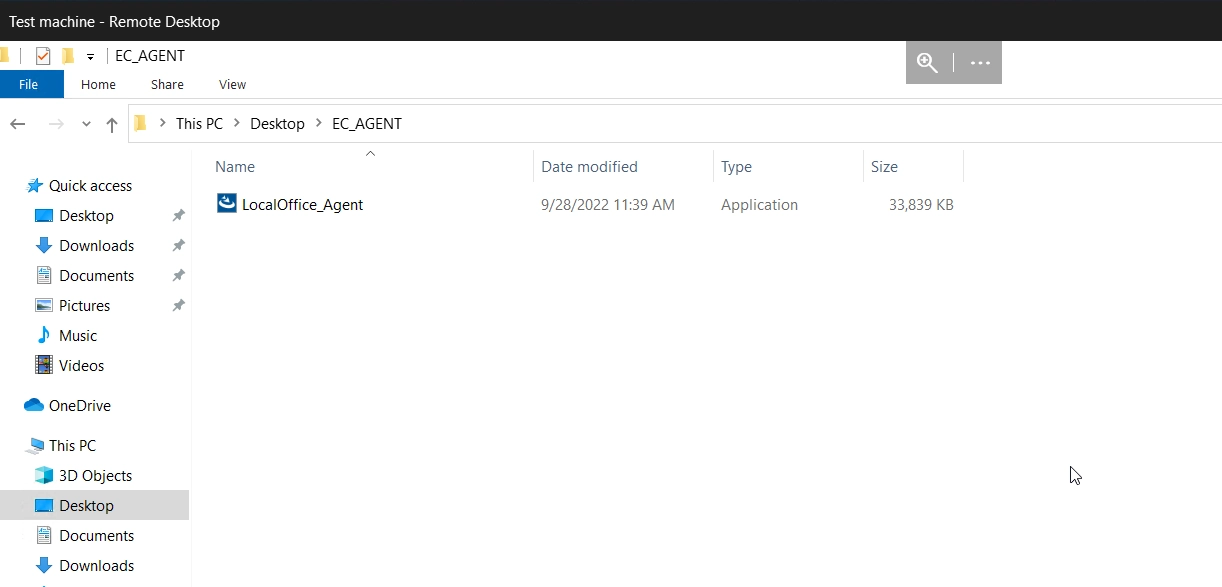
- Log in to the console and navigate to the Agent -> Computers -> Download Agent and place it in a folder.
- Open the MDT Workbench application.
- Click the Application->New Application option.
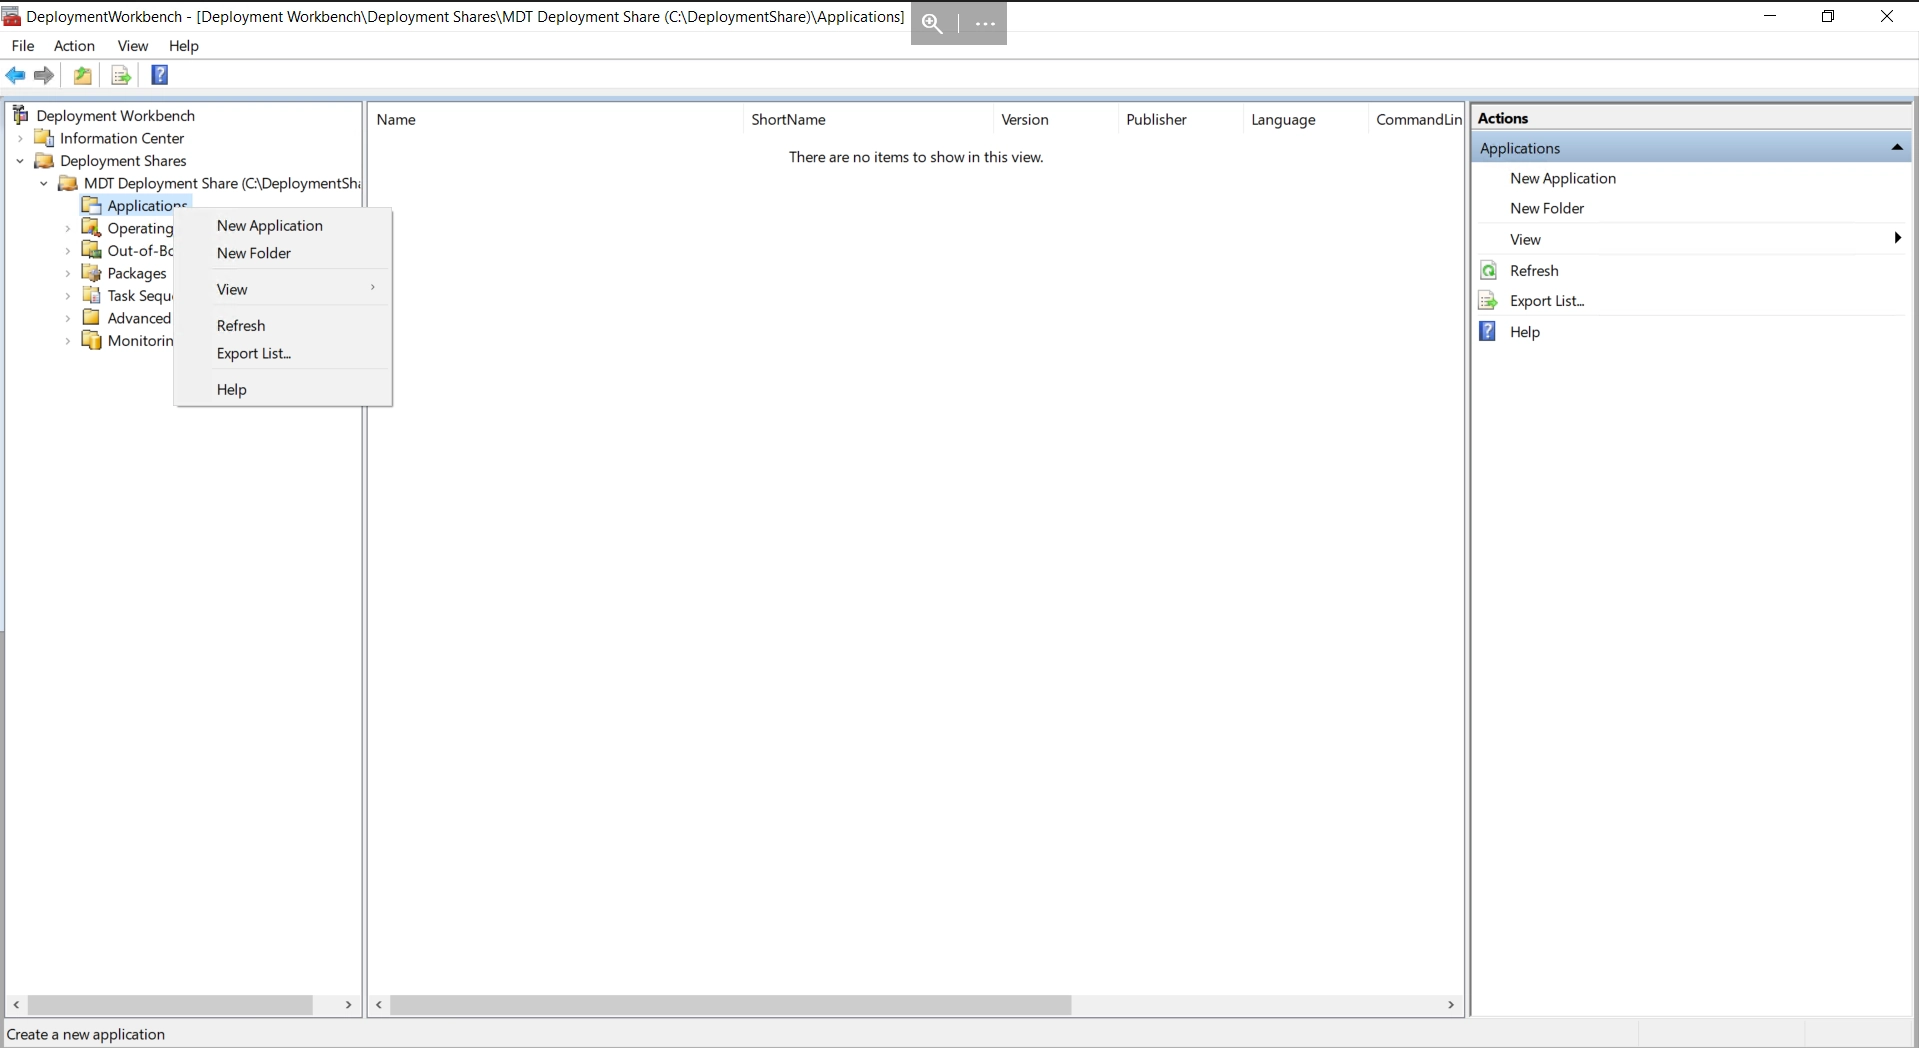
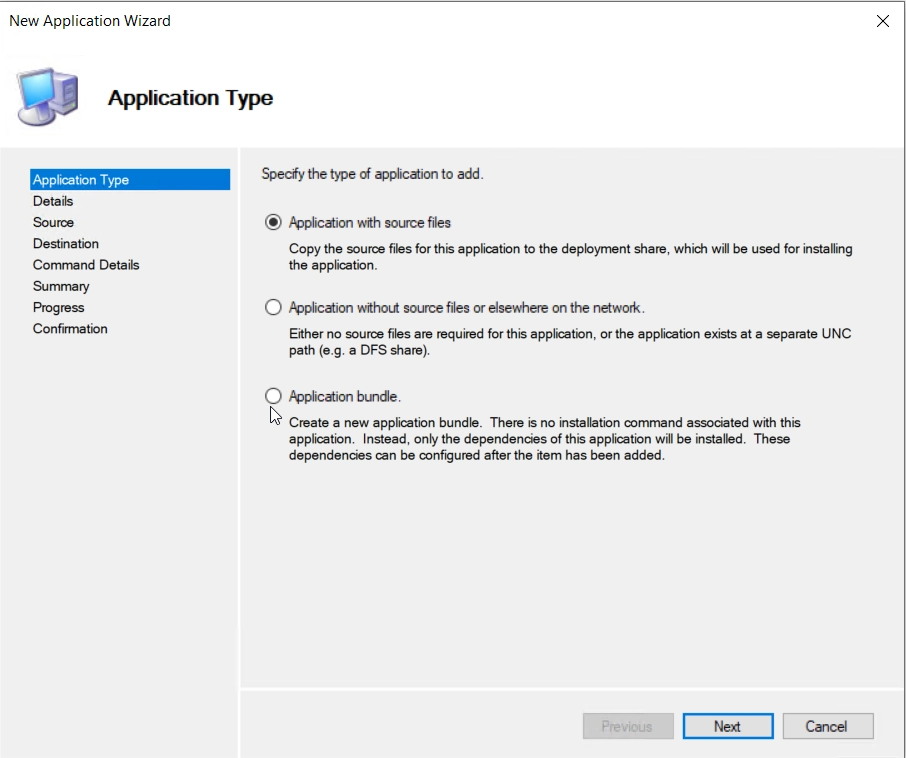
- Select "Application with source files"
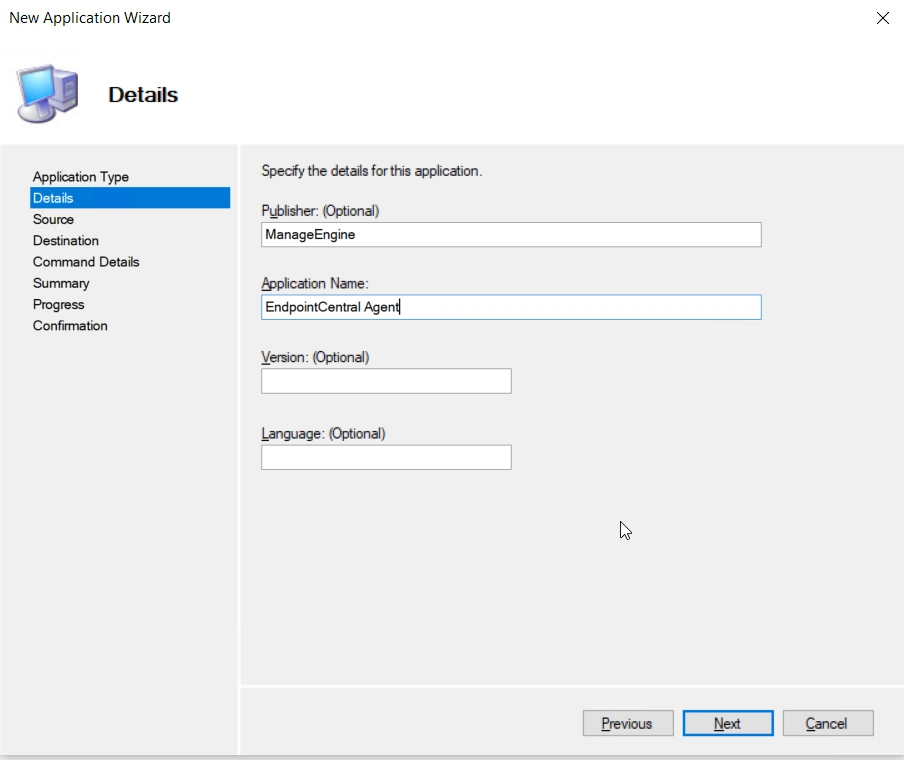
- Enter the details of the target application
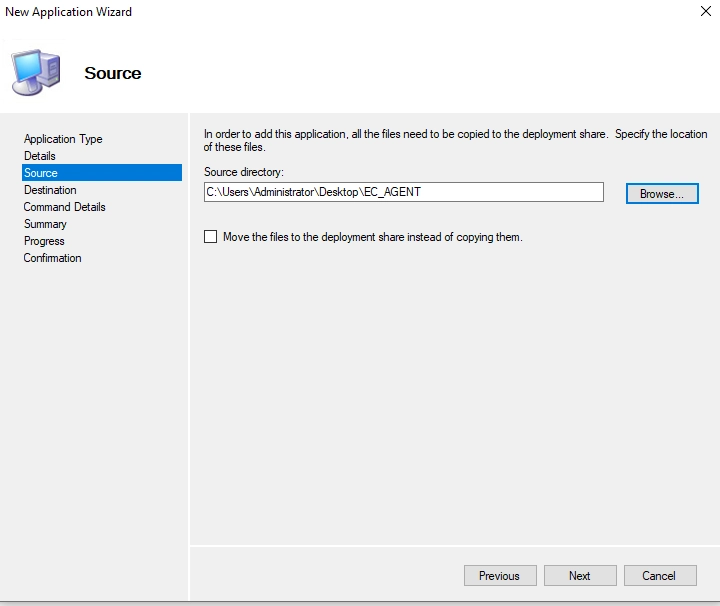
- Indicate the location of the folder where the agent is downloaded and click next
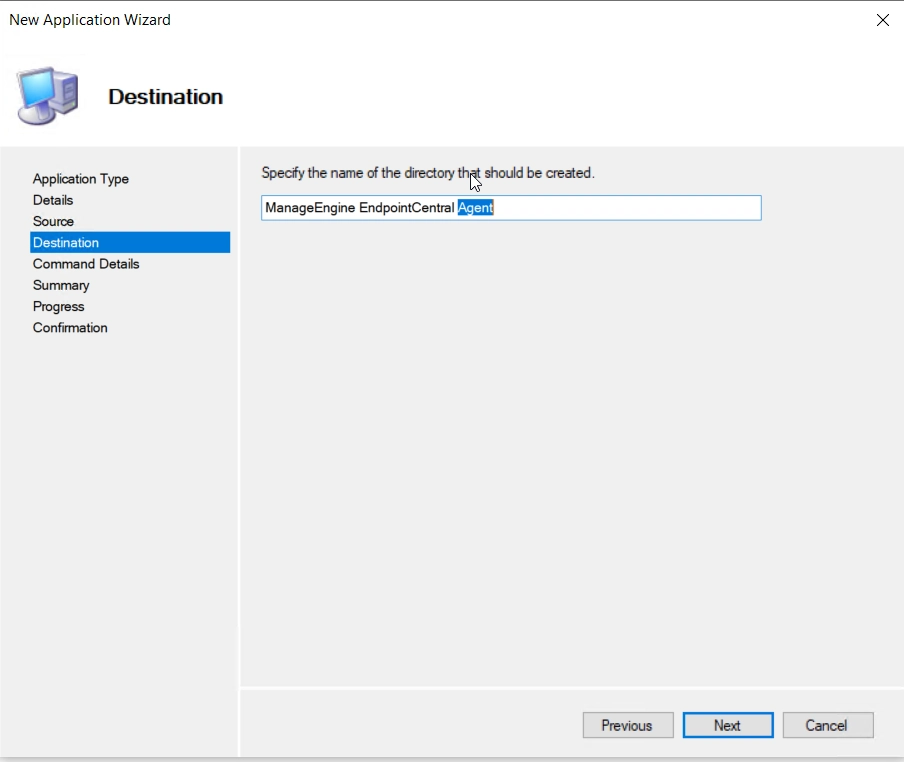
Enter a destination folder name.
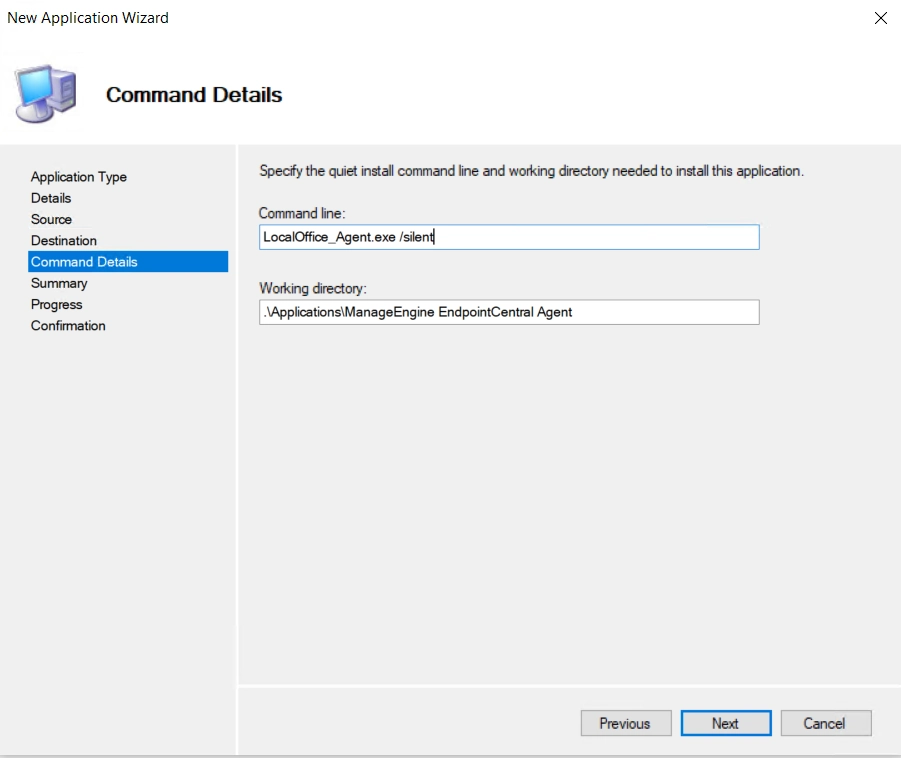
Enter the command line for silent installation:
LocalOffice_Agent.exe /silent
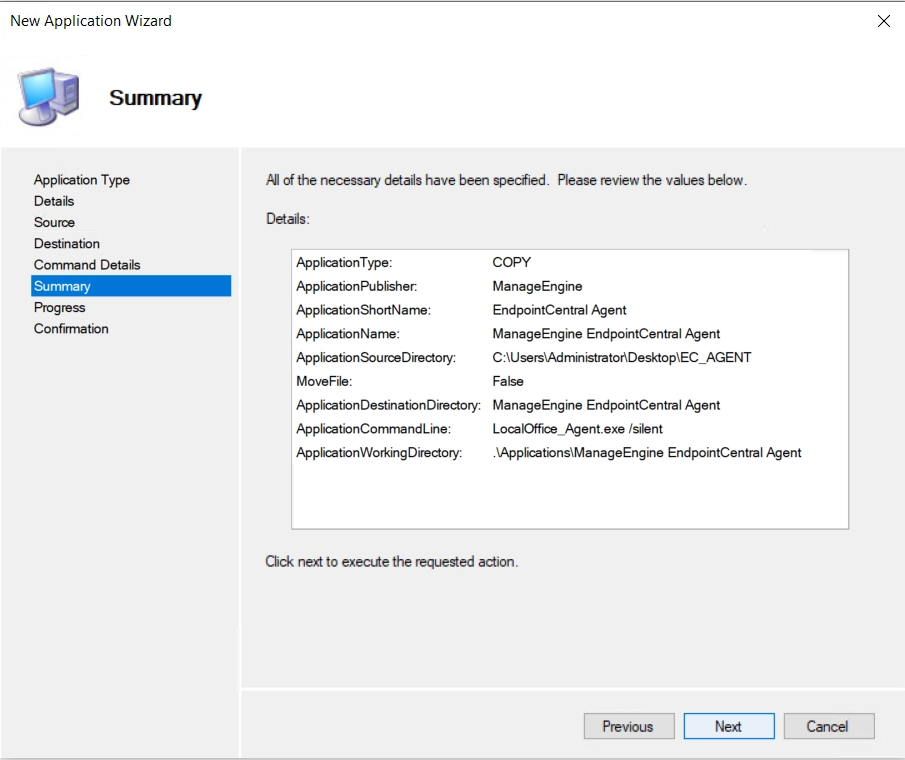
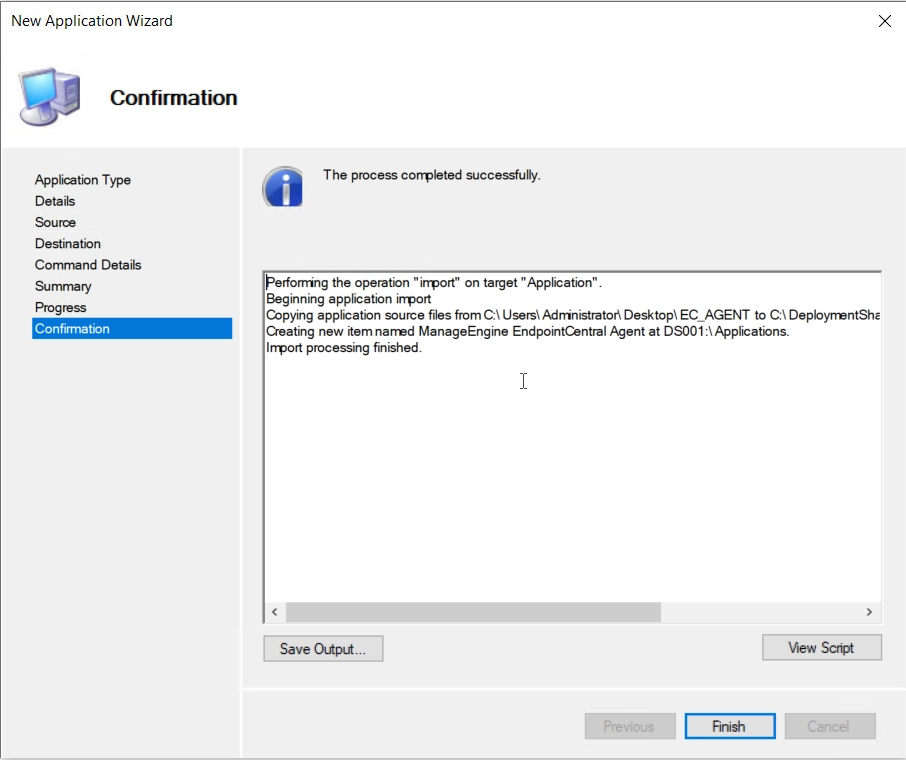
Verify the summary and click finish, the application will be added to the list of apps.

- Navigate to Agent -> Computers -> Download Agent and download the respective remote office agent installer file.
- Paste the exe in a share path accessible by all the computers on which the agent is to be installed.
- Download the script given below and update the shared path with your network share path.
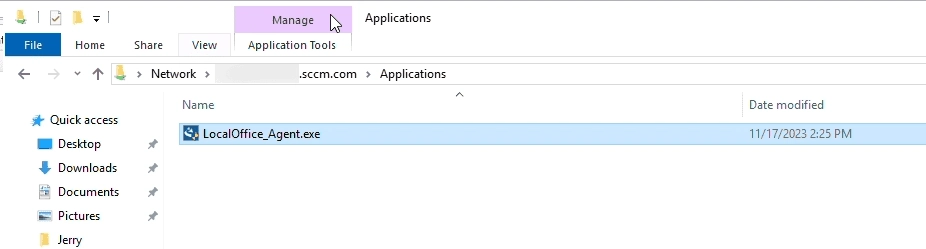
- Now, open System Center Configuration Manager (SCCM) and navigate to Software Library -> Overview -> Application Management ->Packages.
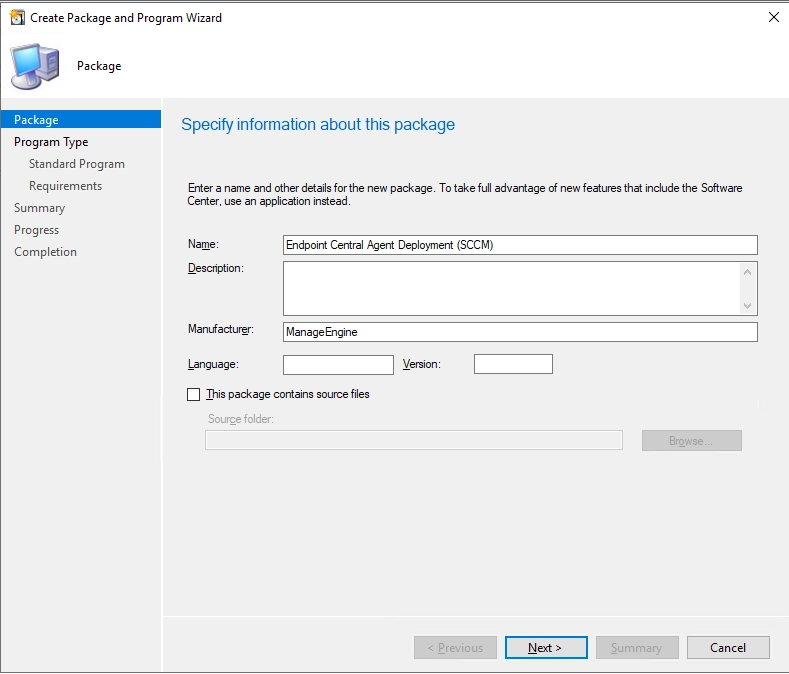
- This will launch Create Package and Program Wizard window, in which you will be asked to fill in the necessary information like Name, Description, Manufacturer, etc.
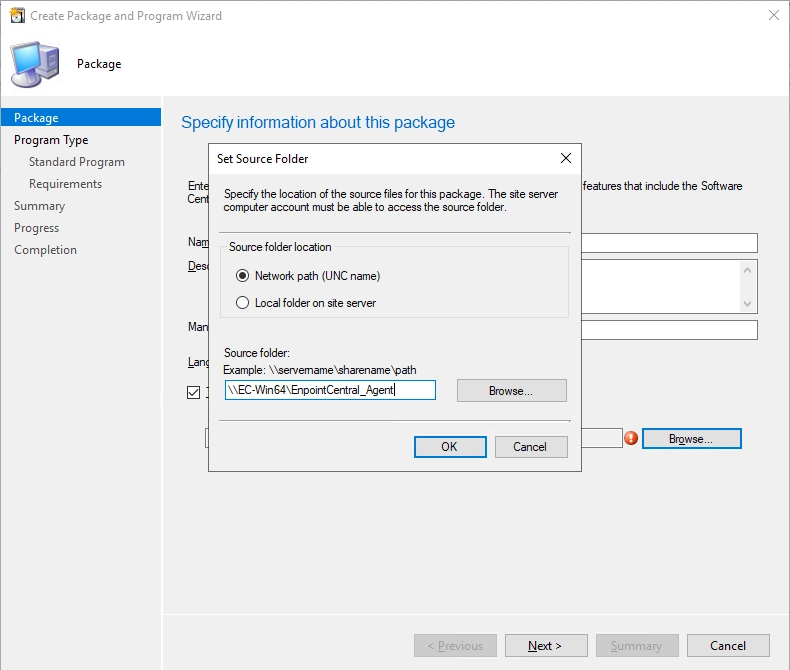
- Enable the checkbox This package contains source files. Select Network path and enter the path of the shared folder as shown below.
- Select Architecture as x86 (if available) and the program type as Standard and click Next.
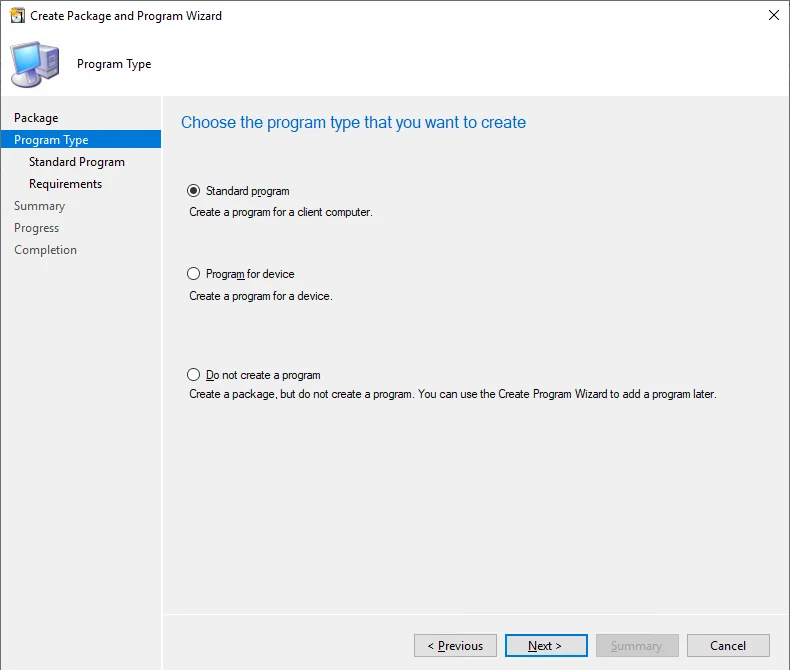
- Fill in the necessary information, as shown in the image below and click Next.
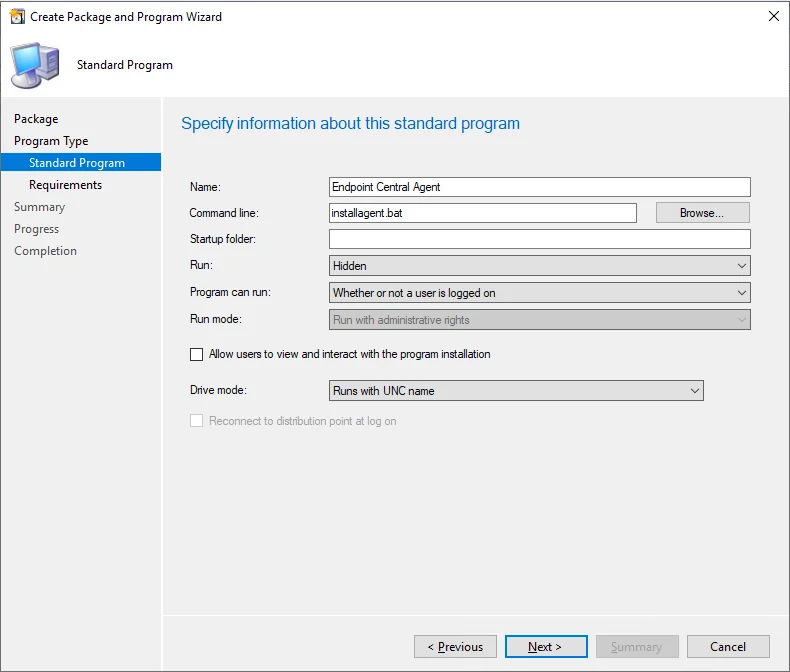
- Review the requirements and ensure they are like as shown in the image below and click Next.
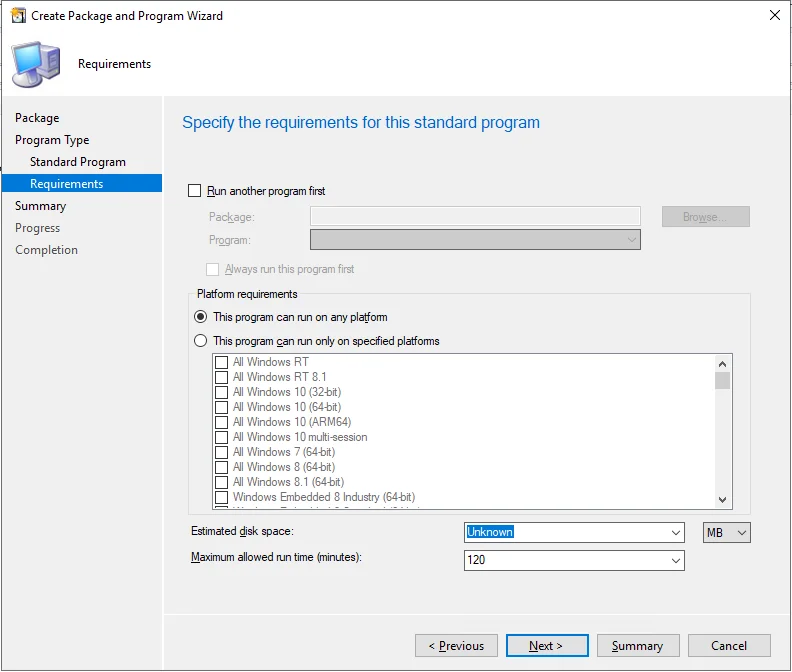
- After reviewing, confirm the settings to proceed to create the package
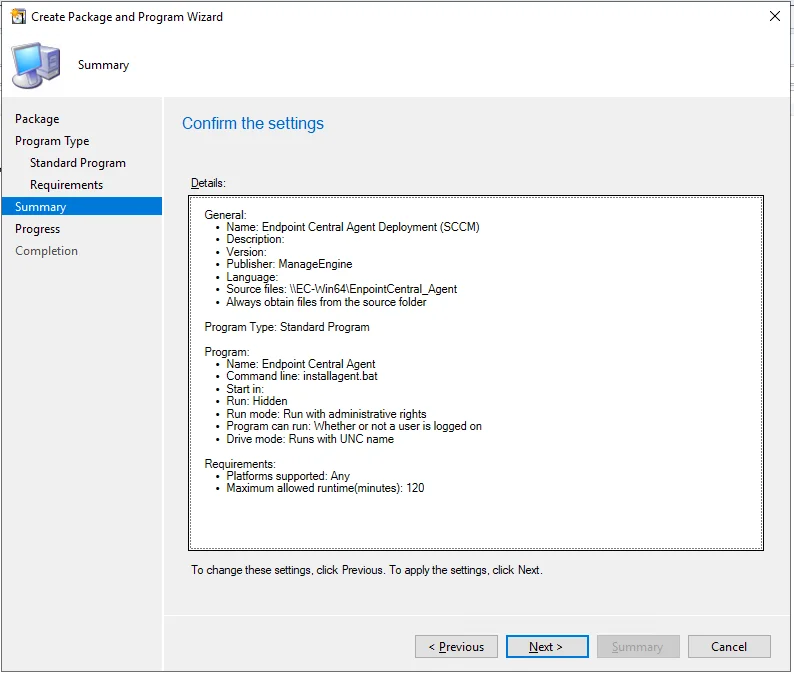
- The package has been created successfully.
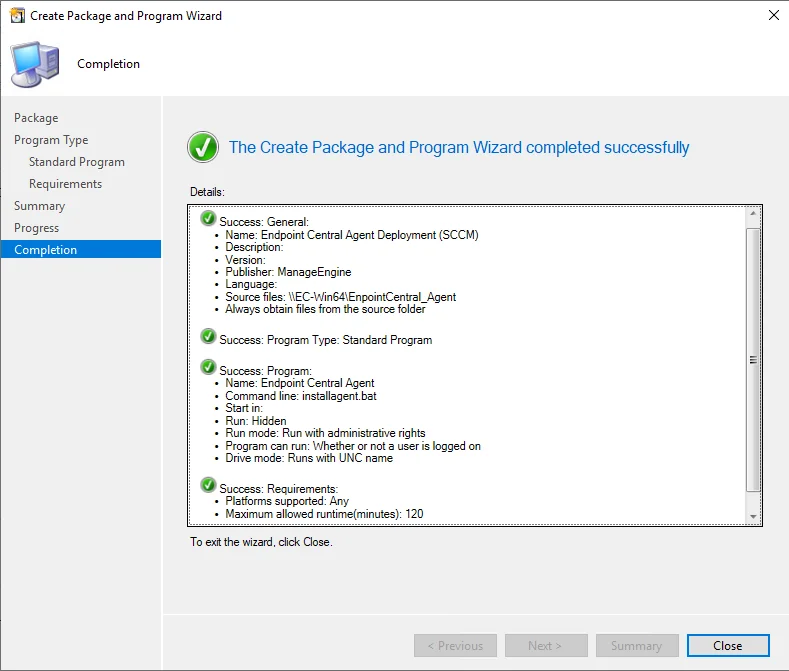
- The package can now be deployed to the end user's computers.
You have now successfully installed agents in target endpoints using SCCM.
Agent reinstallation is commonly used during migration from an on-premises setup to a cloud environment or to address agent upgrade failures.
- Navigate to MDM tab > Enrollment > Enroll Device > Windows Laptop.
- Download and extract the enrollment tool, then run enrollment.bat as Administrator on the end machine that needs to be enrolled.
- Navigate to MDM > Enrollment > Devices > Staged to locate the enrolled device.
- Assign the user to manage the device under MDM.
- Once enrolled in MDM, the device will be brought under Scope of Management to be managed under Endpoint Central.
- If Devices for Approval is enabled, the device will appear under Agent > Computers > Waiting for Approval.
- Approve the device to install the agent and enable management under Endpoint Central.
- Kindly note that if the agent is installed, if no other third party MDM is present, the ME MDM profile will be installed automatically.
- To know more about enrolling windows devices, click here.
Check this page to learn how to automatically enroll windows endpoints to your server for modern management.
 Yes No