Business Rules - Execute Script action
With Execute Script action in business rules, you can validate requests and update field values to automate request workflows. You can use scripts for validation of requests that involve complex conditions or requests that use third-party application inputs.
You can execute business rule scripts on requests incoming through browser, API, mobile, and mail.
Use cases:
Update request fields based on field values in a different module or an application.
A user logs a service request for an asset.
In this case, you can write a script to automatically check the asset availability, then allocate it to the request, and update the asset status in the Asset module.
Stop a request operation at any point in time.
You can simply define what's not allowed for a requester or a technician, whether it's data modification or the operation itself in any given stage of the request processing.
A user logs a service request for a new laptop. During this request processing, you can use Business Rules script execution in the following cases:
-
After the approver approves the request, technician or requester should not be able to change the request's input.
-
The technician shouldn't be allowed to change the request status to Waiting for Purchase unless the request is approved.
-
When the technician delivers the item to the requester, the technician should only be allowed to change the request status as Resolved and not Closed. Only the requester should be allowed to close the request after verifying the received item.
Stop a request from creation itself.
To prevent request duplication when the same requester raises a request for the same category, sub-category, and item.
To add a command in a business rule
-
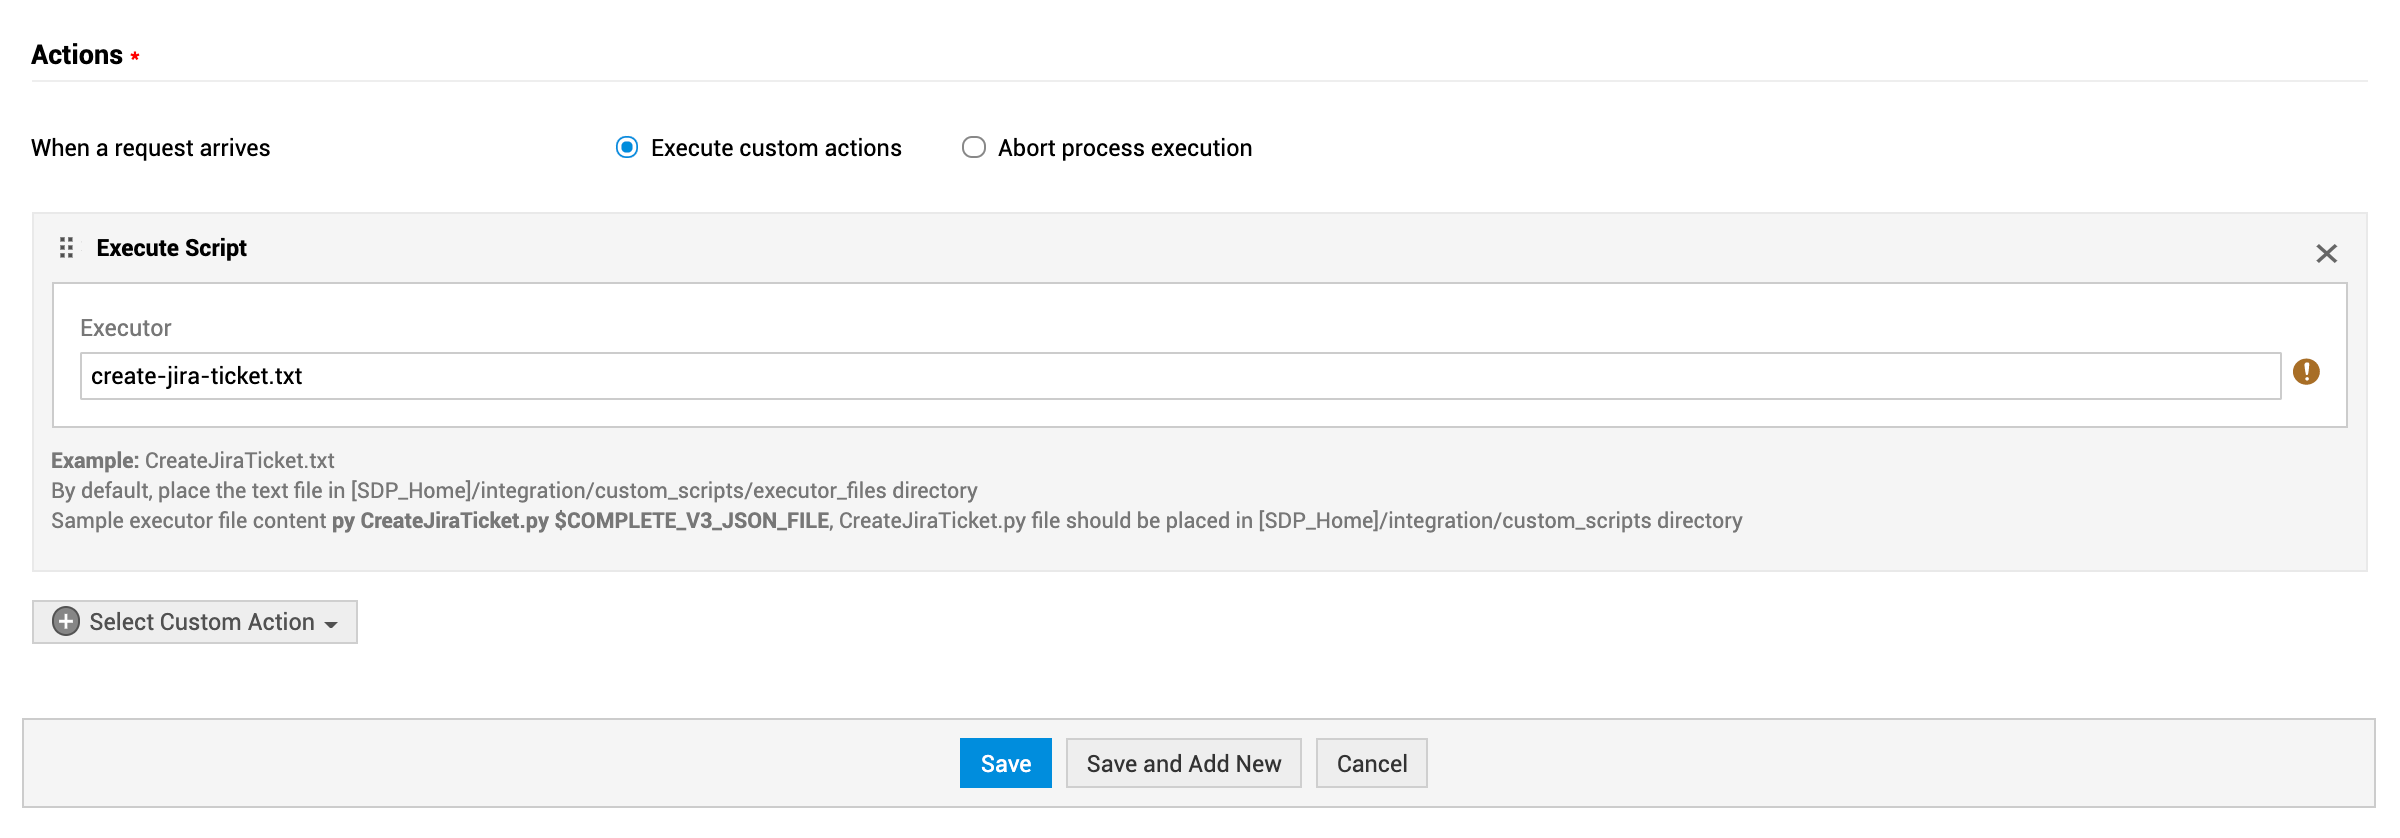
Go to Actions, click Select Custom Actions > Execute Script.
-
On the displayed text box, enter the file name containing the script and click Save.
Sample configuration:
Consider the case to raise a Jira ticket from ServiceDesk Plus MSP. To configure a custom script for this action,
- Create a text file with the command given below:
| py CreateJiraTicket.py $COMPLETE_V3_JSON_FILE |
- Save the file as create-jira-ticket.txt and place it under [SDP MSP_HOME]/integration/custom_scripts/executor_files directory.
- When configuring the custom action, enter the file name in the executor field.
- Click Save after providing all the other details.

During execution, the application will fetch the command from the given text file.
Parameter supported—$COMPLETE_V3_JSON_FILE
$COMPLETE_V3_JSON_FILE denotes the path of a file that has complete request details, previous and updated field values in the JSON format. The file is temporary and it will be automatically deleted after the script is executed.
The temporary JSON file is created in SDP MSP_Home\integration\custom_scripts\request\ directory, file name being <requestid_timestamp>.json.
$COMPLETE_V3_JSON_FILE structure
| { "request": { <all request properties in V3 format> }, "diff": { "old": { "request": { "priority": { "id": "4", "name": "High" }, "urgency": { "id": "3", "name": "Normal" }, "impact_details": "High impact for servers" } }, "new": { "request": { "priority": { "id": "1", "name": "Low" }, "urgency": { "id": "4", "name": "Low" }, "impact_details": "Low impact for servers" } } }, "LOGIN_NAME": "administrator", "LOGGEDIN_USER_TYPE": "Technician", "LOGGEDIN_USER_NAME": "administrator", "OPERATION_TYPE": "add" } |
Input provided to $COMPLETE_V3_JSON_FILE temp file
Input is in JSON. Here the request key contains the user given fields and fields filled by system in V3 API format.
Additional information given in the input file
-
LOGIN_NAME
-
LOGGEDIN_USER_NAME
-
LOGIN_USER_ID
-
LOGGEDIN_USER_TYPE
-
OPERATION_TYPE
Output JSON format for custom scripts
The script for requests file should return a JSON which has the success/failure status and a message which will be displayed in the history tab of the request.
General format:
{
"result": "success",
"message": "Message"
}
-
Result denotes the success/failure status of the action.
-
Message is the information to be displayed in the request's history tab.
The server script must write the output JSON (if any) to the same temp file that is provided to the script. You must not invoke external API calls to update the same request because this will not allow the updated values to be carried forward to the cascading business rules.
Operations Supported
You can perform Update and Negate operations using the JSON return.
Example for Update operation
| { "result": "success", "message": "Sample Python script", "operation": [ { "OPERATION_NAME": "UPDATE", "INPUT_DATA": [ { "request": { "urgency": { "name": "High" }, "group": { "name": "Network" }, "priority": { "name": "High" } } } ] } ] } |
Example for Negate operation
| { "result": "success", "operation": [ { "OPERATION_NAME": "NEGATE", "REASON": "Negate Reason" } ] } |
Click here to view the sample script for the below use case:

