
Secure your digital landscape by simplifying user access control and centralizing identity management
Microsoft Entra ID, previously known as Azure AD, is a cloud-based directory service that also provides identity and access management functionalities. By integrating Microsoft Entra ID with Identity360, organizations can establish centralized identity management by synchronizing and managing identities from various integrated directories in a single console. Enlist Identity360 to steer the efficient management of user journeys in the organization. This paves the way for a comprehensive and seamless approach to monitoring identities.
Leverage Identity360's automated user creation, modification, and deletion capabilities to expertly manage the user's organizational journey in Microsoft Entra ID and other enterprise applications, from onboarding to offboarding.
Configure nowAcquire convenient access to Microsoft Entra ID and other business applications via Identity360's single sign-on, eliminating the need for multiple login credentials.
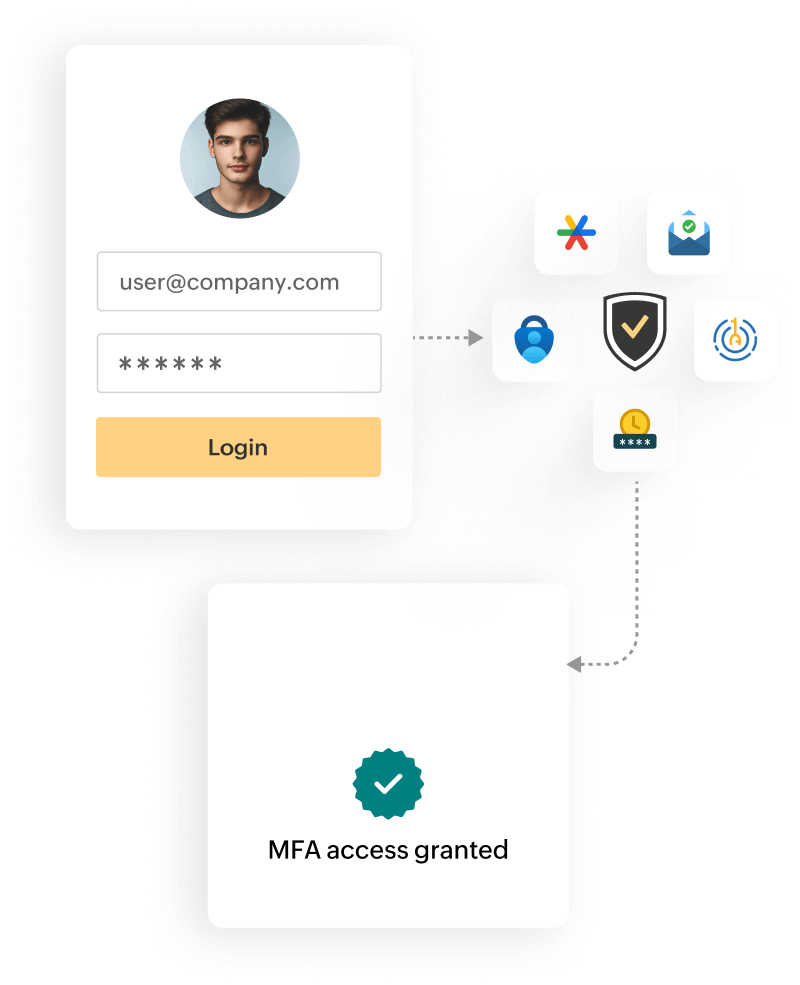
Configure nowAdopt a strong authentication strategy by verifying identities with secondary authentication factors before granting access to Microsoft Entra ID and other apps through Identity360's multi-factor authentication.
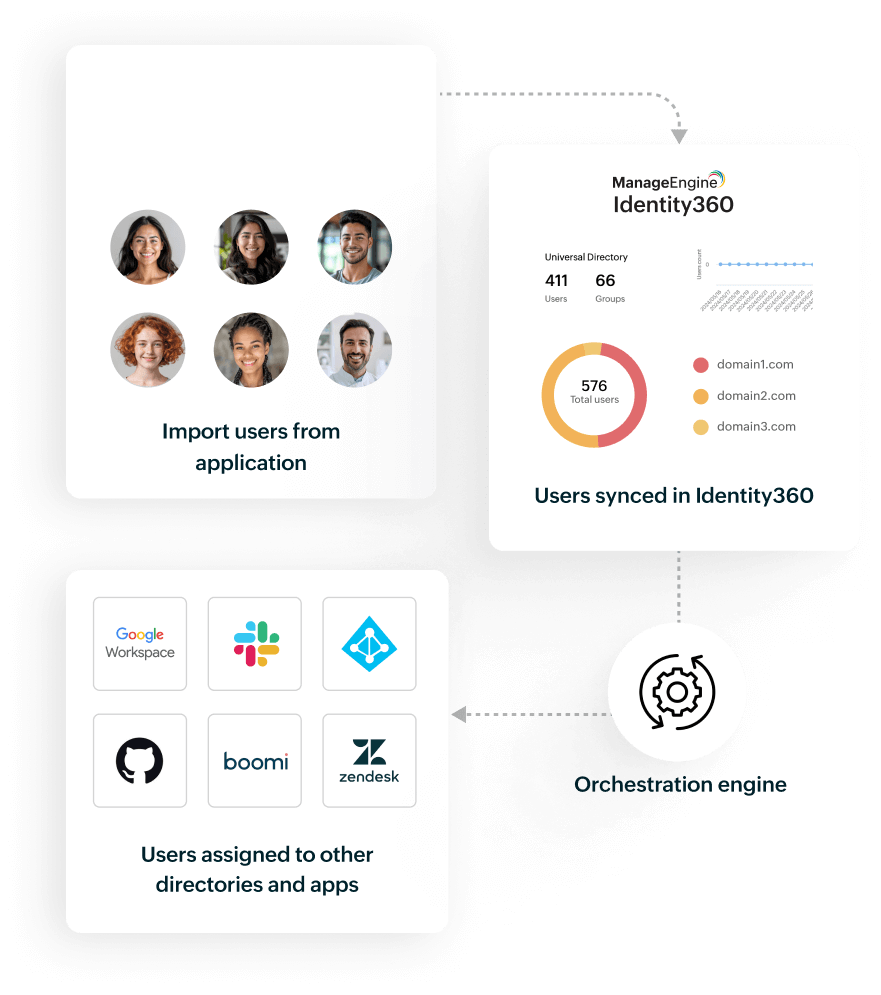
Configure nowEffortlessly import and govern digital identities from Microsoft Entra ID within Identity360, facilitating user account synchronization across multiple integrated directories and applications.
Configure now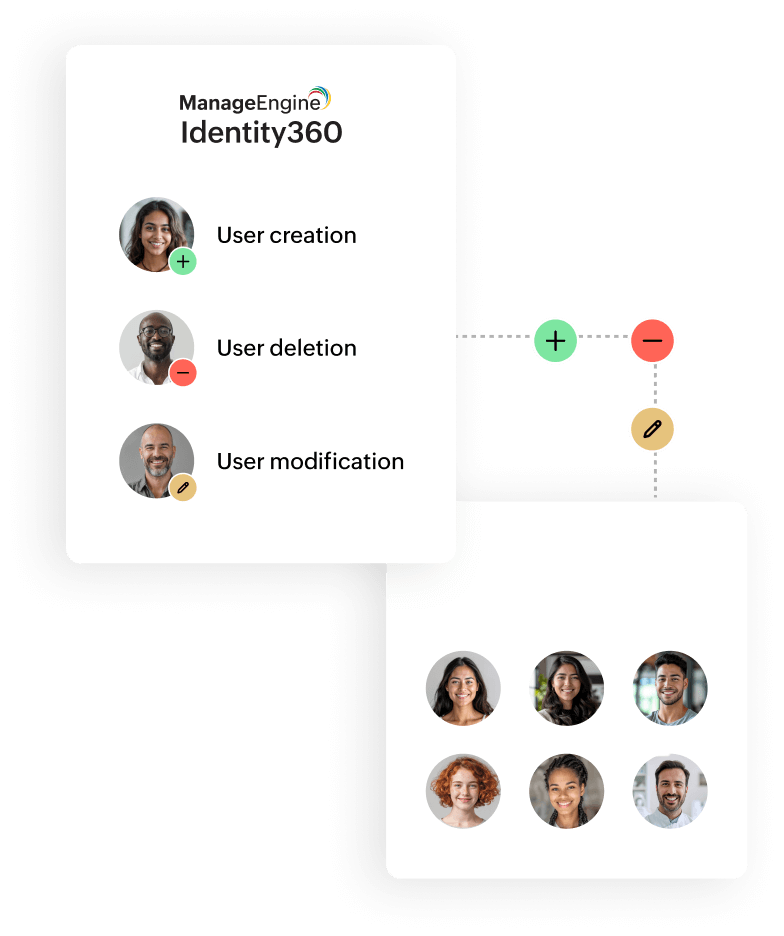
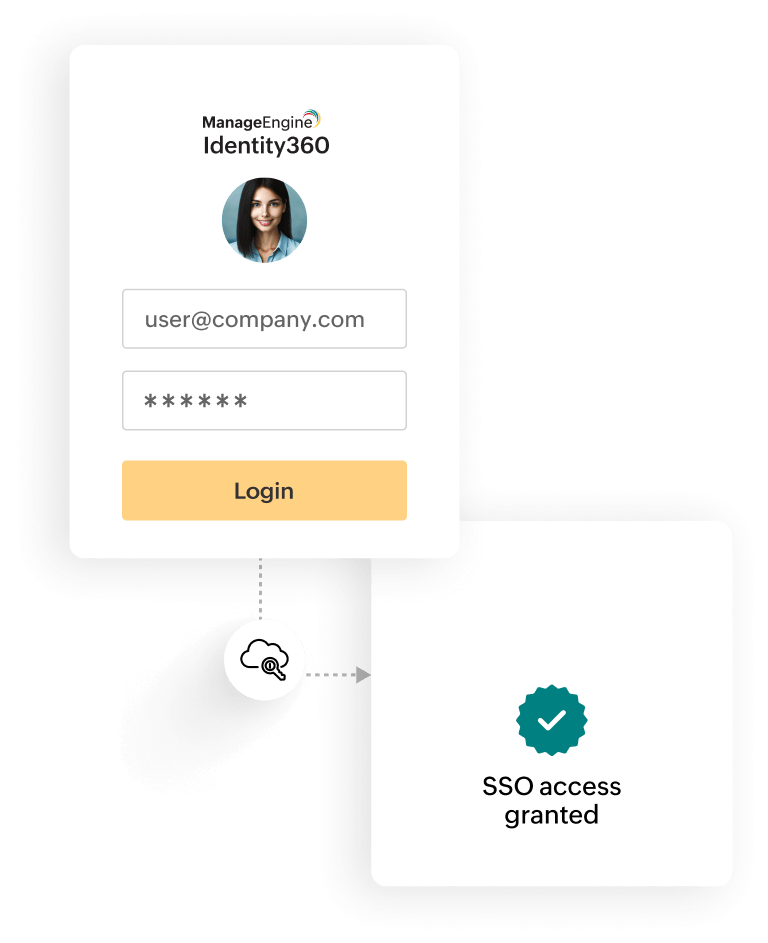
Simplify authentication and provide quick access to Microsoft Entra ID and a diverse range of applications in one click.
Manage user interactions with Microsoft Entra ID within your organization by leveraging security insights gathered from Identity360's reports that monitor user authentication activities and trends in application usage.
Improve the security of Microsoft Entra ID by incorporating Identity360's MFA, which minimized threats related to unauthorized access through its central authentication approach.
Build orchestration profiles and deploy smart templates to create users and govern their life cycle within the organization, guaranteeing prompt access to essential organizational resources.
Take advantage of Identity360's Universal Directory for central management of user identities and access across integrated directories and applications, enabling secure and seamless access to Microsoft Entra ID and other organizational resources.