Create Web Groups
Group similar websites for one-shot policy deployment, and stock an extension repository so add-ons roll out automatically instead of one machine at a time.
Setup
Create Website Groups
Bundle similar websites and web apps together so a single policy can target the whole group.
Grouping websites
Websites and web applications of a similar nature can be added into groups to simplify management. They're typically used within Download Filter and Web Filter policies, letting you deploy a policy to the whole group in one go.
- Go to Manage → Website Group.
- Click Create Website Group.
- Give the group a name and description.
- Add websites either manually or by uploading a CSV file.
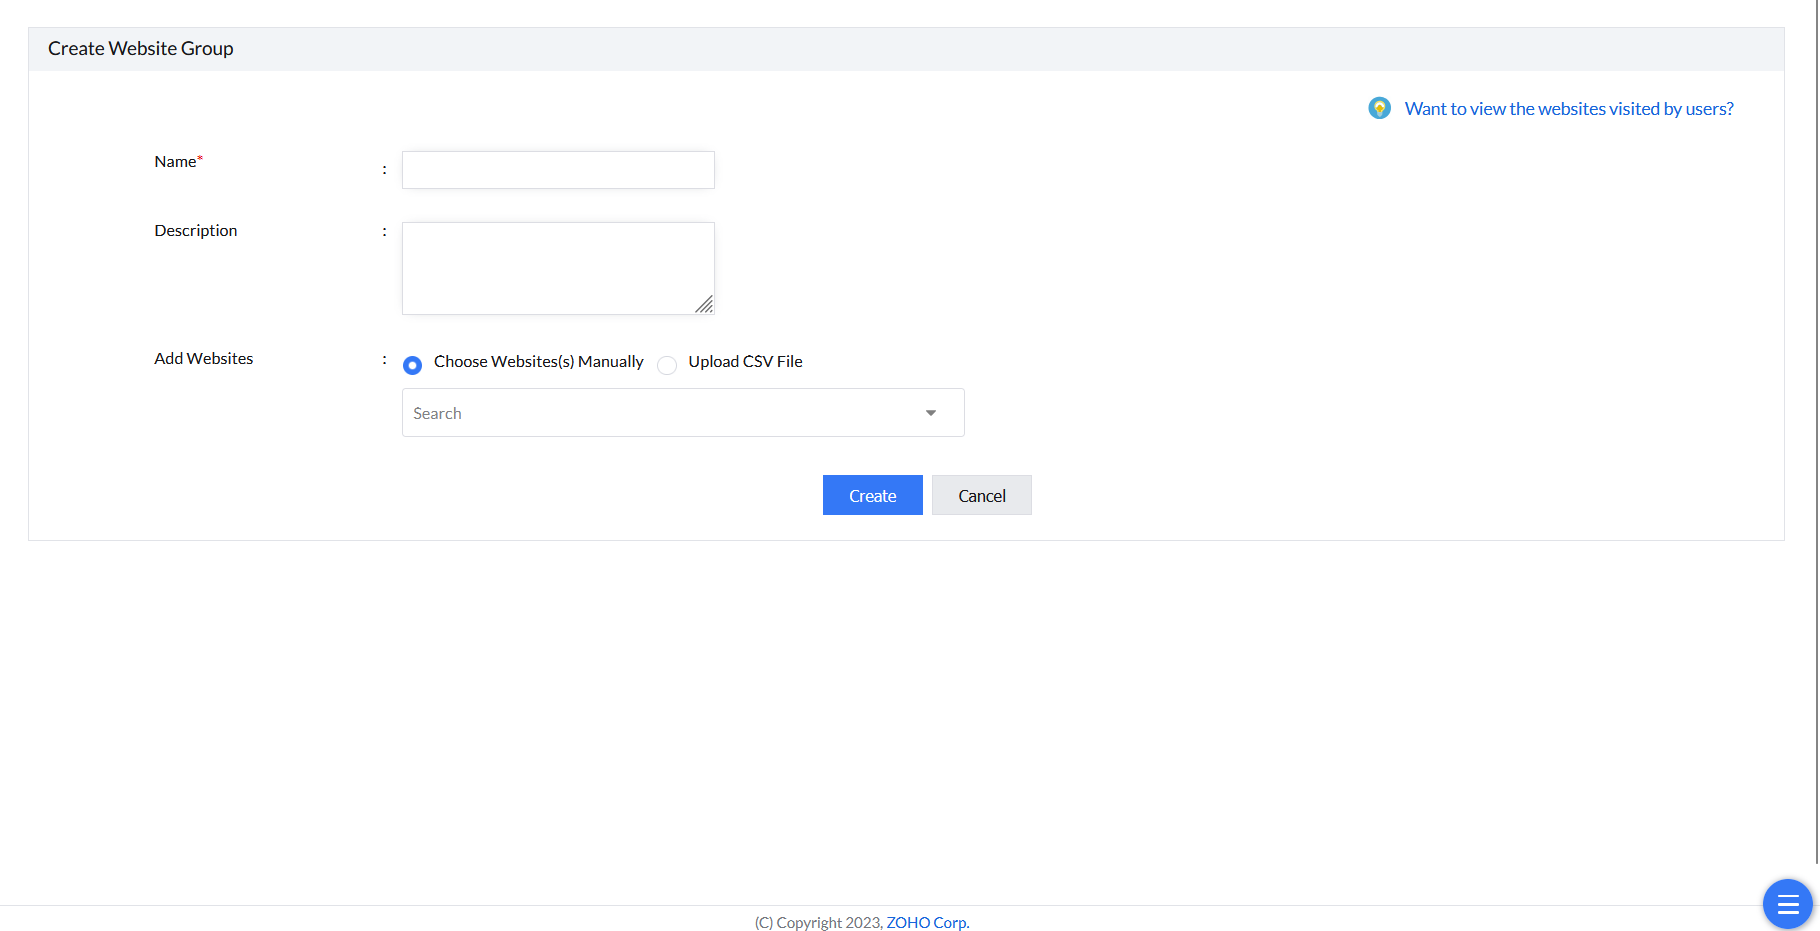
Setup
Extension Repository
Stock the repository once, then distribute extensions to computer groups automatically.
Adding extensions to the repository
Extensions can be efficiently deployed to computer groups by adding them to Endpoint Central MSP's extension repository. This automated distribution eliminates the need for individual installations.
- Go to Manage → Extension Repository.
- Click Add Extensions and choose the desired browser.
- Add the extension either by uploading it directly or through the Web Store by entering the extension identifier, then click Add.
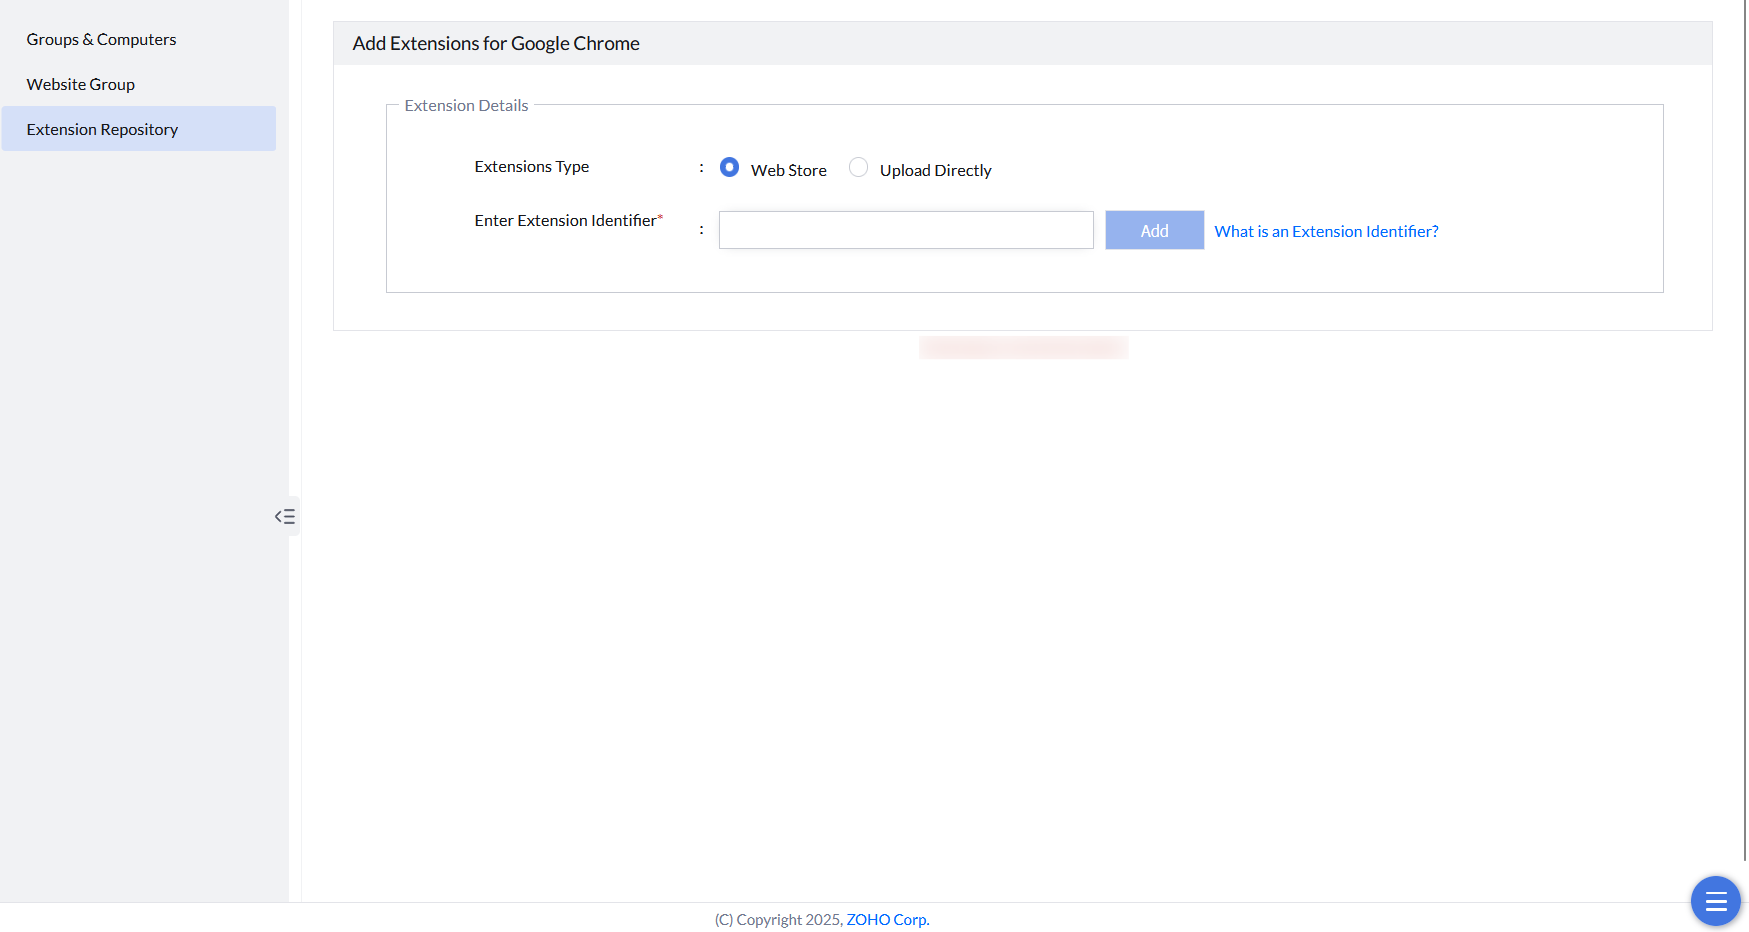
Once you've added extensions to the repository, see Distribute Extensions to push them out to target devices.
Obtaining Chrome Extension Identifiers
An extension identifier is a unique code assigned to each browser extension in the Chrome Web Store that enables you to add and manage extensions through the Extension Repository.
How to Find a Chrome Extension Identifier
- Navigate to the Google Chrome Web Store extensions section.
- Search for the extension you want to deploy (for example, "Postman Interceptor").
- Open the extension's page in the Chrome Web Store.
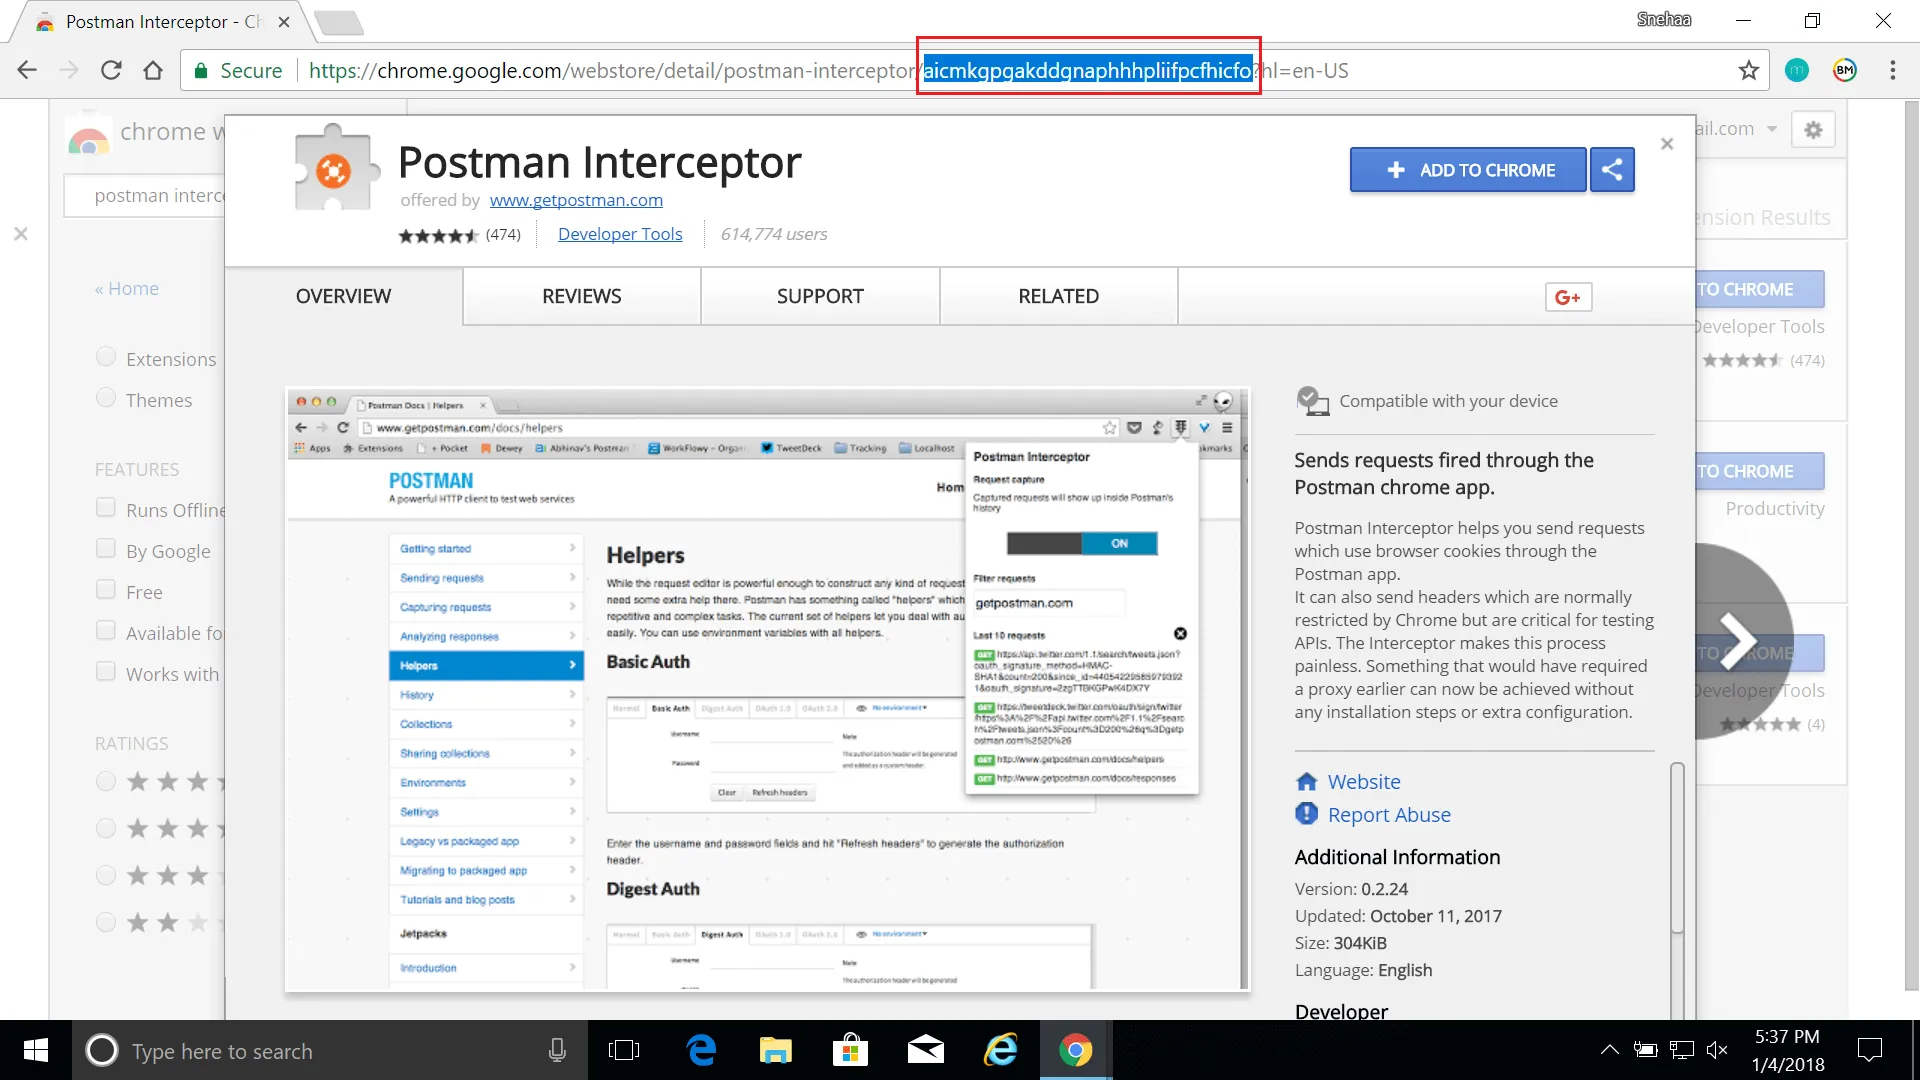
- Look at the URL bar. The extension identifier is the unique code located between the "/" and "?" characters.
- Example URL:
https://chrome.google.com/webstore/detail/postman-interceptor/aicmkgpgakddgnaphhjpplbacjbuhafa?hl=en - Extension ID:
aicmkgpgakddgnaphhjpplacjbuhafa - Copy this identifier and paste it into the Extension Identifier field in your Extension Repository interface.
File Formats and Requirements
When adding extensions to the repository, you must use the correct file format and URL structure depending on the browser type.
Supported File Formats
- .CRX (Chromium Extension): Required for Chrome, Edge, and Chromium-based browsers. This is the compiled binary format for custom extensions you upload directly.
- .XPI (Firefox Extension): Required for Firefox. Use the direct download URL from Mozilla Add-ons (not the add-on page URL).
- .XML (Manifest): Not supported. You must provide the compiled extension package (.crx or .xpi), not the XML manifest file alone.
Adding Firefox Extensions
When adding Firefox extensions, use the correct direct download URL, not the add-on page URL.
Wrong Format (Add-on Page):
https://addons.mozilla.org/en-US/firefox/addon/1password-x-password-manager/Correct Format (Direct Download):
https://addons.mozilla.org/firefox/downloads/file/[ID]/[EXTENSION_NAME]-[VERSION].xpiExample:
https://addons.mozilla.org/firefox/downloads/file/3845234/1password_x_password_manager-8.9.10.xpiHow to Find the Correct URL:
- Navigate to the Firefox Add-ons page:
https://addons.mozilla.org/firefox/addon/[EXTENSION_NAME] - Right-click on the Add to Firefox button and select Copy Link Address.
- The copied URL should be in the direct download format (.xpi file).
- Paste this URL when adding the extension to the Extension Repository.
Browser Extension Inventory Reporting
Generate reports of browser extensions installed across your managed devices.
Available Views
- By Extension: View all computers where a specific extension is installed
- Go to Insights → Browser Add-ons → Extensions
- Click on an extension name to see its Installation Count
- The list shows all computers with that extension installed
- By Computer: View all extensions installed on a specific computer
- Go to Manage → Groups & Computers → Computers
- Select a computer and click Extensions tab
- The list shows all browser extensions detected on that machine